Russian bath: features of its action
The human body temperature does not exceed 40° because he sweats, due to which he releases excess heat into the surrounding air with the release of excess fluid. This is the basis of the operating principle of any type of bath. The differences are only in the ratio of temperature and humidity.
Hammam decorated with mosaics
In a Turkish bath (hammam), the humidity reaches 100%, and the temperature of the air, stone floor and benches does not exceed 40°. In a sauna (Finnish bath) this ratio is completely opposite. At 120° the humidity is only 40%.
A sauna can also be installed in an apartment
But the optimal combination of temperature and humidity for health (and there will be no negative consequences from such a procedure) can only be maintained in a Russian bathhouse, but only if it is properly designed and built.
A bathhouse cannot be called a cheap pleasure. If you order its construction on a turnkey basis, the amount may turn out to be unaffordable. With average prices for materials and specialist work, you will have to pay from 7 to 22 thousand dollars. You can build the simplest bathhouse yourself, saving significant money.
Construction of a Russian steam bath
Russian baths, as close as possible to traditional ones, are coming back into fashion. They have their own characteristics:
- the foundation is a boulder stone that does not require a plinth;
- the walls are logs, wild, debarked and dried, selectively chopped logs that have not undergone any other processing;
- assembly without metal parts such as nails or corners;
- caulking with natural materials such as tow and moss;
- insulation with natural materials, for example, peat or moss;
- waterproofing - natural resin;
- roof - shingles, turf or shingles;
- the stove must be made of stone;
- font - barrel, pool (you can always run outside and plunge into a river, lake or rub yourself in the snow).
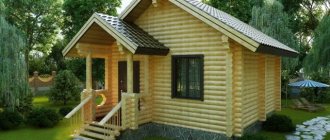
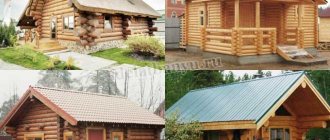
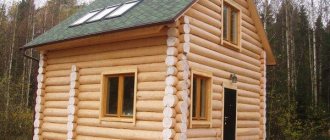
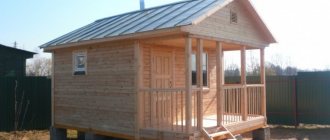
Traditional Russian steam bath built on boulders
All this creates a lot of unnecessary difficulties; the bathhouse itself is generally flammable and short-lived. But there is every opportunity to independently build a bathhouse with the same qualities, but much more practical and modern. It is recommended to make a sauna house not only with a steam room, but also with a washing room, where there is a font, a tub for dousing or a shower, and a dressing room.
A Russian traditional steam bath can consist of several rooms
Waiting room
They undress in it, store towels, sheets, brooms and brooms, relax between visits to the steam room, and drink tea. This room serves as a barrier to cold air. There is a window there (for security reasons and for beauty).
A well-equipped dressing room can lift your spirits
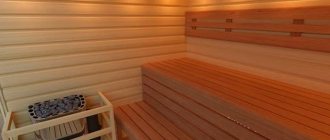
Steam room
A heater with a water tank is installed in it, and beds or shelves for lying on are built. The oven provides uniform, strong heating and exposure to superheated steam without convective air mixing. The steam room may have a small window for ventilation, which will help avoid waterlogging (one or two ventilation holes can be made for the same purpose).
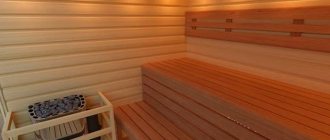
A steam room with beds can be equipped with one window
Washing
Heat enters this room from the back wall of the furnace. After visiting the steam room, you need to cool down in the font or shower, which removes waste and toxins from the body. At the same time, sweating does not stop, and due to high humidity it also intensifies. The washing machine's operating principle is similar to that of a hammam.
The washing area with a font and rinsing tubs is heated by the rear wall of the stove
DIY sauna from foundation to roof
First you need to decide on the location on the site. This requires special attention from the owner. The choice itself depends on the size of the territory and the evenness of the surface. It is also worth considering the geometric parameters of the bath itself. It is worth considering the most optimal conditions for supplying communications in the future. To support bath traditions, it is built near bodies of water in order to experience all the charm and contrast of sensations when plunging into cool water.
Development of a project for building a bathhouse
In the classical style, the bathhouse consists of three rooms: a dressing room, a steam room and a washing room. Quite often the last rooms are combined into one. The dressing room is necessary for the location of the locker, benches, table and chairs. This is where company gathers for friendly gatherings. Shelves for bath accessories, firewood or coal are also installed here.
The choice and development of a bathhouse project depends on wishes, free territory and financial capabilities. It is quite difficult to create a high-quality and thoughtful plan on your own. To do this, it is best to invite an architect who can quickly turn your dreams into a real project. It should be noted that the dimensions can be arbitrary. But for maximum convenience, it is necessary to carry out calculations. For comfort, each person steaming should have about 5-6 m2. However, in reality, bathhouses are built both larger and smaller.
Do-it-yourself bathhouse foundation
Like other buildings, a bathhouse requires the construction of a foundation, which must be laid to the depth of soil freezing. In this case, it is necessary to decide on the material for the walls. This is necessary to calculate the maximum loads, since the massiveness of the base itself will differ from the weight of the wall.
If you plan to build stone walls, you will need a strip foundation made of rubble stone. The materials for the foundation can be concrete, iron ore and brick. It is necessary to understand that red and sand-lime bricks are destroyed in the ground due to exposure to moisture.
Having chosen the material, it is necessary to build the foundation half a meter above the soil level. To level the surface, use a cement-sand mortar. After drying, it is necessary to lay the roofing felt on the mastic. This will allow moisture coming from the ground to be cut off from the building.
What type of foundation to choose for a bathhouse
For a bathhouse, you can use several foundation options. Their choice depends on the depth of groundwater, the geometric dimensions of the structure and the materials of the walls. The most effective for a bath are:
- Lightweight concrete strip with a reinforcement belt. It is used in the construction of simple structures that have a low specific gravity. To create a strip foundation, rubble stone or concrete is used. They are held together with mortar. For the device, it is necessary to prepare a pit with a gravel or sand cushion 15 centimeters thick. As for the width of such a foundation, it depends on the size of the bathhouse and the type of structure.
- Columnar with supporting concrete brick or metal pillars. This type is used when soil water is deep. It consists of support pillars located at the corners and along the perimeter. The distance between such pillars should not exceed two meters. Concrete, brick, asbestos-cement or metal pipes are used as materials for supports. They are buried in the ground to a certain depth, after which they are filled with concrete.
- Floating. This is an alternative option for which a monolithic slab is used. It can be used on any soil, regardless of the depth of soil moisture. To arrange such a foundation, it is enough to dig a trench with a depth of 50-60 centimeters, at the bottom of which gravel or sand is poured. After this, a layer of waterproofing is laid down and filled with concrete.
- A screw foundation is used when building a bathhouse on loose or unstable soil. It is created using screw pipes that have a pointed tip for easy penetration into the ground. It should be noted that the depth of immersion of piles may vary. The pillars are screwed into the soil by two or three people.
- Pile-screw grillage. It is used as additional strapping using metal channels or timber.
In practice, people want to build a wooden bathhouse because of its unique properties. In this case, the most optimal type of foundation for building a bathhouse with your own hands is a columnar one. Unlike other options, it has a number of advantages:
- Almost everyone can install a columnar foundation. This does not require special knowledge or the use of construction equipment.
- A wide range of materials that can be used: concrete, brick and metal pipes.
- Minimum expenditure of effort and time for its construction. Unlike poured concrete, it dries very quickly.
- This option is the most effective for a bathhouse, since ventilation and water drainage systems are very easy to organize.
Preparing a trench for the foundation
For example, let’s take conditions in which the soil freezes to 70 centimeters, and soil water is located at a depth of one meter. In this case, it is necessary to use support pillars with a diameter of 200 millimeters, deepened one meter into the ground.
First you need to create a preliminary layout of all support pillars. Along the perimeter of the future building they must be placed in increments of one and a half meters. Additional supports are installed at the intersection of walls and corners. After marking all the pillars, it is necessary to drill holes. They should have a diameter 50 millimeters larger than the pipes themselves. The bottom of the pits is filled with sand 20 centimeters thick, followed by compaction.
After this, pipes are prepared, which should protrude from the ground by at least 40 centimeters. As a result, they will have a length of 1.4 meters. Before installation in the ground, the piles are wrapped in roofing felt. During the installation process, the pipes are covered with fine crushed stone or screenings, which will add additional strength to the structure. Rods are mounted into the supports to reinforce the structure. The last stage is concreting.
Features of the foundation for a bathhouse stove
The design of the foundation largely depends on the type of heating furnace that will be used. If you plan to use a device weighing more than 500 kilograms, you should consider creating a separate concrete pad for the furnace. To do this, you can use two options:
- A columnar or strip foundation is created over the entire area of the furnace with additional structural reinforcement.
- Another widely used option is a monolithic concrete pad. It is placed exclusively under the stove.
Creating a water drain in a bathhouse with your own hands
When creating a bathhouse, you need to think about an effective system for draining water from the room. As you know, moisture is the enemy of buildings and reduces the service life of materials. Because of this, water must be diverted at least 3-5 meters from the structure. It is necessary to install a drain in the floor of the bathhouse, which will carry moisture through the pipe system into the sewer system. Pipes must be laid below the frost line with a slope of 3 centimeters per meter. You can also use surface trenches with a depth of up to half a meter, the walls of which are lined with clay.
The option for arranging a drainage system largely depends on the volume of water and, of course, material capabilities. However, you need to understand that there is a risk of icing when using a surface gutter. This situation can lead to uncontrolled flow at the ground surface.
If water leaves the bathhouse using a drain, the slopes in the floor must be carefully calculated. If the floors are filled with cement, then drainage is not a particular problem, since modern bottom drain systems with the help of pipes will drain the required volume.
Another element is the sewer well, which has several options. If there is no drainage well on your site, then you need to build a separate system for the bathhouse. In this case, a size of 1 cubic meter is sufficient.
Digging a well will not be much of a problem. To prevent it from crumbling during operation, it is necessary to lay out the walls with brick or cinder block. Many owners use car tires. For better filtration of removed moisture in wells, it is necessary to install additional horizontal channels.
Bathroom floor installation
First of all, under the future floor it is necessary to cut off the living layer along with the turf. If a bathhouse is being built on a summer cottage, the land should not be removed, since it can be used on the site in the future. The soil must be cut to a depth of 15 centimeters. After leveling the surface, you can begin to work.
The best material for the floor in a bathhouse is a wooden board. The flooring should not be made higher than the level of the foundation, but strong lowering is also unacceptable, since the flooring will absorb moisture from the ground. You need to install additional brick posts under the wooden logs. All frames are covered with tongue and groove boards.
To drain water from the sink, perforations are made in the floor. It must be remembered that there is high humidity in the bathhouse, which affects the wood. Because of this, it is necessary to leave gaps between the boards that will allow the material to move without further deformation.
Another option for flooring is a dirt floor. To do this, you need to use fatty clay that will not allow water to pass through. The water drainage system can be made from gutters. To avoid getting your feet dirty on the clay, install wooden gratings. In this case, it is worth paying special attention to the efficiency of drainage, since stagnant water may cause an unpleasant odor.
As in other buildings, the floor can be made of concrete. This will facilitate the installation of communication systems and increase the service life.
Building bath walls with your own hands
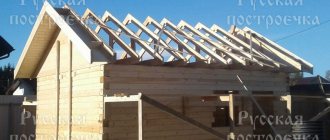
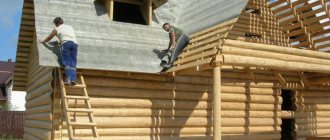
Once the previous steps have been completed, you can begin building the walls. A wide range of materials can be used for this. In the standard view, a bathhouse is a wooden structure, but nowadays it can be created from brick, concrete or rubble stone.
There are standards for wall thickness made from different materials. The thickness of concrete or brick for walls should be 51 centimeters (two bricks). Using rubble stone, these indicators increase to 75 centimeters. As for wood, a thickness of 20 centimeters is sufficient.
When using wood as a building material for the walls of a bathhouse, it is necessary to carry out preparations. The main thing is that the logs are well dried and sanded. It is better not to use material damaged by insects or rot.
Of course, using concrete or brick, there are no such problems, but the structure itself will be colder. In addition, constant temperature changes cause condensation to form, which will need to be dealt with. When using wood, moisture is not a problem as it is quickly absorbed into the fibers and released through the pores.
For maximum protection of the log house for a bath, it is necessary to treat it with special antiseptics and fire retardants. It is worth noting that wooden walls cannot be plastered, since moisture will not be removed outside. As a result, rotting of the logs may occur. It is not superfluous to use vapor and waterproofing of the structure.
Choosing material for building bath walls
At the beginning of building a bathhouse from the foundation to the roof with your own hands, a lot of questions arise about what to do and how to do it. One of the main ones is the choice of material for building walls. Today, experienced experts in this industry advise using the following options:
- Profiled timber is one of the most popular and sought-after materials for building a bathhouse. They have a huge number of advantages. The main one is low thermal conductivity. In addition, the timber has an attractive appearance and gives clear and neat lines to the building. When choosing a profiled beam, you need to wait some time for the material to shrink, after which the log house is professionally caulked.
- Glued laminated timber is perfect for a bathhouse because it has a smooth surface and does not require additional finishing work. Unlike profiled timber, this material does not require additional time for shrinkage. Because of this, the bathhouse can be used immediately after all work is completed. When using laminated veneer lumber, the walls retain heat well, and the material is not subject to rotting. It is worth noting that it is highly resistant to chemicals and rodents. The only drawback is the high price, but it can adequately justify its quality in practice.
- Quite often planed timber is used for bathhouse walls. This is, indeed, a high-quality and affordable material that combines excellent thermal and sound insulation properties of the room.
- To build a classic Russian bathhouse, most owners use logs. Of course, a log structure has its own subtleties during construction that must be observed. One of the features is maintaining the straightness of the fibers. Bends in wood fibers are an accurate sign of poor quality material. In addition, the service life depends on this indicator. After constructing walls from logs, it is necessary to caulk gaps and cracks.
- To create not only a high-quality, but also an attractive building, rounded logs are often used in the construction of bathhouses. The material is reliable and very durable. The disadvantage is the duration of shrinkage, which is one year. Only after waiting for final shrinkage can you continue finishing work and laying communication systems.
- One of the economical options is to use a frame. This is an excellent solution, since the structure itself will be light in weight, which in turn will save on the foundation. However, the main advantage is the speed of construction. If technology is followed, such structures have excellent characteristics and can last a very long time.
- For maximum safety and durability of the bathhouse, brick is used as a wall material. This is a modern and affordable material that is widely used in all types of construction. To prevent the bathhouse from being cold, it is worth making the walls two bricks thick.
- Today, the cheapest option for building walls in bathhouses is cinder block. This material also allows you to quickly and easily complete construction.
- Aerated concrete is modern and of high quality. Due to its excellent resistance to moisture, the structure will last a very long time. At the same time, the thermal conductivity of aerated concrete is very low.
Despite the abundance of various materials, for building a bathhouse with your own hands, bursa and gas blocks were preferred.
Because of this, it is necessary to consider in more detail the features and characteristics of these building materials. Features and advantages of aerated concrete baths:
- The blocks are relatively light in weight, which significantly reduces the pressure of the finished structure on the foundation.
- Perfectly protects the room from winds and frost.
- The porous structure allows moisture to escape.
- Quick and easy installation work.
- Construction does not require the use of specialized tools or equipment.
Advantages of timber in the construction of bathhouse walls:
- The material does not require additional finishing. With personal initiative, you can carry out simple manipulations to improve the appearance of the building.
- The timber is easy to install and does not require the use of complex technologies.
- Using this material, there is no need for additional insulation.
- Timber is a durable and environmentally friendly material.
Technology for laying beams for bath walls
A do-it-yourself bathhouse from the foundation to the roof will last a very long time if you adhere to the technology of laying beams. This material is placed tightly against the pins along the entire perimeter of the constructed foundation. To strengthen the structure, holes with a diameter of 25 millimeters are made in the timber. At the ends, cut-outs are made for grooves or tenons. Insulation materials are placed where the elements are connected to each other.
Professionals recommend using larch beams for the lower rows. This wood is practically resistant to rotting and can withstand temperature changes well. After this, you can use material from any type of wood. Before you start building the walls, you need to prepare blanks that will correspond to the geometric parameters of the future bathhouse. After that they are collected in boxes.
In parallel with the construction of walls, it is necessary to insert window openings and door blocks. You also need to remember that the places where the beams are connected to each other should not be very tight. The resulting gaps are filled with insulation.
The order of laying the beams
- The second wreath is laid on the first beam, which rests on the foundation. After this, through holes are made in the upper one, the lower one is drilled halfway.
- After this, the top beam is removed. Dowels are driven into the holes made, the length of which should be one and a half times the height of the beam.
- Before applying the next row, tow is applied along the entire length. Only after this can the next beams be placed and the dowel driven in.
- It is imperative to cut out the dowel. Its height should be more than 2 centimeters. This will allow you to firmly fix the bars and avoid lifting in the future.
If you decide to use a different material to build walls in the bathhouse, then the technology is the same as for conventional construction. At the same time, do not forget about door and window openings. In the steam room, it would be important to install glass blocks that effectively withstand high temperatures, moisture and transmit light perfectly.
Bathhouse ceiling and roof
Only dry wood is used as a material for covering the bathhouse. These can be boards, slabs or plates. The final choice depends on whether the attic will be used in the future or not. If you plan to use this space only as thermal insulation for a bathhouse, then you can safely use a slab. This will save money. But if you plan to use the attic for your needs, you need to use high-quality materials that can withstand the weight of a person or property stored there.
The face of the ceiling requires sanding to create a more beautiful appearance. If plastering is planned in the future, then this procedure is not carried out.
As for the attic side of the ceiling, it should be covered with roofing felt or roofing felt. As insulation, you can use furnace slag or fill it with earth, the layer of which should be 20 centimeters. Before filling the soil, it is necessary to sift it to remove the roots or seeds of plants. You can also use adobe as insulation for the attic of a bathhouse. This is a layer of straw with clay. This option is very common, as it will allow the clay to trap vapors and prevent fire.
The roof of the bathhouse itself can be made of various materials, namely: slate, roofing felt or tiles. To create a colorful look, use reeds or straw. Such options can emphasize the individuality and peculiarity of the structure. When constructing a roof, it is necessary to provide an overhang of at least 50 centimeters. It is also worth taking care of effective attic ventilation. Before heating the bathhouse, the ventilation must be closed.
Doors in the bathhouse
Bathhouse doors can be made with dowels with your own hands; this will require boards 4-5 centimeters thick. If financially possible, you can buy ready-made structures. In any case, it is necessary to take into account that exposure to steam will increase their size. Because of this, it is necessary to maintain a technological gap so that there are no problems with opening in the future.
The doors of the steam room should have a width and height of 70x170 centimeters. If desired, they can be higher. The disadvantage of a high doorway is that the heat that has accumulated at the top of the room escapes when they are opened. To avoid drafts in a heated room, it is necessary to make the threshold quite high, from 15 centimeters. Despite the slight discomfort, it avoids the unpleasant cold that runs down your legs.
Windows in the bathhouse
Like any other buildings, the bathhouse must have windows, the total area of which must be at least 10% of the total floor area. By adhering to such standards, you will receive sufficient daylight. In addition, it will help fight mold and mildew that will dry out when exposed to sunlight.
Given the rather cool climate of Russia, windows must be located at a height of 80 centimeters above the floor. If you plan to place two window frames side by side, you should leave a partition half a meter wide. When installing adjacent frames, a gap of 15 centimeters is required.
As you know, glass actively transfers heat from the building. To reduce these losses, it is worth using designs with two or three glasses. For maximum tightness, the gaps formed between the frame and the window are sealed with tow or similar insulating material.
As for the size and geometry of the windows in the bathhouse, they can be made at the request of the owner. There are no strict criteria in this aspect.
Installation of a stove in a bathhouse
A do-it-yourself bathhouse from the foundation to the roof cannot exist without a special stove, which will produce heat. Their configurations can be very diverse.
The most optimal and effective option for a bathhouse is a stone stove. When creating it, it is necessary to carefully bandage each seam on the masonry, and the seams themselves are made as thin as possible. For construction, baked and heat-resistant bricks are used. The lower level of the sauna stove should be located 10 centimeters above the floor level.
At the request of the owner, the firebox can be located in the washing room itself or on the side of the dressing room. The latter option is more convenient because the waiting room is drier. Despite all this, three sides of the stove should be led into the washing room, which will significantly increase heat transfer. It is also worth leaving a gap of 25 centimeters from the walls of the building. This will allow the room to heat up faster.
Design features of a sauna stove
Don’t think that building a stove yourself is very difficult. The design of the stoves may differ slightly from each other, but they are still made according to the same principle.
The entire heating structure is installed on a soil foundation. For maximum strength and safety, a layer of crushed stone or rubble is placed under the stove, and the gaps are filled with sand. Next, they create the foundation for the furnace, and it must have a flat surface.
To lay out the firebox, burnt brick is used, and a sand-clay mortar with a small proportion of cement is used as a binding material. When making a solution, it is worth adding more sand, since an excessive amount of clay will create cracks and reduce viscosity. In addition to the firebox, a ash pan is laid out for draft purposes, which is located below. To be effective, it must have an area half as large as the firebox itself.
Frames and doors for the stove must be purchased in the store, since making such structures yourself is problematic.
The back of the stove should be covered with a sheet of high-quality metal with a thickness of 10 millimeters. To increase heat transfer efficiency, it is better to use cast iron over the entire length and width of the stove. This will be the working surface that will give off heat. A chimney hole with a diameter of 150 millimeters is cut out in the center of the sheet. An afterburner with a height of 70 centimeters is installed in it. A pipe with a diameter of 30 centimeters is suitable for this production. This chamber is necessary for extinguishing sparks and afterburning gases.
The entire structure of the afterburner and heater is covered with 5 mm steel. As for the heater, it is filled 1/3 with stones. It should have one door installed on the washing side, and the second one opens into the steam room. A steel pipe is used to remove smoke from the heater. All gaps between the furnace structure and the pipe are sealed with mortar.
A tank for heating water is installed near the afterburner system. Its volume should be within one hundred liters. It can have a wide variety of geometric shapes. The main thing is that the bottom is in contact with the stove tiles.
A variety of types of wood can be used to fire a stove in a bathhouse. It is worth noting that conifers produce a large amount of resins. When using oak you will get a lot of heat and a minimum of soot. You can use coal or gas, but you shouldn't, because they don't have the same spirit at all.
A similar design of a sauna stove produces light steam and low wood consumption. When the tank is full, the water can heat up to 90°C. These are the most optimal indicators for a Russian bath.
Approval of the project by administrative authorities
This is a key step. Without approval of the project before the start of construction, an already built bathhouse can be demolished due to any complaints from neighbors, and you will lose the labor and money invested. The project should include the following items:
- A plan (floor plan, even if you have only one), created according to all the rules of drawing with specifications, sections and explication.
- Approximate estimate for materials.
- Planned type of foundation with drawing.
- Consent of the closest neighbors for construction.
The bathhouse design must be agreed upon with the necessary authorities
Preparation for construction
Before building a small bathhouse, it is necessary to carry out preparatory work.
Choosing a location
Any structure, regardless of area and purpose, should begin to be planned, following certain norms and rules. The location for the bathhouse must be selected taking into account a number of requirements.
The building must not:
- Being too close to a residential building.
- Harm the communication system.
- Pressure the area closest to it.
It is recommended not to build a bathhouse next to a window so that it does not block the view. Not because of regulations, but because of aesthetic feelings.
The bathhouse must be correctly placed on the site Source mebel-go.ru
It is necessary to take into account the distance to other structures in order to avoid problems with government employees and neighbors. SNiP rules regulate at what distance a bathhouse must be built from other structures. According to the rules established by the state, from the bathhouse to other structures and buildings there must be:
- 3 meters – to a residential building;
- 4 meters to medium trees, and 5 meters to large ones;
- 1 meter to other bushes;
- 4 meters from buildings where animals are kept.
Selecting wall material
Yes, a bathhouse can be built from any materials. But it is advisable not to use the same brick, polystyrene concrete and foam block. They get too hot and then take a long time to cool down. Such structures create high humidity, and when ventilated, the room dries very quickly.
Bricks and blocks can be used if desired, but they must have a multi-layer cladding for such variable thermal conditions.
Timber is the best material for a bath Source deltodom.ru
The best option is timber. It does not require any cladding. In addition, it is wood that produces useful and healthy steam when warmed up.
Approximate material calculation
To carry out the calculation, you need to take into account what diameter the log will have. A larger one is better for a bath, but it is more expensive. The optimal diameter is 280 mm. The cost of 1 m3 of such logs with cups is on average about 8 thousand rubles.
Now you need to determine the height of the pediment. To do this, it is recommended to focus on natural conditions. In case of a large amount of precipitation, the gable should be high and the roof steep so that the snow does not linger on it, and in strong winds, vice versa, so as not to create excessive windage. The average height of the pediment is 1.5 m.
Photo gallery: drawings of a log house and necessary parameters
Top view and log cross-section parameters
A drawing of a log house will help in filling out the initial data
To calculate the amount of material, you must fill in all the initial data
A special calculator can help with the calculation.
All values can be entered into a special table
Selection of timber
The durability and reliability of the log house depends on the quality and type of lumber chosen. When choosing, it is necessary to carefully and scrupulously inspect each beam in order to avoid defective products from entering the log house.
Material with shrinkage cracks, wormholes, traces of branches, and black spots on the surface, which indicate damage to the wood by a fungal disease, is mercilessly put aside.
Wood for construction is harvested in winter; it takes two to three months for it to age and go through the drying stage.
Types of timber:
- Solid non-profiled logs are made from logs by processing four longitudinal surfaces and obtaining a rectangular or square section measuring 150X150 mm or 150X200 mm.
- The profiled lumber has grooves on the bottom and top sides for a tight connection of the tongue-and-groove system, which significantly speeds up the process of installing the frame. Thanks to the longitudinal recess, the appearance of shrinkage cracks can be avoided.
- Glued laminated timber is made from strips of lamellas, which are attached to each other with phenol-formaldehyde glue. Alternating vertically and horizontally located wood fibers increases the strength of the material, reduces its moisture absorption, increases moisture resistance, and shrinkage of the structure is reduced from 30% to 5-10%.
- Thermobeam is a new composite material that is made of two lamellas. Between them there is a layer of extruded polystyrene foam. The material is lightweight and has high thermal insulation properties.
What tool will you need?
To build a bathhouse with your own hands you need:
- electric saw;
- grinder with a set of discs;
- drill with various drills and grinding attachments;
- planer, jointer (or electric analogues);
- axes;
- crowbar, mount;
- pliers, nail puller;
- bayonet and shovel;
- hydraulic level;
- hammers;
- mallet;
- bit;
- set of chisels;
- files;
- caulk tool;
- tape measure and carpenter's meter;
- buckets;
- wheelbarrow;
- stairs;
- construction trestles;
- container for concrete or construction mixer.
Now you can proceed directly to construction.
Laying the foundation of the bathhouse complex
Construction of the foundation is one of the main stages of building a bathhouse. The strength of the entire structure of the structure and its service life largely depend on how well this work is done. Therefore, it is extremely important to carry out all calculations and construction work correctly.
In addition to the building material, the type of foundation is also influenced by the topography of the site and the type of soil. Since structures made of wood are lighter, a strip foundation is suitable for arranging a foundation on even terrain (with any type of soil, even heaving). If the difference in relief exceeds 1 m, as well as for buildings made of brick and other materials (brick, wood concrete or gas blocks), bored piles are more suitable.
If it is determined that in a given area it is better to build a bathhouse on a strip foundation, you can begin work. First, the plan is transferred to the area using a theodolite. If this construction device is not available, pegs with cords are quite suitable for this purpose - they also allow you to draw almost straight lines, so the breakdown of the axis will be accurate.
After marking, they proceed directly to the construction of the foundation. First you need to make trenches, the depth of which is determined by the type of soil and the depth of freezing in the region. For heaving soil, the length of the trench should be 15-20 cm greater than the freezing depth. The latter indicator varies depending on the climate zone; the exact figure can be found in specialized literature.
A layer of sand up to 15 cm thick is poured into the finished trench, then wooden formwork is installed. In addition to wooden panels, you can use any sheet material for this purpose: slate, wide boards, plywood, etc. Next, lay a layer of waterproofing for the foundation. To impart rigidity to the structure, the foundation is reinforced using a frame of 14 mm rods connected with wire.
Then a concrete mixture is prepared and poured into the trench. After 3-4 days, the formwork can be removed.
Tips for interior decoration of the steam room
Even at the construction stage, it is necessary to use modern impregnating compounds that can withstand high temperatures and humidity without harming human health. This way you can protect the building from fungus and rot. Those that are suitable for the ceiling cannot always be used to cover furniture.
Manufacturers of varnishes and paints (Senezh, Empils, Rogneda, Dulux, Tikkurila, Nobel, Belinka, Teknos) produce many such products with water-repellent natural substances such as paraffin, wax, oil. They are divided into those suitable for external walls, internal surfaces that a person does not touch with his body (ceiling) and furniture.
Silicone impregnation suitable for ceilings
Pyroprotective and antiseptic impregnation of logs is usually done at the timber mill, but it must be done again after construction.
The first application of the compositions to furniture is carried out immediately after its manufacture on a dry and clean surface, or even before manufacture (on wooden blanks). The product should be evenly distributed with a sponge, soft cloth or brush. Due to the thick consistency, a spray gun will not work.
Impregnation can be applied with a sponge, brush, or cloth.
Insulation system inside
It is organized by a specialist in several stages based on the developed project. High-quality performance of these works allows you to reduce heat loss and minimize fuel consumption. First, installers insulate the ceiling, then the walls and floor.
Stages:
- The surface is thoroughly cleaned, all dust and dirt are removed. After this, a sheathing consisting of bars measuring 5*5 cm is installed. A level is used for checking.
- Material is applied to the wooden frame for reliable waterproofing.
- The insulation is being installed. The ceiling is treated with two layers, the walls with one.
- A vapor barrier is being installed. This can be aluminum foil, fixed to the wood sheathing using a construction stapler and staples. The joints are carefully processed with aluminum tape.
- A sheathing with insulation and vapor barrier material is installed on the walls, then protection is laid for the wooden lining, which acts as a decorative covering. To finish the floor, you can choose floor tiles or porcelain stoneware.
- At the last stage, existing holes, cracks, seams, etc. are sealed. For this, silicone or sealant is used.
How to build a sauna stove
For all sauna stoves there is a single condition, the fulfillment of which is mandatory - lengthening the combustion channel so that the door is located in the dressing room (firewood is placed in it in that room).
The oven door must be in the dressing room
You can install a metal stove by purchasing it ready-made, or build a brick one yourself (it is much better due to its slower heating and long-term heat transfer). The most difficult thing will be to correctly remove the chimney through a wooden roof, insulating it with special metal sheets and vermiculite.
When installing a stove, the most difficult thing is the chimney outlet
Stones must be selected as carefully as possible. They must have the following qualities:
- heat resistance (does not collapse due to temperature changes);
- heat capacity (gives off heat for a long time);
- environmental friendliness (does not emit harmful substances when heated);
- homogeneity and the same coefficient of thermal expansion (foreign inclusions with a different thermal expansion can explode when heated);
- round shape (it improves the circulation of hot air).
The stones should be:
- up to 13 cm for the first layer on the grill;
- up to 9 for the intermediate layer;
- up to 6 for the top layer.
Bath stones should be round in shape
If the heater is made correctly, then unforgettable moments of steam await you.
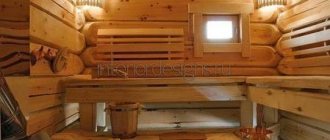
Russian traditional steam room with heater can be supplemented with dry herbs for aroma
Making shelves right
Previously, we talked about the design of a steam room in a bathhouse, and now we will look at how many levels there should be, their sizes, quantity and on what factors they depend. The best option is 3 shelves located at a distance of 30-40 cm from each other. But it is quite acceptable to limit ourselves to two. If the area of the room is small, to rationally use the space, you can make them retractable and add as needed.
When installing, the professional first determines the shape, and then assembles the frame at an angle or straight. Next, wooden panels are laid on the surface. There must be a gap of 1 cm between the panel boards. For their production, you need to use aspen or linden.
Features of operation
Only a steam room provides the healthiest and only correct ratio of humidity and heat. But even there there are extreme values. This is also confirmed scientifically. The best state of health at a certain combination of humidity and temperature is graphically expressed by a homeothermal curve. Below the first curve is the optimal combination of temperature up to 90° and humidity up to 80%, which is what the Russian steam bath provides.
Homeothermal curves can be considered an indicator of well-being in the bath
While in the steam room, the body is washed with hot, humid air, especially when exposed to it with a broom, due to which everything warms up. In this case, there is a constant flow of oxygen to the tissues.
Air circulation in the steam room provides a healing effect
After being in the steam room, you need to plunge into the ice plunge pool.
Fonts in a washing Russian bath should be filled with cool water
Arrangement: ventilation
Of course, in addition to decorating the walls with an insulating “pie,” there is still a lot to equip in the steam room. First, you decide how many simultaneously staying people it is designed for. You can read about the sizes in each case here.
Having decided on the configuration (length, width, height), you decide where the stove will stand. Then you decide whether you will make a window in the steam room or not.
And finally, think about ventilation. (Of course, there will also be lamps and wiring .) Bathhouse ventilation is needed everywhere: in the dressing room, sink, steam room. Take a look at the ventilation section on our website.
And here we will say that where the stove will be located, it is advisable to ensure an influx of fresh air by bringing a fresh air ventilation hole closer to the vent , which can take air both from the street and from neighboring rooms.
the hood in the steam room on the opposite wall. You can make two holes - one under the shelves, the other above the top shelf. By opening and closing the plugs on both, you can ensure the outflow of air in the desired volume and direction.
IMPORTANT! You remember that the caps close while vaping?
Of course, in the steam room of the Russian bath, burst ventilation , so the window was a necessary part of the ventilation. During the procedures, the outflow was blocked, and during breaks, complete air exchange .
Hood: how to make
So, if you are interested in how to make a hood in a steam room, the simplest option is burst ventilation using a window and a door . Second option: inlet and outlet openings , the first is low, the second is high, so that there is draft, always with plugs. In addition, you have at your disposal forced ventilation , that is, using a fan in the duct.
We recommend reading our material with a step-by-step guide on how to create ventilation in a steam room yourself.
Cost calculation
How much does it cost to build a bathhouse? Before starting construction, it is necessary to calculate the estimate. This is required to make it easier to calculate upcoming expenses. To do this, you need to make a list of works:
- Creation of a planning bath project. In this matter, you cannot do without the services of an architect. He will independently make and prepare all drawings in accordance with the client’s conditions. A typical bathhouse design 6 m by 6 m will cost 8,000 rubles.
- Foundation. The cost of the necessary materials will depend on the point of purchase.
- Walls and roof. To do this you will need to buy a roofing covering.
- Communications. These include conducting electricity and water. This is one of the most important work during construction.
- Furnace installation.
- Carrying out finishing work.
In addition, funds will be needed to heat the bath and insulate it.
Of course, preparing an estimate and the cost of construction will not show the exact costs, since the prices of the materials used vary.
Undoubtedly, self-construction will cost much less than professional construction (specialized companies require at least $20,000 for the construction of a bathhouse).
Walls
The following materials are used for the construction of walls:
- Wooden beam.
- Logs.
- Boards.
- Brick.
- Blocks from various building mixtures (cinder block, aerated concrete, wood concrete, and so on).
Since the construction of a bathhouse from logs or bricks is already quite widely described on the Internet, let's consider the option of building a frame bathhouse from timber 15x15 and 5x10 centimeters and boards with a section of 2x15 centimeters:
- Make the bottom trim; to do this, take bars with a cross-section of 15x15 cm and install them on the foundation, connecting them together with special metal plates and corners. There is another way to connect bars, by cutting out tenons and grooves at their ends and then fastening them with screws or nails. When making the strapping, do not forget to place waterproofing under the bars.
- Install vertical posts from 5x10 cm timber. The distance between the posts is usually 50-60 centimeters. First of all, determine the position of the window and door openings and install the racks framing them.
- While working, secure the already installed racks with temporary strips so that they do not warp.
- Make the top trim, securing it to the ends of the vertical posts.
- When making the final fastening of the top trim, carefully monitor the position of the vertical posts, checking their evenness with a level.
- Be sure to strengthen all corner joints with diagonal posts, this will help prevent the frame from warping.
- Make the ceiling sheathing.
- After making the frame, make the external cladding of the walls of the bathhouse with a board with a section of 2x15 centimeters. If you do not want gaps to appear between the boards, then make the sheathing - “overlap”, laying the bottom edge of the board on a nailed board. In appearance, this method resembles finishing walls with siding.
- Having sheathed the bathhouse from the outside, proceed to installing the insulation. Sheets of foam or mineral wool are installed along the vertical posts of the frame.
- On top of the insulation, it is necessary to install a layer of vapor barrier, which is attached to the vertical posts using thin slats.
- After installing the vapor barrier, line the interior of the bathhouse with clapboard or slats.
- Insulate the ceiling by laying vapor barrier sheets on the inner lining, then insulation. Sheathe the ceiling from the outside with sheets of plywood.
Please note that the manufacture and insulation of the ceiling can also be done after the roof has been installed.
