Very often the existing area of a bathhouse building is not enough. Although, in practice, projects for placing bathhouse facilities have been tested in buildings of extremely small dimensions - for example, 2x3 meters. Many owners are not ready to radically rebuild an existing premises, so the simplest, and at the same time effective, method of solving the problem of available free space is an extension to the bathhouse. This is what we are talking about today.
Why do you need a veranda near the bathhouse?
Installing a veranda near the entrance to the sauna is a good choice for those who like to spend time outdoors. This building has a beautiful appearance, as well as many useful functions:
- a suitable place for holding feasts before or after water procedures (make a dining room, put up a barbecue or grill);
- when equipping the veranda with upholstered furniture, you can create a comfortable area for relaxing in nature;
- if you plan to use the steam room in winter, then the extension can serve as a connecting room between the house and the bathhouse;
- also, with glazed walls, the veranda will provide additional protection from wind blowing for the dressing room or vestibule;
- if there are no bodies of water near the sauna, then under the roof of the terrace you can install a swimming pool for those who like to cool off after hot steam;
- such a building will increase the working area of the bathhouse, especially if the veranda is being added to the finished structure.
Another argument in favor of attaching a gazebo to the bathhouse is the arrangement of a children's room. Even with open walls (no glass) in such an area, flyers will be able to spend time in cloudy or too hot weather, since the roof will protect from rain and sunlight.
Dining room on the terrace near the sauna Source luckclub.ru
Style directions
The veranda under the same roof as the bathhouse assumes the unity of the composition of the entire structure and is a continuation of the bathhouse interior. If the bathhouse is designed in the style of Russian classics, then a wooden veranda with carved railings and pillars, timber furniture, embroidered pillows and tablecloths will complement the unique flavor of the country style.
A more austere version of country - chalet, implies calm luxury and elegance of the interior. For this option, full glazing, sun loungers for sunbathing, and a tea table of modern design are suitable.
Oriental style gravitates toward exotic decorative elements; low couches and a table, bright pillows, and Chinese or Japanese-themed decorations would be appropriate here. The multifaceted or semicircular shape of the veranda will add special chic to this style.
For eco or ethnic style, wicker furniture made of natural or artificial rattan, wicker partitions for openings of an open veranda, and elements of flora in the interior are suitable.
In the southern regions, where there is plenty of sun, the veranda can serve as a place to relax in the shade and coolness. Mediterranean country or simply a marine theme would be especially appropriate here. Cool blues, cyan and white tones will not attract the sun's rays too much, creating an atmosphere of freshness and sea breeze.
What types of extensions are there and tips for choosing a location?
The main types of extensions can be considered closed and open. The first version is a glazed veranda, in which you can comfortably sit in both winter and summer. Its main advantage is the presence of closed walls, which are often made using double-glazed windows to make them transparent.
This design, in the presence of heating means, makes it possible to arrange a living corner, dining room or recreation area for spending time in the cold season, for example, in winter or late autumn. Also, if you equip a swimming pool in such a design, you will not have to make an ice hole in the pond (if there is one) in order to cool off in the water after the steam room.
The open version of the extension, which is most often called a gazebo or terrace, is usually used for feasts or simply relaxing in the warm season. Due to the fact that the walls are not covered with glass, the room can be covered with snow in a strong wind or flooded with water during rain, but all this can be solved with the help of the right selection of location or thoughtful design.
Open extension Source stroykauglich.ru
When planning a sauna, you should carefully select the entrance location, since it will be easier to attach a gazebo to the bathhouse with your own hands if there is a lot of free space near the door. It is recommended to make a veranda in the shade of trees, as this will help reduce the heating of the room in the summer.
If you plan to use the steam room in winter, then the exit from the veranda should be located on the south side to reduce the likelihood of the passage being covered with snow during heavy precipitation. Also, if there are bodies of water near the sauna, it is recommended to build an extension not far from it, since you can save on the pool and plunge into cold water after the steam room (for those who like hardening).
In winter, in order to conveniently get from home to the bathhouse, you can make a veranda as a connecting structure between the sauna and living quarters. This construction option is only suitable if the distance from one door to another is no more than 10 m. If it is larger, then the structure may not have a very pleasant appearance and will also be too expensive.
An example of connecting a steam room and a house using a veranda Source archmasters.ru
See also: Catalog of companies that specialize in the design and construction of baths
When thinking through a design plan, you should immediately choose what type of building will be used: open or closed, since many design solutions depend on this. For example, if you plan to use a bathhouse and a veranda in winter, then the roof should be made one. You can also make an extension next to the bathhouse so that they are not connected. This way you can choose a more convenient place for the gazebo, which will not depend on the entrance to the steam room.
Enclosed veranda with partial glazing Source dekormyhome.ru
How to install it yourself
Craftsmen who like to do everything with their own hands will most likely be happy to undertake the expansion of the bathhouse area by adding a terrace.
This is not difficult to do if the project is simple enough. Let's take a step-by-step look at the options for how you can arrange the foundation, walls and roof of your terrace. If you decide to give up some elements, don’t worry, it will be easier, you’ll do it faster.
Foundation
IMPORTANT! The foundation is determined by the soil.
What does it mean? If you have already built a house and a bathhouse, then you know the geology of your site, you also know how heaving your soil is, that is, whether it will lift the foundation during freezing or not.
Heaving soils are those that have a lot of clay in them. The more sand there is in the soil, the calmer it behaves during frosts.
So, shallow foundations (above the freezing depth) are recommended where the heaving of the soil is low (sand). Otherwise, even for a terrace you will have to deepen the foundation below the freezing depth.
Strip foundation
And since we are talking about a late extension, that is, the bathhouse already has its own foundation, and you decided to add a terrace, then you don’t need to connect it with the bathhouse, and especially if it also differs in type or depth.
So, make a separate foundation of any type, the main thing is that it supports the weight of your structure - the entire floor, walls and roof, plus snow.
The main thing is to focus on the type of soil and deepen the foundation correctly. Because you really need it to not “walk” if you are making a common roof, for example. Even if the foundations are separate and move independently, and the roof is common, there will be problems.
Walls
Walls near the terrace are, of course, rare. And even if they exist, they will be more like partitions than full-fledged walls of the thickness needed for winter.
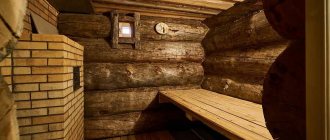
Bathhouse with a terrace with pillars. Photo by Uralekodom
Therefore, let's assume that in most cases the load from the roof is transferred to the foundation through supports - racks, columns or pillars. And if there are walls, they are light.
In this case, the cross-section of the supports will also have to be calculated, as well as the foundation. Don’t skip this step; do the calculations yourself using online construction calculators, or trust the specialists.
In general, two options emerged: with the roof supported on one of the bath walls and without it.
But now we are talking about walls and supports, so in the second case the number of supports will double. However, this may be a reasonable solution if the soil is mobile and the foundation has not been properly buried.
What to do if you decide to make the extension yourself? Leave a gap of several centimeters between the terrace and the bathhouse. And then fill this gap with polyurethane foam. Just remember to paint or cover it so that the foam is not destroyed by ultraviolet radiation.
Roof
Let's look at the options again. If the extension is located perpendicular to the length of the ridge, then you can extend the roof along the gable - lengthen the ridge, add rafters, support them on the frame, and it on the posts. In this case, the roof is single.
The second option is when the extension goes along the ridge. In this case, the fastening can be either on the mauerlat of the bathhouse, but this will require partial disassembly of the roof. However, you will have to disassemble it anyway, because most likely you will have to cut the overhangs.
So, either you put the rafters on the bathhouse’s mauerlat, or secure them in U-shaped brackets. The brackets are attached to the wall using anchors, forming a reliable support for the rafters (of course, the U is inverted). In both cases, you need to be sure of the foundation.
BY THE WAY! An alternative to modern brackets is to make grooves in the wall, but this is still a thing of the past. Another option is to fasten the beam along the wall with anchors, and place the rafters of the terrace on it and secure it with corners.
It was said above that along the ridge you can also build a shed roof, which continues (albeit at a different angle) the slope of the bathhouse roof, or you can make a gable roof that will be perpendicular to the ridge of the bathhouse. In this case, the terrace must inevitably have its own reliable Mauerlat or top frame.
IMPORTANT! Don't take risks with general roofing unless you're confident in the foundation.
Again, we have detailed materials on the construction of single-pitched and double-pitched roofs - we recommend that you read it if you want to do everything yourself.
Materials for making a veranda
The most common material for an extension is wood, since it is easier to make a veranda for a bathhouse with your own hands from boards and logs, and this design also has a more aesthetic appearance. But for a more harmonious combination, you should select the same material as the sauna itself.
If the bathhouse is made of wood and has already begun to sag significantly, then making an extension from a material that will shrink even more is not recommended, since after a while the veranda will “sag” and the entire structure will be deformed. This type of problem can cause the deck to collapse and make it look bad.
To decorate the walls of the extension, you can use durable wood that will be resistant to high humidity and weather conditions. Most often, linden or aspen lining is used (thin cladding board with a tongue-and-groove joint).
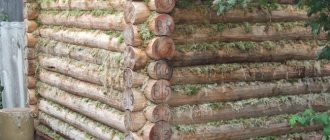
The material used to build the base is rounded timber or logs from coniferous trees. The advantage of a wooden structure is that it will be environmentally friendly, and with certain processing it will also be strong. Also, with the help of additional means, you can make the tree resistant to temperature and weather conditions.
Attached wooden veranda Source izhevsk.ru
Choosing a roofing option
When constructing a brick extension, the roof can be built so that it is integrated with the main building. But you need to wait until the extension settles. If you used brick, shrinkage will take about six months, foam block will require no more than 3 months.
It is worth considering that a common roof will require a complete dismantling of the roofing system of the main building, so you should not neglect the option with a separate roof.
The roof should be constructed from boards measuring 10-15 x 40-50 cm. This is necessary to ensure special strength with a relatively light weight of the roof. Plus, you can save on the cost of your roofing system.
Thus, to build an additional room for a bathhouse, you do not need to be a jack of all trades; this task is within the power of everyone. The main thing is to follow the recommendations and follow the sequence of actions. At the same time, you can always entrust the construction of an extension to a construction team, and the information received now will help you calculate the costs yourself.
The foundation and features of its construction
When building a veranda, many factors should be taken into account so that over time the structure does not begin to move away from the wall of the bathhouse. The main point that needs to be taken into account is the location and design of the foundation. If at the stage of building the steam room it was not taken into account that an extension would be added, then the foundation of the terrace will not be able to be made one with the bathhouse.
First, you need to decide what kind of base the veranda will have, since it is easier to attach a terrace to a bathhouse if certain rules are observed. Most often, the foundation is made in the same way as a bathhouse; for example, if the sauna is on a strip base, then the extension should be made in the same way. It is recommended to make the height of the base of the terrace the same as the sauna so that the floor of both structures is on the same level.
When laying the foundation for an extension, you should take into account its depth, since it must be the same size as the sauna. At the preparation stage, it is necessary to dig a trench along the wall to which the extension will adjoin. This is necessary in order to connect 2 foundations to each other.
Pouring a strip foundation for an extension Source sdelai-lestnicu.ru
After this, holes should be made in the base of the bathhouse so that when laying a new base, reinforcement can be inserted into them, with the help of which the connection will take place. Next, you need to make formwork for the future foundation and pour 20 cm of sand to create a cushion.
The reinforcement must be inserted into the holes between the formwork panels so that when concrete is poured, it holds the 2 bases together and the extension does not move away from the wall. But this method is only suitable for strip foundations. If the bathhouse stands on a columnar or poured pile-grillage foundation, then the installation technology will be different.
When the main points are determined, you can begin the construction itself.
- Pouring the foundation.
Step one. The perimeter of the future bathhouse is determined in advance; special pegs are driven into the ground along its edges, within which it is necessary to dig a ditch 60 centimeters deep and 40 centimeters wide.
Step two. The ditch is filled with sand to one third of the depth. The sand is poured from above with water and thoroughly compacted.
Step three. After compacting the first layer, finely chopped red brick or gravel is poured over it.
Step four. A layer of broken brick or gravel is covered with a layer of sand, which should be level with the ground level.
Step five. Formwork is assembled from reinforcement. The entire structure is poured with concrete and insulated on top with a thin layer of roofing felt.
Important! Before building a frame bath, at least a week should pass so that the foundation has the opportunity to properly settle
- Construction of walls.
Step one. Lumber prepared for a frame bath must be thoroughly dried before starting work. It is not recommended to use birch wood for construction, as it quickly rots. The best option would be linden, aspen or larch
The wood of these species is able to maintain its shape for a long time and has thermal insulation properties, which is very important for a bathhouse.
Step two. After all construction work is completed, the inside of the boards should be coated with an antiseptic solution, and the outside with furniture varnish, in two layers. This procedure must be done around the entire perimeter of the room, avoiding only the steam room and the washing compartment.
Step three. The bottom trim, made of a reliable beam with a cross-section of 10x10 centimeters, must be fixed firmly enough, after which the beams should be properly fastened at the corners with nails. It is recommended to place the racks on metal pins so that during the construction of the walls they cannot change their location and knock down the structure.
Step four. Corner posts must be embedded in concrete.
Advice: The pillars - the basis of the walls of the future bathhouse - should be placed directly under load-bearing walls, corners, stoves - that is, in those places where the load is greatest.
Step five. Along the perimeter of the walls, intermediate racks are installed, made of the same timber as the main structure.
Step six. To make the floor waterproof, it should be laid out with timber made of any wood, with a cross-section of 15x15 centimeters.
- Let's move on to building the roof.
Step one. It is necessary to take 8 special ceiling beams, sawn to the angle of the rafters. To begin with, you should set up only the outer rafters, and only after that fix a couple more pieces in the center of the future roof. The remaining rafters are connected to the main structure, first on one side of the roof, then on the other (through the ridge).
Step two. After the rafters, vertical posts are installed, and if necessary, an exit to the attic is also made.
Step three. On the rafters located at the edges, beams are cut out, to which the front boards are nailed, after which the battens are attached on top.
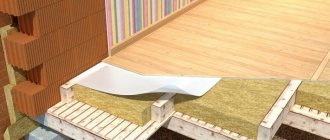
- It is necessary to insulate the walls.
The most common material for this purpose is roll insulation about 50 millimeters thick. In some cases, mineral wool or ready-made mats are used. The insulation is laid between vertical wooden posts, after which slats are nailed to them. For thermal insulation of the room, it is recommended to use polyethylene or glassine.
Advice: it is not recommended to use roofing felt for wall insulation, since under the influence of high temperatures it begins to emit an unpleasant odor.
For floor insulation, it is better to choose expanded clay or other types of backfill, and for the ceiling - polystyrene foam. If the insulation is selected correctly, heat will be lost several times less. Thanks to this, the cost of heating the bath will also be reduced.
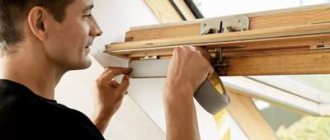
After the walls and roof are built, you can begin installing windows and doors in the openings previously left for them. Upon completion of this work, it will be possible to enter the finish line.
Veranda installation
Installation of the extension should be done after the foundation is completely ready, as well as the height of the walls and the type of roof have been determined, since it will be easier to attach a gazebo to a bathhouse with a pitched roof from the side. The easiest option for creating a veranda is to make it out of wood. Therefore, for walls, a structure in the form of a frame made of logs or timber measuring 100x150 mm or 100x100 mm is most often used.
To make a veranda you need to make a grillage (a wooden frame for the top of the foundation). It should be mounted on top of the waterproofing of the base. Most often, the grillage has a thickness of 55 mm and a width of up to 160 mm. For a strong connection, anchor bolts are used, which are inserted into the concrete.
After this, vertical beams are installed. With their help, the foundation for the roof and walls will be made. To do this, the beams are attached to the grillage using metal corners or a notch. In order for the structure to be as stable as possible, it is necessary to fix the racks on each side.
An example of attaching vertical posts to the base of a veranda Source remontnik.ru
Construction stages
Preparing the area where the extension will be located: all garden debris is removed, bulges and holes are leveled. Installation of strip foundation. (It is this type of foundation that is mainly used on such structures because it is easy to manufacture, does not require the use of special equipment, has a long service life, and the cost of construction is inexpensive.) The frame racks are embedded in concrete - a steel or aluminum profile. When choosing a steel frame, it must first be primed and painted. With an aluminum frame, these actions are not required. A wooden frame can also be used.
Cover the prepared frame with polycarbonate sheets. It is recommended to secure it using screws with rubber washers. You can cut polycarbonate using an electric jigsaw or a saw with fine teeth (either a hand saw or a circular saw will do). Install a roof for the extension, the possible types of which were described above (in the form of an arch or sloping). If windows are needed, ready-made metal-plastic ones are usually used.
The extension is ready for use, but to increase its service life and attractive appearance, it is important to know the basic rules for caring for this material:
- Branches of nearby trees can scratch the material, so if there are trees or shrubs near the building, it is better to trim them or tie them up.
- When soiled, the material should be washed with soapy water using a soft cloth (or rags). It is better to avoid products containing alkali, solvents and acids - the material may become cloudy, which will negatively affect its appearance.
- The material does not require additional painting.
We hope that our detailed recommendations, as well as visual photos, will help you build a reliable and durable extension!
If you are thinking of updating the lighting in your room, then pay attention to polycarbonate diffusers, these are very strong and durable products
Video description
This video shows an example of building a veranda covered with boards.
In the first case, the walls are made of 1/3 of the main material (wood, brick or stone), and the rest is occupied by the window. With full glazing, panoramic windows are used, which occupy the entire height and area of the wall. Most often they are equipped with opening areas, for example, vents or glass doors to create natural ventilation.
The roof of the veranda usually depends on the shape of the extension and the bathhouse, as well as the material from which the steam room covering is made. If the extension is located under the roof of the sauna, then a common roof should be made. In this case, it is necessary to make a transition between the terrace and the bathhouse so that water does not get into the gap, as well as a separate drainage system for the extension. If the veranda is located perpendicular to the main building, then it is recommended to make a separate roof.
An example of a split roof for a terrace attached to a bathhouse Source remontik.org
Roof connection
Separately, it is necessary to say about the connection of the roof of the gazebo.
There are two types of such work:
With dismantling of the main roof;
It can be seen that one part of the roof of the main building was dismantled
Without disassembling the main roof.
If you do not plan to dismantle the main roof, then the roof of the attached structure should be lower. In this case, it is best to perform a shed with a slope from the already finished walls.
In this case, sheets of tin should be nailed to them, which will bend along the junction angle and lie on the slopes of the roof of the attached room, on top of the roofing material.
Indiscriminately connecting the roof
If the roof is to be dismantled, then the connection consists of placing the rafters of the new roof on the rafters of the existing building, and then laying the roof.
Briefly about the main thing
You should carefully consider the layout of the bathhouse and its general condition, since it may not be possible to make an extension with your own hands due to the location of the steam room or sagging base.
The extension to the bathhouse can be closed or open. Each has its own features, such as weather protection or appearance.
Most often, wood is used as a material for an extension to a sauna due to its technical qualities and appearance, but any suitable material, for example, brick or stone, can be used to build a veranda.
Ratings 0
What should be in the dressing room
When considering the question of how to install a dressing room, you should not forget about its internal decoration (read: “How to finish a dressing room - stages of work and arrangement options”).
It is imperative to place the following elements in the waiting room:
When laying the foundation, it is worth considering the option of arranging additional space for an outdoor area near the dressing room. This will expand the relaxation room, which creates additional comfort for taking couple procedures. You can also install a font for washing after visiting the bathhouse. In the photo and upon visual inspection, the dressing room will look aesthetically pleasing, like an extension to the main building.
Bottom line
The article describes in detail the procedure for installing and finishing the dressing room. To get a high-quality, reliable and safe building, you must follow basic recommendations and not skimp on building materials. You can also entrust the work to specialists who will take responsibility for all stages - from purchasing the necessary materials to their installation and putting the entire bathhouse into operation.