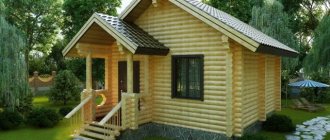
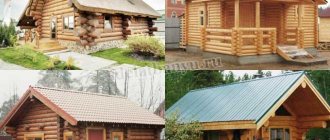
It's no secret that bath procedures have a beneficial effect on health. If there is free space on the site, you can build a summer bathhouse in the country. It can be used for bathing after tiring work in the garden, or you can relax and relax your body and soul in the evening with a cup of herbal tea in a pleasant company with loved ones.
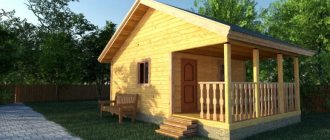
Sketch of a budget bath
Before you start building a bathhouse, you need to decide on its design. It is enough to draw on a piece of paper what will be located and where approximately.
You need to understand the location of the sewer system, how water will flow, how electrical wires will be installed, and so on.
Frame construction
There are many options for constructing bath walls. We will use the simplest and fastest - frame. For its construction we will need the following materials:
- wooden blocks (5x5 cm);
- boards (minimum thickness – 2.5 cm);
- foil/film for waterproofing;
- thermal insulation.
Frame mini bath: the simplest and fastest construction option
According to a previously prepared project, a frame of beams is assembled. The inside is lined with boards. You can use ordinary screws or anchors as fasteners. Don't forget about heat and waterproofing. The first thing we install is a material that does not allow heat from the bathhouse to pass out. For this purpose, you can use expanded clay, sawdust or mineral wool (rarely used). Bitumen mastic is suitable for creating a waterproofing layer. The final stage of wall construction is the internal board covering (not mandatory, but a desirable element).
All that's left to do is build the roof. First, we prepare the rafter system and mount it on the frame. Then we begin laying the roof: metal tiles, slate, etc. will do. Don't forget about the chimney - you need to leave a free opening on the roof for it.
To complete the appearance of the bathhouse, lining or a block house is used as a protective and at the same time decorative element. Lining is the most common option for finishing the external frame of a bathhouse. This material is cheap, practical and durable. In addition, it is a fairly successful imitation of a wooden beam. The block house is similar in appearance to the lining, but differs in a more presentable appearance and quality of wood.
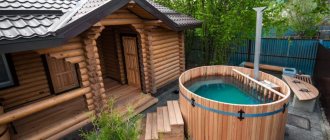
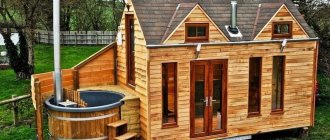
A mini bathhouse sheathed externally in wood will delight with its aesthetic appearance
Materials for the construction of an economical bathhouse
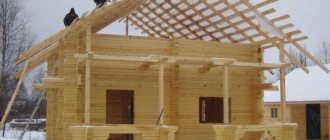
- A budget version of a bathhouse can be built from timber. For a summer bath at a summer cottage, a 10 cm thick beam is suitable. The dowels should be installed at a distance of 1 meter. Such a bath has many advantages. There is no need to finish the walls here. It looks beautiful. A log sauna is not afraid of moisture. They have a long service life, the main thing is to properly care for them. This bathhouse has only one drawback. And it lies in the fact that the building is sagging.
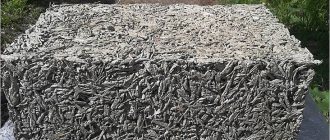
- Arbolit. Such a bathhouse is built from cement, water, sawdust, lumber and sand. It will take a lot of time to build such a bathhouse. This material does not like water. Therefore, it will still be necessary to finish the walls, at least in the washing room.
- Warm frame. The thickness of the wall of a summer bath can be 10 cm. The most budget-friendly wall insulation will be ecowool. It is also safe because it does not burn.
- Gas silicate. The material itself is inexpensive, but you will still have to spend money on wall cladding, because it absorbs water. During construction you will also need a concrete mixer.
- Brick. A bathhouse made from such material will be expensive and difficult to build on your own. You will definitely have to hire specialists to lay the walls. After all, if you make a mistake when building a brick bathhouse, it can fall apart at any moment.
Floors
The design of the floor depends on the type of room. In the recreation room, ordinary wooden floors are made. In the wash and steam rooms, the floors are made of two levels:
- The first level is made of concrete and has a slope towards the drain hole.
- The second level is a finished floor made of boards with gaps for draining water.
If you want to make a floor of porcelain stoneware or tiles, then they are simply laid on the first level at a slope towards the drain hole. In order to make a concrete floor and drain in a bathhouse you need:
- In the center of the steam room and washing room, install plastic pipes with a diameter of 5-10 centimeters with a socket at the end. The pipes should go out through the foundation to the street and connect to the sewer system.
- Lay down a layer of waterproofing material.
- Spread a layer of gravel 10-15 centimeters thick over the entire area of the rooms.
- Make a cement mortar and pour the floor with a slope towards the hole installed on the drain pipe.
- Install a screen over the drain hole to prevent debris from entering the drain.
At the second stage, wooden floors are made:
- Install wooden logs in all rooms of the bathhouse. Make the distance between the logs 30-40 centimeters. As logs you can use bars with a section of 3x5 cm or 4x6 cm.
- Nail boards with a section of 2x15 cm or 5x20 cm onto the logs.
- In rooms where water is expected to drain, leave gaps of 0.5-1 cm between the boards.
Do not forget, before installing wooden floors, to treat all parts with wood impregnation. When making floors, keep in mind that they should be higher, or at the level of the upper edge of the foundation.
Bathhouse foundation
- For a bathhouse made of timber, you can lay blocks on the ground that will support the corners of the building.
- Used tires are suitable for building the foundation.
- If the site for building a bathhouse is not level, then it is necessary to dig a trench and fill it with concrete.
- Instead of digging a trench, you can use screw piles. They are screwed into the ground using levers.
Walls made of foam blocks
The general installation principle will be the same as in the previous case. You should also start with the corners, which must be accurately and clearly set.
Laying walls from foam blocks
In the same way, guides are made from profiled pipes. But there are some nuances:
- In order to achieve the best adhesion, the base row is laid on cement mortar. It is better to make the ratio with sand 1:3. It is very important to maintain a horizontal plane so that all other rows also lie correctly.
- All other rows are fixed with special glue.
- The thickness of the adhesive layer should not exceed 5 mm. Only in this case will it be possible to achieve ideal thermal insulation.
- Every 3 rows, a metal mesh is placed in the seam, which serves to provide additional rigidity.
- Foam blocks are placed on the edge.
- Lintels over doors and windows are made in the same way as in the case of brickwork.
Roof for a bath
- A flat roof is considered the cheapest.
- It is better to choose corrugated sheeting as a roof. Although roofing felt is cheaper, such a roof will not last long.
You can save on corrugated sheets if you buy illiquid goods. Such a product can be purchased at the factory. Usually there is a good discount on them. Illiquid does not mean bad. The price is reduced even because of a small dent, which does not play a special role and is not visible at all.
Construction of brick walls
For a bathhouse, it is better to use red brick, which has undergone heat treatment and has a lower thermal capacity. To calculate the amount of material needed, you need to calculate the area of each wall. To do this, the width is multiplied by the length. Then you need to divide this number by the area of one brick. The area of the masonry joints can be neglected, because you will still need to make a reserve in case of battle or marriage.
Calculation of the number of bricks
The wall can be erected using several methods:
- in two bricks with external insulation.
- with air gaps, they are about 6 cm;
- with a layer of insulation between two rows of bricks.
Work begins with the construction of corners. This is an important process because... It is they who will subsequently ensure the correctness of the entire structure. In order to maintain the vertical level of the future walls, two metal profiles of 5x5 cm and a length equal to the height of the future walls are dug into the corners. They are leveled and secured with jibs. A fishing line is stretched between them to the height of one row. After it is laid, the line is rearranged to the height of the next one. The thickness of the seam should be about 20-25 mm. It should be applied at a distance of no more than a meter so that it does not have time to dry. Additionally, the plane is checked using a bubble level. If the second and third types of masonry are chosen, then it is necessary to ensure a bandage between the two walls. This is achieved by laying two bricks transversely opposite each other at certain intervals. Also, each row should be offset by half a brick to ensure the overall interweaving of the entire plane.
Brick wall laying
A lintel must be installed over windows or doorways. Usually it is reinforced concrete. You can purchase it ready-made or pour it directly on site. It should extend beyond the openings by at least 25 cm. Supports are installed and a wooden board is mounted on them. Two rows of bricks are laid out on edge. Between them there are reinforcement rods, which should also extend 25 cm beyond the opening, and it is better to bend them to intertwine them with the existing masonry. Concrete is poured inside. After complete hardening (usually 10-12 days), the lower supports can be dismantled and the logs removed.
Brick lintel
Bath shelves
Their width is about forty centimeters. They are usually made from pine or oak.
How to make a steam room
- Linden and aspen boards are used to decorate the steam room. Stone and ceramics are also suitable.
- Coniferous wood is not used because it releases resin when heated.
Installation of benches and other sauna equipment
A proper sauna should have a room height of 1.9 to 2.1 meters. When installing benches, it is necessary to take into account that the person sitting on the upper tier should feel comfortable without resting the top of their head on the ceiling (for more details: “How to make benches in a bathhouse with your own hands - from drawings to ready-made benches”). Then the bottom strip of benches will have a height of 65 centimeters. If such a design creates discomfort for visitors, then under the bench you can make a step 20-25 centimeters high.
Other conditions for arranging a steam compartment:
to eliminate the effect of a closed space, you can install combined doors with glass or tinting
It is very important that the door is without any locks and opens to the side from the steam compartment; It is worth considering that a wood-burning heater is very difficult to install, and therefore it is best to opt for electric stoves, which can be purchased in many stores. Such a stove is placed with a gap of 20 centimeters from the floor and secured to the wall with screws; To increase safety, the stove must be fenced with a wooden fence at a distance of 5 centimeters
Stones are placed in the voids between tubular electric heaters at a minimum distance; Lastly, lighting fixtures and switches are installed, after installation of which the sauna can be put into operation.
Mobile sauna on a summer cottage
Such a budget sauna at the dacha can be easily and simply assembled with your own hands. Two people will be able to assemble a structure from a tent, a bag and a stove on their own.
The sizes of such baths can vary. At least three people can wash in them. The temperature in the mobile sauna reaches 90 degrees.
This design can be easily transported from place to place using a trailer. After each use, the mobile sauna is washed and dried.
Features of the construction of a dugout bathhouse
- You can build it yourself.
- No foundation needed.
- Costs for walls are reduced.
- The pit is very difficult to build.
- One person is not enough to build such a bathhouse.
- With the help of construction equipment, such a bathhouse will be built faster, but money will be spent.
More information about insulation
Cheap modifications cannot be called useless; a budget DIY sauna will be quite warm and airtight with such materials
When choosing a specific manufacturer, you need to pay attention to permission to use such a component for buildings of this type.
Among environmentally friendly thermal insulation solutions, it is worth noting basal wool and penofol. The properties of both materials have proven themselves quite well, and the price will be affordable for every average family.
Thanks to convenient rolls and a wide selection of product thicknesses, you can easily choose the right option at an affordable price.
Secrets of building a bathhouse (answers from the master)
- Building materials must be certified. After all, you can buy a fake.
- Consult a specialist when building a bathhouse.
- Stoves should not be homemade. It's safest to buy it in a store.
- Sockets and wires must be protected.
- You can buy building materials in small quantities. For example, there are often promotions on some building materials in stores. You can save a lot of money if you buy everything you need at discounts.
- The steam room should be small.
- It is better to build a bathhouse on level ground. This saves money when building the foundation.
- The foundation doesn't have to be complicated.
- Before building a bathhouse, you must first look at budget bathhouse projects. Then decide for yourself what to build the foundation from. You need to understand how the sewerage system will run, how to install electrical wiring, and so on.
- The smaller the size of the bathhouse, the less money will be spent on its construction.
- It should not be located next to other buildings.
- It is better to choose a flat place to build a bathhouse.
- The roof of the bathhouse must be flat. This is one of the cheapest and simplest options when building a bathhouse.
- If the choice fell on a bathhouse made of timber, then larch is most suitable. Because when wet it only becomes stronger.
- A bathhouse built from a frame is difficult to insulate.
- The window in the bathhouse should not be too small. Also, a large window is not good either. The optimal size for a window is 50*50.
The stove should not be homemade. It must be purchased in a special store. A homemade stove is dangerous to use, although it is more economical.
Pros of DIY construction
- You can save money on construction by purchasing materials only on sales.
- Construction control is thorough.
Disadvantages of DIY construction
- Construction times may be delayed.
- A lot of effort and time is wasted.
- If you can’t build something, then you need to look for workers for spot work.
Frame walls
After the foundation is erected, an additional foundation is made for such a structure. It is carried out according to the example of the grillage discussed above. For the corner posts we will need exactly the same timber as for the base. In addition, you will need to stock up on edged boards with a length equal to the height of the future walls, a width equal to the width of the grillage and a thickness of 5-10 cm.
Construction of a bath frame
- At the base, it is imperative to check the diagonals so that they are the same. It is attached to the concrete foundation using anchor bolts. It is advisable to recess the head. For this purpose, a countersunk groove is made in advance. Waterproofing made of bicrost or roofing felt is laid under the grillage on a concrete foundation.
- Pie wall frame bath
To secure the corner posts, a tenon with dimensions of 5x5x5 cm is made at the end. A corresponding hole is made in the base. The beam is installed and leveled. It is fixed using metal corners. Jibs are also installed that will hold it.
- The top trim is made. This is a beam that will connect the racks together.
- Additional vertical beams are installed every 50–60 cm. They are strengthened with oblique struts.
- At the locations of windows and doors, embedded lintels are installed for rigidity.
- Floor joists are installed. For them, you can use a beam measuring 15x10 cm. In order for them to be secured in the best possible way, a cut is made in the grillage to half the width of the board. A cut is made in the joists and placed into the cut. Fastening is carried out with self-tapping screws; additionally, internal metal corners can be installed.
- The floor is insulated. In the case of a strip foundation, waterproofing in the form of a membrane or film is placed in the resulting space. Expanded clay is poured from above up to the beams. A separate layer of hydrobarrier is laid on the logs; it is secured to the boards using a construction stapler. Insulation is placed in the cavity between the joists. This can be mineral wool, polystyrene foam or penoplex. Everything is covered with a finished floor on top. If the foundation is columnar or pile, then first you will need to hem the beams from below, and then lay the hydraulic barrier and insulation.
- The outside walls are covered with facing material.
- A hydraulic barrier is laid on the inside. Insulation is inserted into the space between the vertical boards. You can use the same as for the floor. Finishing can be done using a block house or other suitable material.
Frame on a pile foundation
Photo of a budget sauna
Design work
The construction of the bathhouse must be carried out in compliance with the requirements of Building Codes and Regulations 02/30/97. The building assumes the presence of: a covered canopy, a relaxation room, a washing room, a steam room, and a bathroom.
The design stage includes the development of working drawings for the general construction part, special interior finishing work, water and electricity supply, sewerage system, natural and forced ventilation system.
What to heat - choosing a stove
When choosing a stove for a sauna, first of all you need to pay attention to the power. This indicator must correspond to the volume of the steam room
The presence of uninsulated areas and the material used to make the door are also taken into account. According to the type of fuel, sauna stoves are as follows:
- Wood-burning. The classic version of the firebox allows you to create a special atmosphere. A ubiquitous tree does not require additional communications. You can independently prepare all kinds of varieties to create different effects.
- Gas. Units of impressive size can only be connected by a qualified gas technician. In such stoves there is no need to constantly add firewood and control the flame. They have no firebox or ash pan. Gas furnaces significantly increase the fire hazard of the entire structure.
- Electric furnaces. Miniature devices heat the room evenly and quickly. The installations are absolutely safe, with great functionality. Due to the high electricity consumption, the operating cost will be high.
Project #3 - miniature bathhouse made of timber in the national style
And if you can’t imagine a Russian steam room made of another material, like timber, you can build this relatively budget option.
- Step 1. We level the area for the foundation from the screenings, knock together the “formwork” and leave only an opening for draining water from the washing room.
- Step 2. Lay out the EPS and knit the reinforcement cage. We fill it with concrete, make a water ramp and the foundation is ready.
- Step 3. Lay the frame. Under the first crown we place a board treated with an antiseptic, which we cover with roofing felt on three sides. You can put moss on the board itself - it has antiseptic properties, and therefore the crown of the bath will last even longer.
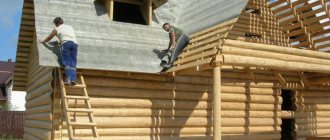
- Step 4. We build the walls and leave it like that for several months for shrinkage.
- Step 5. Attach the rafters and cover the roof. We make a pipe passage through the ceiling - it can be easily made from a metal angle and a stainless steel sheet.
- Step 6. We make a frame partition between the steam room and the dressing room, insulate it with mineral wool and cover it with clapboard on both sides.
- Step 7. Lay out the floor in front of the stove with porcelain tiles. We leave a special hole in the floor for fresh ventilation.
- Step 8. We lead the pipe from the stove through the roof. We make the passage from Master-flash rubber, which is resistant to temperature. The joint with the roofing is sealed with MS polymer.
- Step 9. We attach the shelves in the steam room and conduct electricity.
Remember: the first step to huge savings when building your own sauna is to build it yourself!
