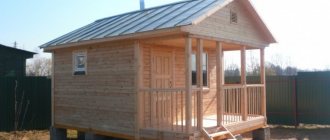
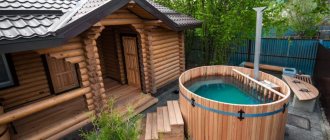
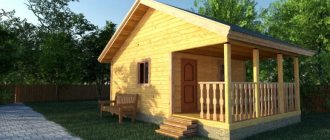
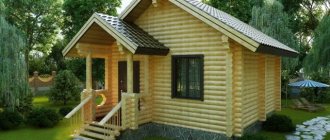
Sketch of a budget bath
Before you start building a bathhouse, you need to decide on its design. It is enough to draw on a piece of paper what will be located and where approximately.
You need to understand the location of the sewer system, how water will flow, how electrical wires will be installed, and so on.
Materials for the construction of an economical bathhouse
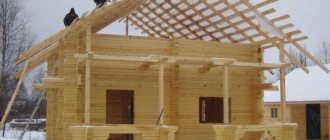
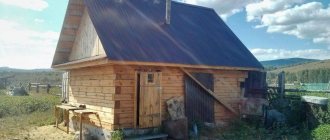
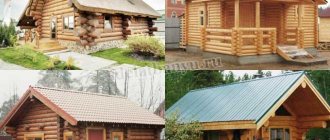
- A budget version of a bathhouse can be built from timber. For a summer bath at a summer cottage, a 10 cm thick beam is suitable. The dowels should be installed at a distance of 1 meter. Such a bath has many advantages. There is no need to finish the walls here. It looks beautiful. A log sauna is not afraid of moisture. They have a long service life, the main thing is to properly care for them. This bathhouse has only one drawback. And it lies in the fact that the building is sagging.
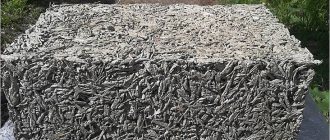
- Arbolit. Such a bathhouse is built from cement, water, sawdust, lumber and sand. It will take a lot of time to build such a bathhouse. This material does not like water. Therefore, it will still be necessary to finish the walls, at least in the washing room.
- Warm frame. The thickness of the wall of a summer bath can be 10 cm. The most budget-friendly wall insulation will be ecowool. It is also safe because it does not burn.
- Gas silicate. The material itself is inexpensive, but you will still have to spend money on wall cladding, because it absorbs water. During construction you will also need a concrete mixer.
- Brick. A bathhouse made from such material will be expensive and difficult to build on your own. You will definitely have to hire specialists to lay the walls. After all, if you make a mistake when building a brick bathhouse, it can fall apart at any moment.
Flaws
Wood concrete blocks can be created on your own, which significantly reduces the cost of work
But when using this material, you need to take into account its disadvantages. Among them are the following:
- The need for waterproofing. The height of the foundation must be at least 50–60 cm, otherwise the material will become damp.
- The sizes of the blocks may vary, so you need to monitor each row of masonry.
- To compensate for deviations in dimensions, additional seams 1–1.5 cm thick are applied. Therefore, the solution consumption increases.
Bathhouse foundation
- For a bathhouse made of timber, you can lay blocks on the ground that will support the corners of the building.
- Used tires are suitable for building the foundation.
- If the site for building a bathhouse is not level, then it is necessary to dig a trench and fill it with concrete.
- Instead of digging a trench, you can use screw piles. They are screwed into the ground using levers.
Roof for a bath
- A flat roof is considered the cheapest.
- It is better to choose corrugated sheeting as a roof. Although roofing felt is cheaper, such a roof will not last long.
You can save on corrugated sheets if you buy illiquid goods. Such a product can be purchased at the factory. Usually there is a good discount on them. Illiquid does not mean bad. The price is reduced even because of a small dent, which does not play a special role and is not visible at all.
Bath shelves
Their width is about forty centimeters. They are usually made from pine or oak.
How to make a steam room
- Linden and aspen boards are used to decorate the steam room. Stone and ceramics are also suitable.
- Coniferous wood is not used because it releases resin when heated.
Wall insulation
The main problem of baths using frame technology is heat transfer. To maintain heat in the steam room, insulation is required. Preference is given to mineral wool. This material is non-flammable, has high vapor permeability and is safe for health.
Important! Foam boards are cheaper than mineral wool, but worse in quality. The high flammability of polystyrene foam does not allow its use in places with increased fire hazard. The space between the posts is filled with mineral fiber
Mineral wool sheets must adhere tightly to wooden surfaces and to each other. Insulation is inspected and gaps are eliminated
The space between the posts is filled with mineral fiber. Mineral wool sheets must adhere tightly to wooden surfaces and to each other. The insulation is inspected and cracks are eliminated.
On the inside, the insulating layer is covered with a vapor barrier using polyethylene aluminum foil or thermofol. The materials protect well from moisture even at high temperatures. The joints are carefully taped to ensure complete tightness.
After laying the insulation and insulation, the interior decoration of the bathhouse begins.
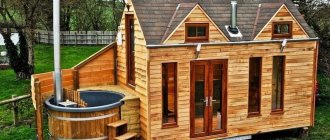
Mobile sauna on a summer cottage
Such a budget sauna at the dacha can be easily and simply assembled with your own hands. Two people will be able to assemble a structure from a tent, a bag and a stove on their own.
The sizes of such baths can vary. At least three people can wash in them. The temperature in the mobile sauna reaches 90 degrees.
This design can be easily transported from place to place using a trailer. After each use, the mobile sauna is washed and dried.
Features of the construction of a dugout bathhouse
- You can build it yourself.
- No foundation needed.
- Costs for walls are reduced.
- The pit is very difficult to build.
- One person is not enough to build such a bathhouse.
- With the help of construction equipment, such a bathhouse will be built faster, but money will be spent.
Wiring
To organize lighting inside the bathhouse, it is necessary to supply electricity from a residential building or from a power line pole located closer to the building. Do-it-yourself wiring installation in a building for washing procedures and rest consists of the following steps:
- calculation of the required amount of cable and electrical fittings;
- purchase of necessary tools and materials;
- direct installation of electrical wires and electrical accessories.
To ensure fire safety, a separate panel with regulators is installed in the bathhouse. Due to the periodic use of the building, high temperatures and humidity, it is necessary to conduct electricity in compliance with regulations.
Wiring diagram
A schematic drawing of a plan for the internal power line in an individual building will help to accurately calculate the cable length and mark the intended placement of sockets, switches, and junction boxes, if necessary. It should be noted that sections of electrical wiring laid to sockets must have a cross-section capable of withstanding a greater load than those laid to lighting sources.
It would be useful to calculate the total and partial power required to power all devices and appliances. You can sketch out the floor plan of your house on a certain scale yourself. On the project, mark the expected trajectory along which the electrical network will be laid.
Necessary materials
Modern requirements oblige owners to place an electric meter outside a residential building or on the outer wall of a bathhouse. You can also install a circuit breaker there that cuts off the power to the building completely. The list of necessary materials for installing electrical wiring is as follows:
- cables and wires with different sections, including hermetically insulated ones for laying wiring outside and in rooms with high humidity;
- electrical panel or electric meter with a protective box;
- cable channels with corners, dowel clamps or staples, depending on the mounting method you choose;
- electrical accessories: switches, sockets, distribution boxes;
- lighting devices for rooms with high humidity and temperature changes;
- self-tapping screws for fastening cable ducts and installing sockets and switches.
When purchasing, choose materials for wiring that have a protective layer against moisture and are resistant to high temperatures. This will prevent the shell from melting and shorting.
List of required tools
To install the internal electrical network yourself, prepare the following tools:
- hammer drill with impact mode and drill bits;
- screwdrivers;
- pliers;
- screwdriver;
- knife.
To decorate the electrical wire and install channels, prepare self-tapping screws.
Electrical wiring installation
In accordance with the plan of the designed wiring from the electrical panel or electric meter, the installation of which should be entrusted to qualified specialists, use a pencil to make notes on the proposed line of future electrical wiring. In accordance with the drawing, install distribution boxes to evenly distribute the load across all rooms.
According to the European standard, sockets in the rest room can be installed 30 cm from the floor. If there are small children in the family, you should purchase sockets with protective curtains or plugs. According to European standards, switches are located 90 cm from the floor. Install switches for the washing room and steam room in a room with little heating.
Select all lighting fixtures for a bath taking into account the specifics of the room where they will be used. For washing and steam rooms, it is necessary to use lamps made of heat-resistant materials treated with anti-corrosion compounds. A competent approach, taking into account all the nuances and features when laying electrical wiring in a bathhouse, will save you from hassle and ensure a safe and comfortable stay.
Secrets of building a bathhouse (answers from the master)
- Building materials must be certified. After all, you can buy a fake.
- Consult a specialist when building a bathhouse.
- Stoves should not be homemade. It's safest to buy it in a store.
- Sockets and wires must be protected.
- You can buy building materials in small quantities. For example, there are often promotions on some building materials in stores. You can save a lot of money if you buy everything you need at discounts.
- The steam room should be small.
- It is better to build a bathhouse on level ground. This saves money when building the foundation.
- The foundation doesn't have to be complicated.
- Before building a bathhouse, you must first look at budget bathhouse projects. Then decide for yourself what to build the foundation from. You need to understand how the sewerage system will run, how to install electrical wiring, and so on.
- The smaller the size of the bathhouse, the less money will be spent on its construction.
- It should not be located next to other buildings.
- It is better to choose a flat place to build a bathhouse.
- The roof of the bathhouse must be flat. This is one of the cheapest and simplest options when building a bathhouse.
- If the choice fell on a bathhouse made of timber, then larch is most suitable. Because when wet it only becomes stronger.
- A bathhouse built from a frame is difficult to insulate.
- The window in the bathhouse should not be too small. Also, a large window is not good either. The optimal size for a window is 50*50.
The stove should not be homemade. It must be purchased in a special store. A homemade stove is dangerous to use, although it is more economical.
Pros of DIY construction
- You can save money on construction by purchasing materials only on sales.
- Construction control is thorough.
Disadvantages of DIY construction
- Construction times may be delayed.
- A lot of effort and time is wasted.
- If you can’t build something, then you need to look for workers for spot work.
Interior decoration
The floor is covered with thick foil waterproofing with all seams sealed with foil tape.
Prev 1of1 Next
A sheathing for the finished floor made of 150x25 mm boards is installed on top of the waterproofing. A homemade metal stove is installed as a combustion unit.
Prev 1of1 Next
Prev 1of1 Next
Prev 1of1 Next
The walls of the steam room are lined with foil vapor barrier on kraft paper and covered with a 100x15 mm wooden board on a lath. The lining was not installed for reasons of economy, since the bathhouse is still being built on a budget.
Prev 1of1 Next
This is what the door looks like from the entrance to the bathhouse through the veranda. The total cost of all materials was no more than $1,700. Despite the cheapness of the structure, fire safety rules should not be neglected. The wall near the stove must be finished with heat-resistant sheet material, and the passage of the chimney through the roof must be made with indentations from wooden structures of at least 10-15 cm on each side.
Prev 1of1 Next
The space between the pipe and the tree is filled with non-flammable mineral wool, and on the side of the steam room it is sheathed with a metal sheet. This solution was taken from the article Do-it-yourself small bathhouse, which describes in detail the technology for manufacturing an inexpensive frame bathhouse with a welded metal frame and dimensions of 4.8x2.6 meters.
