The building materials market is overflowing with various types of raw materials for bathhouse finishing. But from time immemorial, wood remains the true queen. It has a unique natural beauty and fills the room with a special aroma.
But before you start purchasing material, it is important to know that wood is not a simple cladding, but a real natural healer; it knows all the secrets of the human body. Therefore, it is so important to competently choose the type of wood for the interior lining of different rooms of the bathhouse.
1/5 — (1 vote)
What material is suitable for a steam room?
There are a lot of finishing materials for interior work. To make it easier for you to choose what kind of finishing will be done for the steam room in the bathhouse, each designer has photos and pictures of ready-made solutions. It is worth remembering that even if you made your own choice, it is better to coordinate it with a specialist, because not all materials are suitable for installation inside the hottest room.
Taking into account the specific operating conditions, the following requirements are imposed on the finishing:
- moisture resistance;
- heat resistance;
- durability;
- hygiene;
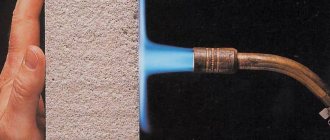
- environmental friendliness.
Important! For the interior decoration of the bathhouse, you should choose natural materials.
When the temperature rises, plastic becomes deformed and begins to emit an unpleasant odor, and ordinary tiles crack after heating. Therefore, the use of such finishing is unacceptable in the steam room.
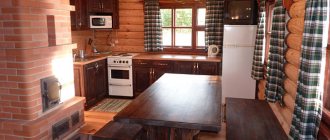
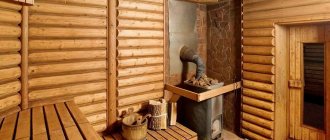
The best option is wood. The finishing structure depends on financial capabilities. For example, lining is cheaper than timber; it is chosen if it is necessary to meet a certain budget. Basically, bathhouse owners prefer deciduous wood. Below is an example of what the interior decoration of a bathhouse might look like, a photo of the classic version.
High-quality wood for interior decoration of a bath Source stroy-block.com.ua
There is an opinion that you should not sheathe the inside with steamed coniferous wood, since it releases resin when the temperature rises. But this statement is controversial, because resin has a beneficial effect on health, cleanses the respiratory tract, and strengthens the heart.
Whether or not to sheathe the interior with coniferous wood is up to you - maybe someone in your household doesn’t like the smell of pine needles or vice versa...
If lining was chosen for cladding the bathhouse, then it must be of high quality. Particular attention must be paid to the external processing of the material - there should be no chips, knots, or cracks on its surface. The lining should not deform: swell when heated or dry out at normal temperatures.
If wood is not suitable for you as a material for interior decoration of a steam room for some reason, you can give preference to heat-resistant tiles; they have proven themselves well under significant temperature changes.
Experts recommend laying the walls of the steam room with terracotta flagstone - this material is resistant to high temperatures and humidity.
General requirements for materials from which bathhouses are built in the country
The construction of bathhouses, like any other objects, is regulated by SNiP standards:
- SNiP 30–02–97, which describes the rules for the development of garden and personal plots;
- SP 11-106-97 - rules for creating a site development project.
Many owners are surprised to learn that the requirements for baths are in some aspects even stricter than for residential buildings. This is primarily due to the increased fire hazard due to the presence of a stove. In addition, there are technical requirements for building materials. They have to:
- provide good thermal insulation;
- be resistant to high humidity and temperature.
The issue of price in this case comes in last place, although it also matters, other things being equal.
Ceiling protection
Before finishing, you should protect the ceiling from hot steam. To do this, use aluminum foil or a construction membrane.
Important ! Do not use foil with mineral wool or polypropylene foam glued on it. When heated, these materials release toxic substances.
Protecting the ceiling in a bathhouse using aluminum foil Source ko.aviarydecor.com
Covering a bathhouse with bamboo panels
Bamboo panels are considered an excellent replacement for wood paneling . This material still continues to gain popularity, which is why it is not very common in private baths. Panels made from bamboo have many advantages: they are not afraid of high temperatures, mold, moisture, they are very durable and very aesthetic. In addition, these products are very flexible, so even rounded elements can be finished with them.
The surface for such cladding is prepared in the same way as for wooden lining. After fixing the heat and vapor barrier, strong slats are attached to the racks. Bamboo panels are fixed to them using liquid nails or a construction stapler.
Using lining - rational or not
Definitely yes! Lining made from linden, aspen, cedar, and abashi has become popular due to its properties. It tolerates temperature changes well, high humidity, is aesthetically pleasing, and does not absorb moisture. Cladding made of clapboard has low thermal conductivity - it does not heat up, but transfers heat to the air.
Bath lining is not covered with varnish, antiseptic, or paint; it is used in its natural form.
See also: Catalog of companies that specialize in finishing materials.
How to line a bathhouse with clapboard inside: stages and cladding technology
It is not recommended to use non-natural materials for the interior decoration of a bathhouse. High temperatures and constant humidity force the use of only stress-resistant types of cladding for finishing. One of the classic ones is lining. You can find out how to line a bathhouse with clapboard inside by reading the article to the end. We will help the reader with the difficult task of interior finishing, but we will also tell you how to choose the material.
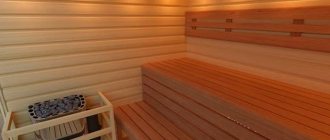
Steam room trimmed with linden clapboard, coated with heat-resistant oil
Which lining is best for a bathhouse?
Linden lining should lie unpacked before finishing.
Lining for the interior decoration of a bathhouse is selected depending on the purpose of a particular room, the degree of humidity in it, the temperatures used, etc. All material is divided according to several criteria: size, what it is made from, type of wood.
You can divide the material by size:
- Classic. It is not wide in size; it is better to mount it vertically, since the horizontal position visually lowers the already low ceiling in the bathhouse. In addition, the horizontal fastening prevents water from flowing down freely, and it accumulates in the connecting locks.
- Eurolining. These are wider and heavier panels, more interesting in the design of the room and have the same quality characteristics as thin lining. On the back side of the eurolining there is a special cut that relieves stress in the product and over time the finish will not crack.
Based on their composition, the material is divided into: vinyl, plastic, wood and metal. For a bathhouse, the best option is made of wood, the rest are for finishing the facade.
Types of wood for making bath trim
A steam room finished with aspen paneling looks attractive.
It is also important what type of wood the product is made from. For the bathhouse, wood trim with the lowest thermal conductivity is used: linden, aspen, abashi, cedar, alder. Moreover, you can take not any cedar, but only the northern one. It contains less resin and when heated, the walls and ceiling will not begin to cry. Larch species have a lower wood density and with tactile contact in the bathhouse, the lining will be more pleasant, even at high temperatures in the steam room. Such lining costs more, but the costs will be justified. Each of the types under consideration is better suited for different bathhouse areas.
Aspen: has a beautiful reddish tint and increased moisture resistance. In terms of its durability, aspen can only be compared with larch. When in contact with water, aspen wood does not collapse, but rather hardens. It is better to use it to decorate a rest room or washing area. The only negative is the high price, due to which it is not recommended for use in the steam room and dressing room.
An original version of a steam room trimmed with linden clapboard
Linden: Lining has become traditional for finishing the inside of a bathhouse. Linden does not heat up at high temperatures and has a pleasant whitish color. But linden has a serious drawback - if it is not treated with antiseptics and protective compounds, it quickly begins to darken and rot.
Cedar lining in combination with linden looks great
Cedar: This is a coniferous tree, but its structure is of low density, so it is often used for baths. Cedar has excellent antiseptic properties and emits a pleasant odor when heated. But it is not recommended to use it in a steam room, since it still contains some percentage of resin.
Alder lining in the interior of the bathhouse looks original and modern
Alder: has a pleasant pinkish tint with a pleasant velvety texture. Holds temperature well and is not afraid of moisture. In baths can be used in any part.
When choosing lining for finishing a bath, it is better to take chamber drying Extra or AB grade. Since changes in temperature and humidity in the bath occur constantly, it is impossible to use material with inaccurate or curved shapes. But in the highest grades this is unacceptable.
Step-by-step description of the installation of lining inside baths
Aspen lining is sewn onto the ceiling.
Before finishing, you need to decide whether only the walls or the ceiling will be coated. To do this, you can look at photos of finished works and settle on the design you like.
You need to sheathe the inside of the bathhouse starting from the ceiling. Only after this the walls. But first the walls need to be waterproofed and insulated.
Insulation of bath walls and ceilings
Diagram of a simple version of clapboard cladding for a steam room in a bathhouse.
It is not necessary to insulate all the walls of the bathhouse, especially if it is a small summer log house measuring 3x3 m. In these, only the steam room is insulated. In other cases, the entire Russian bathhouse is from the inside, including the dressing room and rest room.
As insulation, you need to choose a fire-resistant material, such as bosalt wool. It’s better not to even consider all materials like polystyrene foam. The insulation is attached to a pre-prepared sheathing on which the vapor barrier is attached. Due to the large temperature difference, condensation may accumulate on the walls; a vapor barrier will protect the insulation.
Glassine should be secured on top of this structure. It will play the role of waterproofing. All seams are glued with a special water-repellent glue. Then everything is covered with foil, it will reflect heat and prevent steam from escaping. You need to fasten the foil between the sheathing using a construction stapler or buttons with an overlap of 10-15 cm.
Material processing
The walls of the bathhouse begin to be sheathed from the opposite corner from the entrance.
Before fastening, the lining must be unpacked and kept in the bathhouse for 1-2 days. The fact is that manufacturers, in order to protect the material after chamber drying, pack it in an airtight film. And once in the natural environment, wood absorbs moisture from the air and swells a little.
After this, you need to choose how to process the material. It is better to take a composition intended directly for baths. These contain antipyrines and moisture-resistant components.
Preparing the walls for finishing
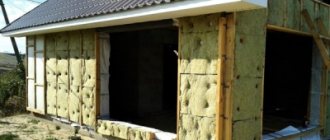
When starting to finish the walls, they solve the issue of insulation and waterproofing. Without such measures, the bathhouse will not last long, and healing procedures will be reduced to simple hygienic ones. For insulation, the walls are covered with mineral or basalt wool. The second one is more resistant to high temperatures, so it lasts longer.
Insulation of walls in a steam room with mineral wool Source hvylya.net
Experts consider cork to be the best thermal insulator for bathhouse walls. This agglomerate does not burn, does not rot, and is resistant to fungi and mold.
Material for bath walls
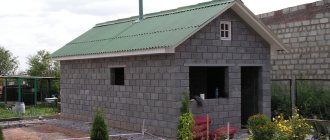
So, the walls in the bathhouse can be made of wood (logs, beams), brick, or built using frame technology. Let's first consider the features of each material.
Wooden walls
The traditional Russian bathhouse was built entirely of wood, from the foundation to the roof. Moreover, for each element a different type of wood was used: for the foundation - larch, for the first crowns of the walls and floor joists - oak, the material for the walls of the bathhouse, floor and ceiling - pine or aspen, and for the interior decoration of the walls of the bathhouse and bathhouse "furniture" - linden and aspen. Such a careful choice can be explained simply: the material must be durable, retain heat well, and the interior decoration must also meet certain decorative characteristics.
Log baths
Log saunas, or chopped saunas as they are commonly called, are familiar to many. In Rus', people have been building from wood from time immemorial, and today these traditions are not forgotten, and the methods and methods of construction are being successfully implemented. The walls of such a bathhouse, very colorful in appearance, convey the naturalness and authenticity of wood. In addition, the log has good heat capacity, and the interior spaces require virtually no ventilation. It is better to take winter logs for construction, well dried, with a moisture content of no more than 10%. The thickness of the walls of the bathhouse also plays an important role. The building material must be of high quality (free from fungal infection, mold and bark beetles), as well as a certain length, diameter and thickness. Among the most common and recognized as the best are logs made from spruce and pine (preferably from the northern regions) and aspen.
Log walls of the bathhouse
Walls made of timber
Today there is a good alternative to traditional logs - timber, glued or profiled.
Bathhouses made of timber, while retaining all the advantages of log buildings, also have additional “advantages”. Thanks to the presence of a special “locking” system, they practically do not need caulking, and the profile shape does not allow moisture to penetrate the seams. Such buildings can serve their owners for many years without rotting and maintaining an excellent appearance.
Walls made of laminated veneer lumber
Brick walls
Brick baths are less popular, since their construction requires significant finances, because brick has high thermal conductivity and does not retain heat well. The brick walls of the bathhouse walls need not only insulation, but also interior decoration. But the service life of brick baths is very significant, and fires for such buildings are not as dangerous as for completely wooden buildings.
Brick walls
Frame walls
Bathhouses, the walls of which were built using frame technology, have become widespread. The structure of the bathhouse walls is based on a rigid frame made of frames covered with boards. The space between the skins is filled with insulation, the type of which you can choose yourself. Such structures are lightweight, do not require the construction of a powerful foundation, and the baths do not shrink. The construction of bathhouse walls using this technology requires a serious approach to the installation of high-quality thermal insulation, otherwise the presence of moisture and condensation will lead to the formation of mold and rot.
Frame walls
Lathing - to do or not to do
Craftsmen prefer to install the sheathing and attach the interior trim to it. The popular base size is 50x50, less often they make 70x70. The pitch is not standard and varies depending on the size of the blocks being strengthened.
The sheathing is made of wood, less often of metal. Considering the operating conditions, the metal must be treated with moisture-resistant compounds. The lining or logs are secured with self-tapping screws and nails. They must be copper or brass. The installation of the base is done perpendicular to the sheathing.
Lathing walls in a steam room under clapboard Source seattlehelpers.org
Pros and cons of cedar baths, construction and finishing
A bathhouse made of cedar is not a luxury except for the residents of Siberia, the rest, for the most part, sigh, but some...
Wood, Materials for a bath inside, Materials for finishing a bath, Materials for building a bath · 09/16/2019 · 0
Stages of clapboard finishing
- A beam is fixed along the perimeter of the wall and ceiling . Fastenings should be every 80–100 cm.
- Cut pieces of insulating wool are placed between the wood without compacting.
- The top is covered with a waterproofing agent . The joints are sealed with aluminum tape, paying special attention to the corners.
- Provide ventilation . To do this, fill the distance rail. It will provide a small gap (2–3 cm) through which air will be vented.
- They make separate upholstery for doors and windows.
- They fasten the lining . You need to start from the corner, fixing each part vertically. This position will ensure free flow of water. If a horizontal arrangement of blocks is planned, make sure that the spikes are at the top. This will protect the lock from moisture.
- The lining located in the corners or near the walls is cut to the required size . It is especially important to cut the corner block correctly. It is necessary to accurately calculate the angle of inclination so that the adjacent block is correctly fixed.
Insulating the furnace using a metal sheet Source interistroy.ru
Next, install insulation from the furnace. For this use:
- metal - stainless steel or profiled iron is mounted on the wall behind the stove;
- red brick - placed between the wall and the fire;
- tiles resistant to high temperatures (kaolin);
- mineralite is a heat-resistant board made of cement and special components.
Installation
A steam room covered with clapboard is beautiful, fast and inexpensive. This material provides a locking system (tenon and groove), thanks to which it will be possible to assemble all the parts in a short time, while the gaps will be minimal. The lining is attached to a wooden sheathing using self-tapping screws, nails or clamps.
In what sequence is the lining of a steam room in a bathhouse performed:
- Lathing. Non-planed boards and slabs are suitable for its installation. The sheathing will not be visible. The selected material is attached to the wall perpendicular to the direction of the lining (steps from 50 to 60 centimeters). The sheathing is fastened to a wall made of brick, concrete or stone using screws with plastic dowels, and to wooden walls - with galvanized self-tapping screws.
- Insulation . The optimal material for this would be basalt wool. Plates of wool are placed between the beams of the sheathing. It is necessary to ensure that no gaps are formed, otherwise the bath will not retain heat well.
- Vapor barrier . Its task is to prevent the accumulation of moisture in the insulation and reduce thermal conductivity. At this stage, strips of glassine or other material for vapor barrier are attached horizontally over the sheathing with insulation using a furniture stapler (from bottom to top). In this case, each subsequent strip should overlap (about 5 centimeters) with the previous one. All strips must be glued using adhesive tape or wide tape.
- Installation of lining . It is better to start attaching it from the most inaccessible corner.
Installation of the lining can be carried out in two ways:
- Vertical.
- Horizontally.
In the case of vertical fastening, you may encounter the appearance of fungus. It can be triggered by the fact that the board is heated unevenly. The temperature is higher at the top and lower at the bottom. In addition, the lower part suffers more from humidity.
Despite the above disadvantages, there is also a relative advantage - a low risk of gaps. The reason for this is the uniform deformation of all boards.
With horizontal installation, the risk of deformation of the lining is significantly lower. This is due to the fact that each board is located in a certain temperature zone. When installed horizontally, the upper boards experience greater shrinkage than the lower ones. This can lead to seams coming apart.
Making the floor in the steam room
Not only comfort, but also safety depends on the choice of raw materials for the floor. Moisture on smooth tiles or linoleum leads to falls and injuries. Installation of such materials will turn the floor into a skating rink. In addition, when heated, linoleum emits an unpleasant odor containing substances harmful to health.
The optimal choice of floor for a steam room is wood. It does not require a special coating, and with this design the room will be designed in the same style. It is worth noting that the wooden floor in the bathhouse is not made of oak. This wood becomes stronger when wet, but at the same time its surface begins to slip.
Concrete works well. A floor made of such material will be strong and durable. Tiles are laid on top of it, but the structure of the surface of such a coating is important. It should not be glossy; a pronounced relief is necessary. The floor is laid at a slight slope towards the water drainage.
Laying tiles on the floor in a bath Source seattlehelpers.org
The tiles are laid from the corner, placing crosses between the blocks, tapping with a mounting hammer. After 2-3 days, the seams between the tiles are rubbed down. Wooden grates are placed on top to prevent you from stepping on the cold floor and provide additional safety in case of possible slipping.
How to properly sheathe and insulate a steam room
Preliminary and final lining of the steam room are important points in the construction of a bathhouse. How this will happen, what the result will be, depends solely on the taste, financial capabilities and skills of the owners. The main thing is to do everything correctly and not miss important points.
Preparatory work before covering
First you need to make a sketch. Perhaps you would prefer to make one wall of stone-look tiles or natural stone, and cover the rest with wood, maybe you’ll opt for the traditional option for the entire room - lining, or decide to use glass or something completely original. Do not forget that all materials must be resistant to water and high temperatures, as well as bioinert, that is, unsuitable for the life of microorganisms. As you prepare, consider:
- where to install the stove, what type of stove it is (electric, solid fuel, liquid fuel, gas);
- what finishing materials will be used for the floor, walls, ceiling;
- where the lamps will be placed;
- what material will the steam room be insulated inside;
- type of hydro- and vapor barrier.
The walls and floor around the stove are sheathed with non-combustible materials. This requirement can be neglected only if a gas or electric oven is used.
Once the final version of the steam room lining has been determined, you can proceed to constructing an accurate drawing and calculating materials. It is assumed that by this time the stove and the chimney to it, if necessary, have already been installed. To do everything correctly, the cladding must be carried out in the following order:
- floor;
- walls;
- ceiling.
There are exceptions, but it is better to stick to this sequence. In this case, possible alterations will be kept to a minimum. There may be several options for finishing the floor in a room with very high temperatures.
- Ceramic tiles are a rational solution for maintaining room hygiene. To make it more pleasant for your feet, you can lay wooden gratings on top.
- Natural stone is an impressive, but rather expensive option.
- Boards. It is important to choose the right type of wood.
- Clapboard or block house. It is also necessary to choose the type of wood that is optimal in terms of price and quality.
Advice from the master!
Any of these options is good, it all depends on the capabilities of the owners. The complexity of the work will be approximately the same.
Stage 1: insulation and sheathing of the steam room floor
The floor and ceiling are the main sources of heat loss, so they need to be insulated as much as possible. If you take on finishing and insulation, it is assumed that the subfloor is already ready. The floor can be done directly on top of the rough or on the screed. The device diagram will be very similar. If you plan to make a wooden floor indoors, then the layers of the “pie” will be as follows (listed from bottom to top):
- Rough floor. It consists of roughly processed boards or other wood-based materials with low hygroscopicity. Rough boards are laid on top of the bars attached to the joists.
- Waterproofing layer. It will protect the insulation from moisture coming from outside the bathhouse. This can be self-leveling insulation, regular PE, or special materials.
- Insulation. It is best to use expanded clay - it retains heat well and is inexpensive. Glass wool, mineral wool, expanded polystyrene or ready-made multilayer materials (insulation with waterproofing) are also suitable.
- Another layer of waterproofing.
- Air gap. Between the finishing lining of the steam room and the waterproofing, you need to fill the slats so that the moisture does not stagnate and does not have contact with the boards below.
- We fill the sheathing and attach the finished floor to it.
If the floor in the bathhouse has ceramic tiles, it is better, but not necessary, to make a concrete screed. In this case, the “pie” turns out as follows:
- Leveled base.
- Waterproofing.
- Insulation.
- Rough leveling layer of concrete (optional).
- Reinforcing mesh (can be omitted).
- Concrete screed.
- Finish coating. Indoors, where water may get on the floor, the best option would be porcelain tiles or unglazed tiles with a rough surface (good for safety reasons). You can make a wooden floor on top of the screed.
Advice from the master!
Important: if a lot of water gets on the floor, you need to make it with a slope and install a drainage system.
If you plan to cover it with wood, it should be made of dense, water-resistant wood, impregnated with antifungal and water-repellent compounds. You can make a removable wooden floor that will be disassembled into sections for drying.
Stage 2: insulation of the walls and ceiling of the steam room
At this point, a stove and a chimney should be installed inside the steam room, if needed. Windows and doors can already be inserted without installing slopes/platbands yet. Then you won’t have to carefully trim the lining - all the flaws will be hidden behind the decorative elements of the openings.
- Even before we start specifically finishing the walls and ceiling inside our steam room, we need to resolve the issue with the electrics. We install plastic boxes and lay cables in them. Can be fixed to walls and ceilings using holders. Next, when we lay down the layers of the wall and ceiling “pie,” do not forget to bring the wires out. The wires must be intact to avoid short circuits. It is better to choose lamps in waterproof housings.
- We build wall and ceiling “pies”, starting with a layer of waterproofing. We waterproof the walls with a liquid compound or film.
- We fill the sheathing, between the layers of which the insulation will be attached. The pitch of the vertical slats is selected to match the size of the insulation sheets, if it has factory dimensions. If the material is rolled, then the optimal pitch will be 60–70 cm. The depth of the sheathing should be such that a layer of insulation, screen waterproofing can easily fit there, and there is still an air gap left, which is necessary for proper air circulation. We fasten the sheathing: to wood - with self-tapping screws, to concrete - with dowels.
Advice from the master!
Important: The sheathing must be placed at the same vertical and horizontal levels. If some boards stick out or “sink,” it will be difficult to attach the lining later.
- We install insulation inside the sheathing. We start from the bottom, laying the sheets very tightly.
- To prevent the insulation from getting wet, we protect it with a waterproofing layer. And in order not to lose heat, this waterproofing must also be a heat shield. So the ideal choice is a roll waterproofing material with foil. We secure it to the sheathing with slats. We glue all the joints between the pieces of the roll (overlapping) with tape or fasten them with a stapler.
Next comes the finishing stage, which is worth considering in detail.
Stage 3: horizontal cladding of walls and ceilings with paired lining
Before covering the steam room, you need to treat the existing frame and lining with a bio- and moisture-proof coating. It doesn't really matter what you do first - the floor or the ceiling, but the pros prefer the ceiling. You will have to choose between horizontal and vertical installation of the lining on the wall. Horizontal cladding is preferable for two reasons:
- If the bottom slats begin to deteriorate from water and fungus, they can be easily replaced. If the same thing happens in the steam room, where the lining is attached vertically, then the material will have to be completely removed.
- Horizontal layout makes the room visually larger.
Before laying, the lining must be placed in a steam room for 1-2 days so that the boards acquire the required humidity and temperature. Then they will give minimal shrinkage.
The lining is laid from the floor of the steam room, starting with the groove down. Attached to the frame with small galvanized nails or clamps. Each subsequent board is driven onto the lower tenon with a wooden or rubber hammer to ensure a strong connection.
The steam room needs to be covered starting from the corner. Then they finish the adjacent wall and so on. If the lining was a little short, then the joints are filled with polyurethane foam. A decorative wooden strip is placed on top of it (do not use plastic or other materials!).
After finishing the wall covering, the corners are closed in the same way as finishing the joints. Now you can move on to the ceiling, which is sheathed in the same way as the walls. Upon completion of the work, a wooden plinth is installed around the perimeter of the ceiling. We cover the walls and floor around the stove with stainless steel sheets, and the job is done.
Advice from the master!
The work on the lining inside the steam room is finished. All that remains is to install lighting, furniture and finishing decor. And you can enjoy a light steam in your own cozy bathhouse.
poparimsya.com>
And now the shelves
A very important point is the shelves in the bathhouse. Since constant tactile contact is assumed with them, increased requirements are put forward for these elements:
- they should not get very hot ;
- it is better if they cool slowly ;
- must be environmentally friendly ;
- do not slip or be very rough;
- have no external damage ;
- easy to wash.
Again, wood is most suitable for this purpose. Carefully cleaned, without knots or nicks, it has served people in bathhouses and steam rooms for centuries. Shelves should not have sharp corners that could cause injury. They are not made solid, leaving a small distance between the wooden boards.
Windows in the bathhouse
The function of a window in a bathhouse is to illuminate the shelves. But since electricity does this perfectly well, the window, rather as a necessary architectural element, should be small to better retain heat in the bathhouse. For this purpose, you can install double or triple glazed windows, order an accurate PVC or wood profile. Separate bindings also increase thermal insulation. To do this, they are carefully covered, lined with polyurethane foam or plastic film, which is attached to the internal frame. The film, rolled into a tube, forms an air channel, which increases thermal insulation.
If the shape of the window is rectangular, then it should be placed horizontally and strive for a lower placement, where there is less bath steam.
After installing the window, all gaps must be sealed. To do this, dilute crushed chalk and wallpaper glue to a paste. The same putty can be used to seal newly appeared cracks and gaps.
A good historical design for thermal protection is external shutters. In addition to their protective function, carved or painted shutters will add a beautiful ethnic flavor.
Setting up a dressing room
The main function of the dressing room is to preserve heat. The temperature in the room is not high, so it is good to use coniferous trees to decorate walls in a traditional style.
Design of the waiting room and rest room “under the tree” Source koon.ru
The interior decoration of the bathhouse made of logs creates an atmosphere of antiquity and ancient fairy tales. A light aroma created by pine, fir, and spruce is appropriate here. The wood of these species resists fungus and mold well. It does not crack after drying and is durable. When heated, fir releases almost no resin.
If hardwood is preferred, experts advise finishing the room with birch. The lining can be laid out not only in even rows, but also in a pattern. It is important that the walls in the room are covered with the same type of wood.
How to inexpensively cover the inside of a bathhouse? Lining for a bath. Installation features
During the construction of a bathhouse, there comes a time when it is necessary to decide on its interior decoration. It is very important to choose a material that will not only be beautiful and functional, but also be able to withstand the specific microclimate of a given room. Based on this, many people wonder how to inexpensively line the inside of a bathhouse and what qualities should the chosen material have? A properly equipped steam room is the key to a comfortable and pleasant stay, which is why the finishing of all its surfaces must be approached as responsibly as possible. In this article we will look in detail at the process of improving this room, starting from the choice of materials and ending with the technology of their installation.
Choosing the right material
To the question of how to inexpensively cover the inside of a bathhouse, there is one correct answer - wood. Why them? Because it is the only 100% natural material that meets all the requirements for use in rooms with high humidity and high temperatures. This finishing gives the space a special aesthetics, creates a pleasant atmosphere, and, most importantly, retains heat perfectly.
For those who are interested in what can be used to line the inside of a bathhouse other than wood, mention should be made of glass-magnesium sheets. This is a new material that is made from wood chips and fiberglass with the addition of various binding components.
The boards are available in light colors and can be used in rooms with high humidity. Since this is a relatively new product, it is rarely used for bath cladding, so we won’t dwell on it for long.
Wooden materials are actively used: block house, panels and lining. For a bathhouse, these options are considered the most suitable.
What wood should you choose for a bathhouse?
When decorating walls and ceilings, you don’t have to limit yourself to just one type of wood. The combination of various varieties that differ in shade will allow you to create a more interesting and extraordinary design. But, before deciding which wood to cover the inside of the bathhouse with, you should take into account the properties and performance characteristics of each tree species.
When cladding the ceiling and walls, it is better to use larch, linden, aspen and cedar. It is highly undesirable to place pine materials in a steam room, since when heated they release a pungent odor into the air, which can interfere with a comfortable rest.
But for finishing dressing rooms and rest rooms, this option is optimal. Pine has a beautiful texture, is easy to process and has a very attractive price.
It is better to sheathe the steam room and washing room with linden and larch.
These wood species are able to retain their original color for a long time and practically do not heat up when exposed to high temperatures.
Decorating a steam room
For finishing the surfaces of the steam room, only high-quality materials should be selected. Most often, lining is used here. For a bathhouse, choose a board of the highest class from hard wood.
The slats are located in a horizontal or vertical position and are secured with nails, gluers or staples in a hidden way. In order to ensure reliable retention of heat and steam inside the room, a layer of thermal insulation material is placed on the walls.
For this purpose the following can be used:
- foil;
- mineral wool;
- polystyrene foam covered with foil;
- glassine, etc.
It is very important that there is air space between the lining and the insulation. This can be achieved by installing the lathing on which the facing material will be installed. The distance between the slats should be no more than 50 cm.
The finished frame and lining are coated with an antiseptic. Processing is carried out before assembly begins. Wall cladding begins from any corner of the room, securing the boards on both sides with any of the above fastening materials.
Flooring: wood or ceramics?
The temperature in a steam room at floor level usually does not exceed 30 degrees, so they can be made of any material. It is more important to properly and quickly drain the water from the bathhouse. The subfloor is covered with plank flooring, on which polished floorboards or ceramic tiles are laid.
Comparing these two coatings, it should be noted that the tiles are more durable. This is due to the fact that when exposed to moisture, wood darkens, rots and after some time fails. Ceramics, in turn, are not afraid of humidity, temperature changes and are not susceptible to rot and mold.
Despite this, very often wooden floors are installed in bathhouses. This material harmonizes perfectly with the surrounding interior and is much more pleasant when touched with bare feet.
When considering how to inexpensively cover the inside of a bathhouse, it is worthwhile to dwell in detail on the installation technology of both options.
Wooden floor finish
The process of finishing a floor with wooden materials is very simple. First of all, the logs are laid on which the boards are mounted. They are placed on brick pillars, which are installed on the base of the floor. For the logs, choose boards measuring 20 x 20 or 25 x 25. They are laid in increments of no more than 1 meter. The floor level in the steam room must be 10-15 centimeters higher than in other rooms of the bathhouse. This is necessary to ensure that warm air does not escape from the steam room for as long as possible. To lay the finished floor, tongue-and-groove or edged material with a thickness of at least 30 cm is used.
Before sheathing the inside of the bathhouse with boards, all cladding and joists must first be treated with an antiseptic composition. This will protect them from colonization by microorganisms and extend the life of the wooden floor.
Floor finishing with ceramic tiles
For safe movement, you should choose tiles with a rough surface for floors. This will make them less slippery when in contact with water.
To lay a ceramic coating, you need to make a solid concrete base. The surface must be perfectly clean, level and dry. Immediately before laying, the tiles are soaked in water for a couple of minutes. This is necessary so that it does not absorb moisture from the solution and the floor covering is of the highest quality and durability.
Start laying the tiles from the most visible corner of the room using sand-cement mortar or moisture-resistant glue. Upon completion of the work, the seams are hidden with a special moisture-resistant grout. It helps protect the tiles from mold.
For more comfortable movement on the tiles, you can place floorings made of wooden slats on the floor. Such designs are convenient because they can be taken out of the steam room to dry.
Price
In order to properly plan your own budget, you need to understand how much it costs to line the inside of a bathhouse. The total amount depends on who will carry out the finishing work and how high-quality the material is chosen for finishing.
If you plan to hire specialists to arrange a bathhouse, you need to be prepared to pay for their services. Thus, work on installing sheathing is estimated at 130 rubles per m2. Cladding walls and ceilings with clapboard will cost the owner of the premises from 350-500 rubles per m2.
In the event that the walls inside the bathhouse are sheathed with your own hands, only the costs of purchasing the lining and related materials are taken into account.
A top quality board made from linden costs about 500-600 rubles per m2.
Lining made from larch will cost 250-350 rubles per m2, while material made from coniferous wood has a price tag of 150-200 rubles per m2.
To these costs should be added the cost of fasteners, bars and thermal insulation.
Conclusion
In this article, we found out how and with what to inexpensively cover the inside of a bathhouse. In order to save money, you can do the interior arrangement of the room yourself, without resorting to the expensive help of specialists. After finishing the floors, walls and ceilings, you need to take care of lighting and furniture installation. A variety of shelves and hooks on which you can put personal items and hang towels will not be superfluous. After completing all the work, you can begin bathing procedures and enjoy your vacation with family and friends.
fb.ru>
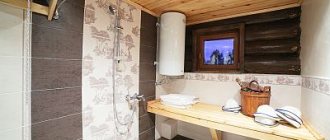
Bathroom and washroom
These rooms do not have very high temperatures, although the humidity is as high as in a steam room. The choice of finishes in the bathroom and washroom is more extensive. Fans of bath procedures recommend using natural raw materials for such rooms - wood or stone. Among wood, pine is the leader - it is an affordable material, however, it darkens with prolonged use.
An example of a washing station design Source profstroiplotnik.ru
Plastic is acceptable since there is no high temperature, and it tolerates humid air well. You can use regular tiles for the shower.
Floor and ceiling finishing
The ceiling in the steam room can also be covered with clapboard. The same material option as for the walls is suitable for this. This will preserve the overall concept and give integrity to the steam room, creating a cozy atmosphere.
The floor in the steam room is the place that is least exposed to high temperatures. To set it up you need:
- Clay layer (concrete screed).
- Fiber zinc.
- Treated board or ceramic tiles.
Video description
For interesting ideas for interior decoration of a bathhouse, watch the video:
Decorating a relaxation room in a bathhouse, in addition to traditional wood, can be done:
- glass wallpaper;
- porcelain stoneware;
- natural stone;
- decorative plaster.
Important! The tree is not installed immediately after delivery to the construction site. It is brought into the room and allowed to stand for a couple of days so that it “gets comfortable” in the bathhouse. After this procedure, the wood is not subject to deformation when heated and high humidity.
Sheathing with paired lining - how to do it right
The quality of the healing procedures of the bath largely depends on the level of thermal insulation of the steam room. By insulating the steam room, they achieve a reduction in heat loss and preserve the wooden structures of the bathhouse. An important element of the thermal insulation system is the lining with paired lining. To decorate the inside of the steam room, you must use only natural materials. The use of lining not only effectively prevents heat loss, but is also much cheaper than cladding with natural wood.
Advantages of using lining in a bathhouse
Cladding in a steam room involves the use of wood, and the small thickness of the panels reduces the cost of constructing a steam room.
The advantages of using lining are:
- Adjusting the humidity in the bath, preventing the possibility of condensation and fungal infection;
- Ease of processing, obtaining a perfectly flat surface;
- Good heat and sound insulation;
- Environmentally friendly material and beautiful appearance;
- Long service life while maintaining original characteristics.
The most optimal solution would be to use not just lining, but eurolining. Its difference is that the tongue-and-groove connection is increased to 8 mm, and the material has previously undergone forced drying. Having compensation slots on the reverse side of the lamellas, the eurolining does not crack. In addition, it participates in the ventilation process of the coating.