The quality of bath procedures depends on the comfortable temperature in the bathhouse. When building a bathhouse, many do not think about heating the dressing room, but in vain. The need to change clothes in an icy room has nothing to do with a contrast shower, swimming in an ice hole or wiping off with snow. In summer, the problem is not so noticeable, but in winter, the issue of a cold dressing room becomes relevant, especially if there are small children in the family.
Floor insulation
Expanded clay is a natural material, it can be used in bulk or poured with concrete.
Since the dressing room is used for changing clothes, people often stand on the floor with their bare feet. To protect health and ensure comfort, insulation is done. For concrete surfaces, you can make a wooden covering, but it is better to provide full thermal insulation.
It is necessary to choose a material that allows air to pass through well. Otherwise, condensation will accumulate, which can lead to the formation of harmful microorganisms. Expanded polystyrene, penoplex, polystyrene foam, and expanded perlite can be used as insulation. Polystyrene foam and polystyrene are laid on the subfloor. Perlite must be mixed with cement mortar. Glass wool, expanded clay, gravel, and boiler slag can also be used for insulation.
If the floor is insulated in the dressing room of a wooden bath, it is necessary to make a layer of waterproofing. The most popular type is roofing felt. Insulation is laid on top of it, and then another layer of roofing material. The finishing is made of wood
It is important to first treat the wood with special compounds against the formation of fungus and mold. Glass wool and stone wool, polystyrene foam, and expanded polystyrene are used as insulation for wooden floors.
The entire bathhouse can have a heated floor. There are different options:
Warm water floor. Placed on a concrete foundation. This is a safe and effective heating method, but you need to take into account that you will have to install a boiler. Electric floor
With this method, it is important to carefully make waterproofing to ensure safe operation. Cable and film construction can be installed
In the first case, energy consumption increases, but the system reliability is higher. The films are harmless and have high strength. The cost of film construction is higher than cable construction.
Foundation for frame construction
As a foundation for a frame dressing room, a lightweight foundation should be used: pile or shallow foundation.
Creating a shallow foundation is done as follows:
- The area is being planned and marked.
- In places where the walls of the building should be located, half-meter trenches with a width of 30 centimeters are dug.
- Sand is poured into the trench in layers and also compacted layer by layer with water wetting.
- Formwork is created along the perimeter of the trench.
- The base of the formwork is reinforced.
- The concrete solution is poured according to the level of the formwork.
- After the concrete hardens, waterproofing roofing felt is laid.
Insulation of the ceiling in a steam bath room
The work on creating thermal protection in the bathhouse is completed by insulating the ceiling.
The complexity and order of work depends on the design of the ceiling itself. It can be with or without an attic. If the bathhouse has an attic or attic, the insulation process should proceed as follows: the board is coated with a 20 cm layer of clay. This material copes well with the task of retaining moisture. Wooden chips must be poured into the cracks between the boards. If they are not available, then you can use any other material that provides good thermal insulation. For example, you can backfill with expanded clay. But the thickness of the layer of this material must be at least 200 mm.
Insulating a bathhouse without an attic
A bathhouse without an attic, made of logs or a panel building, must be insulated inside in a completely different way:
first, vapor barrier material is laid, then insulation is attached, onto which the beams are sewn. Then the shelf boards are nailed.
When insulating the ceiling of a bathhouse, special attention must be paid to the junction of the pipe and the insulation. To ensure that fire safety standards are not violated, it is necessary to make an indent of 200 mm between the pipe and the heat-insulating material.
This problem is easily solved by creating a box from rafter legs. It will be a barrier separating the pipe and the insulation. The space inside the box can be filled with fire-resistant insulation, such as stone wool.
It is optimal if the roof of the bathhouse is designed in such a way that there are no places through which warm air can escape from the room and cold air can enter from outside. Insulating the ceiling has another goal - to avoid the formation of condensation. Condensation is converted into moisture, which, in turn, is the main enemy for most building materials.
Please note that not all materials are suitable for ceiling insulation work. It is worth refusing to use materials such as chipboard, plywood, and fiberboard for thermal insulation. They can not only become deformed during operation, but also release substances harmful to human health when exposed to high temperatures.
Lining is the most popular finishing material
This material has proven itself to be the best, since there are three main categories A, B and C, which leads to a wide price range. Accordingly, each owner will be able to choose the optimal material for himself. The lining is laid horizontally, which provides maximum moisture protection, preventing liquid from penetrating into the joints between the boards.
The lining is made from natural wood of various species. The thickness of one board can reach from 1.1 to 2.2 centimeters. The most popular options for covering a dressing room are those with a thickness of 1.4 and 1.6 centimeters. The lining can be installed on a flat base without sheathing. If there is a high level of humidity in the elevations, then lathing is required. The step between vertical slats should be from 0.6 to 1 meter.
Bathroom insulation - what you need for work
Insulating a bathhouse from the inside with your own hands will save money on work and heating. There is no shame in inviting friends to a comfortable bathhouse that exudes warmth and coziness. High-quality thermal insulation, competently made from good materials, can maintain a unique microclimate. The work is labor-intensive, but anyone with the necessary knowledge and skillful hands can handle it.
Insulating a bathhouse from the inside differs from thermal insulation work in ordinary premises due to the conditions in which the materials are exposed. First of all, this is humidity, especially in the steam room and washing room, and in other rooms the air is not dry. Therefore, the insulation either should not absorb moisture, or it must be reliably protected from steam and moisture. In the steam room, the temperature can even rise above 100°. Materials such as polystyrene foam and polystyrene foam are deformed at high temperatures and release substances harmful to health. For the same reason, plastic or linoleum is never used in the bathhouse. Some of the heat is lost as infrared radiation, so a foil layer is needed to reflect the rays.
To insulate a bathhouse, you will definitely need a foil heat-resistant hydro-vapor barrier.
In addition to the heat insulator, other materials will be required, in particular, sheathing. For stone and brick baths it is better to use a profile for plasterboard. The ceiling profile CD is usually used, the UD guide is used for edging around the perimeter. The hangers are attached on average every 0.7 m, the distance between the profiles is slightly less than the width of the insulation. In a wooden bathhouse, instead of a plasterboard profile, it is advisable to use bars; they are cheaper and will last as long as the walls.
You will need a foil heat-resistant water vapor barrier. for example, penotherm. It is able to protect walls from dampness, reflect infrared rays, and additionally insulate the room due to the presence of foam material. For wooden baths it can be used as the main material for insulation. On top of the insulating layer, a finishing finish is made from lining. The best material is considered to be linden or aspen; they are durable even in such difficult conditions, and they do not burn.
Some important points
Many owners are concerned with the question: is it necessary to treat the wooden structures of the building and with what? Either it will be an antiseptic solution or a special varnish that will extend the life of the products. It is not advisable to do this in a steam room, because at high temperatures the chemical components will evaporate. But the wooden floors in the dressing room must be impregnated, protecting them from rotting processes, the formation of mold and fungi.
Products for coating wooden structures, in particular floors, are as follows:
- Varnishes - they contain antiseptics that prevent the spread of putrefactive bacteria. But they are also suitable for decorative finishing; Example of a varnished floor in a waiting room
- Colorless impregnations contain phytoncides that protect wood from mold, rot, etc.;
- Antiseptic solutions contain toxic fungicides. After their application, further painting of the material is expected.
A qualified approach to equipping the floor in the bathhouse and dressing room is one of the important components that can influence the amount of heat in the bathhouse and its long-term preservation.
Insulation algorithm
When using mineral wool, it is covered with a layer of foil insulation.
Before starting work, you should prepare all materials and tools. The master will need:
- beam lath;
- foil;
- self-tapping screws;
- electrical tape and aluminum tape;
- roll paper;
- insulation;
- knife;
- screwdriver;
- building level.
It is important to follow the sequence - first insulate the ceiling and finish with the floor. All work begins with initial surface preparation
It must be cleaned of dust, mold and dirt, all holes must be sealed with polyurethane foam. Broken parts should be replaced with new ones.
Installation of insulation on the ceiling
The insulation on the ceiling is laid in two layers to eliminate drafts.
Step-by-step algorithm for correct ceiling insulation:
- Covering the ceiling with overlapping roll paper.
- Fastening the bars on top of the paper. The distance between them depends on the size of the insulation.
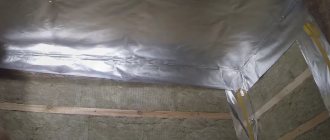
- Covering the frame surface with foil. Necessary for reflecting heat into the room. The joints are sealed with aluminum tape.
- Checking for leaks. You need to make sure that all joints are securely sealed and there are no gaps.
- Laying the insulator in the formed cells between the bars.
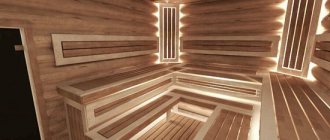
- Finishing the front part with clapboard.
Installation of insulation on the wall
When insulating the walls of the dressing room, it is important not to close the ventilation holes
Work on thermal insulation of walls is similar to insulation of the ceiling
But in the process it is important not to forget about the ventilation inlets
Laying sequence:
- Fastening the slats to the surface. They should be in the form of narrow strips so that temperature changes do not change their shape. The panels must be treated with a special bath product.
- Foil laying. You can fasten it using a construction stapler.
- Laying thermal insulation.
- Clapboard finishing.
Installation of insulation on the floor
Before insulating the walls, it is necessary to seal the cracks on the entrance doors.
The last step in insulating the dressing room is laying insulation on the floor
A large amount of heat escapes through it, especially in a building on stilts, so it is important to make high-quality thermal insulation. Most often, expanded clay is used as a material, which prevents the formation of fungus and condensation.
It is also environmentally friendly and lightweight.
In the case of wooden floors, the material is placed between the joists. When pouring concrete floors, expanded clay is placed between each layer.
Insulation of the floor in the dressing room is carried out according to the following algorithm:
- Filling the initial layer. Waiting for it to dry.
- After complete hardening, lay a layer of expanded clay 10 cm thick.
- Expanded clay chips are sprinkled between the layers of concrete.
- Pouring a layer of concrete onto a reinforced lattice.
- Execution of cement-sand screed.
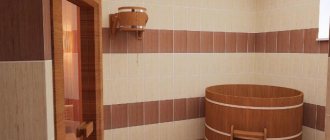
Interior decoration
Upon completion of insulation, work begins on finishing the dressing room. Usually it is covered with wooden clapboard, taking into account the unique design and style of the bathhouse. When covering the floor, the first step is to lay the beams on the waterproofing layer. And again, the entire tree needs to be treated with a water-repellent solution.
You need to fix the floorboard to the beams using self-tapping screws using the tongue-and-groove system. It would be a good idea to install a rubber coating on top of the boards. After the floor is covered, we proceed to finishing the ceiling and then the walls. You can sheathe walls in different ways. So, you can make clapboard cladding horizontally, vertically or diagonally. This is where your imagination comes into play.
How to insulate a dressing room from the inside Good Steam
Probably every owner of his own house or summer cottage dreams of building a bathhouse.
You can entrust this work to specialists, but with all the variety of materials and a sufficient amount of information, it is possible to bring your plans to life on your own.
How to insulate the walls in the dressing room with your own hands, as well as the floors - these are questions that you need to think about already in the process of building a strip foundation.
Scheme of wall insulation in the dressing room
Why do you need to insulate a room?
The room in the bathhouse preceding the steam room is of great importance for the functioning of the entire structure:
- eliminates the possibility of cold air entering the steam room;
- promotes long-term heat retention in the bath itself.
How and with what can you insulate a dressing room?
- How to make a waiting room warm
- How to make warm dressing room floors Warm dressing room walls
- Warm ceiling
Even the smallest bathhouse has two rooms: the first is the room in which they undress, the second is the steam room.
So that in the first room the temperature allows people to change clothes comfortably, and in the second the high temperature remains as long as possible, you need to think about how to insulate the dressing room and steam room before starting construction of the bathhouse. During the design work, future heat losses through windows and doors should be immediately taken into account.
The insulated dressing room does not allow cold air to enter the steam room and ensures that the temperature in the steam room remains high. You can also insulate an already built bathhouse.
Scheme of insulation of a brick bathhouse using ventilated facade technology.
How to make a waiting room warm
The greatest flow of cold air enters the dressing room through doors and windows. In small baths, the area of the dressing room is small - on average it is 1.5 x 2.3 m. One small window is enough to illuminate such a room.
A window with a double frame is installed, and the width of the window opening is made larger than its height, the lower edge of the window is located at a distance of 1.5 m from the floor.
All gaps between the frame and the wall opening are carefully sealed, which also ensures insulation of the dressing room.
The entrance door of the dressing room is made no larger than 1.8-1.85 x 0.8-0.85 m. The door frame can be insulated with wooden blocks with a foam rubber pad. The door to the steam room is usually lower in height than the entrance door. It should open into the dressing room. In addition to windows and doors, almost 20% of the heat in the bathhouse is lost through the walls, ceiling and floor. Therefore, it will be necessary to insulate them too.
Dressing room: insulation from the inside and finishing
The dressing room serves as a connecting room between the street and the premises for taking bath procedures, be it a steam room, a washing room, or a swimming pool. How to properly insulate it from the inside, as well as finish it, will be discussed in this article.
The functions that the waiting room performs are:
- maintaining optimal temperature and humidity, protection both from adverse street influences and from the influence of hot or humid indoor air (a kind of gateway);
- providing rest after and before bath procedures, creating a favorable microclimate (rest area);
- creating conditions for changing clothes and storing them in normal conditions;
- providing opportunities for collective leisure (the leisure area may include a media zone - a stereo system, TV, etc.);
- providing conditions for drinking drinks and food, storing dishes (kitchen unit);
- creating a positive psychological atmosphere and comfort (comfortable design and decoration);
- ensuring the heating of the bathhouse, possibly maintaining a small supply of firewood or other fuel (furnace combustion area);
- storage of accessories (racks, cabinets).
Insulating a dressing room with your own hands is not at all difficult.
The dressing room does not place such high demands on finishing materials as a steam room or a washing room. The main requirement is environmental friendliness and comfort of the materials used.
If the bathhouse is built from timber or logs, then usually its interior does not need significant modification. Wood is classic, beautiful, natural, environmentally friendly.
For wall decoration the following are used:
- PVC panels;
- rubber based paint;
- cladding board (lining) and its varieties.
We design ourselves: we think about the main thing, don’t forget about the little things
In this section we will focus on the most important points that will be of particular importance for the quick construction and long-term operation of your future bathhouse.
We will present the data in relative chronology of the order of work carried out:
At the initial stage. We are conducting reconnaissance of the area. We take into account the terrain, the proximity of the reservoir and the stability of its coastline and water level. We tie the future bathhouse to water sources and methods of waste disposal. Do not forget that according to fire safety rules, the construction of a bathhouse can be carried out at a distance of 8 m from residential buildings. At this time, the designer determines the functional form of the future bathhouse. Will it be made in the form of a free-standing structure or, on the contrary, integrated into a residential household or a utility, separate room such as a summer kitchen;
- At the second stage, the architectural form is determined, the type of building material for the construction of the box and the arrangement of the roof is agreed upon. At this time, the main linear dimensions of the bathhouse and the total usable area are determined. It should not be forgotten that for a family of six people to fully accept the procedures, the total usable area cannot be less than 12 square meters. m.;
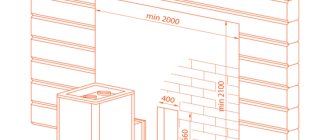
- At the next stage, the internal volume of the bathhouse is divided into functional zones. A traditional modern bathhouse has a steam room, based on the calculation of at least 1 sq. m. for 1 person, washing department, useful area of at least 4 sq.m., rest room, functionally combined with a dressing room. Based on generally accepted practice, the area of the relaxation room should be 50% larger than the intended area of the steam room. The ceiling height is also designed here. Again, practical experience shows that in the steam room the ceiling should be located at a height of about 115 cm from the top edge of the heater stove, but its total height should not exceed 225 cm, based on considerations of rational ventilation and heat conservation. In order to save useful space, shelves should be attached to the wall. Shelf length is at least 650 mm, width is at least 470 mm. The top shelf of the entire stepped system of a set of shelves should be located at a height of no more than 1200 mm from the level of the flooring, which should ensure an acceptable level of temperature in its zone;
- Next, window and door openings are designed. Based on the condition that in the vast majority of cases the bathhouse is used in the afternoon, it is rational to lay the maximum number of window openings on the western side to maximize the use of natural light. Doors must open outwards. This, in the case of external doors, saves internal space, with the doors of the steam room - it will allow you to avoid accidents in the event of an emergency;
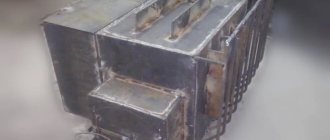
- Organization of heating and steam generation in a steam room. The best option, which produces soft, delicate steam, should be considered a full-fledged stone stove with a stone backfill. Metal stoves, although easier to install, in the vast majority of cases produce harsh, uncomfortable steam, which may be appropriate in a dry sauna. It is imperative to provide a heat-resistant cut-off in the stove corner, which will ensure that basic fire safety requirements are met. Along with the design of the heating and hot water supply system, other communication and support systems are included in the project;
- At the final stage, you can be tasked with measures to improve the appearance of the bathhouse structure, introducing details into the project that can emphasize the individual style of the bathhouse, its peculiarity, and its difference from other similar structures. Possible solutions for decorating the adjacent territory and creating a unique landscape design are also being worked out here.
Sources
- https://www.zwsoft.ru/stati/proektirovanie-bani-normy-rekomendacii-i-programmy-dlya-razrabotki-proekta-bannyh-kompleksov
- https://stroy-good.ru/proekt-bani.html
- https://rubanya.com/proectban/vazhnost-pravilnogo-rascheta-kak-sozdat-proekt-bani-samostoyatelno.html
- https://obane.info/planirovka/proektirovanie-ban.html
- https://Proekt-sam.ru/banya-bassein/programmy-dlya-proektirovaniya-bani.html
- https://baniaisauna.ru/1987-kak-sdelat-proekt-bani-samomu.html
- https://obane.info/planirovka/proekt-bani.html
- https://www.poparimsya.com/proektirovanie/programma-dlya-proektirovaniya-bani.html
- https://www.gvozdem.ru/3d/3d-dizayn-kvartiry-doma.php
- https://zen.yandex.ru/media/id/592d594b8e557de2f707c29f/5a1820dea815f164ccdde8ec
Insulation of the dressing room: insulation methods and choice of thermal insulation material
The Russian bathhouse consists of 2 rooms - a dressing room and a steam room. Thermal insulation of the steam room is carried out in order to reduce heat loss in the room, and insulation of the dressing room will create a comfortable temperature and will prevent cold air from penetrating into the building. It is worth asking the question of how to insulate a dressing room during the construction of a bathhouse, since the insulation of the room begins at the stage of laying the foundation.
Material selection
the quality of the insulation of the dressing room determines the preservation of the temperature in the steam room itself
The question of how to properly insulate the dressing room is quite important, since the preservation of the temperature in the steam room itself depends on the quality of the dressing room insulation.
As a thermal insulation material for the dressing room, it is necessary to choose an inorganic moisture-resistant material, since organic materials, with constant contact with water, quickly rot and mold.
The following is used as insulation:
- perlite;
- Styrofoam;
- extruded polystyrene foam;
- polyurethane foam;
- mineral wool;
- glass wool
The ideal thermal insulation material for a dressing room is polyurethane foam, since due to its qualities such as durability, moisture resistance, sound insulation, inertness to chemical and biological influences, fire resistance, it provides reliable insulation of the room, eliminates sharp temperature differences between the dressing room and the steam room, and ensures air circulation .
When spraying polyurethane foam, a monolithic coating without joints is obtained; the material has high adhesion, which allows it to be sprayed directly onto the walls and ceiling of the room.
What is better to insulate: mineral wool or polyurethane foam from Ecothermix? We recommend watching the video below so as not to torment yourself with reasoning:
How to insulate a dressing room from the inside
Interior finishing also refers to the insulation process
In order to properly insulate the dressing room, it is necessary to pay attention to the insulation of the walls, floor, ceiling, windows and doors of the room. Interior decoration also relates to the insulation process and affects not only the appearance, but also the technical characteristics of the room
Insulation of walls and ceilings
Wood is usually used to build baths. Before insulating the walls of a room, you should not additionally treat them with chemical impregnation, since when exposed to high temperatures, the harmful substances included in their composition evaporate and can cause damage to human health.
The technology of wall insulation consists of the following stages:
- preparing the frame on which the insulation will be attached;
- laying vapor barrier;
- installation of a thermal insulation layer;
- outer cladding.
Ceiling insulation is carried out as follows:
- laying waterproofing;
- installation of insulation;
- laying vapor barrier;
- exterior finishing.
If the thermal insulation of the ceiling in the dressing room is carried out by applying polyurethane foam, there is no need to install a vapor barrier. When insulating walls with polyurethane foam, there is no need to prepare a frame to secure the insulation or use a vapor barrier material.
The use of polyurethane foam will provide high-quality thermal insulation of walls and ceilings. The material is absolutely safe for human life and will reduce the cost of air conditioning and heating of both the dressing room and the bathhouse.
It is best to entrust the insulation of the dressing room with polyurethane foam to professionals, such as the Ecotermix company. The company provides services for polyurethane foam insulation of private buildings, both at the construction stage and during operation.
Insulation of windows and doors
The overall dimensions of its windows and doors significantly influence the heat loss of the dressing room. For the dressing room there is no need to install large windows and door structures, since the larger the size of the windows and doors, the more warm air will “evaporate” from the room.
Regardless of the overall dimensions of the dressing room door, care must be taken to ensure its thermal insulation.
You can insulate the door by creating a frame made of timber on its leaf, the thickness of which should be 20-25 mm, placing heat-insulating material inside the frame and sheathing the outside with a sheet of plywood.
Interior decoration
The interior decoration of the dressing room depends on the purpose for which it is intended to be used. When choosing a finishing material, you should also take into account the material from which the bath itself is built. So, for example, wooden lining is most often used to decorate a log bathhouse, and plaster is usually used as the interior decoration of a brick room. Read about how and what is the best way to insulate a bathhouse from the inside here.
Construction stages
- Create a project. It is necessary as for another structure. The plan should consist of a list of required materials, the layout of the internal structure of the bathhouse and the transition between the two buildings.
- Pour the foundation in the same way as the main housing.
- Make low doorways with a high threshold to retain heat.
- Waterproof the internal walls with vapor-reflecting foil and cover them with linden clapboard.
- Place the chimney on the other side of the house to prevent smoke from entering it.
Foundation
The foundation for the bathhouse extension is made without the help of professionals. The base can be made separately or combined with the base of the building. The first method is better - it shrinks evenly. The raw materials for the foundation should not differ from the main one. The method of tying two bases is determined by the presence of metal fastening brackets. The foundation of the bathhouse uses reinforced concrete piles and slabs, because its frame is lighter than that of a house.
Connection to the house and construction of the roof
The main point is the transition between buildings; it must be end-to-end. To begin with, the door from the bathhouse, exit to the dressing room, and then directly to the housing. This design retains heat better. If the transition is made as a vestibule, another room will appear, a locker room will be organized in it. It is recommended to use material identical to a brick house for the construction of the structure. The raw materials will affect the shrinkage of the new building, and cracks or crevices will appear; this situation does not threaten the main structure. It is recommended to make the roof single-pitched. The top must be attached to the brick wall and located above the main structure under the roof.
Fire safety
The first priority in building a bathhouse is its fire safety. There is a special device - a spark arrester. Install such a device on top of the pipe. Sold ready-made or made by hand. All wall joints are coated with bitumen mastic and treated with polyurethane foam. This action will help ensure proper shrinkage without damaging the walls of the main building. The dressing room and vestibule are made with windows and a door that open outward. The pipe is insulated inside with foil insulation and outside with asbestos. The raw materials are adapted to high temperatures and are non-toxic. An extension should not be built near the gas pipe to avoid fire during a leak. The completed building must be registered and inspected by the fire service.
How to insulate a bathhouse from the inside with your own hands
Quite common nowadays is the insulation scheme using fiber-based heat insulators.
The technology for insulating a bathhouse from the inside involves performing the following work. First you need to create a frame on the surface of the insulated wall. To do this, a sheathing of beams is attached to it. which are placed horizontally and vertically. Note that the thickness of the timber should exceed the insulation by 20-30 mm.
Next, the wall is covered with mineral wool. When the material is installed, a vapor barrier layer is applied. Most often, foil material is used to create it. Note that its overlay must be overlapped. The joints of the material must be sealed with thin slats. A distance of about 3 cm should remain between the layers of vapor barrier and mineral wool.
Next, this material is fixed to a vertical sheathing 350 mm wide.
The effectiveness of this method is quite high, since it has been used to insulate the walls of a bathhouse from the inside for quite a long time. However, you should know that if you choose this thermal insulation option, you will have to spend a lot of effort on creating a high-quality insulation design. Modern materials offered on the market will reduce the labor intensity of such insulation. Often, insulation materials combine several properties at once: they provide effective insulation and waterproofing. Foil penotherm is just such a material. It is characterized by high resistance to fire. In addition, it provides convenience during operation and installation.
The scheme described above is ideal for baths built from timber. Insulation of frame walls and panel-type buildings has its own characteristics. If the bathhouse has panel walls, then the choice is made in favor of lightweight materials. The most commonly used materials are polystyrene foam, reed boards, and mineral wool. Treatment of the heat insulator in this case is a mandatory requirement. Lime milk is used as a composition to protect it from harmful negative factors, followed by drying. The use of such protection will prevent the occurrence of rotting processes. In addition, the material’s resistance to fire will increase.
If the bathhouse has frame walls, then in cold climates, fiberboard or reed slabs are used to insulate it. In areas with a mild climate, the choice is made in favor of gypsum and sawdust. To insulate walls, for example, a mixture of sawdust and gypsum can be used. The material is taken in a ratio of 1:10. The finished mixture is poured between the walls and the sheathing in a layer of 200 mm.
Features of the construction of closed extensions
A closed, insulated extension can be made from different materials. The most common materials are wood, brick and cinder blocks. As a rule, a material similar to that from which the walls of the bathhouse are made is used. However, wood also harmoniously combines with brick, which means that a wooden extension can be safely erected near a brick bathhouse.
A major extension to the bathhouse is being built on the foundation. Most often, the type of foundation used in the construction of the main building is chosen - strip or columnar. During its construction, they try to ensure a connection with the base base, and for this, a new reinforcing belt is inserted into the existing support using steel reinforcement rods. The depth of the new concrete strip is selected 10-15 cm more than the base foundation. Waterproofing is applied to the side walls of the concrete pour by coating with bitumen or laying roofing felt.
The most common type of walls is logs or beams. Profiled and rounded timber is widely used. During construction, it should be taken into account that new wood will shrink within 1-1.5 years, which means that there is no “dead” fastening of the walls of the extension and the bathhouse - a technological gap is provided, which after shrinkage is complete can reach 3-5 cm. This gap must be reliably sealed with waterproofing and thermal insulation material.
Brickwork is also widely used. When using it, a strip-type foundation is most often erected. In brick construction, new and base walls are securely fastened together. To do this, after the first row of bricks, reinforcement rods with a diameter of 12-14 mm are laid, the ends of which are inserted into a hole drilled in the bath wall. A similar rod connection is made every 3-4 rows of masonry. The joint between the walls is sealed with sealant and puttied on top. Construction is carried out similarly using foamed concrete blocks.
The roof of the extension can be combined with the sauna roof or done separately. A common roof involves dismantling the existing roof and installing a new common rafter system. An individual roof is usually erected in a single-pitch design. Its installation is carried out on a rafter system, which is located slightly below the main roof and is not connected to it. The seam is sealed and covered with a special profiled overlay.
When building an extension to a bathhouse with your own hands, you will need the following tool:
- Bulgarian;
- perforator;
- electric drill;
- screwdriver;
- shovels, crowbar, pickaxe;
- a circular saw
- plane, hacksaw;
- hammer;
- vibrator;
- chisel;
- tape measure, plumb line, building level.
If there is a need to expand the bath space, then you can add an additional room for various purposes. Such an event can be done with your own hands.
Thermal insulation of floors, windows and doors
When deciding how to insulate a bathhouse inside with your own hands, take into account the possibility of increasing the degree of thermal resistance of the ceiling and walls. True, a cool floor and the presence of drafts also take away a lot of heat.
To thermally insulate the door leading to the steam room, a thick felt frame is attached to it, which will reliably cover the cracks. Wooden frames at the windows located in the steam room, dressing room and washing room are insulated with cotton wool.
As for plastic, it is not installed in places with high temperatures, but in other rooms there is no need to be afraid that polymers will undergo thermal decomposition. Self-adhesive foam strips are used to protect plastic windows.
The choice of products, the better to insulate the bathhouse inside, depends on the type of floor covering. Expanded clay is poured onto the surface of the leaking wooden floor, and boards are mounted on top of the leveled backfill.
They begin to equip a concrete leaky floor by digging a pit 50 centimeters deep.
The layers of the thermal insulation structure are arranged from bottom to top in the following sequence:
- sand –5 centimeters;
- polystyrene foam – 20 centimeters;
- concrete mixed in a 1:1 ratio with foam chips - 5 centimeters;
- waterproofing;
- concrete combined with vermiculite in a 1:1 ratio (this is the name of a natural material with low thermal conductivity) – 5 centimeters;
- reinforced screed –5 centimeters.
During the process of pouring the base, it is necessary to arrange a slope. A boardwalk is installed on top of the concrete screed on the joists.
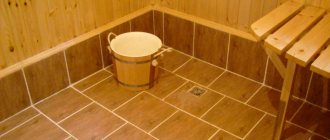
In the case when a continuous floor covering is needed, heat-insulating material is laid on top of the rough base in a layer of 10-20 centimeters, this can be mineral wool or polystyrene foam. Then it is covered with waterproofing, not forgetting to overlap the walls. A reinforced screed 5-10 centimeters high is mounted on top of this layer.
Then, as a rule, the tiles are laid. Despite the fact that the tiles in the steam room do not heat up to a high temperature, it is advisable to provide wooden footrests to make visiting the bathhouse more enjoyable.
Disadvantages of layout
According to the standard, the bathhouse is represented by a structure made of foam block or wood.
The bathhouse element described in the article (dressing room) plays an important role, since its incorrect layout can lead to discomfort. This happens when, for example, they put up a log house or erected a box of foam blocks for a bathhouse, but did not think through the layout. The existing building only accommodates a steam room and a washing area. But for a full-fledged dressing room, in which you can take a break from procedures, drink tea and change clothes, it is not possible to allocate enough space.
Why do you need a waiting room in a bathhouse?
It performs several functions:
- is a buffer zone, does not allow cold air to enter the steam room from the street;
- You can use it to cool down from the procedures before going out into the cold;
- it has a changing room where you can hang your clothes and not be afraid that they will get wet;
- a table is installed in it where you can drink tea and relax between procedures.
Which walls are the most durable for a waiting room?
Considering that there is increased condensation in the dressing room, due attention should be paid to the material’s resistance to moisture. Natural materials withstand moisture best
If it is not possible to purchase just such raw materials, because they are usually expensive, then you can give preference to any material and choose a good product to protect the surface.
Option for decorating the walls in the dressing room with artificial stone. Stylish interior of the dressing room in the bathhouse.
There are quite a lot of similar products in construction stores; you just need to consult with an experienced specialist. Let the bathhouse please you with its aroma and warmth. Only proper preparation for the process of building a bathhouse can make the space complete.
Arrangement
When deciding how to make a dressing room for a bathhouse, do not forget about its internal arrangement.
The waiting room space should accommodate:
- convenient hanger with bench;
- table with benches for relaxation;
- mirror;
- a small refreshment area with an electric kettle and dishes.
In addition, when laying the foundation for the dressing room, think about whether to expand it to create an external veranda in front of the bathhouse. In the summer, it can become an indispensable extension of the rest room. On the veranda you can install a font for those who like to plunge into cold water after a steam room.
Choosing the right insulation
The issue of thermal insulation of the dressing room should be approached in good faith. Click on photo to enlarge.
At the same time, the material must be resistant to moisture and biological influences, fireproof and, if possible, environmentally friendly.
Most often, foil-foamed polyethylene is used to insulate the dressing room.
It allows you to level out the sharp temperature difference between the dressing room and the steam room, and ensures the necessary air circulation. The role of additional thermal insulation can be played by the external finishing of the dressing room.
Are windows needed in the waiting room?
When deciding how to insulate a dressing room, many refuse to install windows in it. Meanwhile, the presence or absence of a window will not particularly affect the thermal characteristics of the room.
You should not give up natural light in the waiting room.
The main thing is that the windows are of high quality - without cracks, if possible without jumpers, with reliable double-glazed windows. Windows should be located no lower than one and a half meters from the floor.
It is not recommended to install plastic windows in a bathhouse. The best option would be a regular wooden window. Modern manufacturers have learned to make windows with wooden frames and reliable double-glazed windows.
Choose at least double glazing. And, in order to avoid additional cracks, it is best to make a window in the dressing room that cannot be opened.
Furniture
Regardless of the style and size of the dressing room, the required set of furniture in most of them is a table, bench, mirror and hanger. This is a functional minimum that allows you to make the room practical. The installation of a sofa, rocking chair, and a small cupboard for dishes allows you to turn the dressing room space into a comfortable relaxation area. Near the mirror it is logical to install shelves for useful little things and accessories, and secure hooks. In the corner you can place triangular ergonomic shelves.
It is important that benches and chairs are durable and resistant to moisture. If there is soft upholstery and textiles on the furniture, they should not be allowed to get wet; they must be washed and dried periodically. If space allows, you can organize a small kitchen area with a sink, tiles with a work surface or an electric kettle. The walls near the sink can be decorated with tiles or colorful PVC panels. It will turn out beautiful and practical.
Insulation for walls
Expanded polystyrene is stable, does not rot, and does not allow moisture to pass through.
Baths are usually made of wood. It is environmentally friendly, and it is easy to breathe in such a room. Less commonly, buildings are made of brick, foam blocks or cinder blocks. The latter material already has good thermal insulation properties due to the porosity of the block structure, but in winter the walls freeze. Brick buildings are practically never made.
The following are used as insulation materials for the wall:
- mineral wool;
- fiberglass;
- Styrofoam.
It is recommended to make a layer of polystyrene foam on top. It is highly durable, cannot be compressed, lasts a long time and does not rot.
A timber frame is attached to the walls. Each part is placed at a certain distance, which depends on the insulation material. A heat insulator and a layer of foil polystyrene foam are placed between the resulting slats. The finishing layer is applied on top.
Requirements
Before building a dressing room, you need to study the requirements that the room must meet:
- There should be enough space in the room. One person needs 1.5 meters of free space.
- If the bathhouse will be used in winter, the rest room should be heated to make it comfortable to be inside.
- A high-quality ventilation system must be installed inside - natural or forced.
- The room should have furniture installed for a comfortable stay.
- The light in the recreation area should not be too dim or bright.
Often the furnace channel with the firebox is discharged into the dressing room. In this case, the area around the firebox door must be fenced off. This space should not be subtracted from the free space.
Insulation of the concrete base
If the bathhouse is not placed on stilts, but on a regular concrete foundation, then the subfloor is usually made using a cement screed. Such a base can also be insulated quite easily with your own hands. To do this, you can use two methods.
First way
This method involves performing a finishing cement screed. The procedure for performing such floor insulation in the steam room and other rooms of the bath is as follows:
- First, the base must be waterproofed. For these purposes, bituminous coating materials or rolled thick polyethylene are used.
- The prepared concrete base is covered with fine-grained expanded clay in a layer of 15–20 cm and thoroughly compacted.
- A galvanized mesh is laid on top of the insulation, which serves as reinforcement.
- Then this entire structure is filled with a cement screed, which is carefully leveled and rubbed down when dry.
- A finished concrete floor (after drying for 14 days) can be covered with a floor covering, such as ceramic tiles.
Second method
This do-it-yourself option for insulating a concrete base is similar to the method by which a wooden floor is insulated.
With this method, it is important to adhere to the following technology:
- The pre-prepared and reinforced concrete floor is subject to waterproofing. To do this, it is better to use bitumen-based mastic.
- Then wooden logs with a cross-section of at least 10x10 cm are laid on the base.
- These logs are leveled and secured with anchors.
- Insulation is installed in the resulting space. In this case, you can use any material: expanded clay, polystyrene foam, penoplex or other moisture-resistant insulation.
- After filling the space between the joists with insulation, the latter is covered with dense polyethylene for waterproofing purposes.
- Boards are laid on top of the joists. It should be remembered that the flooring must be covered with a water-repellent coating.
The result of this process is an insulated concrete floor covered with environmentally friendly and pleasant-to-touch wood.
Correctly fitted boards with your own hands will serve for a long time and delight with their warmth not only in the steam room and dressing room, but also in other rooms. As you can see, insulating the floor in a bathhouse with your own hands is not such a difficult task.
In this matter, it is important to take a responsible approach to waterproofing work and precise adjustment of the finished wooden flooring. In this case, the floor in the bathhouse will last as long as possible.
Furnace air heating
Let us briefly consider this type of heating (warming up) of a bath. In fact, this option is considered the most common and most convenient. It is ideal for small spaces used directly for bathing procedures.
A good heater will be able to easily heat the entire bathhouse, and will not require the installation of an additional heat source and additional cash costs. Previously, to equip a good sauna stove, you had to find a professional mason or show good imagination to make it using scrap materials (what kind of stoves were invented).
Now everything is much simpler. You can easily purchase a ready-made product in almost any specialized store. Moreover, the installation of such heaters is quite simple and does not require any specific conditions. The only thing you should pay special attention to when purchasing it is the power (usually indicated in the product passport).
It is recommended to proceed from the calculation of 1 kW of power per 1 square meter of heated room. At the same time, in order to achieve maximum comfort and use the bathhouse at extreme drops in outside temperatures, it is worth taking into account when purchasing a power reserve, up to 30-50% exceeding your calculations. Here's an article about more detailed choices.
This type of heating also has another positive side. Most stoves of this type are heated with wood, which forms a unique psychological picture and allows true bathhouse lovers to preserve the tradition laid down by our ancestors.
By the way, the well-known company Teplodar recently released a new model of stove-fireplace called Siesta. She quickly gained authority among her “bathhouse brethren.” And this is no coincidence, since it is heated from the adjacent room, thereby simultaneously heating both the steam room and the relaxation room. Agree, it’s very convenient.
Naturally, there are options for heaters that use electricity, gas and even liquid fuel for heating. Well, here, I’ll tell you, everything is an acquired taste and depends on your capabilities and preferences.
How to insulate a bathhouse door
Without a reliably insulated door, all work on insulating the dressing room will not give the desired effect. A huge amount of heat will escape through door cracks and unprotected doorways. Meanwhile, it is not difficult to insulate the door to the bathhouse. For this you will need:
- Beam, 20-25 mm thick.
- Sheet of plywood or fiberboard.
- Insulation.
The technology is simple - timber is placed around the perimeter of the door to create a kind of frame. The timber is not filled close to the edge, but at a distance of about 1.5 cm from it. Insulation is placed inside the frame, and the whole thing is covered with a sheet of plywood. The sheet is secured with a construction stapler or wallpaper nails.
The principle of operation of such insulation is simple. When closing the door, the insulation will rest against the door block and bend outward. This bend will completely block the access of cold air to the dressing room. In this case, the insulation will not be clamped, leaving a layer of air near the door leaf.
This will protect the door from frost and allow it to remain dry on both sides. No sealing gaskets should be installed on the door block itself. The edges of the door should be smooth and clean.
Thermal curtain
Another common way to insulate a door in a bathhouse is to install a thermal curtain. To do this, a sealing frame is installed on the door block inside the dressing room.
The frame is made of a block wrapped in insulation. After installation, a soft cloth is attached to the frame to act as a screen. This method is simple, but well-proven and quite effective.
Before carrying out work on insulating the dressing room door, check the condition of the door frame. Perhaps she began to rot. In this case, insulating the door will not help; the frame will have to be replaced.
Box replacement process
If the door frame is rotten, it must be replaced. Click on photo to enlarge.
If the bathhouse frame was installed according to the rules, then the work of replacing the frame will not cause difficulties.
Dismantling of the old box occurs starting from the lintel.
When sawing the lintel beam and side crossbars, be careful not to damage the walls of the dressing room.
There is no need to saw off the fastening pins.
In a situation where it is impossible to insulate the old dressing room door, it is necessary to replace it with a new one. You can make the door yourself according to the dimensions of the old door.
It is better to use timber and boards for this purpose.
For the dressing room, it is recommended to make a two-chamber door, in which, between the sheets of the door leaf, lay a layer of heat-insulating material. You can order a ready-made door from any company engaged in carpentry work.
Design
The design of an attached bathhouse has certain features. This stage should be carried out very thoughtfully, since the comfort and practicality of the future structure depends on it.
The first thing you need to decide is the shape of the building and its location. Will the bathhouse have a common wall with the house, or will the 2 buildings be separated by a small vestibule?
Finished projects
If the owner’s plans do not include the construction of a non-standard structure, then a factory-made structure can be installed in a separate room. It does not require wood fuel, but is heated by an electric boiler.
Independent design
Drawing up a project yourself requires a thorough study of construction technology. These norms cannot be violated even in an effort to increase comfort.
It is recommended to take into account the specific construction conditions, plan the number and size of premises, their location and the transition between buildings. The design of the base depends on how exactly the extension will be made.
What should the walls look like in the waiting room?
The question of what the walls should be like is quite complicated. After all, each owner of a plot of land on which a bathhouse can be built has his own preferences and ideas regarding the interior of the dressing room. However, there are some standards that most people prefer:
- Wooden walls with grooved patterns. Such coverings look more than harmonious in a bathhouse. Carved images on wood create a romantic and magical atmosphere in the bathhouse.
- Also, types of wood such as lining are often chosen. Thanks to this material, you can realize a wide variety of design ideas. For example, draw patterns on the surface of the material or simply paint the trim in rainbow colors. This will help create the wonderful, bright atmosphere that should be in the bathhouse space.
Lighting
When choosing bathroom fixtures, you should take care of their safety. The rest of the choice is determined by the interior style. For dressing rooms in a rustic style, bright lamps are not used. A small light bulb screwed into a socket on the wall will suffice. For spacious rooms and dressing rooms in a modern style, a chandelier under a lampshade (fabric or glass) is appropriate. It gives a cozy soft light. It is better to hang it above the table. A pair of identical wall lamps will add light.
Small iron tablet lamps look harmonious in modern interiors. For eastern recreation areas, it is better to choose exquisite floor lamps. It is logical to place the switches near the door so that it is convenient to use them as soon as you enter the dressing room.