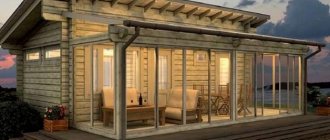
Of course, it’s good to have a spacious and large bathhouse that can easily accommodate a group of friends or the whole family. But not everyone can boast of a large area, especially when it comes to a bathhouse. Even if the area is quite small, this is not a reason to deny yourself the pleasure of visiting a Russian bathhouse - pay attention to the small bathhouses.
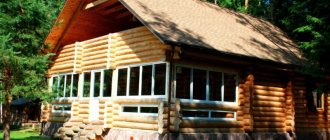
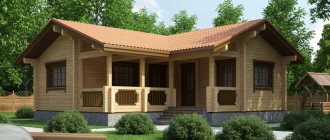
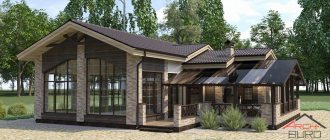
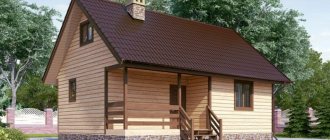
Examples of projects
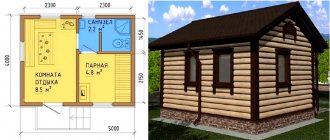
Project of a small bathhouse
Ideally, the bathhouse includes 4 rooms in its design:
- dressing room;
- restroom;
- washing;
- steam room
Bathhouse with washing room and rest room
You can expand the functionality of some rooms by combining them with each other. At the same time, the comfort of your stay is not lost. The overall size of the building will largely depend on how many people will be inside at the same time.
- 1.20 mx2.50 m. Very compact solution. In this case, the bathhouse consists of only two rooms: a steam room and a dressing room. The dimensions of the first are 1.20 m×1.50 m, the second - 1 m×1.20 m. There is no rest room, but in the dressing room you can easily change clothes. The washing room can be combined with a steam room. This size will be enough for one person.
- 2.50 m×2.50 m. In terms of the number of rooms - the same as the first option. The size of the steam room is 2.50 m×1.50 m, the dressing room is 1 m×2.50 m. At the same time, it will be possible to organize additional space for storing firewood. In such conditions, two people can comfortably fit.
- 3 m×3 m. This option can be planned in different ways. If you want the steam room to accommodate three people, then it can be made 3 m x 1.50 m in size; the washing room can be made separate by placing a shower stall there. The size of this room will be 1 m × 1.50 m. There is also a dressing room of 2 m × 1.5 m. You can combine a washing room and a steam room, then there will be space that can be used as a relaxation room, which will also serve as a dressing room.
- 4 m×3 m. In this case, you can separate 4 m2 for the steam room (for example, 2 m × 2 m). The washing room will occupy 1 m × 1.50 m, leaving 2 m × 3 m for the rest room. In such conditions, four people can comfortably fit. They will be able to be in the steam room at the same time, and also enjoy communication in the waiting room.
- 4 m×4 m. In such an area you can already turn around well. The steam room can be left measuring 2 m × 2 m. A separate dressing room can be made measuring 2 m × 1.50 m. The rest room in this case is 4 m × 2 m (one side will be 2.50 m). The washing room can be combined with a rest room; for this, an electric boiler and a shower stall are installed. They can be placed in one of the corners of the room, which does not take up much space.
Frame bath 4*5
Layout of small baths
These are indicative examples. You can easily vary the size of the premises within accessible limits. You may want to reduce the steam room because... there is no need for 4 people to be there at the same time. At the same time, it will be possible to expand the space of the rest room.
Note!
All measurements are given in ideal values without taking into account the thickness of the partitions. This was done for greater clarity. If the bathhouse is adjacent to the house, it can be made in the form of one steam room. In this case, the bathroom will act as a washing room, and the rest of the area is available for relaxation.
Bathhouses
If a summer cottage was purchased recently, most likely it is not equipped.
Sometimes it happens that it does not even have the necessary amenities. In this case, a bathhouse designed as a change house helps out. This room is comfortable and contains everything you need for use. A sauna can also be made from a sea container, which saves time and money. Here are some examples of how to quickly build a bathhouse:
- Sauna. This type of cabin contains an electric or regular stove with wood, a table, benches and a suitable container for water. The water supply system in it is connected to the general sewerage system. The sauna bath contains a dressing room, a steam room and a washing department. Nowadays, a sauna in a country house is a common occurrence.
- Shower room. A bathhouse with a shower stall that meets your needs is built from moisture-resistant materials. It also has all the necessary equipment.
- Prefabricated bathhouse. This bathhouse combines a bathroom, which is connected to the central sewer system.
Choosing material
Small brick bathhouse
Various materials can be used to build walls. Much will depend on the project you choose, as well as the amount of money planned. For example, you can use ordinary brick. You can read how to build a brick sauna here. The following points will be positive:
- availability;
- ease of delivery;
- relative ease of construction;
- long service life (with proper care - up to 150 years);
- ease of maintenance;
- possibility of combination with the main structure;
- when using new brick there is no need for cladding;
- freedom to choose the form of construction.
The negative aspects include:
- high cost of material;
- the need for good ventilation, because brick has poor vapor conductivity;
- lighting such a bathhouse takes more time than building made of wood;
- high costs for interior decoration.
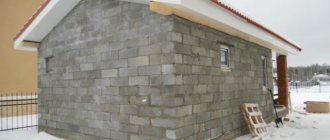
From foam block
Along with brick, foam block is often used. This is a more progressive material; it has properties characteristic only of it:
- light weight with large size;
- high laying speed;
- ease of adjustment of block shapes;
- good thermal insulation;
- relatively low price;
- excellent sound insulation;
- environmental friendliness;
- If you follow the recommendations, there will be little glue consumption.
There is also a fly in the ointment:
- uneven pores can be a problem when hanging furniture;
- Shrinkage may occur over several months;
- poor bending resistance.
Small log sauna
The most favorite manufacturing method is a rounded log. A lot can be said about its advantages, here are just a few:
- high environmental friendliness;
- pleasant appearance;
- low heat capacity;
- no need for interior and exterior finishing;
- pleasant internal atmosphere.
The negative side is:
- unprofitable to use in small buildings;
- some complexity of construction;
- high cost of material;
- long shrinkage time.
Frame small bath
One of the cheapest and fastest options is the construction of a frame structure. Minimal construction skills will be required for this method. The advantages are:
- no need for a massive foundation;
- availability of materials;
- relatively low cost compared to other options;
- ease of care;
- very fast heating of the steam room with good insulation;
- ease of laying communications;
- seismic resistance;
- no shrinkage.
One of the disadvantages is the need to organize good sound insulation. High level of noise – transmission of various vibrations, which can cause inconvenience. It is also important to ensure good ventilation so that moisture does not accumulate inside, which will lead to the development of fungus and mold.
Location Features
In addition to a successful box design, you will need to choose the right place in the country where you can build a bathhouse without occupying the most valuable areas of the territory. On the other hand, the steam room should be located at a sanitary distance from the dacha house in order to ensure a fire safety distance and a minimum of smoke in the area in front of the house.
A typical design for a simple mini bath involves building a room in the space between the remote toilet and the dacha building.
The second option is the most common. In this case, the structure is placed as far away from the house as possible, preferably closer to shrubs or trees that shield the box from the wind.
A bathhouse can be built in the so-called sanitary zone of the dacha, and the site for the foundation, even without taking into account the height of the piles, must be located above the drainage pit or septic tank.
Strip foundation
Strip foundation for a small bathhouse
In the case where a really small bathhouse is planned, there is no point in sinking the foundation to the level of soil freezing. This will only increase the overall cost of the project. With proper manufacturing and waterproofing, you won’t have to worry about the walls being cold. This type of foundation will be relevant for any of the listed building options.
- The first thing that needs to be done is to clearly define the territory that will be allocated for construction.
- Next, debris is removed. In addition, you will need to remove the top layer of soil with grass to make it easier for you to carry out further tasks.
- Using pegs, the boundaries of the future building are marked.
- Special holders are made to make it easier to navigate with excavation. To do this, two pieces of board 50x50 cm (or whatever is at hand) are sharpened on one side and connected using a transverse crossbar from a board 10 cm wide, its length should be about 70 cm. You will need 8 such structures. They are installed two at each corner of the house. Between them two fishing lines are stretched to the width of the future foundation. Be sure to check that all angles correspond to 90°. This way you get clearly defined lines that will be difficult to move even if you hit them.
Scheme of a shallow strip foundationThe soil is excavated to a depth of 50-60 cm. You can throw it in the middle of the territory, then it will be useful for preparing the bedding.
- A layer of sand is placed on the bottom. Its height should be 10–15 cm. In order to compact it well, you will need a manual or mechanical tamper. Additionally, you can moisten it well with water so that it sits better.
- A moisture-resistant brick or something else (granite, for example) is laid at the bottom every meter, which will serve as a support for the metal sheathing. They are needed so that the concrete fills the space underneath well.
- The sheathing is made from a rod with a diameter of 12 mm. Its principle is as follows. Sections 10 cm shorter than each side of the dug trench are taken. You need 4 of them on each side. Every 40 cm they are connected to each other using a knitting wire so as to form a large parallelepiped. The entire structure is placed on prepared stands. All four elements are connected to each other by a bandage of rods, so that ultimately a monolithic structure is obtained.
- Formwork is made from flat boards or laminated plywood. Its height should be such that the foundation rises 30-40 cm above ground level. It is important to make a sufficient number of supports so that the formwork does not begin to creep under the weight of the concrete. Also, in the upper part, individual sheets can be secured together with crossbars.
- A solution is prepared in a concrete mixer or manually in a ratio of 1:3:3. The first number is cement, the other two are sand and filler, usually crushed stone plays its role. For greater rigidity, the solution should not be very liquid.
- The time between batches should be as short as possible so that the layers subsequently become a single whole and do not peel off.
- After filling, you need to go through the vibrator well. If you do not have your own, then you need to rent one. Thanks to it, high-quality filling of all voids is carried out, the presence of which reduces strength and can have unpleasant consequences.
- The top layer is leveled and tightened using the rule.
- After a few days, when the consistency has hardened sufficiently, the formwork can be dismantled. But the foundation will gain full strength only after 28 days. The first few days (or more if it is summer) it needs to be watered so that it does not crack.
At the stage of laying the foundation, the supply of necessary communications is provided. This could be a water supply and sewer drain for washing water.
Sewerage in strip foundation
Note!
If the soil in your area is known to be highly mobile, then a shallow foundation would be a bad option, as it can easily collapse under the pressure of the layers. In this case, it is better to evaluate the possibility of installing piles.
Water supply and drainage
The costs of building a miniature bathhouse can be minimized if you arrange a compact and efficient drainage system. To create it, it is necessary to carry out excavation work and dig a small hole with a volume of 100 liters at some distance from the structure. Inside it should be installed a barrel that does not have a bottom. Thanks to it, the walls of the pit will be prevented from collapsing.
The next step is to install a pipeline , which should go directly from the steam compartment. If the bathhouse will be used in winter, then the plastic pipe should be deepened to a depth of 1 m. To ensure that there is always hot water in the bathhouse, you need to spend money on purchasing an electric heating element.
It can be used to easily heat a small volume of water. This will significantly save time on lighting the stove in the mini-bath. The water container should be placed higher. In this case, it will be possible to use it without swapping. Some owners of such structures additionally install a mixer to control water flow.
The drain installed in the mini-bath can, if desired, be connected to the sewer system of the garden house. This option makes it possible to reduce the costs of installing this system. Communications should be located at a slight slope. This will prevent liquid from stagnating in them. At the bottom of the pit into which the used water will flow, it is worth laying a layer of expanded clay or coarse crushed stone. It is necessary to install an insulation structure on top so that the pit does not freeze over in winter. For this, laying a layer of soil and clay will be quite sufficient.
Pile foundation
Sectional view of foundation on screw piles
There are several ways to build a foundation. Piles can be bored or driven. In the first case, a well is drilled, formwork is made, reinforcement rods are lowered and the entire space is filled with concrete. In the second option, ready-made concrete, wooden or metal posts with a pointed end are driven in immediately. The most suitable options for a small bath will be screw ones. They consist of a metal base in the form of a pipe and blades that help immerse the supports into the ground. You can purchase them or make them yourself. If you chose the second option, then you need to act like this:
- The first step is to find out to what depth the soil freezes. To do this, you can contact the appropriate service.
- Pipe blanks with a diameter of 110 mm are purchased. The thickness of its wall should be more than 3 mm. The total length should be such that it can be sunk below the freezing level by 50 cm and at the same time so that it is 30-40 cm above the ground surface. Additionally, you can buy blanks for screws. It is also necessary to make a square cap on the pile. It should be 25x25 cm in size and 5-6 mm thick.
Screw pile manufacturing processIf blanks for augers have not been purchased, they can be made from metal 5-6 mm thick. To do this, you will need a sheet with a size of 30x30 cm. A circle is cut out of it. A hole is made inside the diameter of the pipe. After this, it is cut halfway and the parts are bent to form blades.
- The end of the pipe that will plunge into the ground becomes sharp. To do this, several vertical cuts of 15–20 cm are made in the form of triangles. After that, they are folded inward and boiled.
- The screw is welded on.
- Additionally, in the upper part you can provide holes for a lever with which they will be wrapped in the ground.
- All piles are primed with paint and coated with an anti-corrosion compound. This will extend their service life.
- The distance at which it is better to place the elements between each other is 1 m. Additionally, it is necessary to provide for the presence of supports for the partitions of the building.
Installation of pile foundationTo ensure that the piles go into the ground exactly vertically, you can tape them with tape or attach a level with a magnetic base. It is important that someone constantly monitors the value of the bubble so that any corrections can be made in time.
- After all components are immersed, they must be aligned in a horizontal plane. For this purpose, one standard is selected that has the smallest offset. A mark is made on it. Using a laser level, a rule with a level, or using a water level, these marks are transferred to all other elements. Next, trimming is done using a grinder.
- Holes are drilled in the caps to make it easier to secure the grillage later. It can be made from beams measuring 20 × 20 cm (you can also use logs 15 × 15 cm, 10 × 15 cm or 10 × 10 cm), or by pouring lintels. In the first option, it is necessary to provide a dressing. To do this, in the logs that will be located perpendicularly at the edges, a sample is made to half the depth and to a width equal to the width of the log. After this, they are fastened together with hexagonal head screws (“capcaillie caps”). For a concrete base, a trench is dug between the piles to a depth of 20 cm, a backfill of sand is made, which is compacted. After this, the formwork is set up, the sheathing is laid and the mortar is poured.
Grillage options
In each of the described options, separate supporting elements for the stove should also be provided, especially if you plan to use a heater. This is very important, because its weight can be large, which can lead to damage to the floor and joists.
Note!
Such a foundation will be an ideal solution for frame structures, log buildings, as well as small foam block bathhouses. If the soil in the area where construction is planned is quite strong and rocky, then you can use something between a pile and strip foundation - a columnar foundation. In this case, separate holes with a size of 50x50 cm are dug every meter to a level below freezing of the soil. Formwork and metal lathing are installed inside and mortar is poured.
Sectional columnar foundation
Correctly obtaining permission to build a bathhouse
Permission to build a bathhouse can be obtained from the administration of the locality in which the site is located or from the nearest MFC (multifunctional center).
Documentation
To obtain a permit for a detached structure, you must prepare the following package of documents:
- passport of the applicant or representative;
- a document confirming the right to own land (donation or sale agreement, certificate of inheritance);
- an extract from the Unified State Register of Real Estate (USRN) - may not be provided, since this information is in the public domain and self-government bodies can request it as part of interdepartmental interaction.;
- land plot plan - ordered from the district administration;
- a project of the proposed construction, with information about utility networks, a diagram of the location of the bathhouse and an indication of the distance to other objects located on the site.
Read more about what documents are required for a building permit.
A bathhouse, which is an extension to a house, will be considered as a reconstruction of the building, so in this case the following characteristics are taken into account:
- change in area;
- compliance with the requirements established by the fire inspection and sanitary and hygienic standards;
- maintaining the safety margin of the walls and foundation.
You must submit to your local government:
- notification and project for the reconstruction of a residential building, while on land plots related to individual housing construction or private plots, the construction permit was replaced by a notification;
- wait for an answer.
All documents are provided to self-government bodies both in the form of copies and originals. Copies remain with the administration, and the originals, along with a receipt for the date of the next visit, are returned to the applicant.
The construction permit document is valid for 10 years from the date of its receipt.
After the bathhouse is erected, you need to:
- prepare a technical plan of the house along with the extension;
- submit a notification to the local government about the completion of the reconstruction of the public health building;
- invite surveyors to take the necessary measurements;
- wait for inspection by municipal authorities for compliance with all necessary standards;
- receive notification of compliance.
If it is planned to build a bathhouse complex for commercial use, instead of a notification, a permitting act should be submitted; permission from neighbors, the SES, the fire inspectorate and Rosnedra will also be required.
Timing and cost
The municipal authority has 10 days to review the notice and make a decision. It takes no more than 3 weeks to draw up a technical plan.
As a rule, if all established standards are observed, obtaining permission to build a bathhouse does not cause problems and, if no mistakes were made, all the necessary documents can be completed within a month.
The cost of services varies depending on the region. For example, in Moscow and other large cities, the preparation of a technical plan can reach 15,000-18,000 rubles. In remote regions and small towns - 8,000-10,000 rubles.
Read more about the price of a building permit here.
The state duty is the same everywhere and amounts to 350 rubles. - bathhouse without permission, and 2000 rubles. - for capital construction.
Can they refuse?
There are situations when organs fail to build. This may happen if:
- a significant discrepancy was found in the documents;
- the presence of typos or errors when submitting a notification;
- the submitted information does not correspond to the technical plan;
- an incomplete package of documents was provided;
- presence of design violations;
- sanitary, fire safety or construction requirements were not met.
If one of the above points is violated, municipal authorities have legal grounds to refuse a building permit.
Thus, the construction of a bathhouse for private use in the legal aspect is a simpler task than it might seem at first glance. Auxiliary outbuildings, which include baths, in most cases, are designed according to one principle - based on a technical plan.
Construction of brick walls
For a bathhouse, it is better to use red brick, which has undergone heat treatment and has a lower thermal capacity. To calculate the amount of material needed, you need to calculate the area of each wall. To do this, the width is multiplied by the length. Then you need to divide this number by the area of one brick. The area of the masonry joints can be neglected, because you will still need to make a reserve in case of battle or marriage.
Calculation of the number of bricks
The wall can be erected using several methods:
- in two bricks with external insulation.
- with air gaps, they are about 6 cm;
- with a layer of insulation between two rows of bricks.
Work begins with the construction of corners. This is an important process because... It is they who will subsequently ensure the correctness of the entire structure. In order to maintain the vertical level of the future walls, two metal profiles of 5x5 cm and a length equal to the height of the future walls are dug into the corners. They are leveled and secured with jibs. A fishing line is stretched between them to the height of one row. After it is laid, the line is rearranged to the height of the next one. The thickness of the seam should be about 20-25 mm. It should be applied at a distance of no more than a meter so that it does not have time to dry. Additionally, the plane is checked using a bubble level. If the second and third types of masonry are chosen, then it is necessary to ensure a bandage between the two walls. This is achieved by laying two bricks transversely opposite each other at certain intervals. Also, each row should be offset by half a brick to ensure the overall interweaving of the entire plane.
Brick wall laying
A lintel must be installed over windows or doorways. Usually it is reinforced concrete. You can purchase it ready-made or pour it directly on site. It should extend beyond the openings by at least 25 cm. Supports are installed and a wooden board is mounted on them. Two rows of bricks are laid out on edge. Between them there are reinforcement rods, which should also extend 25 cm beyond the opening, and it is better to bend them to intertwine them with the existing masonry. Concrete is poured inside. After complete hardening (usually 10-12 days), the lower supports can be dismantled and the logs removed.
Brick lintel
Walls made of foam blocks
The general installation principle will be the same as in the previous case. You should also start with the corners, which must be accurately and clearly set.
Laying walls from foam blocks
In the same way, guides are made from profiled pipes. But there are some nuances:
- In order to achieve the best adhesion, the base row is laid on cement mortar. It is better to make the ratio with sand 1:3. It is very important to maintain a horizontal plane so that all other rows also lie correctly.
- All other rows are fixed with special glue.
- The thickness of the adhesive layer should not exceed 5 mm. Only in this case will it be possible to achieve ideal thermal insulation.
- Every 3 rows, a metal mesh is placed in the seam, which serves to provide additional rigidity.
- Foam blocks are placed on the edge.
- Lintels over doors and windows are made in the same way as in the case of brickwork.
Requirements for structures
The bathhouse must meet a number of requirements regarding the location of the building and fire safety rules. The location depends on different objects:
- The border of the neighboring plot is three meters (minimum 1 m, but the building should not cast a shadow on the neighboring plot).
- Trees - 3 m.
- Residential buildings - 5 m.
- Well, borehole or reservoir - at least 20 m.
- Large reservoirs - 30 m.
- Road - 5 m.
The building must be erected on a hill so that it is not flooded by precipitation and melt water. Requirements for placing a bathhouse are regulated by state documents SP 11-106-97, SNiP 30-02-97.
Fire safety requirements:
- There must be a working fire extinguisher in the bathhouse.
- Wood used for decorative finishing must be impregnated with a fire retardant.
- In the area where the chimney passes through the ceiling, it is necessary to install a special sleeve or cover the walls of the hole with non-combustible material.
- The stove must be installed on a secure foundation. It is better to make a separate foundation and cover it with fireclay bricks.
- You cannot assemble a chimney from asbestos-cement pipes.
- The walls around the stove should be covered with non-combustible materials. There should be a sheet of metal in front of it.
- Electrical appliances located in the bathhouse must be grounded.
Log walls
Construction of walls from rounded logs
This is exactly the option that pops up in the imagination when it comes to a bathhouse. To make it, you will need to stock up on rounded or profiled logs. It is better to make external walls from this material. Because the structure is small, it is good if the partitions are framed.
- In order for the walls to be consistent and even, the difference between the diameters of the beams should not exceed 30 mm.
- Before laying, the wood is treated with an antiseptic compound that will prevent the appearance of parasites. Be sure to remove any remaining bark.
In the pawThe method of ligating the log house is chosen - in a bowl or in a paw. If the first option is used, then the total length should be approximately 60 cm longer than the length of the walls. For the second method there is no need to increase the dimensions.
- For the first crown, the most massive components are selected. They are laid with the sealing rings facing outwards to ensure good thermal insulation. A plane is made on the bottom side so that the log does not roll off the base. Waterproofing made of bikrost and roofing felt is laid under it. You can make it from foam. To do this, bars measuring 3x5 cm are filled every 50 centimeters. The space between them is foamed.
- Each element has a lunar groove along its entire length. Its width is equal to the radius of the log, and its depth is half the radius of the element on which it will rest. It is most convenient to select it with a chainsaw, but it is better to do it with an axe, because... it clogs the pores, which prolongs the service life.
- To mark the binding, a special tool is used - a dash. First, the timber is tried on, marks are made on it, after which it is removed, trimmed and put in its place.
- Tape insulation is laid in two rows in the groove and the joint element so that it partially hangs over the edges.
- To prevent horizontal movement of the walls, wooden dowels are driven in every 80–100 cm. They need to be recessed to a depth of 2.5 crowns. They must also be installed at a distance of 10 cm from the window or doorway.
Into the bowl
After the construction of the walls is completed, primary caulking is performed. During which the hanging insulation is simply driven into the joints. Complete shrinkage of the building can last more than 1.5 years.
Frame walls
After the foundation is erected, an additional foundation is made for such a structure. It is carried out according to the example of the grillage discussed above. For the corner posts we will need exactly the same timber as for the base. In addition, you will need to stock up on edged boards with a length equal to the height of the future walls, a width equal to the width of the grillage and a thickness of 5-10 cm.
Construction of a bath frame
- At the base, it is imperative to check the diagonals so that they are the same. It is attached to the concrete foundation using anchor bolts. It is advisable to recess the head. For this purpose, a countersunk groove is made in advance. Waterproofing made of bicrost or roofing felt is laid under the grillage on a concrete foundation.
Pie wall frame bathTo secure the corner posts, a tenon with dimensions of 5x5x5 cm is made at the end. A corresponding hole is made in the base. The beam is installed and leveled. It is fixed using metal corners. Jibs are also installed that will hold it.
- The top trim is made. This is a beam that will connect the racks together.
- Additional vertical beams are installed every 50–60 cm. They are strengthened with oblique struts.
- At the locations of windows and doors, embedded lintels are installed for rigidity.
- Floor joists are installed. For them, you can use a beam measuring 15x10 cm. In order for them to be secured in the best possible way, a cut is made in the grillage to half the width of the board. A cut is made in the joists and placed into the cut. Fastening is carried out with self-tapping screws; additionally, internal metal corners can be installed.
- The floor is insulated. In the case of a strip foundation, waterproofing in the form of a membrane or film is placed in the resulting space. Expanded clay is poured from above up to the beams. A separate layer of hydrobarrier is laid on the logs; it is secured to the boards using a construction stapler. Insulation is placed in the cavity between the joists. This can be mineral wool, polystyrene foam or penoplex. Everything is covered with a finished floor on top. If the foundation is columnar or pile, then first you will need to hem the beams from below, and then lay the hydraulic barrier and insulation.
- The outside walls are covered with facing material.
- A hydraulic barrier is laid on the inside. Insulation is inserted into the space between the vertical boards. You can use the same as for the floor. Finishing can be done using a block house or other suitable material.
Frame on a pile foundation
Erection of the roof
For small buildings, the ideal solution is a pitched roof. It is necessary to plan its production at the design stage. It is very important to be able to raise one wall higher than the other. When this is done, in the case of a wall made of brick and foam block, waterproofing made of bicrost or roofing material is laid on the upper end. Additional beams are mounted on it, which will serve as a Mauerlat. They are attached to the base using anchor bolts or walled-in studs. Beams are laid on top onto which the sheathing will be placed. They can be secured to the Mauerlat using metal corners.
Bathhouse with a pitched roof
In another option, the walls are made the same. Ceiling beams are laid on the Mauerlat. On one side, vertical boards are installed that will form a pediment, from which the rafters are lowered onto the other wall. At the point where they adjoin the Mauerlat, they are cut to the required angle. They are secured with metal corners. To make it easier to maintain the roof in one plane, the two outermost elements are installed first. A string is stretched between them, which will serve as a level.
Rafter system of a pitched roof
The ceiling must be insulated. A vapor barrier is attached to the top of the ceiling crossbars. Thick foil can play this role. Insulation in the form of mineral wool is placed in the space between the beams. Additionally, it is covered with plastic film. The inside is hemmed using wooden lining or polished edged boards. Read more about insulating the ceiling in a bathhouse here.
Insulation of the ceiling in the bathhouse
Note!
For a house made of timber, when attaching the rafter legs to the mauerlat, it is better to use floating corners. This is necessary to prevent the roof from skewing during shrinkage.
Selecting a location: bathroom, closet or balcony
The first step in arranging a sauna in an apartment is choosing a location and developing a project. The following options can be considered for its placement:
- combining a bathroom and a corridor leading to the kitchen. You can also add a bathroom here;
- a pantry or balcony in cases where the sauna will have infrared heating. By the way, a sauna on the balcony is attractive because it does not reduce the living space of the apartment.
It is clear that the size of the sauna depends on the number of people. When making the appropriate calculations, at least 2 m2 of space should be allocated for each person. The ceiling height in the room being equipped should be 2 m or more.
If you decide not to purchase a ready-made mini-sauna, but to equip it yourself, then you can leave the floor that is already there. An excellent option would be tiles.
The room for the sauna must be at least 1.8 x 2 m. This will allow you to easily place a bed in it. This mini-sauna will be a convenient and practical solution for an apartment.
Finish line
An integral part of every sauna is the stove. It can be made independently from sheet material or a large-diameter metal pipe. In another version, it is laid out of brick, but in this case it can take up a large space. For small spaces, it is better to use electric options that are purchased ready-made.
Stove for a small bath
A shelf is installed inside the steam room. It is better not to use coniferous wood for it, because... When heated, it may release resin, causing burns. Good material for it would be aspen, larch, linden or oak. If the space is small, a width of 40 cm will be sufficient; it is more convenient when there is a footrest. The fastening material must be flush so as not to burn the skin (it must also be made of stainless material). It is better if the entire structure is assembled on dowels.
Shelves for a small bath
For wiring, you must use a double braided cable. It is better if it is non-flammable (usually the marking has the prefix “ng”). Be sure to lay the conductor in the corrugation. There are no switches installed in the steam room itself. The lamps used are waterproof with an IP68 index.
Make sure there is good ventilation. To do this, you can install an adjustable supply valve, as well as anemostats with an outlet to the gable through the roof. This will be enough to ensure that all moisture is removed after taking a steam bath.
As you can see, there are no restrictions on what you can build a small bathhouse from. Choose the option that suits you best.
Summarizing
Summarizing the material presented, we can draw the following conclusions:
- If you decide to start building a bathhouse with your own hands, the first thing you need to do is draw up a project;
- Next, think through everything thoroughly and purchase the necessary material;
- You need to approach work carefully and carefully, but at the same time creatively;
- There is no need to rush in this matter, but you should not leave an unfinished bathhouse for the winter.
And if you follow these simple rules, then a mini sauna at the dacha will not only please the eye, but also soothe the soul, and give health and joy to you and your loved ones.
If you have any questions, have something to say on the topic, or you find an inaccuracy in the article, please write about it in the discussions below.
Scheme
Layout 2.3*4
Layout 4*4
Bath plan 3*4
Plan 3*5
Photo
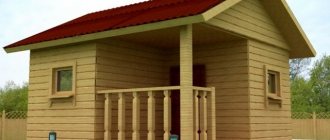
Miniature bathhouse with dressing room
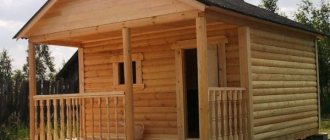
Frame-panel bathhouse with porch
Mini sauna
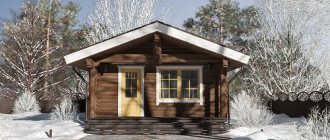
Small bathhouse - wild log house