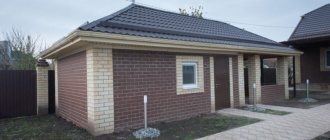
Having your own bathhouse is the dream of many. What could be more pleasant than enjoying steam treatments and then drinking aromatic tea? After such a procedure, all stress and fatigue disappear, the person feels rested and renewed.
To build a bathhouse, you can turn to specialists or do the construction yourself.
The construction process cannot be called simple; you need to follow a certain construction order, comply with technical standards and fire safety requirements. Where does any construction start? Of course, with drawing up a detailed design of the future structure.
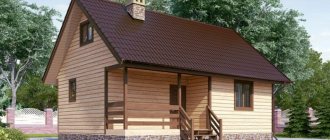
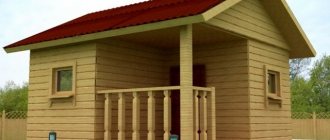
6x3 bathhouse project: features
Of course, a 6 by 6 bathhouse design would be optimal, but the construction of such a structure is not possible on every site. But don’t despair, you can make a cozy and functional 6x3 m bathhouse.
This project is quite small in size, so the main goal is to make the bathhouse as comfortable and functional as possible.
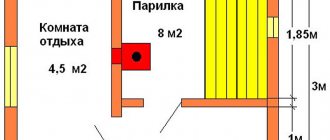
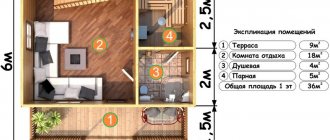
The building should consist of several rooms:
- hallway;
- steam room;
- washing;
- rest rooms.
The design of a 6x3 bathhouse made of timber provides a capacity of about 3-4 people. It is recommended to make a steam room at least 6 square meters in size. The average size of the dressing room is 3-5 square meters. The sizes of other rooms may vary, there are no special requirements.
Of course, some reduce the number of rooms, but it is better to do everything, since each of them is of great importance. A steam room and a washing room are mandatory premises that should exist in any case. If you remove the hallway, you will enter the rest room; in summer this will not cause discomfort, but in winter a draft will enter the room. If you remove the relaxation room, you will get less pleasure from visiting the bathhouse.
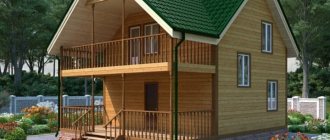
To draw up a project for a 6 by 3 bathhouse, you can contact special companies or find ready-made options. A lot of projects are freely available on the Internet, where all the necessary dimensions are indicated. The advantage of this method is that you can find an already implemented project, evaluate its appearance and learn about its convenience.
The project must be drawn in special computer programs or on paper, all dimensions must be indicated, the location of windows and doors must be drawn, and the location of ventilation and sewerage must be considered.
We recommend reading:
Bathhouse made of laminated veneer lumber: advantages and features of construction; bathhouse projects made of laminated veneer lumber
A properly drawn up project is half the success of building a bathhouse, so this matter must be taken very seriously.
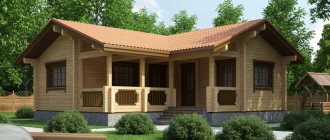
Below are several projects for a bathhouse made of 6 by 3 timber:
As you can see, the layout of the rooms may be different, despite the fact that the total area of the room is small. The main thing is not to rush at this stage. When drawing up a project, you need to have a rough idea of what kind of furniture you plan to put and where, so that after building the bath you won’t encounter any unnecessary difficulties.
Roof installation
So, what other improvements were made?
Special supports were installed. So that later, when we cover the facade, the plane of the front wall will be ready for covering the facade.
Plus, these supports strengthen the front part of the roof.
There will be quite a lot of snow lying on the roof. And according to calculations, a cube of snow weighs 800 kg closer to spring. That is, on the pediment this load can reach three tons.
Therefore, we made supports for two purposes: to level the façade and to further strengthen the roof.
We laid the film down and made it slightly slouchy.
As a good idea, you need to place a galvanized steel drip under the film so that the condensate that will accumulate on the film flows down this drip.
But my attic is cold, so in my case this is not practical.
First we rolled out the first roll of film, closer to the edge of the roof. Then the second one overlapped it by 15 cm. And the bars were already nailed on top, you can see them in the picture above.
Counter-lattice
It serves to provide a ventilation gap. Otherwise, condensation will form in the space between the film and the main lathing, which will run horizontally on top of the counter-lattice.
If there is no air circulation, the board will rot.
The procedure for building a bathhouse according to the 3x6 bathhouse project
So, the plan has been drawn up, now you can proceed directly to the construction of the bathhouse.
Stage 1. Preparing the area
It is best if the bathhouse is located next to a body of water, in which case, after warming up in the steam room, you can cool off by swimming in a river or lake.
If there is no body of water nearby, and there is no opportunity to build a pool, then install a font. It takes up little space and can be located both indoors and outdoors. In addition, it is quite simple to make a wooden font with your own hands.
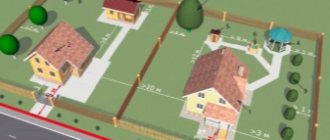
Next, the area where construction is planned needs to be cleared, but it is recommended to prepare an area not exactly 6x3, but larger.
Don't forget to make a drainage hole.
Stage 2. Construction of the foundation
The foundation can be of several types:
- tape - the simplest option that is easy to do yourself;
- columnar - easy and quick to install, but can only be installed on stable soils.
These types of foundations are equally popular and are actively used for construction. But if we compare the characteristics, the strip foundation is considered more reliable, it is suitable for light and heavier buildings, and has a long service life.
Installation of the strip foundation proceeds as follows:
- We make markings. It is important that the foundation has strictly straight and perfectly even angles.
- We prepare the trench. If the soil is hard, then it is enough to make a trench 0.5 m deep, if soft - more than 1 m. The average width is about 0.3-0.4 m.
- We fill the trench with sand and gravel in a layer of about 0.1-0.2 m.
- We make formwork.
- We lay the reinforcement frame.
- We pour concrete.
We recommend reading:
Bathhouse made of laminated veneer lumber: advantages and features of construction; bathhouse projects made of laminated veneer lumber
When the concrete dries, you need to waterproof it. Ruberoid is suitable for this.
Stage 3. Construction of walls
After preparing the foundation, you can proceed to the construction of the log bathhouse.
The following types of timber can be used for the construction of walls:
- non-profiled - the simplest and cheapest option. It is suitable for the construction of walls, roof truss systems, and partitions. When laying the material, it becomes covered with cracks, so it needs additional processing; it is covered with a block house or clapboard. It is not subjected to special drying, so there is a possibility of fungus appearing. To protect the material, it must be coated with a special antiseptic;
- profiled - has tongues and grooves, so installation is easier and faster. Such timber looks neater and does not require external finishing, provides high structural reliability and high-quality thermal insulation. But after building a bathhouse from such timber, you need to leave time for it to dry, so finishing work can begin only after 10-12 months after construction;
- glued is the most popular option. This material does not crack, does not require additional processing or finishing, has minimal shrinkage, and is highly durable. But keep in mind that in terms of price it will cost 2-3 times more than non-profiled lumber. In addition, glue is used for its manufacture, so laminated veneer lumber cannot be called a completely environmentally friendly material.
First, the strapping crown is laid; the most even beams are used for it, which are larger in size than for subsequent rows.
Next, walls are erected using wooden dowels; do not forget to prepare openings for windows and doors according to the design of a bathhouse made of 3x6 timber.
Stage 4. Construction of the roof
To install it, you need to make beams along the top trim. Make sure they are installed perfectly level. Afterwards, rafters are mounted on them at a distance of 1 m. Then you need to lay the roofing material.
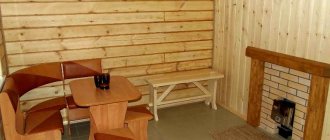
Next, you can move on to the interior decoration of the bathhouse.
The design of a 3x6 bathhouse made of timber provides for fairly compact dimensions, but at the same time all rooms can be located in it. This bathhouse can accommodate 3-4 people, so it is ideal for a summer cottage or for a small family.
Making a frame
To build walls, it is necessary to make a base from pre-prepared beams.
Frame technology consists of connecting vertically located elements into a single structure. It is important to maintain the distance between the bars. It should not exceed 600 mm
Otherwise, the stability and mechanical strength of the entire structure will significantly decrease. Edged boards 25*100 mm can be used as horizontal connecting elements. The construction of a frame bath necessarily includes a heat-insulating layer. It is best to use basalt insulation, as it has the following properties that are important for a bath.
- Fire safety. It does not burn under the influence of flame, and the melting point of the fibers is 700°C.
- Hygroscopicity. Basalt wool allows water vapor to pass through its structure, which helps remove excess moisture.
- Easy installation. You can choose roll or sheet models of thermal insulation material.
For a bathhouse, you can use a simplified frame assembly scheme. Diagonal jumpers are installed in the upper and lower corner parts to connect the structural elements. This technique is applicable only for buildings with low ceiling heights - up to 2.7 m.
Effective insulation of a bath can only be done with a minimum layer of basalt wool of 100 mm. Additionally, it is recommended to treat the external walls with wooden clapboard or a special plaster mixture using a frame mesh.
Preparation of material
For the construction of the walls of the bathhouse, I decided to use softwood lumber.
To do this, I chose a beam 5.5 m long and with a cross-section of 100 x 150 mm. Thus, the wall of the bathhouse should have been 100 mm thick. Few?
Of course it is. But even a thickness of 150 mm would not be enough for the bathhouse to meet thermal protection standards. And since subsequent wall insulation cannot be avoided anyway, why increase the cost and labor intensity of the work? Since I worked alone, the weight of the lumber was a very important quantity for me. I really didn’t want to carry 50-kilogram “sleepers” 150 x 150 mm on myself.
After I brought all the timber for the bathhouse to the site, I had to dry it for some time, as it was very damp. To do this, it was enough to stack the lumber on spacers and close it on top. After a couple of weeks the wood was ready to be used.
Timber for a bath
To construct a log house, each beam for a bathhouse had to be antiseptic in order to prevent the further development of putrefactive bacteria and bugs. Processing the wood separately would take a very long time. I carried it out simultaneously with the installation of the bathhouse frame. While I was covering with protective impregnation the amount of lumber sufficient for the installation of two tiers, the first two or three timbers were already drying out. With them it was possible to begin the next crown of the bathhouse.
Flax-jute fabric
To seal the gaps between the crowns, I used 100 mm wide flax-jute tapes, which I simply rolled out and attached with a construction stapler. The crowns were connected to each other with nails 200 mm long. Of course, I admire the skill of the ancient carpenters who built log houses without a single nail, on wooden dowels, but I did not subject myself to such “self-sacrifice.”
Read about the best way to fasten the crowns of a log house
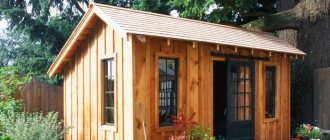
4×4
A 4 by 4 m frame bath will allow you to lie down.
With the same layout (a transverse hallway, right behind it is a washing room, from which the door to the right or left leads to the steam room), the size of all rooms increases.
Each room has a wall close to 2 meters in length (“close” - since we subtract the thickness of the walls from the external dimensions of the building).
A locker room, a water treatment room, and a steam room will already accommodate a bench commensurate with a person’s height.
The wall of the stove with the combustion door in a 4 × 4 room can be taken out into a dressing room (the warmer it is, the more comfortable it is to undress, the drier the removed clothes).