Do-it-yourself gas silicate bathhouse
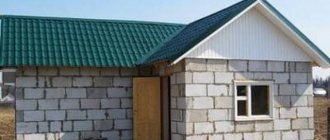
The bathhouse is built not only from wood. Today, bricks, cinder concrete or foam concrete blocks are often used. Another type of cellular concrete – gas silicate – is also in great demand. The lightweight and durable artificial stone works so well that anyone can build a sauna from gas silicate. Before starting work, we recommend that you read this article.
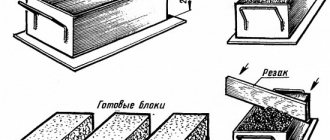
Gas silicate building blocks are made from a mixture of gypsum, lime, aluminum powder and cement with water. All this hardens at a temperature of 180°C and high pressure.
The result is a material that can simultaneously be used to construct buildings up to three floors and as insulation. Its purpose depends on the density of the finished product. The D500 grades are considered universal, that is, with a density of 500 kg/m 3, suitable for both thermal insulation and the construction of walls.
Gas silicate for baths is good because it is fireproof, does not rot and does not create an environment for the development of mold and mildew.
Steam room
The interior decoration of aerated concrete bathhouse begins with the steam room. This room will need additional insulation. It is not recommended to use polystyrene foam for these purposes - this material has a low level of environmental friendliness. Mineral wool is also not worth taking. Its use is allowed in extreme cases. The ideal option is wood. But here, too, not everything is so simple: it costs more than other finishing materials, and besides, wooden cladding takes up a lot of space.
Taking into account the above, it is better to use foam glass for finishing the steam room. Its properties resemble polystyrene foam.
But there is one important difference: glass does not become toxic when exposed to high temperatures.
Foamed glass comes in the form of small tiles
But there is one important difference: when exposed to high temperatures, glass does not become toxic. Foamed glass comes in the form of small tiles. In order to sheathe a steam room with them, you will need tile adhesive
It is also used as putty. There is no need to apply the glue in a thick layer, since the top will be covered with clapboard
In order to cover the steam room with them, you will need tile adhesive. It is also used as putty. There is no need to apply the glue in a thick layer, since the top will be covered with clapboard
Foamed glass comes in the form of small tiles. In order to cover the steam room with them, you will need tile adhesive. It is also used as putty. There is no need to apply the glue in a thick layer, since the top will be covered with clapboard.
What kind of foundation is needed?
To build from aerated concrete blocks you will need a strip foundation. And it doesn’t matter that the structure itself will be light; on a different foundation, the bathhouse will not last for several years. This is due to the structure of the material itself. Although stones are strong enough to be used in the construction of load-bearing walls, they do not withstand bending loads well. That is why there are no buildings made of gas silicate higher than three floors, and there are few three-story buildings.
The advantage of a solid monolithic slab is that it does not change its configuration during soil heaving. A movable foundation will lead either to constant minor repairs to the walls, or even to the destruction of the bathhouse itself.
As an option, you can use a pile structure, but reinforced concrete beams or a monolithic continuous reinforced belt must be installed on top of it.
Note!
Whatever foundation you choose, the base must be waterproofed and rise above the ground by at least 50 cm. Since gas silicate blocks are porous and absorb moisture well, they will collapse when alternating cycles of defrosting and freezing of the water inside.
What are the most common mistakes when building a bathhouse?
The first and most serious mistake when building a bathhouse is choosing the wrong location. What can we say here, because the location of the bathhouse on the site depends on many different factors, including the direction of the world.
Therefore, before building a bathhouse, it is imperative to analyze the site and understand where it would be best to place the structure. You should not choose a low-lying area on the site for these purposes, since in this case, the bathhouse may be flooded in winter.
Also, it is not recommended to place the bathhouse too close to a body of water, which may, due to floods, expand in width and overflow its banks. It is recommended to enter the bathhouse from the south side, as this will avoid drifts. More detailed information about the standards for the construction of bathhouses on a suburban site can be found in SNiP.
The choice of location on a building site, in most cases, also depends on what type of bathhouse will be built. It goes without saying that if this is a black bath, then it should be as far as possible from residential buildings. Otherwise, you may encounter a number of problems when operating a bath of this type.
In many ways, mistakes during the construction of a bathhouse are also associated with savings on materials for the foundation. Yes, a bathhouse is a lightweight structure that does not require a heavy monolithic foundation. However, the type of foundation you choose simply must cope with the assigned loads.
When choosing the type of foundation for a bathhouse, it is recommended to pay special attention to the characteristics of the soil and the presence of groundwater on the site. For most baths, it is recommended to build a poured strip foundation that can handle the weight of even a one-story brick house
What size should the bath be?
When building baths, many builders make mistakes regarding the required dimensions of the future structure. As a result, the bathhouse turns out to be small and inconvenient to use. To prevent this, you need to think in advance about how many people will use the bathhouse at the same time.
According to preliminary calculations by experienced builders, there should be at least 1.5 m² per person in the bathhouse. At the same time, many consider the ideal dimensions of a steam room for a bath to be the same width, length and height, 2.6 meters.
In general, the size of the bath depends on many nuances and should be selected based on the wishes of the customer
It is very important that the bathhouse is not crowded and is as safe as possible. This factor is influenced not only by size, but also by properly equipped ventilation in the bathhouse.
How to make ventilation in a bathhouse
Without properly functioning ventilation, carbon dioxide will accumulate in the bathhouse all the time, which is naturally very harmful and unsafe. Therefore, even at the initial stage of construction, you should think in advance about arranging proper ventilation in the bathhouse.
Again, following the words of experts, it is simply necessary to have at least three levels of ventilation in a bathhouse: regulating, supply and exhaust. To arrange fresh ventilation, it will be enough to provide openings near the doors, where the stove will be located.
The exhaust ventilation duct in the bathhouse would be best installed on the ceiling. In this case, the bathhouse can be cooled most quickly if it is very overheated. Well, as for the control ventilation duct, it should be located on the opposite wall from the stove, not too high from the floor surface.
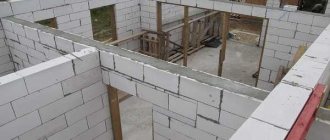
Building walls
Walls made of large cellular blocks are erected quickly and easily. The main thing is to follow some rules:
- The load-bearing capacity of aerated concrete elements for a one-story bathhouse is quite sufficient with a thickness of already 38 cm. But the standards for this type of building say that the width of the walls for our latitudes should not be less than 53.5 cm. And this is subject to the use of cement mortar. However, manufacturers insist that gas silicate masonry must be fixed with a special adhesive. This is the only way to preserve the heat-saving properties of the material. The thickness of the seam when using glue is less, about 2–3 mm, so the optimal width of the walls for a bathhouse made of blocks will be 59 cm or more.
- To increase the strength of the masonry, reinforcing metal mesh or steel rods with a cross-section of 8 mm must be laid every 3–4 rows. Reinforcement is also performed above and below window and door openings. And under the roof a monolithic belt is constructed with anchors. It will provide wind resistance to the roof.
- To ensure that gas silicate blocks do not lose their strength under the influence of environmental factors, the bathhouse box must be additionally sheathed on the outside with vapor and waterproofing. Reinforced thermal insulation is also necessary, especially in the steam room. The walls have a porous structure, so without a layer of insulation it will be impossible to heat the room.
- All insulating layers are attached to a wooden beam sheathing, since cellular concrete does not hold conventional fasteners. The slats themselves are fixed with special dowels for aerated concrete.
- The last stage of wall finishing is cladding. When choosing a material, pay attention to its vapor permeability. If it is less than that of gas silicate, water will begin to accumulate inside the multi-layer cake. This will lead to the loss of all the benefits of the stone and increase heat loss.
- Use special mineral plasters for aerated concrete that do not impede the passage of moisture. If you decide to use a blockhouse or decorative brick, do not forget to leave a ventilation gap of 5–10 cm with holes between the facade and the insulation.
A sauna made of gas silicate, made in compliance with all technological standards, will not cost you as cheap as one might assume, looking at the cheapness of the main building material. However, the opportunity to do it with your own hands and not pay to the swindlers, as well as the absolute environmental friendliness of the building, should please you.
Gas blocks: dimensions and characteristics
Foam concrete is a rectangular product with an internal porous structure. This effect is achieved by adding a vulcanizer to the cement mortar, which has the property of foaming it, forming many bubbles. After hardening, the material is characterized by sufficient strength and low specific gravity. To build a bathhouse from aerated concrete blocks, you need to choose the material wisely.
It has the following characteristics:
- Density. Depending on the brand, it varies between 350-750 kg/m³. Based on this indicator, the strength and load-bearing capacity of the material is determined.
- Form. For the construction of walls, monolithic products of rectangular shape are used. Window and door openings are formed with U-shaped lintels followed by reinforcement.
- Dimensions. The length of the stones is 500-625 mm, height - 200-500 mm, thickness - 200-400 mm.
Features of assembling structures from aerated blocks
Aerated concrete is technologically different from traditional materials, both in terms of manufacturing and laying techniques. The porous structure of the material does not allow the use of conventional masonry mortar, since water from it will immediately be absorbed into the briquettes and the joint will not be able to gain structural strength. Therefore, when laying rows, a special glue is used, which performs the functions of a masonry mortar without changing its qualities upon contact with gas blocks.
The load resistance of aerated concrete is significantly lower than that of dense materials. If standard types of concrete show greater compressive strength, being unable to resist only tension, then aerated concrete does not tolerate both types of loads well. For this reason, tall buildings cannot be built from aerated blocks - a maximum of 2 floors.
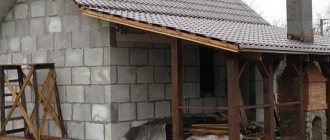
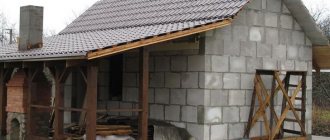
When drawing up a bathhouse design, it is necessary to take into account the low load-bearing capacity of the wall material and lay a lightweight roof structure. In addition to limiting the weight of the structure itself, it is necessary to take into account the wind and, especially, snow load. These are important requirements, since the weight of snow can be several tons, which is extremely dangerous for aerated concrete walls. As a rule, the issue is resolved simply - materials with a slippery coating are used as roofing materials - metal tiles, corrugated sheets or corrugated sheets. Snow melts off such surfaces on its own; you just need to eliminate the danger of people or property below.
Advantages and disadvantages
When deciding to build a sauna from porous blocks, you should familiarize yourself with their advantages and disadvantages.
The advantages of the material are:
- Light weight with large dimensions. The stones are easy to work with, and high productivity is achieved with minimal physical effort. There is no need to build a heavy and expensive foundation.
- Low thermal conductivity. In this indicator, gas silicate profiles are not inferior to solid wood.
- Hardness and strength. Load-bearing walls are guaranteed to withstand external loads and the weight of the reinforced concrete floor slab.
- Ecological cleanliness. There are no harmful emissions into the environment, including when heated.
- Fire safety. The material is not flammable; the most powerful stoves can be placed close to it without a protective casing.
- Biological inertia. The porous composition does not harbor fungus and mold, and is avoided by insects and rodents.
- Constancy of form. The blocks retain their dimensions at high and low temperatures and have virtually no shrinkage.
When a bathhouse made of aerated concrete is designed, the pros and cons must be considered fully and objectively.
The disadvantages of foam blocks are:
- High moisture absorption. Damp walls are extremely difficult to dry, and this affects the thermal insulation characteristics.
- High-quality waterproofing is required from below, inside and outside. The use of sealants leads to loss of vapor permeability; high-quality forced ventilation is necessary.
- Expensive interior and exterior decoration of the building is required, since the appearance of the walls is not presentable.
We build with our own hands
Having answered the question whether it is possible to build a bathhouse from aerated concrete, you should move on to the process of constructing the building.
It consists of the following steps:
- Design.
- Calculation of material requirements.
- Purchasing everything necessary, preparing tools.
- Marking, digging a pit, laying out the foundation.
- Waterproofing the base.
- Wall masonry
- Installation of partitions.
- Reinforcement of masonry.
- Reinforcement under window openings.
- Pouring armored belt between floors
- Installation of interfloor slabs
- Insulation from the inside
- Finish lining.
In addition, the stages of installation of communications should be foreseen in advance.
Methods for laying blocks
A do-it-yourself aerated concrete bathhouse can be laid out in various ways. The choice to lay blocks flat or on edge is determined by the climatic conditions of the area where construction is taking place.
In the middle zone and in the southern regions of the country, it is advisable to lay stones in a vertical orientation, creating surfaces 20 cm thick. In this case, additional insulation is not required, since this design has the insulating qualities of 100 cm of brick.
Another solution is to lay the products on the wide side. This allows you to make single-layer walls with a width of 40 cm and 60 cm. This approach is used in areas with long and cold winters, where good thermal insulation is necessary.
Another method is the construction of parallel walls, between which vapor-permeable insulation is laid. The surfaces themselves are connected by ties, anchors or reinforcement. A continuous strapping is made on top.
Waterproofing the base for masonry walls
Thermal conductivity, durability and strength of load-bearing walls depend on the quality of this stage.
Perform waterproofing in the following sequence:
- Cleaning the foundation surface from dust and dirt.
- Applying a layer of mastic.
- Laying 3 layers of roofing felt.
After the first row of stones has been laid, the roofing felt should be turned upward and glued to their surface. This will protect the material from snow, rain and melt water.
Technology and features of wall masonry
To make your own aerated block bathhouse durable and beautiful, you must follow the rules for laying the blocks.
There are few of them:
- The beginning of laying is from the corners, after preliminary measuring the evenness of the base.
- Bandaging each row with an offset of half a stone.
- Reinforcement of walls every 2 rows.
- Using hollow lintels to make openings.
httpv://youtu.be/v >
First row
The quality of laying the first row directly affects the progress of further work, solution consumption and the final result.
This stage is performed in the following sequence:
- The highest base angle is determined.
- Cement mortar is produced. Its task is to link blocks and align them.
- On the upper corner of the base, 2 stones are placed to form an angle. They are aligned vertically and horizontally.
- The remaining corners are made.
- A cord is stretched between them.
- Laying is carried out from top to bottom.
If there are gaps between the stones, they are filled with sawed-off fragments smeared with glue at the joints.
Although the material is light, it is worth working carefully. Due to unevenness, cracks may form on the walls. Do not use mortar to hold the blocks together; there is a special glue for this.
Technology
Composition of gas silicate material:
- Cement.
- Lime.
- Aluminum powder.
- Gypsum.
- Water.
For additional qualities or appearance, various substances are added to the mixture. The structure contains gas , so there is no need to include insulation in the structure.
The process of constructing a bathhouse consists of the following stages:
- Selecting a project, calculating estimates.
- Laying the foundation.
- Walling.
- Roofing installation and exterior finishing.
For a bathhouse, you can lay a columnar or strip foundation . For the first option, it is recommended to install a tape bundle. The depth of the wells depends on the geological features.
To protect the structure from the increased moisture present in the bathhouse, hydro- and vapor barrier layers are installed. For quick and high-quality fastening, a metal sheathing is installed.
Stages of work
The construction of the bath takes place in several stages. Each stage must be approached carefully so that there are no problems in the future.
Preparation and tools
Before starting construction work, you need to completely plan everything: the place where the bathhouse will be located, purchasing materials, completing a drawing of the structure and purchasing tools. It’s better not to skimp on purchasing quality materials and tools - this will all have an impact in the future.
Construction Tools:
- A wall chaser for cutting out special channels where reinforcement will be placed to strengthen the structure.
- Drill for drilling holes.
- A cutter for processing grooves for laying fittings or wiring.
- A hacksaw for processing blocks if they do not fit.
- Rubber hammer.
- To check the evenness of the installation, you need to purchase a level.
- Containers for future adhesive solution.
- Construction materials: cement, sand, glue.
The gas block must have a uniform color, symmetrical shape and the same size.
Project planning
The most critical stage before the start of construction. You need to carefully consider every step: how best to make the foundation so that the load on it is optimal, how to make good waterproofing, and so on. It is necessary to take even the smallest detail seriously, as problems may arise at the final stage.
What should you pay attention to when planning your own? Choose the best option for sealing windows and doors. An excellent sealant would be a special fabric that reduces the amount of moisture absorbed. There are membranes that allow steam to pass in only one direction.
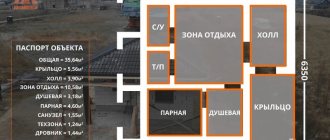
It is worth considering the size and location of all rooms: dressing room, steam room, shower and relaxation room. Decide where the drain will be located. Pay attention to the stove. It is necessary to choose the right place for it and the materials with which the stove will be lined.
It is better to plan projects up to 50 square meters yourself. If the size of the building is larger, then there is a chance to make a lot of mistakes. In this case, it is better to turn to professional companies.
Construction of the foundation
Any building requires the construction of a high-quality foundation. The advantage of using gas blocks is that you can save a lot on the foundation. As a rule, to build a bathhouse from aerated blocks, a strip foundation is erected, but a nested one can also be used. The choice directly depends on preferences.
How is the foundation constructed? First you need to carefully prepare - level the soil and make markings. Next, a trench is dug half a meter deep and about 30 centimeters wide. It is necessary to pour a layer of sand with crushed stone up to 20 centimeters at the bottom and fill it with cement mortar. Next, the foundation is left to dry for several days. After complete drying, it is necessary to waterproof it. Roofing felt is excellent for this purpose.
Wall installation
It is necessary to start laying from the corners of the building. After installing several blocks in the corners, you need to tighten the thread between them. This will allow you to navigate along it and prevent uneven masonry. Professionals recommend using a level and carefully adjusting all blocks. This will partially remove the defects of the foundation.
The first row is laid on the solution and carefully adjusted. After the row has dried, it is necessary to blow off all the dust and treat the blocks with a grater. All subsequent rows are mounted only using special glue. The adhesive layer should not exceed 7 millimeters. If the area of the bathhouse does not exceed 20 square meters, then the thickness of the walls can be made half a block. If more, then a thickness of one block will be more than enough.
The blocks are laid edgewise only, checking the level all the time. All imperfections at this stage can be easily eliminated using a rubber hammer. Every fourth level must be strengthened with a reinforced layer. Small trenches are cut around the perimeter with a milling cutter, and reinforcement is placed in them. Even small protrusions of the reinforcement should not be allowed; it must be completely covered with the adhesive solution. The entire last row of gas blocks must be reinforced with a monolithic belt. This will make the row more rigid and will fix all the walls and the future rafter system.
External and internal finishing
Before starting the last stage, you need to think about the concrete reinforcing belt. You need to install special twists of wire on it and strengthen them with anchors. The belt needs to be filled around the entire perimeter, and bookmarks must be made in the screed to secure the Mauerlat. This will help secure the roof as efficiently as possible and provide better protection from bad weather, such as strong winds. The frame is mounted on the rafter system. Next, the frame is covered with a coating.
After completing all the previous points, you can begin exterior and interior decoration. Vinyl siding is the best and inexpensive option for exterior cladding. It has remarkable characteristics, and at the same time they look very beautiful and original. If you don’t like siding, then you can opt for lining or decorative brick.
Another advantage when using a gas block is that laying all communications will be easier due to the ease of processing of this material. The best options for the floor would be boards or tiles. Before decorative finishing, it is necessary to lay a special waterproofing layer on the walls and ceiling.
Interior decoration can be done using wooden materials: linden, alder or larch. The wooden frame will act as another layer of insulation. In order to protect gas blocks from water, it is necessary to carefully plaster the walls. Protection with plaster can significantly extend the service life of the material. The inside of the bathhouse can be coated with putty without any problems, but it is not recommended to do this for the exterior.
For a bath, an excellent solution would be to use foil. There is even a special self-adhesive foil. What is it for? Foil allows you to achieve the effect of a thermos inside. Thanks to it, the room will warm up much faster and maintain the temperature longer. If regular foil is used, then its edges must be sealed only with special aluminum tape. Next, the main wooden frame is installed, after which the final finishing work is carried out.
Features of materials
Interesting features of various materials:
- Foil can be replaced with liquid glass . But it must be used immediately after the waterproofing layer.
- Linden is a very beautiful material with a pleasant smell. But it requires careful and timely care, as it very quickly loses its appearance.
- Alder has a pleasant appearance and emits a cognac aroma . But you will have to pay a lot of money for such material.
- Aspen is not an acquired taste material. Although it has a beautiful appearance, not every visitor to the bathhouse may like the bitterness in the smell.
Choosing material for interior decoration is the most enjoyable process. There are many types of wood on the market.
Estimating and purchasing materials
Drawing up an estimate is the final stage of design work. It is necessary to include in the estimate all necessary materials, including gas blocks, cement, reinforcement, boards, fasteners, etc. As a rule, the calculated quantity is multiplied by 1.1 (increased by 10%) in order to have a small supply of material just in case.
Materials are purchased at regular construction stores. Aerated concrete has long been no longer in short supply, like other materials. It is recommended to purchase all items on the list in full at once. Practice shows that buying in parts results in a mismatch in the quality, size or color of the materials, which significantly worsens the construction result.
You should not start work until all materials have been purchased. Otherwise, you will have to take time off from construction and go shopping in search of certain materials, which greatly slows down the work and takes a lot of time.
Estimated cost
It is impossible to accurately answer the question: “How much will it cost to build a bathhouse?” It all depends on personal preferences, financial capabilities, complexity of the project and the region in which construction will take place. According to statistics, the average price for each square meter will cost about 10,000 rubles. If the project is quite complex, then the price can be several times higher. When building a bathhouse from aerated concrete blocks without professional workers, the main expense item will be the purchase of materials. It is much cheaper to build a bathhouse from sibit than from wood. The final price can be 3 times less.
The only thing you have to pay for in any case is the design of the building. It is better to entrust this process to professionals. If you are the happy owner of a personal plot, then you need not only to build a bathhouse, but also to improve the entire territory in order to enjoy the appearance of the plot. It’s not difficult to build a bathhouse from an aerated block with your own hands. It is worthwhile to carefully approach the layout and choice of materials. Building a bathhouse from aerated concrete should not cause problems with due diligence and preservation of technology!
Bathhouse project
At the first stage of work, it is necessary to choose a layout that is ideal for the owner. In this case, not only the quadrature is calculated, but the need to construct an attic is also taken into account. As a rule, the building will consist of two parts - a dressing room and a steam room. It is also convenient to combine a bathhouse with a common house.
The project with an attic can be expanded by adding an entrance to the second floor. If there is free space, a billiard room or guest room can be placed on it.
Laying aerated concrete blocks can only be done by experienced builders. It is prohibited to implement the project on soft ground. The structure cannot be heavy. In a bathhouse made of aerated concrete, a strip-type foundation should be used. Thanks to this, you can save up to 20% of the total amount.
At the first stage of creating a project, you should choose a location for the stove. It can be located on a common foundation or located separately. Only the brick version is placed separately due to its heavy weight. Any floor can withstand a metal stove.
Waterproofing a bathhouse made of aerated concrete will be expensive. You can reduce the cost if you use gas silicate or plaster. However, the finishing of the steam room can be made of lining. It is allowed to use linden or aspen.
At the first stage of creating a project, you should choose a location for the stove.
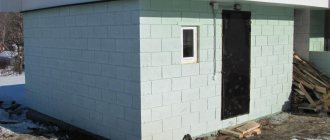
How to build a reliable and beautiful sauna from a gas silicate block?
Many people who have acquired a country house or a country cottage decide to equip a bathhouse on the site. Such a structure can be used for washing procedures, as a steam room, its operation is possible both in summer and in winter, if you carefully consider the choice of materials and carry out construction according to all the rules. The modern market offers a large selection of materials for the construction of such structures, and a bathhouse made of gas silicate blocks is a very popular option. The main differences of such a structure are its low price and lightness, and the construction process takes from 2 weeks to 1-1.5 months.
Pros and cons of gas silicate for baths
The advantages of the material include the following properties:
- The blocks have a clear geometry, identical dimensions, and the dimensions are such that the laying process takes less time compared to installing bricks.
- The products are lightweight, which reduces the load on the foundation, which makes it possible to build a more economical shallow strip or columnar foundation.
- The material is resistant to mold and mildew, it does not rot, is not afraid of exposure to open flames and temperature changes, so the service life of a bathhouse made of gas silicate blocks exceeds 30-40 years, unlike wooden buildings.
- Good sound insulation performance allows you to create the most comfortable microclimate inside.
- Gas silicate retains heat well and warms up the room quickly.
- The cost of building a gas silicate bathhouse is relatively low; due to its low weight, you can save on the foundation.
The main disadvantage of the material is its high hygroscopicity: construction requires raising the foundation to a height of 50-60 cm, wall finishing is required.
Selection of tools and preparatory work
Before starting construction, you must purchase the following materials:
- Blocks.
- Sand, Portland cement.
- Lumber (boards, beams, slats).
- Construction adhesive mixture.
- Thermal insulation (mineral, basalt or stone wool).
- Waterproofing (preferred material is rolled).
The preparatory stage includes design work. When creating a project, you need to consider the following aspects:
- Communication connection points (electricity, water supply, sewerage).
- The area of the building, the number of people planning to use the bathhouse.
- Layout. The classic version includes a steam room, a dressing room, a technical room; larger buildings can contain a relaxation room, a room with a swimming pool, a jacuzzi, and a veranda.
- Finish type.
Creating a foundation
The first stage of constructing a bathhouse from gas silicate blocks is laying out the foundation. Due to the light weight of the structure, it is possible to equip a shallow belt, columnar, or pile foundation. The most popular foundation options:
- Columnar. Creating a structure takes 2-3 days; no heavy equipment is required. Brick/concrete pillars are made at the corners of the future building, at the intersection of load-bearing elements, and at points of contact with external walls. They dig holes 300-400 mm deep under the pillars, arrange a sand cushion by compacting it, then place the pillars. The simplest installation is carried out using asbestos-cement or metal pipes filled with concrete mixture.
- Tape. Such a foundation requires more time and effort to create. A trench is dug along the perimeter and under the load-bearing partitions on the site, having previously marked the foundation using a level, pegs or reinforcement and a cord. The bottom of the trench is lined with a gravel layer 10-15 cm thick, then sand is placed. Inside, formwork is assembled from boards, a reinforced frame is formed inside, after which concrete is poured using manual labor or special equipment.
The base, regardless of the design, must be waterproofed: you can use rolled material, laying the sheets in two layers, or coat the surfaces with mastic/bitumen.
Construction of a building
Anyone can build a bathhouse from gas silicate blocks
It is important to learn how to work with hand and power tools and to know the specifics of working with the material. Additionally, you will need the help of two people
Foundation and floor
A strip foundation is suitable for construction from gas silicate blocks. Construction of the foundation:
- Mark the dimensions of the future building with pegs and string. Mark the dimensions of the trenches for the foundation.
- Remove all debris and level the soil. It is recommended to remove a layer of soil of 20 cm.
- Dig trenches to a depth of 70 cm. The depth depends on the freezing point of the soil in the region. The width of the trenches is 30–40 cm.
- Place a layer of sand 20 cm thick at the bottom of the trenches and compact it.
- Make formwork from boards and bars. It should rise 50 cm above the ground.
- Cover the inner surfaces of the formwork with thick polyethylene film to prevent cement from leaking out.
- Cut the reinforcement into separate parts and tie them into a reinforcing frame. Secure it inside the formwork and trenches.
- Pour cement to a height of 50 cm above the ground.
Cover the foundation with film to prevent precipitation from falling on it. Regularly water the hardening cement with a small amount of water to prevent the surface from cracking.
Construction of the foundation and plinth (Photo: Instagram / lopatinstroy)
Walls
Before erecting walls, the formwork must be dismantled. Fill the resulting voids with sand or expanded clay. Clean the foundation surfaces, knock down uneven surfaces, and cover cracks with plaster. Coat surfaces with liquid mastic. Lay 2 layers of roofing material on top.
Walling:
- Start laying out the first row from the corners. Check for evenness with a level.
- After constructing the first row, pull the thread along which the next one will be laid out.
- Make a reinforcing screed every two rows. To do this, you need to use a wall chaser to cut recesses in the surfaces of the blocks and secure the reinforcement inside.
- Seal the recesses with cement or block adhesive.
Remaining glue must be removed using a trowel or spatula.
Trowels and spatulas (Photo: Instagram / laluna_interior)
Windows and doors
Window and door openings must be additionally reinforced, regardless of the row. Even if the previous row was reinforced, the reinforcement must be done again. In order for the blocks above the openings to be supported, they need to be laid on two metal corners.
Ceilings and roof
Roof construction:
- Make a reinforcing belt.
- Secure a timber strapping beam over the belt. Attach it to the walls.
- Place ceiling beams on top of the beam in 60 cm increments. Secure them.
- Assemble rafter sections. This is best done on the ground. If there are many blocks left, gables can be built from them.
- When the individual rafter sections are ready, lift them onto the roof and secure them on top of the ceiling beams.
The next steps are installation of the sheathing, vapor barrier film, counter battens, and roofing.
Roof arrangement (Photo: Instagram / lopatinstroy)
Communications
Communications should be laid in the first stages of construction. If this doesn’t work out, don’t worry; drilling into porous blocks is easier than drilling into brick or wood.
Electricity
Features of conducting electricity in the bathhouse:
- The wires should be hidden in corrugation.
- Switches, switches, and sockets must be placed in the dressing room or recreation area.
- The transformer must be covered with a shield.
It is better to make several lighting points around the perimeter of the premises.
Sewerage
It is better to collect sewer drains from plastic pipes. It is discharged from the lowest point of the floor, passes through one of the foundation walls, and is discharged into a drainage well or septic tank outside the building. A grate should be secured over the drain.
Water supply
Water can be supplied from a well, well or central water supply system. It is better to use plastic pipes. If they go outside, they should be protected with insulated covers. It is also necessary to make points for draining water from the system.
Well (Photo: Instagram / idei_dlay_dachi)
Wall treatment
To protect the surfaces of gas silicate blocks from moisture, you can use special waterproofing mixtures. Before applying to surfaces they are diluted with water.
- Mineral wool can be used to insulate walls in the dressing room and recreation areas.
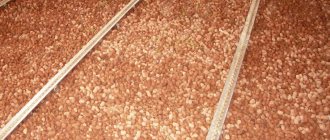
- It is better to insulate the ceiling and floor with expanded clay.
- Insulation of the steam room and shower should be done using foam materials. The best insulation is foam glass.
- For waterproofing, foil film should be used.
Wall masonry
After arranging the foundation, the construction of a bathhouse from gas silicate blocks involves laying walls and partitions. Before work, you need to slightly moisten the products: moisture will improve the adhesion of the gas blocks. The installation procedure is performed sequentially:
- The creation of the first row begins from the corners; it is necessary to achieve a perfectly flat surface, checking the position of the blocks with a building level.
- The second row is laid using cement mortar, which has the strongest possible adhesion. The elements are staggered relative to the first row.
- Subsequent rows are laid using construction adhesive: the seams will be thinner, the percentage of heat loss will decrease.
- Every 3rd row needs to be reinforced: holes are drilled in the masonry, a thin wire (cross section 6-8 mm), pre-coated with glue, is inserted inside.
- The vertical seams of the row are shifted by 15 cm.
Many craftsmen recommend laying out the first 2 rows of red brick: the material has a high degree of hardening and protects against moisture penetration.
Thickness and layering of walls
The bathhouse is not a living space and is heated only periodically, so there is no need to build massive walls in it.
Excessive thickness only increases warm-up time, forcing you to waste more fuel. It’s not for nothing that standard designs provide for a wall thickness of 300 mm - it is the most optimal. Taking blocks of greater width (375 mm) or laying a wall one and a half blocks long makes sense only in the northern regions. In a relatively warm climate zone, walls can be made no more than 200 mm, for which the same block with dimensions 60*20*30 cm can simply be laid on its edge.
A lot here also depends on the size of the building - a small bathhouse definitely doesn’t need thick walls. Moreover, the facade is also insulated.
A little about masonry
Work begins with preparing the foundation surface, which is most often uneven. When installing gas blocks, manufacturers recommend using special adhesive mixtures. This is more profitable, since glue, although more expensive, is consumed much more economically.
However, the first row of blocks is placed on a regular solution of cement and sand, and the foundation is also leveled with it. A screed is made, waterproofing is laid on top of it with mastic (to cut off the possibility of capillary suction of moisture), and then the bed for the first row of masonry is laid out.
Laying the first row of waterproofing
- All other rows are mounted with glue - with it the thickness of the seams is thinner, and accordingly, there are practically no cold bridges. Like any building mixture, dry glue is mixed with water, mixed, and swells for 5-10 minutes. Then it is mixed again and goes to work.
- Laying begins from the highest point of the foundation, determined by the water level. In the corners of the wall, ordering slats are placed, a mooring cord is pulled between them, which will make it possible to control the position of the blocks and the thickness of the seams.
- There should be no differences between the upper planes of neighboring blocks, as this can cause cracks to appear. They are sanded - like the block halves, which need to be sawn to complete the laying of the row. The next row begins to be laid on the side where the extension is installed - this will ensure the necessary displacement of the vertical seams.
About reinforcement
If the length of the bathhouse walls does not exceed 6 meters, there is no need to reinforce them in every 4th row.
It is enough that you provide reinforcement:
- On the sides of the openings on top, where the lintels will rest.
- In the penultimate row of masonry in front of the window opening.
- Make an armored belt in the area of the ceiling or support of the roof rafters.
Reinforcement of a number of gas blocks with rods
The masonry can be reinforced either with rod reinforcement: on walls with a thickness of 250 mm or more - in two rows with a diameter of 8-10 mm (on thinner ones, one rod with a diameter of 12 mm is taken). The reinforcement is placed in pre-cut grooves and embedded in glue. You can also use punched tape, steel or basalt mesh to strengthen the masonry.
Interior decoration
After laying the walls, they arrange the ceiling and try to quickly install the roof - to protect the construction site from precipitation. Then they begin to form the floor and only then begin to line the walls. First from the inside.
Traditionally, the walls of the washing compartment of the bathhouse are covered with wooden lining - a profiled board with a tongue and groove on one side and a groove on the other. It is mounted on a wooden sheathing, between the belts of which they lay, for example, foam plastic, covered with sheet foil on top.
Cladding made of clapboard in the steam room
- We have already mentioned the ease of use of materials such as Penofol and Tepofol. They have a great advantage over all known insulation materials, since with the same thermal conductivity they have a vapor permeability coefficient of only 0.001 mg/m*h*Pa. We can say the figure is zero.
- That is, such a material best protects against the penetration of vapors into the wall, while at the same time being a thermal insulator. Thanks to the foil layer, which must face the inside of the room during installation, it perfectly reflects heat.
- A vapor-waterproofing membrane is first installed under the polyethylene foam, making overlaps between the sheets, leading them to the foundation and to the ceiling, and fastening them with double-sided tape. Next, Penofol sheets are mounted end-to-end, gluing the seams with aluminum tape.
- Mechanical fastenings are made with dowels only along the top line, since the sheathing bars installed at the next stage will perfectly fix the rolled insulation. If the lining is mounted vertically, the bars are placed in a horizontal position - and vice versa.
Arrangement of openings for windows and doors
The process of laying blocks does not change significantly when it comes time to create openings. The wall should be laid as evenly as possible and the rows above future windows and doors should be strengthened so that the frame meets the criteria of reliability and safety. When arranging openings, it is recommended to consider the following:
- To create, non-standard shaped blocks are used.
- The cavities are filled with reinforcement and filled with concrete mixture.
- To facilitate installation, it is advisable to use support structures.
- Between the upper surface of the opening and the next row it is necessary to lay thick reinforcement: this will avoid deformation.
Roofing
Before a bathhouse made of gas silicate blocks is finally built with your own hands, you need to determine which roof to install. The most popular options:
- A single-pitch structure supported by a mauerlat. The angle of inclination is 10-15 degrees: such a roof is protected from the wind, while the snow and ice formed in winter are easy to clean.
- Gable. It is necessary to install a rafter system, a roofing pie with layers of steam, heat and waterproofing, and install an outer layer.
Slate, corrugated sheets, ondulin, soft roofing, and other lightweight materials can be used as an external covering.
Interior decoration
From the inside, when choosing a finish there are also a lot of design solutions. You can build a frame and cover everything with clapboard. This option is most often used in the steam room. Or cover everything with tiles - this is often done in the washing department. Again, whatever is easier to build with your own hands is what they come up with.
But there is also a prerequisite: vapor barrier. After all, the wall material absorbs moisture well and releases it poorly. The best option, especially in the steam room, is again to recognize foil. It will also serve as a heat reflector. Therefore, it is simply a must in the steam room. Other materials may be used in other rooms.
Well, in general, when building a bathhouse, you should be guided by general construction standards and rules. And then the built bathhouse will not let you down and will last for many, many years. Just be patient and careful about the entire project. And everything will work out.
Finishing a bath from gas silicate blocks
Inside and outside the walls must be protected from condensation and moisture; To do this, a sheathing is mounted to the surfaces, then sheets of vapor and waterproofing are placed inside. Insulation is usually carried out from the outside: a ventilated facade is installed, the sheathing is covered with heat-insulating material (mineral, stone wool). The thickness of the insulation depends on the climate, the standard option is one layer; Vinyl or metal siding can be installed on top. Inside, after installing the sheathing and waterproofing, the walls are lined with linden or aspen clapboard.
Bath floors can be cast or wooden; laying is done at an angle so that water flows down. It is important to build a gutter for outflow: if moisture accumulates under the base of the building, freezing will occur in winter, threatening the lower row of blocks with destruction.
After this, you need to introduce communications inside. The following rules must be adhered to:
- The wiring is arranged from the central network, the cables are pulled in a corrugated pipe. It is necessary to protect the wires from moisture and condensation, otherwise a short circuit may occur that could lead to fire. Sockets, switches, adapters are mounted in the dressing room, lighting fixtures in the steam room are covered with a heat-resistant lampshade.
- Water supply is possible from a centralized network, borehole, well. If there is not always electricity on the site, or there is no connection to the municipal pipeline, you can install a storage tank so as not to carry water in buckets. Heating of water can be done using electricity, a stove or a solar collector.
Insulation and vapor barrier
External insulation is performed only for a heated bath. At the dacha this is not financially feasible. The block building is insulated using a special technology. Use mineral wool and polystyrene foam of a certain thickness. The first is sold in rolls or in the form of mats, and the second - in sheets. Decorative cladding is made on top of the insulation.
Vapor barrier is not waterproofing. Each type has its own purpose. A budget vapor barrier can cope with the task, while using waterproofing for other purposes reduces all the work to zero.
The procedure for internal insulation:
- Cover the walls with waterproofing film.
- Make a wooden sheathing.
- Lay a vapor barrier (foil) and insulation.
- Organize finishing work.
Construction time
A bathhouse is built from gas silicate blocks with your own hands in a period of 2 weeks to 1.5 months. The exact construction time is determined by the following factors:
- Foundation type. A columnar base can be built in 2-3 days, hardening of concrete or masonry mixture lasts 7-10 days. The strip foundation hardens within 3-4 weeks (the speed is affected by climatic conditions, weather, degree of humidity, depth of placement).
- Dimensions of the building, number of workers involved in construction.
- Complexity of interior/exterior decoration, materials used.
- Design features of the bathhouse layout, time costs for installing equipment (boiler, pipes, communications).
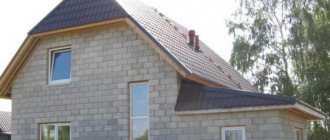
Conclusion: the modern market offers not only classic, but also modern building materials, and you can build a bathhouse from gas silicate blocks yourself. The finished structure is durable, retains heat well inside, and externally the building looks neat and presentable. The use of various finishing materials allows the construction of a structure that is harmoniously combined with other elements on the site and the residential building. Due to the low investment of time and money, construction with gas silicate is one of the most profitable and practical solutions.