Articles
All photos from the article
Every home craftsman who is at least a little familiar with construction can build a small bathhouse from timber. However, before starting work, you need to competently draw up a construction project and calculate the required amount of materials so as not to encounter a shortage or, conversely, to avoid unnecessary costs. Actually, this article is devoted to the topic of designing a bathhouse, in which we will familiarize ourselves in detail with all the nuances of this work.
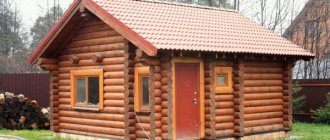
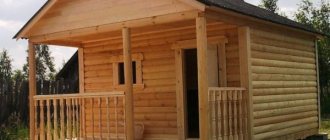
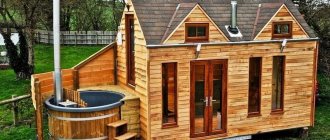
Bathhouse made of timber, size 3x4
General information
Any construction, even if it is a bathhouse measuring 3x4 meters, requires the availability of design documentation. It is necessary not only for calculating materials and drawing up estimates, but also as instructions for performing construction work.
A drawing of a bathhouse made of 3x4 timber, which will be in front of your eyes during the construction process, will allow you to avoid mistakes at all stages of the work. Therefore, you should not neglect the preparation of the project even when constructing such small buildings.
Three-dimensional design of a 3x4 bathhouse
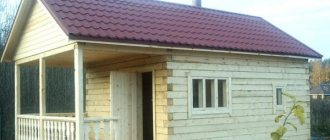
The process of building a small bathhouse
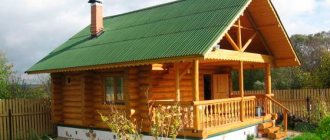
When building small baths, savings can be seen at almost every stage of the work. This applies to both the construction of the foundation and the finishing work inside the premises. For a small bathhouse project, a lightweight strip base is most often chosen. Serious cost savings can be achieved at the stage of purchasing building materials. Although the buildings being erected are oversized, most often the expected difficulties do not arise during the connection of rows of logs during their laying and selection of suitable lumber.
Small baths provide an undeniable advantage to the owner, which is associated with the heating process. For such structures, minimal power equipment is sufficient, which costs much less than traditional furnaces. An additional opportunity for savings opens up when choosing the technical support for a bath. As a rule, the most primitive and easy-to-manage option is chosen here.
Creating a Project
As an example, let's look at how to complete a 3x4 bathhouse project made of timber, which involves a detailed description of the construction.
In the process of this work, it is necessary to decide on the following points:
- planning of the future bath;
- features of the base;
- roof structure.
Below we will consider each of these design stages separately.
Layout
Of course, a bathhouse made of 3 by 4 m timber is a small building, however, this area is quite enough to accommodate a steam room, shower and locker room. Therefore, it is necessary to think in advance about how the rooms will be located in order to make the most practical use of the space.
First of all, you need to decide on the size of the steam room, which depends on its planned capacity. For example, if the steam room is small - for one or two people, then you can arrange another relaxation room in the bathhouse.
Layout of a bathhouse with a relaxation room
In the proposed bathhouse project, the rooms are designed as follows:
| Room type | Dimensions |
| Steam room | Occupies 3.33 m2 |
| Shower room | 1.81 m2 |
| Restroom | 5.04 m2 |
However, with this layout, things will have to be left in the rest room, since there is no locker room. The only thing that can solve the problem is an attached vestibule, which can be adapted for these purposes.
If a more spacious steam room is required, then in addition to the shower room there will only be room for a locker room. True, many developers, in order to increase the usable space inside the bathhouse, resort to one trick - they make the building corner, for example, an excellent option is the size of a bathhouse made of timber 3 by 3 by 3 by 4.
This solution is suitable for cases where the bathhouse is located in the corner of the site. Such a structure does not take up much more space, but at the same time has sufficient area to arrange all the necessary premises.
An example of a three-dimensional corner bath project
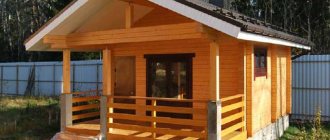
In this case, the rest room can be made both closed and open, i.e. in the form of a terrace. The second option can be implemented in a summer bath.
If the recreation area is expanded by a meter in length and width, then a barbecue will fit here. In this case, you will get a bathhouse made of 4 by 4 by 3 by 4 timber. Of course, an increase in size will also lead to increased construction costs.
Thus, the layout of the bath depends on the following points:
- purpose - only a steam room or, for example, a recreation area at a summer cottage;
- the size and features of the site allocated for construction;
- budget allocated for the construction of the bathhouse.
To complete the space planning work, you should draw a plan indicating the size of the rooms.
Diagram of a pile-screw foundation
Foundation
The foundation for a small bath can be of several types:
- pile-screw - consists of metal pipes that are screwed into the ground to the required depth. From above, all piles are connected by a grillage. The advantage of this design is the possibility of building a bathhouse on a slope, however, it can only be realized if the soil is strong enough;
Diagram of a columnar foundation
- columnar - columns built from brick or concrete blocks are used as the base. As in the previous case, all the pillars of the base are united by a grillage;
In the photo - strip foundation - strip - is a closed monolithic contour, which is located under all load-bearing walls. Brief instructions for arranging such a foundation look like this:
- trenches are dug to the depth of soil freezing;
- a sand-crushed stone cushion is poured into the bottom of the trenches;
- formwork is installed;
- reinforcement is performed;
- The formwork is filled with concrete.
The choice of foundation depends on the type of soil. If the soil is unstable, a strip foundation should be poured. If the soil is stable, the best option would be a columnar or pile foundation, the price of which is much lower.
Roof frame diagram
Roof
The roof is a conventional gable structure. As a rule, in such baths the frame is based on hanging rafters, which are fastened together by a ridge purlin and lathing. To strengthen the structure, tie downs are installed between the rafter legs.
At the roof planning stage, you need to draw up a diagram on which all the frame parts should be displayed and their dimensions indicated.
Note! If the bathhouse will be used not only in the summer, the roof must be insulated. To do this, you can use mineral mats, expanded clay or other heat-insulating material.
Beam with a section of 100x150 mm
Advantages and disadvantages
It would take a long time to list the advantages and disadvantages of blocks in bath walls. Everyone will find their own qualitative differences in this material, both good and bad.
It’s still more pleasant to start with the positives:
- foam blocks do not shrink at all;
- the bathhouse is ready for use immediately after construction, external and internal decoration and installation of the stove;
- minimum construction period;
- the cost of the finished structure is two times lower than a wooden frame or brickwork;
- absence of harmful chemicals in the production of concrete blocks and, as a result, absence of unpleasant odors;
- low weight of the material, allowing for easy masonry and the use of the simplest foundation;
- has high heat-repellent qualities;
- are not subject to the growth of mold, mildew or other microorganisms;
- The thickness of the walls is good because you can use just one block at a time, this will be enough to create a warm, comfortable room.
But there is often a fly in the ointment. Therefore, we note the disadvantages:
- If the blocks are not treated with a special hydrophobic solution, they can easily absorb moisture. In winter, even with double insulation, it can freeze and ruin the walls of the bathhouse. The structure may simply crumble.
- When using concrete blocks in such a building with high thermal parameters, the problem of condensation on the walls arises.
Material calculation
After preparing the project, you can calculate how many cubes of timber are needed for a 3x4 m bathhouse. To do this, you first need to calculate the number of pieces of timber.
For example, a bathhouse is being built from timber 3 by 3 by 4 m, i.e. The height of the walls is 3 meters. The section of the beam is 100x150 mm.
In this case, the calculation looks like this:
- at the beginning we will find out how many pieces of timber will be needed for one wall - 3000/150=20 pieces;
- Now you can calculate the required volume of timber for a wooden wall 4 m long - 0.10x0.15x4x20=1.2m3x2=2.4m3;
- in the same way, the volume of material for three-meter walls is calculated - 0.10x0.15x3x20=0.9m3x2=1.8m3;
- Now you can find out how much 100x150 timber is needed for a 3x4 bath - 1.8+2.4=4.2 m3. Of course, the material must be purchased with a small reserve, so the resulting value must be rounded to 5m3.
Note! The required volume of timber should be adjusted depending on its length. For example, if the length is 6 meters, then the volume should be calculated as for six-meter rather than four-meter walls.
Now that we know how many cubes of timber are required for a 3x4 bathhouse, we can calculate the total cost of the material for the walls. To this amount you need to add the cost of materials for the foundation, roofing, and interior decoration.
This way you can find out how much it will cost to build a sauna with your own hands from 3x4 m timber.
Advice! For the lower crowns of the bath it is better to use hard wood, for example, larch or oak. This will increase the strength and durability of the walls.
Here, perhaps, is all the basic information on the design and calculation of a small bathhouse made of timber.
Interior decoration
Despite the many trends in the design of modern baths, the most popular is still the traditional decoration in the Russian style with ordinary benches in the steam room and traditional bath utensils.
In the classic version, the Russian bath has three main zones:
- dressing room or dressing room;
- washing compartment;
- steam room
In this case, the washing room and steam room can be combined, and the dressing room is divided into a relaxation room and a separate locker room.
By choosing an antique design for decoration, you can bring wooden utensils (ladles, tubs, tubs) into the interior of your bathhouse, purchase bath furniture with carvings or forging elements, decorate the walls and ceiling with bundles of brooms and aromatic herbs. Textile accessories can include weaving and embroidery.
For those who want to use modern finishing materials, such as ceramic tiles or chrome faucets, in the design of a Russian bath, you should remember that all elements must be in harmony with the overall design line
Remember that it is extremely important to choose the best combination of simplicity and modern design elements to introduce a casual touch of bad taste into the interior
Lighting is also important: it should be warm and subdued, emphasizing the intimacy and tranquility of the atmosphere - first of all, this rule applies to lighting in the steam room. To diffuse bright light, you can use special filters
The procedure for assembling a log house
Two layers of waterproofing are laid on the foundation. It may be ordinary roofing felt, but in its modern version it is very unreliable and breaks after just a few years. To waterproof a log house, it is better to use a more modern version, something like Gidroizol. In areas with high water levels or large amounts of precipitation, it is advisable to do a combined waterproofing: first coat the foundation with bitumen mastic, and stick waterproofing on it. For reliability, you can use two layers (the second one is also for bitumen mastic).
Example of waterproofing
Before laying logs or beams, they must be treated with antiseptics and fire retardants. But the fact is that if you then plan to sand the log house, it is better not to treat it: treated wood requires many times more effort when sanding. On the other hand, there are parts that will be inaccessible after the frame is assembled. If they are not treated until the wood is dry, fungi may develop or it will darken. Darkening is not scary, it can be bleached, but fungi are worse. Especially for a log bathhouse, where there will be periodically high humidity. The solution then is to coat with impregnation only those parts that are closed, and impregnate the free surfaces after grinding.
After the logs/beams are soaked and dried, the actual assembly of the log house begins. The first crown is laid on the waterproofing, its geometry is checked - the diagonals are measured, the angles are checked. Then it is secured to the foundation with previously laid studs. If there are no studs, drill holes and install anchor bolts (holes are drilled under the caps so that they are recessed). Next - on technology. If you are assembling on dowels, then install them in two rows.
Anchors must be driven to a depth not less than the height of the beam/log
The first crowns can be laid by hand without any problems. As you gain height, it becomes increasingly difficult to lift logs. The problem is solved simply: two inclined beams are installed. Two slings are nailed from the inside to the lower rims of the frame and thrown over the wall. They are threaded under the log/beam that needs to be lifted, and pulled up along the inclined bars (see photo).
This is how logs or beams are lifted onto a log house
The log house is built with solid walls - no windows or doors. They are cut out after the walls are completely removed and the roof is installed. If the log house is left to spend the winter without a roof, you don’t have to cut out the windows/doors: there will be enough ventilation anyway. But if the log house is placed under a roof, then window and door openings are necessary for normal drying.
Before cutting them out, the frame is fastened (a fixing bursa is nailed in, which holds the crowns in a stationary state). After the opening is cut, a frame is installed (a beam that holds the opening and to which the door or window frame is then attached). The beam is held in the groove only due to the force of friction; it is not fixed by anything else. So the logs/beams remain in place and the log house can shrink.
A groove is cut out into which the timber is driven. It is no longer held in place by anything - no nails, no self-tapping screws.
If you cut openings, be sure to install a window frame. At least in this version, as in the photo above - a block driven into a groove
Just pay attention once again: it is not attached to anything. Maintained only by friction
That is, it is simply driven into the groove. If you leave the openings unsecured, the logs/beams will most likely go in different directions and you will become the owner of walls like the one in the photo below. It is possible to level them, but it is long and difficult.
What happens if you don’t put the sapling in place for the winter?
In this case, the doors and windows themselves are not installed: a draft is necessary. If you want to prevent visits, cover the doors with mesh, membrane, and cross the openings with boards, but air must pass through.
After the walls are kicked out, the assembly of the roof truss system begins. The upper crown is used as a Mauerlat. If necessary, holes are cut in it for installing rafter legs. Roofing material does not need to be installed. You can leave the rafters with sheathing covered with a helicopter-protective membrane over the winter. You just need to fasten the membrane according to all the rules: start from the bottom, move up, lay the sheets overlapping one on top of the other, gluing the joints with double-sided tape. Fasten with wide-backed staples from a powerful stapler.
The log house is ready for wintering
Next, caulking of the log house awaits you and you can calm down on this until spring. In the spring - secondary caulking, if the main shrinkage is already completed, by the summer it will be possible to begin finishing work.
Wall cladding
Wall cladding
Let's start with the internal ones. For the steam room and washing room, you need to use only natural lining; for the rest room, you can use any other materials, from plywood or OSB to plastic lining. Let’s look at cladding technology using lining as an example; it’s easier to work with all other materials.
Prices for lining
lining
Preparing the supporting frame and installing the lining
This is an important operation and requires great care. For the frame, use 20x50 mm slats, make preliminary markings. The wall must be level, all large bulges must be eliminated.
Step 1. Nail the outer slats at the corners to a level, stretch a rope between them and install the remaining slats along it, the distance between them is 40÷50 cm.
Step 2. Check the distance between the floor and ceiling at the corners of the bathhouse. If there is a difference, eliminate it using the first and last rows of lining. Leave small gaps (1÷2 cm) between the lining, floor and ceiling. The gaps will be covered with baseboards. Nail ceiling plinths (baguettes) to the lining, and not to the ceiling, otherwise, during fluctuations in the size of the walls, deformation of the cladding is possible.
Step 3. To fix the lining, use nails 1.5÷2 cm long, you need to drive them into the groove of the lining.
For external cladding, you can use any materials; the stages of work are normal. If the bathhouse is small and cheap, choose inexpensive materials. Modern construction technologies allow them to be made beautiful and of good quality. Windows and doors are finished with platbands.
Cladding inside the bathhouse
Steam room lined with clapboard
Finishing direction Illustration Basic information Vertical
Vertical fastening of the lining
Vertical fastening of panels has a big drawback - the boards heat up unevenly along their length, which negatively affects their service life. Vertical cladding is optimally suited for steam rooms operated primarily in conditions of high temperature and low air humidity, i.e. in sauna mode. To ensure more efficient air circulation in the space between the insulation and the lining, several holes are usually drilled in the sheathing. Horizontal
Horizontal
In the case of a horizontal arrangement, temperature deformations of the lining material will be much less noticeable. Horizontally oriented finishing allows you to visually expand a small steam room. When the panels are fastened horizontally behind them, more efficient air circulation will be ensured - in this situation, the sheathing will be attached to a vertically oriented frame, as a result of which the gap will also be vertical. In addition, with this orientation of the frame it will be much more difficult for rodents to get into the space behind the skin. Horizontal lining is attached much faster and easier than vertical
Important! If you decide to orient the trim panels horizontally, make sure that the groove “looks” down.
Do-it-yourself 3x4 frame bathhouse: we make it for many years
The process of bath procedures is the most accessible way to improve muscle tone and improve your well-being.
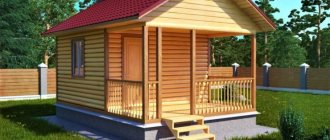
That is why those people who have an empty piece of territory make a bathhouse on it. For those people who want to build such a building on their own, frame types of steam rooms are well suited. In this article we will look at how to build a 3x3 frame bathhouse with your own hands, as well as similar modifications, but with dimensions of 3*4 and 3*5.
Components of a steam room
Information on the purpose of the calculator
Online calculator for profiled and laminated timber
designed to calculate the quantity and volume of lumber for the construction of houses, bathhouses and other buildings. The amount of inter-crown insulation, dowels, crowns, cost and anti-corrosion impregnation is automatically calculated based on the average value. For more accurate calculations, be sure to contact specialists in your region.
When filling out the data, pay attention to the additional information with the Additional information sign
To understand the advantages and disadvantages of profiled timber compared to laminated veneer lumber, you should start with the basic concepts about the production of both.
Profiled timber is made from coniferous trees. In most cases, it has standard section dimensions:
- 100x100 mm - best suited for building a bathhouse or summer country house
- 150x150 mm - suitable for a good home
- 200x200 mm - for the construction of large wooden houses or cottages
If desired, you can individually order timber of a different section. The appearance of the timber can be either with a straight front side or with a D-shaped one. A log of the required thickness is processed on planing and milling machines, after which it is ground on the required sides. The side of the beam that will be located inside the future house and may not require further finishing is usually subjected to high-quality sanding. For convenience and reliability of installation of a log house and for protection from cold and moisture, the profile most often comes with 1 or 2 tenons for a lightweight structure or a “comb” for a residential building. The finished log house must shrink for further completion of construction, usually this period is about 1 year. To reduce this period to several months, you can dry the timber in advance in special chambers.
To produce laminated veneer lumber, logs are sawn into boards, which are also called “lamellas”. The boards are cut and placed in a drying chamber, where the soft drying process produces material with a moisture content of about 10%. The boards are then planed again to the required dimensions, sorted, and then glued into timber using a hydraulic press. For gluing, special waterproof adhesive compositions are used. To make laminated timber resistant to rotting and significantly increase its strength, the boards are laid in a special way - each is laid opposite to the cross-section of the fibers of the neighboring one.
When assessing the strength of materials, it is necessary to recognize the best performance of laminated veneer lumber.
When comparing the moisture content of the material and the shrinkage time, it has already been noted that laminated veneer lumber has a moisture content of about 10% and, accordingly, a short shrinkage time, which makes it possible to reduce the construction period of a house. Profiled timber has the natural moisture content of wood, and even drying it can reduce the moisture content only to 20%, so shrinkage cannot be avoided. When comparing shrinkage periods, we must not forget the fact that solid material, due to its greater massiveness, is practically not susceptible to cracking, but on laminated veneer lumber there is a possibility of small cracks occurring.
Due to technological manufacturing features, each type of timber may have different overall dimensions. The profile usually has a length of up to 6 meters, and a cross-section of 100x100, 150x150 and 200x200 mm. Manufacturing timber of a different section size (for example, with a step every 10 mm) can increase the amount of waste, which cannot but affect the price. The length of laminated veneer lumber can reach 12 meters, and the cross-section is usually made from 80 to 280 mm.
In terms of cost, solid timber is almost 2 times cheaper due to the less complex manufacturing process.
In terms of environmental friendliness, profiled timber is not just a favorite, but rather a champion, preserving all the beneficial properties of such an excellent material as natural wood. For processing, you may only need special mixtures to protect against fire and rot, which the owner of the house can choose. In the production of laminated veneer lumber, adhesive compositions can be used, which are divided into several groups according to the degree of danger, and it is not a fact that the manufacturer did not decide to save on the cost of the glue.
In conclusion, we can say that each of the 2 types of timber considered has its undoubted advantages with a small number of disadvantages. And only the owner can decide what material to build the house from in order to continue living in it.
The following is a complete list of calculations performed with a brief description of each item. If you haven't found the answer to your question, you can contact us via feedback.