Home |Construction |Gas silicate bath
Date: April 24, 2017
Comments: 0
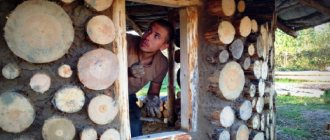
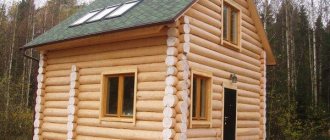
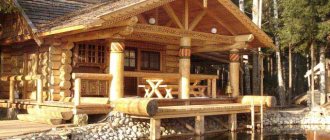
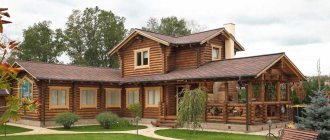
Many owners of private houses and summer cottages dream of building their own bathhouse. It’s nice, after a hard day of work or work on a personal plot, to take water treatments and enjoy a steam bath in your own bathhouse. People perceive a private bathhouse as a room built from a wooden frame. However, it is not necessary to use logs, the acquisition of which requires increased costs, and the construction of a building requires professional skills. After all, there is a proven alternative solution - a do-it-yourself bathhouse made from gas silicate blocks. Its construction is quite possible without hiring hired workers.
Constructing it yourself is not very difficult. This is a budget idea that can quickly be implemented on your own. The reasonable price of gas silicate and the ability to quickly carry out construction attract private property owners with limited income.
The stages of construction of your own gas silicate bathhouse can be easily mastered. Compliance with the technological sequence of operations and the use of high-quality materials will allow you to build a warm room in which it is comfortable to take water procedures. So, let's look at how to build a gas silicate bathhouse with your own hands. Let us first dwell on the properties of the material and evaluate its characteristics.
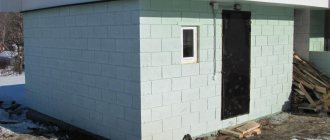
With the right approach, you can build a bathhouse from gas silicate blocks with your own hands, especially since the material is lightweight and you can handle the work without additional help
Material composition
Among the building materials suitable for building a bathhouse, blocks made from gas silicate stand out. The material is a type of cellular concrete, hardening in special containers - autoclaves. Gas silicate is made based on a mixture including:
- Portland cement
- Quartz sand.
- Aluminum powder.
- Lime.
- Water.
The quality of gas silicate is determined by the peculiarities of manufacturing products in production conditions, where manufactured products are controlled by laboratory methods.
Estimated cost
It is impossible to accurately answer the question: “How much will it cost to build a bathhouse?” It all depends on personal preferences, financial capabilities, complexity of the project and the region in which construction will take place. According to statistics, the average price for each square meter will cost about 10,000 rubles. If the project is quite complex, then the price can be several times higher. When building a bathhouse from aerated concrete blocks without professional workers, the main expense item will be the purchase of materials. It is much cheaper to build a bathhouse from sibit than from wood. The final price can be 3 times less.
The only thing you have to pay for in any case is the design of the building. It is better to entrust this process to professionals. If you are the happy owner of a personal plot, then you need not only to build a bathhouse, but also to improve the entire territory in order to enjoy the appearance of the plot. It’s not difficult to build a bathhouse from an aerated block with your own hands. It is worthwhile to carefully approach the layout and choice of materials. Building a bathhouse from aerated concrete should not cause problems with due diligence and preservation of technology!
Advantages of gas silicate
Let us dwell in detail on the features of gas silicate, which ensure the possibility of its use as a building material for the construction of a bathhouse.
Even at the planning stage, the finishing of the bathhouse is thought out, since it will have to be done on both sides, and a lot of money will be required
Main advantages:
- affordable, compared to wooden logs and traditional bricks, price, reducing the cost of building a bathhouse;
- ease of masonry associated with clear geometry and increased dimensions of lightweight products;
- resistance to mold, mildew, impossibility of reducing strength characteristics as a result of rotting of environmentally friendly building materials;
- resistance, unlike wood, to the effects of open fire, increased temperature, which is achieved indoors as a result of heating;
- increased strength characteristics, resistance to the effects of multiple cycles of freezing with subsequent thawing, makes it possible to ensure the stability and long service life of the bathhouse being built, which is occasionally subjected to sudden temperature changes when the room is heated;
- increased level of sound insulation, making it difficult for extraneous noise to penetrate into the room;
- the insignificant mass of the blocks allows for quick laying and the formation of a lightweight foundation;
- increased thermal insulation characteristics associated with the cellular structure of the porous composite. The air cavities located inside the concrete mass are a heat insulator, allowing the walls to better retain heat inside the room and warm up faster.
Gas silicate blocks are produced from a mixture of materials: lime, gypsum, cement and aluminum powder
Is it possible to build a bathhouse from aerated concrete?
Doubts about the advisability of using aerated concrete in the construction of baths arise due to the requirements of rules 15.13330, which “in plain English” state that the use of cellular concrete blocks for the construction of walls of buildings with wet operating conditions is not allowed. But, knowing about the excellent physical properties of aerated concrete, which are as close as possible to the characteristics of wood, many experts, including aerated concrete manufacturers, do not agree with this.
- Why, then, is wood not banned - after all, its water absorption is even higher? In addition, it is fire hazardous, exposed to biological effects, and greatly changes linear dimensions when swelling and drying. It has only one advantage over aerated concrete - a pleasant aroma and aesthetic appearance. That’s why the board exists, to give similar qualities to walls made of other materials.
- Bans have never bothered our compatriots, and many regulatory documents that have not been revised for decades simply lag behind technological progress. Any sane person understands that if a material cannot be wetted, then it must be made so that it cannot absorb moisture.
- Today there are many opportunities to achieve this. For example: line the walls from the inside of a bathhouse with expanded polystyrene, and cover them on top with foamed foil polyethylene such as Tepofol, Penofol, Isolon. Even with hermetically sealed joints and panels, some tiny part of the steam will still get into the walls, but if you give it the opportunity to freely escape from the outside, no problems with moistening the walls will arise.
- Therefore, it is better to finish the façade of the bathhouse with materials mounted on the wall, or use vapor-permeable plaster. In cold regions, insulation can also be used outside, but it should only be mineral wool, as it allows vapors to pass through well. The main condition that will not allow it to be moistened by condensation moisture will be the presence of a ventilated gap between the insulation and finishing material - or the same plaster with a high coefficient of vapor permeability.
Expert opinion Vitaly Kudryashov builder, aspiring author
Ask a Question
Important: Polymer insulation materials practically do not allow steam to pass through, so they can only be glued to aerated concrete from the inside. If you glue the same foam plastic on the outside, it will seal the pores of the aerated concrete, preventing steam from escaping and forcing it to condense in the thickness of the wall.
The conditions for normal operation of aerated concrete walls are quite simple, and if they are met, the operation of a bathhouse built from this material will be as comfortable as when using wooden beams.
Pros and cons of building a bathhouse from aerated concrete
Since the main competitor of aerated concrete in the construction of bathhouses is wood, we will focus on it in comparison. In general, all the advantages and disadvantages of an aerated concrete bath can be characterized as follows:
| pros | Minuses |
| Despite the fact that the physical properties of aerated concrete are very close to wood, the cost of a bathhouse built from it is half or even three times lower. | It takes at least six months to reduce the initial humidity of 25-30% to the standard 5-6%. Therefore, it is not recommended to start exterior finishing immediately . |
| Processing aerated concrete mechanically: sawing, planing, cutting, drilling is as easy as wood. | In order for the bathhouse to be well ventilated, it is necessary to arrange supply and exhaust ventilation. And it is better if it is forced, because the window opening is a heat loss zone. |
| Autoclaved aerated blocks practically do not shrink. Therefore, after construction there is no need to spend a lot of time waiting before starting interior decoration. | Increased costs for internal waterproofing, since it is important to prevent the aerated concrete masonry from getting wet. |
| The material is environmentally friendly and has a very low natural background radiation. | The need to construct a rigid monolithic foundation, while a wooden bathhouse can also be placed on metal piles. |
| Aerated concrete is resistant to chemical and biological influences. | The construction of the box is inexpensive, but considerable costs will be incurred for moisture protection and finishing. |
| Due to the enlarged dimensions, the speed of work is much higher than in the case of brick or timber. | When purchasing substandard blocks, the consumption of masonry mixture increases , and first-class products are more expensive. |
All building materials have disadvantages. Here they are fully compensated by their advantages. Many experts believe that an aerated concrete bath is even better than a wooden one, and we tend to agree with this.
List of works
The general set of measures, according to which a bathhouse is built from gas silicate blocks with your own hands, includes the following stages of work:
- preparatory stage, which involves performing calculations, preparing the necessary materials and tools, determining the required type of foundation, as well as preparing the site;
- construction of a foundation, the correct manufacture of which ensures the stability of the bathhouse being built;
- construction of walls that are the load-bearing part of the structure being built, as well as the installation of a roof;
- insulation of the room, implementation of waterproofing measures that ensure a comfortable temperature regime in the room and reliable protection of gas silicate from moisture.
We will separately consider the main stages of the events.
To install a strip foundation, it is necessary to mark and dig a trench to a depth below freezing of the soil
Bath installation stages
The construction of a bathhouse from gas silicate blocks is easy to do with your own hands. Installation is carried out in several successive stages:
- Planning and budgeting.
- Foundation installation.
- Laying walls.
- Roof installation.
- Interior and façade finishing.
Any of the stages should be examined in more detail.
Bathhouse planning
Plan of a bathhouse made of gas silicate blocks.
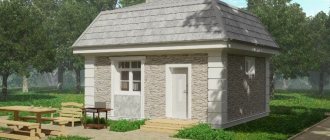
You need to plan a gas silicate bathhouse just like any other. We determine where it is best to place it on the site and select a project. You can take a standard one from the Internet; many construction sites have a calculator with which you can calculate the required amount of materials. For construction with your own hands, choose a small bathhouse of the correct shape, for example 3x3 or 4x4 m. It is easy to accommodate a steam room of 4 m², a relaxation room of 10-12 m², a dressing room and a shower room.
Even at the planning stage, the finishing of the bathhouse is thought out, since it will have to be done on both sides, and a lot of money will be required.
It is not worth making a thick layer of thermal insulation, since gas silicate blocks in one row maintain the temperature of 3 rows of brickwork.
When the bathhouse is planned, you can begin purchasing materials and installing the foundation.
Foundation installation
The strip foundation is optimally suited for a bathhouse made of gas silicate blocks.
The foundation for a bathhouse made of blocks can be strip or monolithic. Other types of material are not suitable, despite its light weight. Although the blocks are quite dense and strong, they do not withstand loads at the corners of the building. Therefore, bathhouses from it are not built higher than one-story or with an attic.
To install a strip foundation, it is necessary to mark and dig a trench to a depth below freezing of the soil. A 10-15 cm sand cushion is poured onto the bottom and compacted. Then formwork is made from unedged boards and bars. The formwork must rise above the soil by at least 50 cm.
A reinforced bundle of reinforcement and binding wire is placed into the structure. Everything is filled with concrete. To save money, you can make concrete yourself using a concrete mixer. For this you will need: cement, ASG or sand and crushed stone, water. You can mix everything by hand, but it’s more difficult. The foundation is poured in layers, but it is better to complete the work in one day. Next, the foundation is allowed to mature. To do this, cover it with cellophane and moisten it once a day, opening it slightly. After 2 weeks, open completely and allow to dry.
The monolithic foundation is poured with a single reinforced structure. It will cost more, but even with severe heaving of the soil, the bathhouse will stand reliably. In addition, you will not have to install a separate foundation under the stove, as in the first case.
In any case, the height above the ground level should be at least 50-60 cm, since gas silicate blocks absorb moisture and it is better to raise them as high above the ground as possible.
After the foundation hardens and stands, you can begin laying the walls.
Block laying
You can assemble a box of large gas silicate blocks in 1-2 weeks, even alone. The main thing is to observe some subtleties:
- The load-bearing qualities of the blocks are good and according to the rules it is enough to lay a wall of 38 cm, but our climate dictates its own conditions. The bathhouse must be warm, so the optimal wall thickness is at least 53.5 - 59 cm.
- Since the blocks do not tolerate moisture well, it is recommended to lay the first 2-4 rows with red hardened brick. It is more resistant to moisture and the bathhouse will last longer.
- The blocks are placed in a checkerboard pattern, constantly checking with a level the evenness of the masonry. They are fastened together not with cement, but with a special adhesive composition. This way the thermal insulation of the bathhouse will be better. The seam thickness will be less. The adhesive composition is diluted according to the instructions on the bag from each manufacturer.
- To increase the strength of the structure, a reinforced masonry mesh or steel rods with a cross-section of at least 8 mm are laid every 2-3 rows. They are also used in areas of future door and window openings.
- The upper rows are reinforced with a special reinforced tie made of anchors and wire. Anchors also need to be installed in the places where the Mauerlat will be attached. They will be linked to. The design can be seen in more detail in the photo.
Roof installation
The roof is made of the simplest design.
The roof structure for a bathhouse made of blocks is chosen to be a simple gable or single-pitch roof. The lean-to is supported on one side by the mauerlat. The angle of inclination is made small, so the roof will be better protected from winds. Roofing felt is laid on top and the selected roof is laid: slate, ondulin, corrugated sheeting. You can read how to construct a gable roof in one of the previous articles.
Since the wall material is afraid of moisture, it is necessary to waterproof the roof and insulate the ceilings. To do this, it is better to use a new membrane waterproofer; it will prevent water from penetrating inside and release steam, preventing condensation from forming.
Installation of external and internal finishing
Finishing the inside of the bath with linden clapboard will create a natural woody smell.
The bathhouse box must be protected from the effects of steam and moisture, not only from the inside, but also from the outside. To do this, the first step is to lay vapor and waterproofing inside and outside. It is difficult to attach the material to the cellular structure, so lathing is required. It is attached to the walls using special gas silicate dowels. For the steam room, a foil membrane is used. A clapboard, linden or aspen, is mounted on top of the sheathing.
It is better to insulate a bathhouse from the outside, using a ventilated façade design. The pie system is selected: lathing or cross lathing. The second is more complicated, but there will be no cold bridges left and the bathhouse will quickly heat up. The structure is covered from above with siding or imitation timber.
Bath communications
Floors can be made of poured or wooden. In any case, it is necessary to lay them at an angle and organize drainage. Water should not be drained under the foundation, as in winter it will fall on the blocks and freeze and destroy them. It is better to construct a separate septic tank from two wells.
The electrical system is carried out from the central one, observing all safety rules. Since the material absorbs water well and releases it for a long time, all wires must be laid in a special corrugated tube. It will protect owners from short circuits and fires. All switches and sockets are installed outside the steam room. The lamp in the steam room is covered with a special heat-resistant and sealed lampshade.
Water is carried out from a central pipe, from a well or a well. In garden plots, you can leave the bathhouse without water supply; before heating it, it is hauled in buckets, the old fashioned way. For convenience, you can install an outdoor shower by installing a barrel made of dark iron and leading the shower to the washing compartment.
Building a bathhouse from gas silicate blocks with your own hands, complete with finishing and insulation, is not as cheap as it might seem at first glance. But if you follow all the rules, it will last no less than a wooden one. And the speed of assembly and slight shrinkage will make it possible to start using the bathhouse immediately after finishing. And the photo and video materials in this article will give a complete picture of the work, even for novice builders.
Design
Before construction begins, a project should be developed that will regulate the design features and dimensions of the future bathhouse. When designing, pay special attention to the following points:
- Connecting the necessary communications that provide a high degree of functionality and comfortable operating conditions.
- The configuration of the building and the type of finishing that harmoniously fits into the exterior of the site.
- The dimensions of the building, taking into account the number of people simultaneously taking water procedures. For a family holiday, a small bathhouse measuring 4.5 x 5.5 meters is sufficient.
- The height of the room is 2–2.2 m, allowing you to place 3 shelves in the steam room, comfortably move around and take a shower.
- Breakdown of the general contour into separate rooms, allowing you to arrange rest rooms, a steam room, and a shower.
- The type of foundation that ensures the stability of the bathhouse being built and takes into account the characteristics of the soil.
A bathhouse made from gas silicate blocks can be built quickly with your own hands if you approach the development of the project responsibly and think through all the details.
You need to plan a gas silicate bathhouse just like any other.
Planning projects
Sometimes when building gas silicate baths, difficulties arise with the layout and location of the premises. The idea can be taken from ready-made projects and, if necessary, modified slightly.
If we are talking about small baths, then they most often have three rooms: a relaxation room, which is combined with a locker room, a washing room and a steam room. Some have a veranda or porch attached.
Layout options for a 6 by 3 bath made of gas silicate blocks
Medium-sized baths may already have a dedicated changing room, as well as a vestibule or hall. A vestibule or hall is desirable, since if the front door leads directly to the rest room, then in winter every opening of the door threatens a sharp drop in temperature. Therefore, at least a small vestibule is needed. If it is not possible to fence it off from the rest room, then you can attach it outside. Let it be small, but closed and insulated.
No one argues about whether a locker room is needed (if space allows). The dispute is about where her door should go. There are actually two options: in the sink and the rest room. Both are imperfect. If the doors of the locker room open into the rest room, after undressing you will have to go through it. If there is no one there, that’s one thing, but if people are resting, that’s another. The second option - the doors open into the washing room - usually does not have this drawback. But in such a room the clothes will be damp. So you have to choose: either a naked fashion show or raw clothes. Although the problem of dampness can be solved by making good forced ventilation in the locker room: the supply hole is at the bottom, the exhaust hole is at the top, and there is an exhaust fan in it.
Bathhouse layout 6*4.45 m
In its entirety, the bathhouse has a large length of 7.4 m since it has a veranda attached to it. It consists of three rooms:
Project of a gas silicate bathhouse 6x4
- rest room 13.66 m2;
- sink area 4 m2;
- steam room 5.8 m2;
- veranda 4 m2.
In this case, a vestibule can be made by moving the steps and installing doors. And the locker room can be fenced off at the end of the rest room opposite the entrance. Then, really, you will have to install a smaller window, or make two small ones: one in the rest room, the second in the locker room.
Bathhouse 5*5 with terrace
In this bathhouse layout, a rather large terrace is made of gas silicate - it has an area of 7.5 square meters. (Projects of bathhouses with terraces are here) Of the interior spaces, the steam room has the largest size - 5.8 m2, all the others are smaller. Non-standard solution. Usually the steam room is made small. But why not? The stove is installed in the wall between the steam room and the washing room.
Projects for a 6x4 gas silicate bath
Premises area:
- rest room/locker room 3.8 m2;
- sink 4.5 m2;
- steam room 5.8 m2;
- veranda 7.5 m2.
There are no options for changes here: the small size of the premises does not allow any liberties. But on the veranda you can have a pleasant time in the warm season.
Project bathhouse 6*6 made of gas silicate blocks with a terrace
In this layout, 6*6 is the size of the bathhouse itself, and the terrace is another two meters. In total, in terms of plan, the entire building will occupy 6*8 meters. The approach is more standard: the largest area is in the rest room. The steam room and the washing room are almost equal in size.
Project of a foam concrete bathhouse with a terrace and a large relaxation room
The stove is positioned so that it is heated from the rest room. The decision is ambiguous. As far as heating is concerned, everything is fine: the rest room will also be warm. But if you need to add firewood, and there are no people outside the steam room in the bathhouse, you will have to go through the shower and go to the rest room. Nothing terrible, but not everyone will like this option. Although installing a stove with a remote firebox is the most popular option recently.
Area of premises in a 6 by 6 bath:
- recreation room 16.2 m2;
- sink 5.5 m2;
- steam room 5.2 m2;
- hall 3.2 m2;
- terrace 12.3 m2
Drawing of a gas silicate bath
What is needed for the job?
To do the work yourself, prepare the following materials and tools:
- ingredients for preparing concrete mortar (cement, crushed stone, sand, water) necessary for the foundation;
- gas silicate blocks, the number of which is determined at the design stage;
- concrete mixer necessary for preparing the solution;
- shovels and buckets used in the construction process;
- reinforcing bars to strengthen the concrete base;
- pegs and cord for marking the site.
After marking the site, removing vegetation, planning the surface, proceed to further work.
Insulation for block walls
A distinctive feature of the bath is the high temperature level during its use. Therefore, for a steam room, the choice of insulation must be limited. We generally recommend not using the following materials for internal insulation of bathhouse walls:
- mineral wool;
- polystyrene foam and polystyrene foam;
- glass wool
When heated, mineral wool begins to release phenolphthalein resins that are part of its composition. They are definitely harmful to the human body. The same situation is with the release of harmful substances from polystyrene foam and expanded polystyrene under the influence of temperature.
We can say an unequivocal “no” to glass wool. It is dangerous to use: protection of hands, skin, eyes and respiratory tract is required. It is subject to deformation under the influence of high temperature (which is typical for a bath). Over time, it may begin to emit an unpleasant odor.
Nevertheless, these insulation materials are popular due to their availability and low price.
Ecowool can be a good material for insulation: it is environmentally friendly, and when applied using the “wet” method, it fills the entire surface, creeping even into small cracks. But this is also its disadvantage: you cannot do without special skills and equipment to apply it.
Peat blocks and foam glass have proven themselves to be modern and high-quality materials. They are not exposed to moisture, are fireproof, but, alas, quite expensive. At the same time, peat blocks are rare - only a few companies produce them in Russia.
Foil roll insulating materials work well (see link above). They need to be overlapped and glued with aluminum tape.
ADVICE! Tile insulation can be tied together with diagonally stretched threads (use nylon cord) for additional fixation of the heat-insulating material. The ends of the cord can be secured with a construction stapler to a wooden frame or with special fasteners to a metal profile.
Foundation
Various types of foundations can be used as the foundation of a future bathhouse:
- Tape, repeating the perimeter of the building.
The foundation is formed into a wooden formwork with a reinforcement frame by pouring it with concrete mortar. The finished foundation of the bathhouse is immersed 0.5 m in the ground and is located on a compacted sand and gravel backfill. The monolithic foundation is poured with a single reinforced structure - Columnar, representing concrete supports installed at the corner points of the building and in the areas where walls adjoin. Pay attention to the horizontal surfaces of the supporting elements, which should be located at the same level. Concrete is poured into pits with pre-installed reinforcement.
Any foundation must be waterproofed with bitumen or two-layer roofing felt, since gas silicate blocks require enhanced waterproofing.
Start of construction
Having chosen a place to place the bathhouse, start drawing and drawing up a project. This is the main document when obtaining a building permit. After this, you can begin installing the foundation. There are two options for this:
- tape;
- columnar.
Columnar foundation - brick or concrete columns that, like columns, will support the building. The simplest method is asbestos-cement pipes dug in and filled with concrete. It is better to reinforce this type of foundation after laying it. The process of installing a columnar foundation is relatively simple and short. The level of all columns must be strictly in a single plane. This requires careful checking - otherwise the durability of your sauna will suffer.
Strip foundation for the construction of a bathhouse
A strip foundation will require more effort and time. You need to dig a 0.5-meter trench around the perimeter, cover it with a layer of sand, assemble wooden formwork to fix the solution and install a reinforcement frame into it. After this, the trench must be filled to the top with concrete. Regardless of the choice of filling method, do not forget about enhancing the moisture protection of gas silicate blocks. To do this, 1-2 layers of bitumen or waterproofing material are placed on the foundation.
Attention! Due to the low moisture resistance of gas silicate, the foundation of the bathhouse should be at least 0.5 meters above the ground.
Construction works
A gas silicate bathhouse can be built quite quickly with your own hands. Use silicate blocks measuring 20x30x60 cm. Installing them “on edge” allows you to ensure a room wall thickness of 20 cm. For masonry you can use:
- self-prepared sand-cement mortar, the content of cement and sand in which is 1:3;
- a ready-made commercial mixture applied in a thin layer, reducing the thickness of cold bridges.
The blocks are laid in a checkerboard pattern, constantly checking with a level the evenness of the masonry
Stages of work:
- Installation of the bottom row of gas silicate blocks on the foundation surface. Lay the first row starting from the corner, applying the solution to the surface, pressing the blocks tightly.
- Execution of wall laying. Control the horizontality of the rows using a level, shift the seams between the blocks by 15 cm. At intervals of three rows, reinforce with steel rods with a diameter of 8 mm installed in pre-drilled holes in the blocks. Fix the reinforcement with an adhesive mixture. When forming window and door openings, use U-shaped blocks, placing them on the beams.
- Construction of gables, the height of which corresponds to the configuration of the future roof.
The roof structure can be varied to suit the requirements of the project.
Reinforcement of boxes and partitions
Reinforcement of masonry walls and partitions is done to give the building greater strength. Gas silicate is quite fragile; when the soil moves, shrinkage or other deforming forces, the walls can crack. Reinforcement eliminates this possibility.
It is usually made using reinforcing bars or reinforcing mesh; a perforated strip can also be used for this purpose. Every third row is subject to reinforcement. Reinforcing bars are placed in grooves cut along the surface of a row of blocks. The depth of the grooves must correspond to the diameter of the rods. Adjacent partitions at the junction with the wall are reinforced with T-shaped anchors in the same order - every three rows.
Insulation and waterproofing
A bathhouse made of gas silicate blocks requires waterproofing protection and insulation. Sequence of work:
- fill slats measuring 5x5 cm to the walls inside the room and place insulation between them;
- attach a vapor barrier film and aluminum foil to the slats;
- nail the strips that form the basis for fastening the sheathing;
- secure the “lining”.
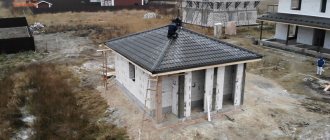
Tile the shower room, the color depends on the tastes of the owner. The finishing of a gas silicate bathhouse on the outside is carried out in accordance with the requirements of the project, which includes waterproofing. Having completed construction and waterproofing measures, proceed to equipping the bathhouse with the necessary plumbing equipment and interior items.
We build with our own hands
Having answered the question whether it is possible to build a bathhouse from aerated concrete, you should move on to the process of constructing the building.
It consists of the following steps:
- Design.
- Calculation of material requirements.
- Purchasing everything necessary, preparing tools.
- Marking, digging a pit, laying out the foundation.
- Waterproofing the base.
- Wall masonry
- Installation of partitions.
- Reinforcement of masonry.
- Reinforcement under window openings.
- Pouring armored belt between floors
- Installation of interfloor slabs
- Insulation from the inside
- Finish lining.
In addition, the stages of installation of communications should be foreseen in advance.
Methods for laying blocks
A do-it-yourself aerated concrete bathhouse can be laid out in various ways. The choice to lay blocks flat or on edge is determined by the climatic conditions of the area where construction is taking place.
In the middle zone and in the southern regions of the country, it is advisable to lay stones in a vertical orientation, creating surfaces 20 cm thick. In this case, additional insulation is not required, since this design has the insulating qualities of 100 cm of brick.
Another solution is to lay the products on the wide side. This allows you to make single-layer walls with a width of 40 cm and 60 cm. This approach is used in areas with long and cold winters, where good thermal insulation is necessary.
Another method is the construction of parallel walls, between which vapor-permeable insulation is laid. The surfaces themselves are connected by ties, anchors or reinforcement. A continuous strapping is made on top.
Waterproofing the base for masonry walls
Thermal conductivity, durability and strength of load-bearing walls depend on the quality of this stage.
Perform waterproofing in the following sequence:
- Cleaning the foundation surface from dust and dirt.
- Applying a layer of mastic.
- Laying 3 layers of roofing felt.
After the first row of stones has been laid, the roofing felt should be turned upward and glued to their surface. This will protect the material from snow, rain and melt water.
Technology and features of wall masonry
To make your own aerated block bathhouse durable and beautiful, you must follow the rules for laying the blocks.
There are few of them:
- The beginning of laying is from the corners, after preliminary measuring the evenness of the base.
- Bandaging each row with an offset of half a stone.
- Reinforcement of walls every 2 rows.
- Using hollow lintels to make openings.
httpv://youtu.be/v >
First row
The quality of laying the first row directly affects the progress of further work, solution consumption and the final result.
This stage is performed in the following sequence:
- The highest base angle is determined.
- Cement mortar is produced. Its task is to link blocks and align them.
- On the upper corner of the base, 2 stones are placed to form an angle. They are aligned vertically and horizontally.
- The remaining corners are made.
- A cord is stretched between them.
- Laying is carried out from top to bottom.
If there are gaps between the stones, they are filled with sawed-off fragments smeared with glue at the joints.
Although the material is light, it is worth working carefully. Due to unevenness, cracks may form on the walls. Do not use mortar to hold the blocks together; there is a special glue for this.
Arrangement of openings for windows and doors
The process of laying blocks does not change significantly when it comes time to create openings. The wall should be laid as evenly as possible and the rows above future windows and doors should be strengthened so that the frame meets the criteria of reliability and safety. When arranging openings, it is recommended to consider the following:
- To create, non-standard shaped blocks are used.
- The cavities are filled with reinforcement and filled with concrete mixture.
- To facilitate installation, it is advisable to use support structures.
- Between the upper surface of the opening and the next row it is necessary to lay thick reinforcement: this will avoid deformation.
Selection of tools and preparatory work
Before starting construction, you must purchase the following materials:
- Blocks.
- Sand, Portland cement.
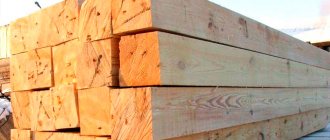
- Lumber (boards, beams, slats).
- Construction adhesive mixture.
- Thermal insulation (mineral, basalt or stone wool).
- Waterproofing (preferred material is rolled).
The preparatory stage includes design work. When creating a project, you need to consider the following aspects:
- Communication connection points (electricity, water supply, sewerage).
- The area of the building, the number of people planning to use the bathhouse.
- Layout. The classic version includes a steam room, a dressing room, a technical room; larger buildings can contain a relaxation room, a room with a swimming pool, a jacuzzi, and a veranda.
- Finish type.