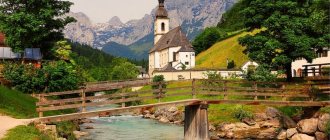
In rural life, the bathhouse acted as a universal remedy for all occasions. In addition to her hygienic function, she was positioned as a healer and midwife; neither wedding nor funeral ceremonies could take place without her. A bathhouse in the village helped to see a potential groom, predicted the weather and prophesied the future harvest. However, first things first.
How to choose wood for village bathhouses built by yourself: instructions with photos
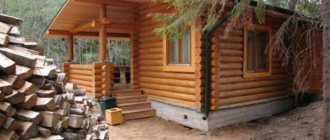
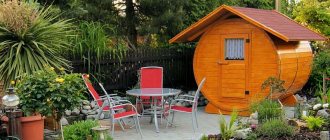
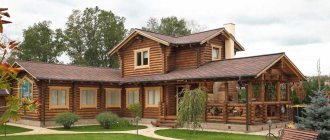
Country baths are made from natural wood, the type of which has a direct impact on health.
Important! Coniferous wood will provide a subtle aroma in the steam room, which can harm people with diseases of the cardiovascular system. Combined with high temperature and a large amount of steam, pine needles are dangerous; even a healthy person in such a steam room can increase blood pressure.
Therefore, the bathhouse is made mainly from hardwood; choose timber or rounded logs. The last option is very expensive, and we will focus on timber.
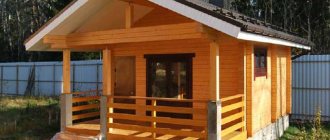
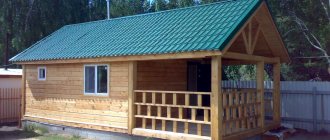
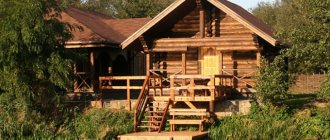
Plan and classic project of a rustic bathhouse with your own hands with photos
Do-it-yourself village baths have a classic layout of premises:
- A dressing room where you leave your clothes and relax after the steam room. A real village bathhouse should have a dressing room, which is a relaxation area.
- The village bathhouse is equipped with a sink in which anyone can wash themselves. Washing after the steam room is especially useful to rinse the body from sweat and salts.
- Steam room with shelves and benches, this is where the temperature is highest.
Of course, the bathhouse can be “equipped” with a shower, a terrace, and a swimming pool can be located next to or inside. We invite you to view the drawings and photos that will help you design and build a bathhouse in the village with your own hands:
Scheme 1.
Scheme 2.
Scheme 3.
Scheme of a stove for a bath.
Drawing of a bathhouse.
Important! The main feature of the bathhouse for the village is the pouring floor, which ensures unimpeded drainage of water at any time of the year.
PREPARING BROOMS AND FLAVORED WATER TO SUPPLY HEAT
We heat the bathhouse with wood, guided by the thermometer. For us, a comfortable temperature is 65+-5 degrees. We lay the floors and wash them.
We are preparing brooms. We mainly use a pair of birch brooms, which we prepare ourselves in the summer, after the holiday of Ivan Kupala. And every time we take a new pair.
We have a steam room and a washing room two in one. By the time we have been steaming and resting for an hour and a half, the heat in the bathhouse has subsided.
My husband also brews by collecting herbs, greens that grow in our garden, whatever comes across: nettle, celandine, wormwood, lemon balm, basil... For the winter, I prepare brooms from herbs and branches for brewing. With this decoction we give the heat and the aroma spreads throughout the entire bathhouse.
It is pleasant to rinse your face and body with the same water.
At the end of the bath, having removed the brewed herbs, I sit straight down on this water in a basin for two or three minutes. My husband says that the body itself knows which herb to attract.
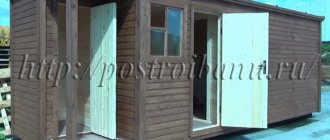
Do-it-yourself sauna without special expenses: myth or truth?
When building a bathhouse, you need to know exactly what you can and cannot save on. So, let's look at budget options for building a bathhouse with your own hands:
- Choose purchased stoves without a remote firebox. The device is inexpensive, and heats up the steam room very quickly, which saves firewood.
- Mount the water tank on the chimney.
- Make a strip foundation for a light one-story bathhouse. Massive buildings filled with modern devices require a columnar foundation.
- Pay attention to insulation. The better the bathhouse is insulated, the more comfortable you will be, and you won’t have to “heat the street.” In winter, cover the windows of the entire bath house with regular packaging film, which will save up to 60% of heat.
- The shower can be replaced with a classic tub, into which you can fill with water of any temperature.
OUR BATH HARDENING
In the bathhouse, most of the time we steam and go out to rest.
We prepare two buckets of water from the well for each person. After the third time of steaming, and we are steaming hard, we go out into the yard and dump two buckets of water on ourselves, one after the other. Our yard is closed on all sides by a high fence and buildings.
Before pouring, I turn to the water in the bucket: “Water, water, I love you. Please wash away all illnesses and troubles from me and grant me good health! Thank you, I give you some water.”
To the second bucket of water: “Water, water, I love you!” Please wash away all diseases of body and spirit and all problems from my son Alexey and grant him good health, success and good luck in life! Thank you, water!”
After two buckets of water, we go into the bathhouse, lie down on the shelves and let the body relax. Vibration begins to roll through the body in waves. I love this state so much. And mentally, in these waves, rolling energy throughout the body from the tips of our toes, we push out the old spent energy.
After resting, we take another hot steam bath and go out to repeat the dousing with well water. My message to the third bucket: “Water, water, I love you. Please wash away all illnesses and problems from my loved ones, from my husband Ivan, from my mother Zoya, from my sister Lyudmila and brother Pavel. Grant them good health, long life, prosperity...” “Thank you, I give you some water” - this is after pouring the water, I thank you.
Address to the fourth bucket of water: “Water, water.” I love you! Please wash away all diseases, wars, evil from our planet Earth and bring Peace, Light and Love!” and “Thank you, water!”
Due to the fact that skin cells either expand from hot steam or contract from cold, refreshing water, all body dirt is washed away when doused. A surge of strength appears. After dousing, you must warm up on the hot shelves and let the waves of energy take place.
I noticed that the more contrast the temperature of the steam room and the temperature of the water, the better the sensation.
We have been practicing this type of bath hardening for more than 25 years in any weather.
DIY construction: laying the foundation with photo
The foundation is laid with your own hands in the following order:
- Installation of a columnar base to ensure normal air circulation. A monolithic concrete foundation is suitable if the bathhouse is equipped with a relaxation room, sauna or swimming pool.
- For marking, the top layer of soil is removed by installing support pillars at a distance of 1 m or more.
- Before laying, concrete products are treated with bitumen mastic, which will ensure good stability and protect the base from moisture.
- The prepared holes are filled with a sand-cement mixture and compacted well. Then they install reinforced concrete products, sprinkling them with construction waste (rubble). Finally, the pillars are filled with concrete mixture at the base.
That’s it, 6 months are allotted for the shrinkage of such a base, and then the installation of the grillage remains. Before installation, it is recommended to reduce the piles to the same height using a circular saw.
How to make a pouring floor with your own hands: tips with photos
A bathhouse with a pouring floor is very convenient to use, and the type of structure of such a floor directly depends on the type of soil. For example, for soils with good moisture absorption rates, a drainage pit is constructed under the bathhouse. If the soil practically does not absorb moisture, then the drainage system is built at certain angles.
How to make such a floor for a bathhouse in the village? See instructions with photos:
- The logs are laid at a slight angle in the direction where the pit is planned.
- Before laying, the logs are treated with 2 layers of waterproofing compound.
- Floorboards are laid on top of the joists and are not secured with nails.
When laying the correct pouring floor, you should comply with the following requirements:
- The water intake is laid before the installation of the flooring.
- All boards are laid with a gap of up to 5 mm so that water can drain freely. When the gap is less than 2-3 mm, the board swells and water can no longer pass through.
- A 40 mm thick hardwood board is used. Coniferous species are not used due to their resin content.
Advice! This type of floor insulation is not performed, and all boards are attached to the structure with special bars. That is, if necessary, the floor board can be removed and taken out to dry.
See the photo for a diagram of the structure of a leaking floor:
Scheme 4.
Scheme 5.
Construction of walls for a bath
To build the walls of the bathhouse, 2 methods are used:
- The base is made of a frame crown, which is wider than the other layers. In this case, you ensure high stability of the bath.
- The subfloor is laid onto the joists, after which the walls are raised, secured with dowels.
Advice! When constructing walls in the old way, each crown must be covered with jute, which will prevent the finished building from being blown through.
Rafter system for a bath
This type of roof construction is lightweight, so even inexperienced craftsmen can use it:
- For construction, a beam is taken, which is sawn so that in the upper part it converges at a certain angle. But the ends of the sawn timber should ideally lie on the Mauerlat.
- The pediment is installed with a shield; it is pre-assembled directly on the ground.
- The roof will have to be insulated, so the distance between the sheathing elements is about 55-60 cm.
- After lathing, the roof is covered with a finishing crown, and the roof is covered with insulation and the selected roofing material, for example, metal tiles or budget slate.
Scheme 6.
Scheme 7.
Advice! A practical gable roof is installed in a classic country bathhouse, ensuring unhindered slope of seasonal rainfall.
A real Russian bath: the secret of light steam
The steam cake is a thick, up to 50 cm, layer of strong superheated steam that hangs above the shelf above the shelf when the water thrown on the heater evaporates. Experienced steamers skillfully work with the cake, scoop up steam from it with a broom and distribute it over the body of the person being steamed so as to steam the body, but not burn it. Not all bathhouse adherents agree to consider the cake to be of some special value, arguing that conditioned steam, which evenly fills the entire volume of the steam room from floor to ceiling, is more comfortable and healthy. Often, steam room lovers come to the combination of a pleasant, relaxing conditioning regime with hot steam from the cake to steam certain areas of the body. An interesting effect from using mixed modes is achieved when a person first warms up in conditioned steam, and then steams, adding steam from the cake.
The characteristics of the Russian steam room also determine its size; they are "attached" to the steam. In order for the layer of steam to be sufficiently stable, it needs space under the ceiling, but so that the steamer can freely scoop up the steam with a broom. Therefore, the optimal height of the steam room is 2.5 meters, the shelves are made higher and a step is attached to it. The size of the steam room is usually 2.5x2.5 m, for a family steam room from 3x3 to 5x5 m. This is also related to the steam - it should be enough for a full steaming session, but it should not be wasted in a too large room. The door to the steam room is always small (height from the floor 1.8 meters, width 60 cm) and this is again because of the steam, it is impossible for it to leak out of the steam room; the threshold is high (25–30 centimeters) - so that colder air does not creep into the room and does not create unacceptable drafts. Felt is stuffed around the perimeter of the door to prevent steam from escaping into the cracks. The window was traditionally located low, the lower edge was a meter from the floor, and was made small. The ceiling of the steam room was always well insulated.
The cozy steam room, decorated with wood, is in itself an excellent place for relaxation. And brooms, fragrant decoctions, dry grass on the shelf, birch firewood, decoctions and infusions expand the range of effects of steam on the body, give strength and make the Russian bathhouse the undisputed leader among all the bathhouses in the world. The steam is ours!
And sometimes everything in the bathhouse contradicts the signs described above, and it looks super modern and innovative, but it brings no less pleasure than an authentic log house with a brick stove - read the story about this in the article on FORUMHOUSE. Find out how to properly prepare brooms. Read the story about a man who was able to improve his steam room nine times! Watch a video about what a real Russian steam room should be like.
Subscribe to our Telegram channelExclusive posts every week
How is insulation and waterproofing performed?
The bathhouse is insulated from the roof, and you can choose modern mineral wool or fiberglass as the insulation material. Of course, it is cheaper and more practical to take what is available in abundance on the farm - sawdust or slag, which is placed in the gaps of the sheathing. You can see what it looks like in the diagram:
Scheme 8.
Scheme 9.
Advice! If the bathhouse was built on a light foundation, then the materials for finishing and insulation should not have a significant weight.
For waterproofing, the simplest rubber in rolls, roofing felt, is used, and in winter a film is added here. A classic wooden bathhouse does not need wall insulation, because wood is famous for its excellent heat retention properties. But you can’t do without caulking wooden walls, and here the first place is free moss, which is used to caulk the building outside and inside.
Important! Moss does not disturb air exchange, lacks moisture, but reliably protects the steam room and other rooms of the bath from drafts.
Connecting destinies
Village soap shops also served as a special place for weddings. Actually, baths of this kind can be divided into two large groups: a wedding bath for the bride in her father’s house and a joint bath for the newlyweds on the second day of the wedding.
Wedding bath
For the bride, this bathhouse served as a farewell to her native nest. Especially for her, the room was scraped clean, decorated with flowers and wreaths, and covered with fragrant herbs. The solemn procession of the campaign was led by the bride's brother; in the absence of one, in some places of the Russian North he was successfully replaced by a village sorcerer, surrounded by a fishing net. Second, a close friend walked in front of the bride, who “swept the bride’s path” with a new broom, clearing the path of bad and obscene things. The bride herself ritually cried and wailed, saying goodbye to her girlhood.
Important! For lovers of traditional rituals, it is worth remembering that the bride is not allowed to cross the threshold of the bathhouse on her own, but is carried into the room in her arms.
Here the ritual unbraiding of the braid took place, symbolizing farewell to girlhood.
Bathhouse for newlyweds
It is a mandatory ritual and in the old days, ignoring this procedure caused active public condemnation.
The bathhouse for the newlyweds was heated in the groom's house by a groomsman; in some areas, a matchmaker was allowed to participate in this procedure.
Naturally, the village bathhouse was richly decorated and cleaned for such a special occasion. During the steaming procedure, guests sat around the room tapping cast iron and frying pans, thus scaring away unclean and evil spirits. Very often, after the newlyweds, the guests also tried the bathhouse, and what is important, also in pairs - a man and a woman. The young wife always takes an embroidered towel as a gift to the bannik in order to appease him and enlist support and protection during future childbirth.
Let's sum it up
We still have instructions for building a bathhouse with photos; all that remains is to calculate the savings on self-construction. Perhaps it’s worth starting with a project that will cost 30 thousand rubles. The cost of building a turnkey bathhouse from rounded logs amounts to 250,000 thousand rubles. (22 thousand rubles per 1 sq.m.), if you add construction and finishing here, you get about 500 thousand rubles.
From this amount you can safely subtract 50%, which goes to pay for the work of builders and their markups for materials. For independent construction, from 100 thousand rubles are spent. and more, of course, the price depends on the size, materials used and the filling of the bath itself. In any case, it turns out cheaper than ordering from a construction company, and see what you get in our gallery!
HOT WATER
For hot water, there is a 12-liter stainless steel container located next to the stove, which is filled through a tap.
The container is connected through a pipe to the coils coming out of the stove. The water is heated by coils during the combustion process. Our water always gets very hot and remains after the bath.
We fill the water from a well, which is located in the yard next to the bathhouse. We bring in cold water as needed, going out to cool down and at the same time collecting water. The water is pumped in by a pump, and all we have to do is plug the plug into the socket and wait for the water to fill.