As a rule, most of the newest floor coverings place significant demands on the sub-base of a wood or concrete floor. For this reason, the process of leveling it is always relevant. Laminate and parquet are very susceptible to various floor roughnesses.
If they are insignificant and the differences in height levels are no more than 2 mm/m², then this can be easily corrected. But it’s another matter if the floor is significantly damaged. Then you need to lay some sheet material on it. The optimal solution is to level the wooden floor with plywood, which will level and reliably strengthen the base.
Why level the floor?
For high-quality installation of flooring material, a level base is required. This will save you from the need to place felt or bars under equipment and furniture.
Leveling a wooden floor with plywood is necessary to remove bumps, depressions, and also to eliminate curvature in the surface area.
Almost all flooring materials react poorly to defects in the rough flooring. Laminate flooring without a prepared floor will, after some time, creak, become loose and the board will become unusable. On linoleum, after a while, without first leveling the floor with plywood, all the bumps and flaws that are under the finishing material will be visible.
Installing furniture and appliances will also have problems when placed on an uneven floor. A simple installation of a sofa can turn into a multi-hour problem with placing felt and pieces of wood under the legs for leveling.
Floor putty under linoleum: types of compositions, application rules
Puttying the base for laying linoleum is an extremely important procedure. If you refuse to do this, the floor covering will last a much shorter period of time and will quickly lose its original appearance during use. In order to carry out all the work properly, it is necessary to choose the right putty composition and follow the sequence of actions recommended by experts.
Features of the base for linoleum
When using linoleum coating as a finish, it is important to remember that it is quite demanding on the quality of the rough surface. It must certainly be smooth, without cracks, depressions or humps. If you ignore proper floor preparation, the flooring material will soon begin to wear out and lose its integrity and attractiveness. To avoid such troubles, in practice the base is puttied and a special layer is placed under the finishing coat.
Sealing of irregularities is allowed only on a high-quality basis with a small number of errors and a slight difference in level. If defects are observed en masse, then you will still have to make a self-leveling concrete screed, and then proceed with the installation of linoleum.
Types of putties
Based on the type of rough base (concrete or wood), the most suitable putty composition is selected. The joints between the panels also need to be processed. In addition to specific products designed for a specific material, there are universal ones. They can be applied to concrete and wooden surfaces.
Oil based
Typically, oil putties consist of drying oil, dyes, plasticizers, and other additives. They are ideal for wood because they contain natural ingredients. The main advantages of such funds include:
- excellent ductility;
- good adhesion to wooden substrates;
- economical consumption;
- Ease of use;
- intensive drying;
- environmental friendliness;
- relatively low price.
Oil formulations are sold ready-made: they do not need to be mixed the day before application. In addition to many advantages, such materials have serious disadvantages:
- poor adhesion with other paints;
- under heavy load on the floor they “fall out” of cracks;
- high sensitivity to excess moisture.
Important! Before applying oil putty to plywood or wooden floors, it is necessary to completely remove traces of the old finish from them.
Oil putty is a leveling composition in the form of a paste, which is characterized by a dense consistency and uniform application Source materik-m.ru
On wood
Used for leveling floors before laying linoleum, reconstructing wooden bases, and finishing boards. This product ideally seals cracks, fallen knots, and other defects on the surface.
Among the positive characteristics of this putty it is worth noting:
- Elasticity. Since wood periodically expands or contracts under the influence of ambient temperature, the putty must also be elastic. Otherwise it will soon fall off.
- Uniformity. It is unacceptable to use coarse-grained compounds on wooden surfaces. Sanding can lead to scratches, which will also have to be puttied later.
- High adhesion. For wood, it is important to use mixtures that have good adhesion.
- Environmental friendliness. If the putty composition contains toxic volatile substances, then when dried they can harm human health.
Wood putty has excellent antiseptic properties. This prevents mold from appearing on closed wooden floors and prevents rotting if water accidentally seeps through the linoleum covering.
Acrylic putty for wood is moisture resistant, it can withstand temperature changes and strong mechanical loads Source gidpokraske.ru
On concrete
There are seven types of such products: gypsum, cement, acrylic, lime, varnish, oil, glue. Moreover, it is quite easy to work with concrete foundations. Most importantly, after cleaning such surfaces, it is necessary to apply a layer of deep penetration primer, after adding a little sand to it. This will significantly improve the adhesion of the putty to the base and prevent it from being damaged in the event of heavy mechanical loads.
Compared to cement, gypsum has important advantages: it does not shrink and is affordable. Cement putty shrinks considerably, but, unlike gypsum mixture, it can be used in excessively damp rooms. The acrylic composition does not shrink at all, is moisture resistant, and is expensive.
The most suitable for concrete is epoxy putty. It adheres firmly to the base, is resistant to moisture, strengthens potholes, and perfectly fills even small cracks.
Waterproofing putty for concrete is characterized by high resistance to the external environment, mechanical compressive and tear strength Source pol-exp.com
Polymer
Contains plaster or latex. The gypsum mixture is excellent for sealing cracks between plywood sheets, restoring wooden floors, after which linoleum can be laid on them.
Latex putty is a great option, but it is difficult to work with. Once such a composition has set, it is no longer possible to change the surface. Therefore, it is important to seal the cracks properly the first time; it is unacceptable to leave errors.
Compared with gypsum, latex has the following advantages:
- more elastic;
- does not crumble after a while;
- eliminates even small cracks.
Among the disadvantages, it is worth noting the high cost, the inability to use in low temperatures.
Latex plaster is sold ready for use, so it does not require any additional mixing Source stroy-podskazka.ru
Quick drying
Nitro putty is produced using wood flour. It dries instantly and comes in a huge variety of shades.
Main advantages:
- high adhesion to wood surfaces;
- high-quality elimination of defects;
- the ability to process the base (polish);
- dries within ten minutes;
The solvent for nitro putty is ordinary acetone.
After drying, nitro putty shrinks slightly, but if necessary it can be reapplied Source vinnica.prom.ua
Why choose plywood
Plywood - flooring material
Plywood is a durable, multi-layer wood material. Due to its affordable price and excellent technical characteristics, it is often used in construction.
This material is chosen as a subfloor due to many factors. Plywood has an affordable price per m2, it fits well without additional time and money spent on leveling the floor. Due to the arrangement of fibers in different directions, it is a fairly durable material. It can be used not only to obtain a flat floor, but also to make minor repairs to eliminate flaws and defects.
What does sheet thickness affect?
The sheets have different sizes. The choice of one material or another depends on the construction task assigned to the workers.
Size affects the following parameters:
- The thinner the plywood sheet, the worse the job of leveling the surface will be.
- If you choose thick sheets, you will not need additional thermal insulation materials.
- The thicker the veneer, the less deflection, and the rigidity of the structure, on the contrary, is greater. Thanks to this, it is possible to increase the interval between the lags of the subfloor, and the quality of the latter will not deteriorate as a result.
According to the standard, veneer sheets have a thickness of 4, 6, 10, 12, 15, 30, and 40 mm. This indicator affects the ease of installation in joists and its wear resistance.
The thickness of the sheets does not affect the height of the room in any way. Therefore, you should not be afraid of making a mistake with the size. Maximum plywood can raise the floor by 40 mm.
How to buy plywood correctly?
Plywood of different thicknesses
When purchasing plywood used for leveling, you should take into account the following parameters:
- Brand;
- Class;
- Variety;
- Thickness;
- Manufacturer of the material.
Depending on the type of premises, preference should be given to different brands. For residential premises, preference should be given to the FC or FSF brands. This plywood is safe because it contains no phenolic compounds. For wet rooms, it is preferable to choose FSF brands. This plywood is moisture-resistant and resistant to mechanical stress.
Differences in plywood grades
The grade of plywood indicates the level of release of free formaldehyde particles into the air. There are two classes:
- E1 contains 10 mg of formaldehyde per 100 g of wood material;
- E2 contains 30 mg of formaldehyde per 100 g of wood material.
For living rooms it is preferable to buy E1.
Plywood is produced in 4 grades. Grade 1 material is high-quality plywood. The fourth grade is a material with a large number of flaws, chips and knots. Professional craftsmen recommend using grade 3 and 4 plywood for rough flooring. For the main floor, grades 1 and 2 are preferable.
Varieties and classification
The thickness of the material is selected depending on the leveling method, the curvature of the floor and the coating laid on top. Creating a subfloor for laying linoleum and carpet allows you to choose a material up to 10 mm thick. Under laminate or parquet, a plywood thickness of at least 12 mm is required to level the floor.
When choosing the thickness of plywood for the floor under linoleum, be guided by these indicators. If you choose the wrong thickness, the sound insulation will decrease and the floor will quickly become unusable.
The manufacturer determines the quality of the plywood. European manufacturers guarantee excellent quality of the produced material. But Chinese-made sheets do not always meet consumer requirements.
Floor leveling scheme
Also, plywood can have a sanded or unsanded side. If it is used as a subfloor, then it is laid so that there is a surface at the top without sanding. This will ensure good contact with the finishing material.
When using plywood as a finished floor, the top layer must be sanded for subsequent opening with varnish.
Laying on strip supports
To level a floor with significant unevenness, you can lay the material on logs - transverse and longitudinal beams of the sheathing. The elements must be laid at a distance of 3 cm from the walls of the room. Leveling the floor with plywood along the joists is done on wooden and concrete bases. This floor can be used as a base for linoleum, tiles or laminate.
Tools and materials for laying on strip supports
To install plywood on strip supports you will need:
- Plywood cutting tool,
- Strips of plywood or 60x40 timber as supports (depending on the height of the floor),
- Level,
- Drill and wood bits,
- Screwdriver,
- Tape measure and pencil.
Sequencing:
- First, the sheets are laid on the floor with the seams moving in adjacent rows. Laying sheets is marked on the floor with chalk. All sheets are numbered.
- Next, we remove the material from the floor, and attach the logs according to the markings. First, we install the bars against the walls. It is better to use 40x60 cm timber. In order not to raise the floor too much, you can use strips of cut plywood or boards.
- After laying the longitudinal beams, we install the transverse elements. We attach them to the joists using metal corners and self-tapping screws. The pitch of laying the beams depends on the dimensions of the sheet. A distance of 35-50 cm is considered optimal.
- All elements of the sheathing are leveled in one plane. To do this, place pieces of plywood, roofing felt, roofing felt or boards under the joists.
- When all the logs are at the same level, they are attached to the base using galvanized steel angles, dowels and self-tapping screws.
- Now sheets are laid on the sheathing for leveling.
- Any material (linoleum, tile, carpet or laminate) is used as the front layer.
Tip: if you place heat or sound insulation material in the gaps between the joists, you can improve the performance characteristics of the floor.
Video - leveling the floor along the joists
Tools for work
What tools are needed for the job?
Without the appropriate tools, it is impossible to properly level a wooden floor with plywood. To do this you will need the following devices:
- Hammer;
- Screwdriver;
- Floor level;
- Roulette;
- Hammer;
- Jigsaw;
- Screws
- Marker for marking.
It’s good if you have even minor skills in handling construction tools and materials.
What kind of plywood is used for floor joists?
Multi-layer veneer boards come in many variations, allowing you to choose the optimal solution for a particular situation.
Variety
There are 5 categories of plywood quality. Elite is not used when installing flooring, so one of the following options is selected for work:
- I grade. Has minimal damage and defects that do not affect the appearance of the coating. Suitable for installation on joists and forming a finishing surface in all areas of the house.
- II grade. The slabs can be used to create a decorative coating that requires additional processing. To do this, existing cracks are sealed with special putty or sawdust with PVA glue.
- III and IV grades. Sheets of lower quality are preferable for subfloors. It is recommended to lay the products exclusively on the sheathing, since broaching with self-tapping screws ensures leveling of possible curvatures of multi-layer panels.
It is taken into account that material of quality group 4 should be selected especially carefully: some manufacturers produce products suitable only for creating disposable containers for transportation.
It makes sense to use first grade plywood only when arranging the finishing layer of floors; for a rough base, grades 2, 3 or 4 are suitable, while the latter is not advisable to install on highly loaded structures
Advice! To save money, you can use slabs marked 2/4. The numbers mean that one side of the product is second grade, and the other is fourth.
View
The sheets are divided according to the type of glue used, which is responsible for acquiring certain properties by the material:
- FBA. Based on albumin-casein composition. This option is environmentally friendly and suitable for children's rooms and bedrooms. The slabs are characterized by low resistance to high humidity, so careful waterproofing of the floors is necessary, which is especially important for the first floor of an apartment building.
- FC. Urea solutions are used to glue such panels. The material has average moisture resistance, which makes it possible to lay plywood on joists in the living room, bedroom and hallway.
- FSF. It is made on the basis of phenol-formaldehyde resins. High humidity resistance parameters make the material an ideal solution for bathrooms, kitchens, attics and enclosed loggias.
- FOB. Lined FSF slabs with laminated coating are suitable for all types of premises.
FK plywood is considered the most environmentally friendly, while it is undesirable to use moisture-resistant FSF sheets in residential premises, since this material contains formaldehyde
The remaining varieties are special, they are expensive and are used only in special cases.
General Tips
Before laying plywood, assess the condition of the base and check the floor level.
Concrete base defects and ways to eliminate them
An inspection of a wooden base consists of removing creaks, replacing fasteners, updating boards in the damaged part of the floor, assessing the condition and replacing underground communications if necessary.
The concrete base is checked for defects on the surface. The level determines the curvature. Before laying plywood on a concrete base, check the surface for moisture by covering it with film for several days.
Laying on old joists
Experts report that depending on the difference in floor height, they choose the method of laying plywood sheets.
If the difference in height is up to 2 mm, there is no need to level it. Changing the floor level to 5 mm per m2 allows you to level it with plywood, laying it directly on a wooden base.
A large difference in the height of the concrete floor up to 8 cm requires the installation of strip or point lathing for leveling with plywood.
A high floor difference requires dismantling the old covering and replacing it with a new floor.
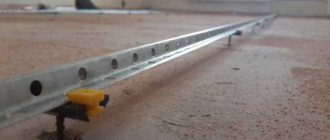
Fastening plywood with adjustable studs
This method using anchor pins allows you to get rid of significant unevenness in the floor by adjusting the position of its surface. This happens as follows:
- using a drill, grooves are prepared, the depth of which is half the thickness of the sheet;
- a hole is drilled inside for a pin of smaller diameter;
- washers are inserted into the recesses;
- Marks are made for drilling holes in the floors, after which the sheet must be removed.
Anchor studs are fixed to the floor surface, with a screwed-in nut and washer, on which a prepared plywood sheet is laid and attached to the studs using nuts. The excess length of the anchors is removed with a grinder.
In this way you can get rid of significant unevenness in the floor.
How to level the floor with your own hands
Finishing a plywood floor
Knowing the simple rules for leveling various types of floors with plywood, you can easily do the job yourself. When laying plywood as a finished floor, the sheets begin to be installed from the middle of the room. The plywood must be secured with self-tapping screws at a distance of at least 2 cm from the edge of the sheet. After the process is completed, the coating is sanded and varnished.
Creating a subfloor using plywood does not impose any special requirements on the fastening and arrangement of sheets. If two layers of material are expected, then it is laid with the sheets offset to prevent the seams of the top and bottom rows from matching. There are a number of methods for laying plywood sheets over concrete or wood floors.
Floor leveling without joists
Laying sheets without logs
It happens that a concrete floor requires not only leveling, but also insulation. For this, an option without the use of logs is suitable, which is considered one of the simplest ways to level a floor with plywood. Work with plywood material begins only after it has been kept in the room for several days to get used to the room conditions.
The base for laying and the plywood sheet are treated with an antiseptic before it is laid. To create the gap required by the technology, bars are placed around the perimeter of the room.
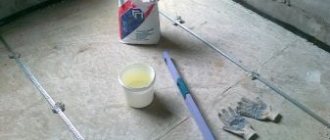
Sealing seams and irregularities
The plywood sheets are placed on the floor so that they are offset relative to each other (as when laying bricks). The material is secured with screws evenly along the protruding points of the plywood.
All fasteners and seams are covered with sealant, after which the surface is puttied.
For a wooden floor that is not loose and in good condition, you can also use plywood leveling without using joists.
Fastening with self-tapping screws
Wood plank floors are treated with sealant or putty material. It is leveled using sand or sawdust mixed with resin. A vapor barrier film is laid on top, on which plywood is already laid.
To ensure that after fixing the plywood with screws, they do not protrude above the coating, the holes are made in several approaches. First, a hole is drilled to the size of the screw, and then it is processed so that the head of the screw is level with the surface of the plywood sheet.
Leveling the floor with plywood along the support strip
Laying along joists
Leveling the floor with plywood over strip sheathing can be used for laying under laminate, tile or linoleum. This support is created using square bars and plywood sheets. The logs are laid in increments of 30-50 cm, and at a distance of 20-30 mm from the walls. The cross bars are secured to the joists in a checkerboard pattern using screws. To add rigidity, you can secure them with metal corners.
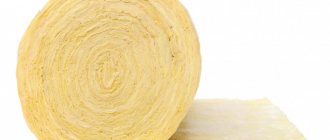
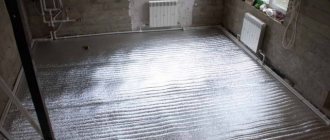
To create sound and heat insulation, wood shavings mixed with glue are poured between the sheathing. This mixture dries within 2-3 days. You can also use expanded clay or mineral wool for backfilling.
Laying insulation between joists
The plywood is secured to the support with self-tapping screws. After this, you can lay any floor covering.
Alignment by mini-lags
The method of leveling the floor with plywood over mini joists is chosen when there is a slope or the surface difference is up to 8 cm.
Adjustable joists
The floor surface is marked for the installation of bars and pads, which create an ideal structure for laying plywood sheets. This work requires careful calculations of the height of each support element with markings on the floor and preliminary fitting.
With this type of flooring, all structural elements will be of different heights. Working using this method is not difficult, but it requires a painstaking approach.
By point supports
Laying scheme using point supports
This leveling method requires supports, self-tapping screws, two layers of plywood covering and glue.
First, sheets for marking and numbering are laid out on the base. The sheets are removed and the height of the finished floor is marked on the wall.
Threads are then stretched across the room to show the height of the finished floor. Next, point supports are installed. The result will be a grid of supports that are located at a distance of 30-45 cm from each other. This method is inferior in reliability and stability to alignment using a strip support.
Alignment of logs
After checking the height of the supports with a level, secure them to the base of the floor. Then we level the floor with plywood, laying and securing the sheets to the supports.
About the preliminary preparation of plywood
In order for the leveled floor to last a long time, you need to properly prepare the leveler.
When purchasing, you need to make sure that the plywood is dry and not warped: it will be difficult to work with deformed sheets. It should be stored not in the open air, but indoors at a temperature typical for the given place.
Before laying, the sheets must be marked and cut (sawed) accordingly, taking into account not only the size of the room, but also the laying features: corners, columns, pipes, etc.
Then they are laid out on the floor so that the master can make sure that all measurements and cuts were made correctly. At the same time, we must not forget about the necessary gaps between the sheets, and especially near the walls: the sheet should not be butted against the wall.
After cutting and fitting, they are numbered, which greatly facilitates installation and does not lead to confusion, and are removed. Installation is carried out in small sections, slowly and efficiently.
Before starting work, sheets need to be measured and cut
Master's recommendations
Professionals remind you that the underground must be ventilated. After laying the finishing coating and installing the baseboard, ventilation holes are made in it, which are covered with a grille for ventilation.
Depending on the finishing coat, the plywood will need to be sanded and varnished after laying. After leveling the floor, a backing made of natural or synthetic material is laid on the plywood under the parquet board.
Using plywood to compensate for differences will help extend the life of a parquet floor for many years. The advantage of this leveling is that the floor rises only to a height of up to 5 cm. This means that this method can be used even in low rooms.
Did the article help you? ( 5 ratings, average: 4.80 out of 5)
Finishing plywood floor
The finishing treatment of plywood and its necessity is dictated by the material that will be used as a finishing coating and the quality of laying the plywood itself.
If the surface is covered with ceramic floor tiles, then for finishing it is enough to coat the plywood with a primer, which will reduce the absorption of moisture from the tile adhesive and enhance the quality of adhesion. The remaining minor irregularities will be hidden by a layer of glue.
If laminate, parquet, carpet or linoleum will be laid on plywood, then additional sanding of the surface is necessary. For semi-commercial carpet or other material that requires a backing, a height difference between plywood boards of up to 2 mm is allowed. Differences of more than 2 mm must be eliminated by scraping the plywood with a special machine or sandpaper.
After sanding or sanding the plywood base, you must thoroughly vacuum the floor and remove all dust. Then coat the surface with the necessary primer and begin laying the facing material.
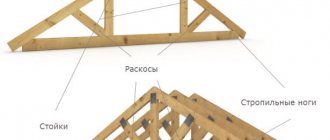
Requirement for distance between joists
The main element when constructing a plywood floor is the frame. The logs are a wooden beam 2 m long with a cross section of 40x70 mm. When constructing the frame, you must make sure that the logs do not have serious defects, since this will directly affect the durability and reliability of the floor.
As for the distance between the logs, it is determined in accordance with the size of the plywood sheets, but a distance of 30–40 cm is considered optimal.
As practice has shown, plywood floors are highly durable and reliable. Although the installation of such a floor cannot be called a cheap option for a subfloor, it has a high degree of heat and sound insulation, allows the use of almost any type of finishing floor covering and is characterized by increased durability.
In what cases should it not be used?
Plywood should not be used in damp rooms
Despite the variety of impregnations, plywood is made from wood particles, so the moisture resistance of the material is manifested in a certain environment.
Conditions in which plywood cannot be installed:
- It is not recommended to use FBA, FC for finishing open loggias, balconies, kitchens or bathroom floors. The material does not emit substances harmful to health, but when exposed to water and exposed to it for a long time, it warps and swells.
- You cannot use plywood, even of a high degree of water resistance, for covering floors in bathhouses and saunas. There must be a healthy climate, and any type of wood-based products emit harmful substances under the influence of high temperature and steam.
Water resistance can be increased by painting and varnishing.
Features of laying plywood under parquet and laminate
For laminate and parquet, you should know what kind of plywood to buy. The main task of laying laminate or parquet is to have a perfectly flat floor. Only moisture-resistant plywood should be used. There are several variations of installation under laminate and parquet:
- On the screed. The concrete must be dry, the surface smooth, clean, free of debris and unevenness.
- On the logs. Among the advantages we can highlight: the possibility of insulating the floor, hiding installation communications.
- On a wooden floor. One of the simple and effective styling methods.
Size formats
Floor leveling diagram.
The sizes of plywood boards from domestic manufacturers may vary. But conditionally they all have 2 formats: standard and large.
Typically, a square plywood sheet of standard format has a length and width of 152.5 cm. Rectangular - 244x152.5 cm.
Large format slabs can be up to 366 cm long.
FK brand material can have the following dimensions:
- 1525x1525 mm;
- 1270x1525 mm;
- 1220x1525 mm.
FSF plywood sheets are usually cut as follows:
- 1500x3000 mm;
- 1220x2440 mm;
- 1525x3050mm;
- 1250x2500 mm.
The dimensions of plywood boards of different brands may depend on the terms of agreements between the customer and the manufacturer of building materials.
All other configurations of this floor leveling material are obtained by cutting standard sheets.
Thickness
Table of quantity, volume and dimensions of plywood in packaging.
The standard thickness of plywood sheets varies from 3 mm to 3 cm.
There are types of plywood used in highly specialized areas, for example, in aviation, their thickness can be less - 1-2 mm. But such material is not used in the construction industry.
The optimal thickness of plywood boards for the floor is selected according to the installation method, the thickness of the intended coating and based on the planned load on the floor.
If the floor is covered with parquet, then with a parquet thickness of 16 mm, 10 mm plywood is sufficient. For thicker parquet – 16-20 mm – the sheet thickness should not be less than 12 mm. If large-sized parquet is planned, then the plywood sheets should be 1.5 cm or thicker.
Plywood slabs for the floor can be thicker. For example, when laying on joists, a material thickness of 18 mm or more is recommended.
What it is?
The name USB cannot be considered official - rather, it is a distorted version of OSB, which is how oriented strand board is labeled. USB plywood is sometimes called its universal variety, but the characteristics of the material are no different from the regular version. OSB is produced in the form of large-format sheets or, as they are also called, boards. This type of plywood does not have a solid structure, but consists of wood chips joined together in layers using glue based on natural or synthetic resins.
USB sheets are characterized by high density and strength. Usually the slab consists of 3-4 layers, in each of which thin chips are glued together and with the previous layer. For the connection, resins mixed with boric acid and synthetic wax are used. These materials are called oriented because their layers have a multidirectional structure: the outer layers are directed longitudinally, the inner layers are directed transversely.
USB sheets have certain characteristics.
- High moisture resistance. Material completely submerged under water will increase in volume by no more than 10% after 24 hours.
- Resistance to biological damage. Neither insects, nor mold or mildew are harmful to the stove.
- Improved fastener retention rate. Compared to particle board and softwood plywood, the superiority is about 25%.
- High quality. The selected raw material contains no knots or voids, and the likelihood of delamination is minimal.
This is the basic information you need to know about the material known as USB board. In addition, it is inexpensive, visually looks quite attractive even without coating, and is stable in its composition and chemical properties.
Successful examples and options
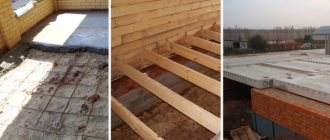
In this case, the flooring was made on an old wooden floor, maintaining horizontality, using sections of threaded rods covered with PVC corrugated tubes.
The floor is covered with plywood evenly, the seams between the sheets are treated with sealant and putty.
Installation on joists is made in solid sheets with a minimum of cuts, compensation gaps between the sheets are taken into account. Mineral wool is laid between the joists as insulation and sound insulation.
Preparations are being made for flooring along the joists, the concrete floor is leveled, and polyethylene film is laid for waterproofing.
The case when the recommended gap from the wall can be neglected is a narrow section of the floor covered with joists. For metal elements protruding along the edges, cuts were made with minimal loss of load-bearing capacity. Fastening with self-tapping screws. Mineral wool in the space between the joists.