One of the most important structural components of any building is the floor system - not the final decorative coating, but the entire “pie” consisting of several layers. There are several types of floors, differing in raw materials, manufacturing method and characteristics. Everyone faced with construction or major reconstruction makes a choice in favor of one of the systems based on their capabilities, preferences and building parameters. Conveniently, some designs involve the simultaneous creation of an underfloor heating circuit - single or additional. Let's consider the main floor systems in demand among users of the FORUMHOUSE portal:
- how to make floors on the ground;
- how to make floors using joists;
- how to make floors on floor slabs.
Creating a screed on a concrete slab
Layout of a concrete screed with insulation
The installation of a floor on a slab suggests the presence of several options. The simplest one is pouring screed. You can make it in several ways:
- Mix sand and cement (with the addition of water);
- By preparing a special mixture.
The old method is no longer very relevant today. The second option is much better. Of course, purchasing a dry mixture will cost a little more, but the result of its use will be much better. The fact is that manufacturers put on the market improved formulations, which include plasticizers, polymers and other components that improve product quality.
Installation process
First of all, you need to inspect the slab for defects in order to know which places you will have to pay more attention to when pouring the mortar. Afterwards, a primer is applied to it (with a roller or brush).
Important! It is best to use a deep penetration primer. When the surface is dry, you should move on to the screed. The layer should not be very thick. Its task is to hide defects and slightly level the surface. In about a day, the screed will dry out and it can be covered with film. Polyethylene will play the role of a vapor and water insulator. The film should cover not only the floor, but also at least 15 centimeters of the wall.
Afterwards, metal profiles or wooden slats are placed over the entire area. So called beacons are installed in one horizontal plane.
How to install a beacon?
Installation of aluminum profile beacons by level
- In the corner of the room, near the stove itself, install a laser level. When the light rays mark a contour on the walls, make sure that they exactly repeat the floor level along which the finishing will need to be done.
- Beacons must be installed over the entire area (along the contour) at a distance slightly less than the length of the rule that will be used to level the screed. First, strong threads are stretched from opposite walls. They are attached to self-tapping screws. Beacons are fixed using gypsum or screed mortar.
Final stages
An example of pouring screed and leveling the mortar along the beacons.
Having installed the beacons, you can proceed to laying the insulation. There are no restrictions in the choice of material, but expanded clay will be the most optimal. It does not need to be protected with film, unlike porous insulation. Then it’s the turn of the main screed. It must be dense and also have a thickness that can withstand heavy loads (5-15 cm).
Important! To make a level floor, you need to use a rule. It should be placed on the beacons and pulled towards you. As a result, the excess mortar will be drawn towards the wall and fill the unevenness.
The floor will dry in a few days. Then it will be possible to remove the beacons and fill the gaps. Finishing is recommended only on a completely dry surface.
Nuances of technology
In the presence of concentrated operational or structural loads, the minimum layer of the leveling structure is calculated:
- for pushing;
- for compression;
- the methods are specified in SP 52-101.
This is relevant when placing partitions on poured screeds, which are not always constructed from lightweight gypsum plasterboard, but tongue-and-groove slabs and partition blocks are also erected.
Thus, restrictions on the thickness of the screed are relevant only for its minimum value. The maximum height of the structure is practically not regulated. The choice is made taking into account the specific project, joint venture standards, materials and technologies used.
Advice! If you need repairmen, there is a very convenient service for selecting them. Just send in the form below a detailed description of the work that needs to be performed and you will receive proposals with prices from construction teams and companies by email. You can see reviews about each of them and photographs with examples of work. It's FREE and there's no obligation.
>
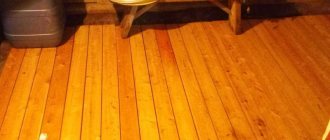
Making a plank floor
Wooden flooring is still the most popular in private homes. Its installation is not particularly difficult. The device must begin with the elimination of base defects. The usual cement-based mortar will do. It is used to seal cracks, chips, and seams between slabs.
Installation of floors and leveling with screed
Then, using a laser level, a contour is determined along which the finishing surface is ultimately set, and it is time to create the overall design.
Main works
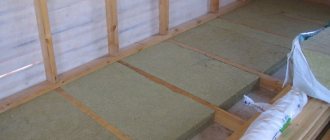
Installation of wooden joists for a plank floor
The floor is covered with waterproofing material, as indicated at the beginning. Then the logs are installed. They are installed in the same horizontal plane.
Important! The logs are fixed perpendicular to the boards, and the boards are fixed perpendicular to the wall with the window.
There are several options:
- Using long self-tapping screws, the joists are cut through and fixed to the floor. The holes in the slab are made in advance. Plastic dowels must be inserted into them.
- Along the edges of the logs you can install supports made from wooden slats or pieces of logs. The supports are attached to the floor, the logs are laid between them.
- A modern method is to install logs on lifting devices.
Final stages
Diagram of a plank floor with insulation
After installing and securing the joists, you should start insulating the floor. The insulation is laid in the space between the joists. The type of material used is not important, its thickness is important. When installing wooden floors, the main thing is not to forget to leave a gap between the clean coating and the insulation. It will become ventilation, which will remove excess moisture and increase the service life of the coating and thermal insulation materials.
Now all that remains is to cover the surface with polyethylene and proceed to the final step - laying the boards.
It's useful to know about lags
- Mounted across the direction of natural light. In corridors, foyers and other rooms with directional traffic, they are laid across the aisle, in which case the flooring boards will be placed along the room. When installed on an interfloor ceiling, sound insulation is performed using special gaskets, and a soundproofing layer is poured around the perimeter of the ceiling. When laying tiles, you should first lay moisture-resistant plywood, followed by gypsum fiber board as the next layer. When using a laminate, the rigidity of the subfloor is increased, forming a mesh structure: solid logs are laid in increments of 0.75–1 m, and beams of the same length as the log spacing are laid across. Plywood is laid on the resulting structure and only then laminate. For floors made of piece elements, for example, parquet or parquet boards, it is recommended to opt for plywood or adjustable joists. There are several reasons for this:
Water floor installation
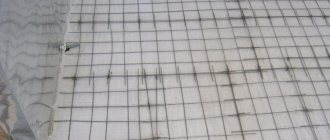
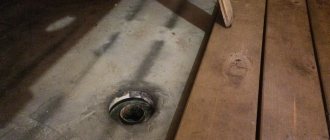
Before moving on to installing warm water floors, you need to deal with their thermal insulation. For this case, foil insulation is best suited. It is covered with reinforcing mesh. Afterwards you can lay out the pipes for water heating. They are fixed to the mesh with plastic clamps.
Important! For greater reliability, a reinforcing mesh is also laid over the structure.
To protect expansion joints, pipes are laid along the walls (corrugated ones are suitable). It will be possible to proceed to pouring concrete after hydraulic tests. The water system is checked for faults throughout the day. All detected problems are promptly corrected.
Diagram of a screed with water heated floor
To make the final screed of a warm water floor, you need to use a cement mortar. The thickness of the layer should be within 5-15 cm. In a day or two it will dry, after which you can proceed to the direct use of the heated floor. The temperature should be increased gradually.
This method of installing warm water floors is relevant not only if the base is a floor slab, but also a concrete floor on the ground. A water floor is perfect for both home and apartment. It is warm, durable, and protects against moisture and mold.
Flooring in a house without a basement
Types of ties
If we talk about design features, all screeds are divided into those connected to the base or made on a separating layer. The separating layer is a dense polyethylene film or a heat and sound insulation system.
The installation technology in each case is similar, regardless of the type of structure. The difference lies in the principles of preparing the base and in thickness.
Distinctive characteristics:
- connected - have a connection with the structural part of the object. This is either a concrete floor slab on the ground or a floor slab. Such screeds function in conjunction with the base on which they are laid. Before installation, the concrete slab must be primed, that is, it is necessary to create a layer that ensures high adhesion;
- on the separating layer - performed if the base is: 1. Moist, 2. Contaminated with fats, 3. There is high absorption, 4. Too weak. The structure is poured over the separating layer. Usually this is a polyethylene film 0.2 mm thick. The material is always laid with an overlap (10 cm), overlapping the walls. After completion of the work, the excess is cut off;
- floating - a solution for places where the level of impact noise needs to be reduced or the base is too weak. The substrate (soundproofing layer) is laid using special materials. This can be natural cork, polymer boards, corrugated cardboard sheets, mineral mats, 30-40 mm thick. A polyethylene film is laid over the thermal insulation, and then the solution is poured. If the room is located above an unheated area, you should take care of the issue of thermal insulation.
Plates of insulating material are laid with bandaging, that is, with the seams shifted relative to each other
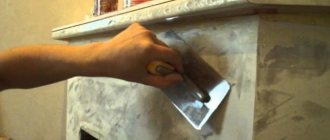
Laying self-leveling floors
To make a self-leveling floor the main coating, you need to start with a base primer. Epoxy or polyurethane primer is applied in two layers (only from one mixture). The front layer is applied exclusively to the decorated coating. Photo printing looks especially impressive on the surface. It is made on a special film, and a transparent self-leveling floor is laid on top.
Laying technology
The process of installing self-leveling floors begins with a standard procedure - cleaning the surface from dust and dirt. Next, a primer is applied. After it dries, along the vertical surfaces that will come into contact with the self-leveling floor, damper tape is glued around the perimeter. It protects the self-leveling base from cracking.
Then it’s time to apply the self-leveling floor solution. It must be done strictly following the instructions, using an electric mixer at low speed.
Laying a self-leveling floor on a concrete base
Important! To obtain a homogeneous composition, you need to stir the mixture according to the principle: stir and stop. The duration of action-inaction should be the same and not exceed 5 minutes.
The finished solution is poured onto the surface and spread with a roller or spatula, and air bubbles are removed with a needle roller. The thickness of the fill should be at least 3 cm. Now you need to wait for the coating to harden.
Important! Direct sunlight and drafts have a negative effect on uncured material.
The time it takes for the surface to completely dry is also affected by its thickness. The curing time is indicated on the packaging of the dry mixture. As a rule, work on laying ceramic tiles begins after three days, and installation of parquet – after a week.
Preparation
Such floors are a very common design solution. Warm natural material creates comfort and coziness indoors. But such a move requires preparation of both components for the future surface.
No matter what kind of wood you use or what installation method you choose, the concrete base requires treatment.
Before laying, the concrete base must be put in order
Putting the concrete base in order
The fresh concrete screed must be completely dry by the time the base is laid. If you are making a wooden decorative covering on an old screed, it is necessary to carry out measures for its ongoing repair.
Concrete base required:
- level;
- get rid of cracks;
- remove dust;
- prime.
Concrete should be primed and dust free
At this stage, you should also prepare all the technological holes in the concrete for laying communications. As waterproofing, you can lay polyethylene film or penofol.
If a decision is made to use roll waterproofing, then the material should be laid overlapping, carefully gluing the seams. In this case, the film should extend onto the walls to the entire height of the future surface. It would be a good idea to tape the edges of the film with damper tape.
Important! Before laying wood flooring, check the moisture content of the concrete, it should not exceed 3%.
Experienced builders recommend constructing such floors in the spring, after the central heating system is turned off.
Choosing wood
Which floor is better: wood or concrete? The answer to this question is far from obvious. The wrong tree laid on the floor can bring quite a lot of problems in everyday life.
For flooring you should choose the following types of boards:
| Board name | Short description | Photo |
| Regular sexual | Laying is done using a tongue and groove pattern. It has a front side and a back side with vents. Width ranges from 8.5 to 10 cm, thickness from 2.5 to 3 cm. |
|
| Parquet | Consists of 3 perpendicular layers and a varnish (oil) coating. Installed using tongue-and-groove or locking joints. Width from 12 to 20 cm, thickness within 1.8 -2.5 cm. |
|
| Engineering | Three-layer glued. The top layer is made of valuable wood. Width 12 - 45 cm, thickness 1.2 -2 cm. |
|
In addition, a regular board can be planed or unplaned. Unplaned material is used as a rough coating for further finishing. For finishing, planed dry with tongue and groove is used.
Rules when buying a tree:
- The material must be dry. Overdried or wet wood becomes deformed during further processing.
- The board should be flat and smooth.
- The wood must be free of defects.
- For a single coverage area, it is better to purchase material from one batch, with a similar color and texture.
When ordering volume, always buy 10% more material than required by area. The length of the edged tongue-and-groove board should not be less than 2 m. Before starting work, the wood should be treated with antiseptic and fire-retardant impregnation.
Regardless of which material was preferred, before laying the floor, in order to adapt to the microclimate, it is better to let the wood rest for several days in the room where the work will be done.
The tree should be allowed to rest at room temperature.
The role of OSB in floor construction
Laying OSB or plywood to level a floor
OSB or OSB is used to achieve one or all of 3 objectives:
- To level the floor and hide defects.
- To ensure good sound insulation. The multilayer structure successfully absorbs noise.
- To insulate the floor and make high-quality waterproofing. The natural-based material is characterized by increased moisture resistance and excellent heat retention.
Classification
A complete analysis of the element allows us to identify several categories of floors, divided by purpose. These are industrial buildings, residential buildings, public institutions and livestock buildings.
There are several more distinguishing features, first of all, division by type: monolithic, roll and piece. Analysis of the installation site is divided depending on the location: above a heated room, floor construction on the ground, along the interfloor ceiling.
Regarding sanitary standards, there are 3 types of floor installation:
You can understand how to make a good floor while meeting numerous requirements only after fully familiarizing yourself with the standards.