The bathhouse premises have a special microclimate, which differs from the conditions in residential premises. Therefore, materials for wall decoration require the right approach to their selection. When deciding how to line the inside of a bathhouse, take into account that the finishing will be used in conditions of high temperature, hot steam and high humidity.
The decoration of each room should be functional
Features of microclimate and wall material
When choosing interior cladding for walls, ceilings and floors in a bathhouse, several issues need to be resolved. To begin with, is cladding actually necessary? In a wooden bathhouse built from logs, the walls can be left “as is.” If timber or some other material is chosen as the construction material (aerated concrete, brick, frame construction technology), then you can choose lining - it will create the necessary atmosphere of a wooden bathhouse, form a healthy microclimate, and fill it with the aroma of fresh wood.
The lining can be mounted not only vertically, but also in other directions - horizontally or in a herringbone pattern.
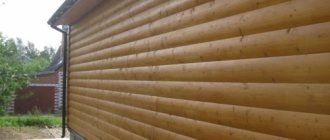
The sheathing material is selected taking into account the wall material. A stone, brick, foam or aerated concrete bathhouse necessarily requires internal lining. This will ensure high-quality insulation, prevent heat loss and give the necessary “bath” flavor to the interior. Lining is suitable for these purposes - it has different profiles and can be mounted not only vertically, but also horizontally, in the form of masonry, or in a herringbone pattern. You can use a block house or imitation log. The cladding made of wooden boards looks original. To make the right choice, you need to familiarize yourself with the requirements for interior decoration in a bathhouse.
Classification of lining
Depending on the material used, lining can be divided into several types.
Plastic
The plastic type of the material makes it possible to save money, and we are also pleased with the simplicity of how the lining is attached to the wall. This lining is suitable for both ceilings and walls; moreover, it looks aesthetically pleasing and fits almost seamlessly. One of the disadvantages of the material is its short service life, since it fades in the sun and cracks in frost.
Metal
Such panels are usually made of steel and aluminum, which have an additional layer of protective coating. The texture and color scheme can satisfy the needs of even the most demanding buyer. Aluminum products are made to last and are ideal for outdoor work. As for steel, if the integrity of the protective coating is damaged, corrosion processes may begin and the metal will begin to rot.
What is the difference between regular and eurolining
Both options are suitable for high-quality surface finishing, but eurolining has additional advantages:
- Euromaterial is made from other types of wood and using other processes in manufacturing technology.
- It has an elongated groove for fastening.
- Other geometric parameters are inherent.
- The products go through excellent drying and special processing.
- Eurolining is characterized by an additional ventilation function.
- There are systems for removing accumulated moisture, and this helps protect the wood from destructive processes (special grooves are made on the back side of the panel so that the aesthetics of the wood are not compromised).
- It differs in cost (it is higher than that of standard lining).
Operating conditions
To begin with, it is necessary to clarify that in addition to being decorative, the interior decoration of the walls performs practical functions. First of all, the material used must have the ability to accumulate and retain thermal energy for a long time. This will not only create comfortable conditions, but spend less resources on heating it. An exception may be a traditional log bathhouse, where the walls are left unfinished.
Interior of a log bathhouse
Expert opinion: Masalsky A.V.
Editor of the “construction” category on the Stroyday.ru portal. Specialist in engineering systems and drainage.
It is important to understand that not every material is suitable for finishing a steam room. In addition to humidity, there is high temperature here. Panels made of chipboard and fibreboard emit toxins when heated, so it is better to immediately forget about this type of cladding. The same applies to linoleum, laminate and other materials based on synthetic substances. Wood has been and remains the most suitable option for interior decoration of a bathhouse.
Pine slats
To decorate the steam room, wood is used, which absorbs heat, accumulates it, but does not burn upon tactile contact. This wood is characterized by rapid drying, stability and resistance to microorganisms.
So, the material for interior wall decoration in a bathhouse should have the following properties:
- Be non-flammable (if wood is used, it is treated with special compounds).
- It should absorb and retain heat without getting hot.
- Be moisture resistant.
- Dry quickly.
- Have a natural and environmentally friendly composition.
Some surfaces can be finished with more practical modern materials. For example, tiles. We'll talk about this later.
Alder has an even, smooth texture, a soft shade and a not very pronounced wood grain
How to sheathe the ceiling correctly?
You need to start finishing the steam room from the ceiling. It is in this part that there is the greatest likelihood of the formation of thermal gaps that exceed the norm, which is unacceptable when constructing steam rooms. The wall panels must be in close contact with the ceiling.
Attaching a wooden board to the ceiling should begin from the entrance side. For installation, nails or a clamp are used. The finishing fastener must support the total weight of the ceiling.
It is quite difficult to secure boards with a metal clamp or an ordinary nail. For this, a special hidden fastening element is used. The head of the nail is cut off and the end board is attached to it.
To protect the front surface of the lining, the nail should be finished off using a hammer. Clean the location of the fastener with sandpaper to prevent the formation of roughness.
The boards must be laid in strict sequence. The distance between the wall of the bathhouse and the ends of the lining should be no more than 40–50 mm. A gap is left to ensure air circulation.
Features of wood cladding
Wood is the best material for walls, ceilings and floors in a bathhouse. In turn, a rich assortment of wood-based finishes can be confusing.
Sometimes simple boards are used to cover walls. Of course, you should choose only products of the highest quality, without mechanical defects and traces of mold. The lamellas are fastened at an angle of 90 degrees on a wooden crate, also pre-treated with antiseptics and anti-feathers. However, it should be borne in mind that the cost of such material is quite high, and therefore it is rarely used for these purposes.
Combining shades of wood in the interior of a steam room
It is better to choose a material specially designed for wall decoration - lining . They are easy to install, they do not weigh much, unlike boards, and have all the positive qualities of natural wood.
The advantages of lining include the following:
- A wide range of shades and textures - different types of wood are used to make lining.
- The slats are equipped with a tongue and groove, which allows them to fit tightly to each other and greatly simplifies installation.
- Visually, this finishing makes the walls smooth and aesthetically attractive.
- The design of the lamellas assumes natural air exchange between the sheathing and the wall.
A bathhouse usually consists of several rooms: a dressing room, a washing room, a steam room, and sometimes a relaxation room. For finishing, you should use different types of wood, based on the purpose and operating conditions in the room.
Wood goes well with stone on the floor
Where the temperature remains at the same level and humidity is minimal (dressing room, rest room), choose pine trim. It is characterized by low cost, stability, low thermal conductivity and a beautiful natural pattern. Pine contains phytoncides, which, when released into the environment, have a beneficial effect on the body. The aroma that such cladding exudes is especially expressive. Due to the presence of resin in the composition and natural antiseptics, this finish is not susceptible to the formation of mold and mildew. But this wood is not suitable for a steam room, since when heated strongly, it begins to release resin and a pungent odor.
pine paneling
Steam room materials
For the walls in the steam room, lining made of aspen, oak, linden, birch or cedar is used. As a cheaper material, you can use edged boards made from the same types of wood. The surface of the boards must be sanded to a perfectly smooth state and treated with protective compounds. If they are to be installed in the dressing room and rest room, then the top can be varnished. Planed boards are almost twice as thick as lining, so they provide high-quality thermal insulation, but you should not give up insulation.
Boards as wall decoration
Washing material
The washing room has a comfortable temperature, since it is most often located in front of the steam room. There is high humidity here, so the materials are subject to requirements regarding moisture resistance. Often the walls are sheathed with clapboard made of larch - a stable, moisture-resistant material that dries quickly and does not deform.
Larch paneling
larch paneling
Material for the rest room
When decorating a relaxation room, decorativeness and creating a cozy atmosphere come to the fore. There are the following options for wall cladding made of natural wood:
- You can cover the walls with pine wood boards. This is the most affordable material with excellent performance properties. Pine is not subject to rotting, it contains natural antiseptics, the wood dries quickly, and has a beautiful natural pattern and shade. Scandinavian pine has the greatest durability, so it is worth choosing it. The shade of pine is light pink, over time it darkens a little and becomes deeper.
- Another inexpensive but high-quality material for walls is spruce lining. During its manufacture, heat treatment is used, due to which the lining becomes very durable and moisture resistant. This type of wood does not contain as much resin as pine, has a pleasant aroma and a unique natural pattern with knots.
Rest room (dressing room)
Note! If the bathhouse is made in the form of a log house, then all finishing measures are carried out only after its complete shrinkage.
spruce lining
The process of covering walls with clapboard: step-by-step instructions
Covering walls with clapboard involves installing insulation. For example, you can use a material with a fiberglass base of the URSA brand together with a vapor-proof layer of foamed foil polyethylene on top.
First the walls need to be prepared. They are cleaned of contaminants, primed, dried and markings are applied - the places where the timber is attached.
Table. Sequence of actions when installing the sheathing
| Illustration | Description |
| Installation of guides is carried out at intervals of 60 cm. If we take into account the width of the beam, the distance between adjacent elements will be 56 - 58 cm. Dowels are used to fix the beam. The caps are recessed so that they do not protrude above the surface (flush). Thermal insulating material is placed in the formed niches between the guides. An important point: the thickness of the sheathing should be the same as the thickness of the insulation. Mats with a thickness of 60 cm, when choosing this step of guides, will fit tightly, without forming gaps and without requiring additional fixation. |
| Fixing the vapor barrier | Foamed polyethylene with a foil front covering is used as a vapor barrier. Material no more than 2 mm thick is fixed around the entire perimeter of the room on top of the insulation. It is attached to the guides with brackets. For joints, use foil-coated moisture-resistant tape. |
| Fixing slats | Horizontal wooden slats measuring 2 x 4 cm are attached to the vertical guides through a vapor barrier foil material with self-tapping screws at a distance of 40 - 50 cm. |
| Alignment of slats | When fixing the slats, it is important to maintain their even position in space in the horizontal and vertical plane. If during fastening you find uneven areas, then you can place a piece of plywood or thin lath under the slats. It is important that the plane of the wall is level. |
| Fastening when aligning slats | If an additional leveling element is placed under the rail, then it is attached to the sheathing using a longer self-tapping screw (5-6 cm), through the plywood. |
| Attaching the bottom rails | The height at which the bottom rail is fixed is 3-5 cm from the floor level. This will make it easier to fix the lining at the bottom of the wall. |
| Attaching additional rails | Additional slats are fixed in corners, as well as around windows and doors. The installation method (vertically, horizontally) depends on the location of the element’s fixation. |
Table. Cladding walls with clapboard
| Illustration | Description |
| Fixing the first lamella | Attaching the first lamella begins in the corner. Its position is strictly leveled in the plane using a building level. Additionally, you can apply pencil marks to the slats. |
| The first lamella is attached in the corner | The panel is secured with self-tapping screws to each rail on the corner side. If you first make thin holes in the lining with a drill of a smaller diameter, then when attaching it to a self-tapping screw, the likelihood that the lamella will crack is reduced to zero. |
| Fixing the clamp on a nail | At the opposite end, the lamellas are secured using clamps. It is pushed inside the groove at the end of the panel so that it rests. It is fixed to the rail with a small nail or a stapler. If a nail is used, it must be held by the leg with pliers so as not to accidentally damage the lining. |
| Fastening subsequent lamellas | To fix the next panel, its groove is placed in the tenon of the fixed lamella. On the free side, the fixation also occurs: the clamp is inserted into the groove and secured to the sheathing batten. |
| Padding of lamellas | If you cannot get the slats to fit tightly, then most likely the tenon has not fully entered the groove and you need to “help” it. To do this, apply the lath to the locking part of the lamella and gently tap it with a hammer. |
| There should be a flat wall | All subsequent panels are fixed in the same way. The sheathing should create a flat plane with recesses, depending on the profile of the lining. |
| Fastening the corner | When all the walls are sheathed, to complete the finish, install overhead elements at the corners and at the joints between the ceiling and the wall, as well as baseboards. Small nails are used to secure these elements. |
| Tinted lining | To tint the lining, protective substances with anti-foam and antiseptics are used. This treatment will not only add aesthetics to the wooden finish, but will also protect it from negative external influences. |
How to make proper ventilation in a bathhouse and prevent rotting? Read in the special article.
Covering saunas and baths: what's the difference?
Bathhouses and saunas differ in humidity and temperature.
In the sauna, the air is dry with humidity up to 8% with a permissible temperature range of 80–140 degrees.
In the Russian steam room, high humidity is always maintained with an indicator of up to 70%. In this case, the maximum permissible temperature is up to 100 degrees.
There are no restrictions on the choice of tree species for sauna cladding, with the exception of pine. Raw materials are less susceptible to moisture and therefore last longer. Installation method: vertical, horizontal.
For lining a Russian bathhouse, it is better to take lining made of alder, linden, abasha, and larch. The combination of several breeds at the same time looks beautiful. The installation method is predominantly horizontal.
Alternative finishing materials
If wooden cladding is chosen for the walls in the steam room, then the floor and walls in the remaining rooms can be made of other materials.
Steam room
The interior of the bathhouse does not have to be completely “wooden”. The floor and wall behind the stove can be tiled. You can choose natural or artificial heat-resistant stone as the material for the area near the stove. For the floor, heat-resistant clinker tiles with a matte rough surface are used. You can slip on glossy tiles, which is especially dangerous in a room with a stove. To create a comfortable floor temperature, plank flooring is laid on top of the tiles or a “warm floor” system is installed. It can work from the stove.
Tiled floor in the steam room
Expert opinion: Afanasyev E.V.
Chief editor of the Stroyday.ru project. Engineer.
I recommend that you read the material about the most serious mistakes when installing a stove in a bathhouse!
Washing
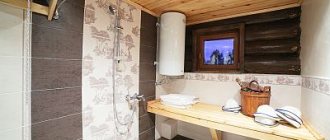
To finish surfaces in the washing room, it is better to use moisture-resistant materials that are not afraid of high humidity: ceramic tiles, porcelain tiles, mosaics. This material will forever eliminate the need for caring for wooden surfaces and treating them with antiseptics. One of the advantages of tiles is durability. Disadvantage: cold surface. For the floor, choose a material with a rough, non-slip surface; for the walls, you can choose glossy tiles or mosaics. Ceramic tiles come in a variety of colors, patterns and shapes, so the interior of a sink can be not only practical, but also stylish. Tiles go well with natural wood, so you shouldn’t completely abandon them in your washroom interior.
Ceramics diversify the interior
Restroom
Since the humidity in the rest room is not increased and there are no thermal effects on the surface, it is quite possible to use materials familiar in residential interiors: laminate on the floor and walls, MDF panels and boards with a laminated surface, glass wallpaper, decorative plaster, tiles, artificial and a natural stone.
Waiting room
If the bathhouse is built not from wood, but from concrete blocks, then the inside wall before finishing is lined with OSB or gypsum board sheets with insulation. You can install any finishing material on top, even moisture-resistant wallpaper for painting.
Which lining to choose for a bathhouse
There are 4 types of lining, differing in the profile of the boards:
- Eurolining.
- Standard (otherwise called “peasant”).
- Block house (imitation logs).
- American (imitation timber).
Popular brands that have proven themselves to be of high quality:
- "Calm";
- "Soft Line";
- "Classical".
All of them belong to the eurolining category and differ in size and profile. Boards, regardless of their type and brand, are often called lamellas.
Finishing a bathhouse with clapboard is a traditional, frequently used solution. It has gained so much popularity for many reasons. Lining is a natural and therefore environmentally friendly material that is beneficial to human and animal health.
When choosing, it is extremely important to consider several points:
- type of wood;
- grade of material;
- resistance to moisture;
- coefficient of thermal conductivity.
Additional protection - special compounds and impregnations
Wood is a pleasant-smelling, natural material, which, in addition, gives the bathhouse the appropriate atmosphere of a rustic steam room. Using wood clapboard simplifies the procedure for finishing a bathhouse, and also saves material and costs - covering the walls and ceiling with clapboard will ultimately be cheaper than making a bathhouse from wood or covering it with untreated boards. But the finished finish has a significant drawback - without treatment with waterproofing compounds it will not last long: moisture passes through the connecting seams, settles in the grooves, reaches the vapor barrier material, accumulates on it and provokes the development of mold. To avoid this, you will have to treat the walls, floor and ceiling after finishing with a waterproofing solution.
Protective impregnation will extend the service life of both the finish and the bath itself. The main thing when applying it is to read the manufacturer’s instructions on the packaging and act in accordance with the algorithms specified therein. The safest and most effective waterproofing agents for baths are those containing wax. Water-based impregnations can also be used.
What can't be used in a steam room?
It is unacceptable to decorate the walls of the steam room with coniferous species (spruce, pine). The reasons for this are as follows:
- when the walls are very hot, touching them can become unexpected and quite unpleasant;
- drops of released resins can get on the skin and burn it.
It is not recommended to use hardwoods such as oak and walnut. This is explained by their high heat capacity , which leads to the accumulation and retention of heat on their surface.
In a steam room, the walls of which are covered with clapboard made of oak or walnut, it is usually difficult to breathe . In addition, if you accidentally touch them, you can burn your skin.
You should not cover the walls in the steam room with chemical materials: varnish, stain and other similar compounds.
This is due to the harmful effects of chemicals on the human body at very high temperatures.
How to line the inside correctly if the bathhouse is made of bricks or blocks
Brick buildings are the coldest, blocks made of foam concrete are still better thermally insulated, but in general both of them require additional thermal insulation , so there is no option when you simply make a sheathing on a brick wall and start installing lining on it. Because it would take a very long time to heat such a bathhouse.
Therefore, it is possible to properly sheathe the inside of a brick bathhouse with clapboard only on top of a thick (depending on the cold of your area) layer of insulation. Since mineral wool is most often used, it is worth proceeding from its popularity. Below we will give an example of the entire “pie”, with insulation and lathing for the lining in the bathhouse.
Useful video
The author of this video shares life hacks that we did not mention in our article, maybe someone will find it very useful in their work:
*** For those who are building their own bathhouse, erecting a roof and other components of the building, we advise you to subscribe to our channel on Telegram to keep abreast of all new publications. And if any of you were looking for information on our website and didn’t find it, write in the comments what exactly you were interested in.
Providing the wash room with water
- heating water with a gas heater, if it is possible to supply gas to the bathhouse;
- using an electric boiler.
Thus, if it is possible to connect to the central water supply, then solving the issue of providing water is not difficult.
But if no communications are laid near the bathhouse, the required amount of water for washing all visitors to the bathhouse must be prepared in advance so that everyone can collect the required volume of water for themselves in a separate container.
Therefore, the calculation of the approximate volume of water must be made in advance. Considering that on average one person needs about 7-10 liters of hot water at 80-90 ºС and 3-4 times more cold water, it turns out that each steamer will need about 45 liters of water.
By multiplying the resulting value by the number of visitors to the steam room, you can determine how much water is required. Hot water is prepared in a large vat, leaving it on a stove, which is usually heated with birch wood.
Thus, if it is possible to connect to the central water supply, then solving the issue of providing water is not difficult.
Therefore, the calculation of the approximate volume of water must be made in advance. Considering that on average one person needs about 7-10 liters of hot water at 80-90 ºС and 3-4 times more cold water, it turns out that each steamer will need about 45 liters of water.
