A wooden house is valuable for its high vapor and air permeability. It is easy to breathe in, it is environmentally friendly and plastic. Easily repairable. However, situations arise when it is necessary to “make friends” between two incompatible materials: wood and concrete. Concrete floors are especially relevant when arranging washrooms in bathhouses, where it is planned to install a floor with a drain, or in utility rooms, on the first or basement floor, in which a large amount of pollutants gets onto the floor. Let's talk about how to install a concrete screed on a wooden floor.
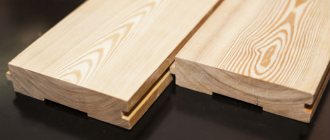
Description of plank floors
A wooden floor, from the point of view of the theory of strength of materials, is an unreliable support for concrete. The fact is that plank floors tend to change their linear dimensions, depending on the temperature and humidity of the environment. The length of the boards varies in the cold and warm seasons, the wood swells when wet and contracts when dry. In addition to linear changes in size, boards tend to change their spatial structure - as they dry, they begin to curl. Such unfavorable changes are completely unsuitable for the construction of a concrete screed, which, after setting and gaining strength, becomes monolithic, practically not subject to linear expansion.
Another obstacle to installing a concrete screed is its heavy weight.
The usual base for installing a wooden floor is logs made of wood lying on the foundation or, in rare cases, beams made of reinforced concrete or metal profiles. They are not designed for significant loads and with additional pressure, the ties can become deformed and break.
The third nuance of floors is the small thickness of the base. A standard floorboard has a thickness from 2.54 to 50 mm. Inch boards are rarely used because they bend under the weight of a person of average build. Floor boards thicker than 40 mm are also rarely used in house designs, only in those rooms that experience strong static or dynamic loads. The most popular board is 36 mm - tactile (feels), does not bend when moving on the floor. But, if you make accurate measurements of the floor level, it becomes clear that when laying tiles it also “plays”, especially if the distance between the supporting joists exceeds 1000 mm and the floor boards are not reinforced. Such “floating floors” are installed in newly built houses in order to prevent the boards from deforming when the outer walls of the house shrink. It is impossible to install a screed on such an unsettled floor that is in the stage of natural deformation. Otherwise, there is a high risk of cracking of the screed, despite the reinforcement and installation of the sliding layer.
The fourth obstacle is the wood's susceptibility to rot. The concrete screed sharply limits the flow of air to the surface of the wood and creates favorable conditions for the growth of mold fungi that destroy the structure. In addition to fungi, insects like to make shelters in unventilated spaces, many of which feed on wood. Topographer beetles, sawflies, and in the southern regions – termites.
If the developer is not afraid of the obstacles that he will encounter when arranging the screed, he can proceed with step-by-step actions.
Option 2. Installation of a monolithic screed
In general, experts do not recommend leveling wooden floors with a concrete screed. It may be too heavy for the old flooring, which will accelerate its destruction. And this order of arrangement of layers violates the immutable rule of construction: the base must be stronger than the coating in contact with it. Therefore, you need to make sure that they do not contact each other.
Poured concrete base
The most important thing is proper preparation of the base
However, in special cases, sometimes it becomes necessary to pour a screed over a wooden floor. Since these materials have completely different properties, the main task that will have to be solved is to make sure that the mobility of the wood does not interfere with the long-term service of static concrete.
Important! During the first 4-5 years of operation, the boards are most susceptible to shrinkage phenomena, so only old wooden flooring can be poured with concrete. In a new one, as a result of the loss of moisture from the wood, after some time cracks appear and the linearity of the boards changes.
Plank floor
- Such collisions always occur with wood, but to a lesser extent with old trees. Do not forget that a monolithic screed poured onto a wooden base should not be in direct contact with either the flooring or the walls.
- When the wooden covering is made along joists and is the floor of the first floor, under which there is a concrete base, then there is no need to fence the garden - remove all wooden structures and fill in a new concrete screed with light filler.
- If the floor structure itself is framed or it is a ceiling on wooden beams, then nothing can be done - you will have to pour a screed under the tiles. In this case, if possible, you need to reduce the number of layers of the floor cake if, for example, it is like the one in the picture below.
Construction of wooden interfloor ceiling
- That is, you need to remove the finishing coating or remove excess lathing, reaching the subfloor, which will reduce the mobility of the base. All elements that remain must be well secured. Here you need maximum rigidity, and if the flooring is loose in certain areas, you will have to open it to install crossbars, as shown in the photo below.
Installing crossbars after opening the deck
The last stage of preparing a wooden base, if it is not a painted floor, will be treatment with a biocidal-hydrophobic primer, which will slow down the process of its destruction and extend its service life.
Calculator for calculating the amount of ingredients of a mortar for floor screed
Go to calculations
Pouring process
Table. Step-by-step instructions for pouring.
| Steps, photo | A comment |
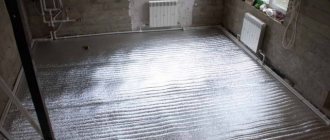
| Step 1. Installation of shock-absorbing tape | Shock-absorbing tape - damper, is mounted along the perimeter of the walls. It will provide the screed with a technological gap for thermal expansion. The tape can be purchased ready-made or cut from a laminate backing. |
| Step 2. Laying polyethylene | Before you proceed directly to monolithing a wooden floor, it needs to be waterproofed with rolled material overlapping the walls. For this purpose, ordinary polyethylene is used - a film 1.5-2 mm thick. Width - the larger the better, there will be fewer joints. It is only important to handle it carefully so as not to damage it. Note! You can, of course, use bitumen-based materials instead of film. But polyethylene is better in this case, since it is smooth and does not adhere to the solution at all. |
| Step 3. Marking and installation of beacons | Then you need to bring the zero level to the walls, and break off the horizontal top of the screed from it. Instead of beacons, you can use a tightly stretched cord secured to self-tapping screws screwed into the floor. How all this will ultimately look is shown in the picture. On a note! When determining the thickness of the screed, do not forget about the thickness of the tiles and the adhesive layer. The thinner the fill, the better. If you need to raise the floors, say, by 20 mm, then it is better to first install cement-bonded particle boards, and then pour a 1-2 mm screed on top of them. A large thickness of concrete will create unnecessary loads on the wooden base with its weight. |
| Step 4. Selection of reinforcement and calculation of coating layers | To make the structure lighter, there is no need to use a reinforcing mesh, at least a steel one. There are lighter composite meshes on sale. |
| Step 5. Mixing the solution | But it’s even better to simply add polymer fiber to the concrete - it’s better suited for thin screeds. If the room is small, the easiest way is to simply buy a ready-made factory mixture reinforced with fiberglass - for example, BESTO. |
| Step 6. Filling the screed | The finished solution is poured in one layer - the entire room at one time. If metal beacons were installed, then after a day they need to be removed and the recesses sealed. To prevent the screed from losing moisture too quickly, lightly moisten it with a spray bottle and cover it with cellophane. |
Prices for cement M400
cement M400
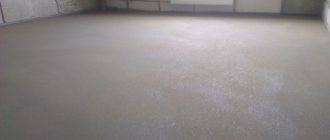
If you are going to lay tiles, allow the monolith to gain at least 70 percent strength, which for concrete is 19 to 20 days. However, as for the screed, the drying time will depend on its composition and thickness. If it is a 1-2 mm self-leveling floor, you can lay the tiles within a week.
Self-leveling screed
Design features of plank floors
The design features of plank floors include:
- Support material of the base (lags);
- Distance between joists,
- Board thickness;
- Connection type:
- regular board with straight ridge;
- tongue and groove;
- and a quarter.
Floors made of boards without connecting elements are not suitable for screeding, since each of the boards is subject to independent fluctuations in size under load or changes in humidity and temperature. This leads to rapid destruction of the screed. Boards held together provide a more reliable base for concrete. Although they are subject to linear changes in size, they behave more predictably.
An important factor when deciding whether to pour screed on a wooden floor is the material from which the boards are cut. The most popular and cheapest wood is coniferous wood: spruce and pine. It also has the lowest consumer and strength characteristics:
- High moisture capacity;
- Tendency to curl when dry;
- Susceptibility to damage by pests and microorganisms.
Larch floors are more suitable for screeding. This wood is practically not subject to rotting due to its high resin content. It has a low coefficient of linear expansion, is heavy and is not prone to deformation under load.
Hardwood is used less frequently for flooring, mainly in bathhouses or for decorative purposes.
Do-it-yourself wooden flooring: step-by-step instructions for self-installation
It is quite possible to lay a wooden floor with your own hands if you first study the instructions for carrying out this work. Plank flooring has always been more popular than floors made from other materials, as it differs from them in its natural warmth, environmental friendliness and ability to create a specific, especially healthy microclimate in living spaces.
DIY wooden flooring
Most often, coniferous wood is chosen for flooring in the house. Mostly larch is used, which shows particular resistance to both temperature changes and high humidity. Thanks to the natural antiseptic qualities of this tree, destructive fungal formations do not occur on it, which means that processes of rotting and destruction are excluded.
Floor requirements
Wooden flooring must meet certain requirements, without which the floors will not last long and will not be comfortable for residents. These criteria can safely include:
- Effective sound insulation and thermal insulation of premises.
- Reliability and durability of wooden covering.
- Wear resistance, and therefore durability of the floor.
- Moisture-resistant and hygienic – cleaning the floor should not be particularly difficult.
- The aesthetics of wooden flooring - it should become a decoration of the room.
- Ease of installation work.
To achieve all the mentioned qualities of a wooden floor, you need to choose the right material for its installation.
Material selection criteria
For a wooden floor, you should select high-quality material.
In order for the floors to last a long time without the boards drying out and deforming, when choosing wood you need to pay attention to the following material parameters:
- Grade. For finishing coating, it is better to choose the highest or first grade of board, and for rough flooring, 2 ÷ 3 grades are usually purchased. If the finished floor will be covered with paint, then second-rate material will be quite suitable for it.
Its quality will directly depend on the grade of wood. Even when purchasing the highest grade material, you need to pay attention to the presence of possible defects, such as chips, cracks and knots - they should either be completely absent or be in a minimal quantity.
- It is very important to pay attention to the dryness of the wood. It must have a certain humidity, otherwise, over the years, cracks will appear between the boards, and the floorboards themselves will begin to deform. Humidity for finishing boards cannot exceed 12%, and for rough boards - no higher than 17%.
- The length of the bars and boards should ideally correspond to the length and width of the room where the floor will be laid.
- The standard thickness of floorboards is 120 × 25 mm and 100 × 25 mm. This parameter is selected depending on the step of laying the logs on which the boards will be attached. According to existing technology, these distances must be selected in accordance with the data given in the table:
| Step between joists in mm | Floorboard thickness in mm |
| 300 | 20 |
| 400 | 24 |
| 500 | 30 |
| 600 | 35 |
| 700 | 40 |
| 800 | 45 |
| 900 | 50 |
| 1000 | 55 |
When purchasing any building material, after the necessary calculations have been made, you must add 15% to this amount in reserve - this rule has been tested by experienced builders, so it is recommended to follow it.
Wood preparation
Before installing joists and floorboards, they must be prepared. Typically, flooring material is sold already planed, but if burrs are revealed during inspection, they must be removed using an electric planer.
Treating wood with antiseptic compounds
Next, all boards and bars are treated with antiseptic compounds. This is done to protect them from fungal and mold infections, protection from insects and, to some extent, even rodents.
Their installation begins only after the material has completely dried.
Choosing a floor design
Knowing all the requirements for the covering material, you need to decide on the design of the floor, since each specific case will have its own option, depending on the conditions under which the installation will take place.
There are several main types of wooden floor designs:
- The floors are on joists laid on floor beams. In this case, plywood or boards can be used for the finished floor.
- “Floating” structure - boards laid on a concrete base, but not attached to it.
- Covering fixed to logs laid on the ground.
These methods of installing a wooden floor have become the most popular, as they give creative freedom to the craftsman, who can make his own adjustments to the design. But, one way or another, for each room it is necessary to choose the only option that suits it to a greater extent.
Floor beam system
- The logs, as the basis for the floor, can be attached to floor beams, which, in turn, are laid on a columnar or strip foundation. This is permissible if the room where the floor is installed has a width of no more than 2.5 ÷ 3 m.
Beams are installed directly on the foundation
- To create an air gap, floor beams are often raised above the ground to a certain height, laying them on the upper waterproofed surface of the foundation. They can be rigidly attached to it or simply placed securely on top. The second option is chosen if the foundation has not yet had time to shrink, and when it occurs, it will not drag down the floor system, which will certainly begin to deform from such an impact.
For large spans, additional support columns are installed
- If the room is large (more than 3 meters), columns can be additionally installed between the walls, which will create rigidity for the floor system. All supporting structures under the floor beams must be waterproofed so that the wooden parts last as long as possible.
What should be the thickness of the joists and floor beams? This mainly depends on the free span width (the distance between adjacent support points). Typically based on the following indicators (see table):
| Log section size in millimeters | Width of the room span in meters |
| 110 × 60 | 2 |
| 150 × 80 | 3 |
| 180 × 100 | 4 |
| 200 × 150 | 5 |
| 220 × 180 | 6 |
- After the floor beams are installed, the logs need to be secured to them. The distance between them, as already mentioned, is calculated according to the thickness of the selected flooring boards.
The joists are attached to the floor beams
- When arranging such a “floating” floor structure, the logs, and then the boards, must be located at a distance of at least 12 ÷ 15 mm from the walls, that is, be independent from them. An insulating material is laid into the opening between the walls and the floor system, which will not allow cold air to enter the room, will allow the wood to “breathe”, and will expand freely when there are changes in temperature and humidity.
- When laying logs consisting of two separate sections, their overlap by 400 ÷ 500 mm should be on support posts or on a beam. The logs must be leveled to the building level; if necessary, small pieces of wood are placed under the logs to achieve an ideal horizontal level.
- After the logs are installed and fixed, it is recommended to install a subfloor, for which low-quality boards are quite suitable. To install them, cranial blocks measuring 30 × 50 mm are screwed from below along the entire length of the lag.
A low-grade board is quite suitable for a subfloor.
- Subfloor boards are not always secured to the slabs; usually they are simply laid tightly together. A vapor barrier film is laid on top of the subfloor, secured with staples to the joists and boards.
Vapor barrier film over subfloor boards
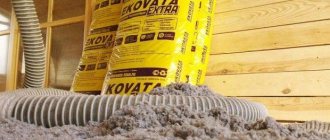
- An insulation material is tightly placed between the logs on the vapor barrier - this can be mineral wool in mats or rolls, as well as a dry backfill of expanded clay or slag.
Laying insulation on the subfloor
- Another layer of vapor barrier film is laid on top of the insulation. Its individual sheets are glued together with tape, and then the film is attached to the joists with staples.
The insulation on top is also covered with a layer of film
- The top layer of vapor barrier is necessary to prevent dust and particles of insulation material from entering living spaces. Floorboards or thick plywood will then be laid on top of this entire floor system.
Prices for various types of timber
timber
Joists fixed to concrete surface
Often, to create an insulated layer for the floor in apartments, a wooden floor on joists is also installed on a concrete base. Here the whole difficulty lies in leveling the joists on the surface, especially if it is planned to raise the wooden covering a few centimeters above the concrete slab.
If the apartment is located above the first floor, then most often the logs are laid out, leveled, and then secured to the concrete base using anchors.
Aligning joists horizontally using threaded stud posts
In both the first and second options, the logs are drilled through. To raise the logs above the base, various metal and plastic elements are used. In this case, the photo shows the studs. They allow you to raise and lower the logs on one side or the other, leveling them. The excess section of the stud, after bringing the lag to the desired height, is cut off using a grinder.
In each of the options, insulation can be laid on the concrete between the joists, which will add thermal insulation to the coating and also help muffle noise, both from the lower apartment and from the rooms where joists are installed under the wooden floor. Mineral wool, polystyrene foam or bulk insulation can be used as insulation material.
It is recommended in both the first and second cases to stretch the log on top and secure a vapor barrier film and only then proceed to laying the final coating.
Flooring on concrete surface
Sometimes a wooden floor is laid on a concrete floor without the use of joists. Floorboards or plywood are used as covering. It is advisable to lay a thin insulating material under such a floor - most often foamed polyethylene is used for this, but it is better to choose one that has a foil coating.
Laying a wooden floor without using joists
Separate sheets of backing material are fastened together with tape to create a solid coating - it will make the floor warmer and muffle noise. If plywood is used for flooring, you need to remember that a decorative covering must be laid on top of it. Floors made from fairly thick boards will look respectable if they are covered with varnish, wax or high-quality paint.
Installation of floorboards
Having chosen the boards of the required thickness, it is important to determine the correct direction for laying them on the floor. As many years of experience have shown, the best option is to lay the boards in the direction of natural light, that is, from the window. Therefore, you need to start planning the laying of the boards by marking and securing the joists.
Floorboards have different types of connections:
Types of joining boards for flooring
1. Connection using an insert-liner in the grooves of two boards.
2. Groove-tenon connection in the presence of tongue-and-groove boards.
3. Quarter connection.
The last type of connection is the easiest to install, so floorboards with this type of fastening are most often used. In addition, the “quarter” connection creates a single covering with almost imperceptible gaps between the boards, so it optimally retains heat in the room.
Boards can be attached to the joists in two ways:
Self-tapping screws can be screwed secretly into the locking part of the board
- Nails or screws can be driven into a groove located on the side of the board at an angle of approximately 45 degrees, with the head recessed into the wood. Some craftsmen prefer to do the opposite, driving the screws at an angle into the edge of the tenon.
Fastening can also be carried out through the front surface with subsequent filling of the holes
- In the second option, nails or screws are driven or screwed into the front plane of the board.
- When starting to install floorboards, you must step back 12 ÷ 15 mm from the wall. Later, a strip of insulation is laid in this gap and covered with the installed baseboard. It is necessary for the tree to be able to expand with changes in humidity and air temperature.
Be sure to leave a gap near the wall, which will subsequently be covered with a plinth
- The board is attached to the joists with nails 80 ÷ 120 mm or self-tapping screws 70 ÷ 100 mm. The caps are driven “under the cover”, and later they are sealed with putty matched to the color of the wood.
- If insufficiently seasoned wood is used, the laid floor requires a drying period that lasts 6 ÷ 8 months. During this time, the coating will shrink and dry out, the gaps between the boards will increase, and therefore it will be necessary to carry out the process of relaying it. In this regard, during the initial laying of the flooring, all the floorboards are not completely nailed to the joists, but only the fifth to seventh board is attached. After drying the boards, they must be rearranged, pressed together as tightly as possible and nailed to the joists.
For a tight connection, the boards are adjusted with a mallet through a wooden spacer
- If boards with a tongue-and-groove connection are selected, for a tighter connection, use a mallet, with which the tenons are driven into the grooves through the block. Craftsmen often use special clamps for this, especially in cases where, due to the slight curvature of the boards, installation involves coating the grooves and tenons with wood glue.
- To tightly connect the last board installed against the wall, temporary wooden wedges are used; they are driven between the wall and the board.
- The gap between the boards should not be wider than 1 mm. If the board is not installed in the groove completely, then most likely there is a burr or some kind of roughness left on the canvas, and this flaw must be removed and the tenon must be adjusted to the groove.
Find out how to remove the creaking of a wooden floor, as well as consider the causes of creaking and methods of elimination, from our new article.
Video: laying floorboards using clamps
Flooring prices
Floor coverings
Treatment of the floor surface after final flooring
After the floor has been rebuilt and secured, its surface may need to be scraped off. This process is carried out if, when the board dries, it becomes a bit wobbly and the surface becomes uneven.
After sanding the floor, it is recommended to cover it with a starting varnish according to the grain pattern. After drying, which usually takes 10 ÷ 12 days, the surface is sanded.
The starting varnish helps to identify insufficiently smooth areas on the surface of the boards, and therefore, after it dries, it is easier to find rough spots and carry out additional sanding.
After sanding, skirting boards are installed that will well hide the gaps between the wall and the floor boards. If, as a result of this operation, gaps remain between the floor and the baseboard, they are sealed with putty to match the color of the wood.
Now that the floor has been prepared in this way, you can proceed to finishing the surface with wax, oil, varnish or paint.
The plank flooring is covered with a finishing compound not only to give it aesthetics and respectability, but also to protect it, and therefore ensure maximum long-term use.
Oil treatment
If the boards have a beautiful, pronounced textured pattern, then a special oil is often used to cover it. It makes the floors warmer, not as slippery as when varnished, and also gives it antistatic properties. The oil penetrates the structure of the wood and reliably protects it from the penetration of moisture from the outside, practically repelling it.
Oil treatment of the floor surface
Wood coated with oil is less susceptible to various types of damage, and existing flaws become virtually invisible. The oil does not clog the pores of the wood, preserving its naturalness, allowing the material to “breathe”, which creates a favorable microclimate in the living room.
Floors that are coated with oil must be protected from dust until it is completely absorbed. During operation, such a floor requires special care using special means. It is very important to remember that it is not recommended to place furniture with metal legs on such a surface, as there is a risk of unwanted reactions that may result in dark stains remaining on the wood.
Oiling floors is recommended in rooms with high humidity - bathrooms, terraces and kitchens. This coating is also good for a hallway or corridor, since boards impregnated with this substance are more resistant to abrasion.
There are compositions for floor coverings that do not consist of pure oil, but with the addition of liquid wax, which gives the floors a matte, soft shine. Pure oils are also applied to the surface of wood; they are well absorbed into the surface, are economical to apply and do not require a long wait to dry.
Floor oil can be colorless, or it can have different shades that make the wood darker or give it a special, pleasant and warm color.
The oil is applied in two or three steps. It can be rubbed in or applied with a brush, and its excess is immediately wiped off to avoid the formation of a film on top, which will create uneven coverage.
The oil composition can be applied hot and cold in several layers. The faster the wood absorbs oil, the more coats will need to be applied. The heated composition penetrates much faster and deeper into the pores of the wood, and this coating lasts much longer than with a cold application method.
Waxing the floor surface
Wax is most often combined with an oil finish. So, sometimes waxing occurs with a composition that consists of natural beeswax and linseed oil. This coating protects floor surfaces well from scratches and dirt, as well as from moisture absorption, but will not protect the wood from cracking and intense mechanical stress. The wax coating gives the surface a pleasant matte shine and golden hue.
One of the combined oil-wax compositions for flooring
The wax is applied to the cleaned floor using a wide roller in several layers. The first of them must be very thin in order to be well absorbed into the surface. Next, the floor is sanded, and then it is covered with another layer of the compound and sanded again.
Wax combined with oil is an environmentally friendly coating material and is very good to use in children's rooms and adult bedrooms. Wood that has undergone this treatment has the ability to “breathe”, so the floors will last a long time and create a favorable microclimate in the room.
Varnishing a wooden floor
Varnishing a wooden floor
- The varnish coating can be applied by brush, roller or spatula at room temperature, moderate humidity and absence of drafts.
- The first layer of nitro varnish is applied to the cleaned surface, which will serve as a kind of primer for the finishing layers of the composition. It is applied in a thin layer along the textured pattern of the wood. If necessary, the primer can be applied in two layers.
- After the primer has dried, the surface is sanded well using sandpaper. After this, the floor is washed with soapy water, thoroughly wiped and dried.
- After this, they begin to apply the finishing layers. There may be two or three of them, and each of them is dried and sanded.
Applying varnish to floors is a rather complex undertaking that requires careful selection of the composition for a specific type of wood. Therefore, if this particular method of processing a wooden floor is chosen, it is better to entrust the work to a specialist who will determine the amount of work and select the necessary materials.
The varnish coating is quite fragile and easily damaged by mechanical stress, so it is not advisable to walk on it in thin heels or move furniture. In addition, varnishes are most often produced on chemical bases, which, by clogging the pores of the wood, do not allow it to “breathe”.
Staining a Wood Floor
Recently, paint is rarely used to cover wooden floors, but it still happens, especially in cases where a special interior style is chosen. In addition, paint is used in cases where it is necessary to cover up a not entirely attractive type of wood, since such a coating completely covers the surface of the floor. For this finishing treatment, you can choose paints on different bases: oil, enamel, nitrocellulose, as well as acrylic, water-dispersion and latex.
Sometimes it makes sense to use floor painting technology
Water-based paints are preferable for residential premises, as they do not contain solvents and additives harmful to the human body. They are produced in different color shades, so you can always choose the one that is more suitable for a particular interior.
Enamels and other paints based on chemical solvents are also used for living rooms, but after applying them, the rooms require long-term ventilation, since these fumes can pose a threat to human health.
Before painting the floor with water-based compounds, the boards are coated with a special primer. For other coating materials, the base must be prepared using impregnating compositions, the main component of which is usually drying oil.
The paint can be applied in one, two layers or, in extreme cases, three. It is recommended to choose the “golden mean”, since paint applied with too thin a layer will quickly begin to wear out, and if applied with a thick layer, on the contrary, it will peel off. Each coat of primer or paint must be thoroughly dry before the next one is applied.
The technology for painting a wooden floor in great detail in the corresponding publication on our portal.
So, if you have the basic understanding of working with wood, and also have the necessary materials and tools, you can try laying floors from boards or plywood yourself. If you have questions, you can always seek clarification and advice from articles that will help solve any problem. And at the end of the article - another interesting video on the technology of laying wooden floors.
Video: how to prepare and lay a wooden floor
Pouring technology
Pouring a concrete screed requires preparation of the base. If it is possible to avoid the “layer cake” effect, wood should be excluded. If a wooden floor is the only base, then the following measures should be taken:
- Remove the skirting boards around the perimeter of the room;
- Inspect the supports. To do this, remove about two boards along the entire length and find out on what basis the floor is constructed and the safety of the logs;
- The internal (lower) surface of the boards is subject to inspection. If there are traces of mold on it or pests are found, such boards are replaced;
- It is advisable to clean the surface of boards coated with oil paint/varnish using a plane or scraping machine;
- The outer and inner surfaces of the boards are treated with water-based antibacterial impregnation;
The boards are additionally strengthened in places of contact with the joists using screws/screws, but not nails or wooden pins, which become loose over time and allow the boards to move in the vertical direction. It is possible to firmly fix the boards to the joists only after 2-3 years have passed after the construction of the house or the laying of a wooden floor. This is exactly the period of natural drying of wood at room temperature. During this time, all internal stress in the boards is removed. Those defects that remain after the specified period are eliminated mechanically - by jointing or scraping.
On the feasibility of using polyethylene
Bearing in mind that wood is subject to linear changes in size more than concrete, measures are taken to isolate them from each other. The top layer of the floor - the screed - turns out to be floating. A thick (100-200 microns) film is used as a waterproofing agent and separator. The canvases will be laid on top of each other with an overlap of 200-300 mm, and in places of contact they will be glued together with bitumen mastic. The film is not attached to the boards in any way. In places of contact with the wall of the house, an overlap of 100-150 mm is made. The perimeter of the room is covered with damper tape over the plastic film, which will allow the concrete screed to move freely along the walls as they shrink or thermally expand.
Other types of waterproofing materials or insulation cannot be used as an intermediate layer. Roofing felt and other rolled materials impregnated with petroleum distillation products emit formaldehyde and creazote during operation, which will inevitably penetrate through the screed into the room. Under load, the rolled material is glued to the surface of the wood and tightly bonded to the concrete. Thus, materials with different expansion coefficients will be unable to move relative to each other. When there is a change in temperature or humidity, the screed will begin to crumble.
Condensation can form under polyethylene in damp rooms and on the first floors of buildings. Therefore, the surface of the wood must be treated with a hydrophobic antiseptic.
Insulation device for leveling with concrete
After the preparatory work, it is necessary to lay waterproofing coatings. This process can be divided into two stages:
- A foam tape is glued to the wall along the entire perimeter of the room; its width should be slightly larger than the thickness of the concrete screed. The presence of the tape will leave a gap between the screed and the wall, which will allow for a sliding connection. This tape also performs a soundproofing function.
- Polyethylene is laid over the entire area of the wooden floor. The main requirement is tightness. Therefore, if there are joints, they are glued together with tape or glue, and the installation is carried out with an overlap on the walls (200 mm).
If subsequent work results in a puncture in the waterproofing surface, it must be repaired. To do this, you can glue a plastic patch.
Calculations
The calculation of material requirements is made taking into account all necessary consumables with a reserve plus 10% for overexpenditure or unforeseen circumstances.
The calculation includes:
- Fastening hardware (screws, wood screws) for strengthening boards to joists;
- Hydrophobic impregnation in accordance with the manufacturer’s recommendations;
- Polyethylene film 200 microns with a margin plus 20% for overlap and lining under the damper tape;
- Damper tape - around the perimeter of the room;
- Reinforcing mesh - according to the area of the room;
- Dry concrete mixture for screed or cement and sand to prepare the solution yourself. For the screed, use the proportion of cement/sand/water/reinforcing filler:
- Cement grade M150 1:3:0.55:0.1
- Cement grade M200 1:2.8:0.45:0.1
Concrete volume calculator
When figuring out how to pour a concrete floor in a wooden house, you cannot miss the need to accurately determine the amount of mixture used and the time to complete the procedure. To do this, you must perform certain calculations. A calculator will come to the aid of the builder, allowing you to accurately calculate the required volume of concrete. The online calculator will accurately indicate the required amount of mixture, providing accurate information.
Calculation of concrete composition
Another calculator will help you prepare the concrete mixture correctly. He calculates the composition of concrete components. As a result of using such a convenient online service, it will be possible to determine in advance the required amount of cement, sand with crushed stone and water. At the same time, the developer will receive the final cost of materials by entering only the value of the required grade of concrete and its required volume.
Preparing the base
All protruding metal objects are removed from the boards: nails, staples, screws. Remove the top layer of oil paint. Seal holes and depressions from fallen knots, large chips and dents on the boards with oil putty mixed in a 1:1 ratio with sawdust. The surface is treated with a water-based antiseptic and allowed to dry for 2-3 days with active ventilation of the room. The drier the surface of the wood, the better.
Pros and cons of screeds
Dry screed will correct mistakes
Dry screed has a number of advantages:
- simple production;
- if available, it is convenient to lay communications;
- easy to correct errors;
- no need to wait for drying.
However, it has some imperfections:
- Sometimes significant thickness is required, but the height of the room is reduced;
- material costs increase.
When pouring a concrete screed, the material consumption is small, but you need to wait a long time for it to dry.
In any case, it is worth making a choice towards one material or another. The right solution will avoid further problems with other coatings.
Marking
Marking is necessary if the area of the room exceeds 2 meters on one side. In this case, the room is divided into squares/rectangles no more than 2x2 meters. Otherwise, the screed will begin to crack spontaneously. To control the thickness of the screed layer, beacons are set - wooden choppers, the upper edge of which is leveled using a laser level or using a tensioned thread set to a level.
The use of wooden choppers is convenient because after the cement mortar has hardened, they can be cut off with a knife without damaging the integrity of the screed.
Why use plastic film
Polyethylene is a budget waterproofing material that has many disadvantages: wood rots and creates favorable conditions for the development of mold and fungi. Typically, film is not used in conjunction with wood. But in this case it is a necessity. It is due to the fact that concrete does not stick to its surface, which means it can slide when hardening.
Since the use of film is a prerequisite, it is necessary to take all measures to prevent the formation of mold and fungi. A wide selection of antiseptic agents with water-repellent properties will help with this.
Waterproofing
A layer of polyethylene film is laid on a floor that has been well dried after treatment with an antiseptic. Rolled materials are rolled out along the long side of the room, from the entrance to the window. Overlapping areas of 100-150 mm are glued with adhesive mastic. Places of contact with the walls of houses are applied with mastic or pressed with damper tape with a thickness of at least 5 mm.
What is board bonding?
When installing a wooden floor, it is necessary to press the boards as tightly as possible to each other. This is not so easy to do - they will not have ideal geometry. When drying, they bend in different directions. During installation, they must be attracted to each other without gaps, and then fixed. Manually, without devices - this is not possible, because special devices or improvised means are needed.
Screeding floor boards is the elimination of cracks and gaps by mechanically tightening the boards
This process (pressing the boards against one another) is called bonding or floor screeding.
Reinforcement
Reinforcement is a mandatory operation when pouring a concrete screed on a wooden base. The reinforcement will not be able to completely prevent vertical vibrations of the boards, but it will significantly prevent the screed from longitudinal cracking along the joints between the boards.
For reinforcement, it is advisable to use polymer mesh, used for fencing garden plots or ridges.
It is better not to use a metal mesh with a mesh size of 20-40 mm, since the metal ribs lying on the plastic film when the screed moves can eventually wipe the film and open access for moisture penetrating through the screed to the wood.
Method 1 - reinforcing mesh
If the choice is made on a mesh, then it is recommended to use a plastic mesh of the OSS brand, or a fiberglass mesh of the brand:
- SSP-95;
- SSDor-330 (road mesh) coated with impregnation;
- SSM-85;
- SSDor-300.
The advantages of polymer and fiberglass reinforcement are:
- Elastic;
- Chemical inertness in contact with moisture;
- No radio wave shielding effect;
- Ease of cutting and installation;
- Light weight;
- Cheapness.
Method 2 - fiber fiber
Fiber is an unconventional method of screed reinforcement, which consists of introducing short reinforcing fibers with a length of 20 to 50 mm into the solution at the mixing stage. The fiber can be metal - pieces of steel wire, or pieces of fiberglass (bundle) of the same size. Metal fiber cannot be used when pouring over polyethylene film. Sharp edges of pieces of steel wire protruding from the solution will tear the film and damage the waterproofing.
The fiber creates multidirectional reinforcement, practically preventing stretching and compression of the screed throughout its entire thickness. It is advisable to use fiber reinforcement on lightly loaded floors with low traffic.
Many standard formulations of leveling mixtures intended for pouring screeds include fibers of synthetic materials and special plasticizers that prevent cracking.
Using microfiber instead of reinforcement
Reinforcement is the process of strengthening a concrete layer with steel reinforcement. However, working with metal elements can damage polyethylene. Therefore, it is possible to replace steel rods with fiberglass. This is a special material that strengthens the concrete screed.
The use of microfiber greatly simplifies the installation process, because it just needs to be added to the concrete during mixing. The absence of a metal structure significantly reduces the weight of the monolithic slab.
Mixing the solution
The solution is prepared at home in containers with a volume of at least 50 liters. To do this, it is advisable to buy 2 containers to ensure continuity of filling. While 2 workers pour the solution from the container onto the floor and level it with needle rollers, the third one mixes the next portion of the solution for pouring.
First, a clearly measured amount of water is poured into the container, recommended by the manufacturer of the dry mixture for the screed or specified in the recipe for preparing the solution yourself. No DIY or cooking by eye!
The concrete pouring technology, proven over decades, is aimed at achieving the highest possible strength. An excess of any component leads to a weakening of the solution or its extreme brittleness.
First, fill the container with water. Then cement is added, or the prepared solution is gradually poured from the bag. Two people prepare the mixture. One controls the mixer mounted on an electric drill or a special electric drive, the second evenly and continuously pours the mixture. After thoroughly stirring the solution, there should be no lumps left in it. Fiber (basalt, polymer pressed) is introduced into the solution and the briquette is allowed to disperse in water for 10-15 minutes. After this, the solution is mixed again for 5-10 minutes to evenly distribute the fibers. Sand is added last, as it is heavy and quickly sinks to the bottom.
You can also use a concrete mixer.
Devices for screeding floor boards
Do not think that devices for screeding plank floors are an invention of recent years. Our grandfathers and great-grandfathers also wanted a flat floor. Old textbooks describe ways to eliminate cracks during installation. For this purpose, metal staples were used - ordinary or of a special design. Modern devices and techniques are just variations of old methods.
You can also tighten the boards using a regular metal bracket. It's the old way
Bowrench and Special Automation
We describe these two devices together, since the Belarusian Spetsavtomatika made some changes to the Bowrench design, which is produced by the Americans. But, in essence, it is also a device.
You can tighten the boards using Bowrench
So, there is a part with two protrusions that is fixed to the joist. A metal stop and a handle are movably connected to it. By pressing the handle, we ensure that the board fits tightly and install the fasteners. The disadvantage of this device is that it blocks access to the end of the board. When laying a tongue and groove board, you will have to move it several times if you need to fix it to each support.
Logs can be of different thicknesses. To be able to “rest” against them, there are replaceable nozzles. The stop can be easily removed: you need to remove the two studs that secure the mounting bolts. However, the set consists of three or four attachments, so there are not many options.
The Belarusians have made some changes to the design: one part of the joist grip is movable and adjustable
In the device produced by Spetsavtomatika, the log grip is adjustable. There is an adjusting bolt at the end that allows you to extend or retract one of the clamps. There are more adjustment options, but there is also a higher chance of damage. In operation, both are quite convenient, although the “American” is more refined. But the difference in price decides the matter - Bowrench costs 3.5-4 times more.
How to tighten floor boards using a clamp and wedges
You can tighten the floor boards using a clamp and two wooden wedges. The clamp is fixed on the joist at some distance from the board being installed. Two wedges are made from a piece of board 40-50 cm long by sawing the piece diagonally.
A device for tightening boards from a clamp attached to a joist and wedges that press the board
The clamp is installed on the joist, turning the arc towards the board. Wedges are installed between the arc of the clamp and the board. They hit the wide side of the wedges with a hammer or sledgehammer until the gap between the two boards disappears. Then you can fix the board. If you need to install fasteners in a tenon or groove, a “window” is made in one of the wedges, which is placed above the joist and through which a self-tapping screw is screwed.
Thrust board and wedges
The previous method is good for everyone, but the board is attracted only in one place. You can, of course, install several clamps, but this is time. And there are usually not many sufficiently powerful vices on the farm. The problem can be solved using boards and similar wedges.
A support board about a meter long is nailed at some distance from those being mounted. They are nailed to the joists above which it is located. It is not necessary to drive the nails all the way to the heads, but the support should hold well. The distance for installing the support is chosen so that three or four boards can be laid without moving it.
Backing board nailed to joists and wedges are another way to hold floor boards together.
A piece of “lining” with a window through which you can tighten the self-tapping screw is attached to the board being installed. In order to be able to tighten the floorboards, scraps are inserted between the support and the wedges. First you need long pieces, then smaller ones. The entire structure is assembled so that the wedges stand in such a way that by knocking them down, the boards can be held together.
Fill
Filling begins from the corner farthest from the entrance. The solution from the container is poured onto the base, continuously trying to distribute it evenly over the surface so that the beacons are completely immersed in it. If the room area is large, barriers made of 40x40 or 50x50 mm timber are installed to prevent the solution from spreading. Immediately after emptying the container, the solution is smoothed with needle-shaped rubber rollers to remove air bubbles. The curing time of different brands of industrial screed with plasticizers can vary from 25 minutes to 2-3 hours.
If you are using a fast-hardening screed, you must work quickly. The mass hardens quickly and sagging can form at the joints of two fills, which will be very difficult to remove.
video screed on wooden floor
Construction of alignment beacons
The lighthouse is a metal guide. It is used for convenient and effective leveling of the surface of a concrete screed after pouring.
The lighthouse can be purchased at the store, or you can make it yourself from any available material. The only requirement for a lighthouse is levelness.
The presence of polyethylene complicates the process of installing beacons, because the solution does not stick to its surface, and self-tapping screws cannot be used due to the tightness of the coating. But the solution is quite simple:
- Divide the entire area of the room into oblong zones, no more than 1200 mm wide. At the same time, leave a distance of 300 mm to the walls.
- Prepare concrete of the same grade that will be used for pouring the screed.
- Lay concrete in longitudinal lines according to the markings.
- Install beacons on top of the concrete, checking against a pre-made mark on the wall. For greater accuracy, you can use a bubble level.
Further care of the screed
In its pure form, a polymer screed with decorative elements - glass, stone, mosaic - can be used on a wooden floor. In other cases, the screed serves as the basis for laying another floor covering. If there is a need to install a concrete screed on wood, then this is usually a damp room. Then an artificial stone or a base under the tiles is laid on the screed.
The screed, prepared independently from cement and sand, is covered in the first days, until complete hardening, with a thin polymer film to avoid cracking. Subsequently, until the concrete gains full strength, which occurs after 25-30 days, the screed is periodically moistened with a spray bottle or with a broom dipped in water.
Technological principle of leveling with concrete
How to simultaneously create favorable conditions for moving wood and static concrete? This is possible if two conditions are met:
- It is necessary to carry out a sliding connection of materials. That is, the concrete should not stick to either the floor or the walls. To do this, polyethylene is placed between the concrete layer and the wood. It will perform several functions at once: waterproofing wood and concrete and sliding gasket. Lay a damping film made of foam material between the walls and concrete. This will allow the wood to expand freely under the heavy monolithic concrete slab.
- The weight of the concrete screed should be evenly distributed over the entire area of the wooden floor, that is, its surface should be flat. Then the concrete will not begin to collapse due to the movement of wood.
Tiles as flooring
The physical characteristics of wood do not allow it to adequately retain the heat received from the heating system, so the best flooring option for horizontal water heating is tiles made of natural or artificial stone.
Tile screed
To obtain an independent screed for “warm floors” for laying tiles on wooden beams in a private house, the following work must be done:
- A “floating” screed is installed using the technology described earlier. The only exception is the thickness of the concrete solution. It should be 3-4 cm.
- After the screed has completely hardened, it is treated with a soil solution.
- Next, the floor covering is installed using tile adhesive.
Despite the possibility of installing tiled flooring on wooden logs, this technique has a significant disadvantage: the service life of wood is lower than that of porcelain stoneware and other tiled materials. To replace wooden blocks that have become unusable, you will have to carry out serious dismantling of the floor covering.
The advantages include:
- Significant cost savings due to lower wood costs.
- The total weight of the floor “pie” and the load on the supporting structure are reduced.
- The installation speed increases.
- The heating system is put into operation faster due to faster drying of the thin layer of concrete.
Despite some limitations, tiling a bathroom, swimming pool and other rooms with high humidity, together with a “warm floor” system, can significantly increase comfort and increase the durability of wooden structural elements.
“Warm floor” is maximum comfort in your home
Screed is an indispensable attribute of underfloor heating. It protects pipes from load and mechanical damage, allows you to obtain a perfectly flat surface of the floor covering, which has a beneficial effect on the comfort of residents. Its only drawback is that installing the screed “raises” the floor level, reducing the total volume of the room. If in rooms with high ceilings this will not have a significant effect, then in low ceilings it may interfere a little.
Mixture for semi-dry screed
The mixture for semi-dry screed consists of:
- high-quality cement (grades 400-500) – 1 part;
- washed sifted sand – 3 parts;
- polypropylene fiber – up to 1 kg per 1 cubic meter of mixture;
- water, the amount of which is determined by the state of the final product (when the mixture is compressed, it should form a lump without releasing excess water).
To facilitate installation work, you can add a plasticizer for concrete.