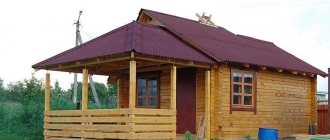
How to make a floor in a bathhouse
Traditionally, the floor structure in a bathhouse is a plank flooring laid on logs. The material used is spruce, pine, larch and fir wood. These are moisture-resistant durable woods with a natural antiseptic in their composition. One of the advantages is that when wet, floors made from these types of wood do not slip, which is not the case with oak planks.
When installing a wooden floor, its design is of great importance. The floor can be poured or not leaky. In the first case, the boardwalk is installed with gaps between the slats through which water flows freely. In the second case, water flows into the sewer through a special hole in the floor.
Note! All wooden elements in the bathhouse must be treated with antiseptic compounds.
Concrete floors are strong and durable. At the same time, when pouring the screed, it is necessary to insulate it. The screed is mounted with a slope towards the drain hole.
Practical modern materials for arranging the floor in a bathhouse are ceramic tiles and stone. This is a waterproof, durable material. The disadvantage is the cold surface. Therefore, a portable pourable boardwalk is laid on the floor, which can be taken out of the room to ventilate and dry.
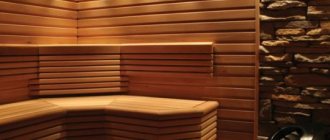
Tiles on the floor in the steam room
Concrete floor
Concrete floors are the optimal solution for baths that are planned to be used all year round. The cost of the materials used in the construction of such a floor is low, and the constructed floor itself will last for many years.
The floor is built like a non-leaking wooden floor: from the first steps, you need to arrange a slope along which water will flow into the drainage system.
The floor does not require special care, but during construction it should be treated with antiseptics that will protect it from moisture, parasites and fungus. Concrete is rarely left bare and covered with tile or ceramic tiles. The tile is resistant to various influences, as well as to fungus, but it should also be treated with antiseptics. Tile is a rather slippery surface, so you should walk on it carefully, or lay wooden nets, which is done most often. The nets are taken out after each wash and dried thoroughly.
Causes of wood rotting in a bathhouse
Without the use of special means, even moisture-resistant wood will begin to rot. The combination of humidity and high temperature creates a comfortable environment for the proliferation of pathogenic organisms. Another reason for wood rot is the lack of high-quality waterproofing and ventilation in the room.
When choosing a material for a bath, you should take into account in advance that coniferous wood, which contains phytoncides, is highly resistant to the formation of mold and mildew on their surface. Therefore, fir, cedar, pine, spruce, and larch are used for flooring.
Impregnations for treating wood in a bathhouse must have the following list of properties:
Note! Less stable materials are birch, alder, elm, maple, aspen, and linden. Therefore, treating wood with special compounds is a prerequisite.
Recommended coating materials
It is no secret that the floors in the dressing room are the coldest zone of the entire building. The room temperature rarely rises above 25⁰C, so before installing them you need to make waterproofing, vapor protection and carefully insulate the base.
Waterproofing
Depending on how the floor will be made and the type of foundation built, several methods can be used to waterproof the base of the dressing room.
Moreover, they differ significantly from each other not only in the material used for this, but also in the method of its installation.
The most acceptable in this situation are the following types of moisture protection:
- cast;
- pasting;
- backfill;
- impregnating.
Vapor barrier
Vapor barrier will protect the structure from steam penetration
Before insulating the floor of the dressing room, it is necessary to carry out a number of preparatory work, without which the base will not last long.
In addition to protection from moisture, you need to think about installing a vapor barrier material in a timely manner. It will prevent steam from penetrating inside the structure.
This primarily applies when laying floors in a wooden building. In some cases, it is possible to install a second layer of vapor barrier, located above the thermal insulation and directly on the floor. The most common type of vapor barrier today is polyethylene film. In addition to it, other materials can be used:
- Polyethylene with a special aluminum coating.
- Polypropylene material.
- Membrane with limited or variable vapor permeability.
Thermal insulation
When choosing thermal insulation for the floor in the dressing room, you should take into account that there is no material that does not have disadvantages, so it is necessary to analyze all types and, taking into account the design features of the room, select the most acceptable option.
You can stop your gaze on one of the presented materials:
- Expanded polystyrene.
- Extruded polystyrene foam.
- Expanded clay.
- Ecowool.
- Mineral wool.
What to consider when choosing impregnations
Some impregnations contain substances that, when heated, are actively released into the environment and can cause poor health. Therefore, they can be used in any room of the bathhouse, except for the steam room. This applies to synthetic-based substances - they can be used in rooms with a normal microclimate and temperature (rest room, dressing room). Compositions for treating wood in the steam room and washing room must have an organic basis.
Wooden coverings can be protected from moisture by:
Note! In the rest room and dressing room, you can use compositions both organic and synthetic based.
Acrylate-based antiseptics
With the help of such compounds you can not only protect the tree, but also give it a new shade. Acrylic impregnations are destructive for most pathogenic organisms. Before applying this composition, it must be diluted with water.
Such compositions have the following advantages:
The acrylate-based antiseptic SENEZH “Sauna” is very popular. It is specially designed for comprehensive protection of wood in saunas and baths. The antimicrobial effect ensures the destruction of viral bacteria.
door lock lining with handle
Impregnation for wood on an acrylate basis "SENEZH Sauna"
Features of the material include:
Is it possible to treat the floor in a bathhouse with drying oil?
After application, the drying oil polymerizes and a durable protective film appears on the surface, which does not allow moisture to pass into the wood. It is recommended to use drying oil on a natural basis in the bath, and especially in the steam room. When heated, it will not release toxins or odor.
The composition of natural drying oil includes vegetable oil - tung, linseed, sunflower and others. Sold as a clear oily liquid. When applied, it does not “clog” the pores of the wood.
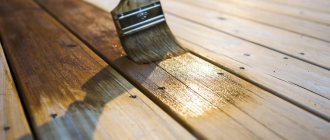
It is convenient to apply drying oil with a brush
Recommendations
When choosing what to paint bath floors with, you should focus not only on the color of the paint mixture and its service life, but also on the following points:
- Features of wood flooring
. When deciding what to paint a wooden floor in a bathhouse with, you should know that different types of wood have their own structure and density. Therefore, it is necessary to use coloring compounds suitable for the specific type of wood. - Intensity of use
. Oil paints are the most wear-resistant. Therefore, they are applied to floors in rooms with a high degree of load. - Service life
. Acrylic and water-based paints in the bath will last longer than others, since they are not exposed to moisture.
Summarize
So, how to paint the floor in the steam room? A steam room is a place where humidity and temperature are always high. Therefore, when painting wooden surfaces, it is necessary to use water-based and acrylic paints, which are non-toxic.
In the recreation room, the floors are painted with alkyd or oil paint.
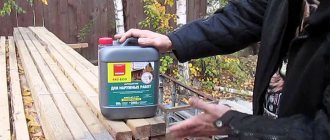
How to apply antiseptics correctly
Before treating the floor in a bathhouse, it is necessary to sand it in order to remove the damaged outer layer and increase the absorbency of the wood. The floor must be dry and clean before treatment.
Important! The manufacturer indicates recommendations for working with a particular composition on the packaging.
Apply impregnation in several layers. Each subsequent layer is applied to the completely dried previous one. The air temperature in the room should not be lower than +5 degrees.
Impregnation of wood with antiseptic
If the tree is already affected by mold, then you must first take measures to eliminate it by treating it with special antiseptic compounds or replacing the boards with new ones.
Most often, when building a bathhouse, wood is chosen as the wall material. The log house looks aesthetically pleasing and does not require additional finishing outside and inside. However, the walls will need to be periodically treated with protective compounds. And many people have a question: how to treat the outside of a bathhouse? We will talk about this in a special article.
How to insulate a dressing room?
Before you carry out any work, you should initially put together a plan.
It must be created before construction begins. This is necessary in order to navigate when choosing insulation, since the installation of each of them requires adherence to a certain technology. There are many different options for insulating such a room. But when using any type of thermal insulator, you will have to remove about 15 centimeters of the base. If you plan to make the floor higher than the foundation, then you can fill the space with bulk materials, such as:
- Earth.
- Expanded clay.
- Slag.
These mixtures will need to be compacted after backfilling.
The ideal insulation for the floor will be a material that is durable and fire resistant. It must be inorganic, so it could be:
- Minvata.
- Perlite.
- Glass wool.
Such elements are not subject to rotting and microbes and/or fungi cannot spread there.
Rating of popular wood impregnations
What wood impregnation would you choose or recommend?
To ensure that the impregnation protects the wood for as long as possible and does not wash out, it is applied under the final decorative layer.
Elcon Sauna
A type of wood oil. Reliably protects wood under conditions of periodic moisture and temperature changes. Protects the floor structure from mold and mechanical wear. Creates a matte finish.
Antiseptic for baths and saunas
Concentrated antiseptic impregnation contains synthetic biocides. The base is water. When applied and subsequently when heated, it does not release toxins and does not smell. Difficult to wash off composition.
Antiseptic for baths and saunas
Antiseptic “Clean Bathhouse”
Destroys pathogenic organisms, prevents the appearance of mold, mildew, and repels insect pests. Can be applied manually or mechanically.
Antiseptic “Clean Bathhouse”
Concentrated antiseptic for baths and saunas from NEOMID
Concentrated antiseptic preparation for treating wooden surfaces in rooms with high humidity and temperature changes. Guarantees long-term protection of wood from fungus, mold, and insects.
Concentrated antiseptic for baths and saunas from NEOMID
Antiseptic impregnation for saunas and baths from Proffi
Provides comprehensive protection for wooden surfaces in rooms with high humidity and high temperatures. Does not evaporate from the surface of wood when heated. Protects against insect pests.
Antiseptic impregnation for saunas and baths from Proffi
Why do you need to paint the outside of a wooden bathhouse?
- For protection against weather conditions. Sun, precipitation, wind - all this does not improve the tree;
- To protect against temperature changes emanating from inside the bath, which also affect the durability of the material;
- For protection from various biological lesions;
- For a more aesthetic appearance.
Points 1, 2 and 3 serve to extend the life of the wood base, and this is the main thing. And point 4, for some, is a controversial point. Someone will say, how can the color of paint be better than the texture of natural wood...
Painting of a log house must be preceded by the application of a primer coating, an antiseptic and a fire retardant compound (antipyrine)
It is important. The antiseptic will create protection against wood insects, fungal mold, rotting and other things, antipyrine, and increase the fire resistance of the structure
Both substances can be chosen either in the form of a colorless substance or an enriched color.
By the way, there are some paints that contain antiseptic and water-repellent impregnations. According to many experts (who always play it safe), it is better to perform priming as a separate process.
And after sanding (when the wood loses its roughened layer and becomes easily accessible to all kinds of biological damage), this must be done immediately.
Choice of varnish and paint
Wooden floors in a bathhouse can be varnished, but not all varieties are suitable for finishing. You can only use non-toxic, safe compounds that do not emit substances harmful and hazardous to human health when heated. The application of varnish is carried out only after careful preparation of the wooden surface: cleaning it, sanding, filling, removing and treating mold-damaged areas with an antiseptic.
When choosing paint, you should take into account the characteristics of the composition. Some of them cannot be used in a steam room, but can be used in other rooms.
Table. Types of paints
| Paint type | Description | What rooms is it suitable for? |
| Water-based | Natural base. Short service life (no more than 3 years). | All premises |
| Acrylic dispersion | Dries quickly. Large selection of shades. | All premises |
| Alkyd | Dims when heated. | Not recommended for painting the floor in a steam room. |
| Silicate | Has excellent water resistance | All premises. |
| Oily | Not resistant to high temperatures. Dims when heated. | Not recommended for washing and steam rooms. Suitable for painting the floor in the dressing room, rest room. |
The right approach to coating
If a wooden floor is being processed, a clear sequence of work should be strictly followed. This will avoid getting a poor-quality coating and further rotting. Experiments with the products used for processing are also unacceptable - they may lead to the need to replace all flooring. Therefore, it is better to give preference to trusted manufacturers, even if their products are not cheap.
The process of covering the surface in the dressing room and other parts of the bath takes place in several stages:
- Treatment with antibacterial composition.
- Application of any finishing type coating.
Laying tiles on the floor in a bathhouse
In modern baths, you can increasingly find tiles on the floor. And not only in the relaxation room and washing room, but also in the steam room. Tile is a universal finishing material. It is not afraid of temperature changes and water; the tiles are easy to care for and can be regularly treated with disinfectants. It doesn't rot or burn. And the variety of shades, patterns, shapes and sizes allows you to realize any design idea. In addition, tiles go well with natural wood.
Gratings over ceramic tile floors
Tiles for laying on the floor of a bathhouse have the following advantages:
Preparation and styling
The base for laying tiles can be wooden or concrete. The second option is more preferable. The concrete floor is also moisture resistant and does not rot. Before pouring the screed, it is necessary to install a drainage system and a drainage system. It is better to locate the drain hole in an area with less traffic. The material of the drain hole located on the floor surface should not overheat under the influence of high temperatures.
When the concrete base gains strength, tiles can be laid. The process occurs in the same way as in residential premises. However, on the floor in the bathhouse it is necessary to provide a slope towards the drain. The process of laying tiles is as follows.
Table. Instructions for laying tiles
| Illustration | Description |
| Step 1 | The concrete base is checked for evenness - it should not have defects on its surface. It is immediately worth noting that the slope can be formed by a screed or during installation using an adhesive solution. The concrete is cleaned of dust and degreased. Then the markings are applied, using as a sample the laying diagram previously drawn on a piece of paper to scale. The trimmed tile elements should be in invisible areas (in corners, under shelves). |
| Step 2 | Tiles are laid along the first marking line. Spacer plastic crosses are immediately placed between the tiles. This will allow you to draw a second marking line, which will run at an angle of 90 degrees to the first. Laying the tiles will begin from the intersection point. |
| Step 3 | Prepare an adhesive solution. The adhesive for laying tiles in a bathhouse must be elastic, since it will regularly be exposed to temperature changes. Instructions for preparing the adhesive composition are indicated by the manufacturer on the packaging. It is produced in the form of a dry mixture, which must be diluted in a certain proportion with water and mixed until smooth using a construction mixer. |
| Step 4 | The finished solution is applied to the area where the first tile is laid, slightly extending beyond the boundaries of the marking. Level the composition with a notched trowel. |
| Step 5 | When laying large-format tiles with one side larger than 300 mm, the adhesive composition is applied to the back side. Laying large tiles is preferable, since the coating ultimately has fewer seams. |
| Step 6 | The tile is laid, checking its position in the plane. The quality of the subsequent floor covering depends on the correct installation of the first element. |
| Step 7 | To adjust the position of the tile, tap it with a rubber hammer. This must be done through a layer of thick cardboard or thin plywood so as not to damage the material. |
| Step 8 | During the process of laying the tiles, a joint is formed between the tiles using plastic spacer crosses. |
| Step 9 | A day later, when the glue has dried, the crosses are removed and the joints are grouted. The grout can be epoxy or cement. The first one requires skill, as it picks up quickly. The grout is spread over the seams using a grater. Then (after 10 minutes) the excess is removed with a damp sponge. After 40-50 minutes, wipe the tiles. If there is a white coating, then a special product is used to remove it. |
If porcelain stoneware is used as a floor covering, then special attention should be paid to the adhesive solution, which should have not only high elasticity, but also adhesion.
Video - Laying floor tiles in a bathhouse
Source
Tiled floor
Tiled floors are easy to install. After forming the screed, apply a special 15 mm thick solution to the floor, which can hold the tiles in the harshest conditions of its use. After this, lay the tiles evenly. Tile is an excellent solution for rooms with a high level of moisture, because the popular laminate cannot be used there, since it does not have moisture resistance, and in addition, there are high temperatures in the bathhouse, which also destroy it.
Why tile floors are so good:
- Ceramic or tiled tiles can easily withstand any temperature, just like the material that holds them on the floor.
- Tiles, unlike wood that is subject to rotting processes, do not absorb vapors and moisture, preventing destruction.
- The service life of tiles will please any bathhouse owner, because it lasts for more than one decade.
- The tiles do not require special care, because they can simply be washed and treated with antiseptics that prevent the proliferation of microorganisms.
Floor in the bathhouse: what materials and how best to make it?
Since the bathhouse has high humidity and temperature, special requirements are imposed on the arrangement of the floor covering. Failure to comply with them will lead to the fact that it will be inconvenient to move around the room, and in the absence of proper outflow of water, stagnation will form.
Not every material can be used as a floor covering. If ceramic tiles and wood are ideal, then linoleum, laminate and parquet are never used for known reasons.
Let's figure out which material is best suited for flooring in a bathhouse and what features of flooring exist.
Applying varnish
The final stage of finishing any room is varnishing. However, the materials necessary for treating surfaces in a bathhouse are subject to special, increased requirements (for more details: “Which varnish to choose for baths and saunas - the differences and advantages of different compositions”).
The varnish must provide:
- absence of rotting due to increased effects of antiseptic impregnation;
- protect floors from any damage, including mechanical;
- safety for the health of humans and their pets;
- resistance to high humidity;
- no toxic fumes due to overheating.
After this, you can apply the varnish using a brush or roller - whichever is more convenient for you. The varnish should dry thoroughly, after which another layer can be applied if necessary. Please note that in the steam room you can only use varnishes that do not contain toxic substances released into the air when heated. Another important point is that the varnish must protect the coating from accidental fire as a result of a spark from the oven.
Which materials are not suitable and why?
The floor in a bathhouse is one of the key places, which determines how comfortable and durable the operation of the building will be. Experts do not recommend using improvised materials and everything that is available on the farm, since this may not only be impractical, but also dangerous to health.
Qualities that a bath flooring material should have:
Absolutely safe: does not slip, does not deform or swell when in contact with moisture, does not release toxic substances when heated.
Dries quickly naturally.
Does not melt on contact with fire.
No less popular is a floor made of heat-resistant tiles, which are laid on a concrete screed. The sequence of work will be different in each case, so let's look at it step by step.
We can do it ourselves, with our own hands.
If we are not talking about an ambitious project, but about a simple village bathhouse for a summer cottage or a country house, then with today’s possibilities in the construction market, you can build it with your own hands.
Let’s assume that you did just that, erected a free-standing log house according to a traditional design, of which there are so many “walking around” on the Internet.
How to reliably protect this room from the severe winter frosts of the middle zone, if the cold spreads from the bottom up, from the frozen earth along the walls? There is only one answer - insulate the floors. How to insulate the floor in a bathhouse?
To choose the best insulation option, you need to evaluate the type of bath floor:
- clay floors (do not provide insulation);
- earthen floors (do not provide insulation);
- wooden floors (leaking and non-leaking);
- concrete floors;
- warm water;
- and the principle of obtaining and maintaining heat in a Russian bath.
And after reading this article, you will learn how to make a garage roof.
Wooden floor in a bathhouse: features and types of wood, advantages and disadvantages, installation
Wood is a trivial material in a bathhouse, since it has all those qualities that contribute to good steaming and durability of the structure.
But each breed has its own characteristics and properties, knowing which you can build a truly high-quality, comfortable and practical floor covering.
Types of wood and their features
These types of wood are considered the best for flooring.
Everyone decides for themselves which material is better. However, you should not focus only on price. If you choose between pine and linden, which are approximately equal in terms of price, then it is better to take linden. If we compare linden and larch, the latter wins in many ways. The main thing to remember is one thing: the material must be well dried before installation, otherwise the coating will shrink and the floor will be deformed.
Advice! Use the material as rationally as possible. There is no point in making a shower floor out of wood, as it rots quickly, just as it is inadvisable to lay tiles in a steam room that cannot be stepped on with bare feet. Practicality and safety come first.
How to make a wooden floor in a bathhouse?
Before you start work, you need to decide exactly how the boards will be laid:
Solid - the boards are laid as close as possible to each other, forming a solid floor covering. Suitable for arranging a steam room and dressing room.
Leaky - the boards are laid at a certain distance from each other so that excess water can quickly drain into the drain, and the wood itself does not rot. Great for showers or those places in the bathhouse where there is always high humidity.
Each method is good in its own way, while having some distinctive styling features.
So, let’s look at the sequence of laying a solid floor:
Laying a leaking floor is carried out according to the following scheme:
Experts recommend making a leaking floor removable, as water and soap residues can accumulate under it, which after a certain time will give off an unpleasant aroma.
Before choosing one or another type of wooden floor installation, let's look at all the disadvantages and difficulties inherent in them:
Each method is good in its own way and each has its drawbacks.
Arrangement of a board covering in the steam room
Possibility of use
There are technologies that make it possible to lay plank flooring both on logs and on top of various solid coverings. Boards can be placed on the following types of bases:
- on top of a concrete floor. The surface is first leveled using a traditional screed or a modern self-leveling compound;
- on logs mounted on top of any base. Such supports can be attached either to a solid pre-leveled base or to brick pillars. In the second case, there is no need to pre-level the surface;
- on top of sheet plywood that is resistant to moisture;
- on a subfloor made of lumber;
- on top of an old wooden floor.
Next, you are invited to familiarize yourself with the sequence of arranging wooden flooring in several of the most popular ways.
Laying boards along joists
Scheme for installing a subfloor on joists
The most popular option. The sequence of actions is as follows:
- Logs are attached to the rough base. To fix the elements, depending on the specifics of the situation, self-tapping screws or adhesive mastics are used. The bars should be mounted perpendicular to the future boardwalk;
- the timber system is leveled. The performer needs to get rid of excess heights using an electric plane or other suitable device. It is enough to place wood chips under low areas. If desired, you can purchase logs that are initially equipped with devices that allow you to adjust the installation height of the timber without the need to trim it down and lay down wood chips;
- Boards are laid on top of the logs. Fastening of elements is carried out at the discretion of the owner. If desired, the space between the joists can be filled with thermal insulation material. The decision regarding this issue also remains with the owner.
Plank floor
Laying boards on top of moisture-resistant plywood
This plywood fits perfectly on any rough base. The combination of logs and moisture-resistant plywood is very successful - the design is as strong and durable as possible.
Example of laying boards on plywood
The operating procedure is as follows:
- the plywood is carefully cut into longitudinal segments of the required sizes;
- the elements are laid diagonally in relation to the future finishing flooring. Between the sheets and the walls of the room, as well as between the elements themselves, approximately 0.5-centimeter technological gaps must be left;
- The sheets are attached to the base. For this, screws or dowels are traditionally used. If plywood is laid on top of a concrete screed, the elements can be secured using adhesive mastic. It is important that the binder composition is intended for use in combination with the materials used;
- The surface of the plywood flooring is carefully sanded. A sander with the appropriate attachment is well suited for this job. If this is not available, the work can be done manually using sandpaper;
- the base is cleaned of accumulated dust and any kind of contaminants;
- plywood flooring is primed;
- The boards are laid and fastened. For fixing them, the same fasteners are perfect as for arranging plywood flooring;
To attach a solid board to the base, self-tapping screws are used, the distance between which should be at least 20-30 cm
- The boardwalk is sanded. Experts advise finishing the work here, because... It is strongly not recommended to use all kinds of paints, varnishes, oils and the like in the steam room.
Laying boards over old flooring
This method allows you to save time on dismantling the old base and money on purchasing plywood or materials for constructing joists.
First step. We check the safety and quality of fixation of the old finishing elements. We must replace worn boards and fasteners with new elements.
Second step. Carefully sand the surface of the old base.
Third step. We lay new boards and secure them to the base with suitable products, for example, self-tapping screws. We recess the fastener caps into the material by 2-3 mm. New boards should be laid perpendicular to the existing deck.
Example of laying parquet boards on a wooden base
The method includes only 3 main stages and does not cause any difficulties during the implementation process, but experts still strongly recommend, if possible, getting rid of the worn-out coating, making a screed, and only after that equipping the system in question.
Concrete floor: features of organization and finishing methods
Concrete associatively evokes the idea of “eternal”, and this is also true with regard to the floor in the bathhouse.
A properly executed screed is not afraid of humidity, temperature changes or mold. It is much easier to clean and process, and it dries faster. The finishing layer in the form of tiles will also allow you to create an attractive interior of the bathhouse, but not in every room. While such a floor would be appropriate in a shower room and dressing room, it would probably not be appropriate in a steam room. This is due to the ability to accumulate heat. Standing barefoot on such a floor will be quite problematic, but this does not frighten many due to its simplicity and ease of operation and maintenance.
Advice! Before you start work, mentally work through each stage, taking into account all the little things. This is important, since redoing something using a dry screed is extremely problematic, not only financially, but also physically and temporally.
Subsequence
If you are faced with the task of making a high-quality and reliable floor “for centuries,” then be patient and get to work:
To ensure that the structure is strong and does not crack, experts recommend installing the frame on a stand around the perimeter and center so that it is approximately in the middle of the concrete pour. Such hardening will make the floor, if not eternal, then close to this value.
The screed must dry for at least 20 days before you begin covering it. Ceramic tiles that can withstand high temperatures are used as finishing.
Interior decoration
Upon completion of insulation, work begins on finishing the dressing room. Usually it is covered with wooden clapboard, taking into account the unique design and style of the bathhouse. When covering the floor, the first step is to lay the beams on the waterproofing layer. And again, the entire tree needs to be treated with a water-repellent solution.
You need to fix the floorboard to the beams using self-tapping screws using the tongue-and-groove system. It would be a good idea to install a rubber coating on top of the boards. After the floor is covered, we proceed to finishing the ceiling and then the walls. You can sheathe walls in different ways. So, you can make clapboard cladding horizontally, vertically or diagonally. This is where your imagination comes into play.
FAQ
This should not be done for the reason that under the influence of high temperatures harmful fumes will be formed, which have a negative effect on the body. It is enough to dry the floor well and treat it with antiseptics.
Definitely disassemble, look for the cause, dry the boards, treat the drainage system.
Yes, the wood should be dry, but not overdried. Let the boards rest in the room where the laying will take place for at least a day.
Plasticizers are actually used to speed up the hardening of concrete, and they can be used in a bathhouse without fear.
It is possible, but tiles become very slippery in high humidity conditions, so you need to walk on them in rubber slippers.
In conclusion, it is worth noting that the choice in favor of one or another material for organizing the floor in a bathhouse should be made as objectively as possible, taking into account all the advantages and disadvantages. Naturally, everyone wants to do it once and for a long time, but this does not apply to wood flooring. Concrete, in turn, quickly cools down and warms up quickly, and the costs of installing such a floor will be much higher.
Where to begin?
In fact, the problem of choosing the optimal floor design and materials for its installation is not so significant. It all depends on the type of foundation and ceiling. Having decided on them, the acceptable options for implementing the base of the dressing room will be reduced.
For clarity, we present in the table the main types of foundations and possible types of floors (the table is a recommendation):
| Bathhouse foundation | Optimal overlap | Possible overlap |
| Tape | Wooden beams, metal beams | Beamless (floor slab) |
| Columnar with reaming | Beam wooden | Beam metal, beamless (floor slab) |
| Slab | Insulation screed | Beam wooden |
| Pile | Beam wooden | Beam metal |
Let's look at the most common types of floors in more detail and continue choosing the optimal floor design for the dressing room.
Types of bath paints
We have already said more than once that, with the exception of the steam room in the bathhouse, all other rooms are quite comparable to similar rooms in a residential building. Therefore, everything that is applicable in a residential building can also be used in a bathhouse.
Recreation room with wood varnish
IMPORTANT! Do not use only exterior paint compounds on interiors and vice versa.
The chemistry of paints is a complex thing. Nowadays, manufacturers are fighting to ensure that their products are better, which means they last longer, do not lose color, and are ready for various loads
Therefore, hybrids appear - for example, the addition of polyurethane makes the composition more durable and wear-resistant, which is important for the same sex
The main directions still exist, but their boundaries are significantly blurred by “hybrids”.
INTERESTING! Paints based on organic solvents are gradually becoming obsolete. But this is not just a tribute to fashion; they are outdated due to their toxicity to humans and the environment.
Alkyd enamels and their subtypes, nitro enamels, as well as oil paints - all this can be called “last century”. However, they are still produced by the paint industry and are in demand, but the main reason to purchase them is budget constraints.
Because with sufficient financial freedom, water-based paints are purchased - they are the most environmentally friendly, have a low odor that is not comparable to previous dyes, they are convenient to use and the result is decent.
However, today you can find the following types of water-based paints:
- acrylic;
- mineral (with the addition of cement or slaked lime);
- silicate (based on liquid glass);
- silicone.
Here we will go over the most optimal dyes for baths. Mineral ones, for example, last too long and are therefore doomed to lose demand.
Acrylic
It is successfully used to create coatings both inside and outside of various buildings. As a paint for baths and saunas, it can be used to cover any surface, including floors. Only in this case you need a special, wear-resistant variety, because walking on the floor erases the paint.
BY THE WAY! An important advantage of acrylic paints is their fire safety. This is compared to the “outdated” ones, which are completely flammable.
Acrylic bath paint can be successfully used for painting both wood and concrete surfaces. However, all this is stated on the labels. There are varieties suitable for painting walls and ceilings, there are special types for floors, and there are facade paints. In general, acrylic is applicable everywhere.
Acrylic varnish for baths, manufacturer “Yaroslavl paints”
Silicate
Silicon based dyes
They are used mainly outside, for facade work on brick or concrete. This creates a coating that will last 20 years - good news, right?
But brick baths are less common than wooden or wood-clad ones, so we’ll be brief here. Of course, it is suitable if it matches the type of surface.
Silicone
An expensive option, but suitable for finishing the same shower. Silicone dyes “breathe”; in addition, they are elastic, therefore the wood underneath will also “breathe”, and the elasticity will not allow the coating to suffer when the volume of the wood changes.
Silicone, for Elcon lining
Both silicone and acrylic dyes have a lot of advantages. They are durable, heat-resistant, fireproof, environmentally friendly and so on. However, they are not cheap yet. Nevertheless, we recommend them. (Latex ones are no less good - this is a type of acrylic with the addition of latex).
Latex paint Dali
Silicone enamel
Paint for an iron stove in a bathhouse
First of all, it is a durable coating that is least afraid of temperatures. That is, the pigments may turn out to be unstable and change color, say, at 150 degrees, but the coating will not lose its shape or change at all.
Actually, when we mentioned silicate paints above, this was silicone paint for facades. But now it is separated into a separate category, because there is a reason to use heat-resistant enamels in the bathhouse - this is painting a homemade metal stove.
Acrylate varnish
An alternative to covering wooden walls and ceilings in bath rooms, with the exception of the steam room, can be a water-based varnish that contains acrylates.
However, those who want to varnish wood floors of this type should take into account the fact that without special additives, scuba tanks are prone to abrasion. Of the additives that will increase its wear resistance, first of all it is worth mentioning polyurethane
Of the additives that will increase its wear resistance, polyurethane should be mentioned first.
The better
preventive and therapeutic measures,
In the first two cases we are talking about antiseptics - substances that kill fungi (fungicides) and insects (insecticides). In the third case - about fire retardants, which slow down fire or make wood non-flammable.
Is it necessary to treat the lining in a bathhouse with these compounds? Optional. They are good for preventing infections, they will keep the sauna from burning out completely, but they have restrictions on their use in the steam room
It is also possible to pay attention to impregnated wood
What to use in the steam room
While we're talking about this, there are a couple of products that can be used in a steam room too. However, their effectiveness is very limited.
For example, if you treat the paneling in the steam room of a bathhouse with “Belizna” bleach or its analogues, you can quickly get rid of the blue stain - this is the name of the fungal infection of wood, with which wood is often sold, since it does not affect the strength, it only spoils the appearance of the lumber.
Fungal infection - blue
BY THE WAY! Why Whiteness? Because there are a number of different antiseptics for wood, which contain nothing but sodium hypochlorite, as in “Belizna”. Well, maybe the concentration is different and the price is different.
After use and achievement of the result, “Whiteness” is washed off and ventilated (!more about ventilation in the bathhouse in a separate material). You can use the bathhouse when you can no longer smell the smell.
As a close analogue of bleach, you can use hydrogen peroxide - also a strong oxidizing agent that does not allow fungi to live.
For mold, you can use boric acid or borax, but now boron compounds are considered toxic, and among the cumulative poisons, that is, those that accumulate and are not eliminated from the body. The only good thing is that the poison is weak, it takes a lot of it to get poisoned.
But it’s not worth living with mold either; you die from it faster than from boron. If it starts up, then it’s no longer a matter of whether it’s a steam room or not, we have to start fighting. Until you get rid of it, you can’t use the bathhouse.
However, this applies to all infections - the more serious they are, the more serious the remedies. It’s better to treat the lining in a bathhouse with a professional antiseptic that will combat your problem, and then wash everything, than to change the entire lining. But it’s better to change the entire paneling than to risk your life because of black mold. With wood-boring beetles, the same strategy - while it makes sense to fight - we fight, if there are too many of them - we burn the affected tree.
Treatment inside other bath rooms
In this case, there is only one difference from the steam room: in other rooms you can use prophylactic agents. That is, do not wait for a problem, but prevent its occurrence by poisoning the lives of pests in advance.
Since there is no steam room heat in other rooms, all these poisons will not evaporate and be inhaled by humans.
Therefore, you can safely use antiseptics and fire retardants, whichever you like. In the washroom you will want to use non-washable compounds, but look at the label: if it says that it is for the exterior and not the interior, then it is better not to. It's better to update from time to time.
IMPORTANT! Antiseptics can be found on sale not only in the form of separate formulations, but also in the form of primers, which precede the application of varnish, glaze or paint. If you are going to paint with something, choose the right primer and you will not need to separately use an antiseptic.
Main types of bath floors
First, it’s worth understanding what floor designs can, in principle, be installed in a bathhouse, and what material they are made of. There are not so many suitable options, since the specific microclimate has a very negative effect on most materials. In addition, the finishing of premises designed for constant high humidity and sudden temperature changes must be environmentally friendly and not emit toxic substances.
Therefore, today the floors in bathhouses are still made of wood or concrete. An innovation in the design is the possibility of organizing heated surfaces using modern “warm floor” systems.
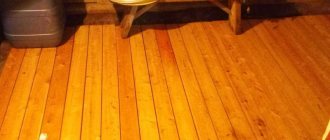
Wooden floors
Be that as it may, wooden floors are still traditional for Russian baths. They were made in this building from time immemorial - they have not lost any of their relevance today. The only thing that many bathhouse owners add to the usual wooden structure is their insulation with such modern material as extruded polystyrene foam.
From time immemorial, the Russian tradition has been the creation of wooden bath floors
It makes sense to say a few words about the material that is chosen for arranging a wooden floor. Due to the fact that the floor covering will be constantly exposed to moisture, it is advisable to choose hardwood for the floor of bath rooms, which absorbs less moisture, since it has a dense structural structure. These species include oak, larch or alder.
Boards used for laying bath floors: a – oak; b – alder; c – larch; g – pine.
For a leaking floor, choose a flat board without grooves or tenons. And for a non-leaking structure, it is better to purchase tongue-and-groove boards, since only they, if well adjusted during installation, can create an almost airtight coating.
Despite the fact that the wood will be in a room with high humidity, it must initially be well dried, otherwise the board may “lead” after laying, and the floors will begin to deform.
The recommended board thickness for making floorboards varies from 25 to 40 mm. The selected thickness parameter will determine the step at which the logs should be installed to secure the finished plank flooring. The thicker the board, the greater the distance between the lags. So, under a 25 mm board it is necessary to lay logs in increments of up to 400 mm, and if a board 40 mm thick is chosen, then the distance between the logs can be increased to 600÷700 mm.
Prices for edged boards
So, wooden floors can be of two types, which differ in their design - a leaky and non-leaky floor.
Leaking wooden floor
This type of floor is designed in such a way that it does not retain moisture on its surface. To do this, a gap is left between the boards that form the surface, through which water flows out.
Wooden floor is a leaky type - water does not linger on the surface, but immediately flows through the cracks between the floorboards into the drainage
A leaky floor can be arranged approximately according to this scheme:
One of the options for arranging a leaky floor in a bathhouse
The arrangement of the underground space of leaking floors can be done in different ways, using different materials:
And already above the concrete inclined base there are support pillars (item 4). Through the mandatory cut-off waterproofing (item 5), beams or joists (item 6) are laid on them, along which the plank bath floor (item 7) is laid with a gap between adjacent boards of approximately 5 mm.
Wooden leaking floor in the steam room.
Now that the underground space and water drainage scheme have been organized, you can proceed to the formation of the floor itself. Its design consists of three layers:
- these are the floor beams of the underground space (beams or logs);
- logs laid on the floor beams, perpendicular to them (sometimes the logs are not mounted, they are limited to the beams if they are located with a small step);
- plank flooring, the boards of which are fixed to logs (beams).
A gap of at least 5 mm is left between individual floorboards.
These gaps are necessary for free flow of water downwards. And the width of the gap is chosen taking into account the possible swelling of the wood when it is constantly waterlogged.
Some bathhouse owners make the leaking floor removable in order to ensure that the covering boards can be taken outside for ventilation and drying from time to time. If this option is chosen, it would be advisable to mount several boards from logs and boards, with such dimensions that carrying them to the flooring site and back to the street would not be particularly difficult. These panels are laid on top of the floor beams, but are not secured to them.
The advantages of this design include the ease of installation, as well as the relatively low costs of its arrangement.
The most obvious disadvantage of leaking floors is that the bathhouse can be fully used only during the warm season or in regions with moderate winter temperatures. In the winter cold, bathhouses will quickly become cold, and heating them requires a large amount of fuel. And catching a cold in such a bathhouse, with a possible cold draft from below, costs nothing.
Prices for timber
Leak-proof wooden bath floor design
The flooring boards are laid directly on the beams covering the space of the bathhouse, if insulation of the floors is not planned.
If the floor will be insulated (and this is very important for a bathhouse), then the structure is assembled from several layers - these are floor beams, a subfloor, insulation and a finished plank covering.
To ensure the tightest possible fit, floorboards are usually made from tongue and groove boards
The boards in the construction of a non-leaking floor should be fitted to each other as closely as possible. Therefore, as a rule, a tongue-and-groove board is chosen for flooring, which will guarantee the “tightness” of the flooring. This is especially important if it is planned to lay insulating material under the coating.
Non-leakage floor covering in the bathhouse. The drain for draining water into the sewer is clearly visible.
In addition, it is very important in this design to correctly calculate the slope of the floor. Water should flow well through it, but we must not forget about the comfort and safety of the people who will take bath procedures. Moreover, water and soap can make the surface slippery. Typically, a finished floor slope of 50 mm per linear meter of length is sufficient, which is, respectively, 5% or about 3 degrees in angular terms.
Drain hole located in the middle part of the floor. The slope is organized towards it from all sides.
— To make it easier to form a slope, you can use a board or timber, cut at the desired angle and secured to the subfloor boards. These elements will become a kind of lags for laying a continuous finished floor.
Prices for drain pipes
— In the designated location, a hole is cut in the subfloor to install a drain pipe with a drain. The drain hole itself should be located at the lowest point of the floor slope or in its center, if the floor slope is provided in this direction.
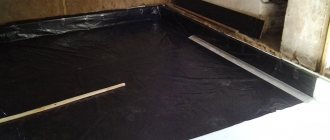
- The next step is to lay insulation boards between the joists on the subfloor - usually extruded polystyrene foam is used for this purpose, since it is not afraid of moisture. All gaps remaining between the joists and the insulation, as well as around the drain pipe, must be filled with foam.
— The edges of the waterproofing material must be raised onto the walls to a height of 150÷200 mm and secured with brackets.
— The plank flooring is being installed, with the floorboards fitting as tightly as possible. At the same time, they try to use hidden fastening technology so that the heads of fasteners (nails or screws) are completely hidden (this is very important for a bathhouse).
— The joints of the drainage ladder parts with the finished floor boards must be treated with silicone sealant.
— Then, the walls of the room are sheathed so that the waterproofing attached to them remains under the sheathing.
— At the final stage, the floor around the entire perimeter is framed with a plinth, which should also be located at an angle so that water falling on the walls flows down them onto the floors.
Wooden bath floors are not painted or varnished; they can be impregnated with drying oil or natural oils, which are applied in two or three layers.
The advantages of a leak-proof wooden bath floor include the following qualities:
The disadvantages of a wooden floor of this design include the following:
Concrete floors in the bathhouse
Concrete floors in the bathhouse are also a fairly popular option. But their arrangement will require serious financial costs and will take a lot of time. But, having done them once, you can be sure that the structure will last 30-40 years without repair. However, in order for a concrete floor to last such a long time, it must be equipped according to all the rules, using high-quality materials.
If you decide to make the floors in the bathhouse concrete, you need to know what positive and negative qualities they have.
The disadvantages of concrete pavements include:
The installation of concrete floors is carried out in several stages:
Cement prices
Extruded polystyrene foam is also quite suitable for insulation. From his slabs a continuous covering of the entire floor area is cut out. If small gaps or gaps remain (for example, around the perimeter of the room or around the sewer pipe), they are filled with polyurethane foam.
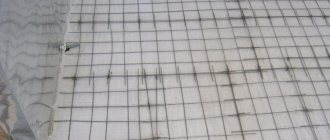
— Then a reinforcing metal mesh is laid on top of the waterproofing layer.
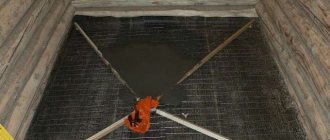
Bath floor with installed thermal insulation and installed beacons - before and after pouring the concrete screed
— Now you can pour concrete mortar and level its surface along the beacons. Leveling is carried out using building regulations, taking measures to compact the concrete as much as possible so as not to leave air cavities in its thickness.
— The leveled screed will completely harden and gain brand strength no earlier than in a month. Finishing work, if planned, can begin in about two weeks.
It is advisable not to disturb the poured floor for the first 10 days - only periodically moisten it abundantly for better maturation of the concrete
The most common option for finishing a concrete floor in a bathhouse is lining it with ceramic tiles
Prices for ceramic tiles
Water heating involves connection to a heating system. That is, it can only be resorted to if the bathhouse is located either directly in the house, or in an adjacent extension, or is located in close proximity, where pipes from the heating circuit can be installed without difficulties and large heat losses. And the contour of the warm floor itself will have to be laid before the screed is poured.
“Warm floor” is extremely comfortable!
But it will take a lot of work! Before you begin such a task, you need to read the instructions to really assess your capabilities. The publications on our portal dedicated to the independent creation of a water heated floor - the most complex to implement, and an electric heated floor for ceramic tiles - here the task still looks simpler can help you with this.
How to cover the concrete surface of a bath floor?
A much higher quality, durable and simply beautiful option for finishing a concrete floor is ceramic tiles, which have all the qualities necessary for rooms with high humidity. In order for the tile to serve for a long time without the need for repairs, it is necessary to make high-quality masonry.
Laying ceramic tiles on the floor - can you master it yourself?
When choosing ceramic tiles for tiling bath floors, it is necessary to take into account the characteristics of its surface. In the bathhouse, the mole can be wet and slippery from soap or shampoo. Therefore, you should not choose facing material with a smooth surface, as the likelihood of falling and getting injured increases many times over.
For floors in bath rooms, it is recommended to use tiles with a textured rough surface
Today on sale it is not difficult to find floor tiles with a textured surface that suits their color and pattern and do not have a glazed coating. This ceramic lining practically does not slip, even when wet.
Terrace boards - decking - will serve perfectly as a moisture-resistant, foot-friendly and quite attractive covering for a concrete floor.
The positive qualities of such flooring include:
Decking can be laid with boards on top of a concrete floor, or used in a leaky construction of bath floors, replacing a regular board with it.
Easy-to-assemble sections of garden parquet – why not cover a concrete bath floor?
Due to the fact that flooring manufacturers are constantly working on new materials, and they appear on sale from time to time, it is quite possible to choose a modern, original and affordable option for bath floors.
So, possible types of bath floor designs were considered, as well as the materials used to create them. Having such information, it will be easier to decide which option is most suitable for a particular room and will correspond to both the wishes and financial capabilities of the bathhouse owner
Features of the problem
A classic Russian bath involves taking a bath procedure in an environment of saturated water vapor at temperatures up to 65 degrees. High humidity at this temperature promotes rotting of almost any material, especially wood. Of course, not all bathhouses are in the same conditions. A typical project involves dividing them into the following: steam room, dressing room, washing room, relaxation room. Requirements for flooring vary significantly depending on the room in which it is laid.
In general, the bath floor is under aggressive influence. Hot water mixed with detergents is poured onto it from above, water vapor condenses, creating a significant mechanical load, and all this at high temperatures. The influence from below is exerted by the soil: soil moisture, low temperatures in winter. As a result, increased demands are placed on the floor covering: water resistance, resistance to steam and chemical ingredients of detergents, resistance to high temperatures and temperature changes, mechanical strength (especially abrasion).
Bathroom floors are most often made of wood
Attention! The most important thing: the coatings used under the specified conditions should not emit substances harmful to the human body.
No less important are the specific operational requirements: preventing bare wet feet from slipping, a warm surface, an aesthetic appearance, and the ability to easily clean from contamination.
Since ancient times, a wooden Russian bathhouse has been considered a classic option. Currently, the tradition is preserved, and floors are most often made of wood, which is facilitated by such important properties as high heat capacity, unique aroma and beautiful appearance. However, the use of such floors also creates a big problem: wood has low moisture resistance and is susceptible to active rotting in bath conditions, which requires protective measures to be taken. Concrete floors are also fairly common structures. They are also subject to destructive processes, and operating them without a floor covering is generally uncomfortable. The use of tiles for flooring is becoming increasingly popular.
Concrete floors are also fairly common structures.
Construction technology
Preparation
If you decide to install a bathhouse on sandy soil, you must first make a drainage hole under the sink to drain the water. Subsequently, it will be imperceptibly absorbed into it.
The photo shows a concrete floor for a bathhouse, how to make it on clay soils
On clay soil, you need to dig a small pit from which to tap the pipeline. Its main function is to drain dirty water into a cesspool.
It is recommended to cover the walls of the pit with tiles or concrete to a height of 50 mm. Don't forget to put a metal grate on top of it.
Making a base for the floor
Below are detailed instructions for the process:
- Compact the soil and make a slight slope towards the hole. Place a layer of crushed stone 150 mm high on it.
What layers are concrete floors in a bathhouse made of?
- Place a ball of clay around the perimeter and compact the entire surface again.
- Make a double layer of concrete, then there will be no cold coming from the floor in the washing room and steam room. The first layer should be no more than 50 mm high. Where the concrete meets the walls, fill the seams with bitumen, this way you will avoid water leaks.
Laying a layer of clay
- Lay down a layer of insulation after the first layer has hardened (you can use regular felt or mineral wool, its price is quite reasonable). Wrap it in roofing material so that the material does not get wet.
Installing a concrete floor in a bathhouse - laying waterproofing
- Pour the second layer, while the concrete must be reinforced, for example, with a chain-link mesh, and compact it. Apply cement mortar to the surface and then level it thoroughly.
Preparing the solution
In this case, it is best to use expanded sand, which gives strength to the concrete surface. In addition, perlite has good thermal insulation properties, so it is well suited for this type of floor.
| First stage | To prepare the solution in a concrete mixer: · fill in 2 buckets of sand; · pour out 10 liters of water; · Stir the mixture; · add 5 liters of dry cement; Stir the solution for 5 minutes; · add 5 liters of water to the mixture; · Stir the solution again. |
| Second phase | After the solution is homogeneous, add 10 kg of perlite and 2 liters of water to the concrete mixer. Stir the solution until it flows. Turn off the concrete mixer for 10 minutes and do not add any components to it. Start the equipment again and stir the mixture until excess liquid is released. The solution should become plasticine-like. In this form it is ready for use. |
| Third stage | Apply the mixture to the prepared floor surface of the future bathhouse. Complete the screed, level it, not forgetting the slope for water drainage. It usually hardens within 5 days. |
A little about the design of the bathhouse
If you’ve never been to a Russian bathhouse, you’ve already seen in the movies how it works.
The simplest design is divided into:
- Directly to the steam room and washing room.
- Waiting room.
It is clear that it is hot in the steam room - there is a stone (heater) or metal stove, all structures from floor to ceiling are covered with wood. But the dressing room, which modern builders sometimes make, if possible, quite large and called a rest room, serves as a barrier to the penetration of air from the street into the bathhouse. It should also be comfortable for the person leaving the steam room, at least fresh.
You can decorate the interior of the dressing room in any style at your discretion, but you should take into account all the subtleties of the arrangement of this room. This is covered in more detail in the following sections.