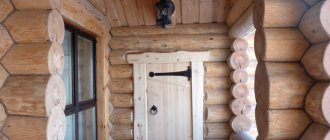
A wooden floor installed in an apartment, country house or other premises is one of the most convenient and environmentally friendly flooring options. Among other things, the coating has excellent heat and sound insulation, which is why it is so widespread in the construction of country houses. Wood is a material that brings warmth and comfort to a home. Modern technologies make it possible to buy various wooden coverings that perfectly imitate expensive types of wood, such as walnut, oak or mahogany.
Before laying wooden floors on the ground, you need to take into account what kind of soil is under the floor; if the groundwater level is high, then it is extremely necessary to make reliable waterproofing.
As you know, the basement or first floor has a soil foundation on which only two types of floors can be installed: wooden and concrete. Wooden flooring on the ground today is quite popular, especially for the basement of a warm country house. As for concrete coating, it is better suited for garages, verandas, storage rooms and basements on the street.
A wooden floor on the ground must be laid taking into account the type of soil present on the site. There are cases when the groundwater level is so high that the soil becomes completely wet. In this case, it is necessary to make high-quality waterproofing, without which the reliability and integrity of the structure will not be guaranteed over a long period. Therefore, the first and most important condition for any wooden floor on the ground is dry soil. Laying a wooden floor on the ground is, first of all, very profitable, since no additional costs are required for the purchase of expensive building materials. Of course, with the purchase of thermal and waterproofing, costs increase slightly. But in any case, such a coating on the ground is the most convenient and affordable.
Construction Features
Typically, technology allows you to install floors on the ground in a strip foundation. The method is not applicable for complex types of supporting structures that combine two or several types of foundation, for example, pile-strip.
Strip foundation in a private house Source betonbase.ru
There are several types of subfloors. Among them, concrete screed. Rely on: the structure can:
- on load-bearing walls;
- a cushion of soil backfill.
As a base, you can use plank flooring on wooden beams (joists). For each type of structure, a floor pie of a certain composition is constructed. Concrete cannot be poured directly onto the ground or clay.
Clay floor in outbuildings. Source 9ban.ru
It is necessary to prepare an intermediate base layer that provides:
- rigidity;
- thermal insulation;
- waterproofing;
- stability;
- ability to withstand loads.
Advice ! It is easier and faster to install wooden flooring. To arrange such a foundation, you do not need to carry out serious preparatory work.
The decision to lay floors on the ground is made based on the results of a soil study. It is important to know whether there is water lying close to the surface under the building.
Wooden floor on the ground Source prd.ru
Base insulation
We insulate the basement along the perimeter of the house. At least 30 centimeters in height. To do this, we cut polystyrene foam, which has dimensions of 1.2 x 0.6 m, in half, so that the size is 1.2 x 0.3 m.
Cutting polystyrene foam is not at all difficult with a regular knife.
We apply the rule to a 5-centimeter slab and cut it in depth by about half, several times, gradually going deeper. Then, simply, we break the slab in half. We break it on anything that has an angle, even on the very packaging of insulation from which we pulled out this slab.
Next, we “mushroom” this insulation onto the base from the inside of the house in two layers (despite the fact that the thickness of the insulation is 5 cm). Something like this:
The photo shows that somewhere the insulation is in two layers (10 cm), and somewhere in one (to the left). I laid insulation in one layer where there is not a street through the wall, but an adjacent room, and not along the entire wall, but only 1.2 meters from the street.
As for thermal conductivity, a 45 cm thick concrete base has a heat transfer resistance of R=0.3 m2°C/W. To it we add 10 cm thick insulation with R=3.33 m2°C/W and get a total R=3.63 m2°C/W, which suits us and SNiP quite well. I described where to get all these indicators from and how to try to figure it out in calculating the thickness of the walls, so with your permission I will not repeat myself.
Positive and negative sides
Floors on the ground have several advantages:
- ease of installation;
- efficiency;
- sustainability;
- ability to withstand significant weight;
- minimal load on the walls or its complete absence;
- wear resistance;
- maintainability;
- suitability for coating with any type of finishing materials;
- possibility of installing a “warm floor” system.
Design disadvantages include:
- the need to lay a layer of insulating materials;
- impossibility of installation over a layer of bulk materials more than 60 cm thick.
Important ! Floors on the ground cannot be laid in areas of flooding, river floods and swampy soil with an unstable level and close groundwater. The design of the floors must be created according to technology.
Groundwater lying close to the soil surface Source avatars.mds.yandex.net
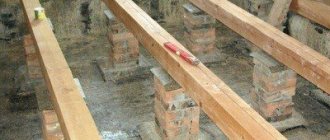
Floor with joists on intermediate walls
| Floor with joists on intermediate walls |
In modern floor designs, joists are located at a short distance from each other, which makes it possible to use lumber of a smaller cross-section, and therefore cost, and also to conveniently place insulation boards.
Instead of brick columns, it can be advantageous to support the logs on intermediate walls laid across the logs at intervals of about 2 m. Bricks or blocks in the wall are laid using the honeycomb method, half a brick thick, leaving increased gaps of 1/4 brick in the vertical joints for ventilation of the underground space. If the wall has a height of more than 0.4 m, then at least every 2 m of the wall length, pilasters are laid - brick-thick columns to increase the stability of the wall.
If the lag pitch is no more than 600 mm. and the span is less than 2 m, then the cross-section of the wooden log is sufficient to have 100x50 mm.
Creation sequence
The rough plank floor is easy to install. A sand cushion is made on top of the soil, which is covered with geotextiles. The insulating material is covered with insulation.
It is more difficult to create a concrete floor on the ground in a private house. Filling is done on top of several layers of building materials:
- sand;
- gravel;
- metal mesh (can be replaced with fiberglass);
- ten-centimeter concrete screed;
- waterproofing material;
- insulation (expanded clay, polystyrene foam, penoplex);
- additional protection from moisture;
- top concrete screed.
It is advisable to reinforce the last layer to avoid cracking when drying. If the homeowner decides to equip the home with a “warm floor” system, the structure will have to be assembled and configured before pouring the concrete screed. This is how floors are built on the ground; the correct pie provides high-quality heat and waterproofing, stability, and wear resistance of the structure.
Sand backfill Source izhevsk.ru
↑ Underground space
Arrangement of underground ventilation
The microclimate in the house and how long the wooden floor will last will depend on how dry and well-ventilated the underground is. Therefore, to ensure ventilation, holes are installed around the perimeter of the base, which, regardless of the time of year and the direction of the winds, will provide natural ventilation. In case of snowy winters, ventilation pipes with a canopy are removed from the underground openings, and several window fans can be installed to increase air circulation. It is also necessary to take care of protection from various rodents. To do this, grilles with cells up to 8 mm should be installed on all openings.
Concrete screed
Before carrying out work, it is necessary to collect information:
- about the composition of the soil;
- about the level of groundwater.
On swampy soils around the building, a drainage system is created to remove soil moisture during the rainy season and active snow melting.
The preparatory layers of backfill are applied one by one after the previous building material has been thoroughly compacted.
Thick layers of sand and gravel are difficult to make dense enough. Over time, the backfill will shrink, which will be greater the thicker the preparatory layers. Therefore, it is better to pour the rough screed directly onto the geotextile fabric. This technology ensures high-quality crystallization of the material.
When concrete is poured over a layer of gravel or sand, the liquid leaves the mixture. The hardening process is disrupted and the strength of the screed is reduced.
Important ! Each previous layer is carefully compacted, and when pouring the screed, the period necessary for hardening and drying the material is maintained. It will not be possible to make a high-quality concrete floor on the ground in one or two days.
The screed cracked due to a violation of the laying technology Source remontik.org
Violation of the manufacturing technology causes:
- deformation, destruction of the lower layers;
- loss of structural strength;
- formation of bumps, depressions;
- cracking of the screed.
Before work begins, hot and cold water and sewage pipes are installed. After pouring the concrete, in order to introduce communication systems into the house, you will have to break the tightness of the structure and break part of the floor pie.
Installation of floors on the ground is carried out in several ways, which differ in process technology and applicable materials. Each method has pros and cons. The choice of technology depends on the foundation, soil, tastes and preferences of the homeowner.
Pouring a concrete screed requires knowledge and skills from craftsmen. During work, “wet” solutions are used. The concrete hardening process takes time. Each new layer of building materials is placed on top of the completely finished previous one. A poorly dried rough screed may burst if the concrete is not allowed to gain sufficient strength.
Choosing a foundation for a wooden house
Compared to heavy buildings made of brick, concrete or stone, a wooden house is a very light structure. In most cases, one of three lightweight foundations is suitable:
- foundation for a wooden house on stilts;
- reinforced concrete strip;
- columnar.
To choose from these three, you should consider:
- soil characteristics: bearing capacity, type, level of soil water, degree of homogeneity, freezing depth, intensity of frost heave, swampiness, etc.;
- the total weight of the future structure plus wind and snow loads;
- building area;
- terrain features - flat, uneven, height difference, proximity to water bodies.
Columnar foundation
The columnar foundation is the least expensive and labor-intensive of all three. Construction materials:
- concrete blocks 20 by 20 by 40 cm;
- brick;
- reinforced concrete beams;
- hollow asbestos-cement or metal pipes filled with reinforced concrete;
- wooden pillars.
This is the optimal foundation for a wooden house on heaving soil and uneven terrain. The pillars are installed in increments of one and a half to two meters, buried in the ground by an average of half a meter, and installed on a sand cushion of 20-30 centimeters.
Pile foundation made of timber
Used on watery and swampy soils: piles are immersed to great depths, where they can rest on a solid layer. A pile foundation is also preferable on uneven terrain: by adjusting the height of the ground part of the piles, it is possible to achieve horizontal laying of the grillage with a significant difference in heights within the site. Piles are:
- screw - steel rods with spiral screws at the ends;
- driven - wooden, metal or reinforced concrete. There are restrictions on use: shock vibration can damage nearby buildings and landscapes;
- bored A casing pipe is inserted into the drilled well and concrete is poured into it.
The preferred option for a do-it-yourself foundation for a house made of timber is screw piles. To immerse driven ones, heavy equipment will be required; for bored ones, a drilling rig will be required. You won't be able to do it on your own.
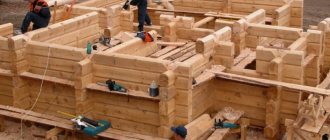
Strip foundation for a timber house
This type of foundation is the most common: a reinforced strip of concrete laid under all external and load-bearing internal walls. It can be buried (below soil freezing) and shallow (within 70 centimeters). The optimal width is 10 cm greater than the thickness of the wall (5 cm on both sides).
Such a foundation has a huge margin of safety; pouring it under a wooden house is not always advisable. Advantages - the tape compensates well for soil movements, is plastic, and gives uniform shrinkage. Disadvantage: installation on uneven terrain is problematic. Limitation: the recessed tape is suitable for heavy houses - brick, three-story. Light construction does not balance heavy loads. There are cases when the foundation was squeezed out of the ground.
Another option is that the tape is not monolithic, but composite from ready-made reinforced concrete blocks. The blocks are laid to a depth of half a meter on top of a sand cushion, and the seams are filled with mortar. For a small light construction you can purchase small blocks, 20 by 20 by 40 cm: their weight is within 32 kg.
Video description
How to properly create a floor pie for pouring a concrete screed can be seen in the video:
See also: Catalog of companies that specialize in finishing materials and installation of stoves and fireplaces.
Work must be carried out under certain conditions:
- Filling is done at temperatures above +5 degrees.
- The construction site or room must have a roof or canopy that protects from direct sunlight.
Sequence of work:
- Step 1 . First, a sand cushion with a thickness of 20 to 60 cm is poured. The layer is leveled and compacted to the maximum possible density. The backfill is filled and compacted using heavy rollers.
- Step 2 . Crushed stone is poured on top of the sand. Ideally, the layer thickness should be about 20 cm. By tamping the crushed stone, the density of the sand cushion increases.
- Step 3 . The backfill is covered with geotextile. The strips of fabric are laid overlapping by 15–20 cm. An overlap is made on the walls from the side of the foundation strip. A damping tape is installed around the entire perimeter. It provides a decoupling between the floor and the foundation strip.
- Step 4 . A metal reinforcing mesh is placed on top of the fabric and filled with concrete mixture. The rough screed must harden thoroughly. Work cannot be continued until the material has acquired sufficient strength.
- Step 5. Double roofing material is used for waterproofing. The material is laid on a rough screed, then treated with bitumen mastic.
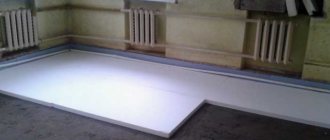
Laying penoplex for insulating a concrete floor Source altpol.ru
- Step 6 . The insulation layer is created from penoplex. Choose brands intended for the foundation. This insulating material is characterized by increased density, resistance to moisture, temperature changes, and the effects of bacterial and fungal infections.
- Step 7 . The next layer is a vapor-waterproofing film placed on the penoplex. The material is laid so that there is an overlap along the entire perimeter over the damping tape on the walls. Its height should be 18-22 cm. The film strips are positioned so that they overlap each other. The sides are taped with construction tape.
- Step 8. A reinforcing fiberglass mesh is laid under the finishing screed. Concrete is poured on top of this material. The thickness of the last layer can be from 5 to 10 cm.
If a warm floor is created on the ground, then before pouring the finishing screed, the system is installed and pipes are laid. Concrete is poured after all commissioning work has been carried out.
Reinforcing mesh with damper tape around the perimeter Source vse-postroim-sami.ru
Reinforcement
Floor reinforcement is an important stage in its construction. Reinforcement in the form of a road mesh allows the floor not to sag, distributes the load correctly, and prevents the concrete from cracking. The cross-section of the mesh rods should be five centimeters. The length of the cells is fifteen centimeters. If you lay the reinforcement correctly - at a distance from the insulation of less than two centimeters, a reinforcing frame is formed.
The reinforced rigid mesh does not lie on the ground - it is raised by at least a third of the thickness of the screed and fixed on a stand. Soft - attached to pins. For very high loads, a reinforcement cage with rod thicknesses from 0.8 cm to 1.6 cm is used.
Dry screed
The technology for making dry screed is simpler. This method makes it possible to obtain results faster than when pouring wet mixtures. Expanded clay is used as a substrate for the finishing level.
Expanded clay backfill Source ad-cd.net
The installation of a floor on the ground begins with backfilling a sand cushion and pouring a rough screed. After the concrete layer has hardened and acquired the necessary strength, proceed to the following stages of work:
- The waterproofing film is laid using the standard method. Strips of fabric are laid in overlapping rows. One sheet overlaps the other by 10-13 cm. The side sections of the film are covered with adhesive construction tape. The edges of the canvases along the entire perimeter are raised onto the wall. The lifting height corresponds to the thickness of the dry screed.
- To create a flat horizontal plane of the floor, plaster profiles are used. Beacons are installed around the perimeter of the room. Their height is determined using a building level.
- Create a pillow from expanded clay. The bulk material is compacted and leveled along the beacons.
- The expanded clay layer is covered with available building material (tongue-and-groove plasterboard, plywood).
- The slabs are covered with finishing material.
Preparatory work
You can raise a house without the use of special construction equipment - in our case we will use hydraulic or any other design of jacks capable of developing sufficient force to lift a load weighing 10 tons. If they are not available, you should not think about buying equipment - you can rent it in one of the railway depots.
We will also need a steel scrap, wedges, and a sledgehammer - tools that are mostly needed to dismantle the old foundation. As temporary supports, you can use chocks, massive beams, bricks, as well as boards of different thicknesses, which will act as spacers. The jack must be installed on a strong square base with sides of at least 50 cm. As such a platform, you can use boards and beams knocked into a shield, or any other durable material. In order to evenly transfer the force from the jack rod to the lower crowns of the house, you will need to cut or find a steel plate at least 5 mm thick.
If you have to deal with a columnar foundation with a backfill, then the latter will have to be dismantled before starting work on replacing the base. It is recommended to remove all furniture and other heavy items from the house and dismantle the floors.
Raising a wooden house
The building is lifted using jacks, which are installed on both sides of the building at a distance of 0.5 m from its corners. The jacks are fixed on a specially prepared support platform, which, if necessary, is buried in the ground to give it maximum stability. The house is lifted, if possible, simultaneously from both sides, evenly, no more than 1.5-2 cm at a time. Immediately fix the result obtained with temporary supports.
If strong bends of the lower crowns are noticeable as a result of raising the house, install additional jacks
At this stage, it is important to control the process so that the building does not move to the side, because as it rises, its center of gravity changes
Dismantling the old foundation
When the house is raised to a sufficient height and securely secured to it with temporary supports, they begin to dismantle the old foundation. Rubble and brickwork are broken using a crowbar, chisels and any other convenient tools. Some of the materials that have retained their quality indicators can be used to form a new base.
Construction of a new foundation
In our case, we will consider replacing the columnar base with MZF - an option that is best suited as a foundation for one-story houses. The construction of a new foundation begins with excavation work: a trench is dug, the depth of which must necessarily exceed the depth at which the base of the old foundation was located. The trench is dug in a U-shape - this is necessary to form a frame with reinforcement outlets to combine all sections of the foundation into a single rigid structure. If it is planned to build new structures adjacent to the house, then the trench is dug based on the design data. For example, at this stage it is best to think about the foundation for an extension to the house.
After the time has passed during which the concrete has acquired sufficient strength (about two weeks), boards are laid on the first element of the strip base, on which temporary supports are installed. In turn, temporary supports are dismantled on the opposite side of the house, and the site is developed similarly to the method described above. The same is done with the remaining elements, only straight sections of the trench are dug out for them, and reinforcement is carried out by connecting the existing reinforcement outlets to the frame of the new section of the tape.
At the final stage, the house is lowered onto a new waterproofed foundation, ensuring the uniformity of the process. If necessary, before lowering the house, you can replace the lower crowns.
Plank flooring
The most budget-friendly ground floor on a strip foundation is constructed from boards. Wooden structures have a large number of advantages. They can be built in houses made of wood, stone, brick and concrete blocks.
Advantages of wooden structures:
- are cheaper than concrete screed;
- Wood beams can be installed independently;
- for the construction of a supporting structure and a plank floor, complex specific materials and tools are not needed:
- Wood structures put less pressure on the foundation of a house than a concrete screed.
Negative aspects of rough plank flooring:
- Wood degrades faster than concrete. It rots under the influence of moisture and fungus.
- The boards catch fire quickly.
- Wood is not resistant to moisture.
To protect wood from harmful insects and infections, building materials are treated with antiseptics, resins and other impregnations. Well-dried wood lasts up to half a century.
Which construction technology is best to choose?
The choice of technology is a matter of preference and capabilities of the home owner. Concrete screed allows you to get a durable and strong floor, but its maintainability will be extremely low . Failure of, for example, a heated floor system will create a serious problem with a very complex and costly solution.
Dry screed is much simpler and allows repairs to be made without much expense or problems, but this option is only suitable for people who are not afraid of repair work.
NOTE!
A wooden floor is a traditional solution, but the specifics of wood as a material have too many undesirable aspects, so this option is increasingly being abandoned in favor of other methods.
Video description
The sequence of installing a subfloor made of planks in the video:
The plank floor is mounted on a support system of longitudinal beams and transverse beams. Inside the room, columns are laid out along the walls of bricks. All free space between the supports is covered with expanded clay. For ventilation, leave 10-15 cm between the backfill and the plank floor.
A lag system is installed on the posts. The height of the supports is leveled. A plank subfloor is laid on top of the bars. The boards are laid:
- waterproofing film;
- insulating substrate;
- finishing material (laminated coating, linoleum, carpet).
There are several options for creating a floor pie along the wooden beams of the first floor. In the old days, logs were built from thick straight logs.
The building material was treated with resin. This impregnation provided protection from soil moisture, insects, and putrefactive bacteria.
Floor on joists Source lestnitsygid.ru
This design option consists of:
- from a clay pillow;
- waterproofing fabric, film;
- brick support pillars;
- beams and beams connected to each other by corners or any other types of fasteners;
- insulating material.
Concreting options
There are several schemes for concreting on the ground.
Scheme with waterproofing
- The soil is compacted.
- A pillow of river sand 30 cm thick is laid out.
- Crushed gravel is poured onto it.
- A polyethylene film no thinner than 30 microns is spread over the crushed stone.
- Then a rough concrete screed is performed.
- After it has completely dried, a layer of roofing felt is laid on top.
- Next comes the thermal insulation material - mineral wool, extruded polystyrene foam or expanded clay.
- A finishing reinforcing cement-sand screed is performed.
- The final floor covering is being laid.
- The soil is compacted again.
- A cushion of purified sand is placed on top.
- Polyethylene is spread out.
- A reinforced concrete screed is being made.
- Insulation is being installed.
- A finishing floor covering is laid over it.
- The soil is compacted.
- Lined with polyethylene.
- The rough screed is laid.
- There is insulation on top of it.
- Reinforcing screed again.
- Flooring.
Scheme used for low groundwater levels
Foundation and floor construction
Scheme without bedding
When building houses in the harsh Russian climate, experts recommend using the following scheme. Compacting the soil -> constructing a cushion of sand, crushed stone and gravel -> waterproofing and insulation -> reinforcement -> concrete screed.
Briefly about the main thing
Laying the floor on the ground is done on one type of foundation, for example, strip.
The construction of the floor on the ground is based on concrete, dry screed or wooden flooring.
Concrete pouring results in a high-quality, durable structure. Before installing it, you need to install water supply and sewerage.
Dry screed and wooden flooring are easier to create. Expanded clay and insulation act as filler in the layers of the floor pie. Waterproofing must be used to protect against moisture.
Ratings 0
Stage 2. Preparing the base
After determining the “zero” level, take out construction debris and remove the fertile soil layer. The floor in our case will be a multi-layer “pie” approximately 35 cm thick. Therefore, remove soil until the depth from the “zero level” is equal to the thickness of the future “pie”.
Next, compact the surface. It is advisable to use a vibrating plate for this, although in its absence you can take an ordinary meter-long log, nail a board on the bottom, and two handles on top, and use such a tool to compact the soil. The result should be an even and, most importantly, dense base. There should be no traces left from walking on such a foundation.
To increase the waterproofing properties of the base, cover the “native” soil first with a layer of clay, then sand, add water and compact thoroughly.
Tips from the experts
To avoid adverse consequences, you should remember some points:
- drainage protection protects against excess moisture, which cannot be avoided after melting snow or heavy rainfall;
- a floating concrete screed not fixed to the foundation will help you forget about the negative aspects associated with soil shrinkage;
- The geotextile fabric does not allow the sand cushion to absorb moisture from the concrete, which ensures complete hardening of the layer.