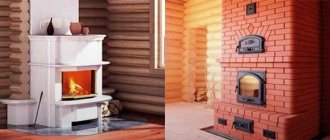
Wood twists and bends, which can cause warping and damage to windows and doors. To prevent shrinkage of the house from leading to deformation of window structures and doors, you need to make a frame or casing.
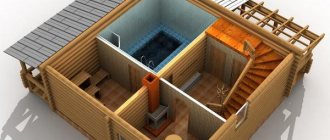
The cap protects the openings from pressure from above and creates the gap necessary for shrinkage. The side parts of the pigtail have poses that create vertical sliding. Most often, the pigtail is made from coniferous wood. It consists of a top, sides and a window sill (threshold).
Important! The casing must be installed before caulking works.
Types of casing (casing)
U-shaped pigtail (in a deck)
Classic pigtail. To perform this, a tenon is cut out at the end of the wall, a vertical part of the casing with a groove is installed on it, along which the frame moves vertically due to shrinkage.
Thanks to this, no pressure is placed on the door and window structure, which guarantees their correct functioning and durability. The casing is treated with an antiseptic, and soft insulation is placed between the tenon and groove.
A wind lock provides protection against blowing under the window sill. The gaps above the top of the pigtail are closed with soft insulating material.
T-shaped socket (in a spike)
The T-shaped frame is made as follows: a groove is cut at the end of the opening, and the side parts of the casing have T-shaped profiles. Bars are glued into the grooves on the risers of the frame, which act as stiffeners; they guarantee the stability of the shape of the casing and uniform shrinkage of the walls.
More on the topic How to insulate windows. Review of insulation materials
When installing a T-type pigtail, strict adherence to technology is required. For example, if you secure a block with nails or self-tapping screws, there is a possibility of freezing or blowing through the window and door opening. An important role in casing is played by antiseptic treatment and insulation of seams with compressible material.
A U- or T-shaped pigtail is selected depending on the house. When visiting the site, the surveyor will tell you the most suitable type of casing. Our craftsmen professionally perform the full range of work on the manufacture and installation of casing in wooden houses.
How to make a casing with your own hands
Making clean casing blocks for plastic windows yourself is difficult, but possible. To do this, you will need a planed dry timber or carriage with a thickness of 50 - 100 mm and a width equal to the thickness of the walls in your house. And also jute tape, PVA glue, self-tapping screws, wood sealant, antiseptic impregnation, brush. Construction stapler to secure jute to the wall.
Simple tools you will need are a hammer, a chisel, a construction level, a hacksaw, a pencil or marker, a ruler, and a corner. Power tools include a chain saw or circular saw, an electric planer, and a hand router. The help of one or two friends will not be superfluous.
Before starting work, decide which casing you will do - P or T type. The size of the opening depends on this.
How to cut a casing profile
In a timber house we will make a T-frame, as it is easier to make with our own hands. Here you can do without a router, just use one hand-held circular saw, which you can rent.
Cutting a T casing from solid timber is too wasteful. There will be a lot of waste left. Therefore, we will use the option of gluing a tenon into the sides. On the market, such casing is also called a monolith spike.
The final result of the work.
In a house made of profiled timber 150 x 150 mm, we will need a planed board 150 x 50 mm and a block 50 x 50 mm to make a frame. We mark the drawing as follows: on each part there is a quarter section with a width equal (!) to the thickness of the window profile and a depth of 25 mm, on the sides there is an additional 53x10 mm groove for the tenon.
Important: when marking a groove in the frame for installing a window frame, find out the thickness of the profile of this frame. For example, the Rehau profile comes in thicknesses of 60, 70 and 80 mm, Veka - 58, 70, 82 mm.
For the top we take a beam 150 x 50 mm.
Windowsill. With a wind lock made of 150x90 mm timber and without a wind lock made of 150x50 mm timber.
Longitudinal cuts are made with a circular saw. If the cutting depth is not enough, carefully cut out the remaining wood with a chisel. We also select the groove for the wind lock using a chisel or a router.
And this is what a drawing of the sides of a classic casing deck looks like. The top and window sill are marked in the same way as the T-view.
Dimensional tolerance table
| Quarter Sampling for installation of frames | The width will be equal to the thickness of the window frame. The depth when casing a window opening depends on the height of the blind profile to the glazing bead and to the hinges. If the hinge is close to the casing, then it will not be possible to open the window completely. Usually the frame extends into the quarter by 10-15 mm, another 10 mm is left for the mounting angles. |
| Groove for tenon insertion Side parts of T-casing | - 2-3 mm wider than the block - depth 5-15 mm, depending on the thickness of the casing board. |
| Groove for the wind lock in the bottom board | - 2-3 mm wider than the wind strip - depth 5-15 mm. On a thin window sill, the wind lock is not cut out. |
| Groove in the end of the house wall | The depth is 10 mm deeper than the tenon. The width is 5 mm wider than the spike. |
| Spike at the end of the house wall | The width is 5 mm less than the groove in the pigtail. The height is 5 mm less than the depth of the groove. |
Making the right casing is not easy. Leave it to the professionals. You can buy ready-made casing (custom made to your dimensions) and install it yourself. Send window sizes to whatsapp to calculate the cost - click to start chat We ship casing throughout the Russian Federation by transport companies (we are located in the Moscow region).
Installation of classic P-casing
The technology for installing a pigtail in a timber house is as follows:
- We mark and cut out openings
- We mark a groove at the ends of the cut openings. Let's choose it. Or we form a spike if you chose a P casing.
- We impregnate the openings and the adjacent part of the casing with an antiseptic, for example Veres Base
- We insulate the opening with jute tape
- We install the bottom part, then the sides and finish by installing the top
- Checking the geometry
- We fill the free space above the tops tightly with jute
It seems simple, but as usual, the devil is in the details. I’ll try to show the process of installing casing in a house made of 150x150 mm timber. If it is unclear, ask in the comments.
When marking openings, remember the golden rule “measure twice, cut once.”
Slowly and carefully form a tenon on the side walls of the opening.
Use a building level. The window sill must be strictly horizontal, the sides must be vertical.
When marking openings, proceed from the planned window sizes. Add to these dimensions the thickness of the casing (taking into account the selected quarter) and the gaps for the jute. The sufficient width of the groove for a wall thickness of 150 mm will be 55 mm. I wrote below on the page how to correctly calculate the dimensions of the opening.
The groove is always 5 mm larger than the tenon. It won’t dangle, you still need to insulate the opening with 1-2 layers of jute tape.
First, we insulate the lower part and install the window sill, then we insulate the remaining perimeter and install the sides. We close the casing by installing the top.
We coat the locks with wood sealant. No self-tapping screws!
At the final stage, we stuff the protruding jute into the seams. We also tightly plug the space above the top with it.
Let's check the geometry again. Profit!
The result of the work.
Installation video - very detailed
In the video, the house is not entirely made of timber. It is a fire monitor, but also with smooth walls. All stages of casing installation were well filmed. A bonus is the visual installation of plastic windows and doors.
We will install turnkey casing and windows in 1 day! Clean, beautiful and with a lifetime guarantee! There will be no draft from the windows, and there will be no need to finish the slopes either. Send window sizes to WhatsApp to calculate the cost - click to start chat We work in Moscow and neighboring regions. We ship casing throughout Russia.
Video timing:
- marking openings in the wall 0:20 - 1:07
- sawing 1:10 – 2:20
- marking the tenon at the end of the opening - 3:30 - 4:05
- sawing out a tenon - 4:10 - 6:11
- impregnation of the opening with an antiseptic - 6:13 - 6:55
- impregnation of the casing with an antiseptic - 6:56 - 7:06
- installation of casing with insulation of the opening with jute - from 7:08
- how the last part of the casing is mounted - the top - 7:54 - 8:05 and 8:20 - 8:30
- installation of doors and windows - from 8:35
- caulking seams with jute - from 11:06
Installation of T-casing in a timber house
The technology differs only in that a groove is selected at the end of the openings. And the spike is formed on the side of the casing adjacent to the wall.
It’s not difficult to make a groove in a beam or, simply put, a groove. In the drawing I showed the top view of the groove. After marking, you make two vertical cuts, then two more 45-degree cuts. Remove the cut triangles and clean the middle with the tip of the chain. Or a chisel if you are not confident in your abilities.
How and how to cut a groove in a beam - top view of the opening.
To make straight cuts with a chain saw you need experience, a good eye and strong hands. You can also cut the groove with a hand-held circular saw, and where it won’t reach, finish it with a chisel.
Both types of pigtails are equally reliable. P-casing is a classic, time-tested option. T-casing appeared relatively recently; it is used for installation in houses with grooves cut during the construction of walls.
Advice: The cost of installing a frame for 1 opening in a log house from different companies is now in the range of 3,500 - 7,000 rubles. At the same time, you can order the production of casing without a proprietary installation.
Thus, you will receive ready-made casing profiles of the shape and size you need. To leisurely install them in your free time, saving tens of thousands of rubles.
An additional bonus when ordering a ready-made joint is the choice of options, the independent implementation of which is very expensive. For example, you can order casing to widen the openings into the house - this visually enlarges the openings and provides more light. Or order a clean window sill.
How to connect the parts of a pigtail - lock options
The locks connecting the parts of the casing vary in complexity of execution. The correct lock prevents the parts of the box from moving relative to each other. Both during the installation of a window or door, and during the period of shrinkage of the house. It also prevents connections from blowing out.
Options:
- quarter connection. The simplest to implement, often used for self-installation. Requires additional fixation with corners.
- quarter joint with reverse corners. A more rigid option also requires additional fixation. Blown through
- dovetail or box tenon connection
- designer locks from companies that manufacture and install casing.
A quarter is the simplest and most unreliable lock.
On the left is a box plier, on the right is a casing with a designer lock.
The upper and lower locks in the casing are usually different in shape.
Factory cut top lock.
Stages of installing a casing (casing)
1. The opening cut is made at a distance of 80-90 cm from the floor; when determining this distance, the person’s height is taken into account.
Between the opening and the window or door structure, you need to make a shrinkage gap of 35-60 mm. 2. Preparing the opening. Using a chainsaw, depending on the type of socket, a groove or ridge is cut in the opening.
3. Treatment and insulation. After installing the frame, its surfaces are treated with an antiseptic, and insulation is placed in the gaps. When installing the frame, you cannot use foam, since the window structure must move freely vertically.
4. Installation of wooden elements. At the end, the installation of wooden elements is carried out, namely the window sill, sidewalls and top.
Manufacturing of casing
The casing is manufactured by specialists in stages.
The first stage is cutting an opening in the log house. First, mark it using a level and plumb line. The distance from the floor to the opening is 80-90 cm. Cut out the opening. They saw the log under the window sill. align the structure first horizontally and then vertically.
Sectional diagram
The second stage is the production of tenons and grooves.
- on the sides of the opening, mark a tenon line using a construction ruler, if it is a P-casing;
- then they pass with a saw along the marking lines on the sides of the opening;
- make markings from the side of the wall;
- cut out excess wood from the log along the intended line;
- at the same distance from the side of the opening, pencil marks are placed on the side of the facade;
- connect them together using a ruler;
- cut off excess;
- the groove is made in the sides of the casing. Mark the location for the groove;
- make several cuts;
- use a chisel to break out and remove excess wood;
- When the groove is ready, it is cleaned with a chisel.
At stage 3, antiseptic and staining is performed. They brush off the dust. An antiseptic destroys pathogenic organisms and prevents their reappearance. Such wood does not rot, and insects do not breed in it.
Stage 4—installation of thermal insulation. To seal and eliminate cold bridges, jute tape is used, which is laid under the casing. It is secured with a construction stapler. A layer of jute is placed under the window sill, then a wind block is attached, and a layer of jute is placed on top again.
Stage 5. Installation of casing. All its parts are prepared. Align the edges of the boards with a miter saw. A one-third cut is made from the end of the board for the groove. The excess is chopped off with an ax. The second side casing is prepared in the same way. Align the groove with a cutter. Place the sidewalls, then the top into the spacer, having previously treated them with sealant. Sealant is necessary in order to avoid leakage and blowing. There is a shrinkage gap between the top and the top log. Place the top until it stops. The gap is insulated with tow.
Installing a socket requires a serious attitude to work and knowledge of the nuances of wood processing. Highly qualified specialists with extensive experience in construction work know how to make a socket in a wooden house.
What affects the price of casing?
1. Wall thickness: wooden houses are built from logs and timber, so the wall thickness can be from 140 to 300 mm. The dimensions of the parts of the frame correspond in width to the walls of the house, or slightly exceed it. You also need to consider the width of the window sill.
2. Size of the opening: the larger the opening, the more material will be required to make the frame and the time to work. The shape of the opening also affects the price of the casing: a standard rectangular design or a complex polygonal one.
3. Quality of a wooden house: if the walls are assembled without connecting elements, the curvature of the walls occurs in the cut out openings. Then you have to additionally straighten the walls, which leads to additional costs.
Houses made of timber are assembled using nails that meet at 300 mm. Because of this, additional money and time are required to sharpen chainsaw chains or purchase new ones.
Source: sotdel.ru/okosyachka-obsada.html
When to casing a newly assembled log house
Question:
Hello! A house made of OCB with a diameter of 240 mm was assembled under roofing felt in mid-February of this year. When can casing be done in window and door openings? Now or after shrinkage? Thanks in advance for your answer.
Sergey, Smolensk.
Answer:
Hello, Sergey from Smolensk!
The installation time of the casing of window and door openings of log houses does not play a special role. It can be installed both immediately during the assembly of the log house, and immediately after its assembly, as well as after a long time, when the log house has finally begun to shrink.
We had to do this for all three options. Depending on various circumstances.
The only thing you should remember is that the later the casing is installed, the smaller the gap between the upper horizontal element and the lower surface of the opening.
That is, it depends on how much insulation you will then need to put in this gap.
If the casing is done immediately, then the gap is left as large as possible in size and in such a way that after the final shrinkage of the log house it remains a couple of centimeters in size. It is not possible to guess the amount of draft of a log house with an accuracy of a centimeter, since it depends on a whole bunch of factors - the degree of moisture content of the wood, its species, the size of the elements, the number of storeys of the building, assembly technology, etc.
All reference data given in construction literature should be treated with skepticism; in practice, it always turns out that their values never correspond to the actual values that will be on your log house in three, four, or five years.
Therefore, see for yourself and do it when and how it is more convenient and convenient for you.
The only thing is, don’t screw it up and do the casing according to all the rules, as described on numerous sites on the Internet.
All. Good luck!
Construction in Moscow and Moscow region
We work with a guarantee! Wide range of construction services. Foundation, walls, ceilings, roofing, turnkey! +7 (905) 797-20-34
luxurykomfort.ru
Other questions on the topic of repairing house foundations:
- Foundation for an extension to a log house
- Repairing the foundation and rotten floors in a country house
- Quicksand next to the foundation of a house
- PGS instead of a foundation for a block house
- Adding sawdust concrete without waterproofing
- The stone foundation is crumbling
- Strengthening the foundation of a house on a slope
- New foundation around the old one
- Foundation in place of a cesspool
- Strengthening the foundation on sand
- Raising a frame house
- The log house is one meter larger than the foundation, what to do?
- Strengthening the foundation under an old log house
- Old iron in a poured foundation
- Timber tying of a pile foundation
- Combination of slab and pile foundations
- Concrete blind area, economical option
- Using a channel in an armored belt
- The grillage on the bored piles burst
- Installation options for driven reinforced concrete piles
- Waterproofing tile blind area
- Foundation blocks are coming off
- Foundation for the yard - which one to choose
- Raise the strip foundation with jacks
- FBS foundation for a one-story frame house
- Concreting piles in the foundation
- Pour the slab onto a shallow strip foundation
- Foundation made of aerated blocks for a timber house
- FBS foundation on loam
- FBS blocks are cracking under a house made of blocks
- Leveling the foundation for a house made of FBS
- Columnar foundation and ground floor
- Two-story house shaking
- Part of the log house sank
- Pour the slab onto the old strip foundation
- How to tie piles into a foundation
- Strengthening a pile-screw foundation for the second floor
- The cabinet under the strip foundation was squeezed out
- The foundation is crumbling
- What is the foundation for a log house?
- Foundation made of reinforced concrete piles
- How to make a blind area for a panel house
- Insulation of the foundation under a timber house
- Sewerage through strip foundation
- Foundation for an adobe house
- Raise a house without opening the floors
- Insulation of the foundation on heaving soils
- Foundation for a house made of polystyrene concrete
- Repairing the foundation of a house on a slope
- Which foundation to choose for a stone house
- What kind of foundation for a 6 by 8 log house?
- The panel house sank along with the block foundation
- How to raise a foundation on a slope
- How to connect the old and new foundation
- Foundation creep: what to do?
- Repairing the foundation of an adobe house
- Waterproofing the log house from the foundation
- What kind of foundation for a house made of timber 150
- Pouring a new foundation and boulders
- Stability of a house made of crossbow stone on tires with concrete
- Uneven foundation under the log house
- Repair of a broken strip foundation
- Raw foundation
- Extension to a one-story panel house
- The pile foundation is walking
- Basement made of concrete
- Strengthening a columnar foundation on heaving soil
- Insulation of the veranda base
- How to fix blocks on a slab
- Foundation for part of a semi-detached house
- How to connect a basement and strip foundation
- Closing the base of a columnar foundation
- Filling the armored belt
- Completing the foundation for a wooden house
- Basement of a house on screw piles
- Distance from the ground to wooden structures
- Which foundation to choose for a foam block extension
- Dampness in the house on the foundation blocks
- Strengthening the foundation for the second floor extension
- Selection and orientation of the foundation for a house on a slope
- Waterproofing foundations in high groundwater
- Strengthening the columnar foundation
- Water seepage under the foundation
- Uneven gaps between the foundation and the frame
- Armobelt for a house made of wood concrete
- Column foundation problems
- Leveling the foundation for a timber house
- Cracks at FBS seams
- Why did the reinforced concrete piles bulge?
- Repair of the basement under a panel house
- New foundation on top of the old one
- Topping up an old strip foundation
- How to make a columnar foundation for an extension
- How to increase the width and height of the foundation
- Strip foundation for a timber extension
- Tire foundation
- What kind of foundation to make on a slope
- Strengthening the foundation
- Strengthening foundation blocks and waterproofing
- Choosing a foundation on sandy soil
- Ground floor on a slope
- How to raise a house in a hole
- The top of the brick foundation leaned
- Stages of pouring the foundation and plinth
- Strengthening the foundation of an old house
- The foundation made of asbestos-cement pipes is cracking
- The foundation burst
- The columnar foundation under the timber house was skewed
- Options for using brick fragments
- Concrete foundation in winter
- Replacement of the foundation and repair of a wooden house
- Recessing the basement floor
- Foundation for a house made of arbolite blocks
- Replacing the foundation under a timber house
- Increasing the height of the block foundation under the house
- Foundation for a two-story house with an extension
- Strengthening the grillage on bored piles
- Soil collapse under a house on a slope
- The block foundation under the timber house is sagging
- The pillars under the frame house were knocked out
- Raise a 2-story house from a cylinder
- The foundation for the timber is wider than necessary
- Cost of repairing a columnar foundation
- Strengthening the foundation of an old cinder block house
- Link the old foundation to the new one
- Strengthening bridge piles
- Strengthening the columnar foundation
- The foundation is smaller than the log house
- The gap between the foundation and the trim
- Raise the foundation under the finished log house
- Replacing a broken foundation in a swamp
- The foundation covered with slabs is crumbling
- Foundation for a cabin 3 by 6 m
- A new house on the foundation of a burnt one
- Inclined blind area
- Cracks in asbestos foundation pipes
- Replacing concrete blocks with sleepers in the foundation
- Strengthening concrete piles under the house
- Increasing the strip foundation under the frame
- Foundation for a timber house and frame veranda
- Choosing a foundation for a house made of wood concrete
- Foundation for a garage with an attic made of blocks
- Strip foundation for a frame house
- How to strengthen a pile foundation on clay
- Bathhouse foundation size
- Deepening the foundation for the basement floor
- Columnar foundation for individual housing construction
- Garden house on swampy ground leaning
- Foundation for a house made of shell rock
- Lay the foundation for an old extension
- Foundation at the drop
- Repair of old brick foundation
- Foundation for an extension made of reinforced concrete sleepers
- Is there a need for a blind area under the terrace?
- Strengthening the foundations of the house and extension
- The foundation of pipes is walking
- Gas connection to a 6 by 4 frame house
- Retaining wall as a foundation
- Complex foundation vents
- Raise the house
- Reconstruction of a strip foundation or pile
- The corner of a frame house sank
- Strapping on a foundation made of reinforced concrete piles
- Foundation for a house on pillars
- Foundation for a house made of polystyrene concrete
- Pour a strip foundation onto an old rubble foundation
- Pour a foundation for an adobe house
- Slab foundation on loam for a block house
- Is it possible to pour a new foundation on an old one?
- How to strengthen an old rubble foundation
- The FBS foundation subsided
- Repairing the foundation under a brick house
- Is a grillage required on piles?
- Foundation with a basement for a timber house
- There are no vents in the low base
- Replacement of the foundation and crowns of an old log house
- What is the best way to make a foundation for a house on a slope?
- Adobe foundation
- Screw piles for a two-story frame
- Repairing a sagging corner of the foundation
- FBS foundation
- Block foundation on a slope
- Make vents in the finished foundation
- Reconstruction of the foundation on quicksand
- Bundle of monolith layers
- The foundation is smaller than the size of a log house
- Screw foundation for a house made of wood concrete
- Foundation waterproofing FBS
- Blind area around a log house without a base
- The corner of the log house sank, what should I do?
- Foundation for walls made of permanent formwork
- Foundation for a garden log house
- Raise and slightly move the country house
- Raise an old wooden house
- Should I tie foundation piles under a log house?
- Screw pile foundation for a block house
- How many years will a brick foundation last?
- Foundation for a country toilet
- How to connect a bored foundation with a rubble foundation
- Foundation for a house on a slope
- House on a slope - problems
- Insulation of the foundation base with penoplex
- Foundation for a bathhouse base on screw piles
- How to repair a foundation
- Replacing the foundation under a house with an extension
- The armored belt of the foundation burst
- A pipe burst inside the foundation
- Insulation of the foundation base
- The foundation pile was squeezed out
- Foundation around an old house for a new house
- Foundation for the fifth wall of the log house
- Foundation for a heavy frame
- Forgot to waterproof the log house from the foundation
- Tying a pile-screw foundation
- Are vents needed under reinforced concrete floors?
- Top up the old foundation for a new building
- Walking veranda without a foundation
- What to make a high and economical foundation from
- Pile foundation made of asbestos pipes
- The foundation, two corners and the wall of the house sank
- Option for insulating an existing foundation
- Part of the foundation sank
- Joining the foundations of a house and an extension
- Waterproofing the foundation - forgot to do it
- The new strip foundation has cracked
- How to cut an opening for doors in a FBS foundation
- Unfinished foundation
- Expansion joint between foundations
- Leveling the foundation with a brick plinth
- Foundation for an extension made of arbolite blocks
- Horizontal waterproofing
- Log house larger than foundation what to do
- How to connect foundations at different levels
- Strengthen the foundation under a new house
- Foundation, crushed stone cushion
- The foundation of a timber house is cracked
- Foundation slab against dampness
- Lifting a panel garden house
- Replacing an old columnar foundation with a new one
- How to pour a foundation in water
- How to add a foundation to the middle of a house
- Brick pillar under a sagging beam
- The gap between the log house and the foundation is like a vent
- Step of the pile-screw foundation under the timber
- Used sleeper foundation for a bathhouse
- Foundation for a frame extension
- Foundation made of FBS blocks for a two-story brick house
- How practical is a 200 mm foundation?
- Foundation for a bathhouse made of sleepers
- The strip foundation collapsed
- Replacing the lower crown with a foam block and raising the foundation
- Foundation for a house made of aerated blocks
- Strengthening the foundation for an attic extension
- Pile-screw and shallow foundation
- Level the foundation from asbestos pipes under the barn
- Foundation for facing a finished house with bricks
- Find a foundation repair team
- FBS foundation joints are cracking
- Strengthening the brick foundation
- Squeezed out by FBS - how to fix it
- How to level the foundation surface
- Strengthening the old foundation of a cinder block house
- Adding asphalt chips to concrete
- Unburied foundation in the Far North region
- Reinforced concrete blocks or screw piles for a country house
- Foundation option for a wooden house
- Replacing the foundation under a garden house
- Foundation under an old house for a new house
- Foundation made of wooden sleepers
- Need advice on how to raise a house
- House partially without foundation
- Leveling the foundation level
- What kind of foundation is there for an 8 x 8 log house?
- How to lift an FBS block onto another FBS block without equipment
- Foundation with a plinth on a slope
- The log house turned out to be smaller than the foundation
- Asbestos pipe foundation for a panel house
- Strengthening a sagging foundation
- The foundation is collapsing
- Foundation for a bathhouse made of bolts 40 20 20 cm
- What kind of foundation is needed for a permanent residence frame house?
- How to use an abandoned foundation
- Reconstruction of the foundation of an old wooden house
- Different foundations for the house and extensions
- Air vents in a house under construction
- How to lay FBS for the foundation of a brick house
- How to level and build up a strip foundation
- Foundation and ground floor made of reinforced concrete sleepers
- Lay a foundation under an old log house
- How to strengthen a brick house
- Pile head foundation
- Insulation of the base and foundation
- Retaining wall on a sloped area
- Weak strip foundation
- Combining FBS and strip foundations
- Breathing of the foundation under a log house
- Plinth made of concrete slabs on a columnar foundation
- How to increase the width of a strip foundation
- Oak pile foundation
- Vents in the foundation in winter
- Coven tricks when building foundations
- Repair of the foundation under a panel house
- Foundation insulation
- The columnar foundation is moving apart
- Strip foundation depth
- Dimensions of the foundation for a timber house with a brick lining
- Lay a foundation under the walls of a burnt house
- Designing a foundation for a frame extension
- Bored foundation technology
- Step foundation for an extension
- Repairing the foundation of an old wooden house
- Shrinkage of strip foundation
- The rubble stone foundation is crumbling
- What kind of foundation is needed for a house made of wood concrete blocks?
- Foundation for a one-story house
- Repair of strip foundation under a panel house
- Waterproofing an already built foundation
- The foundation of an adobe house is crumbling
- Log house on an old foundation
- Brick country house without foundation
- Wall aerated blocks for the foundation of a house
- Construction on the site of an old building
- New frame house on old foundation
- Car tires instead of a foundation for a timber house
- Replacing the foundation under a house in three parts
- Shirt on the foundation of an old log house
- Reinforcement of a shallow foundation
- Drilling holes in the foundation for water supply
- Replacement of block foundation 20 20 40
- Skid foundation for frame extension
- Foundation made of reinforced concrete piles 1-2 meters
- How to pour a new foundation on an old one
- Need advice on strengthening the foundation
- Strengthen the old foundation under an oak frame
- How to top up a fresh foundation in height
- Foundation - wooden sleepers or concrete blocks
- Restoration of the old foundation of a brick house
- Set up a garage basement on heaving soil
- FBS blocks in the foundation are moving apart
- Foundation for an outdoor shower
- Foundation in water - should we raise the house?
- Old foundation for a new house
- Foundation on water - how to make it?
- Foundation for an extension to a cinder block house
- The strip foundation is crumbling
- Foundation for the internal walls of a house
- Foundation pillars of a frame house collapsed
- The columnar foundation sat on the ground
- Foundation for an extension
- Strengthening the foundation before building an attic
- How to insulate and waterproof a foundation
- Choosing a foundation for a log house
- Foundation conservation
- Plastering the old foundation and restoring the blind area
- Foundation piles subsided
- A new strip foundation is being layered
- How to cut FBS?
- The columnar foundation went underground
- Restoration of strip foundation
- The columnar foundation regularly protrudes
- Which foundation for a 4 by 6 m bathhouse to choose
- Finishing the base and blind area of a columnar foundation
- The use of reinforced concrete sleepers when pouring the foundation
- How to level the foundation
- Should I lay roofing felt between the timber and the foundation?
- When and how to pour the foundation for an extension
- Brick house is bursting at the seams
- Repair of strip foundation under a panel house
- The foundation piles next to the vegetable pit were squeezed out
- Choosing a foundation for a timber house with brick lining
- Pour a foundation for an old log house
- Strengthening the foundation under a cinder block house
- Strengthening the old foundation from broken rubble stone
- Foundation depth for a foam block house
- Construction of a new foundation for cladding an old house
- Restoration of the foundation plinth
- Is it worth using the old foundation for construction?
- How to pour a foundation
- Foundation for a frame-panel house
- Foundation for an old adobe house lined with bricks
- Replacing the foundation under a brick garage
- Renew old foundation before construction
- Brick plinth on a concrete foundation
- How to connect a strip foundation with a new floating one
- A strip foundation made of blocks collapses
- Is it necessary to raise a concrete plinth with bricks?
- Is it possible to vent the foundation vents upward?
- Strengthening the foundation for the construction of the second floor
- Log house sank on a slope
- Connecting old and new foundations with reinforcement
- Separate foundation for the second floor
- The columnar foundation is walking
- Foundation for lining a log house with blocks
- How to avoid foundation cracking
- The new foundation is crumbling
- Expansion of the old foundation for a new house
- Vents in the foundation
- Which foundation to choose for a log house
- How to get rid of weeds in the foundation
- How to make a foundation for an adobe house without a foundation
- How to expand a concrete block foundation
- Put an old house on bored piles
- Columnar foundation for a log bathhouse
- Barrel foundation
- Budget foundation for a house made of foam blocks 6 by 6 m
- Cracks in a brick house
- Blind area of a house on a slope
- Which concrete is better for the foundation?
- What to do with the foundation after flooding?
- The foundation under a wooden house burst
- The latest foundation repair technology
- How to build up an old foundation before building a house
- The corner of the house sank
- The house has settled and the foundation is cracking
- The foundation is three years old, how can it be updated before building a house?
- Make a brick plinth on a strip foundation
- The foundation is crumbling
- How to add a foundation under a cinder-cast house
- Block foundation repair
- Restoration of a strip foundation after a fire
- Repair of columnar foundation
- Foundation of adobe house
- How to properly add a foundation to an old clay hut
- The foundation crumbled
- The foundation piles were squeezed out. What to do?
- Strengthening the foundation in land with high groundwater
- How to choose a foundation for a brick extension
- To boot or not to boot
- Strengthening the foundation and walls of an old house
- Foundation made of tires for a timber house
- Strengthening the foundation of the dacha
- Foundation for a bathhouse on a peat bog
- The strip foundation burst
- How to pour a foundation in place of an existing old one
- Waterproofing under an existing house
- Sleepers as a foundation for a house
- Problem with the foundation of a one-story house
- Floating foundation for a timber house
- How to add a foundation to an old log house
- Pile-screw foundation for a bathhouse
- Foundation for a frame-panel house
- The foundation has burst! What to do?
- The foundation burst
- Restoration of an old brick house and strengthening of the foundation
- How to strengthen an old foundation
- Strengthening the foundation under a country house
- New foundation around an old house
- Add a finished foundation
- The brick of the false foundation wall is crumbling
- How to strengthen the old foundation?
- Repair of the foundation of a brick country house
- How to add a foundation to a house?
- Strengthening the foundations of country houses
Construction in Moscow and Moscow region
We work with a guarantee! Wide range of construction services. Foundation, walls, ceilings, roofing, turnkey! +7 (905) 797-20-34
luxurykomfort.ru
Construction in Moscow and Moscow region
We work with a guarantee! Wide range of construction services. Foundation, walls, ceilings, roofing, turnkey! +7 (905) 797-20-34
luxurykomfort.ru
Construction in Moscow and Moscow region
We work with a guarantee! Wide range of construction services. Foundation, walls, ceilings, roofing, turnkey! +7 (905) 797-20-34
luxurykomfort.ru
Construction in Moscow and Moscow region
We work with a guarantee! Wide range of construction services. Foundation, walls, ceilings, roofing, turnkey! +7 (905) 797-20-34
luxurykomfort.ru
Foundations
All questions to Semenych about construction
Semenych (author of materials)
Our site is regularly updated with interesting and unique materials and articles on the topics of lumber, building materials and works, the author's opinion and knowledge of a real coven with more than 15 years of experience are provided. There is a section - funny stories of shabashniks. If you would like to receive information about this, subscribe to our website's newsletter. We guarantee that your address will not be shared with third parties.
Apartment renovation in Moscow and Moscow region
We work with a guarantee!
Wide range of repair work. Professional craftsmen.
+7 (905) 797-20-34
luxurycomfort.ru
| Country house | Bath |
| For the dacha | Tool |
| Materials | Tales |
| Foundation | Log houses |
| Roofs | Insulation |
| Walls | Siding |
| Floors | Cellars |
| Attics | Doors windows |
| Stairs | Extensions |
| Wells | Toilets |
| Balconies | Loggias |
| Condensate | Flooding |
| Fences | Kennels |
| Sidewalk | Birdhouse |
| Adobe | Carts |
| Garages | Barn |
| Greenhouses | Bath |
| Swing | Brazier |
| Shower | Horizontal bar |
DIY pigtail in a wooden house
Modern life, with its busy pace of life, pushes people to look for an alternative place of residence or recreation.
In this regard, a wooden house is a suitable option for a city dweller. A wooden house provides the opportunity to enjoy the naturalness and naturalness of an ecological structure.
Wooden houses, due to their natural characteristics, are environmentally friendly and energy efficient, which is why today the number of adherents of building houses made of wood is growing all over the world.
When building a wooden house, special attention must be paid to the installation of windows and doors, due to their tendency to shrink, which is a characteristic seasonal phenomenon. This phenomenon is due to the fact that wood has such characteristics as drying out and shrinkage.
In this regard, when installing window and door openings, it is important to remember that shrinkage of the building can last up to five years from the date of construction, and, consequently, the openings of windows and doors change.
More on the topic Panoramic windows in a private house
To prevent this deformation, window and door openings are installed in a special flashing, which is otherwise called a casing. A frame in a wooden house allows the natural shrinkage of the house to avoid damaging windows and doors and ensure safe living.
The casing in a wooden house contains 3 components:
- Sidewall;
- Vershnik,
- Window sill board (threshold).
The technology for making a pigtail depends on its type; in order to install a pigeon yourself, you need to carefully study the manufacturing technologies of each type and choose the most suitable one for yourself.
Manufacturing of casing
The casing consists of two sidewalls (side posts), a top - the top board and a window sill or threshold (also called a bottom). It must be said that the lower part is not always present: it is often not made in interior doors. In some cases (when installing PVC windows, for example), they do not make a window sill, but simply a lower embedded board, to which a “standard” window sill is then attached.
Also note that the top does not rest against the top edge of the window or door opening. There remains a gap of 5-7 cm between them - for shrinkage of the log house. This gap is then filled with insulation and covered with platbands and finishing materials.
What does a casing box consist of?
The most questions arise when forming the locks necessary for joining parts of the casing. These elements are especially difficult if a quarter sample is required. It’s difficult to explain in words, let’s provide drawings. Take a look at them and maybe you’ll understand what’s what. But the final understanding will come in the process: when you put the bottom and attach the side posts. They are outlined with a pencil, then gradually cut out. In this process, it is important not to cut off the excess - it won’t be possible to grow it and there will be unsightly gaps.
Drawings of casing/jamb locks
Before installing the casing, the window/door opening is treated with an antiseptic. Then two layers of insulation are laid. The structure is “dressed” on it. The procedure for assembling the casing on the windows is as follows:
- The lower part is installed.
- Place two side panels and check that the locks match accurately. You hit it well on the sides.
- Place the top. Often it “doesn’t fit” - the racks are closer than necessary. Don't take up the saw right away. Take spacers of the length that the opening should be, and with their help bring the window to the required dimensions. First, place it diagonally, then, knocking it out, straighten it out. The sidewalls crush the insulation and occupy the required position. After which the apex falls into place.
The main types of pigtails in a wooden house and their manufacturing technology
The pigtail “in the embedded block”.
This type is a prefabricated structure. A block measuring 50 cm x 50 cm is installed in a cut-out groove prepared in advance. This block will be the main guide for moving the log house vertically. In a wooden house, the frame (casing) is made up of edged boards measuring 50 mm x 150 mm or 50 mm x 200 mm, based on the thickness of the logs.
This technology is highly popular for 2 reasons: 1) due to rapid production and subsequent assembly, 2) due to its relative low cost.
Okosyachka "In Shim Monolith". This technology involves making a casing in a wooden house from a solid rectangular profile beam. Its installation is carried out in a groove in the log house, which is cut in advance. The function of the top (upper horizontal jumper) is performed by an edged board, the thickness of which is 50 millimeters.
The “in the deck” socket is the most common method of casing among the people. Installation involves cutting a groove into a monolithic casing, which is made of rectangular profile timber. The function of the top is performed by an edged board with a thickness of 50 millimeters.
The ridge, which is cut into the end of the log house, serves as a guide for moving the log house. The racks on the sides are also made of timber. At the same time, “blocks” are made, inside of which a groove is cut in the center (50mmx50mm in size); when making them, it is important to take into account the thickness of the logs.
Having laid the thermal insulation in advance, the decks are placed on the ridge, and the racks are attached to the lower supporting crown using pins or wooden dowels. The top is placed on top in a spacer; it is secured with self-tapping screws to the side casing posts.
Pit "in a spike with a ready-made slope." A groove is cut at the end of the opening. A block (50x50 mm) is installed into it through the seal. This block is a guide for the vertical movement of the log house.
More on the topic Standard sizes of plastic windows according to GOST
To make the pigtail, this method uses a glued carriage, which is made from coniferous trees, its thickness is 50 millimeters. Then, on the frame, an “internal quarter” is made from laminated veneer lumber for the installation of window structures. The frame is secured to the opening using self-tapping screws.
In order to facilitate the process of installing a window frame in a wooden house yourself, we present its main stages.
Possible errors and difficulties
When making pigtails on their own, beginners often make gross mistakes that lead to negative consequences. To prevent this from happening, professional installers recommend taking into account a number of features:
Vertical casing imposts do not have a common plane with the end of the opening - even if the bars protrude by several millimeters, chips must be removed until a single plane is achieved.- After installation, the window frame swings in the opening - the frame must be firmly fixed with self-tapping screws along the entire perimeter of the structure.
- When installing the frame, the boards protrude beyond the edge of the opening - it is necessary to bring the parts to the required geometric parameters.
- Wooden parts show signs of rot and mold - the boards must be treated with an antiseptic before installation.
- After installing the casing, the diagonals of the frame are not identical to each other - it is necessary to check the tension force of the elements after installation - the casing must be installed without causing deformations.
The main mistake is using available household tools when making cuts at the ends of the openings. When cutting a groove, it is recommended to purchase or rent a professional milling cutter or mortar cutter.
Consequences
If the casing installation rules are not followed, the following negative consequences may occur :
- Deformation of the window profile.
- Formation of cracks in the glass unit.
- The appearance of condensation on the glass.
- Blowing from the assembly seam.
- Violation of thermal insulation properties.
- Reduced sound insulation of the building envelope.
If malfunctions in the operation of the window sides are detected, it is necessary to take immediate action, since incorrect operation can lead to significant costs later.
The main stages of making a pigtail
Cutting the opening
First, it is necessary to clarify the size of the opening and its distance from the floor. As a rule, this distance ranges from 80 to 90 centimeters. When determining this distance, it is necessary to take into account the height of future residents.
Then markings are made using special construction tools (plumb and level). In this case, the dimensions of the opening must be larger than the dimensions of the window structure, due to the fact that there must be shrinkage gaps (compensation) from 40 to 60 millimeters above the casing. Next comes the cutting of the opening.
Preparing the opening
This stage involves making a groove (or ridge), taking into account the technology of the socket.
Production and installation of pigtails
This stage is carried out based on the specifics of the production of various types of pigtails. Because different technologies have different rules and production sequence.
Direct installation of windows
It is important to know that the installation of a socket in a wooden house is installed if the house is not older than ten years. It is possible to install the pigtail with your own hands, but to do this you need to acquire certain knowledge and skills.
What is casing and how does it work
The casing is a frame installed in a log or timber house. It compensates for the expansion and drying of wood. prevents the impact of shrinkage on the opening. Another name for it is pigtail.
It is made from boards 20-25 cm wide. Using a tongue-and-groove connection, the structure slides along the end of the opening. A non-fixed connection helps the parts move depending on the expansion or contraction of the log house by 7cm. The casing compensates for the expansion or shrinkage of the wood.
A log in a wooden house has a humidity of 12% to avoid cracks in it. The casing for windows consists of 4 parts: top, bottom and sides. The top fixes the sidewalls in a static position. A shrinkage gap is formed above the top. Its height is 5-8 cm. It compensates for the processes occurring in the house during shrinkage. Mineral wool or tow is placed in this gap.
Some novice builders foam the shrinkage gap, not knowing that this should not be done.
The foam hardens and becomes rigid, putting pressure on the casing. The casing may become distorted under load. The adhesive properties of foam have an adverse effect on it. They firmly fix the components of the pigtail, preventing its mobility.
The main tasks solved by the pigtail
The formation of a gap between the upper beam and the window opening, which ranges from 5 to 8 centimeters.
Organization of a strong connection of logs located horizontally in the window area. Organizations of structures intended for installation of windows.
Important. The casing in a wooden house does not rigidly tie the structure to the house; it can move freely if the house shrinks.
Installing a frame (casing) in a wooden house is a necessary and important event that should not be neglected. By installing the joint on time, you will save yourself from problems that may arise in the future.
Source: profibrus.ru/okosyachka-svoimi-rukami-v-derevyannom-dome.html
Purpose of casing in the construction of wooden structures
Such an element is mandatory in the design of the entire house. Its absence leads to the fact that the window opening can completely collapse under the influence of shrinkage of the house. In addition, if the wood dries out significantly, cracks and gaps will appear between the frames and the wall of the building, which will lead to large heat loss and drafts.
It is very important to use a socket if there is a small distance between the windows . A design made according to all the rules will become a decoration for your wooden house.
The window frame protects the window opening from destruction when the house shrinks
Please note that casing for a wooden window is not always suitable for PVC frames. If you decide to replace old wooden windows in a wooden house with plastic frames, you need to pay attention to the frame during dismantling. If it is not suitable for a new plastic window, then it must be dismantled and a new one installed, carefully following the technology.
Properly installed frames made of PVC material will serve you for a long period of time. And if you choose the color of the film covering the plastic structure, which resembles natural wood, this will allow the products to look harmonious, combining with the entire wooden structure.
Types of casing
The casing is the supporting structure of a wooden structure and requires special attention when choosing.
A window frame or casing on the doors of a wooden house is equally important for strengthening walls and preparing openings. There are several types of pigtails:
The pigtail in the embedded block.
In the 90s, when wooden houses made of timber, chopped and rounded logs began to “grow up like mushrooms after rain” in villages and summer cottages, this type of socket, known as an embedded block, became widespread.
With this installation method, a groove is selected at the ends of the window opening logs, into which a 50x50 mm block is driven through jute.
Next, a 50x150mm, or 50x200mm board is nailed to it or turned on self-tapping screws. The top is also covered with screws or nails with a board of the appropriate size.
This is the cheapest type of casing. It appeared, most likely, out of hopelessness among builders, since in those years there was nowhere to buy the right pigtail, and making it by hand was too expensive and labor-intensive. The socket in the embedded block turns out to be fragile, the connection angles of the structure itself are not airtight, there are still many disadvantages and only one advantage - it is inexpensive.
Step-by-step instructions for installing casing
To install the finished casing, you should also follow all the steps of a separate technological map :
- To ensure that the geometry of the finished structure remains unchanged, it is expanded with temporary bars in 2 directions.
- The frame is fitted into the opening, after which markings are applied along the end face of the outer wall.
- A laser level is placed in the opening to outline the path of cutting the groove around the entire perimeter.
- The cut is made using a router or chisels.
- The frame is hammered forcefully into the opening with wooden hammers.
- After installation, the casing is fixed with self-tapping screws, with a length increment on each side of no more than 300 - 400 mm.
After installation, it is necessary to re-check the consistency of the geometry, and then take measurements to order the window structure.
Features of installation in a timber structure
When installing casing from a wooden frame into a house made of timber, a number of important nuances should be taken into account :
- The lower and upper horizontal casing mullions must accurately repeat the factory surface profile of the timber.
- When pairing the elements of the pigtail, the creation of a complex windproof unit is required.
- The casing deck should be installed over the entire thickness of the wall structure for ease of design of slopes and installation of window sill boards.
- It is recommended to remove a quarter to ensure the unchanged position and tightness of the window structure.
- A felt heat-insulating pad should be laid between the mortise block and the wall structure to avoid the formation of a cold bridge.
Window sills and lintel parts of the casing must be laid on a layer of polyurethane foam to increase energy efficiency and eliminate the risk of delamination of the structure after shrinkage of the wooden house.
T-shaped pigtail
The T-shaped jamb, the installation of which is carried out similarly to the casing in the embedded block, has a significant difference that makes it much stronger than the previous method described.
The difference is that the block is glued into the base of the workpiece or is made from a single material. The pigtail itself has a thickness of at least 65 mm. and this is enough to create sufficient rigidity of the structure.
This T-shaped casing can withstand horizontal and vertical loads well and reliably protects the windows and doors of a wooden house from distortions and mechanical damage during shrinkage of the log house.
We most often use a T-shaped frame when replacing a poorly installed embedment bar
Features of casing for an adjacent window opening with a balcony door
Combined opening
If there is a balcony door next to a window, then 2 casings should be installed. The opening where the balcony door is located is larger. And the opening for the window is much smaller. Therefore, the shrinkage of openings can therefore take place according to different scenarios. At the end of the window you can make a casing with a T-profile, and the balcony door with a U-shaped section. They will move relative to each other. The gaps above the top of the window and door will also vary. There is a larger gap above the balcony door than above the window. During the shrinkage process, the gaps will even out.
U-shaped pigtail
U-shaped pigtail is a classic type of pigtail. Someone claims that this is a special development of their company and only they install it this way. Not true. The U-shaped casing appeared a long time ago and it will not be possible to reinvent it again.
The production of the pigtail is carried out from solid wood or laminated veneer lumber with a large cross-section by mechanical processing. The result is a rigid, reliable structure that can withstand high loads in any direction.
Ideal for large plastic and wooden windows as well as for installation of metal entrance doors.
In our company you can buy a U-shaped window frame and install it yourself
Features of wood as a building material
Wood has a heterogeneous structure. This manifests itself if we consider any lumber in relation to the longitudinal and transverse directions.
A log, timber or board (regardless of the type of sawing) consists of a huge number of longitudinal channels (tracheids and tracheae). In wood of natural moisture, water is present in two states: free and bound. Free water is contained in the channels, bound water is contained in the walls of the channels (in microfibrils).
When wood undergoes natural drying, what dries out is mostly free water. And conditionally dry wood may contain up to 30% bound water of the remaining total mass of the entire material. Even when the active stage of shrinkage ends, the tree continues to dry out due to bound water. This leads to a change in transverse dimensions, and relative to the structure of the house - to a decrease in the overall height of the walls and the height of the openings.
Because of these features, the installation of windows and doors is carried out at different times from the completion of the construction of walls and roofs:
- for log houses made of materials with natural moisture - after six months to a year;
- for houses made of atmospheric drying materials - after two to three months;
- for houses made of dry or laminated timber - immediately.
Note. The natural moisture content of a log or beam is a conventional concept without clear characteristics. Its value depends on the time of year and the region where the forest was cut, the duration of transportation and storage, during which the material dried out one way or another. Therefore, the duration of shrinkage may vary
Finishing casing
The finishing casing can be made from solid wood or glued blanks.
Finish okosyachka differs from other types in that it does not require additional decorative finishing. The corner joints of the casing structure are sawn by hand so that the gaps at the junction of the hanger, risers and window sill are minimal, which gives the window opening an impeccable appearance.
The surface of the parts is polished and only needs painting.
It is best to order such a pigtail for a wooden house, in which there will be no interior decoration, where the walls remain as they are.
What is a wooden window casing?
In the modern construction market lately, houses made of logs, panels or timber have often been found. These include bathhouses, country houses, and country houses. Despite the fact that new technologies make it possible to create innovative building materials, environmentally friendly wood remains in demand. In addition, such structures have a beautiful appearance.
A feature of wooden buildings, which is called shrinkage, occurs under the influence of temperature factors. Wood can absorb water and dry out over time. The most vulnerable modules of the house are windows and doors, or rather, their openings. Such building movements can impair their functionality or lead to complete destruction. To avoid this, a special technology for their installation is used, in which a window frame is inserted into the opening . It is a wooden box made in a special way.
The technology for installing windows in wooden houses involves installing a frame
The casing includes: a window sill board, a top and two sidewalls. The boards used for its manufacture are about 25 cm in size. Choose a material that has a moisture content of approximately 10%. You should not take drier wood, as it may have cracks invisible to the eye, as a result of which it will begin to collapse as the building shrinks.
Rough casing
For a house built from unplaned timber, it is better to order a rough frame made from solid wood. It will reliably strengthen the walls of the house and protect the windows from the negative consequences of the shrinkage process.
Subsequently, the rough frame is covered with internal and external finishing.
You should not pay special attention to the appearance of such a pigtail, but the installation must be carried out according to all the rules.
In log houses, when installing this type of window frame, it is necessary to use a window sill board with a thickness of at least 65 mm.
In houses built from timber, the window sill board may not be used; in this case, the riser frames are cut into the underlying timber.
Suitable formats and sizes
The edging of openings is necessary in houses made of ordinary, planed and profiled timber. Highly recommended for houses made of dry and laminated timber. The main reason for its installation is the phenomenon of shrinkage, that is, a decrease in the volume of wood when drying. When shrinkage occurs, the height of the cut openings decreases, and the timber in the walls can rotate and crack.
If you install windows without casing in a house built from freshly sawn or dried timber, then soon through gaps will appear between the beams on both sides of the window to the street - the timber will hang on the screws that secure the window. There will also be a suspended beam that rests on the frame from above. That is, the entire upper part of the house will rest on the window frame. She won't last long. At first the windows will open poorly, then they will stop altogether. The frame will most likely warp and the glass unit will crack.
To prevent this from happening, casing boxes are installed in the openings. For timber houses, T and P type sockets are suitable. It is easy to distinguish them, look at the end of the pigtail - it will look like the corresponding letter.
P-casing and a quarter.
T-casing made of solid wood with a glued tenon.
Recommended dimensions for walls made of 100 mm timber
| Planed timber with natural humidity | P – casing 90 mm thick. Thin walls tend to shrink a lot; a strong box is needed. |
| Profiled timber with natural humidity | |
| Dry profiled timber | P and T casing with a thickness of 55 mm. |
| Glued laminated timber |
Recommended dimensions for walls 145 – 150 mm
| Planed timber with natural humidity | P- and T-pipe with a thickness of 55 mm. |
| Profiled timber with natural humidity | |
| Dry profiled timber | |
| Glued laminated timber |
Recommended dimensions for walls 200 – 220 mm
| Planed timber with natural humidity | P- and T-pipe with a thickness of 55 mm. |
| Profiled timber with natural humidity | |
| Dry profiled timber | |
| Glued laminated timber |
Important! The dimensions in the tables are correct for standard window openings. If the length or width of the opening exceeds 2 meters, then install casing with a thickness of 90 mm or more.
Find out the price for lining your home!
Send window sizes to WhatsApp - click to start chat We ship casing throughout the Russian Federation, install it on a turnkey basis (with windows and trim) in Moscow and neighboring regions. Casing in an embedded block carries a lot of hidden costs and delayed problems. Therefore, I will not recommend it. Read more in the article “Basics of a warm house - once again about casing in embedded timber.”
Pit from an array
Making a casing from solid wood does not take much time and effort, but preparing the material for such casing is quite difficult.
In the case of a rough casing, where appearance does not play a huge role, the finishing casing, on the contrary, should look flawless. To do this, selected carriages or timber must undergo a soft drying process in order to relieve internal stresses in the wood and, at the same time, the formation of cracks in the workpieces should be minimal.
This work takes a lot of time and not everyone takes it on. If the preparation of the material is not carried out efficiently, then be prepared for warping and cracking of such a frame. Of course it won't fall apart, but the appearance will be ruined.
The pigtail can be made of solid pine, larch or oak.
Suitable wood species
Photo: box assembly
Only chamber-dried wood with a moisture content of 8 to 10% is suitable for casing. An ordinary board or timber is not suitable - it contains a lot of moisture and will quickly lead.
Suitable breeds:
- pine;
- Karelian pine;
- larch;
- cedar;
- spruce;
- beech or oak.
- KELO cracker.
For a T-shaped casing, a carriage with a thickness of 50 mm or more is used; for a U-shaped casing, a carriage of 90 mm or more is used. The width of the board for the jamb should be equal to the thickness of the wall.
Glued pigtail
Glued sash is made from lamellas of small cross-section. This material dries well and quickly in drying chambers. There are no internal stresses in such a pigtail. It does not lead, no cracks appear on it.
A laminated timber frame is not made from laminated wall timber. During the production process of blanks for glued casing, a more stringent selection of material is carried out. It is impossible to hide wood defects inside the workpiece, which is why the price of a socket is much higher than the cost of a wall beam.
Particular attention should be paid to the glue used in the manufacture of glued frames. Only glue intended for this work and compliance with all gluing standards can guarantee the quality of the resulting product.
If all production standards are met, the glued frame turns out to be stronger and more reliable than the solid wood. This type of finishing trim is ideal for wooden houses made of profiled timber or chopped logs.
Each type of casing has the same purpose: to strengthen the walls, maintain the functionality of windows and doors, and not interfere with the shrinkage of the log house. Only the cost and appearance are different.
Window frames for wooden houses, the price of which depends on the type, material and complexity of installation, are made according to individual sizes, which are determined by the master during measurement. This takes into account the thickness of the walls, the unevenness of the walls, the size of the shrinkage gap, the height of the lower and upper cut, the thickness of the tenon or groove at the ends of the logs, sometimes the slope of the roof, the alignment of window openings on the first and second floors...
Only a person with extensive experience in the construction and glazing of wooden houses can carry out the correct measurement and installation of the frame.
How to calculate the size of openings if there are window/door sizes
Let's take as an example a 1.4 by 1.2 meter window in a house made of 150x150 profiled timber. We will calculate the width and height of the opening for a P-casing with a thickness of 90 mm. The wooden window sill is the lower part of the frame.
Calculation using the example of a window 1400 x 1200 mm.
Initial data:
- window width 1400 mm, window height 1200 mm
- thickness of side panels - 90 mm, top and window sill - 60 mm
- depth of the selected quarter for the frame - 25 mm
- drank above the tip - 70 mm
Formula:
Opening width = window width + two casing thicknesses - two quarter depths + 5 mm for the gap between the casing and the wall on each side and 10 mm for the gap between the casing and the frame, also on each side.
1400+90+90+30–50 = 1560 mm
The height of the opening = the height of the window + the thickness of the window sill + the thickness of the top + 25 mm for gaps - two quarter depths + the gap above the top.
1200+90+90+25–40+70 = 1435 mm
The principle, I think, is clear. If anything, ask in the comments.
Calculate the cost of installing windows in a turnkey log house. Send window sizes to whatsapp - click to start chat Your benefits:
- Finish casing with lifetime warranty
- Veka or Rehau windows
- Installation in 1 day (up to 7 openings)
- Painting the casing in the color of the windows
- No additional finishing work with windows is required
We work in the Moscow region and neighboring regions. Travel to other regions is possible.
Making a pigtail
Making a pigtail from solid wood with your own hands is possible!
To do this you will need a number of hand tools and the ability to work with them. It is much more difficult to properly prepare and dry the material for making casing. The same work on the production of pigtails, performed on production equipment, will take much less time and will give a higher quality result. Making glued sockets at home, without special equipment, is impossible.
Buying glued material, such as furniture panels or stair strings, and using it to produce casing is also not a good idea. The adhesive used in the manufacture of such products is not intended for use in areas of constant high loads and aggressive environments (heat and cold).
A glued load-bearing beam is ideal for performing these works, but due to the high cost of such material and the large number of scraps, the price of the blanks is higher than simply buying a ready-made socket from the manufacturer.
Filing the casing
The frame for plastic windows can be of various shapes: rectangular, triangular, polygonal in the form of a trapezoid with beveled corners, balcony blocks, entrance blocks, octagon and even circle.
In each case there are features of filing the casing corners. It is the correct filing of the corner joints of the casing structure that ensures the rigidity and tightness of window openings.
Filing the corners of the frame is a labor-intensive process that requires accuracy in the dimensions of the tenons and grooves, and an even plane of contact of the risers and window sills. Maybe someone read on the Internet about a unique old Russian method.
This method is not unique, but it is the only correct one. This is done by everyone who knows how to make a joint and who cares about customer reviews. And this is the best advertising.
Plastic window casing
The installation of plastic windows is also preceded by the correct installation of the frame. It has its own specifics, which differs from the version with wooden frames. First, the window openings are prepared, the gaps from the wall to the casing frame are calculated. Then a carriage with grooves is made, and a ridge is cut out in the window opening. The grooves on the carriage are made in such a way that the logs move freely during the shrinkage process. Before cutting out tenons, it is important to make competent and accurate markings, on which further technology will depend. Sawing grooves, as a rule, is much easier than making tenons. Plastic windows are installed in the finished casing, then they proceed to installing plastic slopes and attaching platbands to the windows. It is important to remember that without proper casing, installation of plastic double-glazed windows on windows is impossible.
Jigsaw for plastic windows
The casing of window openings in a wooden house for plastic windows and the casing of wooden windows do not have a fundamental difference.
The draft version is absolutely the same. The finishing casing differs in the size of the quarter under the window.
Even for plastic windows, the sample sizes are not the same, since there is now a huge selection of window profiles on the market from different manufacturers.
The quarters in the casing for the installation of plastic or wooden windows are made individually for each profile, so it is important to decide on the choice of window structures before installing the casing.
For the same reason, you won’t be able to buy a ready-made joint in a store; you can only order it.
Our prices
| Job title | Price |
| Cutting out an opening for a single-leaf window | from 1500 rub. |
| Cutting out an opening for a double-hung window | from 2200 rub. |
| Cutting out an opening for a three-leaf window | from 3000 rub. |
| Cutting out a doorway | from 2560 rub. |
| The door frame is rough | from 1150 rub. m.p. |
| The opening frame is rough with tenoning | from 1700 rub. m.p. |
| Opening frame with finishing of the opening inside the house | from 2460 rub. m.p. |
Turnkey okosyachka
Turnkey installation of a frame includes the following stages: manufacturing of the casing, installation, installation of windows, caulking of the outer perimeter of the frame, manufacturing and installation of the casing. Caulking the gaps between the window frame and the wall must be done.
Otherwise, the only thing that works to preserve heat in the house is the shell of the socket, the thickness of which is 5-7 centimeters.
This work is carried out before installing the casing and a couple of years after installing the casing, when the house settles and the sliding of the side logs along the risers of the frame stops, check the seams and repeat in places if necessary.
It is advisable to treat the caulk seam on the outside with yacht varnish to protect it from moisture absorption.
Tools and consumables
For the manufacture and installation of the casing / socket, you will need the following consumables, as well as a set of tools:
- For taking measurements and marking the opening:
- Laser or mechanical roulette.
- High precision steel ruler.
- Calipers.
- Carpenter's corner.
- Pencil with soft lead.
- For cutting blanks:
- Cross-cutting machine for cross-cutting at any angle.
- A router for forming a tenon before mating the elements together.
- Jigsaw for cutting grooves.
- In the absence of a router, work is carried out using a set of chisels and a hammer.
- Vise or clamps for fixing the material.
- A miter box and a fine-tooth hacksaw for finalizing the interface units.
- Planer for planing the surface of wooden products.
- Grinding machine with a set of abrasives.
- To assemble the casing frame:
- A set of clamps for fixing elements when gluing using adhesive compounds.
- A drill with a set of drills for fixing with screws or anchors.
- Screwdriver or screwdriver with different bits.
- Construction level for quality control of product assembly.
- For installation of the product in the opening:
- A router for cutting a groove around the perimeter of the end of the opening.
- A wooden hammer for driving casing into the body of an external wall.
- Screwdriver, screwdriver, chisel for fixing and modifying the structure.
- Consumables:
- Ruberoid, felt or polymer gasket between the casing material and the wall
- Epoxy resin based adhesive.
- Rags and means for degreasing the contact surface.
- Protective impregnation for wood.
- Polyurethane foam.
- Silicone sealant.
- A set of hardware for fixing elements together.
All materials and tools must be of high quality, sharpened, in good working order, free of dirt and grease, and ready for work.
Where to order a joint?
Ordering a casing from the manufacturer is the best decision that will help you save time and nerves, while you can rest assured of the quality of the casing and the installation work performed.
An experienced measurer will help you decide on the type and cross-section of the frame for your country house; moreover, after the first measurement, the exact dimensions of windows and doors will be known.
By placing an order for frames and windows in one organization, you will receive a guarantee for everything from a single person. You won’t have to waste time on repeated measurements or wait three weeks for the production of colored windows, and in case of problems, the contractors will not shift the blame for the malfunction onto each other.
Order casing inexpensively
The price of a joint is not small, but there is always a way to save. The casing installation season is spring and autumn. In winter, when it’s cold and no one really wants to build, the manufacturer may offer you a discount.
For this period of the year it is better to leave internal openings and interior doors. It is better to order a window frame in the summer at the height of the holiday season. During this period, not like in winter, but there is a shortage of orders from manufacturers and you can also place an order at a discount
Source: nareevo.ru/pages/okosyachka-dlya-derevyannogo-doma
How the casing works
Door or window casing consists of:
- threshold (lower part in the doorway);
- window sill (for a window opening);
- top;
- sidewalls
When constructing the casing, it is important to take into account that the lumber should be slightly smaller than the parameters of the openings. This is especially true for the height, which will decrease as the house shrinks.
It is customary to fasten the elements of the frame using grooves and ridges. Upon completion of installation, all gaps are filled with tow, which will serve as a reliable sealant. As soon as this stage of work is completed, you can begin installing windows, entrance and interior doors.