There are no houses without windows and doors, but their installation in a wooden building is significantly different from installation in a brick house. A feature of wooden buildings is shrinkage as a result of the seasonal decrease and increase in the amount of moisture in the wood, which causes the crowns to shift in height.
Window and door openings are most vulnerable to such processes. The windows in them can warp with the appearance of cracks in the glass, and sometimes even collapse. To ensure their safety and proper functioning, specially designed wooden boxes, called frames or casings, are installed in the openings. Let's look at how to make a pigtail in a log house with your own hands.
How to choose the type of casing?
Casing in a rough deck with external finishing.
Currently, three main designs of casing frames (“casing frames”) are actively used:
- casing into a deck (or “U-shaped”);
- spiked socket (or “T-shaped”);
- pigtail in the embedded block.
Let us recall that any casing frame is a frame for mounting a window or door that does not have a rigid connection with the log house. If you formulate in one phrase what a socket is needed for, it will sound like this: “the logs in the log house move, the frame remains motionless.”
Please note that when installing the casing, it is necessary to constantly monitor the absence of fixed connections between the frame and the frame!
The coupling of the casing and the frame in the vertical plane is sliding, of the tongue-and-groove type. Depending on the type of frame, the spike can be located either on the vertical riser or at the end of the opening.
Taking this into account, between the top crossbar of the casing frame and the frame there should always be a compensation gap filled with a fibrous sealant. The dimensions of this gap depend on the climatic conditions in the region and range from 60 to 100 mm.
Each of the above casing options has several modifications, but, nevertheless, several general recommendations can be formulated for choosing the optimal scheme.
Window casing
T-shape with selected quarter
The casing for plastic windows in a wooden house is most often made of the T-shaped type. Its design includes four elements:
- Two vertical posts (“jambs”), the task of which is to provide a movable interface between the casing frame and the frame.
- Top crossbar (“top”).
- The lower crossbar, which in casing frames for plastic windows is also a window sill.
Considering that this type of frame is used very often when installing windows, let us consider in more detail its two basic modifications: monolithic and prefabricated.
From the point of view of reliability, durability and quality of thermal insulation, the best option is a monolithic T-shaped casing. The term “monolithic” in this case means that the frame board and the tenon are one piece and made from one block of wood (board).
But at the same time, this is also the most expensive option, since the thickness of the workpiece must include the height of the tenon.
Casing in a tenon with the tenon placed on glue
To reduce the cost of the casing, a prefabricated version is sometimes used, in which the embedded block (tenon) and the inner board of the frame are made of different boards. In this case, the tenon can either be placed in the groove on both sides, or glued with stable compounds that are used in houses made of laminated veneer lumber.
Please note that it is highly not recommended to connect the board and tenon with self-tapping screws, since over time such a connection will become the main bridge of cold in the window opening. Casing in a deck (U-shaped) when installing PVC windows is used quite rarely and most often in cases where there is a partition made of short-length logs between large windows
In this case, the casing not only protects the window, but also frames the logs, preventing them from moving in the horizontal plane
Casing in a deck (U-shaped) when installing PVC windows is used quite rarely and most often in cases where there is a partition made of short-length logs between large windows. In this case, the casing not only protects the window, but also frames the logs, preventing them from moving in the horizontal plane.
Door frame
The choice of door frame design depends on the type of door.
For wooden external doors, the most durable version of the casing is used - a casing in a deck.
In cases where a metal door is installed in a log house, it is sufficient to mount only the vertical guides according to the “into the embedded beam” scheme.
As a rule, they save money on interior doorways and the doors are mounted in a “mortgage beam” frame without a bottom crossbar. Fixation of the lower frame size in this case is ensured by the floor boards.
Concluding the section with recommendations for choosing the type of frame, we note that when installing plastic windows in a log house, an additional factor in favor of the T-shaped structure is the presence of ready-made grooves for tenons at the ends of the openings, since many manufacturers of laminated veneer lumber perform milling and sawing according to customer drawings .
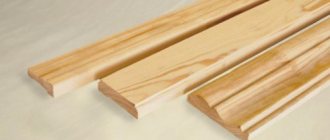
Materials for casing frames
Considering that casings act as power units for the entire structure of the house, only high-quality wood that does not contain knots (classes “Extra” or “A”) is used for their manufacture.
It should also be taken into account that in this case excessive shrinkage of the boards is unacceptable: their humidity should be at least 12%.
Casing made of laminated veneer lumber
A log frame in a log house is most often made of composite boards, in which a complex geometric configuration is achieved by placing cheaper, small-section bars on glue.
The most complex are arched casing frames. In their manufacture, both mechanical joining and adhesive joints are used. The top is assembled from several sections and in its final form is a monolithic structure in the form of an arch. Before gluing the arch element to a permanent workplace, its dimensions are carefully adjusted according to a pre-prepared template.
accepts applications from Moscow and the Moscow region for finishing wooden log houses to a state of complete readiness for finishing work, including installing frames on doors and windows in a wooden house.
The contract is drawn up only after examining the property and calculating an accurate estimate. You can clarify the terms of cooperation and order a visit from specialists using any type of communication published in the “Contacts” section.
Calculate the cost of painting and insulating your home right now
Select types of work:
Select materials:
Casing: prices, cost
Manufacturing costs can vary greatly: prices and costs depend on many factors; in every wooden building, the part is not just necessary, but simply irreplaceable!
What determine the prices and cost of casing?
It depends on the quality of the wood, the type of casing, the shape of the casing, the presence of decorative elements, the size of the opening, and also on where the part will be installed - in timber, logs or a log house.
The window frame is made of dry material with a humidity of 8-12%. It consists of a top, risers, an adhesive window sill or a window sill board in cases of installing a plastic window sill.
Several types of work:
Solid: all parts are made by processing solid wood while maintaining the correct wood texture.
Adhesive: parts of such casing are made from glued boards. It is glued into a microspike on all four sides. Knots and resin pockets in this case are completely cut out.
Combined is the most common type of casing. The top and risers are made of solid pine. And the window sill is made of glued boards. All of it has a clean appearance and after installation needs to be treated with paint and varnish.
It is important!
Window frames are made to fit each window or door individually. When placing an order, the customer must know which windows and doors will be installed in the future casing. It can be made either with a sample for a window - this option is used in cases where the house will not have exterior and interior decoration, the walls of timber or rounded logs remain untouched
It can be made as a sample for a window - this option is used in cases where the house will not have exterior or interior decoration; the walls of timber or rounded logs remain intact.
And without sampling - this option is used in cases where the house is planned for interior and exterior decoration in the future. This version of the frame can be finished or rough (if it is completely closed during future finishing).
The pigtail can be either a standard shape - a rectangle, or non-standard shapes. Trapezes, polygons, balcony blocks.
Helpful advice!
Non-standard forms have their disadvantages, but there are ways to avoid them. Such information is discussed with the surveyor at the site.
More about the process
After window openings are cut in a wooden house, the structure of the log house no longer has the same rigidity as if the log house were solid. First, let's answer the question, what is a window frame, or, as it is also called, casing (wooden frame).
After window openings are cut in a wooden house, the structure of the log house no longer has the same rigidity as if the log house were solid. This is especially true for the window opening itself. During the shrinkage process, the logs can move significantly horizontally, which will also lead to deformation of the windows.
All these unpleasant moments are prevented by the frame (casing, wooden frame), which looks like a wooden box. From all of the above, it is clear that installing a socket in a wooden house is a dire necessity. This is true not only for a log house, but also for a timber house.
The process of installing the pigtail is quite simple. Having the necessary tools and materials at hand, you can install the pigtail yourself.
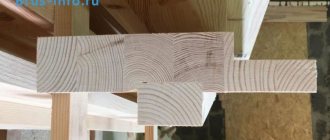
It is assumed that the window opening has already been cut. Now you need to use a chainsaw to select a spike (ridge) on the sides of the opening. This is done so that the pigtail does not move perpendicular to the axis of the walls.
Then the pigtail is made according to the obtained dimensions. Accordingly, in its side racks you need to select grooves for the ridge.
All elements of the pigtail are attached using dowels. Installation of the frame starts from the bottom beam. A layer of linen or jute is first laid under it.
Then vertical bars are installed, into the grooves of which flax or jute is also placed. And lastly, the upper beam of the frame is installed. The shrinkage gap, which must be left above the jamb, is covered with linen fabric.
It is important!
The window frame is a monolithic structure and is absolutely independent of any movements of the frame. Framed with frames, windows and doors will please the eye and will last you indefinitely.
What is a wooden window casing?
In the modern construction market lately, houses made of logs, panels or timber have often been found. These include bathhouses, country houses, and country houses. Despite the fact that new technologies make it possible to create innovative building materials, environmentally friendly wood remains in demand. In addition, such structures have a beautiful appearance.
A feature of wooden buildings, which is called shrinkage, occurs under the influence of temperature factors. Wood can absorb water and dry out over time. The most vulnerable modules of the house are windows and doors, or rather, their openings. Such building movements can impair their functionality or lead to complete destruction. To avoid this, a special technology for their installation is used, in which a window frame is inserted into the opening. It is a wooden box made in a special way.
The technology for installing windows in wooden houses involves installing a frame
The casing includes: a window sill board, a top and two sidewalls. The boards used for its manufacture are about 25 cm in size. Choose a material that has a moisture content of approximately 10%. You should not take drier wood, as it may have cracks invisible to the eye, as a result of which it will begin to collapse as the building shrinks.
How to make a pigtail with your own hands - basic types and drawings
One of the features of wood buildings is their susceptibility to shrinkage, periodic (seasonal) changes in the geometry of the building under the influence of external factors (temperature, humidity). Visually this is not noticeable, but installing door and window blocks in openings with rigid fixation leads to their deformation; or the walls remain in one position (as they say, “hanging”), that is, when the material shrinks, they do not settle, which causes the building to skew.
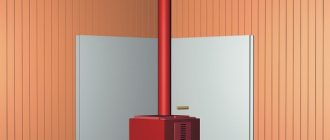
Casing in a wooden house eliminates such problems; it is not connected to the main structure, but is held in it only by friction. It is often called differently - okosyachka. It is a box installed in openings. Its purpose is to prevent the destruction of window frames, door jambs, and incorrect operation of the sashes.
Pipe design
Regardless of the manufacturing method, the main parts of the frame are.
- Vershnik. Its purpose is to hold the upper ends of the sidewalls in a static position. Essentially, this is a horizontal casing strut. At the same time, it provides a shrinkage gap into which the sealing material is placed.
- Threshold. The lower part of the pigtail. In window openings this is the window sill. It solves a problem similar to that for the apex, but it is this element that bears the maximum load, and therefore great importance is attached to its strength.
- Sidewalls (carriages). Vertical casing elements installed on the sides of the opening. The function is to ensure the “sliding” of the walls of the house (up/down) when the wood shrinks.
Window frame
Work on the trim of window openings must be carried out in several stages:
- As usual, you need to start with preparation. It is worth taking all the necessary measurements, preparing the necessary tools and materials.
- Next, you need to decide on the type of installation of the pigtail. By and large there are two of them. They can be called U-shaped and T-shaped. The first option is simpler, so it is offered for consideration.
- First, the window sill element is installed. It is secured with self-tapping screws to the crown of the house located below.
- After this, the side logs are cut down using a chainsaw so that a vertical spike is obtained. This must be done on both sides of the opening. If there is no chainsaw, then the work can be done with a chisel and hammer, but this will take much longer.
- Next, grooves are selected in the component elements of the socket that correspond in depth to the previously obtained tenons.
- After this, tow is placed on the tenon, which will act as a seal.
- Then the component of the pigtail is put on the spike.
- The final stage of installation of the pigtail is the installation of its upper part or, as it is called, the top. This structural element is inserted by surprise and fixed to the side supports with self-tapping screws.
As a result of the work, a frame is obtained that will protect the window frame from distortion that occurs during the shrinkage of the logs.
As for the process of installing casing elements using T-shaped technology, it must be said that this option is not much different from what has already been described. The difference lies mainly in the fact that the grooves are made in the wall, and the tenons are made in the structural elements.
Photo report on the production of the finishing pigtail
The work was carried out in a log house that had been standing for a year. We used purchased kiln-drying timber and the remnants of profiled construction, which had been drying along with the house for a year. The casing is monolithic U-shaped. The width of the tenon was approximately 45 mm. This distance remains if you make a cut with a circular saw on both sides of the wall. In order not to modify it later with a chain saw, it was decided to make the tenon wider. Its height is 35 mm. The spike under the bottom/window sill is 1 cm high. Its task is to prevent a draft from occurring.
We start by preparing the openings. First, cuts were made in the side planes of the walls using a circular saw. There were no problems with vertical cutting, but when cutting horizontally, the saw kept trying to go up and down. Be careful in this part.
First, use a circular saw to make cuts on the walls.
We also repeat outside
Tightly control the position of the saw when cutting horizontally
Then we take a chain saw and modify the tenon. This is the most responsible and delicate work. We make the first pass from top to bottom. Its depth is only 1-2 cm. All subsequent ones are from bottom to top, gradually increasing the depth. In order not to mess up, we used a step-by-step algorithm: first we made the cut with a circular saw, stepped back 0.5-1 centimeter from the cut, cut it with a chain saw, and brought it to the required depth with a grinder and a plane. Long, but reliable.
Cut carefully so as not to cut off the thorn
Next, use a circular saw to make cuts at the ends of the openings. We work on problem areas in the corners with a multitool or chisel.
These influxes need to be removed
The opening is ready. Let's start making the casing. The first thing we do is the bottom-window sill. We make a groove in it with a depth of 10*45 mm. Also, do not forget about the protrusions: the window sill must “fit” onto the wall.
Made a groove
These are the sides
This is how it looks almost installed
Now we make the sides. They are made of 200*100 mm timber. It was adjusted to size and polished. The groove was formed using a milling cutter. It could have been done with a circular saw - it would have been faster, but less accurate.
The groove was cut with a router
After using a circular saw, a quarter is made - its size is 70-30 mm.
Already ready and no quarter yet
Next you need to cut out the locks. On the sides, those that go to the bottom, are simple. All you need to do is cut off 20-40 mm on three sides. If, like me, there is a quarter, then on this side we cut out less to the depth of the quarter, i.e. cut out 10 mm (40 mm - 30 mm = 10 mm). Now the spike is ready.
Lower Castle
Next, we place it on the lower part, trace the outline with a pencil, and remove all excess. The castle is ready. Having installed everything in place, we see quite decent gaps. Now the task is to bring them to a minimum through gradual adjustment. The main thing here is not to cut off the excess, since it is impossible to increase it. Therefore, little by little we polish and try on, polish and try on.
Achieving minimal gaps
When the bottom locks are ready and adjusted, you can cut the sides. They should not reach the top of the opening by 6 cm. This is how we cut it.
We make the top itself in the same way as the side posts, then cut out a quarter of it. You'll have to tinker with the lock. There are two conditions:
- The distance at the top should be the same as at the bottom. We adjust all the dimensions of the spike based on this postulate.
- Then we also outline it, but the shape here is much more complicated. It is advisable to cut it so that there are no through connections, so that air does not have the opportunity to freely enter from the street.
That's why we make stepped cuts.
Shape of tenon and mate at top
Another perspective
This is what it looks like when folded
When the mold is ready, the fitting begins again by sanding. We work gradually, slowly. When the desired result is achieved, we disassemble the box, sand it, and round the edges. In general, we bring beauty.
Grinding
Here is the final version
After sanding, we cover all parts (including openings) with antiseptics. After drying, the casing elements can be painted in the required color. In any case, you can go through the paint once.
While everything is drying, we place jute tape in the opening. There is no tape covering the entire width of the casing; it was laid in two parts with an overlap in the tenon area. Apply a layer of sealant on top of the insulation.
Apply a layer of sealant
First, they laid the bottom (it was never possible to install it on jute - it was torn off during installation, but the voids were filled later). The sides sat down, but with difficulty. But the top part didn't fit at all.
The top part could not be installed
We take the spacer, first set it obliquely, then use a hammer to make it more horizontal. The sides are moving little by little. As a result of these manipulations, the upper part also fell into place.
After installation, the spacers “settled” and the upper part of the casing
To prevent it from moving, we install wedges. They are removed after installing window or door blocks. This is what happened as a result.
Installed casing
Window frame made of plastic
Testing for plastic windows in a wooden house is carried out not only for double-glazed windows made of wood, but also for plastic ones. Installing windows made of this material has its own characteristics. The opening in the log house should be 10 centimeters wider than the double-glazed window.
It is recommended to order plastic windows after installing the frame box. Installation of double-glazed windows takes place according to a more complex scheme. A carriage with grooves is made (a box assembled from timber, with a groove prepared in advance for the tenon), the size of which should allow the frame to easily slide along the guides during shrinkage.
Internal vapor barrier of windows
On the inside, the foam should also not remain open to prevent moisture from entering it from the air in the room.
To install an internal vapor barrier, you can use vapor barrier tape, which has already been discussed in the main section of this site, or use acrylic sealant SAZILAST-11 (“STIZ-B”).
The vapor barrier tape is glued to the end of the frame with a thin adhesive strip before foaming. Immediately after foaming, the protective paper is removed from the wide adhesive strip, and the tape is glued to the pigtail.
Before the foam under the tape hardens, it is advisable to immediately install the window sill and screw the starting profile to the edges of the frame, otherwise later the tape “bloated” with foam will interfere with this.
Sazilast is applied to the hardened foam, or more precisely, to its cut. In this case, it is no longer necessary to rush to install the window sills and the starting profile, as when using tape. Nothing will prevent you from doing this later, when it is convenient.
Prices for a wooden house frame
Installation of casing is an important element in building a wooden house. Prices for this service vary, but consist of: the size of the door or window opening, the diameter of the timber, the formation and preparation of openings. The complexity of manufacturing and installation of the pigtail is also taken into account.
This service is specialized for companies that produce wooden windows. On the Russian market there are both rough and finishing saplings. Let's consider how much a frame of windows in a wooden house costs. The price for each of the materials is indicated as average, and depending on the manufacturing technology and the qualifications of the company, it can fluctuate both down and up.
| Pipe material | Price in rubles per linear meter |
| Draft box | |
| Solid pine | 500-1500 (depending on manufacturing technology) |
| Finish box | |
| Solid pine | 800-1800 |
| Glulam pine | 1100-2000 |
| Glued larch | 1500-2500 |
Prices do not include finishing and painting work. Typically, the cost of casing installation exceeds the cost of its manufacture.
Preparing window openings
It is quite possible to install high-quality plastic windows in an old wooden house with your own hands. The main installation rules are to follow the sequence of actions and take into account the construction features.
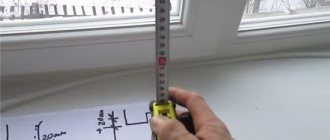
First, measure the distance of the window from the base of the floor. The most optimal parameter is 80-90 cm. Ideally, the window sill is installed above the desk, the standard height of which is 80 cm.
The upper and lower boundaries of the window opening are marked using a professional tool - a water level. Its height should be 13 cm higher than the same parameter of the inserted plastic window, and its width should be 12-14 cm. Plus, 1.5 cm is left on each side for sealing with polyurethane foam.
The next stage is preparing the window opening (measurements, installation). Using a building level, markings are made for cutting it. Maximum accuracy in measurements and installation of the casing itself is especially important.
A casing is made from well-dried wooden blocks, the installation of which is carried out starting from the window sill. The structural elements are fastened together with self-tapping screws, and the joining areas are treated with sealant. The small gap in the socket is filled with tow.
Installation of the pigtail
The frame for each opening in the log house is made individually and should not interfere with the natural shrinkage process. To do this, it is necessary to leave a gap between the top of the opening and the top of about 7 centimeters.
The procedure for installing the pigtailSource handspc.ru
To insulate and seal a wooden house, the space between the box and the logs is filled with insulation.
For proper installation of the casing, the following nuances must be observed:
- 80 centimeters from the floor - the height at which the window opening should be cut;
- Depending on the type of pigtail, a ridge or groove is cut out;
- All wood building materials are impregnated with a special antiseptic composition;
- Thermal insulation material is laid along the entire perimeter.
It is necessary to carefully ensure that the screws used to assemble the casing box do not come into contact with the wall beams. Only after completing the installation of the frame can you proceed to the interior and exterior decoration of the house. Platbands and ebb are fixed on the outside of the opening.
Measurements and project development
To correctly measure the window opening before making the frame, you must complete the following steps :
- Measurements are taken at a minimum of 3 points - at the corners and in the center of the side of the opening.
- For window dimensions greater than 1500 x 1500 mm, additional measurement points are required every 500 mm.
- Measurements are taken along both sides of the opening, as well as in the center of the wall thickness.
- If there are discrepancies at the measurement points of more than 1.5 mm per 1 m, the plane of the opening end should be modified.
Example project:
To draw up a preliminary design, as well as assignments for a woodworking enterprise, it is necessary to take into account a number of nuances :
- Only the actual dimensions of the openings obtained from the measurement results are transferred to the drawing.
- When sketching the casing itself, the depth of immersion of the bars or T-section wall into the body of the enclosing structure is taken into account.
- The overall dimensions of the casing must comply with the modular parameters of GOST 8486-86, which simplifies the search for materials.
- When designing a project, it is necessary to separately draw all the interface nodes of both the frame itself and its fastening in the opening.
When drawing up a sketch, it is necessary to take into account that an installation gap with a width of 15 to 25 mm around the entire perimeter must be formed between the future window block and the casing of the opening.
Violation of technology and its consequences
Failure to comply with casing installation techniques can cause unpleasant consequences for the owner of a wooden house. They are divided into natural and artificial.
Natural ones include:
- The appearance of gaps between the box and the logs;
- Displacement of the walls between the openings of the log house;
- Curvature of the log house and its walls;
- Destruction of a glass unit;
- The need to regularly adjust the settings of the window opening mechanism;
- The same violations occur when opening doors.
Without a frame in the window, when the house shrinks, the frame and glass burstsSource makemone.ru
Artificial consequences most often arise due to the installation of substitutes for the frame, which are boards or timber. Recently, this replacement has become popular among unknowing people. Its consequence is that there is no forced expenditure of money on replacing the casing structure. It must be taken into account that only a solid structure can withstand the load that shrinkage puts on window and door openings.
Features of creating and installing boxes for plastic frames
When installing a pigtail in a wooden structure, you need to know some of the features of its installation. The box can have a width of about 26 cm. It is also possible to use a larger width, but this sometimes causes cracks to appear in the casing. It is recommended to make the box using materials whose humidity is 10-12%. The drier the raw material, the more likely cracks will appear.
To install PVC windows, a complicated version of the casing is used
When installing plastic frames, a more complicated version of the casing is suitable. A carriage with grooves is made and the ridge is cut out.
The structure, assembled from timber with grooves for the comb, is called a carriage for the pigtail. The size of the grooves is made so that the frame can easily slide along the guides when the house shrinks.
The price for making casing depends not only on the size of the opening, but also on the raw materials from which the house itself is built (log house, log or timber). To get a quality product, you should order it from trusted builders. To make a casing with your own hands, you need to understand all the nuances of the process and purchase the required tool for the job.
When starting to install windows made of plastic profiles into wooden walls, please note that they cannot be inserted without a frame. It will help create conditions under which the frame will serve you for a long period of time without deforming or requiring repairs.
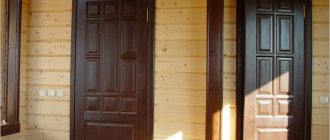
Door frame in a wooden house
The door frame in a wooden house is just as important as the window frame. Without a frame, your doors are just as susceptible to skewing and jamming as your house shrinks.
Many people believe that a door jamb in a wooden house is a waste of money and you can install the door frame on a embedded block, the so-called “sliding block”, partly this solution has a right to exist.
However, many people forget that a real casing (casing) allows you to level the wall and keep it from further curvature, which the embedding block does not guarantee you.
Door frame in a timber house
The door frame in a house made of timber is no less important than the window frame, because it helps strengthen the doorways.
Note!
If the interior walls of your home are thinner than the exterior walls, it is safe to say that your interior walls have a visible warp.
You need to level the walls and frame the doorways, after which you can be 100% sure that your walls will be as smooth as possible, and the installed doors will always work perfectly, without distortions or jamming.
Front door frame
The entrance door frame is distinguished by the mandatory presence of a threshold. That is, the casing for the entrance door frame has a closed shape of 4 parts.
When the doors of the entrance group are framed, the threshold is, on average, the size of the threshold is 4-5 cm; at the request of the customer, the threshold can be made higher or lower.
The door frame in the log house is made for metal entrance doors and PVC balcony doors that are part of the balcony block.
Frame for steel and plastic doors
When installing frames for steel and plastic doors, there are minor differences:
In this regard, the frame of the entrance metal door is produced in a “draft version” (without a quarter). When installing PVC doors, a quarter is selected in the casing equal to the thickness of the PVC profile. The frame of plastic doors is practically no different from the frame of PVC windows.
Interior door frame
A door frame without a threshold is used for interior doors, if the customer plans to have a flat floor. In this version, the casing box has a U-shaped design, without a lower part.
The casing posts are cut into the lower log or, as a last resort, they are attached to the wood grouse in the lower part. We recommend installing interior doors in a door frame; for this, a quarter of 70 mm to 80 mm is selected in the casing, depending on the thickness of the door frame.
Doors for a bath: designs, choice of materials, instructions for self-assembly and installation
Windows to the bathhouse: sizes, types, features, construction installation technologies
The plastic window does not close - causes of problems and their elimination
Types of doorway casings
The window frame allows you to strengthen the walls in the openings and prevent their curvature. If the distortions have already occurred, then the pigtail can correct the situation by fastening them and aligning them. It also protects the house from the penetration of cold air and moisture. At the same time, warm air remains in the room - the window acts as a sealant.
The pigtail allows you to prevent shrinkage of the house, stop the processes of its destruction and deformation.
There are several types of doorway casings
- Chernovaya. High-quality casing at low cost.
- Finishing. This option does not require cleaning the slopes.
- Eurocasing. There is also no need to clean the slopes.
- Power. It is usually installed in arched openings, large windows and large doorways.
- Combined. It is inexpensive and stylish in appearance.
- Arched. Consists of solid pine.
The production time for different sieges depends on the size and quality they will be
It is important to choose high-quality materials, as well as calculate the dimensions of the casing in advance. Today, manufacturers offer a wide range of inexpensive, but quite practical and durable casings
Method N 1. Installing doors using a special casing
The procedure for carrying out work by installing a special casing is as follows:
- The first step is to cut out the opening intended for installing the door frame. It needs to be cut in such a way that half of the log or beam remains on top and bottom.
- Next, using a cutter, you need to cut a groove at the end of the opening measuring at least 50 × 50 millimeters. You can use a chisel to adjust the size of the groove.
- A beam is inserted into the resulting opening. It is necessary to take into account its length. If the log house is new, then the size of the timber should be 5 centimeters smaller. If the structure has already shrunk, then the length of the beam should be less than 2 centimeters.
In some cases, the timber needs to be strengthened. This can be done using a board with a thickness of at least 50 millimeters, and its width must be no less than the size of the wall.
Sometimes, instead of timber, metal channels of appropriate sizes are used. Additional reinforcement of the opening is important when constructing heavy buildings, for example two-story buildings.
Watch this video on YouTubeAfter the beams are fixed in the side parts of the opening, a threshold should be made. To achieve maximum strength, a timber with a thickness of at least 10 centimeters is used, which must be cut in a T-shape.
Method No. 2. Circular casing made of timber
Installing doors in a log house using the second method can also be done with your own hands. The principle of its implementation is not much different from the first. All you need to do is install the blank under the box, following the rules mentioned above.
In other words, it is necessary to install bars around the entire perimeter of the opening. They can be fastened to each other in several ways:
- tongue and groove method;
- self-tapping screws;
- nails.
In addition, it is possible to install the casing without the use of fasteners. To do this, you need to fit the bars as tightly as possible to each other.
It should be noted that in most cases, the construction of log houses is carried out according to this principle. The pressure created by the weight of building materials is quite sufficient for the stability of the structure. The bars must be installed by surprise.
What tools will be needed for installation?
When deciding how to make a doorway and insert a door, first of all you need to decide on the tools necessary for this work. They must be at hand at all times. This will allow installation to be completed as quickly as possible. To carry out the work you will need:
- chainsaw or electric saw with a bar;
- hammer;
- perforator;
- circular saw or manual milling machine;
- chisel;
- construction measuring instruments: level (preferably laser), tape measure and square.
As a rule, searching for tools will not take much time, because all of them, one way or another, were used during the installation of the log house. Having prepared everything you need and understood how to install the door correctly, you can begin work.
Why do you need a casing?
A correctly made frame frame secures the window opening, leaving a compensation gap in the upper part. This technique takes into account further shrinkage of the wall, protecting against its consequences. If space is not provided above the window, the weight of the upper crowns will fall on the casing. At the same time, the crowns of the middle part will begin to sag unhindered, forming through cracks.
To ensure that your house does not lose heat in winter, and you do not overpay for heating, you must be responsible in selecting a team of carpenters and installers. A window and door frame installed according to the rules struggles with several problems:
- Prevents the formation of cracks
in crowns.
- Maintains wall geometry
and interwindow walls.
- Protects the integrity of the glass unit
. If there is no expansion gap, you will have to frequently adjust the window fittings; this will lead to deformation of the glass unit and accelerate the failure of the fittings.
Thus, a good casing box has two main purposes:
- Strengthens wall structures
, weakened by cutting window openings.
- Protects window units
during the shrinkage process.
One of the ways to install a window in a wooden house Source 1prookna.ru
Casing in an embedded block: inexpensive and problematic
Wanting to save money when installing windows and doors in a wooden house and ordering rough casing, you often do not think about further problems and costs.
Today a man came to our office again and showed him a photo of the casing made from a block installed to him with the question “HOW TO CHANGE THIS?”
Rough casing from private craftsmen and some companies consists of a block installed in a groove and a board nailed to it. How will this structure perform its assigned functions of forcefully holding logs and beams from twisting and maintaining the geometry of the opening? Subsequently, the window is attached to this “super” structure, called the rough casing, using fastening plates or mounting tape.
The casing is made of a block installed in a groove and a board nailed to it. Photo from a client's home who came in for a remodel.
Polyurethane foam and mounting plates are sticking out from under the window and you don’t understand what to do with them. The installers installed it and left. Everything is standing, but there is no finished View. Everything needs to be finished.
Polyurethane foam, mounting plates stick out from under the window - NO finished look.
You cannot install platbands because you first need to install the extensions. The cost of work and materials adds up to a large sum. This is justified by the fact that this type of work requires meticulous preparation of each detail of the installation and its individual installation.
Rough casing also brings with it problems that extend over time.
Nails and screws used during assembly often go through and fix the wall of the house, preventing it from shrinking. The block is rested against the upper part of the block “so as not to swing.” We also met this: first, a block was nailed to the wall, and then a 50*150 board was secured to it with self-tapping screws and everything was foamed on the sides.
Problem areas in the photo on the left: the casing has no lower part, the window rests on a log. The width of the casing board is less than the thickness of the wall; additional pieces will also be needed for the platbands. The insulation between the casing and the wall is not visible. From the untestable without dismantling: how well the block is screwed to the board. We do not discuss the mounting plates, considering that the owner made a conscious choice.
This is the story the “specialists” left you, and you have already paid the money for installation and production. What happens next? You start looking at the Internet, reading, thinking about how to close it all, redo it, etc. You need to find a company that will do all this wisely. Self-respecting people do not work for free. Taking measurements, alterations and finishing touches costs more.
According to the owner of the house, the cheap casing turned out to be too expensive. A man has a timber house. On all doors and windows, gaps 5x6 mm wide appeared between the opening and the top beam. It blows between the wall of the house and the board of the house and why an iron ruler fits between the wall of the house and the board of the house. How to redo everything while maintaining the existing windows and doors?
It blew cold from under the platbands. They removed it, and there were gaps on the street between the board and the embedded beam.
What should be the correct casing?
Making the frame in production and installing the finished window into a pre-prepared groove allows you to avoid a whole bunch of problems. Yes it costs a little more. Yes, this requires highly qualified installers. You, as the Customer, receive a finished appearance and an opening ready for use. Securing the trim is no problem. There is no wall hanging. Our great-grandfathers, having meager equipment, hollowed out a groove in the deck for installation, cut out a tenon in the log and made porches for the sashes on the front side. Houses with this design are still in use today. Everything new is long-tested by our grandfathers. We use modern tools and advanced technology for drying and processing wood.
Choose the right casing - this is a guarantee of warm windows for your home!
Order a casing calculation now and receive a clear estimate with drawings. Our phone
shuvoe.ru
Manufacturing of casing
For windows
With wooden frame:
- Preparing grooves on the sides of the opening.
- Laying inter-crown insulation material in its lower part, with a block on top. Its task is to prevent displacement of the sidewalls.
- The grooves on the left and right sides of the opening are filled in the same way.
- Installation of the upper casing element.
For PVC windows
Experts do not recommend installing such blocks in wooden houses, but if the decision is made, then you need to know some of the nuances of installing the casing.
- Preparing the opening involves changing its geometry. The gaps between its sides and the block are at least 130 mm. A more accurate value is determined by the following indicators: the moisture content of the wood of the house and its service life (which means the degree of probable shrinkage), the thickness of the crown joints.
- Making a threshold. Cuts are made in it to obtain a comb. It is needed as the base of the carriage in which the groove is installed. This element ensures uniform shrinkage of the house without destroying the structure.
- Making a carriage. A beam of 150 x 100, with a length less than the height of the opening by 50 mm, is sufficient. A groove is cut into it and the surface is ground to ensure “sliding”.
- For the top, take a “magpie” board with a width of 120 - 150 (according to the thickness of the walls of a wooden house). It also contains grooves for connecting to the ridge of the opening.
- Installing the sidewalls is the same as for a wooden window.
- After checking the geometry, all casing elements are fastened with self-tapping screws. It must be taken into account that they should not go into the wood of the wall. Otherwise, it will form a “rigid” coupling with the supporting frame, and the pigtail will not fulfill its function.
- Insulation of the opening.
- Treatment of wood with special preparations.
For doors
*The simplest option
- Preparing the opening. If it is not pre-arranged in the wall, it is marked and a rectangular segment is cut out. At this stage, grooves are prepared for connection to the door frame.
- Processing the jamb. This technology implies that he is a door frame. Accordingly, wood is sampled for the grooves.
- Placing the box in the opening.
- Installation of horizontal struts (lower and upper).
- Sealing the casing with soft insulation. Another option is flax fiber. The work is carried out in such a way as to prevent the frame from being fixed in the opening; she must remain free.
- Removing the spacers.
- Treatment of wood with a fire-retardant preparation.
- Fastening platbands.
Other door lining technologies are difficult to implement
Considering the importance of this element for the home, it is better to entrust the work to a professional
Finishing casing: appearance, technical requirements
A window or door frame installed in an opening.
Monolithic box, insulation
Feature - there is a shrinkage gap between the top and the wall. The design of the box is made in such a way that it can slide along the wall during drying and swelling of the wood. The windows remain in working order. Structurally, the casing can be:
- finishing;
- rough.
A casing into which a window frame can be inserted immediately after installation is called clean.
Window finishing
The advantage is that the opening does not need lining. There is a window sill, drain, slopes. Flaws:
- high price;
- complexity of manufacturing parts, installation;
- it is impossible to install PVC windows;
- freezing.
To make a finishing frame, you need high-quality timber, without knots or cracks. It is almost impossible to find, especially in large sizes. Therefore, glued laminated timber is used.
Structure of laminated veneer lumber
Made from wooden plates glued together. Has greater strength than a single element. Covered with protective films, painted, varnished. The material is expensive, it is more advisable to use it as a finishing material.
Poor-quality laminated veneer lumber can lead to peeling and destruction.
According to the instructions, the installation of double-glazed windows should be done with foam around the perimeter. It implies a protective coating of the assembly seam; it is unacceptable for finishing finishing.
Installation diagram
The quarter casing under the window is selected from the outside of the box. It turns out to be a bridge of cold. Condensation will appear around the perimeter of the window, which will lead to rot and mold.
Bridge of Cold
Types of pigtails in a timber house
The design can be executed in 2 main versions:
- Draft, if additional finishing is provided. A good example is the subsequent installation of ventilated facades, which will completely hide the part. Typically, the perimeter of the opening at the top and sides is made of unplaned materials, and the visible part, the threshold or window sill, is made of laminated veneer lumber or furniture panels.
- Finish, made of planed and sanded material with further coating with a paint and varnish composition. Typically, expensive and high-quality processed types of wood are used for production.
Based on manufacturing methods, the following types are distinguished:
- In the embedded block. For installation, a groove is made along the inner sides of the opening in which a square section beam is placed. The beam is not secured, but simply driven into the groove, which allows it to move along the groove. Finishing boards are attached to the block with self-tapping screws. The casing is fastened in the lower part, filling the voids with soft heat insulators. The method is the cheapest and easiest to implement, but the most unreliable and requires additional finishing. Failure to properly seal will almost always require refurbishment or repair.
- Spike monolith. The product is a T-shaped rectangular block. The tenon is inserted into special grooves made in the vertical timber walls. The vertical part of the casing block is also a window slope. Fastening is done at the bottom and top using special fasteners, and the free space on the sides is foamed. The block can be cut together with the pigtail from one common blank or attached with glue. The design has good strength and functional characteristics. This is often the way to do it yourself in a timber house for plastic windows. Therefore, we will describe this method in more detail below.
- Casing “into the deck”. When constructing an opening in the vertical bars, a tenon is cut out, onto which a block shaped like the letter “P” is placed. From above, the structure is bursting with a top and secured with self-tapping screws. Installation is carried out using sealing materials. The design is ideal for entrance safe doors and large windows made of wood or plastic, providing high resistance to multidirectional mechanical loads. This is an expensive and difficult option to implement on your own.
Installing a quarter window
Let's assume that the window frame is already installed in the opening. The size of the plastic window is made such that it is slightly larger than the “clearance” of the casing, or more precisely: 10 mm more in width and the same amount in height.
Such a window will not fit into the frame from the inside, but it will easily fit into the reverse quarter from the street side. In this case, the edges of the frame will “hide” behind a quarter of 5 mm on each side (this is no longer possible - the sash hinges will interfere), and an installation gap will remain around the frame, which will later be filled with foam.
The frame is attached to the frame with self-tapping screws, as already described above. To ensure a beautiful tight connection between the frame and the casing on the room side, you can use a D-shaped door seal. It is glued before installing the frame with the adhesive side on the edge of the quarter. Accordingly, the dimensions of the quarter must be adjusted for the seal.
But as practice shows, with high-quality production of the pigtail, the need for such an addition disappears. The window is placed directly into the quarter and the meringue of the gaps is pressed tightly against the frame.
When attaching the frame, we press it tightly against the quarter, squeezing the seal, and screw in the screws, fixing the window in this position. The installed window is foamed from the street. Then, after the foam has dried, its excess is cut off, the seam is sealed with waterproofing tape or sealed with “STIZ-A” sealant, and the trim is installed.
Of course, since we refuse to decorate the casing with any additional elements, we must refine it, i.e. give it a look that matches the interior design of the room.
First of all, you need to give the bottom crossbar the shape of a window sill so that its inner edge protrudes slightly from the wall and is slightly wider than the opening.
Secondly, we “dawn” the internal surfaces of the racks and the top, i.e. we abandon the primitive rectangular (in cross-section) shape of these elements and create a large chamfer, simulating a reversal of the slopes.
Next, we process the inner surface of the casing elements. There are many options here: texture, color - the choice is yours. You can simply sand the surface and coat it with varnish. You can cover the wood with stain of the desired color so that the surface of the casing is in harmony with the color of the window and/or the color of the walls.
There is also, in my opinion, an interesting, but more expensive option - brushing the surface, i.e. antiqued treatment.
Artificial aging of antique wood is now very popular in various design styles. The essence of brushing technology is to remove soft fibers from the surface of wood using a metal brush (along the fibers), while the surface turns from smooth to embossed. After giving the relief texture, the wood is cleaned of lint and fibers, then the final gloss is given.
You can immediately coat the wood with varnish, but “aged” wood will look much more impressive after treating it with stain of the color you want. However, there is an even more effective way of painting - patting - creating a contrast between dark wood pores and a lighter surface.
This is achieved using paint of the desired color: the entire front surface of the casing is covered with it, and then the top layer is removed with a cloth before the paint has had time to dry. The final stage of artificial aging is varnishing. It is applied in two or three layers. You can then rub the surface with a soft cloth to add shine.
Doorway casing
Doorway frame
Speaking about the installation of doorway casing, it is worth noting that they are somewhat more complicated due to their large size, but in general the stages of the work are identical:
- First, the opening itself is cut out.
- Then the tenons and grooves are cut out.
- Then the threshold is installed and tightened with self-tapping screws.
- After this, the sealant is laid and the structural elements are installed.
- Next the top is placed.
It is worth adding that when installing a frame on a doorway, you need to take into account the fact that the frame itself also has a certain thickness, which must certainly be taken into account when cutting out interior doorways and installing the frame as a whole.
Making a doorway
It is important to note that when installing door frames, regardless of location, rigid fastening of elements, with the exception of the bottom one, is unacceptable. The possibility of free vertical movement of logs during the process of shrinkage and drying must be ensured. Otherwise, the described work is quite feasible for independent implementation without the involvement of hired specialists
In addition, work done with your own hands always brings pleasure in itself.
Otherwise, the work described is quite feasible to perform independently without the involvement of hired specialists. In addition, work done with your own hands always brings pleasure in itself.
Technological stages of casing installation
For successful installation of the pigtail, compliance with the technology will be a prerequisite:
- an opening is cut in the wall, which is located at a height of 80 cm from the floor;
- a groove or ridge is cut out - this depends on the type of casing chosen;
- all wooden elements are impregnated with an antiseptic solution;
- insulate the opening around the perimeter using thermal insulation materials.
The casing box is installed with mandatory adherence to the technology.
Measurements to order the production of plastic frames must be taken after preparing the opening and installing the casing. This avoids incorrect sizes.
What is the pigtail for?
What is a door frame? At its core, this is the construction of additional supports that will prevent the walls from moving during gradual shrinkage throughout the entire life of the building.
Over the years, even the highest quality wood begins to dry out, and the pressure on the foundation of the house leads to the fact that its walls and floors can change their original position.
Otherwise known as casing, the frame is a box-shaped structure installed in the door opening. It protects it and the door itself from the impact caused by the movement of logs.
A correctly and timely installed door frame will allow you to:
- Protect the door from skewing and jamming, which can be caused by pressure from the load from the weight of the walls;
- Prevent the destruction of doors - regardless of what material they are made of, wood, plastic or some other;
- Avoid the occurrence of cracks and subsequent drafts.
If you don’t install a door frame in the doorway, you risk not only having problems with the doors, their damage and jamming, but also getting damage to the walls and even their destruction.
This type of work, such as framing door and window openings in a wooden house, is a prerequisite. Without additional strengthening, over time the house may become unsafe, so in this case a lot depends on the quality of the work.
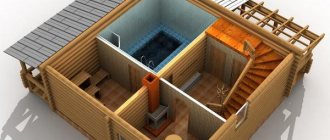
In different bath rooms
Yes, there is a point that windows need to be installed differently in different rooms of the bathhouse.
Installation in a steam room
The steam room is a hot room; many people prefer sauna conditions, plus high humidity. All chemistry, if it stands here, will definitely emit volatile organic matter. On the other hand, polyurethane foam is polyurethane, and it is not recommended for use in a steam room. In general, you just need to remember that it is better not to fix the window in the steam room with polyurethane foam.
It is best to fix the window in the opening using dowels, dowels, and anchors.
In other rooms
In all other rooms of the bath there is neither such humidity nor temperature. Therefore, the use of polyurethane foam can be considered justified. Just don't rely on foam alone - it's a bad idea. And when choosing plates, do not take those that bend like paper in your hands. Take stiff, reinforced ones.
Suitable formats and sizes
The logs are held vertically using cutouts, wooden or metal dowels. When crashing into a tree, the dowels go sideways. The logs move apart and fold. The casing prevents the logs from moving and holds them in place.
An example of a log house with a groove on the left and a tenon on the right
The main element is a block connecting the casing and the frame. Grooves are cut in the timber or casing and the timber is inserted. However, more often a groove is cut into the logs and a tenon is made on the socket board. To determine the width of the groove, take the average value of the thickness of the logs and divide by 3. If the value is less than 50 mm, the groove is cut out on the post, the tenon on the beam.
There are two types of pigtail:
- T – shaped;
- P - shaped.
In the first case, the tenon is located on the casing board, in the second, a groove is cut out. The width of the board is equal to the width of the opening.
Groove on the left, tenon on the right, no lock in the middle
Features of installing a box with a threshold
Such a frame is required for bathrooms and toilets and to a lesser extent for other rooms. The floor level in bathrooms is often higher than that of the adjacent room, so installing a box with a threshold is necessary, among other things, to protect against water getting on the parquet, linoleum or other covering. Fastening the parts of the box to the threshold should be done with galvanized self-tapping screws. The gap for opening the door leaf is made an additional 4 mm larger than that of the option without a bottom strip.
Door frames with a threshold are more durable, so they can be installed in places where there is a high level of vibration, for example, next to railway tracks. Installing a frame with a bottom strip may be required in rooms with high levels of noise pollution. In addition to the soundproofing function, the threshold can act as a seal: prevent the outflow of air and, as a result, heat loss.
Advantages of door frames with a threshold:
- partially solve the problem with drafts;
- protect from dust and smoke.
Installation of casing of an adjacent window opening with a balcony door
If the house is supposed to have access to a balcony combined with a window, you should take into account some subtleties when installing such a structure.
With this arrangement of the opening, the casing cannot be made common; they should be separated by a T-shaped sidewall. The combined side of the door will have a U-shape, which will allow the overall structure to slide parallel to each other without deforming the opening.
The gap left above the window opening should be smaller, and above the door larger. After final shrinkage, the gaps will become equal.