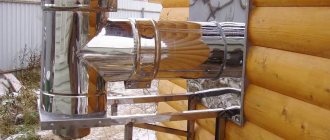
Other uses of sliding supports
A sliding support can be used wherever it is necessary to ensure the movement of elements of wooden structures. In particular, when installing partitions and linings in wooden houses. For example, in the bathroom of a wooden house it is planned to decorate part of the wall with ceramic tiles. To do this, it is necessary to cover the wall with sheet material (gypsum fiber board, gypsum board, OSB), having previously made a frame. Moreover, the frame must be “floating”, because the walls can settle over time and be subject to seasonal deformation. If the lining is not extended to the ceiling, and the frame posts are secured to the wall on sliding supports, the problem is solved.
What brick should I use?
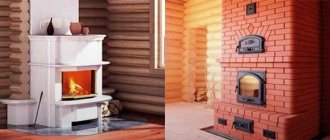
Ceramic red brick is perfect for making a partition in a bathhouse. You can use both solid and hollow types. Hollow brick is lighter, which significantly reduces the weight of the structure and increases heat and sound insulation. When using solid bricks, the recommended masonry thickness is a quarter or half a brick. If a hollow material is chosen, the wall is made of half a brick or one brick. It is recommended that the bulkhead that will frame the stove be made of fireproof fireclay stone - this will ensure fire safety.
You can also use clinker facing material. A wide range of colors and shapes will help highlight the decor of the room. Wet brick will lay down better because it absorbs water more slowly (and the mortar remains plastic longer). To do this, you just need to soak the bricks in a container of water. On the other hand, if you decide to use the partition as decoration, then the rows should be laid out especially carefully, and the bricks should be from the same batch. When in the future the brick partition in a wooden bathhouse is lined or plastered, then the requirements for the appearance of the building material are not so strict.
Shrinkage compensation for windows and doors
Among the structures in a log house that do not change their size are windows and doors. A special system for filling the opening allows you to prevent their deformation due to shrinkage of wood. The window or door frame is not attached to the frame, but to a special casing (frame, casing).
The connection between the box and the walls of the building must be sliding. The design of this unit varies. As a rule, a groove is cut out at the ends of log elements. Mounting bars are inserted into the grooves, securing them at the bottom of the opening. The casing is attached to the bars. The gap between it and the end surfaces of the log house is filled with fibrous insulation (linen, jute, etc.) to prevent freezing in the opening area. A gap is left between the top of the box and the frame element that covers the opening, allowing the frame to lower. Its size is determined by the amount of probable shrinkage of the wall and most often is 5-7 cm.
Installation of a door frame to a casing in a wooden house | To install a window casing, first insert a mounting block into the groove made in the end of the log wall. Then the box itself is attached to the block. Thermal insulation material is laid between it and the wall |
To avoid heat loss, heat-insulating material is placed in the gap - linen, jute, etc., mineral wool strips, polyurethane foam strips, etc. It is recommended not to use polyurethane foam for these purposes, which is usually used to seal the window or door frame itself, since it is quite rigid and can deform the structure of a window or door when the frame shrinks. To decorate the gaps at the junction of the filling elements with the frame, external and internal platbands are used.
A compensation gap is left between the casing and the log house element located above it (on top).
When constructing fillings for window and door openings in houses made of solid and laminated wood, two types of risks are likely. Firstly, the impact of the log wall on the infill elements due to the settlement of the building. This risk is eliminated by creating sliding connections with the parts of the log house that form the opening, by organizing a gap above the infill structure, and by attaching the platbands to the infill elements and not to the walls of the log house.
The second group of risks is insufficient tightness of joints at sliding joints. The use of polyurethane foam to fill the gaps between the casing and the log house is unacceptable, since the hardened foam will prevent shrinkage, because of this, either the log house will “hang” above the structure of filling the opening, or it will be deformed and damaged. The best solution is to use thermal insulation of plant origin in the gaps in combination with film protection - a layer of vapor barrier from the inside of the house and a vapor-permeable wind barrier from the outside.
Device
The common thing in the construction of partitions in a bathhouse made of any material is that they are fastened only to the floor and walls, and the partition is not even brought to the ceiling, so as not to take on the load from the roof.
The gap between the wall and the ceiling is filled with jute, for example. Or a brick fight.
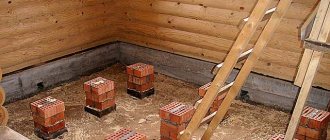
Fastening to the floor is either fastening to the joists or to the base, which will be built on the ground or on a concrete screed. Only the lightest wooden partition of small thickness can be placed and secured on the finished floor.
Read about how to properly attach partitions to the floor and walls in this article.
Thickness
Since we talked about different materials, there are different minimum values for them. Based on the fact that the thickness of the partitions in the bath should not be less than:
The partitions inside the bathhouse can be thicker, it’s just a matter of preference. In general, they usually have a thickness somewhat less than the thickness of the external walls. For brick partitions, a thickness of a quarter brick is not as typical as a thickness of half a brick. The latter can be recommended as more stable.
How to insulate
There are not many options for how to insulate a partition in a bathhouse. First of all, of course, mineral wool comes to mind. This is the insulation that is used most often because it is widespread, relatively cheap, and despite all its shortcomings, it is still suitable for interior decoration of a bathhouse.
RusPar, for example, widely recommends foam glass in its videos, but does not say that this material is not cheap. In principle, everything is correct, for closed-cell foam glass (which is vapor-tight) it is possible to use it to insulate a bathhouse, and you will not have to worry about protecting the insulation from moisture, but this option is not suitable for everyone, but only for those who can afford the increase in the cost of the project .
The third option, which seems suitable to us, is filling the frame with vermiculite. This method is not suitable for insulating brick walls, but the previous two are suitable.
Partitions with convection
One of the ways to solve the issue of heating the room adjacent to the steam room is to create partitions with convection in the bathhouse. More precisely, they use the physical law of convection, and for this purpose holes are made in the partitions.
The easiest way to heat an adjacent room (sink or rest room) is to make two holes in the wall: one right near the floor, preferably located behind the stove, or run an air duct from it to the stove so that air from the adjacent room is drawn under the stove and it was heating up there.
It is best to make the second hole low, somewhere around a meter above the floor. And here’s why: the warm air itself tends to the ceiling, and our task is to heat the entire room, that is, we make a hole in the middle, the air itself rises up, and due to the outflow below, it is actively mixed.
In the first hole (near the floor) it would be worth installing forced ventilation, which will pump cold air under the stove. But it’s possible to install a fan in the second hole, but understanding that it won’t live there for long. At least if its engine is inside. Engines do not tolerate high humidity and temperature. But if it is brushless, it will live.
In principle, one fan in the lower hole should be enough - increased pressure will be created in the steam room, which will descend through the exhaust hole. Or take the engine outside the channel.
There is also another interesting scheme that heats the adjacent room simply due to the pressure difference:
As you can see, here the already cooling air is drawn into the adjacent room, and there the exhaust hole is located under the ceiling, creating draft. We like the first convection option better; after all, heating is faster there.
Near the stove from the fire
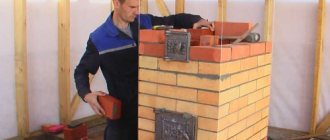
A partition in the steam room of a bathhouse from the stove is placed for fire safety reasons, when the walls themselves are made of flammable material (wood). The partition can be a fire cut - this is a part of the wall that has been cut out of the wall material and replaced with brick. This cutting is done when the firebox is brought into the next room.
If the firebox is in a steam room, then you can move the stove away from the flammable wall, and put a brick partition between them, which will also serve as a heat accumulator.
You can read more about the cutting wall for the bath here and here.
Shrinkage compensation for rafter systems
When creating a rafter system, the shrinkage of the log house is also taken into account. So, in the case of using layered rafter legs, the distance between the upper and lower supports may vary. Accordingly, the rafters must be able to move without causing stress and deformation in the building structure.
Layered rafter systems are used in houses where there is a middle load-bearing wall or columnar intermediate supports. The ends of the rafter legs rest on the outer walls of the house, and the middle part rests on the inner wall or supports.
To do this, the lower end of the leg is secured to the wall using a sliding joint of one type or another. Most often, fasteners are used in the form of two brackets: one is rigidly fixed to the wall, the other to the rafter. These brackets allow the rafter to move relative to the wall.
There is no consensus among experts whether a sliding connection is necessary at the point where the upper end of the rafter leg rests on the ridge beam. Some insist that this is a mandatory measure that helps prevent deformation of the rafter system due to shrinkage of the log house. This measure consists in leaving some distance between the rafters converging at the ridge and attaching them to the ridge beam also by means of a sliding (usually hinged) connection. Other experts believe that to compensate for the shrinkage of the frame, sliding fasteners in the place where the rafter rests on the wall are sufficient.
Fastening the rafter leg to the log wall: 1. Rafter leg 2. Brackets that allow the rafter to be displaced relative to the wall 3. Log house
In the case of rafters in the form of trusses, the shrinkage of the frame does not lead to a change in the slopes of the roof slopes. However, it is impossible to rigidly connect gables made of logs or timber with trusses, since the gable walls are higher than the facade walls, and the amount of their shrinkage will be different.
The truss structure must be designed taking into account the shrinkage of the building. Most often, layered rafter legs are used, which rest on one side on the top element of the frame, and on the other on the ridge beam or the wall of the house (when the roof slope is adjacent to the wall). On the ridge, at the point where the rafters of adjacent slopes converge (or at the point where the rafters adjoin the wall), a distance of about 3 cm should be left so that when the roof shrinks, the rafter legs can lower without hindrance.
The fastening of the upper part of the leg itself is carried out using a metal hinge joint of one type or another, which allows you to change the slope of the rafters as the frame shrinks. A sliding fastening is also necessary at the node where the lower part of the leg rests on the wall of the log house. Here, as a rule, a factory-made sliding support is used, thereby allowing the rafter leg to “move” relative to the wall.
Requirements for log walls
Requirements for log dividers vary depending on which of the three functions it performs:
Bearing wall.
Such a separator is installed during the construction of the building itself and cannot be disassembled. The weight of the roof rests on it and is transferred to the foundation, which is why such a structure must be very strong and made of logs of a similar size to the external walls.The height of such a partition is from the foundation to the ceiling.
- A non-load-bearing wall is a separator that has similar qualities to a load-bearing wall, but the load from the roof of the house or the floors between floors is not transmitted through it. This design presses on the foundation only with its own weight.
- A simple partition may not cover the entire height of the room, but only part of it, for example, it can be a divider in a shower room in a dressing room, or it can have a decorative function. Such a partition rests not on the foundation, but on the floor coverings.
If the partition is not used as a load-bearing structure, then it may consist of smaller or larger logs than the load-bearing walls. The main thing is that it does not add excess weight to the floors or foundation.
Interior partitions made of logs that are not load-bearing walls should be made only after the building has completely settled, since during this process the fixed enclosing structures themselves can be damaged and break the main walls. Also, due to the difference in weight, the shrinkage of the house may occur unevenly, which will lead to the building being skewed.
Due to the fact that partitions carry less weight than load-bearing walls, under excess pressure from the floors, the dividers can move vertically, bend, or begin to bulge.
Compensation for shrinkage during the construction of stairs
When designing and installing a staircase in a wooden house, it is necessary to take a number of measures to prevent it from being affected by the building’s settlement. The staircase is installed at the final stage of construction, when some shrinkage has already occurred. The base of the staircase (stringer or bowstring) is attached to the upper ceiling using sliding fasteners (a metal angle with a vertical groove, etc.); intermediate fixation to the walls is unacceptable.
Installation of an internal staircase: 1. Screw with washer 2. Angle with vertical groove 3. Floor joist 4. Shrinkage allowance
The shrinkage of the frame should be taken into account when securing the fencing and stair railings.
If the flight of stairs has a platform, then it also cannot be attached to the walls - it should be supported by the racks on the lower floor, and then the shrinkage of the walls will not affect the structure. In addition, during construction work there is no need to bring the upper part of the stairs adjacent to the ceiling into the plane of the floor of the upper floor. It is necessary to leave a gap equal to the calculated shrinkage between the top of the stairs and the floor, which is leveled during the settlement of the floor.
The main thing to consider
Static and sliding partitions for log houses can be made and installed independently; lightweight structures will optimally fit into rooms with wooden walls and floors. In addition, structures are easily attached to wood and adhere well to it.
The main thing to remember is that maintaining verticality and dimensional accuracy is the key to successful work. If the ceiling and floor guides are not attached parallel to each other, a slight distortion will form in the fence. Mobile systems are especially sensitive to accuracy. If the profiles are attached non-parallel, the blades simply will not move or the process will be difficult.
- Exterior finishing
- Wall kit
Shrinkage of walls and partitions in a wooden house
The log walls themselves do not require special units to compensate for shrinkage, since the log house is a homogeneous structure and all its elements will sink by approximately the same amount. However, there are rigid parts in the building that either do not settle or settle much less than the frame. Therefore, the construction of such parts requires special solutions.
Thus, the house often has vertical elements (pillars, columns, etc.) that serve as support for the higher parts of the house. Adjustment mechanisms are needed to reduce the height of pillars and columns so that their height matches the height of the log house walls. Most often, screw mechanisms (shrinkage compensators) are used
, special jacks, which are called just that -
screw jack adjustable shrinkage compensator
.
Wooden posts are rigid elements. To prevent them from interfering with the shrinkage of the overlying log structures, adjustment mechanisms are provided to allow the height of the pillars to be reduced.
The jack is placed in the gap between the vertical and horizontal elements, rigidly fixed to one of them. The size of the gap is selected based on the estimated shrinkage of the building (usually a jack allows you to change the height of the support by 8-10 cm). As the log house shrinks, the screw mechanism is adjusted, thereby changing the height of the column or pillar. The jack can be installed at the bottom or top of the vertical support. From the point of view of shrinkage of the structure, its location is not important. And from the point of view of ease of use, it is preferable to have a jack located below - then you will not need a ladder or scaffolding to complete the work.
The adjusting mechanisms are screw jacks that are installed in the gap between the vertical and horizontal elements, rigidly fastening them to one of them.
The gap between the vertical and horizontal elements is usually covered with a decorative casing, which is removed during adjustment. Sometimes the screw mechanism is left open. How often do you have to reduce the gap? This depends on the type of wall material, profile shape, time of year (seasonal changes in wood moisture content) and log house assembly technology. In some companies the interval between jobs is usually from two weeks to three months, in others it is four to six months. Adjusting each jack takes approximately 15 minutes.
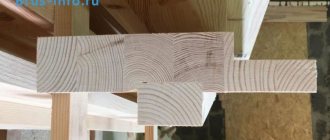
Special technical solutions will also be needed when the log structure is adjacent to a wall or partition of another type (for example, brick or frame), which is subject to less shrinkage. This means that its connection with the log house must be sliding. This connection can be made in different ways. Most often it is carried out according to the “tenon and groove” principle, where the tenon and groove have the possibility of some movement in the vertical direction relative to each other. Typically, a groove is made in the wall of a log house, and a tenon in the form of a wooden block is attached to the end of a brick or frame wall. The space between the tenon and groove is filled with heat-insulating fibrous material (etc.). The connection with brick walls, along which capillary moisture can spread, must contain a layer of waterproofing.
| Connection of a frame partition with a log wall: 1. Log house 2. Frame partition 3. Groove | Connection of a brick partition to a log structure located above: 1. Log house 2. Brick partition 3. Decorative cover 4. Shrinkage allowance 5. Screw jack |
A gap is left between the upper edge of the brick or frame wall and the part of the frame located above for unhindered shrinkage of the latter. The size of the gap is determined based on the calculated shrinkage value (in most cases it is 8 - 12 cm).
Creation of an additional self-supporting brick partition on which the finishing material will be fixed
To prevent the gap from being noticeable in the interior, you can close it with decorative strips that are attached to the frame (and, therefore, go down with it), or you can create a niche in the partition where the frame will settle. At the junction of the upper part of the frame partition to the frame, steel rod elements are usually provided to ensure the rigidity of the structure.
Varieties
What type of interior fence to choose:
- Frame partitions in a log house are the most common and most affordable type of interior fencing that you can install yourself. They consist of a wooden frame, insulation and sheathing. Their main feature is the variety of possible installation configurations. A frame fence can divide the space into zones of different shapes. During redevelopment, the structure can be easily disassembled and moved to another location for further service.
- Carpentry (panel) wooden partitions for a log house are just as suitable as frame ones. They are ready-made panels that need to be installed on frame guides. Partitions often do not require additional finishing; they can be coated with varnish, colored composite materials with a pattern. Their disadvantage is low sound insulation, although this parameter can be adjusted when ordering, purchasing or manufacturing, choosing the option that suits you according to its characteristics.
The cost of a carpentry partition depends on the type of structure and materials used and starts from 250 rubles/m2 to 1500 rubles/m2 or more.
- Solid partitions without a frame are attached to the ceiling and floor guides using the nail method or screwed with screws. To disassemble such a structure, you will have to remove all fasteners of individual boards or panels.
Rafter fasteners
To ensure reliable connection of the parts of the rafter system, special fasteners are used. Rafter fasteners are wooden and metal products that are used when installing components of the rafter system. These include wooden elements
:
- bars;
- scarves (triangular overlays);
- dowel;
- thorns.
Metal elements
:
- nails;
- screws;
- bolts complete with washers and nuts;
- staples;
- clamps;
- overlays;
- loops;
- sliders/sleds;
- anchors;
- serrated plates;
- nail plates;
- corners;
- perforated tapes, etc.
The choice of rafter fasteners depends on the requirements for the strength of structural units, design loads and roof configuration.
Main design characteristics
The function of the sliding support is to clearly fix the rafter beam to the wall and the mauerlat in a vertical plane and the possibility of its displacement along its own axis.
The sliding support consists of two elements. One is a guide (bar), which is attached to the rafter beam. The second is a corner with a support platform, fixed to the upper crown of the log house or mauerlat. The angle is equipped with a loop that engages with the guide, but does not prevent it from moving within certain limits.
The sliding support consists of two elements
The amount of deformation may vary. The support guide element limits possible movement. There are supports on sale with the ability to move to varying degrees.
The possible sliding amplitude of the rafter leg depends on the length of the free section of the support guide bar. These three options allow for an offset of 90 to 160 mm
The supports are made of steel at least 2 mm thick. The height of the angle is usually 90 mm, the width of the plates is 40 mm. Factory products have a galvanic anti-corrosion coating. Fasteners made of ordinary steel must be protected from rust by painting with oil paint.
Made from plasterboard (in the photo above the partition is made from plasterboard)
Such partitions are made very simply and quickly. This is a lightweight version that can be used in any room of the house, even in the bathroom. This system consists of:
- Profiles for gypsum boards. Rack-mount and horizontal guides are made from it;
- Thermal protection. You can use any insulation you like;
- Sealing. From any vapor barrier material;
- Sheathing material in the form of ordinary plasterboard for living rooms or moisture-resistant for bathrooms and toilets.
How to make a frame for drywall is discussed above. Plasterboard partitions are made before the flooring is laid, during the finishing of the rooms. The seams between the sheets are puttied, the partition is primed, and only then do finishing work begin: wallpapering, painting or applying decorative plaster.
The procedure for constructing a frame partition with your own hands
Perhaps I shouldn’t have described the design of a wooden partition in such detail, but started right away with the order of work for its installation. However, what is done cannot be returned. And whoever is not interested in this can immediately go to this section of the article, using it at the beginning.
Installation of a wooden partition frame
Note: at this stage of work, special attention must be paid to the accuracy of the alignment of the frame frame, as this will affect the quality of the entire internal wall. Verticals, horizontals, flatness, dimensions - all this will affect what kind of partition we get
Insulation and installation of sheathing on the frame
Note
: the film can be placed under the base of the frame already at the stage of its installation. Then the issue of securing it in the lower part will be immediately resolved.
Ceramic tiling in the washroom
This operation can be performed both before and after clapboard covering. The main thing is that the junction of the forcing and the end of the ceramic tile should be made accurately and without gaps. As for laying tiles on the floor, this can be done at any time.
Sheathing with clapboard on sheathing
You need to start from the very corner. The lining is sheathed using the “tenon and groove” method. That is, the last fixed element must have an open groove.
Each subsequent element is inserted with a tenon into the groove of the previously fixed lining, and with the help of metal clamps (fastening brackets) is secured to the sheathing. The last lining is cut to the required size and secured with self-tapping screws. You can see details on how to attach the lining.
Bathhouse layout
The entrance to the bathhouse is located on the south side. This is prudent, since in winter snowdrifts from this position accumulate in the smallest quantities and melt at an accelerated pace. In order for the room to be illuminated by the sun to the maximum, it is advisable to place the windows from the west.
Planning the location of the front door and windows
When a place for building a bathhouse is chosen near a body of clean water, it is advisable to locate the building no further than 20 m from the water body. This way you can get a huge supply of water and avoid saving fluid during water procedures.
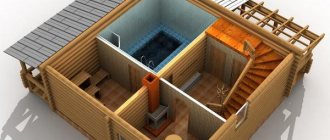
Bathhouse with swimming pool
If it is possible to add a swimming pool, you will get a full-fledged bath complex. You can build such a structure with your own hands. A special bowl is purchased at a hardware store, and a separate place is equipped for it. All that remains is to supply and drain the water. Having shown their imagination, many owners carry out designer mosaic decoration and equip bright lighting, which creates a fabulous effect at night.
View of the pool from the panoramic window of the steam room
The pool can be placed in the room adjacent to the bathhouse, if you equip it with a polycarbonate canopy or roof in advance; options with glass walls look beautiful. The pool is also convenient if it is located in a room adjacent to the steam room. The pool is designed to immediately plunge into cool water after a hot steam room.
Options for arranging a bathhouse with a swimming pool
Creating a “cascading pool” is the most fashionable idea at the moment. This is a kind of cascading waterfall, which is found only in natural areas. A closed water circulation system is created, and the edges of the structure are lined with special stones, which are usually used for alpine slides. To create a real beach atmosphere, you can create a 3D drawing on the walls that will depict your favorite beach or a beautiful tropical area. At the design stage, it is necessary to provide for a developed electrical network, large-scale water sources with the possibility of continuous water supply and drainage.
How to properly plan a partition and calculate the material
When starting work, you need to make a project on the basis of which calculations will be made.
Drawing with dimensions of plasterboard partitions
To do this, you can make an interior design, which includes technical drawings with dimensions. When builders are invited, they do the design and calculations themselves.
It is necessary to determine the thickness of the partition. It depends on the width of the profiles, drywall, sound insulation. In order to calculate the depth, you need to sum up all these indicators.
When constructing such structures, a special reinforced partition profile is used. It differs from the wall thickness. Types of profiles:
- Bearing profile (PN, UW): thickness 75 mm, 100 mm, 125 mm, 150 mm, height of side shelves 37 mm, 40 mm. The length of one strip is from 2 m to 4 m.
- Rack profile (PS, CW). Unlike the guide (U-shaped), it has inwardly curved reinforcing ribs. The thickness of the racks coincides with the guides (75 mm, 100 mm, 125 mm, 150 mm, side shelf height 40 mm, 50 mm. Length: 3 m-4 m. partition frame
The standard thickness of wall plasterboard is 12.5 mm. Having decided on the type of profile, sum up the thickness indicators: (profile + gypsum board sheet) x 2. This will be the minimum depth; if you wish, you can make it wider, lay thicker soundproofing material. Reinforced partitions are sheathed in two sheets of plasterboard; accordingly, it is necessary to add 25 mm.
conclusions
A partition made of logs is a very high-quality and beautiful design for arranging the interior of a house or as a separator between rooms. Due to their large mass and size, logs are not always a good option for building a partition.
Sometimes it is easier to make a frame structure from timber or boards. But despite this, such a separator has good thermal insulation properties and is suitable for separating the cold part of the house from the living part.
Application of sliding supports
The support platform must be mounted on the upper crown strictly perpendicular to the axis of the rafter beam, in the sliding direction. It is recommended to initially install the angle loop at the bottom of the sliding bar.
The rafter beam will sit down, so when installing the plank and corner are positioned in this way. The drawing indicates “shrinkage reserve”.
Metal elements are fastened only with screws with anti-corrosion coating.
Incorrect installation. The platform should be located on the upper crown at an angle, perpendicular to the axis of displacement of the rafter beam. In this case, the plate will jam or the corner will tear off from the crown.
In addition to the described advantages, the use of sliding supports makes it possible to simplify the design of the rafter system. There is no need to make complex cuts to the rafter beams and the top crown to provide support. If the house is built from timber or hand-cut logs, it is enough to plan a platform at the crown for attaching the support at the desired angle. In a structure made of rounded logs, this is even simpler: a square is used to measure the perpendicular on the roof element, and at the point of intersection of the log and the beam, a place for attaching the support is obtained.