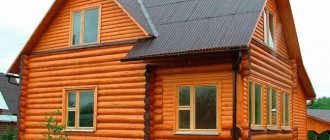
Although wood and structures made from it do not have such a long service life, the vast majority of consumers still vote in favor of this material because of its many advantages: environmental friendliness, low weight, reliability and low price.
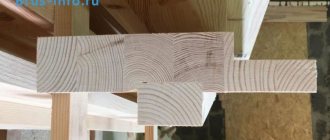
Wood is used to create joists, which play a huge role in the construction of the floor. The service life of the flooring in a wooden house depends on their correct installation. In this article we will talk about how to lay floor joists with your own hands, so that they will serve faithfully for decades.
General installation information
So, if you are interested in the question of how to attach logs to brick posts, then you are seriously thinking about creating a reliable and durable floor. However, with this installation method, you will need to resort to constructing a foundation, and most importantly, it must be done in such a way that it can easily support each installed brick support. You can pour the foundation for installation separately or make it in the form of a narrow strip. The height of the support can be determined using the height at which the timber will be placed.
Columns
To find out the consumption of materials for installing columns under the logs, you need to perform a calculation and then draw up a plan that will indicate the layout of the subfloor, what materials will be required and their quantity. This will need to include the following materials: timber, high-quality cement and bricks.
Laying
To ensure that the lags are laid in a column efficiently, it is recommended to follow the following rule: where the load in the room is insignificant, a larger distance can be maintained between the lags. If thin material is used for flooring, then it is recommended to place the logs close to each other.
This suggests the following conclusion: the smaller the distance between the lags, the higher the strength characteristics of the structure.
However, such a solution leads to high consumption of materials, and therefore an increase in monetary costs. But the end result will be of high quality, and the laid floor will last a long time.
What it is?
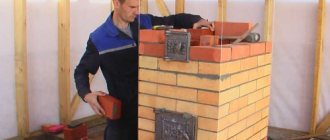
Pillars for brick logs are a masonry structure with a cross-section of one brick. They are erected on a prepared concrete pad, reinforced with reinforcement with a diameter of 5-8 mm. They ensure that floors do not sag during prolonged use and under significant weight loads. For ease of fastening the logs when laying, a bracket with a thread in the upper part should be mounted in the center of the structure, to the base of which a metal plate 3-5 cm thick and 15x15 cm in size should be welded. It is important that the brackets are centered and aligned to zero horizontally. Covering them with bricks on 4 sides will provide support for the joists.
Requirements
When building the foundation, an underground space is left for the floors of the first floor of the house. Its depth depends on the height of the constructed foundation, or it can be further deepened by removing excess soil. Be sure to tamp, as loose soil retains more moisture. When constructing columns, moisture-resistant clay bricks are used. Silicate species have high water absorption and their use for these purposes is strictly not recommended, since they are quickly destroyed by the moisture of the underground soil.
The pedestals under the logs are laid out on a concrete pad, when concreting it, M500 cement is used. The erected columns must be waterproofed. The constructed structures are controlled using a level in the longitudinal and transverse directions. The height is chosen taking into account the thickness of the logs, which will be the basis for the floor.
Posts for joists are an important technological stage of flooring. This design will avoid deflections and subsidence, protect the floorboard from dampness, mold and mildew, thereby extending its durability.
Location
If the thickness of the board is at least 50 mm, in this case the logs are laid at a distance of one meter from each other. However, in private housing construction, 40 mm boards are more often used; in this case, the logs are placed in increments of 70 cm. Many people are interested in the question of how to make the structure reliable and the loads accurately distributed? Here it is important to maintain the exact distance between the lags. The first board is laid no further than 25-35 cm from the wall.
Distance
The main rule that must be followed if you want to perform correct installation is location. The logs are laid perpendicular to the floor boards. If boards in two layers are used to create a structure, then the top one is laid “cross” to the bottom one.
Installation of logs in different rooms is carried out differently. If the installation is carried out in the living room, then the floor boards are installed in the direction of sunlight. In this case, the logs themselves are mounted in a transverse position. But for rooms where there is a lot of traffic, floor boards are laid in the direction of movement.
Distance table
Recommendations from experts
Laying a wooden floor along joists on beams is easier than on the ground. But in any case, the step between the overlaps is taken into account. If it does not exceed 80 cm, you can immediately install the finishing coating. But such a wooden floor design is rarely installed. More often than not, the flooring “pie” is installed in the following sequence:
- fastening the logs with screws, with the obligatory check of the level and compliance with the correct step;
- laying the subfloor;
- waterproofing;
- thermal insulation;
Wooden floors are installed differently on a concrete base. In this case, a certain technology is followed to lay the floor along the joists.
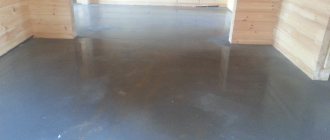
- The concrete screed should be cleared of debris and primed.
- The necessary tools are prepared (hammer, plane, hacksaw, construction level).
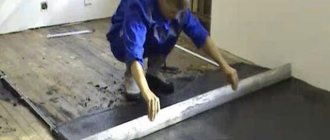
- With an overlap of 15-20 cm on the walls, waterproofing is laid, which is used as roofing felt or thick polyethylene film. The joints must be connected with electrical tape. At this stage, you can install a floating floor.
- After determining the step, the logs are laid. If the base has significant differences in height, you should resort to pads made of boards, chipboard, plywood, fiberboard or pegs. The tree must be treated with protective agents.
Holes are drilled at the bases of the beams into which dowels or anchor bolt spacers are placed. The latter will provide a stronger connection. At a distance of 60-80 cm from each other, self-tapping screws or bolts are screwed into the holes (2-3 for each lag). Before fully tightening the fasteners, you need to double-check the evenness of the installation. The construction of the subfloor remains the same as in other cases.
Having completed all these steps, you can lay waterproofing, insulation and vapor barrier. The final stage is installation of the finished floor. Following all these simple instructions, anyone without special training can install a wooden floor on joists with their own hands.
How to attach
There are several ways to attach joists. This is done using metal corners or nails. However, professionals say that nails for fastening joists are ineffective, and after a certain time they will need to be repaired.
It is better to secure the beams with self-tapping screws, which penetrate deep to a distance of 3 to 5 cm. If the support for the logs is made of brick, then the first thing you need to do is cover it with a waterproofing layer, fastening is done with dowels.
If the length of the beam is not enough to lay a log of the required length, it is recommended to carry out the extension using the cutting method, it is also called “half a tree” and then secure this place with nails. When laying logs directly on the ground, the skull blocks are first installed.
In addition to wooden bars, plastic structures are now used; they can easily withstand significant loads and are self-regulating. The use of plastic logs completely solves the problem of their leveling. If the question is how to attach the cabinets, then such work is not very difficult; the main thing that needs to be done is to adhere to the installation technology.
Important! A waterproofing layer is made between the joists, then a heat insulator is laid. A small gap is left between the boards during installation.
Articles on the topic
Strengthening the foundation of a brick house - how to do it, instructions, advice from masons
Brick pediment - advantages, disadvantages, masonry, instructions, advice from masons
The size of a standard window in a brick house - Brezhnev, Khrushchev, Stalin, instructions, advice from masons
Brick foundation for a wooden house - types, instructions, advice from masons
Staircase in a brick house - types, features of the foundation, instructions, advice from masons
Cladding windows with bricks - options, stages of implementation, instructions, advice from masons
Brick backing - how to make, insulation, protection, instructions, advice from masons
Repair of the basement of a brick house - major, partial, instructions, advice from masons
Reviews ()
Laying supports and fastening joists
To install supports under the timber, bricks are laid in two rows. The masonry of the top row is carried out so that the wooden logs are then perpendicular to the bricks. For laying columns, it is better to use bricks of at least M100 grade; such products can easily withstand heavy loads.
To make the solution, cement and sand are used in a ratio of 1 to 3. Then they are diluted with water and stirred. As soon as the columns are erected, on the second day waterproofing is carried out under the wooden logs. For its construction, roofing material is used.
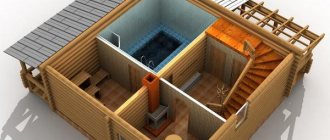
Device diagram
When the beams are laid on the posts, pay attention to the evenness of the base, it should be perfect. Then you can install the boards. Here it is recommended to fasten the corner to the brick pillar with dowel nails. To do this, use a drill to drill holes in the brick.
What it is?
Pillars for brick logs are a masonry structure with a cross-section of one brick. They are erected on a prepared concrete pad, reinforced with reinforcement with a diameter of 5-8 mm. They ensure that floors do not sag during prolonged use and under significant weight loads. For ease of fastening the logs when laying, a bracket with a thread in the upper part should be mounted in the center of the structure, to the base of which a metal plate 3-5 cm thick and 15x15 cm in size should be welded. It is important that the brackets are centered and aligned to zero horizontally. Covering them with bricks on 4 sides will provide support for the joists.
Floor insulation
Warming is also a very important stage. Below, on one and the other side of the wooden logs, support bars 50 × 50 or 30 × 50 mm are nailed.
Next, a roll is laid on the block, which is an unedged low-grade board; its thickness should be 25 mm. Before laying, such boards are treated with a special antiseptic composition to protect the floor from rodents and insects. Self-tapping screws are used to attach the knurling to the bars.
Insulation
Next, a waterproofing membrane with a throughput capacity of no more than 800 g/m is laid on the created bead. It will protect the heat insulator from exposure to moisture. Afterwards, a heat insulator is mounted on the laid waterproofing layer. Considering that today there is a large assortment of insulating materials on the market, there will be no problems with the choice, but you should understand that not every one of them can be used to insulate a wooden floor.
Here it is recommended to choose mineral wool with a density of 35 to 55 kg/m². When laying, a gap of 2-4 cm is left between the boards and the heat insulator for ventilation.
Soil preparation
Preparing the soil for installing a wooden floor is a fundamental point on which the future durability of the flooring depends. The process itself consists of maximally compacting the soil (compaction) and leveling it in order to make it easier to install columns under the logs at the same level.
You can make a tamping tool with your own hands if you have a log with a diameter of about 200 mm and a length of 700–800 mm. On one side of the log, a piece of board measuring 300x300 mm and 40–50 mm thick is nailed, and on the other end of the log a handle is attached at your discretion to raise and lower the “rammer”.
The given dimensions of the “tamper” are purely recommended and in each individual case are selected individually so that it is possible to work quickly and not too hard. Other “rammer” designs are also possible.
Fastening boards
Any wood is subject to deformation under the influence of moisture and temperature changes, so the edge board is laid so that there is a gap of 1-2 cm between it and the wall, this will preserve the integrity of the wooden flooring, even with strong changes in temperature and humidity.
After laying the floor boards is completed, the gap is closed with a plinth. Nails can be used to secure the boards, but they can rust and lift off the surface of the board over time. Therefore, for fastening it is better to use self-tapping screws with a length of 60 mm and a diameter of up to 4.5 mm.
What the logs on the posts look like is shown in the video:
Average score of ratings is more than 0
Share link
Comments There are no comments yet, but you could be the first...
Which brick should I take?
To lay out support pillars above ground level, red bricks, also called ceramic, are used. Choose a solid construction type, which has increased strength and durability. The density of solid brick reaches 1900 kg/m³, while hollow brick is only 1500 kg/m³. This material is not afraid of dampness and is indispensable for loaded structures. The strength of the brick is acceptable M 100. Preference is given to the single type with parameters 25x12x6.5 cm.
So, choose bricks for the lag:
- ceramic;
- full-bodied;
- strength M100;
- single.