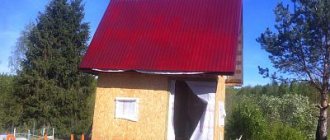
A homemade wood-burning sauna stove is a worthy alternative to factory-made analogues. Not every lover of bath procedures can buy a metal potbelly stove or build a good-quality brick heater, for which there is not always enough space. Having the necessary tools and skills, you can make an iron stove yourself at home or order it from a familiar welder. The purpose of the article is to tell you how to weld a sauna stove from a large diameter pipe or gas cylinder with your own hands.
How do pipe furnaces differ from welded sheet steel products?
The future owner of a bathhouse should understand how sauna stoves are designed and what they are like, even if he does not intend to manufacture this unit himself. You need to know what exactly to order from a specialist or buy in order to end up with a comfortable steam room with comfortable conditions.
Nowadays, most sauna stoves are made of metal, since brick structures take up a lot of space, and there are fewer and fewer specialists who know how to lay them. If you compare a stove made of pipes and steel sheets, then each type will have its own pros and cons.
pros
Since ancient times, the furnace firebox was made with a vaulted ceiling, noting that this shape retains heat better and removes smoke. The pipe’s configuration is closer to it than a structure with right angles, and this is the main advantage of a stove made from it.
Russian stove with a vault Source 900igr.net
The second positive factor is the minimum number of seams on the body. They make a stove for the bathhouse from a pipe with a cross-section of at least half a meter, which has only one weld. Whereas when welding straight sheets, there are 4 of them.
For reference! Only pipes with a diameter of up to 250 mm are produced seamless; they are too small for a heating unit.
By choosing the optimal pipe thickness, you can get a product with a relatively low weight that can be transported or carried without problems. In this case, the stove will quickly warm up and serve for a long time without the risk of burning out the walls.
The advantages also include the variability of stove designs - they can be vertical and horizontal, with an open heater for a sauna and with a closed one for a Russian bath.
Minuses
A novice master may have some difficulties when working due to the fact that:
- it is more difficult to “cut out” a sauna stove from a pipe, since many parts have radius lines;
To make a box-heater and weld a chimney into the body, you need to clearly cut out the parts and holes Source delaj-horosho.ru
- the walls of the pipes are thick, they are more difficult to cut and weld than sheet metal;
- you will need more electrodes and cutting wheels for the grinder.
Preparatory work in the bathhouse before making the stove
Base
It is better to lay the foundation for the stove at the stage of building a bathhouse , and not when you already have the finished floor ready. Therefore, those who have completely decided on the type of future stove start with this:
First you need to dig a hole under the concrete foundation . Its dimensions vary for the horizontal and vertical position of the base pipe. For example, if you have a vertical stove made of a pipe with a diameter of 50-53 cm, then the concrete podium is made 70x70 cm.
So, the hole. You estimated the length and width from the above, and the depth should be about half a meter . But don’t be alarmed, the first 30 cm will go under the sand and gravel cushion, which is needed for greater stability of the base.
Before pouring the base,
a screed of liquid concrete (thin layer) is made.
The ratio of cement and sand is 1 to 4, water - as much as needed. This layer must dry before continuing work. a layer of waterproofing is laid on it , for example, sheets of roofing material, and the base itself will be poured on top of the waterproofing. Formwork is made for it. You can add fine gravel to the concrete , then the ratio will be as follows: 1 part cement to 2.5 parts sand and 4 parts gravel, water as needed.
The surface is leveled using a level - this is important! After hardening, a brick is laid on it, for example, fireclay, but red is also suitable. You can lay one, or two rows of bricks. The binder should be exclusively clay mortar .
When the base is finished, proceed to creating a protective screen . Its dimensions also depend on the size and position of the oven. But, since the stove is always either next to the wall or even in a corner, the flammable walls should be protected with a fireproof screen, and it is preferable to completely replace a piece of the wall with a fireproof one, especially if the stove has an external firebox.
For your information: the issue of foundations for furnaces is discussed in great detail in this article.
Screen
This is a means of protecting bath walls from overheating and fire. The screen is made of brick, but there is no longer a need to use fireclay, and the solution can be with cement , and not just clay diluted with water.
The height of the screen should at least correspond to the height of the oven , and at a maximum it can reach the ceiling.
Thickness - it is preferable to make it half a brick . A quarter is acceptable, but only if you are aware of the overheating of the bath at such a thickness.
Keep in mind! Where a brick wall touches a wall made of flammable material, it is strongly recommended to make a gasket made of refractory material - mineral wool, fire-resistant cardboard.
The distance to the oven may vary. If the firebox is not remote, then place the stove 20 cm from the screen; this will not work with a remote one, so try to ensure a gap of at least 5-7 cm.
Which oven format is better - horizontal or vertical?
There is no big difference between the efficiency of a furnace installed in one or another spatial position. Horizontal stoves are considered more thermally efficient, while vertical stoves are considered compact and easy to manufacture.
Vertical
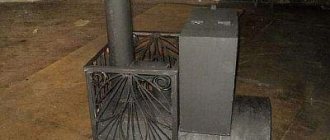
In a small steam room, a vertical stove is often placed in a bathhouse made of a pipe, partitioned inside into 3 compartments and having a stepped design.
- The lower chamber is a firebox with an ash pan.
- The middle one is a closed heater.
- The top one is a container for water heated by the heater and the chimney passing through it.
If you need an open heater, the main structure is made of two sections, in which the hot water tank is located immediately above the firebox. And for stones, a grate is welded around the body.
Vertical oven with open heater Source wixstatic.com
See also: Catalog of companies that specialize in the design and installation of fireplaces and stoves
In any case, the vertical structure takes up little space. But it has disadvantages:
- water in such a container always contains rust particles;
- firewood has to be selected or prepared no longer than the diameter of the pipe;
- the firebox door is located directly in the steam room, which is not always convenient and requires additional space for storing firewood.
An external chamber with a door can also be welded to the convex side wall of the pipe to put firewood into the firebox from the dressing room. But doing this accurately is more difficult than on a straight surface.
Horizontal
A horizontal pipe sauna stove, often called a “steam locomotive” for its resemblance to a railway tractor, is considered a classic design. Its advantages:
- the combustion chamber can be made to any length and the door can be moved into the room adjacent to the steam room without any problems;
- wood in such a stove burns longer and with greater heat output;
- The hot water container can be made of galvanized or stainless steel and placed on the body, on the side or at the end.
From the photo you can evaluate the difference between the stoves by the area they occupy Source izhevsk.ru
But the heater with a horizontal pipe position can only be made open, and many lovers of a real Russian bath consider this fact to be the main disadvantage of this design.
Trial fire
- Before using the stove, you need to conduct a test firebox, which will test the entire structure for the tightness of the welds.
- The damper opens and the air vent opens. Afterwards, a small pile of firewood is made and set on fire. The door is closed and oxygen is supplied to the upper compartment.
- Complete heating is observed, the presence of traction is observed and the seams are checked for tightness.
This is how this sauna stove is made cheaply and practically. Every person can afford such a simple luxury.
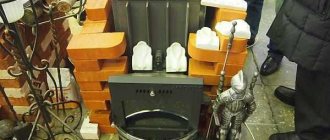
Design options
Regardless of the format, sauna stoves are made from pipes 530 mm or larger, but the maximum recommended cross-section is 600 mm. This diameter is considered optimal for high-quality heating of the steam room without excessive fuel consumption.
In addition to this, other materials will be required:
- sheet steel for the manufacture of end walls, lintels;
- chimney pipe with a diameter of 100-150 mm;
- ready-made or cut-out doors for the firebox and ash pan;
- hinges for doors;
- stainless steel tank;
- reinforcement bars for grates or finished cast iron grates;
- steel corners and strips.
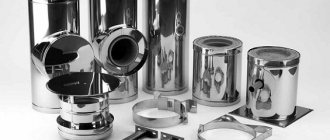
The thickness of the sheets should be approximately the same as the thickness of the pipe walls Source prom.st
A specific list of required materials and their quantities is determined from the drawing of the selected or independently invented design. For beginners and people far from this area, it is better to use ready-made, proven diagrams so that the stove made from a pipe is guaranteed to be reliable, safe and efficient, with an optimal volumetric ratio of the heater and firebox.
Pasting furniture with self-adhesive film
Pasting furniture with your own hands takes a lot of time. You need to be patient and try to carefully complete each step.
Surface and material preparation
To properly prepare the surface and the product for pasting furniture, perform the following steps:
- Leveling the surface. The base to be decorated must not have chips, protruding areas or cracks. Defects are covered with putty and sanded with sandpaper. Otherwise, the furniture will become covered with bubbles or will not adhere well to the base.
- Cleansing. Dust and other contaminants are removed from the surface. To do this, use a clean sponge and soap solution.
- Removing decorative elements. It is necessary to temporarily remove linings, handles, glass shelves and other parts. After gluing the film, they are returned to their place.
- Degreasing. At this stage, you can use special chemical compounds or simple dishwashing detergent. Wooden surfaces are treated with acrylic varnish.
- Open it up. Before purchasing a finishing product, create a drawing containing elements intended for gluing. This will help to correctly determine the width of the roll and eliminate the need to create a large number of joints. The joints should not have small surfaces. The sketch is applied to the wrong side of the canvas. There is a marking grid with a mesh size of 1 cm. After cutting out the parts, you can glue the self-adhesive film to the furniture.
Gluing technology
If a small area is to be treated, for example, the facade of a kitchen unit, the film can be applied using a dry method. When decorating a cabinet or other large object, the surface is first moistened with soapy water or soap. This provides the material with mobility and eliminates unevenness. This method is suitable for people performing such work for the first time. Pasting a cabinet with self-adhesive film is done as follows:
- The edge of the canvas is installed on the upper part of the base. The doors can be dismantled before decoration. The top layer of the film is separated from the paper base by several centimeters. The material is pressed tightly against the surface to be treated. In this case, you need to smooth the surface with a cloth, moving downwards. The lower part along with the backing should hang down.
- Gradually remove the top layer from the paper base, carefully smoothing the glued area. They go down in small sections, removing bubbles.
- Inspect the processed item. If bubbles are found, they are pierced with a needle. By pressing the film to the surface, air is removed. When smoothing, wrinkles may appear. The damaged area is heated with a hairdryer and smoothed out again.
Difficult areas
Difficulties may arise when processing corners and other difficult areas. The following tricks will help you properly cover your cabinet with self-adhesive film:
- You can use a hair dryer to bend the fabric. The material is heated with a stream of hot air.
- Difficulties may arise at the stage of comparing coverage elements. To prevent gaps from appearing, the sheets are glued with an overlap of 1.5 cm. A ruler is applied to the allowance. Using a construction knife, make an incision and remove the excess strip. The result is an even joint.
- You need to work in good lighting. If you paste over complex parts in a dark room, you may miss minor imperfections. They will stand out in daylight.
- If the film quickly adheres to the surface, use talc. The base is sprinkled with powder, after which the canvas is applied.
Video description
An example of a vertical stove with a closed, insulated heater is shown in the video:
Above the heater, a water compartment is fenced off with another horizontal spacer and equipped with a tap. Since the water in the “blackie” pipe quickly becomes red from rust, it is often replaced with a stainless steel tank.
Without special electrodes and skills in such work, it is difficult to qualitatively weld ferrous metal with stainless steel. It is better to buy a ready-made tank with a section of the chimney already installed in it and place it on the heater.
Tank for installation on a stove Source prom.st
If space allows, the water tank can be installed separately, connecting it to the firebox with a piece of pipe. One end of it is welded to the wall of the firebox, and the second open end is inserted into the tank, into the lower part of the side wall.
Gate equipment
Another way to combat increased draft, which causes wood to burn out too quickly and not completely, is to install a damper on the chimney.
A damper is a valve that closes the chimney exhaust duct and blocks the draft:
- In the closed position there is practically no draft - almost no air is sucked in through the blower and combustion doors.
- In the fully open position of the gate, the thrust is maximum - this is the kindling mode.
- By partially retracting the damper, you can reduce the draft so that the wood does not burn, but smolders. This way you can steam on one tab longer than usual.
In factory long-burning furnaces, the gate is made rotary. In a summer cottage it is easier to make it movable. To do this, you just need to cut the sheet to size and make a gap in the chimney. You can pull out such a flap by the tongue.
Installation Rules
The requirements and recommendations for installing the furnace are the same as for other metal units.
- These relatively lightweight structures can be installed on a concrete screed without a foundation.
- If the floor is wooden along the joists, you need to pour or lay out a solid foundation from blocks.
- To reduce infrared radiation from hot metal and reduce the risk of burns, you can line a pipe sauna stove with bricks or simply separate it with a brick screen.
- The distance from the stove to the walls must be at least 20 cm.
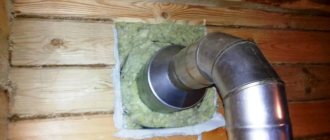
- At the point where the chimney passes through the ceilings, a cut-out is arranged in the form of a metal box filled with non-flammable material, for example, stone wool.
The ceiling around the pipe is covered with a sheet of iron Source izhevsk.ru
- A metal sheet is also placed on the floor before the firebox to prevent accidental fire from sparks and embers.
Chimney installation
The chimney is an important component for removing combustion products. They come in three types:
They come in three types:
- Ceramic. A ceramic chimney has the longest shelf life. Maximum resistance to high temperatures.
- Brick. Due to its rough surface, a brick chimney quickly accumulates soot and slows down air draft.
- Steel. A steel chimney is most suitable for a bathhouse due to its affordable price. Also, due to the rapid heating of the metal, a tank is installed and then used for procedures. A stainless steel chimney is the most current. This material is not afraid of water, high temperatures, is not susceptible to corrosion, is lightweight, durable and cheap.
Build process:
- Before installation, you need to mark the location for making the hole.
- A galvanized steel casing is installed on the pipe, after which rings are put on and fixed to the ceiling. The lower pipe is secured with self-tapping screws. The clamps securely fix the chimney.
- The second part is installed on the roof. The holes between the roof and the chimney are filled with expanded clay, clay or asbestos.
Briefly about the main thing
Most of today's bathhouse lovers prefer to equip them with light metal stoves that occupy a minimum of space and do not require the construction of a foundation. When remodeling the bathhouse, they can easily be moved to another place. The most effective, economical and easiest to manufacture are structures made from thick-walled large-diameter steel pipes. They can be installed both vertically and horizontally, depending on your own preferences, size and layout of the steam room. When placed vertically, a minimum amount of additional materials is required, since the firebox, heater and boiler are compactly placed one above the other in one pipe.
Ratings 0
What styles are suitable for a four-poster bed?
A variety of nations have a tradition of curtaining their sleeping beds, so canopies are appropriate in any style. The main thing is to choose the right materials for creating the structure and draperies, so as not to disrupt the chosen design direction.
Decorating a canopy in different styles
Classical. A luxurious and elegant textile element made of jacquard, taffeta or velvet is perfect for this style.
Modern. Here it is worth turning to floral prints, sinuous lines, laconic and sophisticated forms. Thin threads surrounding a round bed will look great.
Provence. A light canopy made of airy fabrics with small prints can be decorated with frills and lace. In combination with a massive stock decorated with patinated carvings, it will look very romantic.
Oriental. A bed in this style should be fabulous, so the canopy is chosen to be as expressive and luxurious as possible.
Japanese. The restrained minimalism of the Celestial Empire, on the contrary, requires rigor and conciseness. Preference is given to light shades and clear shapes. A canopy adds a touch of coziness to an austere, empty space.
Advantages
When comparing furnaces with different housing arrangements, several distinctive features can be identified that affect the efficiency of air heating:
- Flows of flame and heated gases are directed to the chimney along the shortest path. At the same time, they have less contact with the walls of the structure. The flame flow is located in the very center of the horizontal furnace.
- In horizontal furnaces, flows of heated gases rush to the top of the body. Only then are they thrown out into the chimney due to rarefaction of the air.
- The heat from the heated walls goes normal to them, which means 90% of the heat is radiated in the horizontal direction. Due to this, the walls of the bathhouse quickly warm up. However, the floor receives little heat.
- A stove located horizontally is capable of thoroughly heating all areas of the sauna room, except those adjacent to the floor.
The weight of the structure can be 60-180 kg. For this reason, the horizontal structure is installed in the center of the steam room on a fairly simple frame. If you make 20 mm insulation, the structure can be installed even on a regular 8 mm sheet of steel.
Assembly instructions
The entire assembly must be carried out in accordance with the drawings to avoid complications and errors. This design may cause slight difficulties during assembly, since there will be a section for laying stone in the firebox compartment.
- The bottom of the pipe is welded with a piece of sheet metal.
- At a distance of 1-2 cm from the bottom, a 24×8 rectangular window is cut out for the blower. This will give oxygen access to the fuel combustion compartment and where the ash is removed.
- At a distance of 15-20 cm from the upper part of the ash pan, another hole is cut for placing fuel. Its size will be 20-24 cm. Special thin disks are used.
- On top of the firebox there is a chamber into which stones are placed. A round hole is cut at a distance of 12-18 cm from the top of the combustion compartment. Note: the round hole should be 35 cm in diameter, the offset around the circumference of the pipe will be 900.
- The other, with a diameter of 35 cm, is cut to a length that is equal to the outer diameter of the larger pipe. The upper segment is cut by ¾ in the form of a “scapula”, to the border of the anterior edge.
- A blank wall is welded to the rear end, and a plug with a door is welded at the bottom to the front end. Stones will be laid through it and water will be poured in to create steam.
- The cut “blade” is inserted into the hole in the main pipe. Its outer protrusion should be 2-3 cm. There should be a gap inside along the entire perimeter that is completely welded. To enhance the stability of the structure, rods are welded to the body.
- Based on the diameter of the main pipe, a rounded piece is cut out of sheet steel. To fix the grate bars, rectangular holes are cut in a cut out round piece of steel;
- The firebox is welded into the main pipe, parallel to the floor, 2 cm above the upper edge of the vent hole.
- The base of the blower is cut out of metal, based on the outer diameter of the main pipe. Legs are welded under the heater to hold it. Then weld to the bottom.
- The main pipe is the wall for the water heating tank.
- In the cut out bottom of the tank, a compartment is made for the chimney from the edge 3-5 cm.
- A piece of chimney pipe is welded into the hole, protruding at a distance of 10-12 cm.
- The bottom of the tank is installed on the main pipe. Then it is welded 10-12 cm above the stone compartment. The chimney should be located to the side of the “blade”.
- The bottom of the tank is completely scalded. A hole is drilled at the bottom for supplying a water pipe.
- To make a double tank lid, 2 semicircular parts are cut out. One is completely welded, and the other serves to open the tank and is attached to hinges.
- The result should be a stove like this:
https://youtube.com/watch?v=PPZ_OpmQikQ
Tools and materials
When creating a horizontal furnace, the following materials are used:
- Pipe section. Its diameter should be from 50 to 53 cm. The length of the body is 80-100 cm. For a steam room of 20 cubic meters. The first characteristic is sufficient. If you need to heat the dressing room as well, it is better to add 15 cm to the pipe length.
- Rectangular sheet of steel 120x70 cm. A small layer of rust is allowed. The main condition is that the surface is smooth, without holes or dents. Metal should be chosen at least 3 mm thick.
- Metal profile. Angle No. 50 is often used. For one horizontal oven you will need 1.5-2 m of profile.
- Reinforcing bars with a diameter of 6-8 mm. You can use cuttings of half a meter.
- The pipe is 150 cm long and 110 mm in diameter. You will also need several knees. The rotation angle and their number should be selected in each case separately.
- Two doors - for the blower and firebox.
- In addition to metal elements, you will need to find 20 electrodes for ferrous and 5 for stainless metal.
- Discs for working with an angle grinder with a diameter of 125 mm.
It is possible to build a horizontal oven only if you use certain tools. The main ones include a welding machine and additional accessories. During the work you will need to saw steel sheets, so you should include a powerful grinder in your list of tools. A carbon dioxide semi-automatic machine is the ideal choice when you need to cook critical components. A simple pulse unit is sufficient if you have the operating skills.
Important! If you choose old pieces of pipes, you should make sure that they do not have any deformations. It's better to use new material.
When installing a horizontal stove for long-term operation in a bathhouse, it is necessary to purchase high-quality pieces designed for medium pressure.