How to paint wood with stain and varnish it
A material such as wood has always been in demand, since it is a natural material and no newfangled plastics can compete with it in the ability to create an atmosphere of comfort and warmth in a room. But, like any other material, wooden products require protection and care. For these purposes, special stains and varnishes are used. Treating wood with such means not only protects it from excessive exposure to light, moisture, scratches, and dirt, but also gives it nobility and sophistication.
- Why apply stain to wood? Water stain
- Alcohol stain
- Oil stain
- Preparing the wooden surface
Work technology
The method of applying it depends on the type of stain. Typically, a brush, spray, swab, or sponge are used for painting work. It is better to treat unsmooth and large-sized bases with a spray gun (in the first case, do not use a brush so that there are no fallen bristles left on the wood). To use a sprayer, choose a lighter shade of stain: the layer will be thicker, making it appear darker.
Before the main stage of work, a test painting is always carried out to clarify the required number of layers to obtain the desired shade. The procedure is as follows:
- take a board of the same type as the base material and polish it;
- cover the product with impregnation;
- leave until dry;
- apply another layer to 2/3 of the board;
- after drying, treat another 1/3 of the workpiece with a third layer;
- As it dries completely, evaluate the appearance of all three areas and select the optimal shade.
Water stain and its specifics
Water-based stain is available as a ready-to-use liquid and as a powder that can be diluted to the desired concentration. Water-based stains have good adhesion, naturally highlight the grain of the wood and come in a wide range of shades, from light tones to deep dark reds. The absence of toxic odors makes such compositions indispensable when performing interior work.
When processing resinous wood, water stain may become stained due to uneven absorption into the structure of the material. In this case, it is recommended to subject the surface of the product to a de-tarring procedure.
Another disadvantage when working with water stains is the problem of raised lint. To eliminate this defect, the prepared surface is moistened with water and allowed to dry. Then the product is sanded with fine-grained paper and opened with a finishing compound.
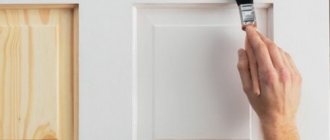
How to paint a wooden door?
The paint for the door leaf must meet high performance characteristics and be safe for human health. Conventionally, paint and varnish materials are divided into two groups:
Most often, when restoring a wooden door, preference is given to opaque paints.
From a wide variety of interior work, it is best to choose safe water-based paint or varnish. From the street, a wooden canvas can even be coated with nitro paint.
Alkyd paint
It is advisable to use alkyd paint during major renovations when no one lives in the apartment. During this period, all toxic odors will have time to disappear. The dried surface can be matte or glossy, but in any case it repels moisture well.
Alkyd quick-drying enamel is characterized by the presence of a pungent odor. Its popularity is justified by the variety of colors, low cost, and resistance to aggressive environmental influences.
Alkyd varnish
Due to their transparent structure, it is better to cover a new wooden interior or entrance door. The disadvantage is the strong odor and long drying time. A shiny transparent glaze will highlight the beauty of natural wood.
Acrylic paint
The best choice to paint interior wooden doors indoors. The advantage of the coloring composition is the absence of a toxic odor, as well as the ability to preserve the wood texture. A thin layer allows the wood to “breathe”.
Acrylic enamels dry quickly, and after painting there is no toxic odor indoors. Another advantage is the large selection of colors. The disadvantage is the high cost. After drying, the surface becomes matte. Additional opening with acrylic varnish further increases the cost of painting a wooden structure.
Acrylic lacquer
Acrylic varnish is perfect for covering a new, unfinished interior door. The non-flammable composition, harmless to human health, will preserve the color and texture of the wood. The wooden door leaf on the street side is not coated with acrylic varnish.
Thermal enamel
It is unreasonable to use it for an interior door block. The paint is expensive and its main purpose is to protect the painted surface from low and high temperatures. If desired, you can paint a wooden or metal door at the entrance to the house. Thermal enamels differ in their scope of application. For wooden panels, Bosny aerosol paint is suitable; depending on the brand, it can withstand heating up to a temperature of 200°C or 650°C.
Nitropaint
The most durable and durable paint for wooden doors is nitro varnish or nitro enamel, but it is better not to use it for interior door blocks. They are highly toxic and can only be handled in well-ventilated areas. Nitro paint is suitable for the front door. If it needs to be removed in the future, it will not be easy to do.
Polyurethane paints, characterized by good adhesion to wood, are gaining popularity. With proper preparation of the wooden surface, you can not be afraid of the appearance of blisters on the door. The dried layer of paint is completely harmless to humans, retains its bright color over a long period of use, and is also resistant to scratches. The main advantage of the polyurethane layer is elasticity. If the wood is slightly deformed, cracks will not appear in the paint.
How to prepare wood for processing
Treating wood with stain is not such a simple process as it may seem to an ignorant person. To achieve the desired result, it is necessary to take into account some of the subtleties and nuances of this procedure, and also perform all stages of staining in order.
- First you need to choose a color, a suitable composition of the solution and tools for applying it. For quick-drying compounds, you need to prepare a spray gun or other sprayer. You can work with oil, water or acrylic stains with a brush, sponges, or swabs. It all depends on the size of the surface to be finished and the expected effect.
- Preparing a wooden product for painting involves drying the new surface or cleaning the old surface from the previous finish to the body of the wood. The dry product must be carefully treated with sandpaper or a grinding machine. To avoid the appearance of new defects, movements should be carried out along the fibers. Scratches, dents, and chips on an untreated surface may be inconspicuous, but after covering with wood stain they appear quite noticeably.
- By grinding the surface being treated is brought to a completely smooth state. Then the dust and removed fibers are removed. To do this, you can use a vacuum cleaner or a soft cloth.
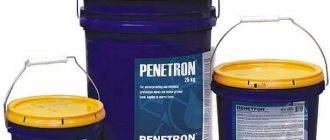
- The next stage is degreasing, most often performed with white spirit.
- Before applying the base composition, especially water stain, the product must be moistened with clean water. And sand again.
Some nuances occur when preparing coniferous wood products for working with stains, especially those with high resin content. The fact is that after applying the stain, resinous areas can appear through the coating in ugly spots. It is best to first rid such wood of such manifestations. To do this, use one of the compositions:
- an aqueous solution of acetone, for this purpose mix 750 g of water and 250 g of acetone;
- a soda mixture consisting of one liter of warm water, 60g of soda ash and 50g of potash (potassium carbonate).
To get rid of the resin completely, the treatment must be performed several times. Then rinse the product thoroughly with soap and then with clean water. Dry and then carry out traditional preparation for staining.
Color spectrum
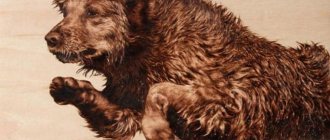
Beitz is a unique product that helps give wood a noble shade.
The structure of the wood is heterogeneous, different areas are impregnated unevenly, therefore, after the composition dries, an original pattern is created on the surface. The most popular shades of stains are included in the wood range; their names correspond to different types of wood. When purchasing, you should carefully consider the samples on which the stains are applied, because the shade on the label and in reality may not match. The finished color will depend on the following factors:
- original wood shade;
- degree of porosity of the material;
- density;
- breed;
- amount of resin.
Deciduous wood is impregnated much better than coniferous wood, so the tone will be as close as possible to the stated one. To give a light shade, you can purchase a lightening impregnation, which also tends to emphasize the wood grain. There are even colorless stains on sale that do not change the color of the wood, but still have full protective properties.
Finishing wooden surfaces with stain: tips from TBM-Market specialists
To make the result pleasing, before starting finishing work you need to remember the simple rules of wood processing:
- To increase the depth of penetration into wood and improve adhesion to the surface, the composition should be slightly heated to a temperature of 36-38°C.
- The stain can be applied in different ways: rub in in a circular motion using a swab and longitudinally using a roller and brush.
- Wiping off excess must be done only along the fibers.
- To avoid blots and drips, do not dip the brush or swab into the solution too much.
- Do not apply a second layer of composition on the first one that has not dried.
- The ends and sections of wood that actively absorb the composition must be subjected to more intensive processing.
- Vertical surfaces of doors, panels, and walls should be coated starting from the bottom to prevent stains from being absorbed into unpainted wood.
- The procedure for applying layers can be repeated several times until the desired tone is achieved.
Watch a video about the features and types of stain
Different types of wood react differently with stains, especially “real” ones, i.e. coloring fibers due to chemical reactions.
Thus, a stain based on ferric chloride will give oak a black color, make apple or pear wood only a little grayish, and will not have any effect on pine at all.
Resinous and, in particular, coniferous species can behave even more unpredictably with different types of stains.
Advice. Before applying stain, test paint several samples that closely match the wood of the piece being treated.
Water-based stains often cause wood pile to rise, significantly reducing the quality of the coating. In this case, the surface of the part is pre-moistened with clean water, allowed to dry, and then sanded again, removing loose fibers.
Types of tinting products
The main advantage of treatment with a tinting composition is the aesthetic aspect (the material takes on a decorative appearance). But there are other advantages: increased service life due to the antiseptic effect, preservation of texture, absence of toxic substances, the ability to combine different tones and colors, good adhesion to the processed wooden object, increased resistance to a humid environment, ease of use.
The process of treating with stain depends on its type; the classification includes several main types of tinting material:
- Water stain is the most budget-friendly and non-toxic option suitable for interior decoration. The compositions are sold in ready-made diluted form, or in powder form, which must be diluted with water. Water-based compositions are available in a wide variety of colors. The drying process is relatively long – up to 14 hours. Resinous species must be deresined before processing, wood with raised pile must be sanded. Powder compositions must be diluted with warm water. To make the solution a shade lighter, add a little more water.
- Alcohol stain - consisting of an alcohol base and aniline dye. The product is also available in two states: dry and liquid. Unlike water-based stains, dry substances are diluted with alcohol. In general, in order not to confuse what to dilute with, you need to carefully study the instructions. Alcohol stains dry much faster - in half an hour. Attention! When working with these solutions, ventilate the room, otherwise you will get poisoned by inhaling the vapors. The evaporation process lasts only 30 minutes, so during this time there will be a maximum concentration of toxic substances from denatured alcohol.
- Oil stain - characterized by resistance to ultraviolet radiation, the solution is based on oil (often linseed), so the richness of the pigments remains for years. How long such a composition dries depends on the concentration, temperature, and other factors. On average, the period is within 2-4 hours. Application is even easier, the result is the most uniform layer possible, the pile does not rise.
- Acrylic or wax - with excellent moisture-proof properties. But the coating is not protected from mechanical damage. The compositions are applied easily, without streaks, and maintain the same tone. The choice of colors is wide, well suited for restoration work on parquet and furniture. A whole range of factors influence how long it takes wood stain to dry, but the average time for complete drying is between 4 and 5 hours.
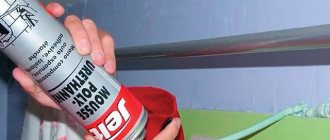
- Nitromortar – similar in properties and method of application to alcohol stain. They need to quickly cover wooden structures; a good option is to use sprayers.
What to apply?
For staining at home, use brushes, foam sponges, swabs made of soft absorbent fabric, ordinary paint rollers, and spray guns. The choice of tools and equipment is influenced by the type of composition and its drying time.
Water stains are applied with a brush, roller, swabs; for alcohol and nitro stains, spraying with a spray gun is recommended - this way the consumption is more economical, the quality of the coating is several times higher. For oil and acrylic compositions, lint-free cloth swabs and wide brushes are equally good for application.
Oil stain - FAQ
What is oil stain, and what is it for?
Why is it oily?
What are the benefits of oil stain?
How to properly prepare the surface before applying oil stain?
How to achieve uniform coloring without spots?
What tools are required to apply oil stain?
How to apply stain correctly?
How long does oil stain take to dry?
Is it possible to make your own oil stain?
Should an oil stained surface be coated with varnish or another finishing coat?
Can oil stain be used to tint a wood floor?
What is oil stain, and what is it for?
Oil stain is a paint and varnish material, namely a dye, primarily for wood products. Used to change and adjust the color of wood of various species. Some oil stains with a thick consistency and gel stains are used when painting products made from various plastics and metals to imitate the pattern and texture of wood. The binder in such stains is oil, hence the name “oil stain.”
The video demonstrates the versatility and various applications of ZAR Wood Stain oil stain
Why is it oily?
In oil stain, to give the treated surface some color, colored pigments with a relatively large particle size are used, which, getting into the pores, into the space between the fibers, into the marks left by the grinding material and other surface irregularities, accumulate there and, thus, form a coloring layer.
To hold these pigment particles on the surface, a binder is required, which is used as oil, which, after polymerization (drying), forms a thin film that holds the pigment particles.
For the production of stains, oils of plant origin capable of polymerization are used, most often linseed oil. However, despite the ability to polymerize, these oils require quite a long time to dry. To reduce the drying time, driers are added to the stain - metal salts, which serve as catalysts for the polymerization process and reduce the drying time of the stain from several days to several hours.
Another important component of oil stain is the solvent, or in this case it would be more accurate to say, the thinner, which is most often used white spirit. After all, by mixing pigment powder with oil and siccatives, we will most likely get a paste-like mass, which will be quite difficult to evenly apply to the surface. When you buy a can of oil stain, you are actually taking away a lot of thinner and very little color pigments and oil from the store.
Manufacturers also add special fillers, thickeners or gelling agents that produce stains that are thicker in consistency, evenly distributed and easy to apply.
What are the benefits of oil stain?
The main advantage and reason for the popularity of oil stain is its lightness, ease of application with a predictable result. To work with oil stain, neither a special tool nor professional skills are required, and at the same time you get a uniformly colored surface, without tool marks, without streaks or smears. You apply the stain using the tool you have, be it a brush or a rag, wait a few minutes and remove the excess - that’s it, you can enjoy an excellent result.
Oil stain does not raise the pile, saving you from additional labor costs for preparing the surface for the finishing coat.
The coloring pigments in oil stains are highly lightfast. Items finished with oil stain can retain their original color for many years.
After complete drying, paints and varnishes of almost any origin can be applied to a surface painted with oil stain. Contrary to popular misconception, the manufacturers themselves claim that aqueous materials can be applied to oil stain, but only after complete polymerization of the oil contained in the stain.
How to properly prepare the surface before applying oil stain?
The surface must be clean, dry and free of any oil, grease or wax. In principle, all these requirements are met by careful grinding. Dust from sanding can be removed with a vacuum cleaner, a sticky cloth, a microfiber cloth or a rag soaked in white spirit.
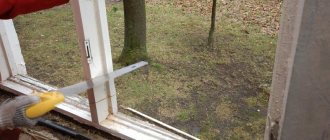
Particular attention should be paid to two circumstances that can negatively affect the result: glue stains and scratches (and other marks from the cutting tool), which are often difficult to notice on the untreated surface. Glue stains do not stain well, and as a result you will get whitish spots in places where the glue has not been completely removed from the surface. Scratches and other artificial damage, on the contrary, retain a larger number of pigment particles and are painted more intensely, revealing themselves in the most unfavorable light. To identify these defects, it is enough to lightly moisten the surface with white spirit, and glue stains and scratches will immediately reveal themselves. Wait for the white spirit to dry and sand or scrape the damaged areas.
Grinding for oil stain can be completed with P180 abrasive for hard rocks and P240 for soft ones. But keep in mind that the grain size of the abrasive also affects the intensity of the oil stain. The coarser the grain of the abrasive, the larger the scratches it leaves on the surface of the wood; accordingly, the greater the number of pigment particles will linger on the surface being treated and the color will be more saturated.
Understanding how sanding affects color saturation can help solve some problems. The stain is absorbed much better at the end of the board, where the wood fibers extend perpendicularly to the edge of the part. As a result, these areas are painted much richer and look much darker. In such places it makes sense to finish sanding with a finer grit, for example P400. Putty stains, on the other hand, may require treatment with a larger grain to attract more pigment.
How to achieve uniform coloring without spots?
Soft wood species, including the common conifers (pine, spruce, etc.) are characterized by uneven density, which leads to their uneven coloring. In lower density areas, more stain is absorbed, resulting in stains and an unattractive, dirty-looking paint job. The stains appear in a chaotic order, often not matching the wood texture pattern. And oil stain has nothing to do with it. This is not a problem with the stain, but with the material we are painting. With water or alcohol stains you will get the same, not pleasing to the eye, result.
To prevent this undesirable effect, use a special material - a conditioner, for example Varathane Wood Conditioner (this product should only be used with oil stains).
Apply the conditioner liberally to the wood, adding it in areas where it is actively absorbed into the wood fibers. Wait 15 minutes, remove excess conditioner from the surface, and immediately, without allowing the conditioner to dry, begin applying the oil stain. After 5-10 minutes, while the stain is still liquid, remove any excess from the surface.
Using conditioner will make the overall color tone lighter. If you require a darker, richer shade, wait until the first coat of stain is completely dry and then apply a second coat.
Some stains do a good job on soft woods even without conditioner. Typically, these are stains with a thicker consistency, such as Varathane Gel Stain or ZAR Wood Stain. The first is a gel stain, which overseas is often called “pine stain,” that is, coniferous stain, precisely for its ability to color coniferous species with minimal staining.
What tools are required to apply oil stain?
The essence of the process of applying oil stain comes down to solving a simple problem - you need to transfer the liquid contents from the jar to the surface to be treated, where a thin liquid layer - a puddle - should be formed. And since after a few minutes of waiting you will still have to clean up this puddle with a napkin or rag, then what exactly you apply the stain with does not really matter - it can be a brush, some kind of applicator or a regular rag. When we talk about a “rag,” we do not mean any piece of material, which still has a couple of requirements: it should not leave lint on the surface and should not cling to wood fibers. When finishing, it is best to use rags made of soft, undyed cotton fabric. T-shirts that have been washed more than once or old bedding are the best contenders. But the brush, in my opinion, is still better. It allows the stain to be applied more evenly to the surface and keeps your hands relatively clean.
In addition to the application tool, you will most likely also need:
A pair or two of disposable gloves. The most durable and most suitable for such work are nitrile disposable gloves. If you do get your hands dirty, use a special hand washing paste that effectively removes any paintwork, contains scrap and does not dry out the skin due to the use of special additives that maintain the health of the skin of your hands.
White spirit may be needed to clean tools or simply to remove stains from places where there should not be stain. If, say, you don’t like the result, then white spirit can wash off or lighten the layer of oil stain that has already been applied.
When working with oil stain, special wipes for collecting oil are a great help. With their help, you can solve a lot of problems that arise during work: remove excess stain from the surface being treated, remove drips and accidentally splashed drops, wipe your gloved hands, collect stain in the groove under the lid of a jar, etc.
To protect your eyes, you will need goggles, and to protect your respiratory organs, a special respirator that can contain vapors from organic solvents is suitable.
How to apply stain correctly?
The beauty of oil stain, first of all, lies in the ease of its application. The only thing that can hinder you is a poorly prepared surface - see the answer to the previous question: “How to properly prepare the surface before applying oil stain?” Be sure to read the application instructions printed by the manufacturer on the can itself. Despite the fact that the application scheme is similar for any oil stain, differences may lie, for example, in the time it takes to keep the stain on the surface before removing it. The instructions may also indicate the permissibility of application by rubbing.
And one more important note before you start applying. The contents of the jar must be thoroughly mixed, making sure that all the clumps of pigment that have settled to the bottom of the jar are diluted in the total mass of stain. The color pigments in oil stains tend to sediment very quickly, so quickly that the need to stir the contents of the jar continues throughout the application. Having thoroughly mixed the contents before starting work, you should also return to this procedure periodically. All this, of course, is true in cases where work on a project is delayed.
So, the surface is ready, the stain is thoroughly mixed, you can start. Apply the stain evenly to the surface. Wait a few minutes (usually the manufacturer indicates in the application instructions the time for which the stain must be left on the surface). Remove excess stain from the surface. All! The application process is completed, now you need to wait until the stain is completely dry and you can proceed to the next stages of finishing.
If you think the color is too dark or rich, soak a rag in white spirit and remove the stain from the surface. Apply the stain again, but wait a shorter time this time.
If the color is lighter, wait until the first coat dries and then apply another coat.
By removing excess stain, you will see that you can adjust the saturation of the color, and even form some kind of pattern or texture on the surface, but leaving the excess stain you need on the surface, remember that you will most likely have to wait longer for it to dry. Poorly dried areas can cause problems with adhesion of subsequent layers of finish.
How long does oil stain take to dry?
As a rule, a surface painted with oil stain is ready for subsequent finishing the next day.
The drying time for all one-component paints and varnishes, and oil stain is one of them, depends primarily on two factors: the ambient temperature and the thickness of the applied layer. For quick and proper drying, apply the stain and dry the painted item at the ambient temperature recommended by the manufacturer, usually ideally 23 degrees Celsius, +/- 2 degrees.
Moreover, the thinner the layer, the faster it dries. It is always preferable (and ultimately faster) to apply many thin coats than one or a few thick ones.
Is it possible to make your own oil stain?
Certainly. All components are available for sale in art supply stores. Instead of pigments, you can use oil art paints. Oil, thinner and driers are usually also available commercially. But this path is both labor-intensive and expensive. It is much easier to take a ready-made base that already contains all the components except the pigment, for example, colorless Danish oil (Watco Danish Oil or Rustin's Danish Oil) and add a universal tinting concentrate to it, for example MIXOL.
Should an oil stained surface be coated with varnish or another finishing coat?
Oil stain is not a protective finish. A surface treated with oil stain without additional protection quickly loses its attractive appearance. Moreover, under mechanical loads and friction it wears out quite quickly, exposing the wood.
Almost any finishing coating can be applied to dried oil stain - from wax to water-based polyurethane. The only condition is that the stain must dry completely. And in any case, it is always better to test your finishing system "on scraps" before you begin finishing the entire project.
If you have problems with the adhesion of subsequent coatings, there is a universal material that is compatible with coatings of any origin - this is shellac - applied to an oil stain, it will ensure reliable adhesion of any topcoat. There is, however, one condition - shellac should not contain wax. Again, experimenting on scraps will help you make sure that there is no wax, or simply purchase a ready-made solution, for example, a sanding sealer. In addition to being guaranteed to be wax-free, Sandable Shellac Primer is, as the name suggests, easy to sand to help you prepare a flat, smooth base for your base coat finish.
Can oil stain be used to tint a wood floor?
Yes, sure. Let's watch the video.
How to stain wood?
There are four main ways to treat wood with stain. We will look at three of them, since painting with a spray gun is a more professional option. Not everyone has such equipment.
- Processing with stain by lowering small parts directly into a container with stain. Since this exotic method is more suitable for various wood crafts.
- Applying stain using a brush. The stain is applied with a soft natural brush.
- Painting wood with stain using a roller or swab. The roller should be medium or narrow, with short or medium pile. A foam roller is suitable for water-based stains.
Dealing with defects
When applying stain, it is very important to avoid smudges, which are quickly absorbed into the wood and significantly worsen the appearance of the finish. A small amount of stain on the brush and a thin layer of coating can avoid this defect.
You can remove unwanted stains from stain using sandpaper, or in more difficult cases, with a plane. You will have to act carefully, gradually removing the darkened area of the wood and smoothing out sharp transitions.
For porous wood species in which the coating is absorbed unevenly, it is better to use wax-based stains or gel stains. They cover the surface with a thin layer and do not penetrate deep into the wood structure. You can also treat the surface of the wood with a special conditioner compound, which will prevent the active absorption of the stain.
The “apple-colored” defect occurs when pigment thinners are of poor quality or there is a lack of skill in spraying stain. Stains form on the surface covered with stain.
When applying stain with a spray gun, in order to avoid coating defects, it is necessary to adjust the material supply torch. It should be oval in shape and the spray angle should be approximately 90°.
Coating defects can arise from poor-quality sanding of the wood surface. In this case, it is necessary to remove the layer and sand it again. Then cover the surface with stain.
Remaining stains of grease and dirt due to poor cleaning will appear when applying stain. Here, too, it is necessary to remove the poor-quality layer by grinding, clean and degrease the surface. Apply a new coat of coating to clean, dry wood.
It happens that the stain is applied to the surface incorrectly. Here are the main ways to eliminate defects:
- For numbness. Immediately after tinting the wood, you need to cover the area with varnish, which will dissolve the stain. Then clean the treated area with a rag. When the drip has already dried, it will have to be softened with white spirit or ground off with sandpaper.
- For stains. If we are talking about plywood, you will have to remove all the veneer using a plane. Solid wood is also processed with this tool, removing the thin top layer.
What is the best way to apply stain?
Wood staining is done with the following tools: a brush, a foam rubber or fabric swab, a roller and a spray gun.
When tinting the surface with alcohol-based stain and nitro stain, use a spray gun. These liquids dry out quickly, and brushes on the surface leave stains. The spray gun is also convenient to use for treating large areas.
Tools for applying stain to wood
For other types of stain, use a swab, rag and brush. It is necessary to choose a brush with strong bristles so that no hairs remain on the painted wood. Rags and tampons should also be of high quality, since lint and threads remaining on the surface will create an unattractive appearance of the paint.
Oil stains are used to paint wood with brushes with natural bristles, while water-based stains can also be used synthetically.
Popular manufacturers
Today there are a large number of stains from different manufacturers on the market. It is difficult to choose the best: many products are of excellent quality and have a reasonable price. You can buy stains at any hardware store: IKEA, Maxidom, Leroy Merlin and others. The selection of a good stain for woodwork can be done from the following list:
- "Novbytkhim" (NBH). Water-based, odorless stain that forms an abrasion-resistant coating. Helps to tint doors, baseboards, railings, trim, boards and other products. It has a rich palette of shades and can be used in decoupage.
- Coswick Wood Stain. Alcohol stain for tinting and protecting wooden bases. Helps to repair minor scratches, chips, and finish edges when installing parquet. Combines perfectly with varnishes.
- "Rainbow 21". Acrylic stain contains special substances to protect against mold and wood-destroying fungi. Has a high degree of adhesion to all types of wood.
- Zar. A quick-drying composition for interior and exterior work, with a self-leveling structure. Apply to wood without stains or streaks.
- Tikkurila Pirtti (Tikkurila Pirtti). A colorless stain that can be tinted according to the Tikkurila pigment catalog in absolutely any color: mocha, antique, villa and others (36 glaze shades).
- Liberon. It is used for the restoration and protection of wooden surfaces, suitable for indoor and outdoor work. The product is resistant to UV radiation.
- Varathane (“Varatan”). Oil stain made from transparent soybean oil, has pure natural shades, and is characterized by deep penetration into the wood.
- Zerwood. Stain is water-based and comes in many colors to match noble types of wood.
- Minwax (“Minwax”). Oil impregnation, which gives beautiful shades to wood and protects products from water and ultraviolet radiation.
- Pinotex Interior (“Pinotex Interior”). Water-based decorative impregnation is widely used for finishing work and protecting wood from external factors.
- "Krafor". The product is used on products used inside and outside buildings. The finished coating is highly polished and does not require varnish.
- "Biotex Universal". Antiseptic impregnation, highlights the wood structure, gives a beautiful shade, extends service life.
- "Vertex". A popular inexpensive water stain that comes in a wide range of shades: rosewood, ebony, beech, walnut and many others.
- Tury. A wood-protective stain that produces an attractive matte finish. Emphasizes the structure of wood, protects against microorganisms.
- Renner. Concentrated product with an emphasizing effect, water-soluble, has 17 basic shades.
- "Latek". Used to highlight wood fibers. Does not fade under the influence of light, is applied evenly, and has high moisture resistance.
- "Belinka". A wax-based wood coating designed for long-term protection of wood from any external factors.
- Herlac. A line of environmentally friendly stains without harmful components. Can be used for any joinery, chipboard, lining, veneer.
Is it possible to varnish after oiling?
Theoretically and practically yes, and, at the same time, in both directions. There is just one caveat. If the process of replacing varnish with oil is easy in principle, since it does not penetrate deeply into the material, it will not be difficult to remove it by sanding.
Interesting materials:
What is a family organizer? What is an organizational form of training? What are organized emission sources? What is an orthopedic mattress? What is error 38 when sending SMS? What is Fundamentals of Accounting? What is bleach? What are relative cell addresses? What are holiday pay? What is a sector of the economy and what are its characteristics?