Today, not only many are trying to replace windows with plastic ones, but also to remove the relatively new profile. And put it in an elite wooden one! Fashion constantly makes its last squeak, but never dies, as one comedian said. Therefore, it is logical to consider dismantling windows, both wooden, old, still Soviet, and plastic, which are already tired of their owners. It must be said that the process in each case is slightly different, so it is impossible to give any uniform recommendations. This is despite the fact that the installation process has not changed in general. Only the glass wool was shuffled into polyurethane foam, and the roofing felt was replaced with a new vapor barrier membrane. Well, and, of course, before, the military commanders and soldiers used to build a lot, but now this work is done mainly by Moldovans, Kyrgyz and Tajiks.
In what cases is the procedure necessary?
In houses and apartments from previous years of construction, old wooden windows are preserved. In some cases, further use of such structures becomes unacceptable. In this case, they will have to be replaced, and the old ones must be dismantled.
Low thermal insulation
If it becomes colder in an apartment or private house in winter, outdated structures are to blame. The wood dries out, cracks, and cracks form through which cold air penetrates from the street.
If a person lives in a private house, he will have to spend more money on heating. The optimal solution would be to dismantle the old ones and install new ones.
Bad appearance
After years of use, wooden products begin to lose their appearance, the paint peels off, and the material becomes covered with cracks. Updating them won't be easy. Just painting it won't make the cracks go away. Major renovation will be required.
Low sound insulation
Every year, wooden frames gradually move away from the platbands. The sounds of what is happening on the street are heard louder and louder inside the apartment. They will interfere with concentration at work and sleep at night.
Window hinge repair
Loose or worn window hinges often cause problems. First, try tightening the screws or replacing them with longer ones, but of the same thickness. If this does not help, install new hinges of the same type and size, plus screw in new screws. Remember that steel hinges rust quickly, so prime them immediately, and then, when the primer has dried, paint them with paint that matches the color of the window.
Check how the window opens and closes. If the sash touches the post of the window frame opposite the hinges, then it may be necessary to deepen the sockets in which the hinges are installed; if it locks from the hinge side, one or both slots are too deep and, most likely, pieces of cardboard should be placed under the hinges. Window rattling can often be eliminated by using a sealing strip. Measure the thickness of the gaps between the sash and the window frame, then buy the appropriate seal.
The loose corner of the sash can be glued again with fresh glue. Clamp the joint to be glued until the glue dries.
Practical advice:
When replacing painted iron hinges with brass ones, always secure them with brass screws.
Preparation period
To ensure that the room does not become dirty after the process of dismantling old windows, careful preparation is required.
- Remove all items from the windowsill.
- Curtains or drapes must be removed.
- Furniture must be carefully covered with film.
- Remove household appliances from the room.
- Remove small items and floor coverings, if possible.
- It is better to put sheets of plywood on top of the floor; it will protect the floor from scratches or damage.
It is required to provide free access to the facility for workers.
You also need to make sure that there is an unoccupied electrical outlet nearby. If not, use a portable extension cord.
Sash corners that have lost their rigidity
If the paint on wooden windows is peeling, the corner joints of the sashes may dry out and shrink, which will cause the sashes to sag and become jammed in the frame.
Remove the sash and remove the old paint. You will be able to see the gaps in the loose corner joints between the socket and tenon and fill them with wood glue. Use a window vise to maintain the correct geometry of the sash while the glue sets. Wooden wedges can be driven into the end gaps of the joints by inserting a through tenon into the eye, which you can replace with new ones by placing them on glue.
If there are no such wedges, then to strengthen the joints you can drill through holes in them and drive wooden pins (pins) coated with glue into them. Use a drill that matches the thickness of the pin - 6, 8 or 10 mm; Drive two pins into each joint. Once the glue has dried, cut off the protruding ends of the pins with a chisel or plane.
Another option is to reinforce any loose joints with metal corner plates to reinforce the wood elements (corners). Before attaching these corners, make sure that the sash has the correct geometric shape. To give the sash a neat look, use a chisel to hollow out the seating sockets so that the corners are flush with the surface of the sash or slightly lower, and seal them with putty.
To install the reinforcing metal corner, first hollow out the mounting sockets with a chisel. Screw the corner with screws so that it lies below the surface of the sash. Putty the installed corner, and when the putty dries, sand the area with sandpaper.
These articles may also be of interest to you:
- Plastic window handle repair
- Furniture fittings. How to install hinges and cut locks
- DIY door repair
- Installation of window fittings and locking devices
How to remove glass
The next step in the process is removing the glass from the frame. To do this, you need to know how to remove glazing beads from a wooden window.
For this you need a chisel. It must be carefully inserted between the frame and the bead next to the nail. It’s better to start with the last one, then move on to the rest in a circle.
It is necessary to make careful rotational movements with the tool when it enters under the glazing bead. This will help swing the mount. The chisel should also be used as a lever.
If, after removing the beads, the nails are stuck inside the frame, they must be carefully removed using pliers.
Sticking window sashes
Over time, the accumulated layers of paint on a window can cause the sashes to jam, especially when the weather is damp and the wood begins to swell. Take a plane and plan out the problem areas - this is much easier to do by moving the sash out of the frame; then paint over these places and put the sash in place.
Make sure that all freshly planed areas are painted as this will prevent moisture from reaching the surface of the wood. Also make sure that the caulk is in good condition and is effective at keeping water out of the window and glass into the window.
To strengthen the glued joint, first drill through holes at the joint. Then hammer in the pins of the appropriate diameter, having previously coated them with glue. When the glue has dried, cut off the protruding ends of the pins with a chisel or plane.
Dismantling of platbands
If the plans do not include saving the old platbands, they will also need to be dismantled. This should be approached with care so as not to damage the wall of the house or the opening.
If the platbands are ordinary and not carved, you can easily remove them yourself. To do this you will need one of the following tools:
- bit;
- axe;
- screwdriver;
- nail puller
Using anyone, you can pry up a wooden plank, and using the tool as a lever, tear it off the wall.
Behavioral windows
Sometimes wooden sashes installed on hinges can become deformed, so normally they will only fit into the frame opening from the top or bottom. The best way to correct the situation is to install several mortise window locks in such a sash, for which it will be necessary to cut recesses in the sash, and also select grooves in the frame for the locking bolts (latches). This will ensure that the sash is held in the correct position (have someone press down on the outside of the sash while you bolt it) and the moved areas will straighten themselves in this way.
For an instant correction, you can also install a small wooden spacer in a certain place between the sash and the frame - in order to bend the bent section of the sash in the opposite direction - but do not overdo it, otherwise you will crush the glass.
A jammed sash can be easily freed by tightening the hinge screws or replacing them with longer ones.
If the sash closes tightly on the side opposite to the hinges, it may be necessary to deepen the sockets with a chisel. It is possible that the wedging sash is swollen or that too much old paint has accumulated on it. Plane the front edge of the sash with a plane.
Removing window sills
Important! To avoid hand injuries, gloves must be used when carrying out work.
First, you should check how the window sill is attached. If it is attached to the wall, hit it several times with a hammer to loosen the fastening. Use a crowbar to lift it up. After which you can remove it from the wall with your hands.
If this was not enough, a chisel and a hammer will come in handy. You need to insert a chisel between the window sill and the wall and hit it with milk.
If this does not work, you will have to use a hacksaw. It is necessary to saw through the window sill in several places and remove it piece by piece using a crowbar.
How to remove a window sash? (video)
How to remove a window sash with your own hands? I made a video and showed how to remove the sash using ordinary tools. Why remove the sash? Sometimes this needs to be done to carry out maintenance, replace seals, fittings or double glazing. If you use the services of a master, then of course you don’t need the article. The master will do this himself, but if you need to do it on your own, watch the video.
So, how to remove the sash if there are no tools. How is the sash even secured?
Everything is quite simple. If you have a regular tilt-and-turn plastic window, then there are only 2 hinges on the sash. Top and bottom. The bottom one is generally a pin from which the sash is simply removed, moving upward.
The bottom hinge sits under a plastic cap. The hinge is pinned, i.e. the sash is put on a pin. To remove the door (leaf), lift it up. The bottom hinge sits under a plastic cap. The hinge is pinned, i.e. the sash is put on a pin. To remove the door (leaf), lift it up.
Attention, there is a double-glazed window in the sash; it is 2 or 3 glasses glued together through a frame; the weight of the double-glazed window is from 30 kg per sq. m. A balcony door can weigh 50 kg; this work must be done together with a partner. The window sash weighs 20-25 kg, you can remove it yourself, but the balcony door is already 40-50 kg.
How to release the top loop from the pin, watch my video.
In the video we showed how to release the top hinge so that you can remove the window sash or balcony door. I would like to note right away that there are some types of fittings where the pin cannot be pulled out in this way and you need a special tool that will allow you to squeeze out the pin. In such cases, you need to call a specialist because you may break the loop.
How to dismantle the frame
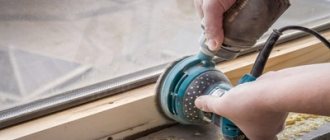
Before removing the old structure from the window opening, you need to cut it. A regular saw will do for this purpose. It is recommended to use a grinder with a diamond blade or for cutting on concrete.
After making several cuts, the frame can be dismantled. To do this, you can use a crowbar, a nail puller, or a hammer drill with an attached attachment - a spatula.
The structure should be removed from the opening without any residue. It is recommended to pick up the piece with the selected tool, using it as a lever.
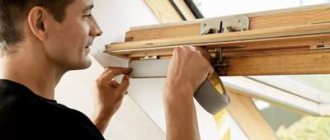
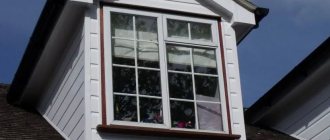
How to install (mount) a metal-plastic WINDOW in a frame house doorway or opening.
You purchased a new plastic window and decided to install it yourself, then this article and video will not allow you to make many irreparable (sometimes correctable) mistakes.
I will mount the window in a frame (in previous articles I covered its manufacture and installation) with SCREWS, rather than anchor plates for fastening windows, since the plates do not fit into the interior decoration of the room. I always use universal self-tapping screws 6*80, 6*100, 6*120, etc. The length of the self-tapping screw depends on how far it will go deep into the wood (preferably from 30 to 50 mm), but NOT GOING THROUGH the jambs.
First, remove the sash from the window. To do this, insert the window handle in a vertical position and turn it into a horizontal position (the sash should open in the rotary position). Now you need to remove the pin from the top hinge of the sash. This can be done in different ways, for example, with a flathead screwdriver.
If the window has a non-opening part (solid glass), then you need to unglaze it (remove the glass unit from the frame). The easiest way to do this without special tools is with a knife and hammer. Gently tapping to remove all the beads holding the glass unit in the frame.
If anything, I already wrote and shot a video about how to unglaze a window (How to independently and competently change a double-glazed window in a PVC WINDOW. All the nuances of this process). Having freed the window frame from all the sashes and double-glazed windows, I began to drill it out. I install a metal drill with a diameter of 5 mm in the drill and drill the window from the outside so that the drill does not break the hole on the inner front surface.
In what places do you need to drill for self-tapping screws? From the outer corner of the window 150-200 mm and also from the central lintel (impost), if any. Also, there should not be more than 700 mm between fasteners. Now I screw the screws into the holes, so to speak, I attach them to the frame.
Next, I install the window in the opening of the house on plastic pads adjustable in size (load-bearing supports).
The window supports are installed at a distance of 80-100 mm from the corner of the window and the impost.
Instructions for dismantling wooden windows
Depending on whether the windows are old or modern, there are some differences in operation. The following instructions show in detail how to safely and effectively dismantle old and new wooden windows, as well as aluminum and plastic.
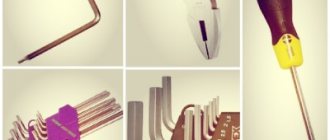
Of course, every job requires the right materials and tools.
This also applies to window removal.
- Reciprocating saw
- Concrete cutter (not necessary, but useful)
- Hammer
- Scrap
- Screwdriver
- Pliers
- Knife with insert blades
Pay attention to safety when dismantling windows.
Protect your eyes with assembly glasses from flying fragments, and your hands with comfortable work gloves from splinters. 1. Preparatory work
Before you begin removing the window, first cover the floors and furniture with protective film.
Before dismantling, be sure to measure the opening and compare it with new windows.
If the dimensions match, you can safely begin dismantling. (Fig. 1)
Window sizes in older buildings are calculated differently than in new ones. Detailed instructions on how to measure windows correctly can be found here.
2. Remove the window sash
The first step in dismantling a window is removing the sash. There are a number of differences in dismantling old-style or modern windows. An important point is whether you are removing a swing sash with old hinges, or a tilt and turn sash with modern fittings.
a) old-style wooden windows
Simply open the sash, lift it up and remove it from its hinges, just like a door. When removing, make sure you don't stain the wall with oil pins.
b) New wood, plastic and aluminum
If the sash is pivoting, simply open the sash, lift it up and remove it from its hinges, just like in old windows.
For a tilt-and-turn mechanism, open the sash and place the handle in the tilt position. Now lift the sash so that the pin comes out of the bottom hinge. Now take the so-called scissors - a metal strip that holds the sash in an inclined position, at the top of the window, and simply unfasten it. (Fig. 2).
It is convenient to remove the sash with an assistant, especially if the scissors are located high.
c) Remove the sash from modern wooden, aluminum or plastic windows
Removing the sash from a modern window - be it wooden, aluminum or plastic - can be done easily and quickly compared to first-generation windows. All you need is a pair of pliers or a screwdriver.
Regardless of whether the tilt mechanism is installed or not, simply open the sash and pull the pin out of the top hinge. To do this, first remove the plastic cover from the top hinge. Once the top hinge is open, simply pull the pin down (Figure 3). Now you can easily remove the window sash from the bottom hinge by lifting it up.
3. Dismantling the window frame
The frame holds the sash and is rigidly mounted into the opening. A crowbar and a reciprocating saw or a hand router are used here.
Before you begin dismantling the window frame, first cut the joint between the window and the slopes. If there are flashings, tear them off. (Fig. 4a) To cut old frames, use a concrete router so as not to damage the tool when it comes into contact with concrete or brick (Fig. 4b). If you don't have a concrete router, use a stable saw, but be careful when moving the saw close to the wall (Figure 4c). In addition to the danger of damaging the tool, if it jams, you can injure yourself. Since fasteners are mainly installed at the top and bottom of the window, it is enough to make a cut on the left and right sides of the frame. If it later turns out that the fastenings are not limited to the top and bottom, make additional cuts. The frame has now been cut into several pieces so that it can be safely removed. Typically, only six cuts are needed to cut the window frame into several pieces: two on the left, two on the right, one on the top and one on the bottom. Make the slots as V-shaped as possible so that the frame parts do not become wedged when removed.
Now insert a crowbar or hammer under the window frame and move the individual parts away from the window opening. If you notice that the frame is still fastened in one place, simply cut the masonry again in this place (Fig. 4d), or use a strong push with a crowbar to pull out the fasteners.
With this step-by-step guide, you'll be able to remove a window - a similar procedure also used when removing balcony doors - simply, safely and efficiently. If you want to see for yourself how this kind of dismantling happens, we will post a video soon.
What it is?
Work on window structures, in addition to installation, necessarily includes dismantling after some time of operation. This concept is explained by experts as the primary stage of replacing a window opening, which is carried out with or without preserving the old window (for restoration).
Dismantling is carried out using special carpentry tools. It includes several main steps :
Preparing for the process.- Removing window sashes.
- Cutting and cleaning of the impost and frame.
- Separation from the wall of the window sill and ebb.
- Cleaning the surface from insulation and cleaning the opening.
- Garbage collection.
You can do the dismantling yourself or invite specialists. To carry out the dismantling steps, builders use the technical document SP 325.1325800.2017, which describes the sequence of the process and is applied to any buildings and structures.
When removing the window structure, be sure to follow safety precautions and protect yourself from possible injuries:
- work clothes;
- gloves;
- glasses;
- shoes;
- comfortable headdress.
The specifics of the dismantling work depend on the pre-drawn up work sequence plan and the type of window construction (sliding, removable, hinged).
Why is it worth saving old wooden windows?
There are several reasons:
- Opportunity to save a significant amount of money. There is no need to take out a loan or arrange an installment plan for new windows, or spend tens of thousands of rubles from the family budget. Undoubtedly, if such an opportunity exists, and old windows are practically beyond repair, you can take advantage of it;
- Possibility of modification, change of configuration and appearance of windows. The wooden parts of the frame and sashes are repairable. You can change the color, shade, general styling, easily replace glass, install interior decor, stained glass elements;
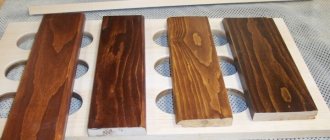
- The material for making windows is coniferous wood or harder and more expensive wood - ash, oak and others. All parts are heat-insulating and sound-insulating, durable, provided they are properly protected;
- Environmentally friendly products without synthetic additives that give off an odor or a negative background when heated in the sun in summer;
- The function of maintaining the indoor microclimate due to the hygroscopic properties and air exchange of wood!
You can always save yourself from the hassle of repairs, restoration, and window insulation. But this article is about preserving them, not replacing them, which is a radical alternative!
Preparing the opening for installing a new window
If a wooden window has been dismantled, then the opening must be cleaned of the remnants of old mortars, and wooden embedded parts and crumbling areas must be removed. After dismantling the PVC window, it is necessary to clean the opening from the remains of the mounting foam, remove the PSUL, and clean up any traces of glue and sealant left from the plastic slope. Next, you need to inspect the surface, if necessary, knock down sagging and bumps, clean from dust, degrease the surface of the opening, prime, and seal cracks and cavities with a solution.
Inspection and determination of the scope of work
You meticulously inspect the window sashes and frame, open and close them several times, see if there are any cracks and how big they are. Assess the condition of the wood: are there any rotten areas, if so, what are their sizes.
The first stage is dismantling and assessing the condition of the windows
The first step is to determine whether the affected areas can be restored or whether the rotten fragment requires complete replacement. If replacement is inevitable, there are only two options: if you know how to work with wood, you cut out the required part yourself; if you don’t, you order it from a carpenter. All other window defects can be eliminated by anyone with “straight” hands.
How to insert a pin into the top loop of Maco Multi fittings without special tools. key?
A question for specialists or for those who understand Maco fittings: how can you remove the pin from the top hinge or, on the contrary, insert it there without a special key (which I don’t have). Just before installing the Maco Multi tilt-and-turn fittings on the window, where there had previously been some kind of Turkish turning fittings, I accidentally inserted a pin into the hinge. And now it’s impossible to remove it or insert it completely (since the installation, with the exception of threading the pin into the upper loop, is completed).
07/01/2012 at 12:51
Nothing complicated. You just need to press down on top of the thread, even with the end of a screwdriver. The pin will drop a couple of mm. then use the same screwdriver to pry at the grooves in the lower part of the pin. It is inserted back simply by pressing until it stops. There is a spring ring in the loop itself. Here is the top hinge disassembled to make it clearer.
07/01/2012 at 13:34
Mikael wrote: Nothing complicated. You just need to press down on top of the thread. At least press down with the end of the screwdriver. The pin will drop a couple of mm. then use the same screwdriver to pry at the grooves in the lower part of the pin. It is inserted back simply by pressing until it stops. There is a spring ring in the loop itself. Here is the top hinge disassembled to make it clearer.
I removed the hinge from the frame and tried again to press it in from above and use a screwdriver to pry it into the second groove, which was free (that is, the pin only fit into one groove). I don’t know what happened there after it was fixed, but this latch holds the pin firmly: I tried to pull it out with pliers and to push it in with a hammer, but nothing. By the way, in your photo, on one end of the pin the edge groove is larger than on the other end or is it just me? If so, does it matter which end of the pin you put into the loop?
Replacing rotten sections of a wooden frame
If the area has rotted out, you can help the grief in two ways:
- cover with special reinforced putty, recreating the required shape;
- remove the damaged area by inserting a patch in its place.
A reliable way to eliminate rot is to cut out the damaged area.
The second option would be more correct from the point of view of durability: here it is possible to remove the entire infected area, ensuring that the rot will not spread further. The technique is simple. Cut out the affected area, taking some healthy wood. Cut out a fragment of exactly the same shape. Coat the joints with wood glue, insert the patch, level it, if necessary, fix it, and leave until the glue dries completely.
Afterwards you need to putty the seam, sand it and paint it. All. The window frame (or sash) has been restored.
But it is not always possible (or desire) to cut out a damaged piece of wood. Then you can use epoxy putty with reinforcing fiber. Once dry, it is hard enough to hold its shape.
First of all, we separate everything that can be removed. All the rot and rot. We blow away the dust, where possible, and get to a healthy tree. If you plan to use the restored frame for a long time, treatment with antiseptic impregnations is necessary: to prevent, as far as possible, the spread of rot.
A rotten section of a window frame can be restored using putty with reinforcing fiber
Afterwards, the composition is applied to the damaged part with a spatula. This type of putty has a fairly thick consistency; any configuration can be sculpted. Give it a shape close to the desired one, but a little larger in size: after drying, you can sand it and level it out. It takes approximately a day to dry, but the exact time depends on the composition, temperature and humidity of the air. After sanding and leveling, all that remains is to paint the window. Then nothing will be noticeable at all.
What is the repair of old windows?
Repair and restoration of windows involve returning the previous qualities and advantages to the state of a new or practically new product. Standard methods of restoring former characteristics are painting and pasting the junctions with paper. But, often, this is not enough, because more often than not the work is carried out without proper qualifications, according to the usual home standard - the cheapest paint, foam rubber + paper. In this way, it will not be possible to save the windows, except to provide temporary peace of mind to yourself. and then, until the first serious cold weather.
At the moment, experts have tried dozens of methods, thanks to which only a few of the most effective ones have been developed, which are worth using. They are not very expensive, but they will require a lot of attention and time. On the other hand, everyone can afford to spend a weekend to completely tidy up one window in the kitchen or bedroom. Within a month, you can completely renew your windows and not worry about the future cold autumn and winter!
Do-it-yourself dismantling of wooden windows
Do-it-yourself dismantling of wooden windows
Before installing a new metal-plastic or wooden window, it is necessary to dismantle the old one. This work does not require any specific skills or tools and is designed more for strength than for intelligence.
When dismantling the window, you will have a lot of dust and debris, therefore, it is advisable to remove all curtains, curtains, carpet from the floor and remove all furniture away from the experimental window. The floor surface needs to be covered; for this, some old carpet runners or rags will do.
Tools you will need:
An electric jigsaw or grinder with a wood circle to cut the window frame.
After preparing all the necessary tools, you can begin to work. Firstly, there is no need to remove glass from old windows unless you need them in the future. An old wooden window is usually dismantled along with the glass.
First you need to remove the doors. To do this, you need to open them and try to remove them from their hinges. If the sash does not respond to the efforts of only one hand, then you need to try to pull it off its hinges using a crowbar or a hatchet. To do this, place the tool under the bottom of the sash and pull it sharply upward.
If the hinges are very soured or there is no way, or rather space, to move the sash upward, then you can simply saw the hinges with a grinder and that’s it, it will be much faster and easier than trying to somehow move the hinges that have long been unusable.
After you are done with the doors, you can begin dismantling the box. Be prepared for the fact that while working with the box, plaster may fall off the slopes, and sometimes the layers of plaster are very large and the entire slope falls off.
You also need to take into account the fact that sometimes houses were previously built in such a way that a lintel was not placed on the window opening, but a box was simply walled up and the bricks were laid directly on it. This only applies to old small private houses and outbuildings. So check if this jumper is there. If not, then when you pull out the box, bricks that were held directly on it may fall off from above. In this case, it would be better to first cut into the wall and install a reinforced concrete or metal jumper, and only then remove the box.
To make the box easier to remove, it is necessary to cut its side posts in the middle. This can be done using an electric jigsaw or grinder. If there is neither one nor the other, then an ordinary hacksaw for wood will do, but this process will take a little longer.
After the side posts have been sawn, you can try using a crowbar or a hatchet to pull out the box if it has not yet fallen on its own.
Share this article with your friends:
Author: Administrator| Date: 2011-08-16| Views:(7075)| Comments:(0)
Coloring
You choose the type of paint yourself, based on your preferences. The only thing I can advise you to do is to take glossy or semi-gloss. They retain their color for a long time. This is especially true for white paints. Surfaces painted with matte white paint quickly turn gray: they have a porous structure, which gives them a “matte” appearance. These pores become clogged with microscopic dust particles, which give a grayish tint. Therefore, for perfectly white windows, take gloss or semi-gloss.
The first layer is a primer. This is one part paint diluted with two parts of a suitable solvent. After the primer has dried, you can apply the base paint. There will be several layers, so everything will be painted over.
Apply paint in thin layers in different directions
Do not use a lot of paint on your brush: there will be drips that are not easy to deal with. Dip, squeeze, rub well. You need to move from top to bottom without changing direction. This is the only way the layer will be even. Apply the first layer, moving the brush from left to right, the second - from top to bottom, and the third layer - from right to left.
Each subsequent layer is applied only after the previous one has completely dried. If after the first application of paint there are streaks and uneven spots, after the paint has dried, take sandpaper and smooth them out. Just don't wear it down to wood. Do the second layer more carefully, but even here you can still sand it a little. The third one should be without flaws. After the paint has dried, your self-restored window can be installed in place.
Possible mistakes
Difficulties during dismantling may arise for non-professionals if they do not follow the sequence of window removal and carry out improper preparation for the work process. Errors that will complicate the process and damage elements of the window structure, especially if it is dismantled for restoration, can be of the following type :
- Failure to remove sealant and caulking at frame seams.
- Do not remove the sashes immediately (this will severely damage the glass).
- Applying force rather than using a prepared tool.
- Not removed fittings, glazing beads and fasteners (nails, screws).
When sawing the frame, the slopes may be damaged, so it is better to cut grooves in the plaster in advance and carefully remove the frame along them , especially if you need to save it. When working with tools and old windows, you must follow safety precautions.
It is easier and more convenient for two people to carry out the dismantling process than for one person.