To properly insulate wooden walls, you need a material that has low thermal conductivity, hygroscopicity, a long service life, and ease of installation and use.
Among the wide variety of thermal insulation materials for wooden walls, Penoplex deserves special attention, as it fully meets all requirements.
When choosing this insulation, it is worth considering installation methods, advantages and disadvantages of the material, as well as the features of working with it.
Types of material
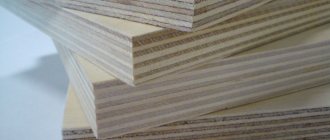
The product is one of the types of polystyrene foam, therefore it has many of its characteristics. This is a special polymer filled with gas. The composition of the material is foamed polystyrene, various additional substances that improve its structure, as well as a small amount of water. Manufacturing technology allows us to obtain a unique product with high thermal insulation properties. Expanded polystyrene also perfectly prevents sound transmission.
Floor insulation in the house Source masterskayapola.ru
The material is produced by various methods, depending on which it acquires certain characteristics. The result is products with different densities, so each type is used in a specific area. Also, the manufacturing method affects the final cost of the substance. Main production methods:
- Pressless. These are granules dried several times and then foamed. This material is very fragile and retains moisture well inside.
- The pressing method has low thermal conductivity. The granules are subjected to additional compression, due to which they close and change the structure of the product. The material turns out to be of higher quality, but the manufacturing technology takes longer, which increases the price of such foam.
- The autoclave method is used quite rarely, since its production requires a special device. This material is practically not used for home insulation, since its characteristics do not meet the task.
- The extrusion option provides for the production of household products. Various foams, packaging and other products for household needs are made from it. This polymer is not used for insulation.
- The extruded method is most often used to produce materials that can then be used to insulate a home. This is a type of pressless manufacturing, but it must involve an extruder. The product retains heat well, since its pores are very small in diameter, they are maximally closed to external influences. Thanks to these indicators, this type has become widespread among craftsmen and users; it is presented in a large assortment on the construction market.
Work on insulating a wooden house Source rubankom.com
Mineral wool
It is worth noting that stone wool made from basalt rocks is quite often used (its characteristics are described in detail here). But it has a “minus” - it cannot be compressed. Therefore, very precise sizing will be required, and therefore labor costs will increase. The use of glass wool is associated with additional installation difficulties, in particular, with measures to protect the skin and respiratory tract from its dust.
Therefore, it is more advisable to use mineral wool. However, it must be taken into account that working with ecowool requires certain professional training.
For high-quality insulation, the density of mineral wool must be at least 30 kg/m3. It is better (more convenient) to use the material in the form of slabs rather than rolls. Thickness – 50 mm.
- High vapor permeability.
- Practically does not “shrink” during operation.
Technology
The total thickness of the “insulation” is usually from 10 cm. Therefore, installation is carried out in at least two layers, with offset joints between the slabs. They are placed “at odds” between structural elements (racks). The material shrinks slightly, and after laying, increasing in size, it is tightly fixed at the landing site.
Unlike foam plastic, joints are sealed with reinforcing adhesive tape. In this regard, the insulation process is simpler.
General recommendations
- Polystyrene foam is a dense material, so it will not allow the walls to “breathe.” Cotton wool absorbs moisture well. Based on this, the issue of natural ventilation is one of the paramount ones.
- A material such as glassine is excellent for waterproofing. But there must be a gap between it and the insulation (an air gap for ventilation).
- To reduce the amount of work associated with processing the material, you need to decide in advance on the size of the slabs. Based on this, mount the frame with the required distance between the posts (according to the width of the products).
- For high-quality protection of the foundation, it is better to use permanent formwork, which is mounted from slabs of the same extruded polystyrene foam. It simultaneously serves as both a mold for pouring and an insulator (hydro- and heat).
Conclusion
There are different opinions regarding the quality of insulation with this or that material. Some people may praise the same “thermal insulator” too much, but others may not like it. Here you need to understand the following.
Firstly, a lot depends on the correct choice of “product”. In this case, you must first of all focus on the conditions under which it will be used.
Secondly, the quality of thermal insulation largely depends on the conscientiousness and professionalism of the workers. After all, ill-considered actions, violation of technology and irresponsibility can ruin anything.
Before choosing the appropriate material, it is a good idea to consult with people who already live in a frame house, and most importantly, built it with their own hands. Their assessment given to the insulation used will be quite objective. You can read the material on insulating a house from the outside, where similar work is described.
There are also cheaper options - filling the gap between the walls with expanded clay, sawdust, even straw. But here everyone must decide for themselves, taking into account the following aspects:
- the walls will be thicker;
- maintainability is “zero”, since the entire structure will have to be disassembled;
- except expanded clay, all other materials quickly get wet.
We have indicated only the main aspects of insulation work. But the wall of a frame house itself is a “pie”, in which, in addition to insulation, there are other layers (waterproofing, vapor barrier). Therefore, it is necessary to study the features of their arrangement, as well as the criteria for selecting appropriate materials.
How to insulate a wooden house with foam plastic
To understand how to glue foam to wood, it is important to study its structure. The material is most often supplied in the form of lightweight but durable slabs, the thickness of which can vary significantly depending on the type and purpose. The structure of the substance allows it to work effectively in any weather and temperature conditions - it is not afraid of mechanical damage and natural factors.
Walls of a house with polystyrene foam Source otdelkaexp.ru
Due to its unique composition, expanded polystyrene is successfully used for both internal and external insulation of homes. The difference will only concern the method of fastening the material:
- The house can be insulated from the inside by placing sheets of polystyrene foam on wooden walls. This method is not used often because it has significant disadvantages. Expanded polystyrene for interior decoration has high heat-insulating properties; it also does not allow moisture and water vapor to pass through it. As a result, the walls will not warm up well, but they will be exposed to cold and wind from outside the room. This can lead to the formation of a dew point inside the room, which can lead to the accumulation of condensation between the wood and the insulation layer. Constant exposure to liquid is dangerous by the onset of putrefactive processes, the appearance of fungus and mold on the surface of the walls.
- The external method of insulation is increasingly used by craftsmen in the construction and renovation of houses. Its second name is a ventilated facade, which has special properties. When installing insulation, waterproofing is used to protect it from the effects of weather factors. Also, this method allows the sheets to be constantly ventilated, which has a good effect on the durability of such a coating. The only drawback of the solution is the high cost compared to the internal option.
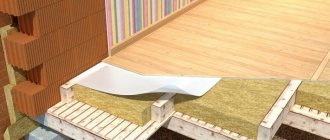
A wooden floor can also be insulated using expanded polystyrene - in this case, sheets of material are laid between the floor joists. If the first floor is being finished, this method prevents cold air from entering from the ground, and in the case of intermediate floors, stabilization of the temperature regime is achieved. The heat is evenly distributed between the rooms, which avoids overheating of the upper rooms. Insulated floors help create a normal microclimate in the house if the upper floors are not heated in winter.
Insulation of a wooden floor
The most common way to insulate a wooden floor is through joists. If you have to insulate the floors in a habitable house, then the floor covering must first be dismantled. After opening, the board/plywood base and joists are treated with antiseptic and water-repellent agents. Then the following actions are performed:
- A layer of dense waterproofing film is laid on the base under the logs.
- Penoplex strips, cut to size, are laid in the space between the joists.
- Floorboards, parquet, laminate, etc. are laid on top of the thermal insulation coating.
Advantages and disadvantages of the product
The production of the material is possible only in production; polystyrene foam cannot be made at home. The substance contains styrene, which is a waste product from oil refining, so the product is not highly safe and environmentally friendly. Despite this circumstance, polystyrene foam has significant advantages:
- Low price, which is significantly inferior to other types of insulation.
- Good density, allowing you to effectively retain heat indoors.
- Low weight and excellent elasticity.
- Does not allow sounds to pass through walls.
- Easily tolerates interaction with liquids.
- Widely distributed in stores, you can find different types of products for specific tasks on sale.
- Large selection of structures and shades.
- High resistance to various adhesives and dyes, chemical inertness.
- It does not rot and is durable - the decomposition of the material can last for years.
- It is not subject to ignition, which allows you to protect a wooden house from fire.
- Long period of operation, which is more than 15 years.
- Easy to cut and install, they can be done even without the use of special equipment.
Building walls with foam plastic Source remontami.ru
The negative aspects of the material are associated with its synthetic origin, as well as its complex structure, including many chemical compounds. Among the disadvantages of polystyrene foam are the following:
- Poor tolerance to sunlight, prolonged exposure to which leads to damage to the product. Also, the initial properties of a substance can change significantly.
- Flammable substances and solvents can damage the structure of the material. It is dangerous to use gasoline and fuel oil.
- Animals and insects can easily destroy or damage polystyrene foam.
- When ignited, a large amount of harmful substances are formed that are extremely dangerous to human health. Inhaling them can be fatal.
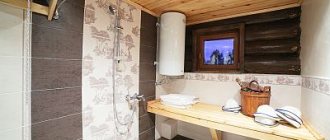
- The material should not be heated, as this results in the formation of toxic compounds. For this reason, it is prohibited to use polystyrene foam in baths and saunas.
Insulating a house from the inside Source stroyrem-nn.ru
Types of penoplex
To insulate a wooden house, the following types of penoplex are used:
- slabs for vertical structures. They are designed to insulate walls and partitions inside and outside the house. The insulating material has a density of 22 kg/m3. The milled surface of this type of penoplex improves adhesion to various mixtures: adhesive and plaster compositions;
- "Comfort" series. This is a universal insulation material, which, due to its positive properties: strength, low thermal conductivity and moisture resistance, is successfully used to insulate ceilings, walls, plinths, foundations, and walls. It is able to withstand high humidity, so it is widely used as a heat insulator for bathrooms, baths and saunas. The density is the same as the previous type;
- heat insulator for roofing. It has a high density: from 26 to 34 kg/m3. Successfully used for pitched roofs. The slabs have a U-shaped edge, due to which the joints between the sheets are almost invisible. The insulation forms a flat surface on which any roofing materials can be laid;
- insulation for the foundation. It has a high density of 27-35 kg/m3. Durable, withstands significant loads. Insulated structures—foundation, but also floors, basement.
Expanded polystyrene insulation
Any type of material is subject to environmental influences. Products are affected by temperature fluctuations, humidity changes, sunlight, precipitation and other natural factors. Therefore, to prevent the gradual deterioration of the foam, insulation is used to protect vulnerable areas. In the case of a wooden house, the fight against humidity, which provokes putrefactive processes, is especially important.
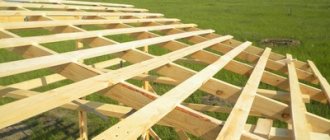
Arrangement of the frame on the building Source ultra-term.ru
Tips for installing insulation
When insulating with Penoplex, owners first need to look at the structure of the building. For example, if it is a frame house, then it is justified to insulate all structural elements of the external and internal zones with polymer material.
For a reliable connection, slabs with a quarter groove and a ridge (tongue and groove system) around the perimeter are selected. Suitable sheet material without dents, bends or manufacturing defects.
Laying the material
In a private home, it is important not only to know how to attach polystyrene foam to a wooden wall, but also to understand the features of installation on the floor. In the latter case, the material is laid along the logs. Work begins by creating a foundation at the bottom of the structure.
Expanded polystyrene sheet on the floor Source beton-house.com
The easiest way to do this is by two methods. The first of them is to install boards under the joists, on which a layer of insulation is then laid. The second method involves installing slats on both sides of the joists, which serve as the basis for laying the material.
Laying polystyrene foam on the wall Source baurum.ru
Before installing insulation, it is necessary to lay waterproofing so that moisture from the ground or concrete does not penetrate deep into the material. This requirement is relevant even for monolithic types of foundation. After this, you can lay the polystyrene sheets themselves directly. It is best to install the slabs in layers, in a checkerboard pattern, so that the visible seams overlap.
Installation of foam plastic boards Source remoskop.ru
When placing insulation under the joists, it is necessary to leave a 2 cm gap for ventilation. If the installation was made too high, the structure will need to be raised using lathing.
Base insulation with polystyrene foam Source uteplix.com
To prevent steam from the room from penetrating the material during the heating season, a layer of vapor barrier is laid. Lastly, they begin to organize the subfloor. To do this, use a board, plywood or OSB board.
Insulation of the roof of a house Source svoidomstroim.ru
Rules for carrying out insulation work
If the house is ready for thermal insulation, it’s time to take care of the preparation directly for the installation itself. You will need the following tools and materials:
- insulation for sealing cracks in walls: tow, jute, sealant;
- for laying natural sealants - a set of chisels, for synthetic ones - a spatula;
- fire-retardant composition for wood processing;
- roller, wide brush or spray bottle for applying fire and bioprotection;
- hydro- and vapor barrier films;
- foil tape;
- construction stapler;
- wooden blocks and slats for installing sheathing;
- self-tapping screws;
- insulation calculated based on the area of the walls with a small margin;
- tool for cutting material;
- level and plumb line, tape measure, screwdriver, screwdriver, hammer.
Fastening the material to the walls
Typically, insulation is laid on the facade using frames. This technology allows you to effectively hold the material and simplifies the installation of the entire structure. The procedure is performed gradually, step by step.
Preparatory work
Attaching expanded polystyrene to a wooden wall begins with preparing a reliable base. Since wood is very sensitive to external factors, it must be protected as much as possible from damage. Both old and new buildings are periodically insulated, so you need to pay close attention to the quality of the surface. It is important to remember that before starting the main work, the wood must be dry; remaining moisture can provoke putrefactive processes and even destruction of the structure of the material.
In painted rooms, all coating should be carefully removed, and the joints between the logs should be well sealed. All procedures must be completed before the start of insulation work. Damage is also eliminated; any remaining bark is removed, if there is any on the surface.
Scheme for attaching foam plastic Source masterfasada.ru
The prepared and dried wall is treated with antiseptic solutions. Particular attention is paid to this point, since after installing the insulation, this area will become inaccessible for viewing. As a result, it will not be possible to notice the formation of mold or the appearance of insects and fungi there.
Installation of sheathing
Installing the frame allows you to securely hold the insulation in place, prevents sliding and sagging, and also allows air to freely penetrate and ventilate the walls of the house.
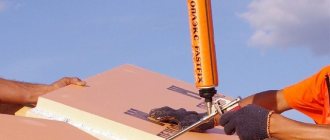
Application of adhesive foam for installation Source opechkah.ru
Features of internal fastening
Experts pay attention to the following factors:
- internal insulation with foam boards is carried out only if there is no opportunity to do work from the inside;
- Insulation can be done in a house only after final shrinkage, as practice shows - after a year.
- the thickness of the penoplex should not exceed 30 mm, and its density should be as low as possible to avoid the formation of condensation on the wall;
- It is necessary to attach a foil film to the insulation to prevent the appearance of dampness and deterioration of the microclimate. The algorithm of actions generally remains the same as for the exterior decoration of a house, taking into account the stated factors.
Video description
How to glue foam plastic?
If you have a choice between glue and foam, then it is better to choose the first option, since the consumption of the product will be much less, and the quality of gluing will remain the same. The substance is applied between the wall and the insulation in a thin, uniform layer to securely attach the material to the surface. Before starting the procedure, it is important to thoroughly clean the area, remove traces of paint and varnish, repair potholes and damage, and dry the wood.
Applying glue to polystyrene foam Source balkon4life.ru
This method is well suited for timber buildings, but it makes no sense to use it for log buildings. This is due to the heterogeneous surface of the latter, which reduces the area of contact between the material and the glue. Differences in the size and shape of the logs will make it difficult to create an even and smooth area, so the results of the work may be far from ideal.
After glue or foam is applied to the foam, sheets of material are laid evenly across the entire work area. Compared to using a frame structure, covered areas are more difficult to process and must be treated with caution in further finishing. The easiest way is to resort to plastering the surface, but this method is not very suitable for wooden houses. It would be better to build additional sheathing for the facade so that the choice of design becomes wider.
Adhesives for foam plastic in tubes Source samodelino.ru
Finishing
Using polystyrene foam allows you to create a kind of “thermos” that effectively retains heat inside the home and prevents cold from entering the building. This way you can significantly reduce heating costs and save significant money in winter.
Universal polymer glue Source samodelino.ru
After preparing the base and sheathing, a layer of insulation is laid, and then the finishing of the building begins. If you approach this process responsibly, you will eventually be able to bring almost any idea to life. The most commonly used materials are wood - lining, imitation timber or block house. Sidings are also popular. Each type of finish differs in the method and type of fastening. Usually, to equip the facade, an additional frame is used, which is installed on top of the main sheathing.
General information
Insulating wooden buildings with penoplex is not recommended, since wood is a natural, “living” material that requires constant air circulation. Without the ability to “breathe,” the wood will fog up and in the future this will lead to rotting. We recommend that you use suitable materials for insulating wooden walls, for example, mineral wool.
How to prepare the wall surface?
Initially, it is necessary to clean the wall surface from all kinds of dirt, stains and dust. If the wall surface is not perfectly flat, you need to try and use putty to bring it to such a state.
Please note that the use of putty is suitable for leveling concrete and brick surfaces, but not for wooden and plaster surfaces - here you will have to use sandpaper or brushes of the required hardness. The work of leveling the walls is quite painstaking and dirty, but without this step you cannot proceed with the installation of penoplex.
After you have completed the leveling work
The walls need to be primed. The most suitable choice would be a deep penetration primer. The assortment of construction stores offers many brands for the buyer to choose from. The next stage of preparation will be the location of the guide for attaching the penoplex - the starting base strip. The plank can be either wooden or metal. Its purpose is to help fasten the penoplex plates as quickly and conveniently as possible, without allowing the plates to move or be positioned unevenly.
Gluing foam to a wooden surface
Before fixing the material, the surface is thoroughly cleaned and dried. To remove dust and small debris, use a sprayer and a regular brush.
Sheet of foam plastic on a wooden surface Source blog-potolok.ru
The base must be coated with a primer, and then a mesh must be glued for subsequent reinforcement. Using a stapler or adhesive, the material is securely attached to the surface.
Since the mesh is supplied in the form of rolls, before starting to work with it, it is necessary to cut identical strips approximately 40 cm wide. It must be secured in such a way that at least 10 cm is under the foam layer. After installing the insulation, the remaining sections of the product are wrapped and glued to the sheets.
Foundation insulation
First, the foundation wall is leveled if the differences in unevenness are ≥ 2.5 cm. The cement-sand mortar is applied directly to the surface or to a chain-link mesh secured with staples. Then waterproofing is carried out, bitumen mastic is applied in a layer 2–4 mm thick, and a roll of material is glued on top. Acrylic glue is applied pointwise (at 5-6 points) to the foam sheet. After this, the plate is pressed against the surface for 30 - 60 seconds. The following slabs are glued above the bottom row.
After sheathing, the seams are filled with glue, the surface is covered with fiberglass reinforcing mesh, and the foundation is plastered again.
Video description
What is the best way to glue polystyrene?
Before directly applying the glue, the surface must be treated with antifungal and antiseptic drugs. It is important to choose the right composition, since subsequently access to the junction of materials will be very difficult.
The cheapest option is dry polystyrene foam adhesive, which is made from cement. For use, this product is diluted with liquid. The result is a reliable and durable compound for attaching foam to virtually any type of material.
Also recently, solutions based on polymer cement have become increasingly widespread. They are universal in use and are well suited for gluing insulation to any type of base. To work with facades, you can use products that contain various mineral fillers. Many companies produce products to increase the protective properties of polystyrene foam. After applying glue to the front surface, the material becomes resistant to various environmental factors. In addition to the advantages, such substances also have disadvantages - a long polymerization time, which is about 3 days.
There are also aerosol mixtures containing polyurethane. They can be used as glue or to fill gaps and seams between sheets. These are universal substances that behave equally well both indoors and outdoors. They can be applied to facades, roofs and walls of houses, flooring and other wooden surfaces. In all these cases, the products set quickly and hold the material securely for a long time. And although the prices for such mixtures are relatively high, they are justified by the convenience of applying the glue.
Expanded polystyrene sheets usually begin to fix within 2 hours after gluing the surface. For better stability, the material is secured with anchor bolts for facades.
The main advantages of polyurethane products are: fire resistance, good tolerance to changes in humidity and temperature, environmental friendliness and safety for health. Modern production technologies make it possible to obtain high-quality and easy-to-use compositions. When choosing an adhesive, it is important to consider its chemical reactions with the material. To prevent the destruction of polystyrene foam, you need to purchase products that do not contain acetone or gasoline.
Sometimes sheets of expanded polystyrene need to be glued together. For these purposes, use any wet or dry glue that does not contain solvents. When choosing products, a specific task is taken into account, and then the most suitable product is selected to solve it.
Types: how to choose insulation
By selecting a certain type of slab from the product line, you can not only insulate a wooden house with penoplex, but also properly insulate buildings and structures for a wide variety of purposes. Penoplex is available in several types, differing in alphanumeric code in the marking:
- 31 – a type resistant to low temperatures, widely used for thermal insulation of private houses, balconies and loggias, shallow/surface pipelines;
- 31 Standard – unstable to deformation and load, used for thermal insulation of swimming pools, water pipelines, heating pipelines and utility networks;
- 35 – difficult to ignite due to the fire retardant in the composition, the most popular type, used in almost all building and enclosing structures;
- 45 is a load-resistant type, indispensable for thermal insulation of floors of production workshops and warehouses, construction of roads, railways and airfields.
Penoplex is produced in the form of slabs 1.2 or 2.4 meters long, 0.6 m wide, 20–100 mm thick. In private construction, the most popular are slabs with a strength of ≤ 300 kPa.
Fastening foam with dowels
For external finishing of facades, sheets of expanded polystyrene are used, which are attached to the frame using disc dowels. These elements are considered mandatory for reliable fixation of the material. The parts act as insurance in case the slabs sag, so that they cannot slide and peel off from the wall. Dowels are placed according to certain patterns, which are selected for each specific building.
Most of the elements will be needed to fix the material on the plaster. For solid foundations, 2 to 5 dowels per square meter of area will be sufficient. To calculate the appropriate length of fasteners, it is necessary to measure the thickness of the plaster layer. The size of the element must extend through the entire layer and be fixed at the base of the wall.
The foam is secured using dowels as follows:
- Fixation is carried out 4 hours after applying the glue, so that it has time to set well and is not damaged during installation of fasteners.
- Surface drilling is performed with high precision, having previously installed a special limiter in the hammer drill, which does not allow penetration beyond the size of the fastener.
- A disc-shaped dowel is placed in the completed opening. Inside the element there is a plastic core, which is designed to open it in the hole.
- Drive the fasteners very carefully so as not to deform the surface of the insulation. Otherwise, its characteristics will suffer, the foam will be less effective at retaining heat inside the building. If you have difficulty placing the core, you will need to replace the drill with a new one.
Manufacturers and reviews
The modern building materials market offers a variety of adhesive compositions for penoplex. We invite you to familiarize yourself with the most popular and high-quality products from different manufacturers.
Tytan
The Polish company Selena quickly gained popularity in our market. And all thanks to the high quality of products and loyal pricing policy. Almost the entire range of products is presented in the form of adhesives and sealants, one of which is the Tytan universal adhesive.
, which is resistant to precipitation, temperature changes, and moisture, is most suitable for working with penoplex This glue does not require shrinkage and ensures a tight fit of the material to the surface.
Cerisit
The popular company Cerisit, known as one of the best manufacturers of building materials, offers a whole line for working with penoplex.
Experienced specialists select high-quality compounds.
- Cerisit ST84 is a special foam for penoplex used in facade cladding. Tolerates high and low temperatures well (from -10°C to +40°C). It is characterized by fast drying - in the warm season, the composition hardens within 2-3 hours. The work can be carried out using a mounting gun. This composition is loved by consumers for its harmonious ratio of affordable cost and excellent quality.
- Cerisit ST83 is a dry mixture for laying slabs. The drying time is much longer than the previous material - three whole days at above-zero temperatures. The composition is applied using a notched trowel. The approximate consumption of the mixture is 6 kg per m2. The only negative is that the material does not tolerate cold well, so if the temperature is below zero, work cannot be carried out.
- Cerisit CT85 is a reinforcing adhesive used for gluing and subsequent reinforcement of tile material. The product can only be used at positive temperatures – from +5 to +30°C. The mixture must be used within two hours after mixing. Approximate mixture consumption: 6 kg/m2 – when gluing; 5 kg/m2 – with reinforcement.
Fixing polystyrene foam to a wooden ceiling
Before starting the main work, the ceiling must be carefully prepared, whitewash, dust and debris must be removed from it. You should also immediately place the electrical wiring, which will then be covered with plates.
The sheathing for insulation is made from wooden blocks. They are laid at such a distance from each other that the sheets of material are tightly located between them. Then the foam itself is mounted, and adhesives or fasteners are used to secure it. The cracks and recesses are filled with sealant. You can also use polyurethane foam for this purpose.
Next, a vapor barrier is placed on the frame. This is a film that will prevent moisture from entering the ceiling from inside the room. Lastly, the foam boards themselves are laid.
During preparatory work, the ceiling should not only be thoroughly cleaned, but also its surface should be disinfected using antiseptics. Then the entire area is covered with primer. If it is impossible to remove all the whitewash, it is recommended to completely treat the ceiling with special glue. The product is applied to the material with a dotted line. The sheets begin to be placed from the middle, moving them slightly. For greater reliability, it is advisable to add fasteners. Expanded polystyrene is also strengthened using a reinforcing mesh, which is subsequently puttied and processed.
Preparing the sheathing step by step installation
To make the lathing, you need to decide on the material from which it will be made:
Wood is more environmentally friendly, but more complex in terms of installation. The aluminum frame is much more convenient and practical. Let's move on directly to installing the sheathing:
- The first step is to clean and prepare the surface for future lathing.
- At the second stage, you will need certain tools to attach the frame to the prepared wall.
- The third step is to mark the entire surface where the sheathing frame will be installed.
- After all the preparatory work, you can begin installing the sheathing elements according to the marked marks.
Recommendations
Internal insulation of a house is recommended only in exceptional cases due to the existing possibility of undesirable consequences. And since this must be resorted to, then insulating a wooden house from the inside with penoplex will be the best, if not the only option. This is possible thanks to such an indicator as the excellent moisture resistance of the material.
Not all owners resort to the possibility of insulating their homes (or not immediately, but later). With gender the situation is completely different. It is very desirable to have heated floors in a residential building. Therefore, work on this is carried out during the construction process. Insulating the floor of a wooden house with penoplex or expanded polystyrene has proven itself on the most positive side and is carried out by many specialists.
Insulating your home ultimately leads to more comfortable living and savings on heating costs.
This is far from a simple task, as it might seem at first glance. I would like to hope that the material provided helped to find out why penoplex is good for a wooden house, why and how to insulate wooden walls with penoplex and do it efficiently.
More on this topic on our website:
- Insulation of a wooden house using polyurethane foam
- As you know, the main purpose of thermal insulation material is to reduce all possible heat losses from a building to a minimum level. Moreover, high-quality thermal insulation material should provide acceptable.
Insulation of the foundation of a wooden house from the outside with extruded polystyrene foam
Everyone knows that insulating the walls of a house is a necessity, and the same can be said about the foundation. This will become especially relevant in areas with very high...
Insulation of a brick house - insulating the walls from the outside
- And now material from Alesya Krashennikova from Tyumen about brick houses and insulation of brick walls. How wonderful it is to have your own home, which is filled with comfort.
Wooden house insulation technology - installation of insulation
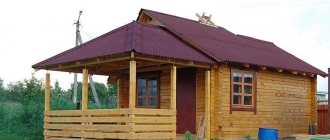
- Wooden houses have long been valued for their practicality, high level of comfort and aesthetics. But, like other residential premises, additional insulation will not harm them.
Add a comment Cancel reply
You can subscribe to new publications by email.
Fastening penoplex outside the room
In order to attach penoplex outside the building, you must follow approximately the same rules as inside. You can visit the manufacturer’s website and calculate the amount of material for a specific house or apartment. It is important that, together with recommendations on the amount of penoplex, you can get an unambiguous answer as to what thickness of material is best to use, taking into account the territorial location of the building.
Installation work is carried out taking into account the interior decoration and external material of the house (for example, aerated concrete, foam concrete, brick).
To do this, the wall must be leveled and plastered. There is no point in applying an antifungal agent for external insulation. Therefore, next they carry out installation work on attaching the foam plates. Unlike interior work, this will require mandatory fastening with dowels. Such reinsurance is necessary at least in case of strong winds.
Then seal the seams with foil tape. Thermal insulation is placed under the longitudinal slats, which are attached directly to the penoplex.
After this, siding or any other finishing surface is installed. It is this type of insulation that is reasonable to combine with underfloor heating. This will guarantee that the dew point will either go to the center of the brick or aerated concrete masonry, or move closer to the sheathing, but even in this case it will not create anything critical.
Main stages of installation
Regardless of the method of attaching Penoplex, this process includes the following work:
- A horizontal guide is marked along the entire perimeter of the house using a chokeline or level.
- The required level is set, the beacons are fixed using a thread.
- The bar is attached to the dowels along the guide.
- The best way to fix Penoplex is to stagger the sheets from bottom to top. The resulting voids are filled with polyurethane foam
- Upon completion of fastening, it is necessary to perform decorative finishing of the building.
How to attach penoplex to a vertical foundation
This method is applicable both during the construction of the foundation and in already erected buildings. The foundation should be dug to the depth of its laying.
The foundation is cleared of dirt and leveled with cement.
Next, the glue for penoplex is diluted. If the base of the foundation is not level, then the insulating material can be placed deeper.
The glue is applied to the slab in dots. Then the penoplex is attached to the foundation. Each subsequent plate is secured by aligning the mounting groove.
In the case of fixing several layers of heat-insulating material, it is placed in a checkerboard pattern. The second layer is attached to the same glue using a similar technology.
How penoplex is attached to the base
The basement of the house is located underground. It is strongly influenced by natural factors. If you insulate the base, you provide it with protection from destruction and deformation. Penoplex is the best choice for insulation. This material has its advantages. After all, it perfectly withstands temperature changes. It does not absorb water. If there is no moisture in the material, then there is nothing to freeze and damage the base. Attaching penoplex to the base is quite easy.
Before applying a layer of glue, the surface should be primed. This will ensure adhesion. Penoplex boards are attached tightly. The gap between them should be minimal. Undoubtedly, using only glue for fastening is not enough, since in this case the process of finishing the base with tiles or decorative stone is complicated.
Together with the tiles, you can attach a mesh for reinforcement based on plastic, fiberglass or metal to the penoplex. You can use inexpensive metal mesh.
After the penoplex has been secured, wait until the glue has completely dried.
The surface of the heat-insulating material is primed together with the mesh for reinforcement. Then the main layer of plaster is applied. After it dries, the surface is primed again. Then the finishing coat is applied or finishing materials are laid.
How to attach penoplex to the floor
For high-quality thermal insulation of the floor using penoplex, grade 35 sheets should be used. Insulation can be done quite quickly.
To work you will need:
- foam sheets;
- waterproofing material;
- cement mixture;
- level;
- mixture for screed.
The concrete floor is checked for defects. All irregularities should be eliminated. Cracks and potholes are sealed with cement. If the base of the floor is ordinary soil, then it is covered with crushed stone and sand, and then compacted and filled with concrete. When the surface has completely dried, insulation of the floor begins.
The floor is covered with a film for waterproofing. Adjacent pieces of film are overlapped and secured with tape.
Then the penoplex is attached to the floor. The sheets are stacked tightly. Work begins from the corner of the room.
In places where pipes or risers will come out, the penoplex is cut out. Then a special mixture for the screed is prepared. Penoplex is poured in a layer of 5 cm. Any floor covering can be laid on a dry screed.
What you should know about this insulation option
Let us note right away that foam plastic is not the most popular solution for wooden buildings for a number of reasons:
| Low vapor permeability | As you know, for the best preservation of wood, it is necessary that moisture from the material can evaporate freely. But if the surface is covered with foam, then the moisture has nowhere to go, and condensation can form inside the wood, so it is necessary to install high-quality exhaust ventilation for a wooden house |
| Material hardness | If you use mineral wool, it can be inserted into a wooden sheathing and it will hold without additional fastening. Polystyrene foam can also be arranged in a similar way, but the sheets may crumble during operation |
| The need to seal joints | After completing the fastening, the cracks must be sealed to prevent the penetration of cold; this complicates the process and makes it more labor-intensive. This stage should not be neglected, since the result of the work largely depends on the insulation of the joints |
Important! You should select high-quality polystyrene foam; you should not save money and purchase low-density materials, they are very fragile and can break during operation. In addition, it is advisable to use insulation with fire retardant additives in its composition; it is much more resistant to fire.
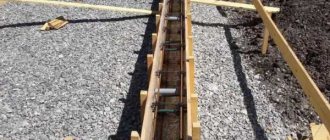
How to insulate a foundation based on slabs
The work is carried out in the following order:
- The site for the foundation is marked and the top layer of soil is removed to the depth provided for by the project. The bottom is made smooth. The last 30 cm are removed by hand. The prepared site is filled with sand and compacted. Temporary formwork is made and a concrete base is prepared. No base reinforcement is required.
- After the concrete has hardened, penoplex is laid on it. The mounting groove is aligned. The sheets are attached without gaps. A thick film of cellophane is applied to the penoplex. The joints of the strips are glued with tape. The film serves as waterproofing. It prevents the concrete mass from penetrating through the foam joints.
- Formwork, reinforcement and pouring of the slab foundation are done. After the foundation hardens, the formwork is removed. The foundation is subject to additional thermal insulation. Penoplex is laid on the side walls.
The sole of the strip foundation is insulated using the same method
All methods of fastening this insulation
- The first, and perhaps the most used option is the use of a special adhesive bitumen-polymer mastic. A typical example is the well-known one. Mastics, as a rule, are sold ready-made. All that remains is to apply it in separate dots on the surface of the penoplex slab. Then press it firmly against the wall and wait a while.
- The next method is the use of dry cement-based mixtures. Ceresit products are in particular demand. For example, a brand of dry glue, Ceresit ST-85, is very popular among builders. This is the perfect combination of price and quality. The mixture, diluted with water and thoroughly mixed with a mixer, is applied to the entire surface of the insulation with a notched trowel and attached to the walls.
- Adhesive foam is also a fairly common fastener for penoplex. It comes in the form of cylinders, like regular polyurethane foam. The method of application is simple: screw the can into a gun, apply it to an EPS sheet, apply it to the wall and wait 5-10 minutes. This method is most often used for gypsum and plastic surfaces.
- Installation of polystyrene foam with disc-shaped dowels is usually done on concrete and brick. Here a special fungus is used to attach the insulation. It is also called an umbrella. 5 such umbrellas (4 at the edges and 1 in the center) are quite enough to securely fix the foam sheet to the wall. To work, you will need a hammer drill, a drill of the appropriate diameter and length, and a hammer.
- Another option for fixing penoplex to the wall is to use liquid nails. It is used less often than others and is quite expensive. Typically, liquid nails are used when working on small areas, for example, when insulating a balcony or loggia. There is no need to talk about insulating the house from the outside. The price will be exorbitant.
Quite often a mixed method of attaching penoplex to walls is used. The umbrella dowel is combined with bitumen mastic, dry mixture or foam. The result is excellent. Reliability and durability of installation work is guaranteed for many years.
Ventilation and vapor barrier
By closing all the cracks in the external wall, heat loss can be avoided. But a new problem appears: the air stops circulating, and the moisture has nowhere to go. To prevent it from accumulating and destroying the tree, you need to take care of two things: ventilation and vapor barrier.
The first of them is worth thinking about even at the stage of building a house. The best option is forced ventilation using supply and exhaust systems. If the budget does not provide for them, it is advisable to equip windows and doors with special slotted valves. Ventilation will save the room from the “greenhouse” effect, when high humidity accumulates in it during the cold season.
Protection of insulation from moisture is achieved in another way - using a vapor barrier film. It is mounted indoors on top of the already glued heat insulator. Fixing it with a construction stapler, the vapor barrier is placed tightly, and at the joints it is laid with an overlap of 15 cm and then taped.
Note! Laying a vapor barrier is mandatory if hygroscopic materials are used as insulation: mineral wool, ecowool. When using PENOPLEX, this step can be skipped, since extruded polystyrene foam does not absorb moisture.