The use of beacons is required to perfectly level the plaster mortar on the wall and create even corners. Such guides help to significantly save expensive mixtures. Beacons for plaster are made in factories from different materials, as well as by craftsmen directly at the place of repair. To get the best result in plastering walls, it is important to delve into all the nuances that are associated with the use of beacons.
What is a plaster beacon
Plastering walls using beacons is a technique familiar to every master. Beacons (profiles, guides) are devices made of different types of materials that serve as limiters for the putty layer. They are designed for a more even and beautiful application of the plaster mixture, to reduce time and labor costs for leveling surfaces. Previously, all craftsmen used homemade beacons; now there are ready-made disposable and reusable products on sale.
The use of beacons has many advantages. They are inexpensive, resistant to mechanical stress, flexible and easy to use. Thanks to the beacons, even a thick layer of finishing will be even, whereas without their use you will have to constantly check the correctness of the plastering level. The builder applies the solution, focusing on the position of the profiles, so they are usually placed over the entire surface to be plastered.
Applying the plaster solution along the beacons allows you to create a perfectly flat surface
Preparing the surface for installation
Before installing the beacons, you need to prepare the surface itself, otherwise after a short period of time the plaster may fall off. It is necessary to remove all dirt, remove old finishes, and, if present, clean the surface of mold and fungi, and any existing metal elements. Cracks and other defects are covered.
If the surface is too smooth, then it needs to be sanded to obtain better adhesion to the material.
A primer is applied to the dry surface and, if required, the wall is reinforced.
It is necessary to remove all dirt and remove old finishes.
Types of lighthouses
Depending on the material and properties, the beacons differ from each other. They all have their own characteristics and specific application.
Metal
This is the most popular version of profiles available in construction stores. Installation of metal beacons is the simplest; no special training is required. They are most often not removed after work is completed. There are metal beacons of different sizes on sale, with small ones used infrequently, while medium and large ones are most in demand.
Perforated beacon profile
Since a thin profile is used for the manufacture of products, it can be easily cut with scissors according to the required dimensions, which is a definite advantage for the craftsman. The disadvantages of metal beacons include the risk of rusting. Such products are made from ordinary carbon steel, which is prone to corrosion. In some cases, this leads to the appearance of unsightly red spots on the finish. In addition, if the beacons are too flexible and thin, to fill them you will have to prepare a special solution to strengthen the structure, or additionally use clips.
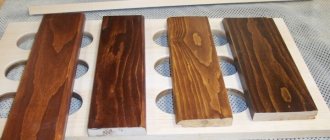
Wooden
Such devices are made from rectangular wooden slats with a channel-shaped profile. After the plaster hardens, they are removed. It is necessary to saturate each lighthouse with a water-repellent agent in advance, otherwise the wood may warp and bend, and the coating will not be even.
Wooden guides for applying plaster
Plastic
Such profiles are made of durable plastic. Their standard thickness is 3, 6, 9 mm, length - 3 meters, although there are other options on sale. The advantages of plastic beacons are undeniable:
- light weight, easy to transport and store;
- strength is not lower than that of metal products;
- non-susceptibility to deformation, return to original shape after bending;
- no risk of corrosive destruction or rotting.
PVC profile for leveling
Plastic guides also have disadvantages. They are less resistant to shock loads than their metal counterparts. In addition, the products are not suitable for facade decoration, since they lose strength under the influence of sub-zero temperatures. They require strictly correct fixation on the surface, otherwise they will bend when moving the trowel.
Reusable steel
Beacons, which can be removed and reused after plastering, are an order of magnitude more expensive than disposable ones. They are made of very durable metal (usually stainless steel or galvanized), they will never move even when a thick layer of the mixture is applied. Due to the high price, such beacons are most often used by professional builders.
Reusable steel beacon with fastenings
Homemade
Craftsmen often use various homemade devices that act as guides. For example, when finishing wooden surfaces, wooden blocks of the required size are used, which are easily attached with self-tapping screws. Experienced finishers even make beacons from the mixture, applying it in “heaps” according to the level or on the heads of pre-screwed screws. There is no need to dismantle them, because they will be completely hidden by plaster.
Installation of self-tapping screws for leveling walls
Strings
These products are also homemade analogues of purchased beacons. To install them, screw in self-tapping screws and stretch a thin wire or string between them, checking the correct location with a level. The free space that has formed under the string is filled with plaster. The strings must be removed before the solution has completely hardened. If you make a mistake and install the string beacons incorrectly, you can end up with a crooked surface.
Set of string beacons for plaster
Laser
Such “beacons” are projected onto walls using levels or laser levels. Such devices create marking lines in one plane. If you install the device and set the vertical plane parallel to the position of the base, the laser beam on the floor will outline a line to adjust the thickness of the finishing layer. Using this mark, you can install self-tapping screws with a certain height.
Using a laser level to level the plane
Briefly about the main thing
Beacons for leveling walls are clear guidelines on which the rule for removing excess plaster is based.
The factory-installed guides feature a rounded center rib and perforated mounting plates.
They are made of aluminum, galvanized steel or plastic for working with planes, external corners or arched openings.
Additionally, corner-forming products can be equipped with reinforcing mesh.
An alternative to factory samples can be a plasterboard profile, a metal pipe or a wooden beam, which are subsequently recommended to be dismantled.
You can also replace hard elements with plaster mortar.
Installation of beacon guides is carried out using self-tapping screws, a laser level or special clamps for a T-shaped profile.
Ratings 0
Sizes and shapes
There are guides of various sizes on sale - from 3 mm to 3 cm. As for the length of the products, it can be 1-6 meters. They must be selected depending on the depth of the depressions and the height of the convexities, that is, on the degree of surface roughness. The more mixture you have to apply, the larger the limiters should be. Devices 2-3 meters long are usually used for renovations in residential buildings and apartments. Six-meter profiles are more suitable for plastering warehouses, industrial premises, as well as for exterior finishing.
Straight guides are perforated products that have a V-shaped protrusion that will serve as a guide during operation. Corner beacons have the same protrusion, but in parallel they are equipped with shelves located at right angles. They are used to level and increase the strength of external corners. Corner profiles do not have great rigidity, so during installation it is necessary to regularly check the straightness of their installation.
Dimensions of plaster beacons M6 and M10
Video description
This video details the process of installing factory beacons using a laser level:
Special fasteners
A less common option for installing guides for plastering walls involves the use of special plastic or metal elements to fix T-shaped beacons. Among craftsmen, the name “ushastiki” is common; on sale these are often creamers. Here, first, screws are screwed into the level along the marked lines in increments of 30 cm. Next, a latch is installed, which is subsequently pressed against a rigid reference point.
Sample of a plastic device for fixing a profile Source par-torg.com
The advantage of this technique is the speed, simplicity and purity of the process. But in this case it is necessary to apply the leveler in a layer 5 mm more than the minimum. At large facilities this can significantly affect the cost estimate.
Materials and tools for finishing
To install the guides and apply the plaster mixture, different tools may be required depending on the specific type of product and the technology used. Typically, an exhaustive list of devices and consumables looks like this:
- building level (any) and plumb line;
- strong thread or fishing line;
- self-tapping screws;
- dowels;
- screwdriver;
- capacity;
Tools for plastering an apartment
- drill with mixer attachment;
- grater or grater;
- rule;
- spatulas;
- Master OK.
You should also purchase the beacons themselves, which are selected in accordance with the expected thickness of the coating. As for the length, it is better for beginners to take standard 3-meter products. If mechanized plastering is intended, an apparatus for applying the mixture (plaster ladle or gun) is also prepared.
General advice from experts
Experienced plasterers also draw the attention of beginners to the following points:
- Working with corners. For internal and external corners, it is worth preparing metal angles in advance, the design of which will allow you to optimally maintain the geometry of the site.
- Nuances of slope processing. Another difficult area that can be worked in different ways. In the simplest version, corner guides are used. But how can you place beacons for plastering walls on slopes if the design of the corner does not allow you to fit a solid strip with the correct geometry? In this case, a system of separate planks is created, which will have to orient the laying of the mixture both on the sides and on the top of the slope.
- Working with large areas. The plastering rule does not always help if you need to get an even coating based on a viscous and dense solution. In this case, trowels are used - this is a large-format spatula that gives large coverage when working between the beacons.
- The method of fixing the beacon must be strong enough, but balanced, since a rigid massive fastening over a large area will provoke the destruction of the base of the surface.
Installation of beacons
Plastering work begins with markings, then profiles are installed, and then they begin the process of plastering the surfaces.
Wall marking
The marking is applied on an already prepared base, which has been cleaned of old falling off coating, freed from rot, mold and thoroughly primed. To set up beacons, you can use the simplest method - manual marking, which is carried out in the following sequence:
- They retreat from the corner by 30 cm. Draw a strictly vertical line along the level, repeat the operation on the second side of the wall.
- Measure the distance between the lines, divide it by 1.5 meters, thus calculating the number of required beacons.
- The finished accessories are cut so that they are 30 cm shorter than the height of the ceilings.
Wall marking scheme for installing beacons
- Holes are drilled at the top and bottom of the lines and self-tapping screws are placed in them. Draw the entire area of the wall with lines every 1.5 meters.
- Screws are screwed into the holes on the first two strips and the threads are pulled between them. Where the thread will intersect with the other lines, fasteners are also placed.
- Calculate the level of location of the screws. To do this, add up the wall collapse indicator, the thickness of the lighthouse and add a small margin (about 0.5 cm). The self-tapping screws are aligned to this value.
- Stretch the threads diagonally and pass the beacon under this plane (it should only slightly touch the thread).
Professionals prefer to install beacons using a laser level. With its help, they find a surface blockage by first placing the device against the wall and turning on the cross-shaped beam. This indicator will give an idea of how thick the plaster layer should be. Then, using a level, vertical lines are drawn on the wall every 1.5 meters, onto which the beacons are subsequently placed using glue or screws.
Installation of beacons
Each type of profile has its own installation and wall mounting features, but all of them are suitable for any type of base.
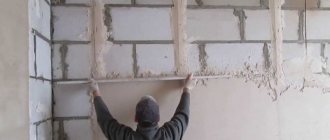
Installation of metal and wooden beacons
Such beacons are placed at a distance of 120-170 cm from each other (the standard indicator is 1.5 meters). The outer guides are placed 30 cm from the walls, but this distance can vary depending on individual conditions and be 15-20 cm.
If the marking was done correctly, then further actions are not difficult. Check again that the screws are positioned correctly using a level. If necessary, adjust their location. Next, profiles or wooden slats are placed on the heads of the screws so that they rest along the entire length, and secured with mortar. The latter is prepared in advance, and then the beacons are pressed with a long rule to the head of the screws. Excess solution will immediately come out through the perforation. After the initial setting of the solution, fix the profiles with dowels or add a cement mixture so that it holds them securely on the wall.
Installation of beacons from solution
This method works well if the solution layer is small. It is ideal for gypsum mixtures. The preliminary stage (marking) is also carried out, and then the order of work will be as follows:
- mix the solution and apply it in heaps directly onto the heads of the self-tapping screws;
- after the solution has set slightly, the excess protruding from the caps is removed;
- as the marks harden, apply a rule to them vertically, throw the solution into the space between it and the wall;
- tap the rule with a hammer to level the strip of mortar, then carefully remove the device;
- when voids, holes, or potholes appear, rub out all defects with a small trowel;
- repeat these steps throughout the applied markings.
Homemade lighthouse made of gypsum plaster
Installation of string beacons
This technique is even simpler than those already described. When marking, a steel wire (thread, fishing line) is immediately pulled onto the aligned beacons, which will serve as a guide for leveling the wall. Afterwards, putty is applied so that it protrudes slightly beyond the wire, and the excess is removed.
Installation of strings for plastering walls
Purpose
The plaster mass is pliable and plastic during application. It is impossible to level the mass of mortar over a large area so that an even, geometrically perfect plane is obtained with one trowel. For this, there are wide spatulas, small spoons and rules that require even, rigid guides - guidelines. Lighthouses serve as such landmarks.
The beacon, being a guide stop, when leveling the applied mortar, prevents the plasterer’s rule or other tool from approaching the surface closer than intended. Guided along the lighthouse slats, the master cuts off the excess mortar, leaving between the slats an even mass of the desired thickness. When the beacon landmarks are installed correctly, the tops (working surfaces) of all beacons form a single auxiliary plane.
Installation of beacon profiles is carried out using a plumb line or level (bubble or laser). This way you can set the auxiliary plane strictly vertically (for walls or partitions) or horizontally (for the ceiling or floor). Beacons also set a curved surface, for example, when plastering curved walls and columns. Beacons are also used for plastering openings of complex configurations, corners and slopes of windows or doors.
Applying the solution along the beacons
The prepared mixture is applied using a trowel, spatula, or trowel between the installed beacons. It is very convenient to use a ladle for this purpose, but if you don’t have one, you can simply throw the product on with a spatula. The finished layer should protrude slightly beyond the tops of the profiles.
Next, stretch the solution using zigzag movements from bottom to top. After completing the work on the entire base and setting the coating, the beacons are removed or left, if possible. The grooves from the products are filled with plaster of a thicker consistency.
Construction of slopes and corners
The internal corners are formed with a corner spatula. They are ironed, brought to perfect evenness, checking with a level. Door and window slopes are made with inward expansion. Obtuse corners are smoothed out with a wooden lath or shaped using a special profile for slopes.
Plastering external corner
Final alignment
Rubbing is carried out as the final stage of finishing. All actions are carried out only after the solution has completely dried. You will need a similar mixture, but with a thinner consistency. The procedure is as follows:
- Sprinkle the base with a little water;
- Apply the liquid solution to a grater and spread it in a thin layer;
- place the tool at an angle of 45 degrees, carefully rub the surface literally 1-2 square meters;
- The excess solution accumulated on the grater is removed.
Finishing plaster with a trowel
If tiling is planned, then grouting work is not necessary. Irregularities will only improve the adhesion of the ceramics to the base.
Types of device
The conditions under which the surface is leveled may differ, which is why beacons are made in different design options. Thus, according to their functional purpose, mortar and reinforcing devices can be distinguished. The first ones are intended specifically for orienting the strip of the working mixture. In the future, they are not dismantled, but are included in the structure of the coating. In turn, reinforcing beacons for plaster serve not so much to guide the laying lines, but to strengthen the corner protrusions. For example, when you need to create a small projection outside in the wall for decorative or structural purposes. If you leave the structure of the mixture without strengthening, it will simply collapse. However, the presence of a rigid beacon at the base of the ledge will preserve it for a long time.
A fundamentally important feature of the classification of lighthouses is the material of manufacture. Profile strips can be made of wood, plastic (polyvinyl chloride) and metal. Wooden products are good because they are inexpensive and are a suitable consumable for large volumes of work. A metal beacon will be beneficial where it is planned to apply thick layers of mortar - the load-bearing structure of the strip will allow it to cope with heavy loads. As for plastic elements, due to their elastic structure they are recommended to be used when applying thin, delicate coatings. In the small-format version, they are organically integrated into the cladding design and do not cause problems when finishing the surface.
Depending on location
Since the operating conditions of the plaster coating outdoors and indoors are radically different, this also affects the thickness of the plaster layer.
What characteristics of the coating are affected by the size of the laid layer:
- coating strength;
- base strength;
- leveling efficiency;
- financial and labor costs.
The maximum thickness of wall plaster, depending on the number of layers (according to the quality of finishing), can be represented as:
a) 1.2 cm – simple (total thickness of spray and soil);
b) 1.5 cm – improved (total spray, soil and covering layers);
c) 2.0 cm – high-quality (spray + 2 ground layers + covering layer).
The maximum value is set to reduce the likelihood of cracks forming, shrinkage of the plaster coating when drying, and slipping of the freshly laid mortar.
Read more about plaster defects and the reasons for its cracking in the materials on our website.
Plastering indoors
The thickness of the plaster on the interior walls may depend on the design features of the room. For example, if electrical wiring is laid along the surface of the walls, the thickness of the coating is increased to hide the location of the wire. In this case, it is necessary to ensure a minimum height above the wiring itself.
In interior spaces, increased demands are usually placed on the quality of plaster finishing. This concerns the geometry of surfaces. If the walls collapse or the angles between them are less than or more than 90 degrees, then leveling is performed, which may require a layer of more than 8 cm.
An increased layer may be necessary in the case of dense reinforced concrete walls for operational reasons. For example, to install fasteners on which paintings are hung, dense, strong concrete walls have to be drilled.
For walls made of cellular concrete, it is especially important to ensure vapor conductivity of the interior and exterior finishes. Moisture from such walls must be removed continuously. Therefore, in order not to resort to complex calculations, we are guided by the rule: the internal plaster coating should be twice as thick as the external one.
So, if the permissible minimum thickness of the street layer is 10 mm, then the internal plaster is made no thinner than 20 mm. This method will prevent condensation from entering the room to the base of the wall. In this case, the right choice would be to use a silicone or silicate mixture for facades.
Facade plaster
For facades, the strength of the coating is the primary condition, since this side of the building is exposed to hail, strong wind, temperature and rain loads, and the base is subject to strong mechanical stress. And the protective function is more important than the decorative one. The composition of the mixture that will be applied to the outside of the house depends on this. Therefore, cement compositions are more often used for facade work, which determines the minimum layer of simple plaster - from 10 mm.
The minimum standard is also due to the need to ensure the integrity of the plaster coating during operation. An excessively thin plaster layer has low strength. A small mechanical load is enough, and the finish will begin to crack and peel.
What should be the thickness of wall plaster?
It turns out that the thickness of the plaster cannot be arbitrary; it has its own maximum and minimum, determined by the properties of the plaster materials and the type of base. This was found out in the practice of plastering and included in SNiP. It is understandable that property owners want to save on compounds and apply as thin a coating as possible. Why it is not recommended to apply plaster compositions thinner or thicker than specified in the rules, we will consider further.
Thickness of decorative plaster
Decorative compositions intended for decorating interiors and facades also have their maximums and minimums.
Existing types of finishing decorative mixtures are divided into:
The Venetian can boast the most minimal layer of plaster. This is due to the fraction of the components included in the composition (the filler is stone flour). The finish with the effect of crinkled silk and Moroccan is also distinguished by its thin layers.
Structural compositions produce a layer no less than the size of filler granules. For example, the popular finishing of bark beetles, performed with roller compounds. By the way, for the bark beetle, the grain size dictates the maximum thickness. Indoors, compositions with filler of a smaller fraction are used than on facades. The same can be said about travertine plaster.
The thickest decorations are textured finishes and stone coatings. The thickness of the former can have a wide range - up to 5 cm. For example, imitation of brickwork, wooden surface or wave relief. The size of the layer of pebble plaster, for example, mosaic, depends on the size of the stone grains.