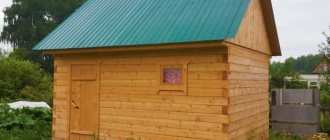
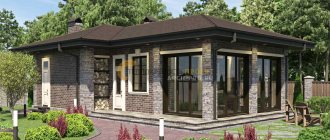
Cinder block is an affordable building material. It is easy to construct an auxiliary building, garage, or other building from it. This material is not suitable for the construction of residential buildings, but it makes cheap, warm auxiliary structures. A beginner can easily master the operating technology. There are nuances without knowledge of which a home built from cinder block with your own hands will not be durable and reliable.
Piece building materials are divided into solid and hollow. Some are used for the construction of the basement and base, while others are used for the construction of external and internal vertical structures.
Types of cinder block masonry
Products can be arranged in different thicknesses. The nuances of each placement method:
- In 2 blocks. The basement and foundation are built in this way. The masonry is the most durable, durable, resistant to dampness, and has a high heat-retaining ability.
- 1.5 blocks. This is how loaded cinder block walls of a standard type are laid, including external ones. Advantages: reliability, heat-holding capacity, product savings compared to a solid wall.
- In 1 block. This thickness is suitable for the construction of standard wall structures, mainly non-load-bearing.
- 0.5 blocks. The method is suitable for non-critical parts of the building. They turn out thin and cannot take a significant load.
Before you get started
Tools
As for electrical tools, you may need a hammer drill, a grinder (to cut off reinforcement or corners to create jumpers). To mix the solution, it would be nice to have a concrete mixer on hand, as well as a barrel of water (can be made of metal or plastic). To create jumpers from corners you will need a welding machine. If you plan to lay two or more floors, then it is better to carry pallets with blocks along the floor not by hand, but to use a cargo trolley, which you don’t have to buy, but rent at a tool rental point.
Materials
Directly for installation you will need low-cement blocks, cement mortar, water and sand. The lintels that will be located above the door and windows require metal - reinforcement, angle or channel. As a rule, a lintel made of reinforcement is used over the doors, the diameter of which is from 1 to 1.4 cm in several rods, and for windows it is better to use corners. For garage doors, the best option would be to make a lintel from channels - much will depend on the weight of the door and the width of the opening. Beacons may require a wooden batten, as well as dowels; For scaffolding, use boards and pallets, and you can fasten it all with nails. If you have a construction goat, then that's even better. If you live in seismic regions, then you will need a masonry mesh, or A240 0.6 cm reinforcement. But it will be much easier to find the mesh and use it, and it is better not to use fiberglass reinforcement as wall reinforcement. if you plan to cover the entire house with facing bricks, you will need a notch for the outlets that will be embedded in the seam. This is where you can use fiberglass reinforcement.
Mortar for laying cinder blocks
Prepare the mixture for working with blocks yourself or buy it. The first method is cheaper, the second is simpler and faster. Home craftsmen often want to save money, so they should master self-cooking. You can use a bucket as a measuring container.
Mix the components in the following proportions:
- water - 0.5 tsp;
- sand - 3 hours;
- cement - 1 tsp.
The amount of water may be more or less, depending on the thickness of the solution. To make the mixture more plastic, you can add plasticizers. They are sold in building materials stores. You can also add any dishwashing detergent at the rate of 1 cap per 1 bucket of cement. Thanks to this additive, the mixture will be homogeneous, plastic, and easy to work with.
It is more convenient to mix a large volume of solution in a concrete mixer. If you have to work alone, it is better to prepare small spoilage in any suitable container.
The components are mixed manually in the correct sequence:
- sifted sand and cement are poured into a wide basin and mixed vigorously until uniform;
- If desired, add additives to the water and mix until the components dissolve;
- pour water into a container with a dry mixture, add a solution.
A properly prepared mixture looks uniform, there are no dry fragments, debris, stones or other foreign inclusions. Density is determined experimentally. Excessively viscous or fluid composition is unsuitable for use.
Having detected foreign particles, they are removed manually. If this is not done, the wall will crack.
Planer for aerated concrete based on sandpaper
The basis of this version of the plane is moisture-resistant sandpaper 20 cm wide with an abrasiveness of about 40 (for rough work). In addition to this, you will need:
- a piece of flat multi-layer plywood;
- board for making a pen;
- screws, jigsaw, drill, stapler.
The handle can be cut with a jigsaw and then sanded. It is more convenient if it is higher on one side than on the other. The dimensions of the narrow side of the plywood base are determined by the width of the sandpaper strip, and its length can be made equal to the transverse size of the block or slightly larger.
The handle is screwed to the base with two screws. A countersink should be made for the screw heads, and it is advisable to drill holes in the handle so that it does not crack. Then a piece of sandpaper of the required length is cut and stapled to the ends of the base. The paper fastening may be different. The planer-grater for aerated concrete is ready.
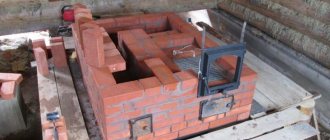
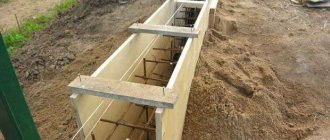
Preparing the foundation for laying cinder blocks
When starting the next stage - laying walls from massive cinder blocks, you should make sure that the foundation is ready. Laying a cinder block on a wet base is not allowed. If the foundation was built a long time ago, it needs to be prepared. Remove dust, dirt and anything that flakes or crumbles. Irregularities are knocked down with a special trowel, hammer or pick, trying to get the most even surface possible.
A wall made of prepared cinder block is laid on a prepared waterproof base. The top of the foundation is treated with mastic or a layer of high-quality waterproofing material is laid. If this step is skipped, the products will absorb moisture and become damp. Foundation parameters matter. It should be 40-50 cm wider than the wall and rise 70 cm above the ground surface. The latter circumstance is not critical if the façade is to be finished with a waterproof material.
Prepare the work site. The construction site should be conveniently approached from both sides of the future building. Then during the main actions you will not have to be distracted to remove foreign objects from the road. Basic operations during installation of products: moving the mixture, bringing building materials to the installation site, laying.
Errors during operation
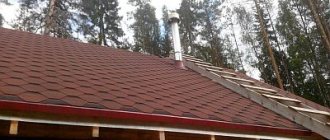
Cinder block is afraid of water and moisture.
Therefore, masonry work must be carried out in the warm season. Otherwise, in winter and during the rainy season, the blocks will absorb moisture and collapse. If construction takes place in winter, then anti-frost chemical additives and additives need to be added to the mixture.
It is better to veneer the finished building right away . Plaster is not suitable for this purpose because it has poor adhesion to the surface of the cinder block. After a short period of time, the plaster will begin to crack, peel and crumble.
Attention! If there is absolutely no other cladding option other than plaster, then you must definitely use reinforcing mesh.
Laying cinder blocks with your own hands, step-by-step instructions
The principle of working with large piece building materials is similar to the construction of brick buildings. But there is an advantage: cinder block masonry takes less time.
It is important to lay out the starting row as accurately as possible: it determines the operational characteristics of the entire structure being built. Therefore, special care is needed at the initial stage of work.
Sequencing:
- prepare the masonry mixture;
- take a portion, place it on the base, level it;
- lay the product, guided by the string;
- tapping the back of the trowel on the stone to level its position;
- remove the solution that appears from the seam;
- apply the next portion of the mixture, distributing it along the side of the laid stone;
- quickly place the next block;
- level the position.
When the first row is laid, it is carefully checked again and the position of all products that have deviated to the side, up or down, is leveled. When laying out the next row, not a whole stone is placed in the corner parts, but halves. Cinder block extensions are made by hand. Whole products are sawed using a grinder with a disc of 15 cm or more.
Using this principle, foam concrete and aerated concrete products can be laid. There are nuances regarding markings, which are familiarized with before construction begins.
Materials used
The planer for aerated concrete is made on the basis of available materials:
- boards, 10-15 cm wide and length corresponding to the size of the product;
- thick plywood or board used to make the handle;
- screws, the dimensions of which allow you to securely fix the handle;
- carbide files, which are the cutting element of the device;
- glue that allows you to reliably glue metal to wood.
To make a plane, it is necessary to incorporate the maximum available materials into the design.
You will also need sandpaper, which is used to round the edges and sand the surface of the product.
Second and subsequent rows
Having laid out the first row, fill all the seams with mortar. Excess is removed immediately before the solution hardens. The second row is laid so that the seams are mixed with respect to the masonry of the first row. The same principle is used as for brickwork. If a whole building is being built, and not individual walls, the entire row around the perimeter is laid out, and not each wall separately.
The laying of the second row begins from the corner. You need to take the most responsible approach to placement. the second and third stones that will be adjacent to the corner one. Then they lay it out around the perimeter, guided by the stretched cord. Having placed the stone, adjust its position horizontally and vertically by tapping it with a mallet. After laying down a few stones, they check again.
If there is a need to use additional elements, place them further away from each other, optimally at opposite corners. When constructing the lower part of the walls, do not rush. The third and subsequent rows will be laid out faster.
After every 3-4 rows, check the correct positioning in the vertical direction. Use a bubble or laser level.
The correct placement is assessed every 3-4 pieces or more often, depending on skills. A person with experience can do without such checks, but for a beginner this is unacceptable, since there is a possibility of placing the blocks crookedly. It is important to detect the defect before the mixture has set: then it will be easier to give the product the correct position.
The thickness of the vertical joints is up to 1.6 cm. If they are made thicker, the cinder block laying will become ineffective, and cold will penetrate into the building. Although it is auxiliary, it is better not to allow this. Excessively narrow seams do not provide sufficient strength to the walls.
Inexperienced craftsmen think that if they fill the voids in the blocks with mortar, the wall will be stronger. In fact, this leads to a deterioration in the thermal insulation characteristics of the building and to excessive consumption of the mixture.
Description of the design for carrying gas blocks
Since the weight of one cellular concrete block can reach a maximum of 30 kg, the question arises about the advisability of using special manual and mechanical devices that will help easily transport the blocks to the installation site. This type of device is considered to be a grip. It is designed in such a way that it is capable of grasping, with a specially created mechanism, a block of aerated concrete of any weight and size, and carrying it with the help of a handle (grip), like regular luggage.
The gripper has the form of a metal clamp and is a hinge-link mechanism that can facilitate labor during construction work on the construction of buildings made of aerated concrete blocks.
The advantages of using the tool are:
- the ability to raise gas blocks to different heights;
- significant acceleration of construction time;
- noticeable reduction in labor costs;
- ease of use and quick turnaround of products;
- careful operation in relation to the surface of the blocks;
- reliability of the clamp enclosing the product;
- assistance to ensure the accuracy of masonry installation;
- ensuring reliable coupling of the mechanism with the block;
- multifunctionality of the device (lifting, transporting, turning over, transferring, etc.);
- compliance with safety and technological standards.
The standard mechanical gripper device (pictured) includes:
- Rocker.
- Clamp (levers).
- Stand.
- Suspension.
- Traction 1.
- Traction 2.
The clamp is represented by 4 levers with a “scissor mechanism”, connected by a hinge element that allows the mobility of the parts. Some types of grips (multifunctional) have, in addition to levers, a ring for hanging from the forklift hook. The picture does not show the handle that comes from the pendant, by which you can use the tool manually. But the handle (grip) helps to use the device manually.
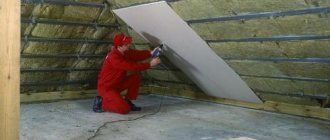
Wall reinforcement
When building a cinder block house for a summer holiday, the walls must be reinforced. A slag block is less strong than one made from heavy concrete, so it is not advisable to lay it without reinforcement. Mesh products with cells of 50x50 mm are used as a reinforcing material. It is placed between the rows: on top of the first, and then between every fourth and fifth.
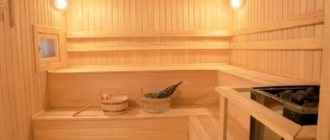
This is all the basics you need to know about how to build a house from blocks or an auxiliary structure yourself. To build residential premises, you need to use other products, for example, made from cellular concrete, since they do not contain toxic substances. The principle of their installation is the same.
Forming methods
Factory molds for preparing cinder blocks are made of reinforced concrete or steel.
Such parts can easily withstand the weight of a large volume of solution. As for do-it-yourself molds, they are most often made of wood or steel sheets. Such elements largely play the role of special formwork. To save on raw materials and free time, molds are mainly assembled without a bottom. You can put a simple film under them. Thanks to this method, the entire process of block formation can be significantly simplified. It must be remembered that the forms themselves must be made of perfectly smooth wood parts. The working surface will be a concrete base, a table with a flat and smooth tabletop, or a sheet of iron, which also does not have any defects.
Let's take a closer look at how to make a mold for slag blocks:
- you need to choose sanded boards 14 cm long (the width should be a multiple of this parameter);
- then, using a hacksaw, you need to separate the segments, which will then play the role of transverse partitions;
- then you will need to connect the segments with longitudinal elements to form a rectangular frame;
- Next, you need to cut a sheet of steel or any other material with a smooth surface into separate plates measuring 14x30 cm;
- in the inner part of the resulting structure, cuts are made that will act as grooves, the width of which is equal to the dimensions of the dividing strips;
- then the sections responsible for the separation are fixed in cuts, creating a mold for the production of 3 or more slag blocks.
In order for the resulting container for hardening the solution to serve as long as possible, at the final stage it is recommended to coat both metal and wood structures with oil-based paint. This form is suitable for preparing cinder blocks, the dimensions of which are 14x14x30 cm.
How to lay cinder blocks yourself - step by step instructions
Cinder block as a building material is gaining increasing popularity. This is due to several factors. First of all, it is cheap, which can be further reduced by making the blocks yourself. The second reason for its popularity is that cinder block laying can be done with your own hands.
Cinder block is an artificial stone based on compressed cemented slag concrete. Slag, granite crushed stone, granite screenings, gravel, broken glass, sand, and dried pieces of cement are used as filler. Cinder block dimensions according to standards: 400x200x200 or 390x190x190. In the second case, 10 mm is left for the mortar joint.
There are two types of cinder block:
- solid is used for laying the foundation, basement, load-bearing structures;
- hollow acts as a building material that can be used to line walls and partitions.
Its properties also depend on the type of block. The higher the hollowness, the lower the thermal conductivity, which means that the heat of the rooms will be retained. However, the strength of the material decreases as a result. The masonry scheme remains virtually unchanged.
What should you consider before starting work?
If you do the masonry yourself, the cost of construction can be significantly reduced. All you need to do is select high-quality cinder blocks and learn how to lay them correctly.
1. Choosing a installation method.
The laying pattern is influenced by the cinder block used, which depends on the type of material and the nature of the future construction. You can place blocks in one, one and a half, two and half stones (spoon method). It is worth considering the fact that the thicker the wall is, the warmer the building will be.
2. Preparation of mortar for masonry.
The manufacturing technology is the same, but the proportions depend on the nature of the future building. Nowadays you can buy ready-made mixtures in stores, to which you just need to add a certain amount of water. However, this will significantly increase the cost of masonry. Therefore, the solution is usually prepared independently. The standard proportions are as follows:
The amount of water is adjusted for each specific case. The result should be a viscous, non-spreadable solution. If so, then you did everything right. At the end of cooking, it is necessary to add a plasticizer, which is used to increase frost resistance and increase density. A composition that has the following parameters is considered to be of high quality:
- adhesion;
- plastic;
- uniformity;
- frost resistance;
- self-sealing;
- strength;
- waterproof.
The main rule is that the solution must withstand the upcoming loads of the building. If the block manufacturing technology is strictly followed, then the product will ultimately be of high quality.
3. Preparing the necessary tools.
If you don't know where to start laying cinder block, start by choosing the necessary tools. You will need:
- A hand-held circular saw can be replaced with a hacksaw, since cinder blocks are quite easy to saw.
- Respirator. You should not neglect safety measures and still use the specified device during the sawing process (it cannot be avoided). And the price should not be a reason to refuse a purchase.
- Construction level, laser or bubble, your choice. You must be absolutely sure of the quality, so it is recommended to check it.
- Hammer or mallet.
- A trowel that you can make yourself, which will further reduce the cost of construction.
- Plumb. Its role is performed by any weight on a fishing line or cord.
- Order. This instrument is usually made of wood and is a river with a cross-section (50x50 or 70x50 mm), length - about two meters. The goal is to mark the rows of masonry, fix the marks of the top and bottom of the openings.
After the preparatory work, you can begin to lay the cinder block directly.
Step-by-step instructions for laying
If you follow the recommendations and stages of laying slag concrete, you should get durable and even walls. The whole process takes place in several stages:
1. The beginning of laying cinder blocks is pouring the foundation, the width of which should slightly exceed the width of the blocks. The surface must be perfectly flat, without flaws in the form of bulges and holes.
2. Setting the corners. For this purpose, rows are used that are attached to each corner. It is necessary to select a tool taking into account the thickness of the blocks, as well as the thickness of the two seams. A thread or cord is stretched between the row marks of each row, which indicates the level of the row.
3. Directly laying the cinder block. The most important is the first layer, so special attention is paid to this process. First, you need to spread the adhesive mixture in an even layer using a trowel, on which you want to place the cinder block. After 3 blocks have been laid, the installation must be checked by level and plumb. Then repeat this procedure as often as possible, as required by the instructions. This will avoid re-laying, which means the price for the work will be lower. The following layers are laid in a similar way with level control. It is not recommended to make the seam thickness more than 1.5 cm. The cracks are also filled with cement composition. If you are laying hollow cinder blocks, then under no circumstances should you fill the voids inside the blocks with mortar, as this will lead to a loss of thermal insulation properties.
4. Completion of the work consists of facing the wall or “joining it” (run a cut hollow pipe with an oblique cut along the cement between the blocks from the outside).
If the wall will not be covered, then you can add soot to the cement mortar. This will allow you to decorate the structure, but you need to be careful not to stain the blocks.
Other builder tips
There are little tricks that will help make your work a little easier, since laying walls with your own hands can be difficult for an inexperienced builder.
1. Specialists, as a rule, lay cinder blocks without using any additional devices. If you are doing this yourself for the first time, then you can use a template, the size of which depends on the dimensions of the blocks (you will have to make it yourself).
2. Red clay is used as a plasticizer, especially since it is affordable.
3. You also need to take care in advance of making a special platform, which will be needed so that you can lay out the top layers. A stepladder is not suitable for this purpose, because you can’t take a bucket with you, and you have to constantly move it, and it’s easy to fall.
4. It is necessary to monitor the thickness of the seam. It should be no more than 1.5 cm, otherwise heat will escape from the building to the outside.