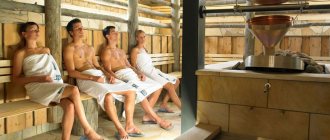
The steam room is the main section of the bath and has special requirements. The room must retain heat well and not be afraid of dampness and high temperature. Currently, there are a large number of building materials and technologies that allow developers to choose an acceptable option for themselves, taking into account personal preferences and financial capabilities. But not only this affects the optimal choice of flooring in the steam room.
To arrange the floor in the steam room, you should familiarize yourself with all the possible options, choose the type, materials, and suitable design
Steam room floor
What factors influence the arrangement of floors in a steam room?
As mentioned above, when selecting the floor for a steam room, the developer takes into account desires and possibilities . But professional builders do not recommend focusing only on these factors; there are several more very important points.
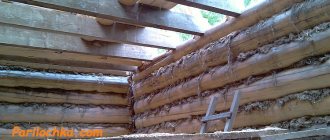
Floor ventilation in the bathhouse
Type of foundation
Three types of foundations are used for baths: screw or concrete piles, columnar and shallow strip foundations.
- Concrete or metal pile foundations Recommended for use on sloping construction sites and waterlogged unstable soils. The peculiarity of pile structures is the large open space between the floor and the ground. This situation has positive and negative sides. The presence of a distance between the floor and the ground improves the ventilation of the underground space. This has a positive effect on the humidity regime; wooden structures dry quickly, thereby increasing the service life of the floor in the steam room. Another plus is that in most cases there is no need to make special water receivers; it is poured onto the ground, the main part is immediately absorbed, and a small amount can flow outside the perimeter of the bathhouse. The negative side is that the floors cool quickly, the surface is cold, especially in winter. It is necessary to take special construction measures to increase the comfort of staying in the steam room.
Metal pile foundation
Diagram of a metal and reinforced concrete grillage for a pile foundation
- Columnar. The cheapest options for foundations for a bathhouse. Most often, the underground space is open. The positive and negative sides are the same as for the columnar ones.
Various methods of arranging a columnar foundation
- Shallow-depth tape . More durable structures that can withstand significant forces. They make it possible to build large baths with rooms for different purposes. The disadvantages include the difficulty of arranging the floors in the steam room. The fact is that the vents provided in the tape cannot provide the same effective ventilation as a completely open space. This worsens the operating conditions of the floors in the steam room; to prevent the occurrence of negative processes, it is necessary to thoroughly impregnate all wooden elements with antiseptics. Any impregnation is a chemical composition that negatively affects living organisms. From a biological point of view, a person is an ordinary living organism, and also reacts negatively to aggressive compounds. But that's not all the problems. In such baths, under the steam rooms, sewer systems must be installed to drain water. Additional work complicates and increases the cost of flooring in a steam room and requires highly qualified specialists.
Shallow strip foundation
The above features of various types of foundations must be taken into account when choosing flooring options in a steam room, regardless of the wishes of the developers.
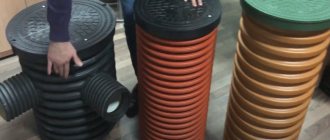
All sewer pipes are assembled before the screed is poured
Prices for screw piles
screw pile
Soil type
The technology for constructing floors in a steam room is influenced by only two types of soil.
- Clay soils do not absorb moisture; all the water remains on their surface for a long period of time. As a result, the humidity in the underground space is high, and the processes of wood decay are accelerated. Under fallow areas on such soils, it is necessary to install a water drainage system.
- Sandy soils quickly absorb moisture and can absorb large amounts of it. Such physical parameters make it possible to simplify the installation of floors under the steam room and washing room as much as possible.
Schemes for installing floors for bath structures
Climatic zone of the bathhouse location
Everything is simple here - the colder the climate, the warmer the floors in the steam room should be. It is strictly not recommended to install cement floors in the northern regions.
This information should be taken into account when choosing a flooring option for a bathhouse, but it is not enough to make an informed final decision. You need to additionally learn the characteristics of the floors, their pros and cons.
Types of floors in a steam room
This parameter also influences decision making; it should be kept in mind and compared with the type of foundations, the physical characteristics of the soil and the climatic zones where the structure is located.
Wooden floor of leaking type - water does not linger on the surface
Table. Types of floors in a steam room.
| Types of floors in the steam room | Brief description of architectural features and operational characteristics |
| Leaking | The simplest and cheapest design, all ancient baths had such floors in steam rooms. Gaps approximately 5 mm wide are left between the boards; a slope of the flooring is not required. Water flows onto the ground and is absorbed into it. There is no need to be afraid that streams will appear near the bathhouse; in the steam room they do not wash, but steam. Accordingly, little water is consumed. The disadvantage of leaking floors is the low surface temperature. But this problem is not critical for several reasons. Firstly, you don’t have to stand on such a floor for a long time; you just need to get to the shelf installed on a hill. Secondly, staying on a cold surface for a short time does not cause a cold, but hardens the body and improves the functioning of the immune system. Thirdly, if the soles of the feet are very sensitive to low temperatures, then you can make wooden grates and walk on them. |
| Leak-proof | The boards are tightly pulled together with social devices, the side surfaces can be flat or have a tongue/groove connection. Such floors must have a slope in one direction and a drain. The slope is small, about a centimeter per linear meter. The drain is given underground with further discharge beyond the perimeter of the steam room. These are more complex floor designs in a steam room, but their performance characteristics are superior to those that leak. |
| Tiled | Used only in exclusive expensive baths. The base is a cement-sand mixture or concrete, there is no underground. It is necessary to install a separate drain and finish with ceramic tiles or porcelain tiles. Professional builders strongly do not recommend installing such floors in a steam room with high air temperatures. The fact is that tiles have high thermal conductivity, a hot floor quickly releases heat, and your feet may be too hot. In terms of cost and complexity of production, they occupy a leading position among all flooring options in a steam room. |
Leaky wooden floor
Diagram of a leaky floor with drain
Non-leaking floor scheme
For traditional wooden baths, it is better to make floors from planks. Larch is considered the best species; it is not afraid of moisture, and its strength increases with direct contact with water. The disadvantage of larch is its high cost. In this regard, most developers are recommended to make floors in the steam room from softwood.
Siberian larch
Which sealant is suitable for a bath
Taking into account the microclimate that is created in the bathhouse, the main requirements for the composition for sealing joints and cracks in floors are:
- moisture resistance;
- heat resistance, resistance to temperature changes.
Also, the sealant must have good adhesion to the materials from which the subfloor and floor covering are made. It needs to be suitable for interior work and not emit toxic substances, especially when heated. Sealing wood structures requires a sealant with high elasticity that can adapt to the thermal expansion of the wood. Acrylic, silicone and polyurethane compounds meet these requirements:
- acrylic sealants are excellent for wooden surfaces, but for rooms with high humidity levels you need to select waterproof (siliconized) compounds. Conventional acrylic sealants are quickly destroyed in such conditions;
- silicone ones have excellent water-repellent characteristics. For a bath, neutral heat-resistant compounds are suitable that can withstand a wide range of temperatures, acidic, and have good adhesion to wood and ceramic tiles. You can use special sanitary sealants that are resistant to the spread of fungus;
- Polyurethane sealants have excellent adhesion to wood; they prevent water leaks and floor blowing, cracking of wood, and its damage by rot and mold.
Step-by-step instructions for making a floor in a steam room
As an example, we will look at a rather complex and expensive floor in a steam room - non-leaking with insulation. This option is used in cases where there are small children in the family, it is necessary to create increased comfort for them in the room.
Ensuring the slope of the wooden floor surface
Initial data. The steam room is undergoing renovations, the floor is being changed due to the presence of cracks that created inconvenience for small children. The material of manufacture is coniferous boards, the front surface will be covered with a special durable varnish. Durable waterproof extruded polystyrene foam is used as insulation. The work on laying the floor in the steam room is done in two stages. At the first stage, the old covering is dismantled, the condition of the wooden elements and ongoing repairs are inspected. At the second stage, a new floor is laid in the steam room.
How to insulate the floor in a bathhouse
Dismantling
Step 1. Remove baseboards around the perimeter of the room. Undermine them carefully; use wooden pads to protect the surfaces of the boards from mechanical damage.
Step 2. Unscrew the screws securing the floorboards.
Dismantling the floor - unscrewing the screws
Practical advice. Never use black self-tapping screws; they are very sensitive to moisture and quickly oxidize. Oxidized caps not only worsen the appearance of the steam room floor, such hardware is then very difficult to unscrew. Most often, the boards have to be torn off, and this leaves large holes. Problem areas need to be repaired; this is long and difficult. In addition, traces of sealing will always be noticeable.
The boards have been removed
Step 3. Inspect the floor structures for mold and rot; if problems are identified, they must be eliminated.
If there are problem areas, they need to be eliminated
Step 4: Remove the floor joists. Damaged areas need to be removed from the surface of the lumber; for this you can use an electric plane. It is recommended to wipe the surface of the walls under the baseboards with any antiseptic. The same composition must be used to impregnate the joists.
The logs are unscrewing
Removing the damaged layer from beams
At this point the preparatory work is completed, you can begin laying the new steam room floor.
Mold around the perimeter needs to be removed
Important. During the construction of the bathhouse, be sure to ensure effective ventilation of the premises. After taking water treatments, the steam room and wash room need to be dried as quickly as possible; this cannot be achieved only by opening the doors. High humidity and high temperature are the main enemies of lumber. No impregnation will prevent the boards from rotting if they are constantly wet and warm.
Laying a new floor in the steam room
The floor will be made with a slope, draining water into a tray. All lumber should be impregnated. As many years of practice have shown, the best antiseptic is used automobile oil. If a specific smell bothers you, you can leave the logs outside for several days; in sunny, warm weather it will quickly disappear. In addition, in our version the floor of the steam room is solid, which is an additional guarantee of the absence of unpleasant odors during the procedures.
Step 1. Determine the floor level and the angle of the boards. The direction of inclination is from the front door to the opposite wall of the steam room. Marks can be made using a basic water level or using a modern laser device. The second option allows you to mark up faster, but not every amateur has such professional tools at home.
The position of the plinth is determined
The upper plane of the plinth should be approximately five millimeters below the threshold; taking into account its width, mark the lines for the location of the floor boards. On the opposite side, do the same operations, do not forget about the slope.
It is more convenient to use a laser level for work.
Step 2. Secure the logs using the marks. It is much easier to fix them with special perforated metal corners. They hold a lot of weight perfectly and make it possible, if necessary, to correct mistakes. The corners are fixed to the side and bottom surfaces of the joists, thereby increasing the reliability of the structure.
The installation location of the tray is determined
Perforated corners have many holes, but this does not mean that you need to screw a screw into each one. No more than three pieces are required on one side. Extra holes are provided so that you can choose the optimal location for fixing the screws. There are knots and cracks on the lumber; hardware is not installed here.
The joists are fixed using metal corners
Practical advice. The surface of the logs is strictly horizontal, and the floorboards are at an angle. In this regard, they do not come into contact with the entire surface of the supports. Don’t worry, it’s much better for the steam room. The fact is that the floor does not have heavy loads, the boards will not sag. And the presence of a small gap between them and the logs speeds up the drying process of the lumber, which has a positive effect on the duration of operation.
The logs must also be attached to the concrete foundation strip
The logs are much easier and faster to place along the rope. To do this, you should fix the first and last ones exactly according to the marks, stretch a rope between them and use it as a template for attaching all the others.
Step 3. Proceed with the installation of the water receiving tray. Some models must first be adapted for a steam room. To do this, use a grinder with a metal disc to cut off the excess planes that interfere with its reliable fixation to the wooden joists. The master must choose a specific modification scheme on the spot, taking into account all the features of the steam room floor. The purpose of modifying a standard tray is that the boards should fit tightly to its surfaces, and leaks should be prevented.
Removing vertical stiffeners from a street tray
Before installing the tray, check the position of the floor plane again. From the opposite wall, it is recommended to place the tray on the entire surface of one board; to do this, it is laid perpendicular to the rest. It is much easier to lay one whole board perpendicularly than to use many short pieces. This should be taken into account at the stage of measuring and preparing lumber.
The tray is put in place
The slope of the future floor is shown
To drain water from the receiving tray, connect pipes to the receiving tray. They can be taken outside, or you can install the receiver inside the steam room. How it's done?
- Prepare the container. The volume depends on the expected amount of water, but in the vast majority of cases, a plastic or metal barrel for one hundred liters is sufficient.
- In the corner of the room, dig a hole of appropriate size, and install several metal rods or corners along the diameter at the bottom. The container will rest on them.
- Turn the barrel upside down and carefully lower it into the hole. Fill the gaps between the container with sand or earth.
- Make holes in it and attach drain pipes to them.
The foundation is insulated with polystyrene foam, a hole was left
Example of a prepared drain
Connect drain pipes to drainage containers
Step 4. Nail slats or pieces of boards for sheathing (subfloor) to the bottom of the joists. Insulation boards will be laid on them. It is needed in order to increase the comfort of small children staying in the steam room. Wooden slats should also be impregnated with any anti-rotting solution.
There are slats nailed to the bottom of the joists for installing insulation.
Step 5. It is recommended to prepare the lengths of the floorboards in advance. If there are problems with the size of the bath (the angles are not equal to 90°), then the length of each board will have to be adjusted separately. To facilitate further installation, fitted boards should be numbered.
Practical advice. It is more profitable to prepare the boards before installing the insulating layer: it is dangerous to move on it, it creates significant restrictions on movement.
Do not forget that the end of each board must fit tightly into the groove of the drain tray. Work on adjusting the floor will have to be done manually; use carpentry tools carefully. Never violate safety rules. Professional builders say that you should not be afraid of tools, otherwise it will be difficult to work. But they must be respected; this is the only way to prevent injury.
Step 6. Install insulation in the niches. For a steam room, a thickness of five centimeters is sufficient. Inexperienced developers may think that this is not enough, because all building codes and regulations recommend a thickness of the insulating layer of at least ten centimeters. In regions with cold climates, this parameter increases to 25 cm. The recommendations are correct, but only for residential premises, those in which people are constantly present. The stay in the steam room is short-term. During this time, the 5 cm layer of insulation will not have time to warm up to its entire thickness, and there will be no loss of active thermal energy. And after everyone has taken water procedures, heat loss does not matter.
Insulation is laid, joints are sealed with polyurethane foam
The gaps between the insulation and wooden structures must be carefully foamed. It is recommended to use ordinary polyurethane foam; it is inexpensive, and the positive effect of its use is significant. If you don’t have foaming practice, then it’s better to learn a little and then get to work.
Practical advice. If the amount of material is calculated correctly, then the protruding foam does not interfere with fixing the floor boards in the steam room. Excess should only be cut off in exceptional cases. The fact is that during hardening the pores close, water does not get inside the foam. And after cutting off the excess, air pores open, moisture quietly penetrates into the thickness of the foam. The negative consequences of this situation are well known to everyone.
Step 7. Start laying the boards on the floor, paying attention to the previously made numbering. If the boards are dry and level, then no problems arise. If they are warped due to high humidity or improper storage, then each one will have to be pulled together. This is not very difficult to do, but you will need to buy a ready-made device for tightening or make it yourself.
Laying boards
Each board is fixed at the edges with two hardware. You can use self-tapping screws (long and expensive) or ordinary nails. The length of the nails is selected depending on the thickness of the boards. But there is one mandatory requirement: the depth of driving nails into the joists must be equal to at least twice the thickness of the board. Otherwise, there is a high risk of the pilaf loosening in the steam room. For example, if the thickness of the boards is 25 mm, then the length of the nails should be approximately 70 mm.
Step 8. The gaps between the floor and the walls around the perimeter of the room can also be foamed. This will be an additional seal.
Excess foam is removed
Step 9. Nail the baseboards. If your elements are made of plastic, then you do not need to cut off the protruding foam, we have already told you for what reasons. Skirting boards are fixed with small nails or self-tapping screws.
Skirting boards installed
At this point, the work on laying the floor in the steam room is completed, you can begin the finishing coating of the front surface.
Stages of interior finishing
Finishing the steam room in the bathhouse is the final stage of construction. After covering the walls, all that remains is to secure the electrical wiring. It is carried out in stages.
- Finishing begins from the ceiling . A sheathing of wooden slats 25 cm thick is fixed on top of the vapor barrier. The clapboard is hemmed to them from below. The direction is chosen based on the size of the steam room. Laying usually starts from the wall with the doorway or from the window.
- Before you start covering the walls, choose a laying method. The lining is attached perpendicular to the sheathing elements.
- Slats 25 mm thick are fixed to the walls. The lining is assembled using the tongue and groove method. Fixed with clamps or nails to the sheathing.
- Cover the joints between the ceiling and walls with skirting boards. The same thing is done with the joints between the floor and walls.
- If the steam room has a floor on joists, no additional finishing is needed. If the floor is concrete, wooden gratings assembled from planks with a distance of 5 cm from each other are placed between the shelves.
After installation, the lining can be painted or varnished or treated with wax.
A log bathhouse does not need clapboard cladding.
Finish coating
It is allowed to use a special stable varnish as a finishing coat. Before application, the surfaces should be sanded and the dust thoroughly vacuumed. For grinding, it is better to use an electric machine; it not only makes the work easier, but also significantly improves the quality. You can never make such a smooth surface with your hands.
Floor sanding
Alternatively, you can sand the floor by hand.
Acrylic wear-resistant varnishes have proven their good performance in practice. If the manufacturers are responsible, then the floor will be used for a long time; no periodic repair work will have to be done due to wear and tear of the finishing coating.
You can cover it with an ordinary paint brush, the number of layers is at least two. Moreover, when covering with the second layer, the brush should move in a perpendicular direction to the first. For steam rooms, it is recommended to apply three or four layers of varnish, which increases the service life. Each subsequent one is applied only after the previous one has completely dried; there is no need to try to reduce the number of layers by increasing the thickness of each. Such a gross violation of coating technology has extremely negative consequences.
The floor is covered with wear-resistant acrylic varnish
After completing the work, it is recommended to ventilate the steam room for several days, during which time unpleasant odors and harmful chemical compounds will be completely removed. After the first warm-up, ventilation also needs to be repeated, and only then is it allowed to enter the steam room.
Prices for floor boards
floor boards