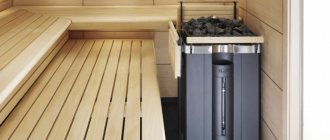
Most Finnish and Swedish saunas use heater stoves with fireboxes without tunnels, with firewood loaded directly from the steam room. This is due to traditions and the harsh climate, but more often – to the small size of the steam room of the bathhouse. For temperate and mild climates, a more rational solution would be a sauna stove with a firebox from the dressing room. And this is not a matter of fear of burning or causing a fire. Despite all the inconveniences associated with maintenance, a stove with a remote firebox provides a noticeably greater level of comfort than a classic heater - potbelly stove.
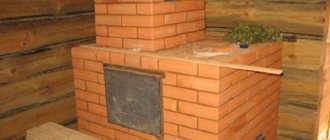
It’s easy to make a brick portal for an external firebox in a chopped bathhouse
Features of installation work
How to install a stove in a bathhouse to avoid ridiculous mistakes? There are several tips from craftsmen who have performed such work several times and built the heating themselves. Tips from stove makers.
- Firebox door location. You need to think about the door exit for any design. The door should be opened where there will be no people present. Throwing firewood while washing is inconvenient.
- Separate steam room. How to place the product so that the steam is directed directly into the steam room needs to be thought out in advance, even on the drawings. You can steam without any problems. A person will not interfere with those who are simply washing.
- Ventilation lines. The accumulation of steam and heat should not exceed the norms. Stale air will not create the atmosphere of lightness and healing that is expected from a Russian bathhouse.
Those who like to spend time in the steam room will receive the maximum temperature; they will not need to get up for each portion of steam if everything is at hand.
Installation of sauna stoves is carried out in accordance with fire and electrical safety requirements. Each rule requires precise execution. All electrical lines require protection from any possible sparks or damage.
The next video contains recommendations for installing a stove in a bathhouse.
Features of a wooden partition
The partition in the bath between the steam room and the sink is the simplest and most affordable design option, requiring minimal time and financial investment.
To ensure sufficient thermal insulation between the washing room and the steam room, it is better to build partitions from a wide board or timber. This design does not provide for the presence of technological gaps in the inner part of the wall, which helps prevent the accumulation of excess moisture in the room.
In this case, the refusal to use a heat-insulating layer in the walls is explained by the fact that during operation the bath structure requires maximum heat accumulation in all functional rooms. Since a lower air heating temperature is maintained in the washing compartment, the lack of heat is compensated by the heated steam room.
Choosing a location for the oven
The most correct decision would be the initial design of the bathhouse, taking into account all the rooms and the location of the stove. If it is possible to heat all other rooms from another source, it is placed in a steam room. If not, consider the option of installing a stove in a bathhouse with a firebox from the dressing room so that it heats both it and the washing compartment. To do this, an opening is provided in the partition between these compartments, which is subsequently lined around the firebox with fireproof materials.
Project of a bathhouse with a steam room and showerSource sk-ac.ru
Both options have their positive and negative sides:
- Installation in a steam room allows you to control the operation of the stove without interrupting bath procedures. But the firebox and the space in front of it take up extra space; with this placement, the oxygen in the room burns faster, which requires the installation of a ventilation system. And most importantly, you have to organize autonomous heating of the dressing room, locker room, bathroom and other rooms of the bathhouse, or conduct it from home.
- The second option is much more effective and economical, since installing a stove in a bathhouse with a firebox in the dressing room is not much more difficult, but there are more advantages. The steam room maintains a normal microclimate and frees up useful space; all rooms are heated from one stove. But the bathing procedures have to be interrupted in order to add firewood to the firebox.
However, convenience is not the only and not the most important criterion for choosing a suitable location for a heating unit. The issue of fire safety is much more pressing.
Correct corner placement schemeSource banyabest.ru
First of all, you need to decide how and where to bring the chimney through the roof. It is best if it is connected to the stove in a straight line, without unnecessary bends or turns.
When placing it in a corner or against one wall, you need to follow the rules for installing a stove in a bathhouse with a firebox from a dressing room in a wooden log house. The distance from the metal body to walls made of flammable materials must be at least 50 cm on any side. It can be reduced by insulating the walls with fireproof shields. This can be sheets of mineralite, asbestos cardboard or basalt cardboard, as well as facing with ceramic tiles or a screen made of red ceramic brick.
Insulating walls with mineralite slabs before installing a stoveSource bg.aviarydecor.com
A distance of at least 120 cm should be maintained from the firebox door to the front door. And in front of the firebox, be sure to lay a metal sheet or cover the floor with tiles.
It is easier to provide for all these points at the design stage. If this has not been done, the task will become more complicated, and there will be fewer options for convenient placement of the stove.
Fire safety requirements
When installing any sauna stove, it is necessary to strictly comply with fire safety requirements, since the walls of the device heat up to fairly high temperatures during its operation. In order to ensure maximum safety and not have problems with regulatory organizations, it is recommended to install the stove in accordance with the provisions prescribed in SNiP 41-01-2003 (Chapter 6.6).
- The first thing that needs to be done is to equip a reliable foundation for the main structure of the stove, which will be adjacent to the wall dividing the room. The foundation should be covered with heat-resistant material and then with metal sheet. Asbestos sheets were previously used as heat-resistant insulation. Today on sale you can find panels of pressed mineral wool, which is less dangerous from an environmental point of view, sheets of foam glass or EZHKAKH (heat-resistant structural mica plastic).
- It is also necessary to provide a metal flooring in front of the combustion door, which will prevent the wooden floor from catching fire and simplify debris removal. The size of the pre-furnace sheet must be at least 400×800 mm.
- If the partition between the steam room and the dressing room is wooden, then the opening through which the fuel channel will pass must be separated from the wood by brick or stone masonry. The distance between the stove and wooden walls should be 400÷450 mm.
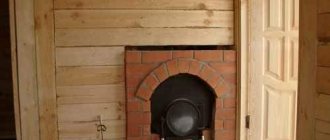
In the version shown, the owner chose to fill the opening with bricks
- Provided that an opening is installed along the end part of the wall through which the combustion channel will pass, a gasket made of heat-insulating material (mineral basalt wool or cement-fiber sheet) with a thickness of 40÷50 mm, the distance between the part of the wall built from combustible material and the outer wall oven can be reduced to 250 mm. If thicker thermal insulation material is installed, the safe distance can be 125 mm.
- The distance between the ceiling of the bathhouse and the surface of the stove should not be less than 1200 mm.
- The distance from the edge of the combustion door to the nearest door must be at least 1250 mm.
- If you purchased a non-factory-made stove, or the device is independently made from sheet metal, then it is best to cover it with brick. Thus, it is possible to protect the structure of the bathhouse from fire, and people taking water procedures from burns. Factory products, as a rule, are made with double walls, between which thermal insulation material is laid or convection channels pass through.
Prices for foam glass
foam glass
Criteria for choosing a heating device
The installation of a sauna stove begins after its purchase. When choosing a device for heating rooms for thermal therapy, it is recommended to take into account a number of distinctive characteristics of the products. These include:
- heated area and layout of the bathhouse;
- location of the firebox: inside the steam room, adjacent room, with removal to the street;
- overall dimensions, configuration, weight of the device to create a comfortable microclimate in bath rooms intended for high-quality thermal therapy;
- the power of the stove, which must correspond to the volume of the steam room;
- compliance with the price of the product, quality and performance characteristics;
- consumption of fuel resources, which determines the production of thermal energy in the bathhouse and the rate of heating of the premises;
- sauna stove manufacturing company.
Taking into account such criteria will allow you to become the owner of the best option for a sauna stove that will correspond to your wishes, preferences and financial capabilities.
Nowadays, among a wide range of products, iron sauna stoves most often attract the attention of consumers
Today we will look at the rules for installing just such models inside a building
I would also like to draw your attention to multifunctional units with a special water tank heater. It's called a heat exchanger
The heat exchanger is installed in a production environment. Purchasing multifunctional sauna stoves, in my opinion, is considered the right, rational and cost-effective decision.
Important points
Brick partition laid out
Pay attention to the basic recommendations before and after
If you decide to plaster the partition, then:
- For its masonry, it is permissible to use different bricks, or used ones;
- During the work itself, you should not spend a lot of time and effort on the quality of the seams.
If a brick partition is a design solution, then:
- Lay the rows with extreme care. For correctness, you need to check the horizontalness using a building level. Then you won't have any configuration problems;
- Remove excess solution in a timely manner, or add as needed;
- It is better to straighten the seams immediately, while the solution is fresh. For convenience, you can use jointing.
You may need to make holes in the partition for communications. Prepare a piece of pipe of the required size in advance, insert it in the planned location and cover it with brick. You should not fix the pipe with a solution; it is better to use polyurethane foam for this.
At the end of all work, be sure to thoroughly rinse the tools used.
Waterproofing measures
Prepare the surface for waterproofing. To do this, remove the old finish and clean the brickwork from dirt.
- Level the surface by applying water or a layer of primer.
- Apply two layers of liquid rubber, which will reliably protect the desired surface from moisture penetration. The advantages of liquid rubber are that it is not only elastic, but also highly durable. This will protect it from damage due to possible settlement of the foundation and the appearance of cracks.
- The second option could be roll waterproofing. It also has high strength and reliability. But installing it is quite difficult.
- One of the most common roll waterproofing materials is roofing felt. It is fairly inexpensive, not difficult to work with, and reliably protects against moisture for a fairly long period. If you heat treat roofing material, it will easily take the required shape.
- But this material also has its disadvantages: when working with it, you will definitely need an assistant, and the joints will have to be processed very scrupulously. Ruberoid is quite fragile, try to protect it from mechanical damage.
- It is advisable to use roofing felt as a waterproofing material on small areas.
Today there is a fairly wide range of new generation waterproofing materials on sale. They are produced using innovative technologies, so they are more reliable, durable and better cope with the tasks assigned to them.
You already know what kind of brick to make a partition in a bathhouse from and how to provide for everything. The most important thing is to take your time and not forget about waterproofing.
Installation of a chimney pipe for a sauna stove.
This work will require several operations:
1. Modern sandwich pipes are used for work. They are mounted using socket connections. The main advantage is that each part consists of an internal and external steel pipe and an internal thermal insulation layer. The first pipe is connected to the chimney pipe coming out of the stove. The parts are secured using special clamps.
2. The pipe is brought out through the roof structure into a hole prepared in advance, a special glass or coupling with an inner layer of thermal insulation is inserted. The glass should fit tightly onto the pipe.
3. The chimney and glass are secured to the wooden rafters using self-tapping screws using a special clamp.
4. A protective skirt is placed on top, exceeding the size of the hole by 100-150 mm, the roof surface is covered with a layer of thermal insulation, then a coating is applied and the skirt is mounted on top. Its inner surface is treated with sealant, the protection is pressed tightly against the roof surface and secured with self-tapping screws; rubber gaskets are placed under the heads to seal the attachment point.
5
Now it is important to first check the tightness of the installation. To do this, pour several buckets of water above the pipe outlet and check the connection inside the bathhouse
If there are defects, they are again treated with sealant, secured and re-bleeded.
6. The chimney pipe should protrude 1000 mm above the roof ridge. The top is covered with a special cap.
Brick partition
If you decide to install a brick wall, you need to pay special attention to the quality of the cement. The durability of the partition in a bathhouse made by yourself depends on this
It is also necessary to use reinforcement for connection to the main wall. The reinforcement is rods with a diameter of 6 mm. We should not forget that a wooden frame will definitely settle by about 4-5 cm. This will happen in 4-5 years. The brick partition retains its dimensions. Therefore, in a new bathhouse it may not be built up to the ceiling. Before starting work, you need to provide the work area with lighting and remove everything unnecessary from there.
To work, you need to prepare materials and tools (Fig. 2):
Figure 2. Tools for laying a brick partition.
All stages of work on the construction of a brick partition in a bathhouse can be completed independently. The working process is approximately as follows:
- the boundaries of the structure are indicated;
- remove all unnecessary items from the workplace;
- apply the solution with a trowel;
- leveled;
- a row of bricks is laid out.
Reinforcement bars must be laid every 4-6 rows of masonry. The solution is mixed from high quality cement grade M500 or higher. For 1 part of it take 3 parts of sifted clean sand. Mix everything carefully and add a little water. Knead the solution until it has a homogeneous consistency. The solution should resemble sour cream. Gradually it will set. Under no circumstances should you add water. You just need to stir it every 15-20 minutes. It is not recommended to prepare the solution for more than an hour of work.
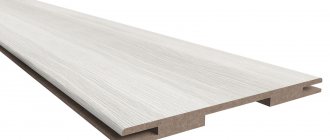
To form the door opening, a strip of metal is laid above it. Its width should be equal to the thickness of the partition in the bathhouse. After completing the entire wall, you need to give it time to dry completely. This will take 7-10 days. During this time, the surfaces are sprayed with water and thoroughly cleaned with a brush. The finished partition can be subjected to decorative finishing. For this, wooden slats, lining made of aspen or linden, and magnesite sheets are used.
Sheet magnesite is a relatively new finishing material of varying thicknesses. It contains perlite and cellulose fibers. It has the following features:
- has high fire resistance;
- the material is hydrophobic;
- easy to install;
- it's cheap.
Wooden lining must be impregnated with antiseptics, which protect the material from mold and mildew.
You need to make a partition in a brick bath so that it is durable and lasts for many years. The reinforcement between the rows of bricks is used for this purpose. There is usually a small gap left near the ceiling itself.
It is filled with crushed stone made from bricks and tow, which is moistened with a solution. The horizontality and verticality of the wall is constantly checked by the building level. If it is planned to carry out any communications through the partition, sections of plastic pipe of the required diameter are installed in the masonry. Subsequently, the pipe is lined with bricks.
Choosing a place for the stove in the bathhouse
Installation of a sauna stove begins with choosing a location
Pay attention to the location of the floor beams and roof. All hot elements of the stove, firebox and chimney must be thermally insulated in relation to wooden structures
When positioning the stove, it must be taken into account that each case is individual. Chimney bends are needed in two cases: for greater heat transfer of burnt gases and to create dynamic resistance when the diameter of the chimney is too large in relation to the volume of the firebox, or the draft is too strong (high chimney).
Since the combustion side of the furnace in our case is led out into the adjacent room, the place must be chosen where it is possible to cut out part of the wall for this. In this case, it is necessary to take into account the characteristics of two rooms at once.
In order for the combustion process in the furnace to be stable, it is necessary to ensure a flow of fresh air into the furnace room. Otherwise, incomplete combustion may result in carbon monoxide poisoning.
Finishing the passage and installation site
The time has come to move from general concepts to practice. When the opening is prepared, the stove is installed and the chimney is installed, the passage area is sealed. First, a lining for the furnace tunnel is assembled from bricks: by orienting the stones in different positions and adjusting the thickness of the seam, you need to achieve a tight backfill.
Next, lay out the side sections. Typically, the bricks are butted together at the edge of the opening, forming a small overhang that provides additional protection for the finish and gives the masonry a more finished look. The areas between the ledge and the fire door are laid out with bricks in a “spoon”. In this case, the masonry can be done in two layers. The alignment of the masonry plane is carried out along the frame of the combustion door.
The top row is laid out in the same way as the outermost bricks, thus forming the frame of the firebox. If, after laying the final butt row, a gap of more than 20 mm remains in the opening, this is a good opportunity to install a narrow shelf above the firebox - just insert a board of suitable thickness into the gap. After the mortar has set, the brickwork is lightly sprinkled with water and embroidered with a semicircular knife.
Additional wood processing
Fire safety standards require wood to be treated with special impregnations to reduce its flammability. But many people know that impregnations are not particularly useful, especially in a bathhouse, where high temperatures are deliberately planned, at which chemicals will begin to be released into the air and poison a person’s lungs. This is not the result you want to get from visiting a bathhouse.
However, not the entire bathhouse has a high temperature; as a rule, only the steam room. Therefore, in order to avoid fires in other parts of the room from sparks, for example, in the chimney area, experts advise treating the wood with fire retardants at least there.
Important! It will not be possible to treat wood once and forget it for the entire time it is used in the house. You can do a small check: if the wood chips ignite with a match, then it’s time to renew the impregnation
On average, the frequency is once every two years.
Step-by-step instructions for installing a metal stove are as follows:
- Having chosen a place to install the stove, we dismantle the old floor, taking 10 - 15 cm more than the bottom of the stove on each side;
- We dig a hole half a meter deep, compact the bottom and pour a thin layer of sand and crushed stone into it;
- We lay out plastic film to waterproof the slab (double layer);
- We cut out a frame from the road mesh, which is 5 cm smaller in width than the hole, and place it on stands made of pieces of reinforcement resting on the floor, tied to the mesh with wire;
- Fill the hole with concrete. Formwork from boards on top will make the edges smoother and raise the level of the slab. Horizontalness can be checked using a level;
- As soon as the slab hardens, we cover its surface with roofing felt, consisting of two layers, and then 1-2 layers of fireclay bricks so that the base level is equal to the floor level. It happens that the base rises above the floor by 5 - 10 cm;
- After the brick has cooled and hardened, we install the stove according to the design;
- We install an adapter in the wall with welded plates that protect the wall near the chimney;
- We weld the chimney pipe to the adapter;
- On the outside of the bathhouse, we weld another part of the pipe and cover it with a special nozzle to prevent the ingress of precipitation and debris;
- We also install a chimney there;
- We protect the slab from three walls with facing or fire-resistant bricks;
- We line the stove itself with bricks;
- We fill the tank with water, lay the stones;
- Making the first test firebox;
- We control that there are no smoke leaks in places of welding and connections, water leakage from the tank onto the stones or into the firebox, etc.
How to install a heater
So, let's see how to install a stove with an external firebox in a bathhouse. Since most often metal structures of this type weigh less than 700 kg, they can be installed without a foundation. But, of course, only if the floor in the bathhouse is poured from concrete or made of boards on very reliable joists.
The stove is installed in such a way that the distance from it to the partition complies with the standards. Its telescopic channel extends to the required length. The firebox can be brought out flush with the surface of the dressing room wall or left slightly recessed in the opening. The last option is considered preferable. With this arrangement of the firebox, it is impossible to get burned on its door.
Laying in the opening is carried out in the usual way. A few centimeters of free space should be left between the brick and the partition material. This gap is usually filled with basalt wool, cardboard or asbestos. You can also use polyurethane foam. Leave a small gap between the metal of the channel and the brick. In this case, it is best to use asbestos cord as an insulator.
Above the channel, the installation of bricks is carried out on a steel angle . If desired, their top row can be moved forward a little. In this case, you will get a small convenient fireplace shelf in the dressing room.
Design and principle of operation
Comparing a stove with a remote firebox and a conventional stone stove, the second option is easier to construct and install. But the advantages of the first option make you get confused and forget about the complexity. For a home bath, the best option is really a stove with a firebox from the dressing room.
Among the advantages of a stove with a firebox from a dressing room:
- the stove heats both the steam room and the dressing room, that is, it maintains a high temperature in both;
- the steam is light due to the fact that the main part of the stove is located in the dressing room;
- the steam room itself does not become clogged with debris from the firebox;
- There is much more space in the steam room.
To summarize, a stove with a remote firebox works more efficiently. It is located in the dressing room, and only one part of the structure goes into the steam room. You save space and expand the function of the stove to two rooms at the same time.
Materials and their quantity
You need to know that the main material is brick, and the design of a stove for a bathhouse with a firebox from a dressing room consists mostly of it. Therefore, choosing a brick should be given the lion’s share of time. In no case should you skimp on this material; the stove needs a high-quality base.
Experts recommend using fire-resistant bricks. It comes in these sizes:
- standard - 23 by 12.5 by 6.5 cm;
- narrowed - 23 by 11.4 by 6.5 cm;
- reduced narrowed - 23 by 11.4 by 4 cm.
Straw-colored fireclay bricks are best suited.
In addition to the brick, you will need to have:
- clay for mortar;
- grate bars of classic sizes – 5-7 pcs;
- a door for a hole with a blower;
- door for the firebox opening – 25 by 28 cm;
- a door for another compartment with stones;
- fireclay products – 7-8 pcs.;
- corners of standard size made of steel – 5-7 pcs.;
- classic size corners for roofing;
- a sufficient amount of sand - both river and quartz.
These materials are enough to get started with confidence.
Types of stoves
Main types of sauna stoves:
- metal;
- wood stoves;
- gas;
- electric stoves in the sauna.
Advantages of a furnace with a remote firebox
Fireplaces and devices with a remote firebox have many advantages over the classic version of the stove:
- Safety – the possibility of carbon monoxide poisoning is almost non-existent, even if there is unburnt firewood inside and the door is closed.
- Comfort - such devices heat 2 rooms at the same time, because they are adjacent to adjacent walls.
- Cleanliness - shoes are removed in the steam room, especially if it is your own bathhouse, and branches and debris from them do not lie under your feet.
- Space – the combustion chamber, moved outside the room, will free up 1 m² of space.
- The steam will not be as dry because the bypass oven will not burn oxygen. There is no need to make an additional ventilation system in the room.
Warm floor
At the construction stage, you can install a water-filled system, which will be powered by the main heating device (for example, a stove), circulation is provided by a pump.
Attention! If you do not add anti-freeze liquids, the water will have to be drained and refilled each time you use it.
Such a system requires knowledge and consideration of many subtleties. Main negative points:
- strong heating (in some cases the water comes to a boil);
- frequent malfunctions in winter (breaks due to temperature changes are possible even when using antifreeze);
- additional space is required (filling requires a separate circuit and a special tank for the furnace);
- reduced efficiency of the heating system;
- additional time to heat the floor.
Most often, a circuit powered by electricity or a gas boiler is chosen. The last option is more expensive than the others, so it is used less often.
Insertion into the wall and installation of a sauna stove
To bring out the combustion part of the stove, a rectangular hole is cut in the wall. Its dimensions depend on the design of the stove, especially that part of it that will go into the adjacent room.
The exact size of the gap between the body and the combustible parts of the wall is indicated in the stove passport. Installing an iron stove in a wooden bathhouse involves covering the contour of the hole with brick, basalt wool, plaster or any other non-flammable and moisture-resistant heat insulator.
For a homemade stove, we can recommend gaps of 30 cm, provided there is good thermal insulation. Glass wool or wool for wall insulation cannot be used for this purpose. This material does not hold up well to heating above 150 degrees and begins to crumble. In addition, the use of glass wool is not safe, since combustion products are harmful to the human body.
Why is it convenient to place the firebox in the dressing room?
A metal stove burns wood quickly, followed by a drop in the temperature of the heater, and, as a result, during the time spent in the steam room you have to open and throw a couple of firewood or briquettes into the combustion chamber several times. It is not always convenient to leave the steam room to the dressing room to heat the stove, especially in winter.
For a brick stove, the firebox in the dressing room makes it possible to:
- Clean and heat the firebox in the sauna without entering the steam room, which simplifies cleaning the steam room and keeping it properly clean;
- Keep the necessary supply of fuel under the stove for visiting the bathhouse, dry it periodically;
- Fully control the heating of the heater and thereby maintain normal comfortable conditions in the dressing room or locker room;
- Reduce the amount of gases, including carbon monoxide, that can escape from the furnace door seals.
The heating process of a brick sauna stove takes more than one hour; as it warms up, the heater and brickwork in the steam room take in hot air, and only after an hour and a half has passed can you go and steam without haste and the need to regularly check the stove.
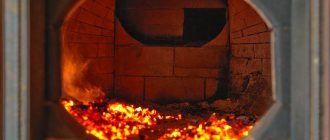
Test firing of the furnace
Test firing of the sauna stove from the dressing room is very important. It is at this stage that the results of your work and all the miscalculations that could come out are immediately visible.
For a test fire, you need to light the stove at full load for 2 hours. Then it is worth checking individual elements of the structure for heat resistance.
The following standards should be adhered to:
- all elements should not overheat, much less glow,
- the traction must be strong,
- the stove should not smoke much,
- The oven should heat up evenly.
If everything went well and you did not notice any failures, you can safely use the oven for its intended purpose.
How to do it yourself?
Scheme
It is difficult to derive a specific ideal drawing for a future furnace. The diagram of a brick stove for a bathhouse with a firebox from a dressing room of a more classic version may look like this:
- Side view:
- End view:
This photo of a stove with a firebox in the dressing room schematically shows us what the design should be and what elements it has. Knowing what is in what place, we can easily navigate further work.
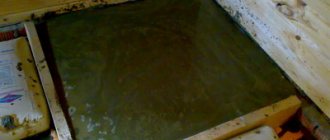
Foundation
A stove is a very heavy thing. And if you want it to stand level and strong, then you should think about the foundation. The foundation is the foundation on which the entire structure will stand. If you make a mistake there, you can call into question the entire structure.
Instructions:
- First, you should dig a hole where the stove will be installed. It is also important to know that the pit should be slightly wider than the oven itself.
- Next, fill the bottom of the hole with sand and wet it. This will make the sand compacted and durable.
- Next, a 15 cm layer of gravel is poured. Then you need to install formwork (a certain frame) and place a metal frame on the base of the future furnace.
- Then everything is simple: you need to make a mixture (cement mortar) and fill the hole, leveling it around the entire perimeter. At the end, when the cement has already hardened, the formwork is removed.
- You need to achieve a perfect surface, so check the result many times using a level.
- If you see small pits, try adding another small layer of solution. But it is very important not to overdo it with its quantity.
Thermal insulation of walls and ceilings
You cannot begin installing a stove that is surrounded by bare wood. This is life-threatening due to the fact that the tree can instantly catch fire under the influence of temperature. You should always remember about thermal insulation.
A sheet of thermal insulation made of metal or cement is suitable for this. Install either one or two such sheets. This material should touch the ceiling and floor, but not directly to the wall. You need to leave a gap of 3 centimeters.
Preparing mortar for masonry
It is worth preparing the solution in advance. This is a rather lengthy process. A brick sauna stove with a firebox made from a dressing room will firmly adhere to its structure precisely on the clay mortar.
At least two days in advance, you need to soak the clay in water and leave it there. Next, you need to mix this material using a construction mixer. At the end, add sand so that it matches the original amount of clay before mixing.
Stir it all again. Determine the amount of masonry mortar needed. It is best to take it with a reserve to take into account unforeseen situations and cover all the necessary brick balls.
Masonry process
After the foundation and thermal insulation, you can proceed to laying the brick itself. At this stage, special precision and coordination of actions are required.
Here are 2 examples of arrangements with an open and closed heater. In these examples, you need to place the firebox towards the dressing room:
The first rows of bricks are very important. All subsequent rows will depend on their quality. Therefore, the laying of a brick sauna stove with a firebox from the dressing room must be perfectly level in the early stages. As the first ones go, this is how the work will look further.
- First you need to lay the first row, not forgetting about the 5-6 cm indentation. Start with the edging and then fill in the empty spaces inside.
- Next, the second row is laid so that the seams of the second overlap the seams of the previous row. Under no circumstances should they coincide. Leaving space for the blower, you can design the third and fourth rows in the same way. It is important to understand the exact location of all elements in order to leave room for them during laying.
- After the fourth row, in the spaces left, you need to insert the doors. Only after installing them correctly can you proceed to the fifth row.
Installation on a wooden floor
Options
There are three options for installing a heat-resistant base:
- a metal sheet;
- brick;
- natural or artificial stone;
- ceramic or porcelain tiles. The minimum size of protection should be 40 cm.
Preparing the walls
As already mentioned, it is easier to decorate the walls with refractories than to take away useful space from the steam room. The most economical, but not the best option is to nail a sheet of metal to the wall on bars.
In general, we have the following options:
- attach the refractory sheet to the wall;
- plaster it (it is better to make the layer more than 2.5 cm);
- make a brick casing for the stove;
- lay it out with bricks instead of a wooden wall.
If the stove is located close to the wall, then you will need a two-layer mineralite with an air gap of 3 cm between these layers of ceramic bushings. It looks something like this: wooden wall - first layer of mineralite - bushings - second layer of mineralite.
When space allows, you can get by with one layer, but grommets are also used to attach it to a wooden wall.
Heat-resistant tiles or mirror stainless steel are sometimes placed on top of the mineralite. The latter perfectly reflects heat, but heats up itself, so it can be attached to any refractory material - mineral wool, ceramic fiber, superisol, etc.
Those who brought the firebox into the dressing room either put up a brick wall, or then cut out part of the timber. A space is left in the brick with a reserve for the combustion tunnel, where a heat insulator, for example, mineral wool, is subsequently placed. It is also used at the junction of brick and wooden walls. If you don’t want to replace the entire wall, make a portal - at least a meter wide.
Ceiling preparation and chimney installation
Often the cause of a fire is the section of the ceiling where the chimney is located. There are many errors associated with the passage of a chimney through ceilings.
The specific cause of the fire may be:
- pipe overheating;
- cracks in the pipe allowing sparks to pass through;
- shortcomings in the distance to combustible objects.
If you haven't thought about the position of the stove in advance, there may be a beam above it. In this case, part of the beam is cut out and fastened with jumpers to adjacent beams. The empty space above the center of the pipe passage must be at least 90 cm in diameter.
The chimney is installed from the pipe that comes out of the stove. In the case of a larger diameter monopipe, an adapter is put on the pipe. The first pipe passing through the steam room will be a monopipe
A gate is installed on it, then it continues again, but not to the end (this is very important!) of the overlap, because there they put a “start” on it - an adapter for a sandwich pipe that will pass through the ceilings
Pipe connections should not be in overlap areas.
It is important to know here that although sandwiches are the most common, they are a dangerous type of chimney. An analogue of sandwich pipes is ceramic or brick chimneys, but both options are heavier and more expensive
The outer side of the box can be wrapped with basalt cardboard to prevent it from touching the wood. The pipe is then laid on the roof through a hole larger in diameter than the pipe itself. Next, it is sealed with sealant, a master flush is put on and secured to the roof with self-tapping screws at intervals of 5 cm. Finally, a deflector or umbrella is installed.
Preparing the oven
Before installing the chimney, the stove should already be located in its designated place. It is recommended to heat it outside first
It is extremely important to do this, because... the first fire is usually accompanied by burnout of industrial heat-resistant paint
The oven may smoke a little and smell. This is a normal state for her. At the same time, you will find out whether it has any manufacturing defects.
New stones should also be tried out in the fresh air, not inside, because they can also sting the throat and eyes.
Strictly follow the step-by-step instructions for installing a metal stove.
Insulation of the room
To avoid heat loss, it is important to pay attention to the ceiling and floor (a significant amount of cold air comes from the attic space and from the ground).
For buildings made of thick logs, additional insulation is not required in most cases. If a thin beam or frame is used as the main material, additional finishing is needed:
- vapor barrier;
- insulation;
- waterproofing.
The last layer is decoration, chosen to the taste of the owner. Concrete is not used for the floor - in cold weather it will be difficult to warm it up; if there is no built-in heating system, it is better to lay a special board. For the ceiling and walls, lining, processed timber, and blockhouse are suitable.
How to determine the required thermal power of a sauna stove?
The power of heating devices is measured in kilowatts. However, manufacturers of sauna stoves take a different approach - they indicate how much steam room volume this model will be guaranteed to be able to heat to a level corresponding to the required microclimate in the steam room. Naturally, subject to high-quality thermal insulation of the latter.
This is usually indicated in passports - for rooms, for example, from 10 to 16 m³.
It would seem that everything is very simple. It is not difficult to determine the volume of the steam room, and it will be just as easy to choose a model. However, the features of the arrangement of the bathhouse can make their own adjustments.
Below is a calculator that will calculate, so to speak, the conditional or reduced “volume” of your steam room, that is, taking into account all the necessary amendments. Based on this value, it will be possible to more accurately select the optimal oven.
For example, if the result is that a stove of 11 m³ is needed, then they try to choose so that this value is approximately in the middle of the range of capabilities of the purchased model. That is, say, a stove designed to heat from 8 to 14 m³.
A few explanations on the calculation.
- It is clear that first of all the actual volume of the steam room is taken into account. To do this, you need to indicate its linear dimensions: length, width, height.
- Sauna stoves are designed for operation in high-quality insulated rooms. But in practice, it happens that log or timber bathhouses are not insulated from the inside. In this case, a fairly significant part of the heat will be spent on heating the walls, which have considerable heat capacity. Therefore, an amendment is necessary.
- If the stove is located entirely in the steam room, then all the heat generated remains inside this room. But if the firebox is made external (just on the topic of this publication), then part of the thermal energy will involuntarily be wasted on warming up the dressing room and the entire created structure of the “inset” of the stove into the wall. That is, it will also be appropriate to adjust the result.
- The quality of the door leading to the steam room is of great importance. If this is a well-insulated door with a good fit, then significant heat losses through it are not expected. But ordinary panel doors are often installed, as well as glass doors that are becoming fashionable. Of course, their thermal insulation qualities are much lower, and this will also be taken into account when carrying out calculations.
- A window to the street is not a mandatory element of the steam room interior, but it is still often present. That is, another loophole appears for heat leakage. Both the quality of the window and its area matter here. If the window is taken into account, then additional fields for entering this data will appear in the calculator.
- Areas in the steam room (on its walls or floor) lined with ceramic tiles, bricks, and stones can also play a role. Warming up such heat-intensive surfaces will require additional furnace power.
- The result will be shown in standard cubic meters, which should be used as a guide when choosing the optimal sauna stove model.
Briefly about the main thing
Exiting the furnace firebox to the dressing room is largely considered a practical solution. In this case, two rooms are heated at once. Therefore, the rest after taking paired procedures is more comfortable. It is also easier to maintain the required temperature in the steam room and restore order. Because there is much more freedom of movement in the waiting room.
The most difficult thing to implement is the classic version of a brick stove, since its construction requires some experience. But if you follow all the recommendations of experts, you can build a fully functional stove. And also take care of the fire safety of the premises.
It is much easier to use a ready-made factory-made oven. It is more reliable and even compact. Its installation in a steam room is not difficult. The only problem will be arranging a niche for the fuel channel. But following the instructions of specialists, covering the opening with bricks and insulating it will not be difficult even for a beginner in this matter.
Ratings 0
Installing a stove in a bathhouse with an external firebox - what to do and in what order
In order for the bathhouse to become a place where all family members can take wellness treatments, it should be equipped according to technology. A properly selected stove will ensure comfort and coziness in the steam room.
Regardless of whether you purchased a modern design or built the stove unit yourself, the main requirement for it is the ability to heat several rooms at once and absolute safety in operation.
There are two ways to install a sauna stove:
- place the firebox in the next room;
- install the structure directly in the steam room.
Each option has both advantages and disadvantages, so the choice must be made at the design stage of a bathhouse building. In the case where it is planned to install a stove in a bathhouse with an external firebox, it is advisable to create an opening in the wall during the construction of the building. True, the heating structure cannot be installed immediately, for which purpose a hole is subsequently created in the already built wall.
Walls - preparation
If the load-bearing fence is made of wood, then the distance will be at least 50 cm. For a unit with an external firebox, you will have to cut out a niche.
How to protect partitions from fire:
- apply the plaster composition to a metal mesh previously screwed to the surface;
- install an iron screen with a non-combustible insulator;
- clad with artificial stone or porcelain stoneware;
- make a brick layout;
- adjust factory thermal insulation.
The best option is to lay the masonry on the side of the adjacent surfaces; it will not only protect them from fire, but also accumulate heat.
Foundation
There may be two options here.
First - the bathhouse floors have already been laid
The option, let’s say right away, is not very pleasant. How to solve the problem? First you need to approximately calculate the total weight of the stove along with the brickwork.
The weight of the stove can be found in the manufacturer’s passport or catalog
The weight of one red solid brick is ≈ 3.5 kg, the masonry will be half a brick. There is no longer a need, such a thickness will ensure both normal heat transfer and sufficient stability of the structure.
Red brick weight
Weight of a pallet with bricks
There are recommendations to do quarter masonry (put the brick on edge), but we would not recommend it. Firstly, laying on edge requires considerable experience. Secondly, the stability of the structure is unsatisfactory.
For reference. The dimensions of a standard single brick are 250×120×65 mm. For one cubic meter of masonry you need approximately 520 pieces with a mortar thickness of approximately one centimeter. To make calculations easier, you need to remember that for 1 m2 of half-brick masonry you need ≈ 53 bricks. Take with reserve, there will inevitably be waste.
Standard sizes of solid bricks
Find the location of the floor beam, you can find it by the floor nails. As a rule, during the construction of a bathhouse, timber is used under the flooring with a size of at least 100×100 mm; it can withstand up to 500 kg of weight. This is quite enough for a small metal stove; there is no need to reinforce the timber.
Photo of floor beams
Place a sheet of metal under the perimeter of the stove, it is advisable to make a thermal protection, strictly follow the rules of SNiP III-G.11-62.
SNiP
It is not recommended to use asbestos sheets as a thermal insulation material; today there are harmless materials made from pressed mineral wool on sale.
For brickwork you need to make waterproofing (for fireclay - no need, it is not afraid of moisture). For waterproofing, it is better to take two layers of ordinary transparent polyethylene film - it is much more beautiful than black roofing felt. The protruding film must then be carefully trimmed around the perimeter of the masonry. Do not be afraid that such a stove base raises doubts about its reliability. If the chimneys were brick, yes, even minor “wobbles” of the stove could cause big problems. In our version, the chimneys will be made of metal pipes. At the connection points and at the points where they exit outside, the structure is “floating” and is capable of compensating for small vibrations.
Types of chimneys for baths
Second option. The floors have not yet been laid
The best option is to make a stable foundation for the stove. And the presence of a foundation significantly expands the possible options for stoves both in weight and design features. How to make a foundation?
| Step, No. | Diagram or photo | Explanations |
| Step 1. | Foundation diagram | Mark the dimensions of the pit; along the perimeter it should be 10 cm larger than the dimensions of the stove. |
| Step 2. | Digging a hole for the foundation | Dig a hole 50÷60 centimeters deep; it is not worth it deeper for two reasons. Firstly, in a bathhouse the depth of freezing of the soil is much less than in an open space. Secondly, the stove is not a design that requires a strong, stable foundation. |
| Step 3. | Foundation diagram | Make a sand cushion at least 15 cm thick and compact it. It compensates for soil swelling, if such a fact occurs. |
| Step 4. | The foundation for the furnace is laid out from foundation blocks with dimensions 200x200x400, 200x300x400, 200x300x600. Masonry is carried out using cement-sand mortar gas silicate stove foundation (example) | For the furnace, you can install a simplified foundation made of concrete blocks, this is much faster and easier. Take concrete blocks of any size, the quantity depends on the size of the hole, place them on the cement mortar. Keep an eye on the horizontal position at all times. We do not recommend cutting blocks if their height exceeds the height of the floor. Firstly, it is quite difficult; you need a large diameter diamond disc. Secondly, the foundation protruding a few centimeters does not affect comfort in any way. |
At this point, the preparatory work is completed, and you can begin to directly install the stove with an external firebox.
Installation and construction work
Some useful knowledge to simplify fire safety work. The ignition temperature of the phosphorus head of a match is +200°C, the spontaneous combustion temperature of wood, depending on its humidity, ranges from 350°C÷450°C. Why are we reminding you of this?
There is always high humidity in the bathhouse; do not be too afraid of overheating of the walls and self-ignition of the log house or floorboards. But do not neglect basic fire safety rules; all work must be done wisely. They need to be done slowly and very carefully.
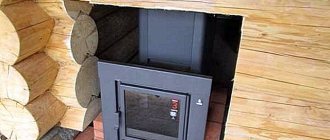
Pre-installation of the furnace
Pre-installation of the furnace (rear view)
We pay special attention to thermal protection in the wall opening
We protect with basalt cardboard and ceramic fabric
Fastening a mineralite sheet in an opening
Fastening a mineralite sheet in the opening (rear view)
It is necessary to leave a small hole under the ash pan of the stove to allow fresh air to flow into the steam room.
We line the opening between the steam room and the room where the stove is heated with bricks. We leave a gap of about 3 cm between the brickwork and the metal tunnel of the furnace.
We cut off the excess basalt cardboard and foil. We fill the gap with basalt wool. After the dressing room is lined with clapboard, the gap will be closed with a platband
Let's start with the remote firebox. It is better to fill the gap between the firebox and the wall with red brick. The brick can be plastered on both sides or sheathed with sheet iron. If the remote firebox is in the bathhouse, nail a sheet of galvanized (or any other) iron approximately 40x40 cm in size to the floor. If you wish, you can put asbestos under it, but we do not recommend doing this. Firstly, asbestos releases carcinogenic substances and is prohibited for use in all developed countries. Secondly, even without asbestos (or other insulating material), the probability of a floor fire under a sheet of iron is zero.