Decorating a bathhouse from timber inside may involve the use of all kinds of materials, but in any case it involves solving two problems, the first of which is decorating the walls, and the second is insulation. The need for thermal insulation in bathhouses made of timber arises for the reason that in the construction of buildings for such purposes, timber is used that is not large enough to provide warm walls.
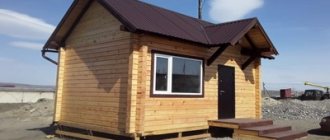
A sauna made of timber is an inexpensive, beautiful and high-quality construction, perfect for water treatments.
Despite the fact that the bathhouse itself in the example is built from wood, the steam room space in it must be made airtight. In this case, you can use wood in tandem with insulation. But it is also important to choose the right type of wood. So, despite the fact that pine acts as the most inexpensive material among other species, it is not recommended to be used for arranging a steam room, since it contains resins that begin to release when exposed to high temperatures.
Characteristics of wood species.
For cladding the walls of a timber bathhouse, it is preferable to use linden or birch, as well as aspen.
It must be remembered that it is better to avoid using some materials for the steam room. Among such materials is, for example, linoleum. You should also avoid using:
- chipboard;
- mineral wool slabs;
- Fiberboard.
This is due to the fact that they are fire hazardous and toxic when heated. Among other things, they swell quite a lot when they become saturated with moisture.
List of requirements for finishing a bath
Thematic building is used for washing in moderately hot steam conditions.
For this reason, projects for finishing the inside of a bathhouse with your own hands or not with your own hands, but with the help of specialists, have special requirements:
- Use exclusively hardwood;
- Focus on non-flammable and natural insulation materials;
- Refusal from wood impregnated with paints and protective solutions;
- Application of rough tiles;
- Using drains for drainage;
- Organization of a protective screen and foundation around the heater;
- Use of fasteners made of wood and stainless steel.
Basic finishing methods
The construction of a bathhouse frame is permissible from wood, aerated concrete and foam blocks, and brick. If building standards are observed, the building will be functional. The choice of material depends on the personal considerations of the developer. In central Russia, preference is given to wood in 50% of cases. A log or beam. Another 25% falls on frame structures, the basis of which is also wood. The last quarter remains for other materials.
The interior decoration of a bathhouse built from logs, using frame technology or bricks and blocks, does not depend on the material of the box
It is important that it meets the specific requirements imposed by the functionality of the building. The most stressful conditions are in the steam room, where the humidity reaches 70% and the temperature reaches 90°C.
For the washing room and dressing room, a humidity of 40% at a temperature of 30 - 35°C and low humidity at 20 - 25°C are recommended, respectively. The given numerical values are indicative and justified from a medical point of view. In life, differences happen. When it comes to steam rooms, the rule of thumb is: higher the temperature, lower the humidity.
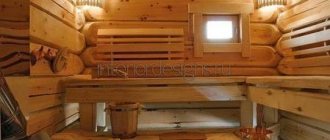
The sequence of finishing the steam room
Let's start with the main thing, the size of the steam room in the bathhouse, and how to choose it correctly. Some tips on how not to make a mistake with the parameters of a steam room when building it.
- First, take into account a certain number of people who will all be together and at the same time not cause discomfort to others, in other words, not interfere with each other.
- The second thing we pay attention to is the height of the ceiling, usually it reaches a height of 2.2 m to 2.4 m. This indicator depends on the height of the tallest person who will visit this steam room. From a person standing up to his full height, there should be at least 20 cm to the ceiling. Adhere to the same principle if the steam room seats are made to be seated, so that the tallest member of the family does not touch his head while sitting on the upper tier. Calculate in advance how many centimeters the ceiling insulation will take up, and only then take into account a reserve of 20 cm.
The third thing you should pay attention to is choosing a stove based on size and power. According to fire safety, the stove in the bathhouse must be located at a distance of at least 32 cm from wooden structures, and if the tree is sheathed with special fire-resistant material, then this distance can be 29 cm
But these distances are sometimes not enough, and a person located close to the stove can get burned from careless movement. You can find out how to cover a stove in a bathhouse here. In order to save energy, you should not build a large room for electric furnaces.
A stove lined with brick, or made entirely of brick, takes longer to heat up, but also retains heat much longer than one made of iron. Burns from such a stove may not be as serious as, for example, from hot iron. The next step of decorating the steam room in the bathhouse with your own hands will be no less important.
The choice of materials for the interior decoration of the bath
When choosing building materials, it is important that they meet the following requirements:
- Resistant to high temperatures and sudden changes.
- Moisture resistance.
- Safety - a person should not have an allergic reaction or burns upon contact with the material.
- Environmental safety – absence of toxic substances.
- Hygienic - the material should be easy to maintain and clean.
- Long service life.
- High strength and reliability.
- Attractive appearance.
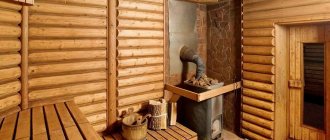
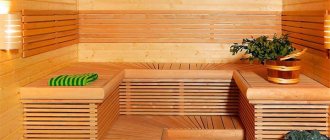
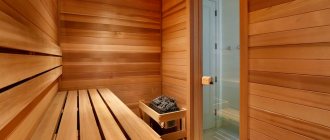
Steam room finishing
The best material for cladding a steam room is wood, but it is better to give preference to hardwood. The thing is that these types of wood do not heat up, you won’t get burned on them, there is no release of resins, and when ventilated, the material dries quickly, making the formation of fungus impossible.
Types of wood for finishing the steam room:
- Aspen is a classic option for the northern regions of Russia, since the material is low in cost, due to its high strength it is difficult to split, and in addition, the wood has bactericidal properties.
- Linden is an attractive material with a stable color and low heat capacity. Due to this, the tree quickly gains temperature and is safe to touch. Linden also creates a pleasant atmosphere due to its special aroma and has a low price.
- Abash is a material that is just becoming popular, since it is wood from the African tropics and we still don’t know enough about it. It is best to make shelves from abasha that are resistant to steam and high temperatures, since they hardly heat up.
- Alder is an attractive visually and tactile wood material that is resistant to steam room conditions. Easy to maintain and clean, low cost.
It must be remembered that wood should never be painted or varnished, since under the influence of high temperatures the coating will release harmful chemicals and odors. When finishing, nails and screws must be carefully hidden, as they heat up and can cause burns. Experts also recommend filling the lining vertically, because the water drains much faster this way.
Waterproof skirting boards will help protect the joint between the walls and the floor. For finishing the floor, it is best to use larch or tiles - the latter option is more preferable, as it is resistant to fungus and is easy to clean. If the tile seems cold, a wooden grate is placed on it, which can be easily removed if necessary.
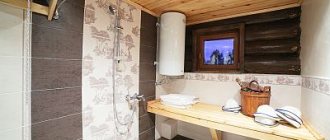
Finishing the dressing room and sink
It is better not to use wood for lining the sink; preference is given to tiles, since in the shower there is constant contact with water. Ceramic tiles do not rot, they are easy to care for, and for an attractive appearance, you can choose special stylish tiles that imitate natural wood.
As for the dressing room, it is a warm and cozy place, but there are no high temperatures here, so it is allowed to use coniferous wood with a pleasant and healthy aroma.
Among the popular types of wood for finishing the dressing room are:
- Pine is an attractive and durable material that has a long service life and is the most popular. During use, the wood may change color, becoming a little redder. Also popular is Scandinavian pine, which has a pink tint and annual rings that create a decorative pattern on the walls.
- Spruce has a homogeneous structure; when dried, it remains solid and does not crack. The color scheme is slightly lighter than pine.
- Fir is a tree that has properties similar to spruce, but practically does not emit resin.
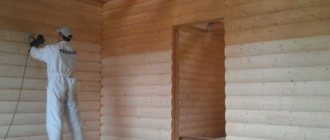
Preparatory work for wall cladding
Before quickly sheathing the inside of the bathhouse with aluminum foil and wooden clapboard, it is necessary to insulate the walls. Before laying the insulation, install the counter-lattice and sheathing. A layer of vapor barrier is laid on top of the insulation.
Thermal insulation device
The best material for insulating baths is basalt wool. This material has good thermal insulation and a high degree of fire resistance. Basalt wool does not rot. This type of insulation does not burn and does not emit harmful substances. Basalt can withstand temperatures up to 1500° C.
Experts recommend using Rockwool brand “Light Butts” mineral wool. The mineral wool of this company is of high quality, increased density and affordable price.
To cut basalt wool sheets, large, sharp knives with a high-quality blade are used. When cutting, the knife blade is held at an angle of 30-45° to the surface of the blade. When tilted, the blades dull much more slowly.
The width of the canvas is taken to be 2 cm greater than the distance between the vertical posts of the sheathing. The increased width helps to fix the blades in a constant position.
Thermal insulation sheets are laid in 3 layers with overlapping joints. The amount of overlap is equal to half the length of the canvas.
All layers are laid in height within one span of the sheathing. The laying direction is from floor to ceiling. They move to another span after laying all the layers of the previous span.
Laying the first layer begins from the floor. First, the whole canvas is laid. After laying all the canvases of the first layer, the second layer is laid.
Laying the second layer also begins from the bottom. For overlapping joints, the length of the first web of the second layer is taken equal to half the length of the standard web.
At intersections with obstacles, elements of the required shapes and sizes are cut out.
Before covering the bathhouse with clapboard, care should be taken to protect the walls from dampness and rotting. Therefore, after installing thermal insulation, they begin to install the vapor barrier material.
Vapor barrier device
The vapor barrier layer is designed to protect walls from condensation and increase the heat-reflecting properties of the insulation.
The work of laying vapor barriers is the most critical when constructing bathhouses. The efficiency of steam use depends on the quality of vapor barrier work.
Aluminum foil with a thickness of 50-80 microns is used as a vapor barrier. Attaching the foil begins from the corner of the room in the direction from bottom to top.
Vapor barrier sheets are sewn with metal nails or staples to the vertical posts of insulation cells. To attach the foil, use a pneumatic gun or a special construction stapler.
The foil is laid with an overlap of 2-3 cm of vertical seams. All seams are taped with aluminum adhesive tape.
In places of transition from the walls to the floor and ceiling, the foil is laid with an overlap of 5-10 cm in each direction. The free ends are sewn to the ceiling and floor with nails or tacks.
At the junctions of walls and ceilings, gaps often appear in the foil. To eliminate these gaps, use foil corners. To make such a corner, a piece of foil is placed on the corner of a table or chair.
The resulting shape is carefully beaten with a light object to soften the foil. Broken corners are glued with aluminum adhesive tape
The manufactured corner is inserted into the corner and carefully taped.
After completing the work, check the quality of the vapor barrier installation. Any damage found is covered with adhesive tape.
After installing the vapor barrier, the installation of the counter-lattice begins.
Counter-lattice device
The counter-lattice serves as the basis for the main sheathing. Designed to ensure air exchange in the space between the foil layer and the lining.
To construct the counter-lattice, wooden blocks with a cross-section of 20x20 mm are used. The bars are nailed to the vertical posts of the insulation cells. The distance between the slats is taken to be 400-500 mm. Installation of counter-lattice slats is carried out according to level and plumb.
When installing a counter-lattice, a hole with a diameter of 80-100 mm is drilled in the ceiling for the exhaust duct pipe. A sealing cap (valve) is inserted into the hole. During bath procedures, the hole is closed. To ventilate the bath after washing procedures, the hole is opened.
Periodic ventilation prevents the appearance of dampness and rotting of the lining. To ensure air exchange, a gap of at least 2 cm is provided between the lower end of the lining and the floor.
Finishing material
Not all finishing materials are suitable for covering walls, ceilings, and floors inside the washing room. This is due to the influence of destructive factors.
Wood paneling and panels
Wood panels and lining are popular, classic finishing materials for Russian baths. They help give the room its originality.
Lining can be made from different types of wood:
- conifers - spruce, cedar, pine;
- deciduous - alder, aspen, linden, oak.
Coniferous lining is suitable for finishing recreation areas. For the washing room it is better to choose finishing material made of hardwood.
Benefits of wood:
- durability, strength;
- environmental friendliness;
- attractive appearance;
- ease of processing.
Flaws:
- Conifers secrete resin.
- Wood is destroyed by moisture and deformed by temperature changes.
- Fungus and mold often form on the panels.
To level out the shortcomings, the wood must be treated with special antiseptics.
Lining (Photo: Instagram / tverles)
Tile
Tile is not suitable for a steam room, since its surfaces quickly heat up under the influence of high temperatures, but for a washing room it would be the best option.
Advantages:
- Durability, reliability.
- Resistance to mechanical stress.
- Large selection of drawings.
- Easy to care for. To clean the tiles from dirt, you can wipe the surfaces with a damp cloth.
- Resistant to moisture and temperature changes.
Flaws:
- High price compared to wood, paint, plastic panels.
- Fragility. Tiles can easily break if accidentally dropped or hit.
You can lay the floor with tiles, but we must not forget that this is a cold material that will be unpleasant to walk on barefoot. To correct this drawback, you can install a “Warm Floor” system.
Tile (Photo: Instagram / ivan__neverov)
Artificial and natural stone
Such materials are used if you want to get a non-standard surface design.
Advantages:
- attractive appearance;
- large selection of sizes;
- durability, mechanical resistance, strength, wear resistance;
- immunity to moisture and temperature changes.
Flaws:
- high price;
- heavy weight.
To reduce the risk of stone collapse when fastening to walls, masonry should not be made higher than 50 cm.
Natural stone (Photo: Instagram / zelenii_kamen_perm)
Plastic panels
A universal finishing material that is resistant to aggressive factors. The panels cannot be used in a steam room, but they are suitable for a washing room and dressing room.
Advantages:
- resistance to moisture, temperature changes, ultraviolet radiation, chemicals;
- strength, durability;
- large selection of colors and designs;
- low price.
Flaws:
- Mechanical stability is not as high as that of other finishing materials.
- When exposed to extreme heat, the plastic begins to deteriorate.
It is better to choose panels from well-known manufacturers. Poor quality products may emit harmful substances during operation.
Plastic panels (Photo: Instagram / stroysya_vl)
Dye
On sale you can find various painting compositions that are suitable for coating concrete walls in conditions of high humidity, but paint is considered a less popular finishing material because it does not look as attractive as its analogues and has low resistance to aggressive factors.
The primary task is to insulate the walls
If the building is based on untreated logs, you need to caulk the cracks by going through the joints with a sealant. A hut made of timber will require the following actions:
- The wall is sheathed with lathing.
- Insulation is laid between the beams.
- A vapor barrier layer, represented by oilcloth or foil waterproofing, is placed on top.
- The final stage is upholstery with clapboard or natural boards.
The following is used as an insulating element:
- mineral wool;
- peat slabs;
- chipboard;
- Styrofoam;
- traffic jam
Organic variations are suitable for the dressing room, rest room, synthetic ones to avoid the appearance of mold - in the washing department, steam room. Polystyrene foam can ignite and, when heated, becomes a source of release of hazardous chemicals.
Finishing a bathhouse made of timber
- Interior decoration
- Lining
- Tile
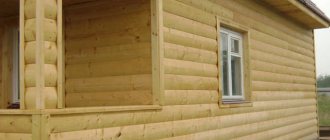
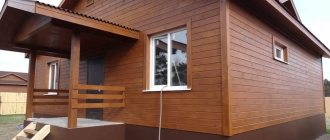
- Exterior decoration
- Siding
- Block house
Finishing the steam room is necessary not only for the implementation of stylistic decisions. This process also includes insulation, steam and waterproofing. External and internal finishing of a bathhouse made of timber is not carried out immediately upon completion of construction. You need to wait until the structure has completely settled and then apply caulk. Sometimes about one or two years pass between the construction of a log house and its cladding. It is not advisable to cover the structure up to the caulk, since this process involves raising the bathhouse to a height of 8-10 cm. In this case, the finishing material will be damaged.
Methods for installing heated floors in a bathhouse
Modern construction requires maximum comfort for people, including when constructing bath complexes. After all, this is not only an opportunity to take a steam bath, but also to relax. The need to install heated floors arose when they began to be made of concrete, due to the fact that the service life is 3 times higher than that of wooden ones.
Both water and electric floors can be installed. Water ones require preliminary installation of pipes and connecting them to heating equipment. This is not always possible. Therefore, more often the choice is made in favor of the second system.
Electric floors are safe in the bath complex. The system is mounted in a screed. The concrete base must first be prepared.
It is important to avoid mistakes during installation that will later be impossible to correct. Therefore, the work must be transferred to specialists
You can make warm floors yourself by installing additional thermal insulation from the following materials:
- mineral wool;
- expanded clay;
- felt;
- polystyrene foam
To do this, you will need to pour 2 layers of concrete, between which thermal insulation should be laid.
Installation of a water floor in a bathhouse
Preparing the area and purchasing materials
Construction work must begin from the site preparation stage. First you need to get rid of all the plantings in the area and foreign objects. When purchasing the right materials, you need to determine what exactly is needed.
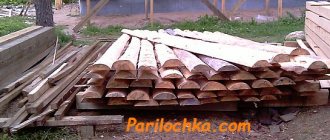
For construction you will need the following material:
- A profile with dimensions of 20 by 20, or larger for the first crown;
- Profiled timber with dimensions of 15 by 15 for partitions and walls;
- Tow or moss will be needed for insulation. These materials are laid between the beams;
- Metal or wooden dowels;
- Reinforcement brackets for fixing several perpendicular logs.
A batch of timber must be prepared in advance long before the construction process begins. This is due to the fact that the material must be dried as much as possible, since wet wood will dry out after some time. This can lead to very undesirable consequences.
Finishing the bathhouse inside: fixing the lining
Having completed the preparatory stage, they begin the process of finishing the bathhouse inside - the photo will help you navigate the order of actions. It is necessary to select suitable fasteners made of materials that are not susceptible to exposure to moisture and high temperatures. Immediately forget about traditional nails, as they will quickly corrode and the walls will be damaged by rust stains. And when the temperature in the steam room rises, touching the nails is dangerous - they can burn the skin.
The lining is cut immediately to size, focusing on the height of the bathhouse, then it is attached to a pre-prepared grate (or directly to the walls) with special brackets. If necessary, the width of the lining can be slightly trimmed at the corner joints.
The relaxation room in the bathhouse is the place where you spend the most time.
To finish the steam room, high-quality wood should be used that can withstand high temperatures and high humidity.
How to cover walls with clapboard: step-by-step instructions on how to do it yourself (read more)
All actions must be performed using a level to obtain a perfectly level structure. After making the frame, it is coated with an antiseptic. The lining should also be processed, but before installing it on the frame. Laying the material starts from the corner. Nails, staples and clamps are used as fasteners. The material that was used to decorate the surface of the walls can also be used to decorate the ceiling.
Light wood species are best suited for small rooms.
It is necessary to understand that the maximum temperature is located under the ceiling, which is why it is necessary to choose lining for this surface from rocks that contain a small amount of resins, otherwise their drops may burn the skin when falling. The finishing of the place where the stove will stand must be made of non-combustible materials - tiles, bricks.
On a note! It is not recommended to choose spruce or pine for the steam room. It is better to cover the dressing room with this material.
The floor in the bathhouse can be made of non-slip tiles.
Sequence of finishing work
Interior finishing work in a Finnish sauna begins with the arrangement of the floor. Then the ceiling is decorated, and finally the walls.
Recommendations for finishing the floor
If possible, wooden floors in the sauna should be avoided. Of course, with a plank floor, the interior of the steam room will look more organic and intact, however, drying such floors is very difficult. Usually, owners do not pay due attention to drying, as a result of which the steam room quickly begins to smell unpleasantly of rotten wood.
First step. Level the base for the tiles. To do this, pour a regular concrete screed. At the same stage, arrange the foundation for the future stove. Select the dimensions of the base in accordance with the dimensions of your furnace unit. Make the height such that the foundation rises above the floor by about 10 cm.
Level the base for the tiles
Fill the screed so that the finished base for the tiles is tilted approximately 1% towards the location of the water collection pit.
Second step. Make a pit near the location of the stove. From the pit, lay a drain pipe with a diameter of 5 cm to the street.
Third step. Lay the tiles on a dry base. It is best to use clinker tiles - they do not slip even when wet.
Laying tiles
Start tiling from the corner furthest from the entrance to the steam room. To fix the tiles, use a special heat-resistant adhesive. Apply the adhesive composition to the base using a comb spatula. The optimal thickness of the glue layer is 1.5-2 mm.
The joints between the tiles must be identical. To comply with this requirement, use special plastic crosses. Make seams up to 4 mm wide. Remove excess glue from seams immediately.
Fourth step. After the glue has dried (usually it takes 1-3 days), start grouting the joints. A rubber spatula and special grout will help you with this. Choose the grout color at your discretion. After grouting, wipe the floor with a damp sponge.
Tile floor
Fifth step. Place wooden grates on the floor.
Custom made sized pallets
Ceiling finishing
The ceiling of a Finnish sauna is exposed to the most intense thermal effects. The best option for such premises is a suspended ceiling structure.
First step. Assemble the frame of the structure from boards measuring 15x5 cm.
Ceiling finishing
Second step. Attach plastic film to the frame boards. A construction stapler with staples will help you with this.
Third step. Place the selected insulation into the cells of the frame. Usually mineral wool is used.
Fourth step. On top of the insulation, attach a vapor barrier membrane material to the frame boards.
Fifth step. Attach perpendicular slats about 3 cm thick to the frame boards. These slats need to be attached in increments of about 6 cm.
Sixth step. Attach clapboard boards to the slats. For fixation, use clamps or other convenient fasteners.
Finishing the bathhouse with clapboard
If a stove that requires the installation of a chimney will be used in the bathhouse, install a special flange or a passage unit into the ceiling. These elements are sold in specialized stores of stove equipment and accessories for steam rooms.
Wall cladding
Arrange the supply channel at a height of up to 50 cm from the floor, preferably not far from the stove. Place the hood on the opposite side to the supply duct at a distance of about 50 cm from the ceiling. Install ventilation grilles, preferably wooden, over the openings. After this, you can proceed directly to finishing the walls.
Bath decoration
First step. Attach vertical support posts to the base. To fix these elements, use screws or nails. First, attach the corner posts, stretch a rope between the outer supports and, guided by it, align all the internal beams in increments corresponding to the width of the selected insulation.
Second step. Place waterproofing film on the wall and attach it to the studs using a stapler.
Third step. Place insulation on top of the film into the cells of the frame.
Finishing the bath inside
Fourth step. Cover the insulation with a vapor barrier material. Attach the vapor barrier to the studs using a stapler.
Fifth step. Nail perpendicular slats over the posts.
This is how nails should be driven in
Sixth step. Attach the clapboard to the slats. Place the sheets vertically. To secure the sheathing, use clamps or other convenient fasteners.
Cladding walls with clapboard
If you decide to fasten the lining in a horizontal position, do the work in the same order, but do not stuff the perpendicular slats, but attach the sheets directly to the racks. In such a situation, you will need to use racks that protrude 2-3 cm above the thermal insulation. Start the sheathing from the bottom.
Bath decoration
Finishing a bathhouse inside with a block house: photos and features
Finishing a bathhouse with a block house allows you to decorate the interior in the same style. Work on the interior decoration of a bathhouse can be done independently without the involvement of specialists. The whole process is divided into stages:
- Preparation.
- Installation of vapor barrier. The system protects the material from the formation of rotting areas.
- Insulation (insulation is attached to a vapor barrier layer).
- Installation of the sheathing (wooden base on which the finishing material will be attached).
- Installation of a block house.
Important! A wooden bathhouse can be sheathed no earlier than a year after construction. This is due to the process of shrinkage of the structure
When performing finishing work with a block house in a bathhouse, special attention should be paid to the ventilation of the room. The only disadvantage of this material is the low vapor permeability
Lack of good ventilation leads to condensation.
Below are photos of the interior decoration of a bathhouse with a block house.
Preparatory work
Preparatory work for lining the interior of the bathhouse begins with the processing of wooden materials (if the work has not been completed in advance in production). For interior work, combined impregnations, antiseptics and moisture-repellent compounds are used as protection. It is not recommended to use varnish or stain. The coating will collapse under the influence of high temperature and humidity and will begin to release components harmful to human health, which is extremely undesirable in a bathhouse.
The technologies for covering wooden and brick baths are the same. But if the walls are uneven, the preparatory work may include the installation of additional sheathing. It is installed to level the surface. After installing the lathing, layers of thermal insulation and waterproofing are installed.
Specifics of finishing a bathhouse inside a block house
For interior decoration, panels with a width of 80 - 90 mm are used. The panels are fastened using nails or self-tapping screws. The resulting holes are masked with putty or a wooden dowel.
Advice! The use of staples is not recommended. They do not provide reliable fastening of the material.
Sheathing can be started both from the top and from the bottom. An important condition is the presence of gaps. They are designed for blowing out the casing. The tenon on the board should point upward. This prevents moisture from accumulating in the grooves.
Proper joining of corners in the room will prevent heat loss. To set the angles correctly, you need to make a cut at an angle of 45 degrees or use slats (internal or external).
Washing room
The washing machine may be different. If water is supplied to the bathhouse from a centralized network or a well with a pump, and there is a water heater, it is enough to install a shower stall or simply equip a shower corner.
This is impossible without running water, so benches and watering cans are needed. Often both are found, complemented by a large plunge pool or even a swimming pool. And also washing rooms combined with a steam room.
In each case, the interior decoration of a wooden bath will be different:
- For the common room, all the materials described in the previous chapter are used. This is a wood that can withstand intense heat on walls and ceilings and tiled or concrete floors with drains.
- In the washroom, which is separated from the steam room and does not have a shower, any wood can be used to decorate the walls, except birch . Including coniferous ones. Here the temperature is not so high, so the resin is unlikely to flow. But the air will be filled with a pleasant aroma.
Ladders or rubber mats are absolutely necessary here, since tiled floors in the washroom become slippery from soapy water
- Finishing a shower in a wooden bath can also be done with clapboard, but in this case you need good supply and exhaust ventilation so that the boards dry after the procedures are completed. They must be treated with a moisture-repellent agent and the coating must be renewed periodically.
The result of poor ventilation and non-compliance with finishing technology
Shower and sprinkling device in the washing room
- It will be much more durable to cover the walls with tiles or stone at least one and a half meters from the floor. If the load-bearing walls are wooden, they are waterproofed, covered with moisture-resistant plasterboard, and tiles are glued onto it.
Full height tiling in washroom
Combined finishing in a combined sink
- A very convenient option is a shower room with a door or curtain. It can be arranged in a dead end or fenced off a corner with a partition. And there will be no questions about how to decorate the walls in the washing room: with tiles. And the rest of the space, where there will be no heat, no high humidity, whatever.
Entrance to the steam room and washing room from the relaxation room
- It’s even easier to install a ready-made shower stall, and then you don’t have to worry too much about wall cladding; plastic panels will do. In this case, finishing materials are selected in the same way as for a bathroom in an apartment.
Shower stall in the bathhouse
The ceiling here can be plastered and covered with moisture-resistant paint that is resistant to washing. But if you regularly use the bathhouse, you will need to update the coating at least once every two years.
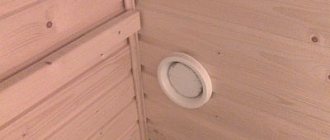
Such types of finishing as wooden and plastic lining, slatted or suspended ceilings are also quite acceptable. They are not afraid of moisture, spotlights can be built into them, and the space between the ceiling and the cladding can be filled with thermal insulation.
The suspended ceiling must have a ventilation grill to prevent condensation from accumulating on its reverse side
If the bathhouse is wooden, built from ordinary logs or timber, finishing can begin no earlier than in a year . Because it will settle as the wood shrinks, deforming the cladding.
If you don’t want to wait, you can bother with a floating frame for drywall and tiles. How to do this correctly is described in the article “Facing a wooden house with plasterboard.” And unlined walls must be treated with a natural-based antifungal antiseptic impregnation.
How to properly solder polypropylene pipes
Everything seems simple if you have experience, but soldering for the first time is scary.
It is necessary to mark the pipes before welding (see information below)
Step 1. Screw couplers to the front of the soldering iron to heat the internal or external surfaces of pipes and fittings. For showers, we recommend using Ø ¾″ pipes. The pipe is heated on the outer surfaces, the connecting elements (couplings, triangles, elbows, etc.) on the inner ones.
Preparing the soldering iron for work
Step 2. Connect the soldering iron to a 220 V network. On the body of the device there is a heating temperature regulator and two indicator lights. Green indicates that the soldering iron is ready for use, red indicates that the heating temperature is insufficient.
Turn on the soldering iron and wait until the green light comes on
Step 3. Set the temperature regulator to +250°C. Specific values do not play a big role; the degree of heating of the pipe is regulated by the holding time.
Step 4. Take the two elements to be connected and insert them each into their place in the soldering iron. Heat for approximately 5-9 seconds. The ends must fit into the heaters until they stop.
Inserting heated elements
We heat the couplings along the inner surface
This also explains why you should not use a soldering iron heating temperature table. We advise you to always set it to maximum - the pipe will warm up much faster.
Pipe heating table
Step 5. The surface of the heated plastic pipe should resemble thick sour cream. Once such softening is achieved, remove the elements simultaneously from both sides of the soldering iron.
Step 6. Connect the two heated planes together as quickly as possible, keeping them as level as possible. You need to hold it in the clamped state for 10÷15 seconds, the exact time depends on the heating temperature of the plastic. As you can see, almost all parameters and modes of pipe welding are determined not by instructions, but by the experience of the master. Experience will appear already on the second or third gluing, gain skills on unnecessary segments.
Sectional connection of PP pipes
Connecting heated elements
Material selection
Methods for finishing a timber bath:
- Monolithic. The walls in all rooms are covered with clapboard without adding any additional elements.
- Combined. Wood is combined with ceramic tiles, porcelain stoneware, artificial or natural stone.
For interior decoration of bath rooms, you need to choose a material that meets a number of requirements:
- high strength, durability, wear resistance;
- low thermal conductivity;
- environmental friendliness.
Popular types of materials:
- lining made of different types of wood;
- ceramic tiles, porcelain stoneware, clinker, mosaic;
- natural or artificial stone.
More often, owners of steam rooms choose lining - wooden panels for covering walls, ceilings, gables, and anemones. Advantages:
- natural look;
- ease of installation;
- good air microcirculation;
- environmental friendliness.
The best lining options for a bath:
- Linden. Boards made from this type of wood are easy to process. Surfaces heat up slightly. Linden lining is suitable for finishing steam rooms.
- Alder. Durable, durable, wear-resistant material. It has a beautiful color and does not absorb foreign odors.
- Aspen. A durable breed that is suitable for finishing washing rooms and steam rooms. Since the tree begins to rot while still growing, it is rare to find high-quality lumber.
- Larch. Durable material that has high strength and wear resistance. Withstands prolonged exposure to moisture and is resistant to temperature changes.
The wall behind the stove can be finished with stone. Various rock types are suitable. If you want to lay stone around the stove, it is better to choose soapstone.
You can combine ceramic and clinker tiles, porcelain tiles, and mosaics with clapboard or natural stone. More often, such materials are used to finish the floor and walls behind the stove.
If the bathhouse is used in winter, the tiles will be constantly cold. To avoid hypothermia, it is recommended to install a “warm floor” system.
Coatings for floors and ceilings
When arranging the inside of a bathhouse, you need to choose the right floor and ceiling coverings. For the floor, planks or ceramic corrugated tiles are better suited. It is recommended to take glazed tiles, as they best withstand temperature changes. Its base should be smooth so that fungi do not form in the cavities.
The best wood material for finishing bath flooring is larch. This material is expensive, but it does not rot, is highly strong and durable. According to its characteristics, it can even be compared with ceramic tiles.
https://youtube.com/watch?v=cQIXzEroi_k
The floor should be finished only after insulation. Even if it is made of concrete, during construction, lay a layer of thermal insulation between the concrete walls in the form of expanded clay or crushed stone.
As for finishing the ceiling, here too it is best to use wood that contains a minimum of resins in its composition. The maximum temperature in the steam room is concentrated under the ceiling, so you cannot take spruce or pine, since the resin released when overheated will drip and can cause burns.
Restroom
The decoration of the rest room in the bathhouse is usually done with pine lining. This type of wood is not used for steam rooms and washing rooms. When exposed to high temperatures, resin is released from pine boards. Its fumes can be harmful, and if it comes into contact with the skin, the molten resin causes burns.
Pine wood is relatively inexpensive and durable. Its advantages:
- resistance to external influences, despite the softness of the wood, the covering made of pine lining lasts a long time and retains its attractive appearance;
- ease of use - pine is easy to process and can be coated with a variety of paints and varnishes;
- low cost - the use of pine lumber for the rest room in the bathhouse will save money.
Along with pine lining, lumber from other coniferous species - for example, spruce, larch or cedar - is also used to perform finishing work in a rest room or small dressing room. The last two options are more expensive.
Vapor barrier and insulation
Previously, ancestors insulated Russian baths with natural materials: moss, tow, felt. Natural substances served well, but prevented air penetration.
Now the choice of insulation materials has increased, mineral and basalt wool have been added. Mineral wool made from rocks is durable, environmentally friendly, and resistant to bacterial growth. Basalt wool has recently come to the forefront. It is distinguished by its resistance to rotting and high temperatures.
Foil film is considered a high-quality vapor barrier cladding material. Foil allows you to maintain maximum humidity and temperature.
DIY finishing process
A day before the start of work, it is recommended to bring into the bathhouse all the materials that will be used in the finishing process. This must be done so that the material “acclimatizes” to the room temperature.
Highlights of interior finishing step by step:
- Manufacturing of sheathing;
- Fastening steam and thermal insulation;
- Installation of wooden panels.
Requirements for installing sheathing
- The sheathing slats must be positioned strictly parallel to each other and the floor. To achieve this, a level is used.
- First, the upper and lower guides are attached, and then all the other slats.
- It is necessary to place the slats from each other at a distance of no more than fifty centimeters.
- The finished frame must be treated with an antiseptic.
Hydro- and thermal insulation of steam room walls
For vapor barriers, aluminum foil and foamed polymer materials (polypropylene) are most often used. The advantage of polymer materials is that they simultaneously have vapor and heat insulating qualities.
These materials, laminated with foil, not only help maintain a high temperature in the steam room, but also resist the accumulation of dampness and the appearance of fungus.
Sequencing:
- Attach insulation to the timber wall (mineral wool is best suited for this purpose).
- Attach a layer of foil to the insulation.
- Install the sheathing (it is necessary to create an air gap between the lining and the foil layer).
Installation of lining
- Before installation begins, the lining (as well as the sheathing) must be treated with an antiseptic.
- Installation of the lining should begin from the far corner of the steam room.
- For fastening, you can use nails (which is extremely undesirable due to their tendency to corrosion under the influence of high humidity).
A more suitable and more modern means are clamps - staples that, when installed, do not damage the surface of the lining, since they do not form holes in it. This is the so-called hidden fastener.
You should know that there are different types of clamps, depending on what materials they are intended for fastening.
- Walls should be sheathed vertically.
This is due to the fact that condensation that can form on the walls will flow down, rather than accumulating at the joints and gradually ruining their condition and appearance.
For a step-by-step guide on how to properly cover walls and ceilings with clapboard, watch the video instructions:
Lining installation technology
Decorating the inside of a bathhouse with clapboards with your own hands begins with preparing the material. For this purpose, the products are covered with bioprotection, which eliminates the occurrence of putrefactive processes. The finish is dried, for this it needs to be left for several days. If you also plan to tint the wood, this can be done using oils or stains. The compounds are applied before installation begins. You can coat the material with colorless varnish. At the next stage, installation of the sheathing begins. It will set the direction of the location of the cladding itself.
These two layers will be perpendicular to each other
Here it is important to decide how the lining will be located. If this is a horizontal position, then if the lower elements darken, they can easily be replaced without touching the rest of the finish
The air behind the cladding will circulate better, since a vertical frame is needed for the normal process.
As for the vertical arrangement of the lining itself, it is indispensable for those rooms where there is dry air and high temperatures. For example, in saunas these are the conditions, but there is almost no water. Therefore, the wood will not change color, and moisture will not penetrate into the joints. Depending on the thickness of the lining, you should select the distance between the frame slats. Usually this value is 40 cm. The outer bars are located in the corners; their position must be checked by level. Between these elements the remaining slats are nailed, the horizontalness of which must be checked by level
When installing the lining, it is important to make markings that will allow you to install the first row. If you choose nails as fasteners, they are driven into the frame slats, and the distance between them should be equal to the step between the bars
Installation of lining on the ceiling
The interior decoration of the bathhouse with clapboard can also be done in the ceiling area. When doing the work yourself, you will need to study the step-by-step instructions. At the first stage, tools are prepared, among them the following should be highlighted:
- hammer;
- drill;
- mallet;
- level.
The ceiling of the bathhouse can also be insulated. For lathing, you can use a square block with a side of 50 mm. If the surface is uneven, you can place pads under the slats. The ceiling should be thermally insulated and protected with a layer of waterproofing. You can use a vapor barrier in conjunction with this. The latter quite often is a membrane film. The waterproofing layer is nailed down with sheathing slats.
Thermal insulation must be laid between the beams. Then comes the vapor barrier. It is secured with a stapler
It is important to provide overlap and protect the seams. Once the sheathing work is completed, finishing can begin.
Manipulations are carried out from the front door. In this case, it is better to abandon finishing nails, since they will not be able to withstand the weight of the lining. An excellent solution would be clamps or nails. When finishing a bathhouse with clapboard, the nails are driven in at an angle of 45˚. It will be easier to work with clamps; they are installed in the sheathing, and the dies are attached with hardware.
Installation of lining on the wall
If you want to cover the walls of the bathhouse with clapboard, you need to study the step-by-step instructions. From it you can find out that work can also be carried out using screws. You need to make holes in advance where the hardware is screwed. Hats can be decorated.
Vertical mounting will be simpler. It gained popularity due to the ease of work. The installation cost is lower, and the moisture that condenses from the steam will easily flow down the lamellas. If you want to ensure that heat is retained inside a steam room in a brick bathhouse for as long as possible, it is better to choose vertical installation, as it promotes heat accumulation. If there is waterproofing between the layers, it can be nailed to the surface with slats. If you plan to use cotton wool, it is placed between the bars. And cutting must be done with an allowance of 10 mm, then the material will fit into the cells and will not slide down.
A foil film can be laid on top of the insulation, which will effectively reflect heat. The vapor barrier is fastened with a stapler. Don't feel sorry for the film. It needs to be laid with an overlap, covering the seams with aluminum tape. A counter rail made of narrow elements can be placed on top. For this, 20 mm blanks are used. They will provide a ventilation gap.
Selecting the necessary materials
For the bathhouse and dressing room, wood material is used - lining. The most inexpensive wood material is pine lining, however, due to its resin content, it is not suitable for a steam room. At high temperatures, the pine lining will begin to release resin and a pungent odor, because of this, there will be nothing to breathe in the steam room, plus you can get burned by streams of resin. Typically, hardwood is used for a steam room, and most often linden. Linden does not overheat at high temperatures, retains its light color, does not emit resin, has almost no noticeable odor, dries well and quickly, and is durable. In addition, linden creates a special microclimate in the bathhouse. The table below shows the materials for making the lining.
| Material | Description |
| Conifers | Coniferous species are characterized by high moisture resistance, however, it is better not to use such lining for finishing the steam room itself: the released resins can cause certain problems. It is believed that pine resins are beneficial for humans. When they are inhaled, the work of the cardiovascular system is stimulated, but in combination with high temperature, such a combination will be extremely dangerous. In view of this, it is better to leave the pine needles for finishing the rest room - they are ideal here. As for specific species: - pine. It has a high density, stands out with an attractive golden hue and interesting ornaments; — cedar is an expensive option with a pronounced pine smell. It has a long service life, excellent texture and antiseptic properties; - spruce. Well suited for interior decoration of a bathhouse. It has a neutral odor and an attractive appearance; - larch. Fills the air with substances beneficial to human health. The material is characterized by the highest resistance to moisture and similar density. |
| Hardwood | Most often, hardwood is used for the interior lining of bathhouses. This lining is characterized by higher thermal insulation properties, which is an additional advantage, and also helps to improve ventilation in the room and create the most healthy microclimate. Several types of wood are used to make lining: - oak. Expensive, durable and strong. Among other advantages, the material is characterized by an expressive structure and generally has an attractive appearance; - Linden. This lining has a beautiful light honey shade that does not change over many years of service; - alder. Hygroscopic and beautiful material with antimicrobial properties; - ash. Quite dense wood, resistant to deformation and has an expressive pattern. |
The following table shows the classes and their descriptions. It is worth knowing that wood with a large number of knots heats up faster and can burn. The markings are the same for all types of wooden lining.
| Class or variety | Description |
| Extra | Free from cracks, knots and other defects. The surface is perfectly smooth and even. |
| A or 1 | The surface is smooth or slightly rough. There is 1 healthy knot per 1 linear meter (knot diameter no more than 1.5 cm). There may be cracks: hairline cracks - no more than ½ panel long, non-through cracks - less than 9.5 cm long (the crack exit is directed towards the end of the panel) that appear when drying - no more than the width of the panel. There may be tars and resin pockets of 2 pcs. by 1 m.p. |
| B or 2 | There are many knots, of which no more than 2 can fall out. by 1 m.p. There may be through cracks up to 1 mm wide and up to 15-30 cm long; hairline cracks are allowed along the entire length of the board. The presence of wormholes (3 pieces per 1 m.p.) and rot (no more than 1/10 of the panel) is allowed. Grade B lining is suitable for painting. |
| C or 3 | The quality is low. Many different defects. This lining is suitable for upholstery of technical rooms or rough work. |
Lining marking
Selection of lining and calculation of area
For quality work, it is necessary to select the right material and calculate its quantity.
It is necessary to sheathe the inner surface of a room such as a bathhouse only with materials that can withstand:
- large temperature changes;
- high humidity;
- constant contact with water and various substances.
Board type and material grade
Today, the building materials market is filled with a variety of linings from many manufacturers. Lamellas are produced both Russian and foreign. Eurolining is available with various profile cross-section options. Also, wooden lining can vary in the surface quality of the back and front sides of the board, the shape of the lock and its dimensions, the type of material and other equally significant parameters.
Most often, lining of several popular profiles is used.
- Eurolining, which has clear sharp edges and forms seams visible to the naked eye when covering.
- Softline with more rounded corners.
- Calm. The seam with this finish is almost invisible, because it does not have recessed shelves. It can imitate timber and have both quite sharp and smoother rounded edges.
- A lawnhouse, the front side of which is not smooth, but with various patterns. The design on the lamella of the lawnhouse is applied using figured milling on more expensive materials and using hot stamping on cheaper ones.
- Blockhouse (siding).
- Double-sided lining. Both the groove and the tenon of such a board are located exactly in the middle, so both sides turn out equally smooth - you can choose between them. However, this material has almost no ventilation (the ability to “breathe”), so it is not very suitable for interior decoration of wet rooms such as a bathhouse, swimming pool or sauna.
To determine the type of purchased lining, you can use the European DIN standard. The difficulty is that many manufacturers use various GOSTs and even their own specifications, so first of all it is necessary to look at the surface quality of the material itself, and not at the markings. All lining is produced using the same equipment and using the same technology, so the grade of material is determined during inspection after the completion of the manufacturing process.
- Premium (or extra). Almost perfect quality of the lining. Neither branches nor cracks are allowed on the slats. A light blue tint, small chips, roughness and imperfections are possible only on the inside.
- Class A. The knots on such a board should not be more than 1 cm in diameter and occur no more than once in a one-meter-long area. Cracks, if any, should be very small and, of course, not through. It is advisable that the manufacturer putty them himself. All other defects are allowed only on the inside.
- Class B. Knots in diameter can be no more than a third of the lamella, but in any quantity. The presence of through cracks and open pockets is also allowed.
- Class C is all the remaining lining, on which blue spots and a large number of large knots are visible. There may even be gaps on the surface of the side that is visible after installation. However, it is believed that lining of this class cannot be used for finishing walls.
Wood
A bathhouse is not only a steam room, but also a wash room, a dressing room or even a swimming pool. For each room it would be more appropriate to choose wood of a certain species.
Wood is divided into two categories:
- coniferous: pine, spruce, cedar;
- deciduous: linden, aspen and others.
One of the most popular material options for eurolining is linden board. Linden is quite durable, does not change the fiber structure for a long time and is resistant to various negative factors. The atmosphere of the linden bathhouse is full of freshness and cleanliness.
Aspen lining is easy to work with; time only makes this material stronger. If the surface of such a lining darkens, it is easy to return it to its original appearance by sanding the surface. Both linden and aspen are used to decorate the hottest and most humid room in saunas - the steam room.
It is also possible to use cedar for its finishing, however, due to the fact that cedar heats up very quickly, discomfort may occur when touching the sun loungers and walls made of this material. Coniferous trees are used mainly to cover the washing room or dressing room. Pine and spruce release resin abundantly and, like cedar, have a high heating rate, but using this material will save money and choose from an extensive decorative range of linings. It should be noted that coniferous wood must first be deresined in order to avoid a large number of stains on the walls.