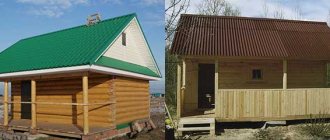
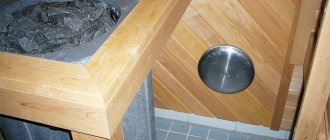
For a long time, the slang word “linden” meant something of poor quality, worthless, counterfeit, in one word “fake”. However, in such a matter as decorating a steam room, linden immediately miraculously transforms and acts as a suitable and original one. In a word, in most cases it’s worth saying that this is a fake steam room, and that’s really enough. Is there an alternative to linden, in the good sense of the word? Let's watch.
Beginning of plating
A bathhouse is a room in which the temperature rises quickly and lasts a long time, so here you need to create the so-called thermos effect.
We insulate the bathhouse from the inside using any type of insulation. Then you need to install a hydrobarrier and a reflector that returns heat to the steam room.
The next stage of work: installation of sheathing under the lining. If you do not plan to attach shelves to the walls, then you can use ordinary slats for the sheathing. Otherwise, purchase beams for the sheathing that can support the weight of a human body. Of course, the slats must be installed horizontally.
Wall upholstery elements placed vertically on horizontal bases
When the sheathing is ready, we begin to cover the bathhouse with clapboard, and you need to start from the corner. Eurolining is becoming increasingly popular. To install it, use clamps that allow you to attach the lining to the sheathing without making holes.
Claimer functioning
Experts advise that when covering a bathhouse with clapboard, use only the vertical type of installation, which eliminates moisture retention on the wood.
Recommendations for finishing the steam room
When covering a steam room, the lining can be mounted vertically or horizontally (for more details: “How to mount lining in a bathhouse - rules and installation sequence”). If a horizontal arrangement is chosen, then the lining should be nailed from the bottom up. This technique will prevent water from seeping into the joints.
First you need to install vertical posts, between which the insulation material will be laid.
To do this, markings are made, which should start from the corner. The distance between the inner sides of the racks should be 59 cm. This step will allow you to correctly install the insulation of the required thickness.
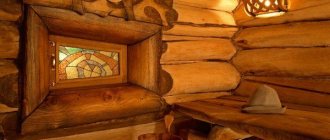
There are some peculiarities when cladding the walls of a log bathhouse.
Fastening the sheathing boards in a vertical position is quite difficult, and not everyone decides to do this work themselves. To obtain the desired result and avoid mistakes, it is necessary to process the side of the vertically located racks facing the logs.
Thermal requirements for a bathhouse building
The bathhouse building must warm up quickly and retain heat for a long time, but at the same time use fuel economically. Such conflicting requirements force builders to think carefully about solving the problem. Fuel for the stove must be high-calorie. All heat produced must remain indoors. All routes for its leakage must be blocked.
From the point of view of a heating engineer, heat in a bathhouse is distributed by convection (the movement of hot air), heat transfer (from one heated body to another with close contact) and infrared rays (low-frequency electromagnetic waves).
Foil is proposed as a heat reflector (infrared transmission) back into the bathhouse. But the foil itself turns out to be shielded from the stove, and infrared rays almost do not reach it. So it reflects only a small fraction of the heat produced by the stove. But foil, when laid correctly, can cover all the cracks and prevent hot air from escaping. The joints of the foil sheets are glued with special foil tape. It is also good.
PHOTO: stroy-banya.comUsing foil as a heat-reflecting surface
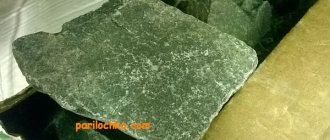
Features of a stone for a bath
The material is gaining popularity due to a large number of advantages:
- durability, only from time to time it will be necessary to change the cobblestones that have crumbled over time, while there is no need to completely disassemble the masonry;
- attractive appearance, stone can be used to create patterns and make masonry of different sizes;
- ease of installation that even a non-professional can handle;
- hygiene and ease of care, even if plaque appears, it can be removed with any means or ordinary water, lightly wiping with a cloth;
- environmental friendliness, stones do not emit toxic substances when exposed to steam and high temperature;
Under no circumstances should you line the wall inside the bathhouse with sea stones. It is a complete misconception that they can tolerate high temperatures. After just a few times, the material will begin to change color, crumble and crumble.
The principle of fastening the casing
The premises are finished from the inside with clapboards in two ways: the planks are placed vertically or horizontally. Each fastening method has its own characteristics:
Vertical installation. It is fast and easy to install, condensate easily rolls down the slots on the back side of the planks (but also easily rises through the capillaries of the wood), the tongue-and-groove lock is protected from moisture penetration.
Due to the vertical arrangement of the slats, it is easier for heated air to circulate inside the steam room. Horizontal laying. When fastened with the tenon facing up, the lock is also protected from moisture; air circulation between the sheathing and insulation is better due to the fact that the sheathing slats are located vertically. With a horizontal lining, if necessary, you can replace water-damaged planks located near the floor without touching the rest of the lining.
Vertical fastening of the lining is suitable for saunas with dry steam, horizontal – more functional for Russian bathhouses with high humidity. But in general, the choice is determined by personal preferences.
Why is steam harmful?
The interior decoration of the steam room also has a number of objective contraindications. What conflicts with steam and why:
- Fiberboard and particle boards. Finishing a Russian steam bath even with waterproof materials of this group is excluded due to the use of phenolic resins in their production, which under conditions of high humidity and temperature can provoke the infiltration of harmful components and cause them to enter the atmosphere of the steam room;
- Plastics. For approximately the same reason, the use of plastic is not recommended for finishing not only a steam room, but also the internal volumes associated with it. In addition, plastic products are unsafe in terms of flammability;
- Artificial stone for steam rooms also has a number of limitations. This is due to the use of modifiers and pigments for their production. In addition, such materials have high water absorption, which is offset by the use of protective coatings based on polyurethane resins. Such a decision will also not add health to steamers;
- Pine and spruce lining with a large number of “resin pockets”.
Cladding from the inside with clapboard from a to z
The interior lining of the bathhouse starts from the ceiling and ends with the walls.
We calculate the area of the internal lining. How to take measurements correctly?
To completely cover the lining in the bathhouse, it is necessary to calculate the total area of the walls and ceiling minus the window and door openings. Correct calculations will help you save your budget on the costs of basic and consumable materials:
- The ceiling area is calculated using the formula Spot = LxW, where L and W are the length and width of the room, m².
- The area of the walls is calculated using the formula Sst = 2x(L1xH1)+2x(L2xH2), where L1.2 and H1.2 are the length and height of the long (1) and short (2) walls, respectively, m².
- The obtained values are added to the total value Stotal = Spot + Sst, m².
- The area of the window and door is calculated: Sok = WokxHok; Sdv = WdvxHdv, where Wok, dv and Hok, dv are the width and height of the window and door, respectively, m².
- The net area for the cladding is calculated: Snet = (Stotal – Sok – Sdv), m².
Preparation of lining and beams. Treating wood with protective agents
It is recommended to first dry the room, then bring in lumber and open it for a day to allow it to warm up and get used to room temperature.
After a day, the lining can be coated with a water-based antiseptic, after which finishing work can begin.
Preparation of materials and tools
In order to sheathe the inside of the bathhouse, you will need:
- beams for sheathing with a cross section of 50x50 mm;
- fasteners (screws, clamps, dowel-nails);
- thermal insulation material;
- foil for vapor barrier;
- tape for fixing the foil;
- construction stapler;
- drill for working with concrete and brick surfaces;
- screwdriver;
- building level.
Conducting communications
Before you start fixing the lining in the bathhouse, you need to think through and mark the location of utilities on the walls and ceiling: power supplies, switches and lighting.
Installation of the frame under the lining
The lathing for the lining in the bathhouse must be durable and of high quality, since it is subject to such requirements as fixing the heat and vapor barrier layer, supporting the weight of lamps and shelves, as well as the finishing material itself. In addition, properly installed sheathing will allow the walls to “breathe”; condensation will not accumulate on the inner surface of the lining and the main wall and mold will not form.
If the lining is vertical?
Vertical markings are applied along the entire wall indicating the installation locations of the beams for the frame and the places of their fastening in increments of 0.5 m, then the beams are attached to the pre-waterproofed surface with self-tapping screws.
If you want to line the inside horizontally?
The technology for installing the frame is the same as for vertical cladding, with the difference that the main beams are attached vertically.
The same work is performed for mounting the frame on the ceiling.
Laying insulation and vapor barrier in a bathhouse
The insulation should be placed tightly into the cells of the sheathing, the vapor barrier should be secured with an overlap stapler, starting from the bottom row. Lining the inside of the bathhouse with foil is additionally accompanied by fastening the joints with tape. Then you need to stuff thin slats onto the frame - the lining will be fixed on them. The thickness of the slats is sufficient to form an air gap that prevents the formation of condensation.
The same work is done on the ceiling.
Installing lining on walls
With horizontal cladding, the lamellas are fastened with clamps to the sheathing from the bottom up, with the grooves down. In vertical finishing, fastening begins from the corner, evenness is also checked by level. Each panel is tightly packed into the previous one.
Lining the lining on the ceiling
The ceiling in the bathhouse should be covered with clapboard in the same way as the walls, but there are some nuances here:
- Installation of panels begins from the entrance, using only clamps.
- A hidden nail is used for the last board.
- The ends of the lining should be placed at a distance of 4-5 cm from the walls for air circulation and the possibility of panels moving due to temperature changes.
Decoration of doors and window slopes
Slopes for doors and windows are made of lining, cut to the required length, and covered with decorative corners and platbands. It should be remembered that it is not advisable to stick decorative elements. To fix them, finishing nails are used with final grinding of the installation sites to avoid accidental injury.
Requirements for the material for covering the steam room
When choosing what to cover a steam room in a bathhouse with, you should pay attention to such points as:
- The tree must be moisture-resistant and dry quickly, which will allow it to avoid rotting. The resin content should approach zero. The best option is to have no resins completely. The surface should be flat, smooth, free of roughness, gaps and knots. The wood should have low thermal conductivity, since wood that is highly heated in a steam room can burn the skin.
When choosing which is the best tree to buy for a steam room, you should pay attention to linden. Lining made from such wood is considered the most optimal material. Linden wood has low thermal conductivity, is easy to process, and releases beneficial essential oils.
Aspen is also a good material for a steam room, as it is durable, strong and has healing properties. And another advantage is its low cost.
When deciding what kind of wood to cover the inside of the bathhouse with, you can opt for larch. It has a positive effect on the human body, has high density, strength, low thermal conductivity, and does not absorb moisture. In general, such wood has all the necessary qualities and is perfect for finishing a bathhouse.
Tile installation technology
If we are talking about laying tiles on the floor, then the floor area is first filled with cement mortar at a slight slope towards the drainage system. The perimeter of the sauna is framed with construction twine. The tilting technology depends on the first tile from which the further floor angle is measured.
When laying, you can use a special tile adhesive, but a prerequisite for ensuring no subsidence is the addition of sand granules
If the tile is laid on a cement-sand mortar, then before laying it is immersed in water for 10 hours.
When installing ceramics on the screen around the furnace, heat-resistant thick glue is used. If the mastic is runny, it is better to make it thicker by adding sand. Wall tiles are laid in rows from bottom to top level.
Regardless of the purpose for which the bathhouse is being built - personal use or business, the task of properly equipping the steam room is considered the main one on the to-do list. Compliance with the necessary standards will guarantee a long, safe, pleasant use of the Russian bath.
Good material - good finish
Lining comes in different qualities. Therefore, when choosing a finishing material, pay special attention to this point.
The wood must be well processed and dried. Make sure that there are no chips, nicks or other troubles on the surface. Pay special attention to products made from hardwood - this is a universal solution for finishing a sauna steam room.
Among the characteristics of the material, it is worth noting the low heat capacity, which contributes to the rapid heating of the bath, and at the same time the walls themselves do not heat up to high temperatures. Thus, during the vaping process, you will never feel discomfort when in contact with the finishing material.
The step-by-step finishing process is as follows:
- Initially, a project is selected for which the finishing will be carried out.
- The second step is the selection and purchase of lining.
- Attaching the vapor barrier.
- Finishing.
- The final step is to treat the walls with special means.
Rules for visual inspection of boards and assessment of their condition
The following must be taken into account:
Pay attention to the quality of the chips. The boards must have a flat and smooth surface. This directly affects the economic benefits of finishing work. If the front side of the lining is rough, finishing will be complicated by the increased consumption of antiseptic and paint materials. The moisture content of the boards should not exceed 12-16% (GOST requirement). It is visually impossible to determine whether the material offered by the manufacturer meets this criterion. Therefore, it is necessary to request documents confirming compliance with GOST. If the wood is not dry enough, there is a high risk that it will suffer during the first years of operation of the finished premises. Pay attention to the depth and evenness of the groove. These indicators determine the quality of installation
And it doesn’t matter how it will be done: using clamps, nails or staples. If the groove is shallow, there will be nothing for the fasteners to grab onto.
An important characteristic of boards is width. Often there are lamellas on sale that are wider than standard ones (more than 88 mm) and managers assure that it is more profitable to buy such lining. This is not true, since such a finish will be less durable and there is a high risk of wide boards bending when exposed to moisture.
Electrical part
Electrical cables must be secured to the wall under thermal insulation and vapor barriers. The cable must be completely durable; it must not have end or solder connections, much less twisted. After installation is completed, the mounting points of the luminaires must be well insulated.
Lighting devices are distributed evenly throughout the room - this can be ceiling lighting, shelves or corner areas. Any lamp must be equipped with a special sealed lampshade that will protect the lamp from moisture. If ordinary unprotected lamps are used for lighting in a steam room, they deteriorate very quickly. In addition, it is likely that a short circuit will occur when moisture inside the device gets into the cable, and this can have very serious consequences.
The cable is attached to the wall using special holders or placed in a box, which will create protection from the aggressive environment in the steam room.
Sometimes small windows in the walls of the steam room are equipped with lighting. If a window is planned, it should be quite small, no more than 300x500 mm, and should be tightly closed. The best option in this case is to install a miniature metal-plastic window with double glazing.
Decorating the rest room
The bathhouse is always perceived as a place of relaxation from everyday worries. Each room in it is intended for its own purposes. The name of the relaxation room speaks for itself: this is where you relax after water treatments
Therefore, it is important to create a cozy and relaxing environment in it.
Proper finishing of a relaxation room in a bathhouse is not an easy task, the implementation of which can be entrusted to specialists: designers and artists.
A cozy environment is created through the correct choice of facing materials, furniture, accessories, organization of lighting and illumination of various zones and architectural elements of the room.
Features of wood cladding
Wood is the best material for walls, ceilings and floors in a bathhouse. In turn, a rich assortment of wood-based finishes can be confusing.
Sometimes simple boards are used to cover walls. Of course, you should choose only products of the highest quality, without mechanical defects and traces of mold. The lamellas are fastened at an angle of 90 degrees on a wooden crate, also pre-treated with antiseptics and anti-feathers. However, it should be borne in mind that the cost of such material is quite high, and therefore it is rarely used for these purposes.
Combining shades of wood in the interior of a steam room
It is better to choose a material specially designed for wall decoration - lining . They are easy to install, they do not weigh much, unlike boards, and have all the positive qualities of natural wood.
The advantages of lining include the following:
- A wide range of shades and textures - different types of wood are used to make lining.
- The slats are equipped with a tongue and groove, which allows them to fit tightly to each other and greatly simplifies installation.
- Visually, this finishing makes the walls smooth and aesthetically attractive.
- The design of the lamellas assumes natural air exchange between the sheathing and the wall.
A bathhouse usually consists of several rooms: a dressing room, a washing room, a steam room, and sometimes a relaxation room. For finishing, you should use different types of wood, based on the purpose and operating conditions in the room.
Wood goes well with stone on the floor
Where the temperature remains at the same level and humidity is minimal (dressing room, rest room), choose pine trim. It is characterized by low cost, stability, low thermal conductivity and a beautiful natural pattern. Pine contains phytoncides, which, when released into the environment, have a beneficial effect on the body. The aroma that such cladding exudes is especially expressive. Due to the presence of resin in the composition and natural antiseptics, this finish is not susceptible to the formation of mold and mildew. But this wood is not suitable for a steam room, since when heated strongly, it begins to release resin and a pungent odor.
pine paneling
Steam room materials
For the walls in the steam room, lining made of aspen, oak, linden, birch or cedar is used. As a cheaper material, you can use edged boards made from the same types of wood. The surface of the boards must be sanded to a perfectly smooth state and treated with protective compounds. If they are to be installed in the dressing room and rest room, then the top can be varnished. Planed boards are almost twice as thick as lining, so they provide high-quality thermal insulation, but you should not give up insulation.
Boards as wall decoration
Washing material
The washing room has a comfortable temperature, since it is most often located in front of the steam room. There is high humidity here, so the materials are subject to requirements regarding moisture resistance. Often the walls are sheathed with clapboard made of larch - a stable, moisture-resistant material that dries quickly and does not deform.
Larch paneling
larch paneling
Material for the rest room
When decorating a relaxation room, decorativeness and creating a cozy atmosphere come to the fore. There are the following options for wall cladding made of natural wood:
- You can cover the walls with pine wood boards. This is the most affordable material with excellent performance properties. Pine is not subject to rotting, it contains natural antiseptics, the wood dries quickly, and has a beautiful natural pattern and shade. Scandinavian pine has the greatest durability, so it is worth choosing it. The shade of pine is light pink, over time it darkens a little and becomes deeper.
- Another inexpensive but high-quality material for walls is spruce lining. During its manufacture, heat treatment is used, due to which the lining becomes very durable and moisture resistant. This type of wood does not contain as much resin as pine, has a pleasant aroma and a unique natural pattern with knots.
Rest room (dressing room)
Note! If the bathhouse is made in the form of a log house, then all finishing measures are carried out only after its complete shrinkage.
spruce lining
The process of covering walls with clapboard: step-by-step instructions
Covering walls with clapboard involves installing insulation. For example, you can use a material with a fiberglass base of the URSA brand together with a vapor-proof layer of foamed foil polyethylene on top.
First the walls need to be prepared. They are cleaned of contaminants, primed, dried and markings are applied - the places where the timber is attached.
Table. Sequence of actions when installing the sheathing
| Illustration | Description |
| Installation of guides is carried out at intervals of 60 cm. If we take into account the width of the beam, the distance between adjacent elements will be 56 - 58 cm. Dowels are used to fix the beam. The caps are recessed so that they do not protrude above the surface (flush). Thermal insulating material is placed in the formed niches between the guides. An important point: the thickness of the sheathing should be the same as the thickness of the insulation. Mats with a thickness of 60 cm, when choosing this step of guides, will fit tightly, without forming gaps and without requiring additional fixation. |
| Fixing the vapor barrier | Foamed polyethylene with a foil front covering is used as a vapor barrier. Material no more than 2 mm thick is fixed around the entire perimeter of the room on top of the insulation. It is attached to the guides with brackets. For joints, use foil-coated moisture-resistant tape. |
| Fixing slats | Horizontal wooden slats measuring 2 x 4 cm are attached to the vertical guides through a vapor barrier foil material with self-tapping screws at a distance of 40 - 50 cm. |
| Alignment of slats | When fixing the slats, it is important to maintain their even position in space in the horizontal and vertical plane. If during fastening you find uneven areas, then you can place a piece of plywood or thin lath under the slats. It is important that the plane of the wall is level. |
| Fastening when aligning slats | If an additional leveling element is placed under the rail, then it is attached to the sheathing using a longer self-tapping screw (5-6 cm), through the plywood. |
| Attaching the bottom rails | The height at which the bottom rail is fixed is 3-5 cm from the floor level. This will make it easier to fix the lining at the bottom of the wall. |
| Attaching additional rails | Additional slats are fixed in corners, as well as around windows and doors. The installation method (vertically, horizontally) depends on the location of the element’s fixation. |
Table. Cladding walls with clapboard
| Illustration | Description |
| Fixing the first lamella | Attaching the first lamella begins in the corner. Its position is strictly leveled in the plane using a building level. Additionally, you can apply pencil marks to the slats. |
| The first lamella is attached in the corner | The panel is secured with self-tapping screws to each rail on the corner side. If you first make thin holes in the lining with a drill of a smaller diameter, then when attaching it to a self-tapping screw, the likelihood that the lamella will crack is reduced to zero. |
| Fixing the clamp on a nail | At the opposite end, the lamellas are secured using clamps. It is pushed inside the groove at the end of the panel so that it rests. It is fixed to the rail with a small nail or a stapler. If a nail is used, it must be held by the leg with pliers so as not to accidentally damage the lining. |
| Fastening subsequent lamellas | To fix the next panel, its groove is placed in the tenon of the fixed lamella. On the free side, the fixation also occurs: the clamp is inserted into the groove and secured to the sheathing batten. |
| Padding of lamellas | If you cannot get the slats to fit tightly, then most likely the tenon has not fully entered the groove and you need to “help” it. To do this, apply the lath to the locking part of the lamella and gently tap it with a hammer. |
| There should be a flat wall | All subsequent panels are fixed in the same way. The sheathing should create a flat plane with recesses, depending on the profile of the lining. |
| Fastening the corner | When all the walls are sheathed, to complete the finish, install overhead elements at the corners and at the joints between the ceiling and the wall, as well as baseboards. Small nails are used to secure these elements. |
| Tinted lining | To tint the lining, protective substances with anti-foam and antiseptics are used. This treatment will not only add aesthetics to the wooden finish, but will also protect it from negative external influences. |
How to make proper ventilation in a bathhouse and prevent rotting? Read in the special article.
Features of lining installation depending on the bathhouse material
Brick or foam concrete baths must be insulated from the inside without fail. The exception is the use of a bathhouse only in the warm season.
Mineral and synthetic raw materials are used as insulation in the form of individual slabs or in rolls (mineral wool, expanded polystyrene).
The floor will also have to be insulated. It will be cheaper and more reliable to use expanded clay backfill.
A brief procedure for finishing a bathhouse made of bricks or foam blocks:
- On the ceiling and walls we make lathing from wooden slats of average thickness 5-10 cm (the exact figure depends on the thickness of the insulation).
- We place insulation in the recesses of the sheathing. To prevent it from falling out, we fix it with temporary strips. If desired, fix the glassine on top.
- If the heat insulator is covered with a foil layer, then this item can be omitted. If the foil is attached separately, this should be done with an overlap of 20-25 cm, so that the overlap from the ceiling extends onto the walls, and from the walls onto the floor.
- To obtain an airtight coating, we go through all joints with metallized tape.
- We nail slats on top with a thickness of 2-4 cm, on the ceiling the thickness increases to 5 cm.
- We leave gaps for ventilation and fasten the lining.
If the exterior finishing is carried out in a brick bathhouse, if sand-lime brick was used, then for a structure made of foam blocks, exterior cladding is required. This is due to the porous structure of foam concrete. If it is constantly exposed to moisture without protection, it will begin to crumble. It would not be superfluous to insulate the outside of the room with expanded polystyrene.
In bathhouses made from fresh logs, it is possible to simply attach foil without using additional insulation, put the sheathing on top and install the lining.
In frame baths made of boards and timber, the finishing and insulation of walls occurs according to the same scheme as in brick structures.
Floor finishing materials
When choosing materials for the floor in a steam room, you need to think not about comfort, but about the safety of vacationers. If moisture or dirt accumulates on slippery or smooth materials such as linoleum and tiles, your vacation could result in personal injury. In addition, the material can release substances that are toxic and harmful to humans.
What are the best materials for the floor in the steam room:
- Any tree except oak. In this case, oak, which is good for the walls of a steam room, on the floor becomes slippery and strong after getting wet, and this is exactly the option when you can get injured.
- Concrete. This material is the most durable and strong; you can always lay tiles on top of it, making the surface embossed or smooth. In any case, concrete is safe.
One way or another, there should always be an anti-slip coating on the floor.
If you decide to lay wood on the floor, it is best to choose deciduous trees or pine. You can impregnate the wood with a special anti-rotting mixture.
The choice of material for building a floor in a bathhouse and the work process has its own nuances:
- When laying wooden materials, it is necessary to maintain a humidity level of no more than 12%.
- Indoor humidity can quickly deteriorate wood, so choose the most resistant wood species.
- If you suddenly decide to lay the floor with tiles in the steam room, then do not forget to make holes for water drainage.
- Thermal conductivity is one of the important and primary nuances; the first thing you need to pay attention to when choosing a material.
- The material must be of high quality, and in the case of wood, free from knots and resin.
Mounting options
Next, you need to choose how the lining will be attached. The planks are connected to each other by grooves, but they must also be attached to the sheathing.
You can do this in 2 ways:
- Using a clamper. This is a mounting bracket with 2-3 holes. It is put on the lining and fixed with nails, screws or staples. Installation begins from the center of the wall. Its main advantage is that the kleimer does not damage the lining.
- Using self-tapping screws or nails: the first ones are screwed in at an angle, the second ones are driven in. To avoid rust, it is better to choose galvanized or copper nails. Unfortunately, the metal will begin to rust, and leaks may also appear at the fastening sites.
Claymer for liningSource mainavi.ru
You can easily see how to properly line a bathhouse with clapboard from the inside with your own hands. The lining can be mounted horizontally or vertically. The first method is more suitable for saunas, where the humidity is low, the second - for Russian baths, where there is high humidity.
Coniferous trees
Scheme of the steam room ceiling cladding.
Of the coniferous tree species, it is advisable to focus separately on larch. This is the most durable and stable coniferous wood for a bathhouse.
It releases many beneficial oils into the air that can significantly enhance human immunity. And if you make not only walls, but also floors from larch, you can be sure that every year they will only become stronger. Keep in mind that such a tree does not attract bark beetles, which is another positive point.
Cedar has approximately the same properties.
It costs a little more, so if you do not have the opportunity to decorate the steam room completely, you can use its wood for installation only in some individual parts. It is especially good to place cedar boards where the greatest amount of steam accumulates. This increases its usefulness and antiseptic effect on the body.
Spruce and pine are also common tree species for decorating a steam room in a house. They release useful substances into the air to a lesser extent and are more susceptible to deformation. But at the same time, they are several times cheaper, and if you properly process them before installation, they will last quite a long time.
Lining in a bathhouse: how to make...
Let us continue the description of technological processes. The article mentioned above gives an idea of installation methods, but we will still briefly repeat here the basics that you need to know.
Covering bathhouse walls with clapboard
The process itself is not difficult even for beginners, but it is full of nuances.
As already mentioned, you should start covering the walls of the bathhouse with clapboard from the top sub-ceiling strip. For this purpose, the thorn is cut off from it, because it goes with the thorn upward. Fasten the first board through the front side.
However, the upcoming expansion, firstly, and the need for uniform moistening and drying of the reverse side for less warping, secondly, suggest not making the first board close to the ceiling. And so that the gap is not visible, it is covered with a plinth or flashing, preferably with some indentation from the wall.
BUT! Don’t consider this a common practice—the Internet is full of videos whose authors make boards end-to-end. You can do as they do, we proceed from the expansion of the wood, and in linden it is minimal. So it’s better to know the properties of your lining and proceed from them.
The last two or three boards from the floor are usually done like this: it is difficult to insert the last one, so the boards are knocked together into a block in advance and it is this block of 2-3 boards that is inserted into the groove of the last one fixed to the wall. It is attached from the front side using the same fasteners that were used above - these are either finishing nails, or self-tapping screws, or staples.
Headlining
The direction of laying the boards when covering the ceiling in a bathhouse with clapboard is determined by the direction of the battens of the sheathing and perpendicular to it.
The process itself is no different from wall mounting.
This video not only advertises the best (from the point of view of the author of the video) method of fastening, but also demonstrates the process of covering the ceiling in a bathhouse with clapboard. Listen to the advice of the master, they may be useful in your work.
Interior arrangement of the steam room
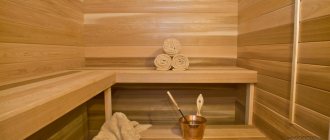
As a rule, benches, shelves, and headrests are installed in the steam room. They are fairly easy to make, so you can do it yourself. It is recommended to make bath furniture from the same type of wood that was used to cover the walls of the steam room.
Nowadays African oak, or abashi in other words, has become widespread.
It has such advantages as:
- low thermal conductivity; moisture resistance; high density; durability; strength; does not deform; pleasant to the touch.
The disadvantage of abashi is its rather high price.
Types of suitable insulation materials
In our opinion, it makes sense to divide the types of thermal insulation materials for baths into sheet, roll and backfill. In addition, there are insulation materials that are applied to the walls in the form of foam or a moistened mass - these are polyurethane foam and ecowool, which are sprayed using special equipment.
Mineral wool can be purchased in rolls or sheets. It all depends on its density and the binders used.
BY THE WAY! We rarely name specific brands, but do you understand that the names Rockwool or Isover hide the same mineral wool produced by different companies?
Basalt wool is a type of mineral wool, a literal reference to the similar mineral used. There is practically no difference.
Basalt wool for baths
But you should not confuse mineral wool and glass wool - these are different insulation materials, made of different materials and with different properties.
Glass wool should no longer be used anywhere, because it is extremely unpleasant for humans - if it gets on the skin, it causes itching, and is hazardous to health if it gets into the eyes or respiratory organs. Yes, and fiberglass crumbles during operation, turns into dust, and it penetrates through the cracks, and you breathe it.
Does not like fiberglass insulation and elevated temperatures typical of a bathhouse.
Polystyrene foam and extruded polystyrene foam are good insulation materials, especially the latter, but using them in a bathhouse is dangerous. They are absolutely not suitable for a steam room, but could (theoretically) be used in other rooms, but we will not recommend them, since they are a fire hazard.
ADVICE! In the bathhouse, polystyrene foam and penoplex can be used in floors under concrete screed - there they do not pose any danger.
So, sheet insulation is mineral wool, foam glass (excellent, but expensive insulation), calcium silicate and magnesium silicate sheets, non-recommended polystyrene foam and extruded polystyrene.
Foam glass
Roll insulation is again mineral wool (lower density), glass wool. foamed polyethylene, with or without foil (penofol, isolon, etc.).
We have already spoken about fiberglass, now about foamed polyethylene. It is often used as additional insulation in residential buildings, but polyethylene does not tolerate high temperatures, so it should not be used instead of foil to insulate a steam room.
Foil insulation Penofol
IMPORTANT! Polyethylene already melts at a temperature of one hundred degrees. By the way, it supports combustion.. In general, it is quite possible to insulate other rooms of the bathhouse with it (as a second layer)
In general, it is quite possible to insulate other rooms of the bathhouse with it (as a second layer).
We will divide bulk insulation for baths into those that can be moistened and “glued” to the wall, and those that cannot. Expanded clay and vermiculite belong to the second category, ecowool - to the first.
Expanded clay and vermiculite can be used to insulate floors and ceilings, where they adhere perfectly and retain heat indoors. In order to insulate the walls of a bathhouse with them, it is necessary that between the two layers of the main wall material there is a gap, a cavity that can be filled with insulation.
Expanded clay
Ecowool is waste paper (cellulose) crushed into dust, impregnated with fire retardants so that it does not support combustion. And it really doesn’t support it - this is a good material for insulating baths where it is on sale. Ecowool is used in dry and wet form. In dry conditions - for insulating floors and ceilings, as well as for filling cavities. When wet - for application to walls.
Insulating the roof with ecowool using the wet method. Cromwell Photos
Also on our website you can read two articles that provide a more complete overview of insulation materials that can be used in a bathhouse:
- review of bath insulation;
- choosing the best of natural and artificial insulation for a bath.
Cladding stages
The cladding of the steam room is carried out in several stages:
- Preparatory work.
- Insulation of the bathhouse.
- Cladding with clapboard.
Free selection of equipment for saunas and baths:
Preparation for sheathing
Preparatory work that must be completed before installing the lining includes:
- Connection and testing of all communication systems (electricity, water, sewerage).
- Cleaning room surfaces from dust and debris.
- Waterproofing.
- Installation of sheathing - the slats should be attached evenly and perpendicular to the direction of the lining. The sheathing is mounted to a concrete wall using dowels, and to a wooden surface with self-tapping screws.
Steam room insulation
After installing the sheathing, a layer of heat-insulating material is laid on it. To insulate the bath, mineral or basalt wool is used. This material is fire-resistant, vapor-tight and not afraid of moisture. When installing it, you must ensure that it adheres tightly to the surface. Existing errors are additionally sealed with self-adhesive tape or foam for installation work. To protect against steam, foil or film is placed on the mineral wool and secured with staples.
Simultaneously with the installation of the sheathing and insulation, the location for installing ventilation is determined. There should be two ventilation holes. It is recommended to place them near the stove. In this case, one of them should be at a level of 15 to 30 centimeters from the floor, the second under the ceiling.
Covering the steam room with clapboard
Installation of the lining can be done in two ways:
- With horizontal placement.
- With vertical placement.
The finishing of the steam room is done using a hidden method. Self-tapping screws or clamps are used as fasteners. Self-tapping screws must be galvanized. Clamps can be made of galvanized metal or plastic. Before laying, it is recommended to leave the boards in the steam room to “rest” for a couple of days. In this case, the shrinkage that they will inevitably subsequently give will be minimal.
The boards should be laid as close to each other as possible. And upon completion of the finishing, all existing gaps, corners and joints should be sealed with polyurethane foam, all wooden surfaces of the steam room should be treated with a special moisture-resistant composition based on wax or water. Lining is not suitable for finishing walls and floors near the stove. There you will need to install stainless steel sheets or lay out tiles.
Types of wood for making bath trim
The steam room finished with aspen paneling looks attractive
It is important what type of wood the product is made from.
For the bathhouse, wood trim with the lowest thermal conductivity is used: linden, aspen, abashi, cedar, alder. Moreover, you can take not any cedar, but only the northern one. It contains less resin and when heated, the walls and ceiling will not begin to cry.
Larch species have a lower wood density and with tactile contact in the bathhouse, the lining will be more pleasant, even at high temperatures in the steam room. Such lining costs more, but the costs will be justified. Each of the types under consideration is better suited for different bathhouse areas.
Aspen: has a beautiful reddish tint and increased moisture resistance. In terms of its durability, aspen can only be compared with larch.
When in contact with water, aspen wood does not collapse, but rather hardens. It is better to use it to decorate a rest room or washing area. The only negative is the high price, due to which it is not recommended for use in the steam room and dressing room.
An original version of a steam room trimmed with linden clapboard
Linden: Lining has become traditional for finishing the inside of a bathhouse. Linden does not heat up at high temperatures and has a pleasant whitish color. But linden has a serious drawback - if it is not treated with antiseptics and protective compounds, it quickly begins to darken and rot.
Cedar lining in combination with linden looks great
Cedar: This is a coniferous tree, but its structure is of low density, so it is often used for baths. Cedar has excellent antiseptic properties and emits a pleasant odor when heated. But it is not recommended to use it in a steam room, since it still contains some percentage of resin.
Alder lining in the interior of the bathhouse looks original and modern
Alder: has a pleasant pinkish tint with a pleasant velvety texture. Holds temperature well and is not afraid of moisture. In baths can be used in any part.
When choosing lining for finishing a bath, it is better to take chamber drying Extra or AB grade. Since changes in temperature and humidity in the bath occur constantly, it is impossible to use material with inaccurate or curved shapes. But in the highest grades this is unacceptable.
Steam room
Many years ago, having just moved to the village and built our first bathhouse, we were also very arrogant. And they lined the steam room with pine boards. Aroma! Beauty! There was no limit to the joy until hot drops of resin began to drip onto my head, and ugly streaks appeared on the walls.
I had to improve my theory, and not just be proud of my ability to work with my hands. The head in this matter is also not superfluous.
Materials for walls and ceilings
The steam room is the hottest place in the bathhouse
It will not be news to anyone that no synthetic materials are categorically used for lining a steam room . Many of them tolerate heat and moisture well, but when heated they emit harmful substances or become very hot themselves.
But not all natural finishing materials are suitable for this purpose. The most suitable one is wood in the form of a polished edged board, lining, blockhouse or imitation timber. However, there are limitations here too!
Are all breeds able to withstand temperature changes, resist fungus, and not rot due to constant contact with moist air? Not everyone. And many of those that are capable have certain disadvantages: they are expensive, get very hot, or “cry” with resin.
Brief characteristics of different types of wood, which are most often used to decorate baths and saunas, will help you make your choice:
- Linden. Changes very little under the influence of steam and temperature, maintaining a beautiful creamy shade. Fills the steam room with a delicate pleasant aroma. But it gets very hot, so the linden shelf needs to be doused with cold water or covered with a sheet before planting. It is unlikely that it will be possible to insulate walls simply with linden lining without thermal insulation material due to its high thermal conductivity. Cost of 1 sq.m. 600-800 rubles.
Linden lining
- Black alder. In terms of performance characteristics, it is an ideal material: it almost does not change its appearance and properties , on the contrary, the aroma and color of the wood become more saturated over time. In addition it does not heat up , allowing you not to be afraid of burns. But it does not emit particularly useful phytoncides and is more expensive than linden - 750-1200 rubles.
Alder paneling
- Aspen. Finishing the inside of a bathhouse with aspen is not the best solution in terms of aesthetics, since it turns gray when exposed to moisture . But in terms of thermal conductivity, it is similar to alder - it does not heat up and can itself become a good additional heat insulator for walls and ceilings. In addition, it allows you to save money, since it costs 400-500 rubles per sq.m.
Aspen lining
- Larch. If you need high-quality, beautiful and, as they say, lasting for centuries, then larch is an excellent choice. Including the price (up to 1000 rubles per square), if you compare it with the cost of valuable wood species with similar properties. It has the highest resistance to moisture, which only increases over time . But finishing a steam room in a bathhouse with larch is a difficult task, since this dense wood is difficult to process.
Larch paneling
- Ash. This wood already belongs to valuable varieties and a square meter of such lining costs between 1500-2000 rubles. As for the use of a steam room for finishing, it is perfect for this purpose: it has a beautiful texture, does not darken, is not afraid of high humidity and temperature, and also has healing properties , especially useful for people with respiratory diseases.
Expressive design is a great advantage of ash lining
- Oak. Of our local wood species, this is the densest and most beautiful. In all respects it is suitable for tiling a steam room, it looks solid and reliable, but it also costs a decent amount: 2300-2800 rubles. This finish is already considered elite.
Solid oak board
- Abashi. For those who do not expect to spend a lot of money, you can skip this and the next points, since decorating even a small room with African abashi oak will be very expensive. 3000-3300 rubles per sq.m. This exotic wood is superior to all others in moisture resistance and has an unusual rich color. But all this is unlikely to justify its price, since it does not provide any benefit to the body and, moreover, gets very hot.
Abashi color is really very beautiful
- Canadian cedar. The most expensive material listed, used only in elite baths. Exudes a pleasant aroma and healthy essential oils. Very beautiful, easy to process. Depending on the thickness of the lining, it can cost from 4,000 to 8,000 rubles per square meter.
Canadian cedar paneling
The range of prices in these examples is explained not only by the different thickness of the boards, but also by their length. Short ones are cheaper. In general, all of these are grade A or Extra products, so you can find them cheaper.
Now about very popular and inexpensive breeds, but completely unsuitable for use in hot and humid rooms.
- Pine and spruce. The most inexpensive lining, costing 200-240 rubles per square meter, is made from just these conifers. And it is perfect for covering walls in a recreation room and making furniture for it. The exterior decoration of a pine blockhouse is also quite beautiful and durable if the walls are built from bricks or blocks. But you can’t put pine in the steam room. I have already described the reasons above - this is the “tearfulness” of the tree under the influence of high temperatures. Moreover, due to humidity it becomes loose. And since protective impregnations cannot be used here, it will not last long.
The most affordable price is for pine and spruce lining
- Birch. Completely unsuitable for wet rooms - steam rooms and especially showers in bathhouses. It is very afraid of moisture: it quickly loses its appearance, begins to rot and mold . But in dry and well-ventilated rooms, it is not inferior to larch or oak in terms of strength and wear resistance. It can be considered as a finishing material for a rest room. Especially if it is spacious and you are looking for something not very expensive. 400-440 rubles per square meter is quite tolerable.
Birch lining
To be honest, from an aesthetic point of view, it is not so important what you line the walls and ceiling with: very few people will understand at one glance at expensive wood how much it cost you. It is much more important how to decorate the bathhouse. Well-polished, well-fitted boards that are pleasant to touch are half the success.
Judge for yourself whether the traditional finishing for our region and the exotic finishing are very different:
This is a linden tree
And this is Abashi
If your imagination and patience are enough for decorative finishing in the form of backs, headrests and beautiful grilles, even better. All this can be done from expensive varieties.
Simple and original
All these tricks with wall cladding are not needed if they are made of thick logs of suitable species. It is enough to caulk the seams well and sand the frame. But finishing a block or brick bathhouse is not only about decorating unsightly surfaces, but also about the possibility of insulating them and reducing heat loss . But that is another topic.
It is also necessary to think through such an issue as fireproof finishing of a bathhouse made of timber or logs.
The walls around the stove and heater should be sheathed in metal or made of brick
I will not repeat in the following sections about the suitability of this or that type of wood for finishing other premises. Their characteristics speak for themselves; making a choice will not be difficult.
Floor
The floor in the steam room should not be slippery and not get too hot. The most inexpensive solution is a cement screed with wooden ladders laid on top. A little more expensive - tiles or porcelain stoneware with the same drains.
In any case, there must be a slope towards the drain hole
Ladders are gratings made of thick boards or bars that can always be taken out and dried or lifted and washed on all sides. Therefore, there are no special requirements for the type of wood; you can even use pine - on the floor it will not get so hot as to release resin.
Solid wood flooring is another matter. Here you will have to choose species that are resistant to moisture - larch, oak, alder.
Country bathhouse under construction inside with wooden floor
There is another option - heat-treated board. It undergoes special treatment with hot (180-200 degrees) steam in the absence of oxygen, thereby acquiring very high resistance to moisture, strength and a dark shade .
This is “dead” wood, but it is not at all afraid of mold and parasites, and does not rot, so it is excellent for flooring.
Heat treated board
The price depends on the type of wood. For example, a square meter of 40 mm thick pine flooring will cost about 1,250 rubles, and 2,700 for alder.
Basic finishing methods
The construction of a bathhouse frame is permissible from wood, aerated concrete and foam blocks, and brick. If building standards are observed, the building will be functional. The choice of material depends on the personal considerations of the developer. In central Russia, preference is given to wood in 50% of cases. A log or beam. Another 25% falls on frame structures, the basis of which is also wood. The last quarter remains for other materials.
The interior decoration of a bathhouse built from logs, using frame technology or bricks and blocks, does not depend on the material of the box
It is important that it meets the specific requirements imposed by the functionality of the building. The most stressful conditions are in the steam room, where the humidity reaches 70% and the temperature reaches 90°C.
For the washing room and dressing room, a humidity of 40% at a temperature of 30 - 35°C and low humidity at 20 - 25°C are recommended, respectively. The given numerical values are indicative and justified from a medical point of view. In life, differences happen. When it comes to steam rooms, the rule of thumb is: higher the temperature, lower the humidity.
Decoration of the washing room
The finishing requirements for the washing room are less stringent than for the design of a steam room. But although this room does not have such high temperatures, the humidity is always very high. Thus, finishing materials are selected taking into account humidity. Experienced craftsmen recommend giving preference to natural, environmentally friendly, breathable materials. Wood has these properties. But other materials are also often used, for example:
- stone;
- tile;
- plastic.
Plastic materials should be treated with extreme caution. They should only be of the highest quality, preferably certified. Because in sauna conditions, heated plastic can emit odor or even release toxins.
Choosing a lining: with what lock and what length?
Good, high-quality lining helps the walls of the bathhouse to “breathe,” prevents the appearance of condensation and fungus, and uniquely regulates the humidity in the bathhouse. The main requirements for these materials are environmental safety requirements. It is worth clarifying that at one time all the lining was made “in tongue” and “in quarter”, but the slats often shifted during operation, and the density of the joints was violated. That is why today almost all lining on the market is made with tongue/groove profiles.
A little secret for those who like to save money: clapboards up to 1.5 meters long in warehouses are much cheaper than those that are more than 2 m long. And figuring out how to cover a bathhouse with clapboards of this length is not difficult. You just need to make a rail in the middle. But the benefits will be quite tangible.
What you need to know when finishing ceilings and walls
A universal option for finishing a steam room is considered to be lining. In simple words – cladding panels. You can either buy such material or make it yourself.
Walls covered with clapboard have an excellent appearance, and the material allows the room to breathe - all this is achieved thanks to good microcirculation. Thus, you will not see condensation on the walls.
Another advantage of lining is its easy installation, which does not require you to have super-high carpenter skills.
Covering the bathhouse with foil and clapboard
Despite the fact that this material can be used in all rooms inside, covering the bathhouse with foil and clapboard is used only in the steam room.
The reason is that, in addition to excellent vapor barrier properties, foil has the ability to reflect infrared radiation, and therefore retain heat in the room, and in an amount that would be excessive, say, for a rest room.
Usually this property is called a “thermos” - the principle is the same, only without a vacuum, more precisely, it is replaced by an air layer, which, although it conducts heat, but weakly.
For more information on using foil, see this page.
In bathhouses, foil is used not even in cases where the heat does not hold, because here it would be more correct to eliminate leaks and increase thermal insulation, but when the owner would like to create the conditions of a Finnish sauna in the steam room.
Foil is also suitable for these purposes because it is not afraid of high temperatures, but polymer films that can be used for vapor protection are.
The use of foil in a Russian steam room is questionable, but there is no point in speaking categorically against this material, because the bath consists of many factors that influence each other. We admit that the conditions of a Russian bath are achievable in a steam room with foil.
As for the technology, the foil is placed on top of the insulation, overlapping, attached to wooden boards separating the insulation; All joints and fastening holes are sealed with aluminum tape.
Then a lathing (at least 3 cm thick) is nailed on top of the foil. And the lining itself is attached to the sheathing. If you need information about fastening, see this article.
Drying (drying and ventilation)
A Finnish sauna is not as humidified as a Russian sauna, but it also needs ventilation.
And it’s easy to lose a Russian bath if you don’t pay enough attention to drying it. Drying wood in a bath should occur after each use. All removable ladders and shelves (if they are removable) are washed and taken out into the air. The oven needs to be left running for some more time - if it is wood-burning, then at the end of the procedures, throw in another log, and time is given to dry, a brick oven will dry everything itself, a gas or electric oven - also let them work for another 20 minutes.
All dampers and windows and doors are opened for ventilation. If the owners leave, the shutters remain open, and the rest, of course, closes.
ATTENTION! Ventilation and operation of the oven for drying are carried out simultaneously!
Here are Bely’s tips from the Teplodar forum on how to properly dry a bathhouse:
We also recommend reading useful information about sauna ventilation in the corresponding section.
Advantages and disadvantages
Lining is an excellent option because it has a good appearance and has all the qualities that are necessary for the finishing material of a steam room. There are many options for how to process it without harming your health.
Due to the fact that there are many types of lining, you can decorate the steam room in the style that you like best. When choosing this or that tree, you should think carefully about what you would like the bathhouse to look like in the end. In addition, you need to calculate the price, since the cost is different for each type of wood. There are, of course, other types of finishing materials, but they are more expensive and require much more attention during installation. In addition, the lining is easier to dismantle in case of damage.
Typically, a bathhouse consists of a steam room, a shower and a dressing room. Each of these rooms has specific requirements. That is why the material that will serve as interior decoration must have specific technical characteristics and be of high quality.
The main advantages of lining over other materials include:
- value for money;
- high moisture resistance;
- resistance to high temperatures;
- variety of types in stores.
Lining can be called an environmentally friendly material that is safe for human health. Since the temperature in the steam room is quite high, the material with which the room will be decorated should under no circumstances be heated. In addition, in order to know how to choose the right material, you need to inquire about the characteristics of the wood species from which the lining can be made. Some types of wood can release resins when heated, which sometimes cause allergic reactions. The lining has no obvious shortcomings, so you can safely purchase this material for finishing.
Options for washing and steam rooms: materials
Let's briefly look at the materials suitable for finishing bath sinks and steam rooms.
Wood
In the photo: finishing the steam room of a bathhouse with wood (lining)
To decorate the steam room, it is strongly recommended to use hardwood , such as linden, aspen, and alder. These rocks are suitable for walls and ceilings, finishing doors and windows.
For the floor, you can use more resistant species, for example, larch. Conifers should not be used because of the resin they contain, which flows out when the temperature rises. But on the floor the temperature is usually low, so there are no restrictions.
However, it is worth saying that linden and aspen have low resistance to rotting and biocontamination (for example, by fungi). Therefore, we still recommend additionally protecting surfaces made of this wood with impregnations and varnishes.
in a sink , unless it is a design decision. In this case, it is worth recommending conifers - they are more resistant to water.
Stone
An option for decorating a steam room in a bathhouse is stone tiles . Of course, we are talking only about partial finishing, for example, near the stove (more on that below).
What types of stone are best suited for finishing walls in a steam room? You will be surprised, but there are practically no restrictions here - the main thing is that it is not rock salt, for example. But pink Himalayan salt is often used as interior decoration. Of course, it will not dissolve as quickly as table salt in a pot of soup, but its composition is the same as salt in a salt shaker.
The wall behind the stove, of course, heats up, but the stones are quite capable of withstanding such temperatures without harming themselves. But the situation will change if you decide to cover the stove with the same stone. The temperatures there are somewhat different. And it’s worth focusing at least on those stones in which ready-made stoves are sold, for example, soapstone .
As an option, you can decorate part of the steam room not with smooth tiles, but with cut pebbles or cobblestones, which are mounted on the mortar with the convex side up. It turns out to be quite a nice decor. As you can see, even street cobblestones can come in handy.
In the photo: interior decoration of the steam room with stones around the stove
in a sink , but this is rarely done, because it is easier and cheaper to cover the walls and floor with ready-made ceramic tiles.
Tile
The tiles in the steam room are used either on the floor or on the wall behind the stove. As for the floor, rough tiles, for example, Metlakh, behave best here . In general, it can be recommended for wet rooms. But it is better not to consider all varieties of smooth glazed tiles as a covering for the floor of a steam room.
In a washing room , it is also better to use rough tiles on the floor, and for the walls... here, in general, you can see more clearly how sober visitors will wash in your washing room. If not particularly so, then give up smooth tiles there too, eliminating unnecessary opportunities for injury.
In the photo: finishing the shower room of the bathhouse with tiles
Sealant
Special mention should be made of such finishing material as sealant for steam rooms in bathhouses.
Sealants in a steam room can be used only in two cases: if it is a bathhouse made of logs and needs to seal the joints between the logs, as well as sealing cracks in the logs themselves, and the second option is to seal the joints, for example, foam glass, if it is used as a heat insulator .
In the first case, we can recommend special sealants for wood that have a certain elasticity, because wood tends to constantly change volume under the influence of moisture. In addition, it is worth asking the sellers which wood sealants can withstand steam room temperatures well (name the numbers at which you are used to steaming).
Perma-Chink wood sealant , which he used for seams and Check Mate for sealing cracks. However, we cannot say with certainty that this was not promotional material.
As for the sealant for the heat insulator, then you need to take silicone without impurities, for example Ottoseal S 73.
Covering depending on the material of the bath
Covering the bathhouse with clapboard, as well as attaching foil in the steam room, was invented primarily for the purpose of preserving heat inside the room. Additional thermal insulation can be placed under the lining, and the film reflects up to 95% of the heat back into the room, creating the effect of a thermos and reducing the cost of heating a bathhouse or sauna.
In order to properly sheathe a bathhouse to solve practical problems, and not to give the room an attractive appearance, you will have to take into account the material from which the structure is made. Some baths do not require additional insulation, others are more capricious and are subject to increased moisture formation
For long-term service of the steam room, you will have to take into account all its features.
Is there a difference between a bathhouse and a sauna?
In a Russian bath, the temperature is maintained below 100 degrees, but the air humidity reaches 70%. The Finnish version of the steam room, the sauna, is characterized by dry air, but at the same time its increased temperature. Therefore, it is allowed to use the vertical method of laying lining in the sauna, but you should avoid using coniferous wood in the finishing. The Russian bathhouse is less capricious in the choice of material, but requires more careful installation of the finishing - horizontally with the possibility of replacing several planks if necessary.
Finishing a brick or block bath
Such a bathhouse is sheathed from the inside not only to give it the appropriate style, but also for the purpose of additional insulation, as well as to comply with the requirements of the law on silence. First, they install the sheathing, between the rods of which insulation is laid - mineral wool or ecowool. After this, the foil is installed on top and a counter-lattice is made. The lining is attached to the slats of the latter.
It is advisable to cover such a bathhouse with clapboards on the outside, but such finishing is carried out at the request of the owner. If you make external cladding and place insulation underneath it, you won’t have to lay mineral wool on the inside - just install a vapor barrier, a counter-lattice and secure the lining to the walls and ceiling.
Frame building
The walls in such a bath are made in the form of a “sandwich” of two boards or panels, between which insulation is placed. If the thickness and material of the insulation are selected correctly, additional thermal insulation for such a bath will not be required. In this case, it is enough to install the sheathing, attach the foil to it, mount the counter-lattice and install the lining panels.
If the thermal insulation of a frame bath is poor, you will have to additionally cover it with insulation either outside or inside under the lining. In the future, you have to foil and decorate the bathhouse according to the generally accepted algorithm.
Do you need cladding for a wooden bath?
A bathhouse made of wood does not need additional cladding, because initially it contains the most suitable material for such a room, and the appearance is preserved as traditional as possible. The exception is situations when the owner of a wooden bathhouse did not calculate the thickness of the walls and the room turned out to be too cold. A wooden bathhouse will also have to be lined with clapboard if you plan to lay foil in order to create a “thermos” in the steam room and reduce heating costs.
What to do with a log house
The expediency of finishing a log house is similar to a bathhouse made of boards. But in a log house it is more difficult to install sheathing and lay insulation due to the unevenness of the walls. Even before foiling or finishing such a bathhouse, you will have to carefully caulk it and seal all the cracks.
Washing
The washroom is a very damp place. Therefore, experts recommend covering the walls, ceiling and floor with ceramic tiles or mosaics. Fortunately, there are tiles on the market that perfectly imitate wood structure. No? Do you want to enjoy the amazing beauty and sensual aroma of wood in every room of your bath or sauna? Well, what then? No problem.
You can decorate the washing room with the following types:
- luxurious teak;
- charming mahogany;
- noble abash.
These rocks are moisture resistant, but still require additional impregnation with special substances.
Luxurious teak
Teak, famous for its rich color palette, velvety surface and matte shine, is known for its excellent technical characteristics. For example, it is incredibly durable because it is biologically passive, chemically inert, moisture-resistant, and heat-resistant.
Due to the high content of certain natural oils, teak cladding has a beneficial effect on the human body. In addition, esotericists claim that the tree species has powerful energy. Teak is wonderful for covering all sink elements.
Charming mahogany
Mahogany is the wood of kings. She can't be demolished. She's not afraid of anything. This tree species is unaffected by climatic, chemical, thermal, mechanical and biological factors. In addition, it is incredibly beautiful and fragrant. Mahogany also has healing properties. In addition, it is famous for its light energy, which has a beneficial effect on a person. It is perfect for covering floors, ceilings and walls.
Noble Abash
Abash in nature
Abash is a guest from colorful Africa. It has an amazing texture and an exciting scent. In addition, it is not afraid of temperature changes, moisture, alkalis, acids, fungus, and shock. Abash is capable of serving faithfully for many decades.
In addition, due to its high content of nutrients, it calms the nervous system, saturates it with vitality and fights various diseases. Abash is also a tree that takes away negative energy and gives positive vibes. It is ideal for covering all elements of the sink.
Abash, mahogany, teak are species that, as practice shows, do not suffer from demolition, since they are not afraid of the harmful effects of negative environmental factors. However, their price is extremely impressive. So be prepared to part with a small fortune.
Methods for attaching panels to walls
Using nails or self-tapping screws is the traditional option for attaching panels to walls. A more modern method is the use of clamps. It does not damage the panels, but requires additional costs of both time and money when installing the lining.
Using nails or screws
This method will require a screwdriver or hammer, as well as special nails or self-tapping screws - galvanized or made of copper alloy. Such fittings are more expensive, but if you save on them and buy ordinary nails, they will begin to rust over time. This will lead to the appearance of red streaks on the lining, which will spoil the appearance of the finish and stain the skin and things when touched. The fasteners are driven or screwed into the lining tenon at an angle of 45 degrees. The fastening points will have to be sanded so that there are no burrs or other defects left. The disadvantage of this method is that holes will have to be created on the planks when fastening them with nails. And when you try to remove the lining, the fastening points will be further damaged, which precludes the reuse of the panels if necessary.
Fastening with clamps
Do-it-yourself installation using clamps is safe for lining strips because it does not damage them. A clamp is a special bracket that is attached to the lower half of the lining groove - a recess into which the tenon of the next plank is inserted. The fastenings of the bracket are covered with the next strip in the row. Fixing the staples to the sheathing beams is carried out with nails or self-tapping screws.
With this installation method, the lining is not damaged, and there are no nail heads or screws left on the outer surface of the cladding, which eliminates the risk of getting burned or getting a rusty drip on your clothes after visiting such a bathhouse.
It is also easier to partially replace the lining mounted in this way - just pull the boards out of the grooves and pull out the fasteners. If you do not work carefully, it will be the staples that are damaged, not the boards.
Installation of sheathing and insulation
No. Illustration Comment 1
Fastening the membrane with a stapler
To protect the insulation from moisture, a vapor barrier should be installed on both sides. Therefore, first, a membrane is mounted on a bare wall, which has been leveled in advance. 2
Installation of sheathing
Attaching the sheathing to the wall
And only then the timber sheathing is attached. Use well-dried timber 60×27 mm and 50×25 mm without knots, cracks and obvious wood defects that reduce strength. The installation distance should not be more than 1 m. Excellent if it is approximately 0.6 m. 3
Lathing
First, guides are mounted level on the wall. After this, according to the principle of racks, the outermost bars are installed first, the position of which must be carefully checked with a plumb line and level. 4
Fastening
Fixation is carried out on special corners, which will ensure loose installation of the structure. The gap that forms between the floor plane and the stand allows for the “movement” of the wood during deformation, which makes it possible to avoid unpleasant consequences. This also solves the issue of additional ventilation (when finishing the steam room, the gap is covered with a plinth). After installing the rack bars, grooves are cut into them, which will serve to attach bars of a smaller cross-section to them
This method of fastening is called floating; it will help avoid any deformation, which is very important for a hot and humid room. Then the entire sheathing is adjusted to the level and secured, and pads are used if necessary.
Lathing on a rounded wall
For semicircular or patterned surfaces, trying to adhere to a given shape, they use not a whole beam, but parts of it. 5
Mineral wool laid and secured with twine
Insulation is placed in the constructed frame
Over time, mineral wool can slip or become deformed, so it is secured with polypropylene twine. 6
Vapor barrier secured
Then a second layer of vapor barrier is placed with the rough side to the insulation, and it is fixed with a stapler. 7
Impregnation
To prevent the tree from being subsequently damaged by pests, it is necessary to carry out a special treatment with an antifungal primer, which is allowed to dry.
Covering a log bathhouse with foil
We carry out the work in the following sequence:
- Attach the sheets of aluminum foil with the reflective coating on the inside using small galvanized nails, with a 20 cm overlap.
- Ensure that the integrity of the material is maintained. If it is damaged, you can glue these places with tape.
- We seal the joints with metallized tape, ensuring tightness.
- We fill the lathing from slats with a cross-section of 5 cm2 in the direction opposite to the installation of the lining.
- We attach finishing material to the sheathing on top of the foil.
- During the installation of the lining, we ensure that the air gap between the reflector and the finish is maintained.
Installation of sheathing and insulation
To protect the insulation from moisture, you need to lay a double layer of vapor barrier foil. The first layer of material is attached to a pre-leveled clean wall.
Then the sheathing is installed from the dried, even beams. The structure is attached to the guides according to the principle: first, corner bars-posts, then intermediate ones. The entire structure is secured with metal corners. The gap is needed for subsequent deformation of the wood and additional ventilation of the bath.
After securing the main posts, smaller beams are installed. This type of sheathing installation is called “floating”; it is used for hot, humid rooms and helps protect the frame from deformation.
The next step is to level the sheathing using wooden supports. It is recommended to treat the beams with a special antiseptic composition. For example, linseed oil is excellent for any type of wood, it is environmentally friendly, penetrating deeply into the wood, and perfectly protects against pests, microbes, and other parasites.
Insulation is mounted on a flat frame, a second layer of foil is laid, which is secured with a construction stapler.