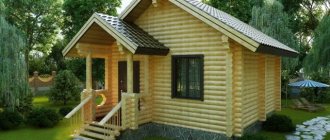
Clay brick is in demand as a construction resource with unique potential, which is actively used in the construction of residential buildings and technical facilities. The material is relevant in the construction of foundations and walls; it is used in the construction of fences and fences, the construction of stoves and fireplaces. Most craftsmen prefer to make clay bricks with their own hands, so as not to spend a significant amount on purchasing finished products. To do this, you only need to know the technology for making clay stone and have the raw materials.
Advantages and properties of clay bricks
Clay brick is distinguished by its optimal characteristics of frost resistance and resistance to high temperatures. Full-bodied, porous, hollow and porous-hollow specimens are made. To remove the load from the foundation and other load-bearing structures, most often they use not solid bricks, but lightweight versions of the product. The latter are not inferior to the classical solution in terms of strength, have low thermal conductivity parameters, and in most cases provide large overall dimensions, which has a positive effect on reducing costs for masonry work.
The requirements of GOST 530-2012 provide for the following indicators:
- frost resistance - marked with the letter F, the number indicates the number of complete freezing-defrosting cycles of the product;
- water absorption - the permissible range is 6-16%;
- weight – 1700-1800 kg/m³, product weight of standard sizes – 3.5-4 kg;
- strength – marked with the letter “M”, determines the permissible load in kg/cm²;
- density – within 0.7-2.4;
- thermal conductivity level – 0.6-0.7 kcal/m.
Standard material sizes vary in height:
- one and a half – 88 mm;
- double – 138 mm.
What does a double clay brick look like?
Clay bricks are also available in non-standard sizes; there are such options as quarter, eight and restoration.
When deciding how to make a clay brick, it is worth considering that a solid specimen is often made with a technical hole of up to 13% of the total volume.
Scope of application
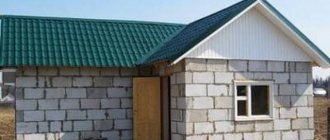
White brick is in demand in the construction of buildings of different heights. Low moisture resistance indicators made it impossible to use it in construction sites with high humidity. These characteristics are specified in GOST, so it is not intended to use silicate blocks in basement or basement facilities, saunas, baths, well structures, and foundations. In these cases, it is recommended to replace the silicate stone with ceramic.
Photo: white brick buildings
Load-bearing walls, interior partitions, and other components of the project are built on the basis of white brick in both private and multi-storey public buildings. The product is used to fill voids in monolithic concrete structures. They buy it not individually, but in pallets or packages. The filling depends on the volume or size of the pallet itself. On average, each of them holds 240-380 units, and a package (pack) - 480-560 pieces.
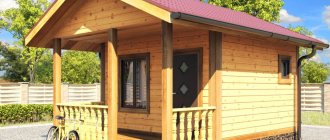
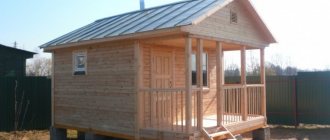
Photo: construction of a white brick building
White brick houses are usually built on a red brick foundation. Both building materials are suitable for cladding buildings, erecting fences, and other permanent structures. When combining white brick with red, the latter is purchased in one wholesale batch, since the colors of the raw materials can differ significantly in tint characteristics.
Features and characteristics of brick clay
Clays that are suitable for brick production have certain properties, including plasticity and adhesiveness of the composition, fusibility and the ability to form a viscous mass. The chemical composition of the raw material determines the characteristics of the material:
- compressive strength - the indicator determines the cohesiveness of the mass - from 3 kg/s/cm²;
- tensile strength – from 0.8 kg/cm²;
- swelling level – at least 4% of the initial volume;
- sintering temperature – 1000°C;
- fire resistance – withstands at least 1100° C.
What is contained in brick clay:
- kaolinite is the main component of the composition;
- montmorillonite - the mineral tends to swell greatly;
- hydromicas – silicate minerals;
- quartz;
- Iron oxides determine the color of the mass.
Brick clay contains kaolinite, montmorillonite, hydromicas, silicate minerals, quartz, iron oxides
. Not only ceramic bricks are made from clay of this category. The raw materials are used for the production of clinker bricks, facing tiles, ceramic wall blocks, panels for ventilation facades, tiles, and concrete fillers. In masonry and plaster mortars, brick clay is used as a binder; varieties of raw materials with variegated colors are included in mineral paints.
The benefits of cosmetic clay for oily skin
We are all well informed that on oily skin the first signs of aging appear later than in those with other types of epidermis. At the same time, owners of such skin do not consider themselves happy, since they face a huge amount of hassle while caring for it. This is a constant shine against the background of hypersecretion of the sebaceous glands, because of which you have to constantly monitor your makeup, these are inflammatory processes that provoke the occurrence of acne, and enlarged pores. In addition to daily basic care (cleansing, toning, mattifying, nourishing and moisturizing), additional use of mattifying and cleansing products is required. Cosmetic clay is a highly effective product that is used in the form of face masks. Clay masks perfectly mattify and dry oily skin, cleanse while exfoliating dead epidermal cells, tighten pores, control sebum production, reducing the risk of pimples and acne, and also supply useful microelements.
There are quite a few types of cosmetic clay, but green, white and blue clay are considered the most useful and effective for oily skin. Reviews of the white clay mask are here.
What you will need to make your own
Making clay bricks at home involves a number of features, including:
- selection of raw materials. It is necessary to find a quarry with clay of the required composition or purchase material on the construction market;
- preparing products for the product molding stage;
- preparation of forms using lumber;
- molding and drying.
To make the required amount of homemade clay stone, the following arsenal is required:
- fatty and non-oily clay, river sand, water;
- cement for filling the mold, filler (if making adobe brick);
- boards and plywood for form, nails, hacksaw, hammer;
- mixing container, sieve, shovel, trowel.
Adobe brick made of clay
To make this building material, special types of clay are chosen, and the raw materials can be found even on your own site.
Instructions for procurement of raw materials
The key criterion for clay quality is the fat content of the composition; this is taken into account when choosing raw materials and the material is tested as follows:
- mix the composition with a small amount of water until a dense mass is obtained, as when kneading stiff dough;
- I form a ball and a cake from the finished product, leave them for 2-3 days outside in the shade;
- then check the strength of the products and the presence of cracks. If the fat content of the raw material is optimal, a clay ball thrown from a height of 1 m will not be deformed. If cracks form on the cake, this indicates that the composition is excessively fatty; the clay must be diluted with sand.
As craftsmen with experience in making clay bricks note, to achieve results you should be patient, since the best assistant in this case is time. The preparation of raw materials begins a year before molding: the composition is spread in a layer of 10-12 cm in an open area. Under the influence of repeated freeze-thaw cycles, all impurities are destroyed, which turns the mass into high-quality clay. In this case, the composition is uniformly saturated with moisture.
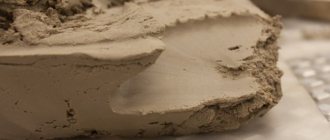
A mass of fatty clay without impurities - adobe - is obtained by diluting the raw material with water and thoroughly mixing. The readiness of the material is checked simply: if the clay block, which is placed on a stick, bends slightly without deformation, this indicates the good quality of the adobe. This mass is used to make adobe stone, which is in demand in the construction of stoves. In the production of adobe bricks for the construction of houses and extensions, straw chaff is added to the raw material.
Preparing the form
It is recommended to make molds to standard sizes 25x12x6.5. However, if desired, you can make containers of arbitrary shapes and sizes. The walls of the future shape are made from the board, the bottom and lid are cut out of plywood. The walls and base are fastened with nails or self-tapping screws, and bars are nailed to the bottom to form voids. Usually they make several forms or a version with several cells.
Methods for removing impurities
From the natural clay stored for oven laying, the first step is to remove foreign impurities. Various methods are used for this.
Dry punching
You can rub the clay through a sieve dry or soaked.
The most primitive way. Use your hands to pick out everything unnecessary - grass, pebbles, garbage, crush large clods. After this, the plastic material must be ground through a metal sieve with cells of approximately 3 mm.
The method can be made a little less labor intensive if the clay is dried. To do this, clay lumps are laid out on a wooden sheet and dried in the sun. In winter, this is done in the cold, laying it under a canopy so as not to be covered with snow. If the volume of material is small, it is placed indoors, on a heated stove or on a heating radiator. The drying speed depends on the size of the lumps: the smaller they are, the faster they dry.
Pour the dried clay into a box with thick walls and crush it with a tamper. After grinding, clay dust is sifted through a sieve with small mesh to remove various inclusions from it: pebbles, splinters, and other debris.
Soaking and elutriation
“Dry punching” is a rather labor-intensive task, so it is more advisable to soak the clay for 2-3 days after manual cleaning.
- Place the material in a large basin in layers of 12–15 cm, with plenty of wetting.
- Pour water in an approximate ratio of one to four with clay.
- When the mass softens, mix with a concrete mixer or other means.
- Wipe through a grid with 2–2.5 mm mesh.
The bottom layer - sand and stones - is not suitable for holding bricks together.
There is also a more ancient method of sanding:
- Several holes are drilled vertically in a wooden container with a small distance between them.
- Each of them, before filling the tub with liquid clay mass, is plugged with a wooden stopper.
- Grains of sand and various small stones precipitate first due to their greater weight.
- Subsequently, after settling, clay particles settle to the bottom.
- The top layer of water gradually becomes lighter, but you need to wait until the liquid becomes transparent. As soon as the boundary of the clarified moisture drops slightly below the first hole from above, the plug is removed. The settled water flows out of the container.
- After the next level of settled liquid appears, pull out the next plug.
This process is repeated until all clarified water is completely drained. To speed up the precipitation, after loading the solution into the tub, you will need to add bitter Epsom salt - approximately one pinch per bucket. If you don’t have a wooden barrel at hand, it can be successfully replaced by a metal container of suitable height and volume. The principle of operation is the same with one difference - first short pieces of tubes are soldered into the holes, and plugs are installed in them.
When all the settled liquid has been drained, the liquid clay is transferred to a wide box and left in the sun to evaporate excess moisture. After the dried material ceases to be fluid, stir it periodically with a shovel. As soon as the mass becomes similar in texture to thick dough and stops sticking to the palms, it is covered with polyethylene or oilcloth and stored until baking begins.
Blank forming
Forming stages and features:
- The inner surfaces of the mold are moistened with water and lightly sprinkled with cement.
- Fill the structure with the prepared clay mass, shake the mold well so that all the voids and corners of the frame are filled with raw materials.
- Excess composition is removed with a trowel and pressed down with a plywood lid.
After some time, when the mass in the mold has set a little, remove the lid. Next, you need to carefully turn over the wooden structure with the molded brick, remove it and leave the workpiece for drying.
This is what a brick mold looks like
Production technologies
Brick production is carried out using different methods. So molding can be plastic or semi-dry. For the first option, the working mass is moistened to 15-21%. Blanks are obtained by squeezing raw materials through special presses. Hollow samples are made on equipment with vacuum installations.
Plastic molding of the workpiece Source braersnab.ru
Burning
To roast raw materials yourself, use an iron barrel as a furnace:
- cut out the bottom, which will later be useful in the form of a lid;
- you should dig a hole 0.5 m deep;
- install a barrel in a pit using channels so that you can build a fire under the bottom of the iron structure;
- the raw material is placed in the barrel with a small gap for uniform heating;
- close the structure with a lid, which is not removed until the workpieces have completely cooled.
Heat for at least 20 hours; it takes about 5-6 hours for the product to cool naturally. The result is an excellent building material in the form of fired ceramic bricks.
White
This is the main type of rock used in cosmetology to treat oily and problem skin.
White clay consists almost entirely of kaolinite, which includes aluminum oxide, silicon dioxide, and water. It looks like a white powder with a milky yellowish or creamy tint.
Kaolin produces the following effects:
- absorbs sebum;
- dries;
- cleanses pores;
- mattifies;
- additionally - tones, nourishes, smoothes.
Morning cleansing soap
- clay (hereinafter we mean the drug in powder form) - 100 g;
- soda, pharmaceutical boric acid (powder) - 1 tsp of each ingredient.
The products are mixed and transferred to a dry container. In the morning, take a pinch of the mixture, add water, stir to form a paste. Moisten and lather your face with clay, leave for 2 minutes. Then they wash their face, use a toner, then a moisturizing cream for oily skin. This will normalize fat secretion, cleanse pores, and reduce inflammation.
Clay mask for oily skin for nutrition and whitening
To prepare the mask take:
- kaolin - 2 tbsp. l.;
- egg white - 1 pc.;
- water - 3 tbsp. l.;
- lemon juice - 0.5 tsp;
- honey - 1 tsp.
Beat the egg white into a foam, dilute the clay with water, then mix all the ingredients. The mask is smeared on the face and left on for a quarter of an hour.
Mask against inflammation, shine
Includes:
- white clay - 2 tbsp. l.;
- aloe juice - 1 tbsp. l. (or 1 ampoule of extract);
- water - 1 tbsp. l.
A paste of mixed ingredients is applied to the face and left for 15 minutes.
How to clean brick from mortar
To remove dry mortar from the surface of a brick, use a mechanical cleaning method or use chemicals.
Mechanical method
Required tools:
- spatula, trowel;
- metal brush;
- chisel, chisel and hammer;
- sandpaper.
Small fragments of dried cement are chopped off with a trowel and spatula, and the surface is cleaned with a brush. To remove massive pieces of mortar, use a chisel or chisel with a hammer, striking along the surface. To make excess construction mixture come off more easily, the object should be moistened with water. After removing large pieces of dried composition, the surface of the bricks is treated with sandpaper.
Chemical cleaning
To clean red brick masonry from cement stains, use a solution of hydrochloric acid.
Stages of work:
- moisten the surface of the brickwork generously with water;
- Using a rag soaked in an acid solution, wipe off stains and dirt.
- Then the surface is washed with water from a hose.
Before manipulating with an aggressive composition, you should arm yourself with skin and respiratory protection.
After work, to consolidate the result, a water repellent is used, which will protect the brickwork from moisture without reducing the level of vapor permeability of the building material.
Briefly about the main thing
The basic component of brick products is clay.
Additionally, lime or cement binder can be used.
To strengthen the blocks, quartz filler or alternative waste containing lime (slag, ash) are added to the mixture.
Additionally, coal, peat, ore containing iron, and sandstone are used to impart increased strength, frost resistance, plasticity or tinting to products.
Ratings 0
Drying
The drying stage should proceed slowly over 15-20 days. During this time, the brick products have time to dry evenly inside and out. It is not recommended to speed up drying, since if the material dries unevenly, the material will crack and warp. You can select the desired drying speed only through experimentation, but it is possible to reduce its time:
- more thorough preparation of working raw materials;
- reducing the initial moisture level of the workpiece;
- using hot water to moisten the workpieces.
Important details:
- the stone is dried under a canopy or in special drying sheds;
- drying in the open air is acceptable if there are few bricks and the weather is consistently dry (drying time is 5-20 days);
- bricks are laid in bags 6-8 rows high;
- each new row is sprinkled with sand or sawdust;
- the very first row (bottom) is placed on the butt (short side of the product), which promotes uniform drying of the entire package;
Photo: brick
- so that the stone can accumulate the required strength, it is kept in a barn;
- if the bags begin to dry out, fresh preparations with the same filling are added to them;
- The upper rows dry faster than the lower layers, so the entire package must dry at the same time.
In a closed and dry room, drying time is 3 days. After this, the raw material is taken out to a well-ventilated and sunny area. The outside air temperature should not be lower than +10 C. The level of soil moisture is of no small importance. If the soil is very wet, the selected area is covered with sand or a wooden pallet is laid. If groundwater is close, it may be necessary to install a drainage trench. You should anticipate the possibility of sudden rain by installing a canopy.
The readiness of raw products for firing is checked by breaking the workpiece from the top row. There should be no dark spots inside the brick - a sign of moisture.
When working with plaster, you need to remember the following rules:
1. If it is not possible to purchase the necessary plasticizers, for better gluing, you can add citric acid to the solution (using the correct proportions).
2. The plaster in the mold hardens for 15 minutes, after which it must be removed and placed on a flat surface to dry completely.
In production, special drying chambers are used, in which the drying process occurs faster. Such a structure can also be built at home if you are going to make gypsum stone not only for yourself, but also for sale. The product dries within 8 hours, after which it can be laid on the walls.
3. The solution is made only for one pour; calculate everything in portions, since the remaining gypsum is unsuitable for the next pour (it will not harden).
We prepare raw materials
So, the plan is ready, it’s time to get down to business. To make bricks we need a lot of clay, since that is what they are made from. First of all, you need to find its deposit. In this case, it is advisable to choose one that is located as close as possible to the place of future production.
In addition, the area being developed must be dry, otherwise the work will be extremely difficult, if not completely impossible. For the job, you will need tools for cutting bushes, crushing, digging and loading. At a minimum, stock up on a crowbar, a shovel and a pitchfork. And don’t forget about the wheelbarrows on which you will transport the material to the production site.
Raw materials are extracted as follows:
- if the field is overgrown with grass, bushes and trees, then all this must be removed. Brush cutters and shovels will help you with this,
- To make it convenient to transport the mined clay, dig a trench along which you can roll a wheelbarrow to the mining site and back. It is advisable to line the bottom of the trench with boards, then the wheels will spin much easier,
- Then you can proceed directly to development. If the clay is loose, great, just dig it out with shovels. If it is quite dense or completely frozen, then you will have to work with a crowbar. Instead, a pickaxe is quite suitable,
- As excavation progresses, the clay is transferred to waiting wheelbarrows. It can stick to shovels. If this factor interferes greatly, then you can replace the shovel with a fork, the teeth of which are often located,
- Roll the loaded wheelbarrow to the storage location and unload it there. You should not throw all the extracted clay into one pile. It is better to make several cone-shaped embankments a meter high, and the diameter of the base of each of them should be about one and a half meters.
I remind you once again that for every thousand bricks you will have to extract two and a half cubic meters of clay. Don't forget to check your preliminary calculations.
It is advisable to add about 7-10% to them in case errors are made during the production of some bricks. After all, no one is immune from receiving defective products. Especially if this is your first time encountering this type of work.
The right preparation process
Since the most important element of brick is clay, it must be of excellent quality and without any impurities. Fortunately, finding clay is quite easy, because it is distributed almost everywhere in our latitudes. But if there is no way to get the mineral yourself, then buying it will not hurt your wallet. In any case, it is much cheaper than buying ready-made bricks.
If you decide to make adobe without firing, then it is important to take care of the straw in advance. There is no fundamental difference here - it can be made from almost any plant: wheat, rye, barley, oats and others. The main thing to take care of is to choose good, not rotten straw and chop it, because coarse straw is not suitable for a small brick.
Video on the topic: DIY silicone mold for decorative stone
Silicone molds are not as durable. Used only for plaster. When working with such forms, you need to carefully remove the finished product, as the plaster can crumble like chocolate.
Also, to produce gypsum, you will need a deep container (it is better to use plastic products, as the plaster can be washed off better in the future), a drill with a rod attachment in order to stir the mixture, and a flat table.
Material
Based on material, brick is divided into:
- ceramic (natural, clay)
- clinker (ceramic with special characteristics)
- silicate (consists of sand and lime)
- fireclay (fireproof, used for laying stoves and fireboxes)
Clinker
Clinker (clinker brick) is a ceramic product with special properties: high strength characteristics, low water absorption, which ensures long service life in aggressive environments and a decorative function. Only bricks that meet the following parameters can be clinker:
- water absorption no more than 6% (usually ranges from 1.5 to 6%)
- acid resistance not less than 95%
- strength grade from M300 and higher
- no efflorescence
It is precisely these characteristics of clinker that distinguish it from ceramic and are achieved through elevated manufacturing temperatures and the use of special types of clay.
Water absorption directly affects durability - the lower it is, the less the brick is susceptible to the destructive effects of moisture and the longer its service life. This is due to the fact that moisture is absorbed through capillaries into the product, expands when freezing and destroys the product from the inside. Clinker is much stronger than ceramics and has a higher frost resistance grade, i.e. withstands a greater number of freezing and thawing cycles, which is extremely important for the Russian climate. A façade lined with clinker bricks will not lose its appearance or be destroyed after 100 years.
Safety precautions
- When building a furnace, you need to remember about fire safety measures. Do not place the kiln near wooden buildings or flammable objects. Choose a place to build the kiln so as to provide yourself with maximum visibility during operation. Before starting work, if necessary, check for ventilation. During firing, do not allow sudden temperature fluctuations. Monitor the cooling rate and final temperature .Do not open the oven ahead of time. Do not touch the surfaces of the hot oven. Limit children’s access to the oven. Do not throw explosive objects towards the building. Decide on the sequence of actions. In case of emergency, check the escape routes and the presence of a first aid kit.