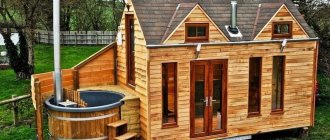
A real Russian bathhouse can be built not only from traditional logs, but also from the same environmentally friendly, fireproof and durable brick. This material can withstand high temperatures and high humidity better than any other, and it has no equal in terms of durability. It is only important to carry out all insulation and waterproofing work correctly. Our article with diagrams, videos and step-by-step photos will tell you how to build a brick bathhouse correctly. So, we build a brick bathhouse ourselves - with the portal Stroy-Banya.com
How to make a steam room in a bathhouse correctly
The main part of the bathhouse is the steam room, it is needed to take a steam bath, so making the steam room in the bathhouse correctly should be the main goal of the builder.
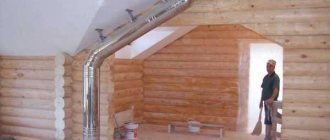
The most common area of a steam room is 2X2.4 m, height – 2.2 m. As a rule, there are no windows in it; heat escapes through them. It is necessary to provide effective ventilation in the steam room and the entire bathhouse, otherwise fungus and mold will firmly establish themselves on the wooden elements of the interior, and you will have to fight it, and this is just improper ventilation. Insulation is carried out by covering the ceiling, walls and floor with boards 40 cm thick. It is advisable to use good, thick insulation with foil.
Features of the steam room design include the use of ceramic floor tiles, since there are constant high temperatures and humidity. It is better to make furniture from aspen, which does not release resin at high temperatures. To save space, the benches are fixed against the walls.
The main element is the stove. Brick, metal and electric are used. They are usually installed in the corner closest to the door. The door itself should have a high threshold and a low frame. This protects against drafts and heat loss.
General rules for choosing material
- For walls, ordinary red brick, hollow brick, silicate brick is suitable (facing brick is not suitable).
- For the foundation - ordinary red, as well as batches with defects in appearance, for example, iron ore (hollow and facing are not suitable).
- For the stove - red and fireproof (silicate is not suitable due to low fire resistance).
Bathhouse bricks are purchased in bulk and delivered in one batch by truck. During storage, it must be protected from water. The general rules here are approximately the same as for timber lumber.
The delivered brick is stacked on a wooden pallet and covered with film. It is also convenient to place the stacks under a canopy. Bricklaying, especially if done by one person, takes several weeks. All this time, the brick must be stored in a dry place.
Finishing
After the construction of the building, installation of windows, installation of the subfloor and ceiling, installation of heat and waterproofing, you can begin finishing. Different materials are suitable for finishing brick surfaces.
Internal
Features of interior decoration:
For finishing it is better to use lining. It is easy to work with, it is suitable for finishing steam rooms, showers, dressing rooms
It is important to prepare the tree in advance. The boards must be coated with special antiseptics and antipyrine. You can combine finishing materials
In the steam room, the walls should be lined with clapboard with the lowest thermal conductivity. In the washing room, wood can be combined with plastic panels, natural, decorative stone. Floors can be covered with ceramic tiles or porcelain stoneware.
When purchasing tiles for a sink, you need to choose rough products. This will reduce the risk of slipping while visiting the bathhouse.
External
It is not necessary to carry out external finishing for brick surfaces, but if the seams are not even, you can cover the walls with special plaster for cladding building facades.
To build a brick bathhouse yourself, you need to have practical skills in using hand and power tools. If you follow simple rules for working with bricks, you can get a durable building.
Preparation of masonry
Which brick for a bath is best to choose?
Next, let's worry about laying the walls. If everything is clear with the solution, there will be nothing unusual in it, then which brick for a bathhouse is better to choose? A simple solid clay brick is ideal. It has all the necessary characteristics:
- Strength. We are building a brick building, and the walls in it must be strong.
- Low moisture absorption. In relation to the bathhouse, this is all the more important, since it will often be humid here.
- Frost resistance. It will be possible to build brick baths in any climatic conditions.
- Low thermal conductivity . The brick takes a very long time to heat up and cool down, so throughout the entire bathing procedure we will maintain an almost constant temperature.
- Easy to use . Even a beginner will be able to lay such solid bricks.
Construction of walls for a bathhouse made of bricks
To build a brick bathhouse with your own hands, you first need to choose the right one. Reliable walls are built only from red brick, since its silicate counterpart quickly collapses under the influence of moisture, which is well absorbed by its surface. Ceramic brick is more resistant to dampness, and due to its fire resistance, it is even used when laying stoves.
Methods and rules for laying brick walls
For bathhouse walls, there are the following methods of laying bricks:
- One and a half or two bricks.
- The “well” masonry consists of double walls connected internally by short transverse partitions. The free space is filled with insulation.
- Double walls with an air gap of 4-6 cm between them.
When laying bricks, it is important to follow these rules:
- The first row of masonry should always consist only of undamaged piece products.
- Each row is laid from the outer bricks.
- Broken brick can be used to fill the inside of the tray rows.
- Broken bricks are not used for bandaging corners and laying support areas.
- Before laying, the brick is moistened with water for better adhesion to the mortar.
Now let's look at how to lay masonry with ceramic red bricks.
Preparing for bricklaying
First of all, you need to establish orders on the finished foundation. This will help to maintain an even laying. This is done using a plumb line at the points of contact and intersection of the walls at the corners of the masonry and on its straight sections. The cords are tensioned to align each row. To avoid sagging of the cord, beacon bricks are placed under it every 5 m.
How to bandage brickwork
To ensure that the finished wall does not creep along the vertical seams after the bath shrinks, they must be properly bandaged. There are three ways:
- Single-row chain system - alternating tie and spoon rows. Vertical seams are tied by half a brick, and transverse seams in each row are shifted by one quarter of a brick. This system is quite labor intensive, but reliable.
- Every three spoon rows alternate with one back row. Transverse vertical seams are not tied in three adjacent rows. This system is very suitable for masonry columns and small partitions.
- The “multi-row” system - here five spoon rows alternate with one tie row. The transverse vertical seams of the spoon rows are shifted by half a brick, and the butt rows by a quarter. This type of masonry can use half bricks, thereby saving material.
Laying the corners of a brick bath
They begin to lift the first corner by laying it in? bricks If the load on the walls is low, half bricks can be used for the bottom of window openings. To avoid displacement of the vertical seams, a mile is laid on one quarter of the brick (a mile is the outermost rows of bricks in the masonry). When laying an odd row, use the butt sides (the brick lies across the wall), and when laying an even row, use the tongue sides (the brick lies along the wall). The internal verst is done in any way - it depends on the thickness of the wall. The voids in the corners are filled with quarters of brick. The geometry of the laid corner is checked with a construction square, and its verticality is checked using a plumb line and a rule. Minor deviations are corrected next above.
Creating joints in brickwork
Masonry mortar is prepared from water, sand and cement. It must be sufficiently plastic to properly fill the voids between the bricks. If you lay the bricks correctly using high-quality mortar, the masonry will be strong. The thickness of its vertical seams is assumed to be 10 mm, and the horizontal seams - 12 mm. The shape of masonry joints can be concave, convex and rectangular. It is created with a special tool - construction jointing.
Brick lintels for openings in the bathhouse
Ordinary lintels over window and door openings are used for spans of less than two meters. When making them, it is necessary to observe the horizontality of the rows and the rules for tying the bricks in the masonry. An ordinary lintel has 6-9 rows in height, and its length is half a meter greater than the width of the opening. The lintels are laid on M25 mortar made of high-quality bricks. To make lintels, formwork made of boards 4-5 cm thick is used. Sometimes it can be replaced by door and window frames fixed in the masonry. In this case, their wood must be protected with a layer of roofing felt.
First, the mortar is laid on the formwork in a layer of 2-3 cm, three reinforcing bars with a diameter of 6 mm are placed in it, which are launched into the general masonry by more than 25 cm and secured by tying the brick.
An ordinary lintel is kept on the formwork for a little more than 12 days at an ambient temperature above ten degrees and up to 24 days at an ambient temperature of up to ten degrees.
Corner in the steam room
A massive cladding is laid out of brick, occupying the entire corner of the paired compartment. It protects the wooden finish on the walls (and in a wooden bathhouse the entire structure) from fire. Thus, a good protective and decorative element is obtained. It is conveniently located near the stove.
The brick corner is laid out in two layers, and in some cases in one. Two layers are preferable, as they allow for good overlap of the seams. For a completely brick bathhouse, enough bricks are purchased, so it is better to lay out the corner in two layers. The work is carried out before the steam room is sheathed. The thickness of the seams is minimal with good decorative jointing.
Information. The best specimens are selected from the stack of bricks for laying the corner and the stove. It is necessary to select a brick without chips, shells or defects. This is usually quite easy to do.
Well masonry of bath walls
Well masonry walls are considered more progressive and economical, allowing significant savings on consumables - up to 15-20%, and at the same time obtain walls with excellent heat-saving properties. It is a structure consisting of an inner and outer part of the wall, between which there is an air gap 5-15 cm thick (see photo)
It is worth paying attention that the air layer must be completely sealed, so the seams must be carefully sealed - this is the only way the layer will perform heat-protective properties. Both parts of the wall structure must be qualitatively connected to each other using brick jumpers, metal or plastic rods, which must be placed at least 1 meter from each other every 3-4 rows of bricks
Both parts of the wall structure must be qualitatively connected to each other using brick lintels, metal or plastic rods, which must be placed at least 1 meter from each other every 3-4 rows of bricks.
It will be possible to further improve heat saving indicators with the help of additional wall insulation:
1. Filling the air gap with perlite, expanded clay, foam balls or any other bulk heat-insulating material. This is the simplest and most affordable insulation option, but it is worth remembering some features.
It is necessary to carefully waterproof the bottom of the air chamber between the walls - bulk heat insulators are usually hygroscopic, so it is worth preventing any contact with moisture. Waterproofing is usually carried out using bitumen mastic and euroroofing material, possibly in several layers, pouring mastic on each layer.
Backfilling is done gradually, as the wall is built, in layers of 20-30 cm. Each layer must be carefully compacted and spilled with a lime mortar of liquid consistency.
2. Installing slab insulation inside the wall. For these purposes, you can use polystyrene foam, extruded polystyrene foam, glass wool or basalt wool in slabs with a density of 30 to 80 kg/cub.m. When choosing a specific type of insulation, you need to take into account some of the features of each of them. Polystyrene foam is very short-lived; extruded polystyrene foam (like polystyrene foam) has almost zero vapor permeability, so their use in a bathhouse will lead to moisture accumulating in the walls. According to all practitioners, the best material for insulating brick bath walls is basalt wool. It is vapor permeable, durable and does not rot.
The insulation is attached to the inside of the wall structure from the outside (see photo) using special dowels and protected with a special film - a wind barrier, which will protect the insulation fibers from weathering. Read more about the thermal insulation of brick bath walls.
When planning the design of a well masonry with basalt wool insulation, it is necessary to provide ventilation holes at the bottom and top of the wall, through which the insulation will be ventilated.
The construction of such a responsible and specific object as a brick bathhouse requires particularly careful planning and execution of the wall structure.
Basic mistakes
A high-quality project and a serious approach do not exclude the occurrence of errors during construction or finishing
To minimize shortcomings, special attention is paid to the following points:
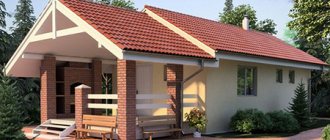
Proper room planning is important. For a couple of people, 10 sq.m. is required. Ceiling height 2-2.5 meters
Low ceilings cause discomfort, and high ceilings cause irrational use of coolants. Doors should be placed on the south side, and windows should face west and south. Door and window openings should be minimal. For example, for a door - 75x180 cm. A country bath should be built from lightweight materials with energy-saving properties.
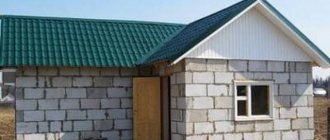
The blocks have proven themselves to be excellent in the construction of bathhouses on a summer cottage. The masonry is made using a special mortar and does not require special construction skills. A warm and cozy bathhouse will delight you after a hard day of work and will warm you up on cold evenings.
Design
First you need to draw up a project, a drawing of the future building. It is necessary to indicate all the features of the structure: from the appearance, number of rooms and general dimensions to the wiring diagram of all communications, calculation of the required amount of materials and weight distribution of the structure.
The simplest bathhouse designs consist of one room, which is a steam room, a washing room, and a changing room. But this option is not always convenient, especially when several people use the bathhouse. Therefore, most projects have in stock:
Steam room. Set up as a dry steam sauna or a traditional Russian bathhouse
During construction, taking into account safety rules, it is important to install the steam room door so that it opens outward
Important! Experts do not recommend building a steam room with high ceilings; the height from floor to ceiling should not exceed 2.5 m, since additional financial resources, time and effort will have to be spent on construction, and it will take much more time to warm up such a room to the desired temperature
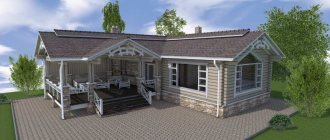
- Rest room. You can sit there, chat and even have a snack.
- Locker room or dressing room. If the area of the bathhouse is limited, then, in addition to wardrobes, you can install benches, armchairs or chairs, a table and even a sofa. Also, fuel and bath accessories are usually stored in this room.
- Washing room (represented by a shower or swimming pool).
- Veranda.
For example, if a bathhouse is being built as an extension to the main residential building, a washing room may not be equipped, since its role will be played by the bathroom of the house.
If you want to save money, you can find ready-made brick bathhouse projects and detailed instructions for them on the Internet.
If you need an economical option
It is not necessary to build a large sauna to enjoy steam treatments - there is always the opportunity to build a sauna cheaply, using an economical option. At the same time, you can save on many things, for example:
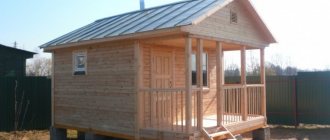
- Wall material. A bathhouse made of wood is more preferable, but one made from blocks is economical. If you do not want to deviate from wooden buildings, it is preferable to choose frame construction technology, in which you can use used edged boards or low-grade unedged ones, giving additional flavor to the appearance of the bathhouse.
- Careful planning. At the project creation stage, reduce the size of the rooms to the minimum acceptable. You can refuse the rest room. But the steam room should be carried out taking into account all safety requirements: in a steam room that is too small, it is easy to get burned on the heater or scalded by the steam. The washing room can be combined with a steam room.
- Drainage system. You can refuse to supply water to the bathhouse through a pipeline; it is enough to equip a stove with a tank for heating water and bring water in buckets. You can even give up the bathroom altogether.
Economy bathhouseSource drevo72.ru
Advantages and disadvantages of brick baths
Brick walls are more durable than wooden ones, but, unlike a log house, they require increased attention to their thermal insulation. However, in garden plots, brick baths are built no less often than their log counterparts.
The construction of brick baths has undoubted advantages:
- Building brick, no worse than any other material, can withstand high humidity and high temperatures in rooms that distinguish a bathhouse from a residential building.
- When erecting the walls of a bathhouse, we are dealing with piece material. This allows you to create absolutely any architectural forms.
- Brick is a fire-resistant material. Therefore, in terms of fire safety, a brick building is more reliable than a wooden frame.
- The use of special facing bricks when laying walls will eliminate the external decoration of the walls of the bathhouse.
In addition to its advantages, brick construction has some disadvantages. Brick can be destroyed by dampness, but this problem can be solved with the help of vapor barrier materials and a well-thought-out room ventilation system. A brick building is more expensive than a log bathhouse.
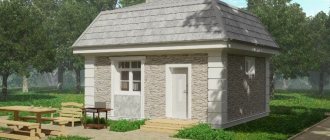
Photo
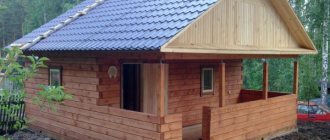
Brick construction
White brick bathhouse
Small brick bathhouse
With veranda
Brick bathhouse with exterior finishing
Insulation
Insulation of a bathhouse is carried out in several stages:
- Exterior walls. The insulation is laid inside lightweight masonry.
For it, you can use sheets of expanded polystyrene, which are cut to the desired shape and filled with them into the space inside the lightweight masonry as the internal walls are built.Mineral wool is also good for these purposes. External structures must be insulated so that when warming up the bathhouse there is no need to spend money on heating the entire building. The task of a sauna stove is to warm up the air inside the room.
- Internal walls.
Here it is necessary to make a high-quality finish so that the heat does not escape into the walls. To do this, the rough masonry is waterproofed with coating materials (for example, bitumen mastic). Next, a layer of plaster is applied, a lathing is attached to it, and fiberglass is placed inside the resulting cells. A layer of thermal insulation is laid (expanded polystyrene, ecowool, basalt wool). Next, the wall is covered with a vapor barrier (for example, foil), on top of which the finishing is placed. Experts recommend using lining, which quickly warms up and will become an obstacle to the transfer of heat to the brick. - The wall near the stove is insulated with a denser layer of heat-insulating material, according to the same principle as the internal surfaces of the bathhouse. Foil must be used as a vapor barrier, since the steam room is the wettest part of the bath and is subject to the most dramatic temperature changes.
The steam room must have high-quality ventilation so that when heated the room does not turn into a kind of thermos without air access.
Device
Brick baths differ in size, layout or other characteristics.
Design companies have both economical projects designed for 2-3 people with a small steam room and a small changing room, as well as solid projects of brick bathhouses with a second floor for receiving guests and for the hosts to live there. In addition, sometimes large baths are provided with various extensions in the form of terraces, verandas or gazebos. After all, often a bathhouse in a suburban area is not only a place for taking water procedures, but also a meeting place with friends and relatives.
There are standard projects that differ in that they are cheaper and have already stood the test of time. Those customers who prefer exclusive buildings on their site are offered individual brick bathhouse designs.
An ordinary standard bathhouse, including a brick bathhouse, consists of a dressing room, a washing room and a steam room. For heating, the sauna usually has a stove with a hot water tank.
A variant of a brick bath is proposed, in which the partition in the steam room is made of salt bricks, which are made by sawing them out of a block of salt. At the same time, the hot, humid air in the steam room is saturated with healing salt vapors. Walls made of salt bricks allow light to pass through, which reduces the number of lamps, and due to the refraction of light passing through the salt bricks, unusual lighting effects occur in the steam room.
The interior of a brick bathhouse is usually insulated. For this purpose, insulation is used, on which a layer of vapor barrier is placed. The top of the interior of the bathhouse is covered with wood. Usually lining is used for this. It is correct to decorate different rooms of the bathhouse with different types of wood.
For example, a steam room should be decorated with larch or linden. These types of wood do not overheat and will last a long time. Pine is usually used in the locker room, which emits an indescribable bath aroma that is very beneficial for health.
How to insulate a bathhouse from the inside? You will find out the answer by reading our next article.
And this article talks about how to insulate a bathhouse from the outside.
Designing a brick bath
When designing a brick bathhouse, understand the purpose of the future building.
It is clear that it is needed for taking hot steam and water for health purposes. But besides this, you can have a good time in the bathhouse. Therefore, in addition to the dressing room, wash room and steam room, a relaxation room will be very useful. If your financial capabilities allow, plan to build a font or pool for your bathhouse. If there is a shortage of living space in the house, you can plan two floors or an attic in the bathhouse. Another important point is to determine the required volume of each of the premises of the building. For example, the steam room should not be made the largest in area, since the duration of stay in it is short. A relaxation room should be used for relaxation and tea ceremonies - make it larger to comfortably accommodate the required number of adults at the same time. Pay attention to all the important aspects of the brick bathhouse project:
- The windows of the bathhouse should be oriented to the west, this way you can save on its lighting.
- The entrance is from the south. In winter, there are usually fewer snowdrifts near it, which will melt faster in the spring.
- According to SNiP, the bathhouse is located no closer than 3 m from the fence, so that in the event of a fire it can be accessed from all sides.
- For a steam room, the optimal dimensions are from 2.5x2.5 to 3.5x3.5 m.
- The door to the steam room is made with a threshold height above the floor of 30 cm and has a size of 1.7 x 0.6 m.
- The steam room window always opens outward, is located a meter from the floor and has a size of 40x50 cm.
- The shelves are made 70-80 cm wide with a height from the floor of 75 cm. There should be a distance of 105 cm from the top shelf to the ceiling.
- It is better to place the stove with the firebox in the dressing room, and the stones in the steam room.
- The door between the dressing room and the washing compartment has dimensions of 1.7 x 0.6 m.
- All sauna doors should only be opened outward, as safety precautions say.
After design research, we proceed to a practical solution to our question of how to build a brick bathhouse.
Waterproofing and vapor barrier of the building
Before building a brick bathhouse, it is important to think in advance about how to ensure that the brick does not come into contact with the ground in any place - this is unacceptable, because brick absorbs moisture well, which quickly leads to mold and general destruction of the entire building.
And in order to prevent this, you can use adhesive or paint waterproofing. The painting method involves coating the walls with bitumen in all places where moisture can penetrate. To do this, you can buy a special mastic based on bitumen. But gluing is done with any rolled material - roofing felt, for example, but before this, all cracks and gaps must be sealed.
Foil polyethylene foam is one of the best vapor barriers for a brick bath. It is easy to fasten it - with wooden slats or bars, and all seams at the joints - sealed with aluminum tape. It is only important to remember: the insulation is attached only with the mirror side inside the bathhouse, and a gap must be left between it and the existing finishing material.
Thermal protection is also necessary for the ceiling - sheets of foam plastic or mineral wool are laid on the rafters. All these materials perfectly absorb moisture and significantly reduce heat loss.
How to make masonry with your own hands
If you are building a bathhouse yourself, then some recommendations from professional builders will be very helpful.
construction of a brick bath
Let's list them below:
- To begin with, two adjacent corners of the future building are selected, and several brick blocks are placed in these places. A guide thread is stretched between them so that the intermediate bricks lie flat.
- With the help of a guideline, the horizontal position of the masonry is achieved, as well as the same height of the cement joints.
- Then small areas of walls, up to six rows of brick, are laid out at the corners. To do this, a landmark is attached in each row.
- The mortar should not be applied over too long an area, otherwise the mortar may dry out before the brick is laid.
- The solution should be thoroughly mixed before starting work. The layer of mortar to be laid should be 20-25 millimeters thick. It is recommended to ensure that the layer being laid is even throughout the entire area. This is necessary so that you do not have to level the masonry later.
Design of a bathhouse made of sand-lime bricks For bonded rows, the mortar should be laid in such a way that it departs from the edge of the masonry by one or three centimeters, depending on the face masonry or the masonry in the waste area. Spoon rows involve laying mortar, retreating from the edges by 2-3 centimeters. During the entire laying process, you should be careful about the quality of the seams.
The first row of bricks must be made of solid brick. Broken bricks can be used for tray rows, and from the inside, but their use as a material for the construction of supporting structures or columns is unacceptable.
Brick laying scheme
Rows begin to be laid from the outer bricks, and bonded rows should be provided to support the beams. When laying bricks with your own hands, you need to know that they need to be wetted, especially when the work is carried out at high temperatures.
It should be noted that you can lay bricks along the entire perimeter and start a new row after the previous one is completed
You can also build walls in sections, which is more convenient, but for this it is very important to provide conditions for high-quality dressing
How to build?
Step-by-step do-it-yourself construction instructions will help you correctly build your own bathhouse on the site.
Any construction begins with choosing a site for the structure. At the selected point, markings are prepared, and then the construction of the foundation begins. For a brick bath, the best option would be a strip base. Such a foundation requires the preparation of a trench that needs to be dug, then it is secured with boards. The walls of the trench need to be covered with formwork, and the bottom is covered with sand. The sand cushion will evenly distribute the load. After this, reinforcement is performed.
You can prepare concrete mortar for a small bathhouse yourself. For large volumes of construction, you can order a ready-made solution. It takes time for the foundation to settle. This period depends on the characteristics of the concrete solution. Sometimes the foundation is treated with waterproofing materials.
If you build a bathhouse with your own hands, then it is easier to use one-and-a-half red bricks. Laying walls for a bathhouse is permissible in one brick. To calculate the amount of material, the planned width and height of the verticals must be divided by the product of the height and width of one brick. The amount of material is selected taking into account the required number of doors and windows.
The wall courses begin with the outer bricks. The material must be wetted when laying, especially if it is hot enough outside. Lay bricks along the entire perimeter of the building, only then move on to a new row. The use of broken bricks is unacceptable for supporting structures. During the process, pay more attention to the quality of the seams.
Appropriate openings must be prepared for roof beams. The ends of the beams that will lie on the bricks must be wrapped with roofing felt. The simplest version of the bathhouse ceiling is the lean-to type. A flooring of boards is made on top of the laid beams. Fabric asbestos is suitable as a waterproofing material. A sawdust-clay mixture is placed on top of it. The dried base is sprinkled with sand.
Pay attention to the location of the chimney
It is important to highlight this area with a sheet of metal
Lath the rafter system of the brick bath. Place roofing material on top of the rafters. It can be slate or profiled sheets.
The next step in the phased construction of a brick bathhouse is laying the flooring. To do this, the lower part of the floor is covered with a sand mixture. Logs are installed on the projections of the foundation. The floor can be covered with boards. Another suitable option is porcelain stoneware. Finishing with tiles will ensure high fire safety of the structure.
Lining is suitable for covering the ceiling, in the steam room it can be linden wood, and in the dressing room you can use pine. The walls inside can also be lined with clapboard. Make shelves parallel to the wall paneling. Use hardwood. The shelf slats are secured with wooden pins; you can get burned on iron ones.
Install the doors. The outer structure can be ordinary, metal, and the door to the steam room can only be made of wood. Please note that it will be used in a humid environment and at high temperatures.
Peculiarities
One of the options is brick, using which you can implement any bathhouse project with your own hands. Check out the pros and cons of a brick bathhouse, and also study the construction instructions. So that you have the best understanding of the features of a brick bathhouse, consider the fundamental advantages and disadvantages of the material used in construction.
Advantages of brick:
- Excellent fire resistance. The fire safety indicators of brick are the best in comparison with other materials.
- Long service life. A brick bathhouse can last up to 50 years, or even more.
- Environmental friendliness. Different types of natural bases are used for bricks. Brick is considered safe for humans.
- Large selection of architectural solutions. From brick you can build not only simple boxes, but also bathhouses of more complex shapes.
Disadvantages of brick:
- Increased heat capacity. Heating a brick sauna will require more fuel than a wooden sauna.
- High moisture absorption. Brick is a hygroscopic material and therefore requires careful insulation.
- Significant price. Brick is not a cheap material, so the bath structure will be expensive. For the construction of a bathhouse, it is allowed to use only red brick, which is distinguished by its long service life and increased resistance to heat.
- One more nuance: a brick bathhouse will require the construction of a stronger foundation.
During construction, it is possible to use several wall design options. For example, well masonry is considered an acceptable option, which allows you to install insulation inside the wall. Another rational way is to build a thin wall with the installation of high-quality insulation on the outside.
The most unsuitable masonry system for a bath structure is the continuous type. Such a bath will require the construction of very thick walls, which will lead to waste of material. In addition, the operation of such a bath will be possible only in the summer.
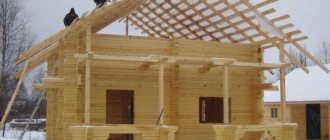
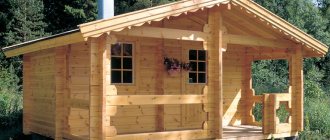
Nuances of frame construction of a bathhouse
Many owners do not want to spend a lot of time constructing the structure, but rather quickly assemble it and relax their souls and enjoy bath procedures. In this case, there is nothing to decide - the frame assembly technology is exactly what is needed.
You will have to start by assembling the frame. The walls are made like a lattice. Materials you will need:
- timber of different sections;
- thermal insulation material;
- material for external and internal cladding.
In the latter case, the following will do:
- siding;
- block house;
- OSB;
- edged board;
- lining.
Basic construction steps:
- The lower frame of the beam is assembled. Dimensions - 100*100 mm. Holes are drilled at the ends of the material. The elements are fastened together with self-tapping screws. When using timber of smaller dimensions – 50*100 mm, the elements are mounted end-to-end on metal corners.
- After this, a strapping board is installed at the end. Floor joists go right next to it (a 50*100 mm beam is suitable).
- On the other side, the logs need to be cut so that another end board stands up for strapping.
- The logs are placed so that it is convenient to attach the heat insulator between them.
- A timber measuring 50*100 mm is suitable for the wall frame.
- For vapor barrier it is better to use film, for thermal insulation - mineral wool.
Photo: frame bath project
Thermal insulation and wall finishing are carried out after fixing the roof.
If you don’t have time to build a bathhouse yourself, you can choose a project and order its installation. Small baths are delivered assembled.
Features of the finished product:
- Assembled on a wooden frame.
- The cladding is done with lining, profiled timber (optional).
- It consists of three rooms - a steam room, a shower room, and a dressing room.
- An electric heater is used for heating.
- The water tank is mounted on the roof. A drain pan is installed under the floor. The drains exit through the pipe.
Which oven to choose
The “heart” of the sauna is the stove
And if earlier it was only stone, today it is possible to choose different types of this very important attribute of the steam room. Sauna stoves are wood-burning, electric and gas, stone and metal, home-made and factory-made
When choosing, you should take into account the significant differences between these types.
Traditionally, a brick stove was installed in the bathhouse. However, today it is a rarity. There are two reasons for this circumstance:
- Lack of specialists in brick kiln laying.
- When using it, the steam room heats up for a very long time.
However, these devices are very durable, fireproof and capable of heating large bath rooms.
For those who are looking for an inexpensive and easy-to-install option, metal stoves are suitable. The most popular among them are cast iron and steel. In addition to ease of installation, their advantages include compactness. Furnaces of this kind do not require foundation preparation, which also reduces installation costs. They are easy to burn and do not emit carbon monoxide.
https://youtube.com/watch?v=P5mAtBbPR64
Large areas cannot be heated with metal stoves. When using them there is a risk of heat stroke. From a fire safety point of view, stoves of this type are also not the best option.
The simplest representative of metal stoves is the “potbelly stove”. However, today many consider its use a relic of the past. Experts in the field of heating equipment recommend using modern models of metal stoves, as they are safer.
One of the most important criteria for choosing a unit is its power. It should be optimal for the room. In this regard, very often two types of mistakes are made: purchasing an insufficiently powerful stove or, conversely, one that is too powerful. In the first case, the device will work hard to fully warm up the bath. This will negatively affect its service life. In the second, the air will be hot and the stones will be cold.
To determine the optimal power of the stove, you should multiply the parameters of the bath room (length, width and height). The areas of non-insulated areas of the steam room are calculated separately. Both obtained values are multiplied by 1.2. The final number is added to the volume indicator. The final calculation of the required power is made from the equality 1 kW = 1 cubic meter. m.
Devices of the first type are strong, safe and durable. They take up little space and heat the steam room quickly and evenly. This is an economical option that does not require large expenses. In addition, to put electric furnaces into operation there is no need to build a chimney or connect gas pipes. The device runs on electricity. However, in areas where the power is often turned off for a long time, such a stove will not be suitable.
When using gas furnaces, there is no need to control heating. There is no need to throw logs into such a device - it will be powered by gas. But you can adjust the temperature at your discretion. Such stoves consume little fuel, but at the same time warm up the room in a short time. If the stove is “powered” by a cylinder, you will have to take additional care of fire safety.
Wood stoves are optimal where electricity and gas are not provided. They are heated with wood and are reliable. It will take a long time to heat up the steam room, and then add logs from time to time. You should also regularly clean the ash pan of such a stove.
It is highly undesirable to light a stove in a bathhouse for the first time. When the firebox is first fired, the factory paint sets. It will give off a very unpleasant pungent odor, which will hurt your eyes and sore your throat, and make it difficult to breathe. Therefore, it is highly advisable to carry out the first fire in the yard.
Interfloor ceilings
Interfloor ceilings
There are 2 types of interfloor ceilings.
- Monolithic.
- Prefabricated.
Monolithic ceiling
They are excellent for foam concrete baths, as they have many positive qualities, including:
- low cost;
- fire resistance;
- durability;
- simple search and selection of necessary materials;
- easy installation technology.
For this type of work, it is not recommended to use self-produced concrete. In the factory, the proportions are monitored, which plays a big role in the reliability of future floors.
When constructing a monolithic floor, the following difficulties arise:
- concrete rises to great heights. A concrete pump is useful for this;
- The formwork is installed over the entire work area, tightly joining the blocks to each other.
The production of formwork must be approached carefully. The concrete mixture weighs approximately 500 kg per 1 square meter, despite the fact that the layer is about 15 cm. The formwork should easily withstand this weight. A safety margin is also required, since when concrete is poured, the force of the jet is applied to the structure, and all processes associated with the gradual hardening of concrete are also withstood.
The minimum parameters for formwork materials include the use of timber measuring from 10x10 cm, and plywood panels are at least 1.8 cm wide. When producing formwork, it is necessary to constantly check its horizontalness, using a building level.
Operating procedure:
- installation of supports in the vertical direction at a distance of at least 1 m;
- installing boards on supports at 5-7 cm;
- Boards are laid on top of the initial structure, serving as the main part of the formwork.
Pouring the structure:
- roofing material is laid out on the lower part of the formwork;
- reinforcing bars form a network and are placed on reinforcing stools at a maximum height of 5 cm;
- concrete is poured in a layer of 10 cm, but usually a level of 15 cm and above is required.
Floors made of hollow concrete slabs
Pre-designed slabs are placed on the top of the bathhouse using a crane. They are fastened together using a special solution. To ensure the reliability of their installation, the production of a wooden or reinforced concrete frame is undertaken in advance.
Types of floors:
- concrete plates;
- foam concrete slabs.
Interfloor ceilings made of wooden beams
Interfloor ceilings made of wooden beams
Wooden and glued beams are used. First, the installation of rough boards is carried out, and then the finishing part of the structure. The resulting empty space must be filled with insulation, preferably in slab form. In addition to wooden beams, you can use metal ones.
How to properly drain a bathhouse
The condition of the structure depends on the removal of accumulated water. The drain in the bath removes dirty water from it. The decision on the future type of drainage is made at the initial stage of construction
It is important to properly drain the bathhouse; this will help cope with troubles in the form of an unpleasant odor and other nuances. You should not arrange it directly under the bathhouse, as this causes:
- mold growth;
- the appearance of an unpleasant odor;
- destruction of lower building elements.
This can be avoided by installing a septic tank next to the structure, or connecting to a central sewer system. Many people arrange round pits at a distance of five meters from the building. For a bathhouse designed for 4–5 people, a well 1.5 m wide and 2.5 m deep is sufficient. It should have a filter bottom made of crushed stone, sand and crushed brick, reinforced walls from well rings, bricks, metal tanks, car tires .
The water is drained through metal or plastic pipes located at an angle at a depth of at least 50 cm. To simplify the exit of water, the floor in the bathhouse is made at a slight angle towards the drain.
Correct location of the bathhouse on the site - distances from borders and other objects
The correct location of the bathhouse at a distance from the boundaries of the site is one of the main requirements for its construction, since it ensures fire and sanitary safety. If the development plan is carried out by a design bureau, you don’t have to worry about meeting all the requirements. But if you decide to plan the location of the house and bathhouse on the site yourself, we recommend that you familiarize yourself with the information that we will present later in the article.
Before the fence
The indicator may increase taking into account the height of the fence and the material from which it is built. Such restrictions will protect against fire and sewage entering the site.
When the neighboring area is not built up, the distance can be reduced to 2.5 m. But provided that the height of the bathhouse along the ridge line does not exceed 3 m.
To the neighbor's fence
The recommended setback from the border of the neighboring plot is 3 m.
As in the previous case, the distance can be increased for reasons of fire and environmental safety. Plus, a building with an attic is a significant shading of the neighboring estate.
When planning a corner structure, the requirements of the regulations often have to be violated, so it is better to discuss this point with the neighbors in advance and obtain their written permission.
To the neighbor's house
In accordance with urban planning requirements, a distance of 8 m must be taken from the bathhouse to the neighboring or own house. When the structure is built from non-combustible materials, the distance is reduced to 6 m.
If the side of the house that the sauna faces is solid (without windows) made of brick, blocks or stone, then the required distance is reduced to 1 m.
Provided that the bathhouse will be built later than the neighbor's house, the party who plans the construction must comply with the requirements of the code.
To the bathhouse (in neighboring areas)
The acceptable distance between two bathhouses is considered to be 2 m. One of the bathhouses can be located a meter from the fence if it has a central sewerage system with drainage.
According to fire safety requirements for buildings made of flammable materials, the distance increases to 5 m.
This is often practiced in rural areas. When there is a garden, sheds, vegetable garden, and pens for livestock around the sauna. And the house and other residential properties are located in the opposite part of the site.
To other buildings on the estate
The sauna is allowed to be placed 1 m from other buildings of economic importance, provided that both structures are made of fire-resistant materials.
Self-production of concrete blocks for a bathhouse
Instead of bricks, you can use small blocks of your own making to build a bathhouse, which will be much cheaper, although it will require additional labor. When making concrete blocks yourself, expanded clay, slag and sawdust are usually used as filler.
For light blocks you will need M300 cement, sand and softwood sawdust in a ratio of 1:2:6. To increase the plasticity of the mixture, you can replace 1 part of cement with the same amount of lime. First, dry sand, cement and lime are thoroughly mixed, then water and sawdust are added and everything is thoroughly mixed.
The resulting mixture must be poured into molds prepared in advance, having previously lubricated their inner walls with used machine oil, technical petroleum jelly or grease and sprinkled the tray with sawdust or sand so that the concrete solution does not stick to it.
The blocks must be left to dry for 3-4 days in a well-ventilated place, but always under a canopy. The finished blocks are removed from the molds and left in the air for another 3-4 days. They can be used no earlier than after a week.
Cinder blocks and expanded clay concrete are made in the same way. To make blocks for main walls, M300 cement is mixed with filler in a ratio of 1:10, and for partitions - 1:12. If M400 cement is used, the amount of slag or expanded clay must be reduced by 2 times, and if M200 - increased by 2 times.
To improve the quality of the concrete mixture, the slag must be sifted, separating large grains (more than 6 mm) from smaller ones (less than 5 mm).
For filler, you need to use 1.5 times more coarse slag than fine slag. The selected proportions of slag then need to be mixed, cement added, mixed, diluted with water and mixed thoroughly again. The resulting homogeneous thick mass is poured into molds and left to harden, as in the case of lightweight concrete with sawdust.
For concrete block masonry, the same mortar is used as for brick masonry. Folded walls on the outside can simply be plastered with cement mortar, but it is better to be faced with brick with or without an air gap. In the latter case, it is imperative to make a metal bond between the block masonry and the brick cladding of the wall. It is recommended to make such a bunch every 4-5 rows of brickwork.
Construction in stages
After erecting the foundation and leveling it, you can proceed directly to the masonry. This is an interesting business, and the work is not so physically difficult. Here's a short list of tools:
- Trowel, trowel for mortar;
- Bushhammer;
- Concrete mixer or hand-held construction mixer for preparing the solution;
- Level, plumb line, tape measure;
- An auxiliary tool for carrying mortar and bricks, such as a bucket.
For each item, you can purchase more advanced options. Instead of a level and tape measure, you can use a laser level and a rangefinder. Nowadays this electronics is inexpensive. With these devices, the accuracy of laying rows will increase significantly. The laser level is also useful in the construction of any other elements in the bathhouse. It is convenient to buy it in advance.
Important! If for masonry, in addition to solid bricks, you purchased ½ and 3/4 shares, then the mason’s hammer can be neglected.
The first row of bricks is laid on top of the waterproofing on a layer of masonry mortar.
This is done strictly according to the level. A cord is pulled across it. Before this, beacons should be placed in the corners of the bathhouse.
It is convenient to use wooden or metal bars as beacons. They must be firmly fixed to ensure a cord tension of several tens of kg. Brickwork in the bathhouse is done in one row. That is, they begin laying the next row only after the entire previous one has been laid out and checked for level and plumb.
Correct masonry and construction of walls
For the construction of bathhouse walls, red and silicate bricks are most suitable. Many people, even before starting construction, ask the question: how many bricks do you need for a bathhouse? Here the calculation will be purely mathematical: the planned height and width of the walls of the bathhouse must be divided by the height and width of the brick multiplied by each other. But this is ideal. And it is also advisable to add 1 cm to the width and length of the brick due to the adhesive mortar, and plus 5% to the overall result due to possible broken bricks.
To build a bathhouse, it is better to lay one and a half or two bricks - then the thickness of the walls will be 38 cm and 51 cm, respectively. And make the internal partitions of the steam room in ? or ? brick, which will give 6.5 and 12 cm. When building a bathhouse, brick walls can be made of the following three types:
- Walls with air gaps inside them - up to 6 cm wide.
- The walls are ring-shaped masonry, where thermal insulation is poured between the outer and inner rows - like transverse insulation.
- The walls have no internal voids, but are lined on the inside with good dense insulation.
The most economical option is the second one. After all, the thickness of the masonry here is much less, but the thermal performance indicators are excellent. The main thing in their construction is to pay special attention to careful dressing and neatness of the seams.
The base and brick part of the bathhouse foundation, where below the waterproofing, are best done using solid bricks, but above the waterproofing, use hollow bricks.
It’s better to mix the mortar for construction like this: cement, water and lime are added to sand with a grain size of 1 to 2.6 mm. The required volume is marked in the bucket, after which water is added until the solution is well distributed over the surface and there are no unfilled areas left.
After finishing the masonry, you need to drive pins into the walls and use them to attach the wall beams. Next, the floor beams are installed directly on the bricks, in special sockets, and for protection they are wrapped in roofing felt. But the ends of the beams must be left open, filling the gaps between the walls and beams with heat-insulating material.
Roof installation: important points
When starting work on creating a roof for a bathhouse, you can make it single-pitch or gable, which is the more popular option. It is also important to consider that the roofing material and the sequence of work will differ slightly depending on the chosen project. In any case, special attention should be paid to thoroughly treating all load-bearing wooden structures with antiseptic compounds: rafters, beams, lintels.
An important step will be roof insulation, which should be carried out according to the following algorithm:
- Treat the slats with a special protective compound, and then, in increments of 50 cm, install lathing from them in the attic, and cover it with a layer of fiberglass; Next, lay construction foil and cover it with plywood, pre-treated with an antiseptic compound.
- Place a layer of insulation made of basalt wool or expanded polystyrene on top;
When the roofing work is completed, you can move on to the final stage of building a brick bathhouse - finishing the room inside and out.
Foundation for brick baths
Most often, a strip foundation is provided for brick baths. The depth of its location should be at least one meter, and in the case of clay soil - more. Let's look at how to build a foundation with your own hands:
- The first step will be excavation work, namely digging a pit.
An example of a finished foundation pit for a bathhouse After the excavation is completed, a sand cushion up to 200 millimeters thick must be laid at the bottom of the trench; - After this, a gravel cushion of 100 millimeters is laid on a layer of sand;
- Next, you need to make formwork, which is reinforced with a frame made of reinforcement. After pouring the foundation with concrete mortar and drying it, waterproofing should be laid from several layers of roofing material;
- At the very end, it is necessary to provide bath drainage and a drainage system.
Building a bathhouse step by step: site preparation
The first step is to work on the construction site. It consists of the following:
- We clean the future construction site of grass, debris, and stumps.
- We make markings for the project.
- We immediately determine the location of the drainage hole.
- We supply communications, electricity and water to make it convenient to work.
- Cleaning up the area
Advice! When starting construction, such a simple point as the supply of communications is often missed. And this is an extension cord, well grounded, a water supply hose. Simple needs that play a role in normal functioning.