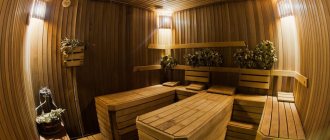
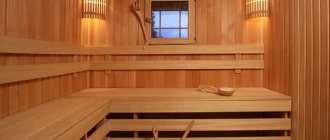
Air saturated with oxygen is vital for people. Especially if the person is in a closed space. Therefore, ventilation in a sauna, bathhouse, bathroom and other rooms with high temperatures and humidity levels must be arranged correctly.
Otherwise, you may encounter a lot of unpleasant surprises and their negative consequences. The consequences include not only harm to health, but also damage to building structures, the development of fungus, and the gradual destruction of the building.
You will learn everything about the methods and features of organizing ventilation for Finnish and Russian steam rooms equipped with electric and wood stoves on our website. We will talk about the specifics of the design of air supply and exhaust systems. Let's list the typical mistakes that occur when the construction is not done correctly.
Step-by-step installation instructions
To avoid all negative consequences, we will consider how to make ventilation in a sauna step by step.
1. Preparatory work. While maintaining the balance of supply and exhaust air, we calculate the diameter of the ventilation ducts and select the shape of the air ducts. Round channels made of plastic pipes are easy to install. They are covered with clapboard, respecting the overall design. Boxes with a diameter of 125 cm² are common. Connecting fittings are used to connect the elbows. We will also prepare ventilation valves, fasteners and other consumables.
2. Minimal project. Now we will select a diagram suitable for a specific room and draw up a drawing.
The most popular are two types of schemes:
The first one is with natural ventilation. The supply duct is mounted in the wall behind the stove at a distance of approximately 30 cm from the floor. Air masses are heated from the stove and rise to the ceiling. The exhaust duct is located on the opposite wall under the ceiling. The physical properties of air allow the use of such a scheme.
It is recommended in addition to the below to make a second ventilation hole for the hood. Installing only one exhaust pipe is not a mistake, but it does not mix enough cold supply and hot air, which rises to the ceiling and is immediately removed.
The second air outlet is located closer to the floor, at a height of 80-100 cm. These ventilation holes are combined with a box through which hot air is not removed as quickly as it does with the upper pipe. We insert the pipes prepared for this into the box. Ventilation in the sauna organized in this way promotes uniform distribution of heated air throughout the entire room.
Natural type
This scheme benefits from simplicity and low cost of installation, as well as the absence of operating costs.
The second type is with mechanical ventilation. The inlet air duct is located slightly above the furnace, but also close to it, which also allows the air to warm up, albeit a little slower. The outflow pipe, arranged opposite, is located approximately 50 cm below the inlet. To provide draft, a fan is installed in the exhaust duct.
Forced ventilation type
3. Installation of control devices. All sauna exhaust ventilation openings are always equipped with dampers. This allows you to regulate the climate conditions of the system. Also, the exhaust hole must be equipped with a valve to prevent reverse draft.
4. Protection. To protect against all kinds of insects and rodents, we cover the “inlet” hole with a grill.
Kinds
Today, there are three types of sauna ventilation. Let's look at each of them in more detail.
Natural
Occurs due to pressure differences indoors and outdoors. It is characterized by low installation costs and ease of operation. This is done in the following ways:
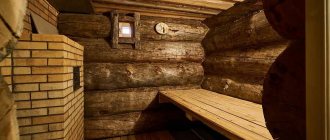
- Due to wind pressure, which seems possible only in buildings made of logs. Air pressure inside a room arises due to powerful gusts of wind, which create a significant vacuum of air on the leeward side. The movement of air in and out occurs through the gaps between the logs.
The disadvantage of this type of ventilation is that it is impossible to regulate it, which directly affects the temperature inside the bath.
As a result of strong winds, drafts are possible, which also causes no less inconvenience for vacationers.
- Thanks to aeration. Its meaning lies in the penetration of air masses directly from the street through the bottom of the room, in which there are special vents. Street air, entering the sauna, squeezes out a hot stream from above and directs it into the air duct. This sauna ventilation system is perfect for rooms with very hot air and a lot of steam. Oxygen circulation occurs very quickly here.
Mechanical
It is installed only in cases where it is impossible to provide fresh ventilation in the sauna. That is why it is also called forced. It consists of quite expensive elements: coolers, heaters, fans and air filters.
To achieve the exit of treated air from the room, during forced ventilation in the sauna, exhaust fans are used, on which filters must be installed.
This type of ventilation is used in very large rooms where there are swimming pools, showers and a huge number of visitors. It makes the air clean from steam, sweat and unpleasant odors in a short time.
Using mechanical ventilation, a forced flow of oxygen is used. This is achieved through a very complex system, which has the following components:
- Supply chamber.
- Mechanisms that reduce noise.
- Diffusers.
- Check valves.
- Distribution grids.
To ensure that the supply air is comfortable when entering the room, it is pre-cleaned and heated.
Combined
It is used in baths only if this is directly due to the peculiarities of their structure. Thus, a sauna located in a house and bordering three of its walls with common housing cannot have natural ventilation. In this case, it will not be possible to arrange the inlet and outlet holes according to all the rules. Therefore, in compliance with the standards, it is allowed to equip the supply opening at a height of at least 20 cm from the floor, and the exhaust opening is placed on the same wall at a similar distance from the ceiling.
The principle of operation of such air exchange is that cold air enters the room, passes it through the stove, heats it and circulates throughout the sauna.
Be sure to install valves on all openings to regulate the flow.
The disadvantage of such a system is the rather strong speed and amount of air masses.
In some cases, the supply channel is mounted not under the heater, but above it. The outlet is placed on the opposite side a few centimeters higher. This will reduce the air flow, but there is rice that does not have enough air flow. To avoid this, a fan is additionally installed in the outlet channel.
Sanitary standards
It is calculated that at rest a person needs from 20 to 25 liters of air per hour. In a sauna, a person not only relaxes, but also steams and washes, so consumption increases. But without ventilation, clean air is replaced by carbon dioxide, which is called the “invisible danger.”
The result of a long stay in such a “gassed” room is a loss of strength, a headache, so instead of being cheerful, people who are in a sauna without ventilation “on the way out” experience a deterioration in well-being, therefore the effect of the procedures is minimal.
Air exchange
The minimum air change rate is 20 m3/h. If there are three people in a regular steam room with a volume of 10 m3, then the air should be renewed 5-6 times per hour. For dry saunas the requirements are stricter - at least 10 times. And this condition cannot be met without high-quality ventilation.
Even a very wide gap between the floor and the steam room door cannot save the situation. It is better if the influx is carried out directly from the street, and not from internal, adjacent rooms, since the incoming air must have the maximum amount of oxygen.
Pipe characteristics
To create a high-quality ventilation system, it is necessary to guarantee proper air exchange, so future sauna owners need to adhere to several recommendations.
- The diameter of the exhaust duct must be no less than the diameter of the supply pipe.
- The cross-section of the air ducts is chosen in proportion to the volume: 24 cm2 is required per 1 m3 of room. A low draft force will make the system ineffective; a powerful draft, on the contrary, will not allow creating an optimal temperature regime in the sauna.
The diameter of the pipes in the designs of different countries differs. As an example, we can cite 3 saunas with accepted inlet and outlet diameters. These are Russia - 100 and 100 mm, Finland - 130 and 100 mm, Sweden - 100 and 80 mm, respectively.
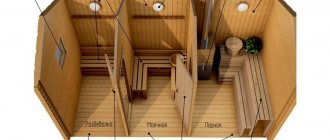
Ventilation and sauna rooms
A separate bathhouse building requires a layout that takes into account all the rooms in it. Usually the steam room is equipped with natural ventilation. The washing room is often equipped with a mechanical version. For a rest room, a simple system without additional equipment is suitable. If there is a utility room where all the necessary accessories are stored, then you can install a forced hood in it, which will be started by a light switch.
Ventilation rules
The question of how to properly make effective ventilation in a bathhouse and sauna worries many owners of country cottages, permanent residences and just small houses. After all, you can set up a steam room almost anywhere, the main thing is the desire and availability of certain funds to implement this plan.
What kind of electric heater is there?
A sauna or bathhouse, the heart of which is an electric heater, is not uncommon. Often the electric option is preferred for its safety and minimal effort required to properly heat the bathhouse.
The dimensions of the electric heater can be selected according to your wishes - it can be a very miniature option for a small steam room on the balcony
Heater stoves offered on the market of equipment for saunas and baths are represented by the following options:
- Finnish electric heater;
- for small saunas;
- with steam generator;
- for a Russian bath.
You can choose any model, the main thing is not to forget to check the availability of technical documentation, quality certificate and manufacturer’s warranty from the seller before purchasing.
Also, depending on the selected stove, there may be different requirements for the arrangement of the ventilation system. The manufacturer's recommendations are usually specified in the equipment operating manual. The most suitable diagram of the ventilation device is also given.
The electric heater is convenient not only for installation, but also for further use. It does not require laying a chimney or thinking through additional options for preparing and storing firewood or other fuel. The only negative is the dependence on electricity. If there are problems with this resource at your dacha, then it is better to choose a different type of stove.
The electric furnace with stones is very compact; there are light weight models - up to 70 kg. Therefore, setting up a steam room on the balcony is not a problem.
An electric stove-heater comes with various additional functions and capabilities - a temperature sensor and humidity regulator, and a control panel. Also, for the safety of users and protection from overheating, electric furnaces are equipped with thermostats and fuses.
If you have purchased a highly functional model of equipment, in which you can set the humidity level and temperature at will, then the sauna can easily turn into a bathhouse and vice versa.
Technical nuances of ventilation in a bathhouse/sauna
A sauna is a non-residential room, but it needs intensive air exchange no less than a residential one. Without a sufficient supply of fresh air, the steam room will not be able to fully improve your health.
And the visitor will feel uncomfortable - the air is stale, musty and it’s hard to breathe. Therefore, when planning a ventilation system in a sauna, it is important to take into account the technical details of its arrangement.
The requirements for arranging a ventilation system in a sauna differ significantly from ventilation in other rooms.
In a steam room with a heater, it is important to provide 3 types of ventilation at once:
- the stove itself;
- steam rooms;
- adjacent rooms (rest room, locker room, shower room and others, if available).
If you manage to ensure proper circulation of fresh air throughout the sauna, then there will be no problems with its operation.
It is important that fresh air from the street immediately hits the hot stove, heating it up and cooling it at the same time. Then it, already warm but still fresh, will rise up and mix with the indoor air masses, displacing some of it outside through the exhaust vent.
Therefore, it is undesirable to use schemes where the supply valve is located far from the furnace. It is better to consider a more acceptable ventilation option
Technical requirements for the ventilation system in the sauna:
- gap under the door 2-5 cm;
- no drafts;
- adjustable inflow/output;
- cyclic air renewal;
- influx of clean air from the street;
- correct direction of air masses through the air duct;
- optimal cross-section of ventilation holes;
- the correct height of the ventilation duct above the roof level.
To ensure controlled inflow and outlet of air masses, you need to use valves. This is a very convenient invention that came to us a long time ago and has received modern execution.
As for cyclicity, according to the standards, the air in the steam room should be renewed 5-6 times per hour, and if it is a dry sauna, then at least 10 times per hour. Its influx should not come from the interior, but from the street. It is important that the incoming air is as saturated with oxygen as possible.
Air masses moving through the air duct must pass in the direction “from the steam room” - first the air entered the steam room from the street, then continued its path through adjacent rooms, ending the path with a technical room, closet, storage room
Exhaust air with a high percentage of carbon dioxide can escape through a ventilation duct located above the roof. Its height in this case should be optimal to ensure good traction, but not higher than 3 m. The height depends on the location of the channel.
The optimal cross-section of the air duct is calculated based on the volume of the steam room. So, for 1 m3 of a room you need 24 cm2 of section
In a sauna with an electric heater, you do not need to worry about installing a separate chimney or ventilation duct to remove combustion products. This is an absolute plus when arranging ventilation.
Features of the system design
The quality of procedures in the steam room, the mood and health of users, and the service life of the room depend on the correct design of the ventilation system. And maintenance costs also depend on how efficiently air exchange occurs.
The choice of scheme for installing a ventilation system depends on many indicators - the size of the sauna/bath, the number of associated rooms, location, type of electric heater. So, it could be:
- detached building;
- sauna in the room adjacent to the bathroom;
- sauna in the basement of the cottage;
- steam room on the balcony of a city apartment.
It is important that at least one wall faces the street. It is in this area that it is advisable to plan the installation of supply valves and windows. If this is not possible, then options with forced injection of fresh air using fans are considered.
It is convenient when one wall is adjacent to the street - a supply valve with a valve can be mounted in it, ensuring a flow of clean air
Depending on the type of control, ventilation in steam rooms can be:
- natural;
- forced;
- mixed.
The last option is most often used, when inflow occurs naturally and outflow occurs using exhaust fans. To do this, a supply valve is installed below the stove at a height of about 30 cm from the floor. It’s good if this particular wall is adjacent to the street.
If not, then it is possible to lay a ventilation duct using a flexible air duct, leading it to the right place. You should avoid sharp turns, choosing the smoothest and shortest path. It is advisable to install a damper inside or install a valve with a gate.
When street air enters the steam room, it immediately hits the electric heater. She, heated, warms it up, allowing it to rise upward, where it mixes with the air masses, displacing some of it. When the cooled air descends, it is drawn into the hole by the exhaust fan and begins to move up the ventilation duct.
Exhaust holes are usually made on the opposite wall. Moreover, one is located below, and the second is above. They are connected to each other by a ventilation duct. Also, the exhaust air removal system is equipped with an exhaust fan.
Air exchange with a supply and exhaust circuit occurs at the highest quality - fresh air is evenly heated, mixed with hot steam, displacing exhaust air into the exhaust hole
Additional circulation of air flows occurs through the cracks in the window and through the gap between the door and the floor. If the sauna is free-standing, and its log house was built according to all the rules, then there will definitely be a small gap between the lower logs, providing additional ventilation to the room. This is necessary to prevent the wood from rotting and mold from forming on the walls inside the steam room.
Reasons for the popularity of plastic
Ventilation structures made of plastic elements have gained wide popularity in various areas of human life. This is due to their attractive appearance and numerous advantages over traditional metal competitors.
The following positive aspects of plastic ventilation are highlighted:
- No corrosion. This advantage most often determines the choice of plastic. Any metal (even stainless steel) in ventilation systems where steam condensation occurs and the aggressive effects of various substances that pollute the air are susceptible to corrosion. Plastic is absolutely resistant in this regard.
- Low cost. Plastic systems have a significantly lower price compared to metal, which provides increased resistance to corrosion.
- Simplicity and quality of installation. When installing metal boxes and pipes, problems always arise in places where there are knocks, requiring rolling, welding, and other operations. Cutting and joining plastic elements is not difficult, and the ends are easy to process and align. Thus, sealing plastic boxes is much easier to ensure.
- Light weight. This advantage is ensured by ease of installation at the installation site and transportation when delivering the goods.
- Plastic elements are resistant to water, steam, aggressive environments, and ultraviolet rays. They meet all sanitary standards under normal conditions.
Installation of PVC pipes for ventilation
PREPARATION FOR INSTALLATION OF ELECTRIC FURNACE
the voltage of the electric furnace and the control panel corresponds to the mains voltage; the control panel corresponds to the power and model of the electric furnace;
The power of the electric furnace corresponds to the volume of the steam room. The volume should not be lower than the minimum volume for the selected oven (see Instructions);
The maximum current of the fuses and the cross-section of the power cable are sufficient for the power of the furnace. (see instructions);
the location of the electric furnace allows for fireproof clearances around the furnace in accordance with the installation diagram;
The oven control device (thermostat and bath timer) is located on the easily accessible side. If necessary, the control panel can be moved by a qualified electrician to the desired side of the stove in accordance with the Instructions.
System requirements
- The basic law of ensuring good air exchange states that the volume of air entering the steam room must be equal to its outflow, and the flows must also be clearly regulated and in the correct direction.
- The movement of fresh air should be in the direction from residential premises to sanitary premises.
- Regardless of what ventilation scheme is used in the sauna, the exhaust rack must be located above the roof level.
- From the dressing room or rest room, ventilation should be directed to the ventilation shaft of the toilet or shower.
- If your bathhouse has gas heating equipment, it must be equipped with a separate ventilation shaft.
- If your steam room is designed on the principle of a Finnish sauna, where dry steam is used, it makes sense to direct the hot air of the exhaust system to heat adjacent rooms.
- The ventilation of the sauna and steam room should be combined; with a long visit, one natural system may not be enough.
One of the air circulation options.
Useful tips
In winter, it is better to avoid using supply fans because they tend to draw in too cold air. If the air outside is very dirty, special filters must be used. When calculating the required power of ventilation devices, it is worth focusing on the requirement to refresh all the air in the bathhouse in a maximum of 15 minutes. Supply and exhaust devices are ideal for the steam room, but in the waiting room and relaxation room you can safely limit yourself to the natural circulation mode. When choosing locations for vents outside the building, you need to pay attention to the aesthetic qualities of the structure; the same requirement applies to pipes leading outside, to aerator fungi and valves.
If a swimming pool is equipped in the bathhouse, the air in this part should be 2-3 degrees warmer than in other parts of the room, and its humidity should not exceed 55-60%. The use of flexible air ducts is considered a much better solution than the use of rigid pipes. Taking into account all these recommendations, you can easily create a ventilation system with your own hands or have it checked by specialists.
Sauna in an apartment: construction stages
- Based on the established dimensions, a plan for the Finnish bath is drawn up. All its elements are positioned on it.
- The sauna room is well insulated.
- A location for installation is selected. The bathroom floor is tiled, which is suitable for construction and does not need to be replaced or resurfaced. Simply lay out brick sides around the perimeter and line them with porcelain stoneware or tiles.
- The wall behind the stove is insulated with facing tiles or bricks, with an obligatory air supply hole at the bottom of the brickwork.
- The stove is electric, with a power of 3 or 4 kW. Heating elements – heating elements. The cable line passing through the steam room is placed in a thermally insulating sleeve that is resistant to high temperatures.
- The frame is made of timber with obligatory strapping at five heights and fixation on the walls of the room. Racks measuring 100 x 50 mm, crossbars – 50 x 50.
- The box is lined with windproof insulation. On top - clapboard, insulated with mineral wool with a layer thickness of 50-100 mm, including the ceiling. Laying reflective foil with the reflective surface turned toward the inside of the room will reduce heat loss during sauna operation.
- Shelves and benches are attached.
- To cover the walls of the sauna, panels with a tongue-and-groove connection are purchased. The outside of the sauna is finished with boards with a mandatory gap of at least 5 mm between them.
- A stove is installed inside and connected to the power supply with an insulated, grounded cable. Be sure to provide a circuit breaker.
- The door is hung with a ball lock.
- All electrical connectors for connecting the stove and lighting fixtures are located on the outside of the sauna.
Recommendations for arranging bath ventilation
To improve air exchange inside bath rooms and extend the life of wooden structures, experts advise thinking about installing a ventilated floor. To do this, flooring boards should be laid with some gap between the elements. It can reach up to 10 mm. Small inlet openings, so-called vents, are laid in the foundation of the building.
Ventilated floors can be easily recognized by the gaps between the elements. This design allows wooden parts to dry quickly, which significantly extends their service life.
Small vents are also made in the walls opposite each other to help activate air exchange.
Important note. These openings must be protected with a metal mesh, otherwise it is possible that rodents will settle in the bathhouse
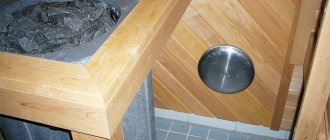
It is advisable to lower the level of the stove vent below the floor. This way, during the heating process, the blower will additionally work as an exhaust hood.
If you plan to install forced ventilation, it is quite important to choose the equipment correctly. It must be remembered that only special moisture-resistant and heat-resistant devices are suitable for installation in a bathhouse.
It is desirable that there is the ability to regulate their power. This way it will be possible to react as flexibly as possible to changing conditions. For example, in winter, with a significant temperature difference, traction will be very good.
The device will be able to operate at minimum power, whereas in the summer, with a minimum difference, it will have to function with greater efficiency. In addition, you should carefully select the type of fan. It can be channel, which is placed inside the air duct, or radial. In the latter case, the device is mounted at the outlet of the ventilation shaft.
Another important point is ventilation ducts. Depending on the type of system and the wishes of the owner, they may be different. The so-called solid products are considered the most reliable and durable. They are made of galvanized steel or special plastic.
A slightly less reliable, but easier to install option is flexible air ducts. They are made as a corrugated pipe with an internal metal frame.
It is advisable to equip ventilation openings with blinds and adjustable grilles. The latter may look like this. It makes it much easier to adjust the air flow intensity
Installing bath ventilation is not particularly difficult. First, all the necessary holes are made and ventilation ducts are installed. If necessary, fans are mounted inside or outside the box. This depends on the type of device. Next, electrical appliances are connected to the network. The method of connecting them depends on the mode in which the fan will operate.
The equipment can turn on automatically as the concentration of humidity and carbon dioxide in the air increases. You can turn it on simultaneously with the lighting by using the motion sensor or by pressing a separate key.
Switching off can be done using a timer, then it will occur after a predetermined time has passed, or when the lighting is turned off.
List of basic rules and recommendations
To begin with, the following conditions should be provided:
- organize a continuous flow of fresh air from outside;
- ensure a constant temperature in the rooms, especially in the steam room, as it should be very high there.
The ventilation systems of saunas and baths are quite similar, but there are also differences, since the latter differ in the way the air is heated - a dry microclimate is created for the sauna. In this regard, simply taking a ventilation scheme in a sauna and applying it to a bathhouse will be absolutely unacceptable.
Rules and regulations for arranging a ventilation system
Due to the fact that almost all rooms in the sauna have a minimum square footage, it is better to install such fans for the bathhouse and sauna so that fresh air flows at least every 15 minutes.
The need for ventilation in modern baths
Modern baths have become completely different over the last century. Today they are built from different materials, not just logs. They are clad on the outside, insulated and clapboarded on the inside, literally sealing the building. They make several isolated rooms - a steam room, a washing room, a locker room, a relaxation room, a bathroom, and sometimes a swimming pool and a kitchen.
Plan of a modern bath complex Source remoo.ru
The principles of heating have also changed: stoves are often made with a firebox from a dressing room, and many people prefer electric heating devices, which do not require a chimney, to work with wood. And in order not to go outside in bad weather, such complexes are often attached to the house or placed directly in it.
The desire for convenience, comfort and beauty can lead to undesirable consequences and even harm your health if you do not think about how to properly ventilate a bathhouse. The most common consequences are carbon monoxide poisoning, rotting of wooden structures and the appearance of mold, the spores of which are not at all harmless.
What do we now know about ventilation?
The following conclusions can be drawn from the information provided:
- Ventilation in the sauna should be linked to general ventilation.
- The natural inflow should be close to the heater.
- The natural exhaust should be higher than the inflow, and the size of the hole should also be larger.
- The hood can be carried out through the adjacent room.
- To ventilate the sauna, you can use the ventilation valve near the ceiling or open the door.
- Mechanical ventilation should only be used if you have the necessary knowledge. Do not forget about the correct operation of the sensor.
- The air exchange rate should be 3-6/hour.
Conclusion
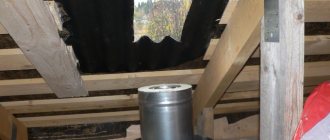
Sometimes the design of a bathhouse, or rather the location of the premises in it, does not allow one to limit oneself to natural ventilation only, so it will not be possible to get rid of air ducts at all. As an alternative, we can offer you installation of them in the attic. But this requires special knowledge, otherwise there is a risk of making mistakes in the calculations.
CAREFULLY. Do not use plastic pipes for ventilation (especially in a steam room); under the influence of high temperatures they can become deformed and also release substances harmful to humans.
Thanks to our article, you have become acquainted with most of the most popular schemes for organizing ventilation in a bathhouse, with the help of which you can draw a conclusion: do the ventilation yourself or enter into a contract with a specialized organization).
See also the material about ventilation of the steam room in the section of the site on ventilation in the bathhouse.
How does the ventilation circuit work in a steam room?
Ventilation
All valves and doors are fully open and the fan is on. 5 – 10 minutes are enough, and the air in the sauna is completely renewed.
Warming up
The doors and dampers of the exhaust duct are closed, but the supply duct remains open. This ensures rapid heating of the room to the required temperature with a minimum of fuel consumption for the furnace.
Taking treatments in the sauna
The hood damper opens slightly, but only at the lower opening. What does this give? The circulation of flows begins, while the heated air remains in the ceiling area. Consequently, the temperature in the steam room is maintained constant. And at the same time, the renewal of air does not stop. As a result of the operation of the scheme, the most favorable microclimate with significant fuel savings, that is, full compliance with the requirements of paragraph 1.1.
Common mistakes when installing ventilation yourself
Installation of only one hole for removing air from the sauna, albeit with a damper, under the ceiling. This drawback of the circuit risks the fact that the heated air will quickly be removed outside. Consequently, the process of regulating its temperature in the steam room will become more complicated and fuel consumption will sharply increase. The location of all openings (supply, exhaust) is at the same height from the floor. It is difficult to judge the effectiveness of the scheme (although the air exchange will be minimal), but it is clear that a draft is provided. The cross-section of the exhaust channel is smaller than the inflow channel. Air exchange in the sauna will be difficult. How to choose the optimal parameter for any ventilation scheme? Recommended ratio: per 1 m3 of room – 24 cm² of air duct cross-section.
- https://stroyday.ru/stroitelstvo-doma/pridomovye-postrojki/ventilyaciya-v-bane-svoimi-rukami.html
- https://derevyannie-doma.com/poleznoe/ventilyaciya-v-saune-kak-pravil-no-sdelat-s-elektrokamenkoy.html
- https://aqua-rmnt.com/ventilyaciya/kak-sdelat-ventilyatsiyu-v-bane-2.html
- https://remoskop.ru/ventiljacija-sauny-shema.html
- https://masterim.guru/banya-svoimi-rukami/montazh-ventilyacii-v-saune/
The most common systems
It is difficult to say which sauna ventilation scheme is better; there are several of them. In each specific case, you need to decide individually, depending on the layout of the bathhouse.
Hood in the ceiling.
First option
- In this option, the ventilation inlet is mounted behind the heater stove, or rather, not just behind the stove, but from below the stove, at floor level, and is covered with a metal ventilation grille. With this arrangement, cold, fresh air entering the room immediately hits the stove and heats up, thanks to this the steam room does not cool down due to the influx of cold air. And with good air exchange, the temperature remains high.
- To remove exhaust air, a single ventilation shaft is installed, which combines 2 ventilation holes at once. The first of which is mounted at a height of 1m or 1.2m, and the second is installed right under the ceiling.
Air circulation in the first option.
Important: during installation, pay attention to the cross-section of the supply and exhaust openings and shafts. They must be the same, otherwise a backdraft effect may occur.
Second option
- The second scheme works the other way around. The supply air duct is mounted above the stove. The outlet air ducts are located, as in the first case, on the opposite wall, but one of them should be 50 cm below the supply air duct.
- Also in this option, a sauna fan is installed on the exhaust system. Fans must be special, capable of operating in rooms with high humidity; their price is slightly higher, but you cannot do without such fans.
- Both the supply and exhaust systems must have dampers for dosing the supply and exhaust air.
Sauna fan.
Important: for a comfortable sauna, the air in the room must be changed at least 5 times within 1 hour. The first option fully complies with these requirements, but in the second option, if all installation requirements are met, the air exchange is more intense up to 10 - 12 times within 1 hour.
Passive ventilation
Natural exhaust ventilation.
- This is a traditional, time-tested air exchange scheme. The arrangement is simple and accessible. If the bathhouse is located in a separate building, then during construction, 2 ventilation holes are made below the finished floor level, and they are located on opposite walls of the basement.
- Next, when installing a finished wooden floor, gaps of 5 mm are left between the boards. For more intensive inflow, 2 more holes are made in the floor, the same diameter as the holes facing the street, and equipped with valves.
- Exhaust holes are made under the ceiling, which are also equipped with valves.
- In modern saunas, the role of such natural ventilation can be played by a gap of 50 - 70 mm under the entrance doors of the steam room.
Hood operating modes
In a sauna, when installing a combined ventilation system, you can use various room ventilation systems.
- Ventilation. This method is needed quite often. Thanks to regular ventilation of the steam room, the safety of all surfaces will be maximum. Within 5 - 10 minutes of ventilation operation with the fan turned on and the dampers fully open, the air in the room will be completely renewed.
- Warm up In this case, the dampers in the exhaust duct are closed, but remain open in the supply duct. This will ensure economical fuel consumption and quick heating of the sauna.
general information
Despite the fact that the steam room was originally created to provide an extreme microclimate, it is still impossible to do without ventilation. The fact is that an influx of fresh air is necessary both for the normal well-being of visitors and for the operation of special heating equipment (see also the article “Profile pipe: how to determine the quality of purchased rolled metal by its weight”).
However, the principle of operation of the ventilation of saunas and steam rooms differs significantly from the systems used in ordinary residential premises. The supply of fresh air in saunas is carried out cyclically, and the mixing of fresh air with heated air occurs smoothly.
In this case, correct calculations are especially important, thanks to which ventilation will ensure optimal air quality without discomfort for visitors. So, what are the features of the design and operation of air supply systems from outside to the steam room?
Ventilation hole locations
Proper ventilation in a sauna, first of all, depends on the proper location of the air ducts. You should not postpone the plan for installing air ducts immediately until they are laid. It is necessary to plan their location at the design stage of the entire sauna.
There are several options for their location:
- the first option involves placing two holes opposite each other. When working on flooring, it is recommended to leave small gaps between the boards, as well as leave two holes located in opposite corners. These vents must be covered with bars. This option allows fresh air to penetrate into the sauna naturally;
- the second option involves placing the inlet near the floor behind the stove, and the outlets on the opposite wall under the ceiling and below. Often the outlet vents are connected by a common box, and they must be equipped with valves;
- The third option involves installing the inlet half a meter above the stove. In this case, the outlet hole should be made on the opposite wall, just below the entrance hole. Under no circumstances should they be on the same line. For such a system, it is necessary to supplement the hood with a fan. With its help, it will be possible to warm up the room much faster;
Regardless of which ventilation device is chosen for the sauna, adding a damper to each air duct will achieve better results. During the period of warming up the room, the valve can be closed, thus, warm air will not escape, and the sauna will warm up much faster. If the air temperature becomes unbearable, the damper can be opened and the room can be ventilated urgently.
The principle of operation of the ventilation system in the steam room
Ventilation organization
We turn on the fan, fully open all the valves and doors - within 5-10 minutes the air is completely replaced with fresh air.
Taking treatments in the sauna
The lower channel damper opens slightly. In this case, a process of circulation of flows occurs, at the same time, heated air accumulates under the ceiling, which maintains the desired temperature. As a result, the air is constantly renewed, the desired microclimate is maintained and fuel is saved.
It is worth highlighting a number of basic mistakes made when installing ventilation yourself:
- Installing only one channel for air exhaust when organizing ventilation in a sauna with an electric heater or any other type of steam generator. By installing the hood only under the ceiling, we get a flaw in the system in which heated air will quickly leave the steam room. In this regard, it will be quite difficult to control the temperature inside, and fuel consumption will increase.
- Installation of inlet and outlet openings at the same level from the floor. This will lead to poor air exchange and the occurrence of drafts.
- The dimensions of the exhaust duct are smaller than the inlet openings. As a result, the movement of air flows will worsen. It is recommended to calculate 24 cm2 of air duct openings for every 1 m3 of room.
The ventilation system described above is the most convenient, despite the fact that it is not difficult to equip it with your own hands. Its effectiveness is confirmed by practice. We hope that all doubts about whether ventilation is needed in a sauna have been dispelled, so that everyone can equip their sauna with a proper and high-quality ventilation system.
Errors in ventilation construction
If you take into account all the subtleties of the ventilation system design, the result will please you for decades. But often inexperienced professionals make annoying mistakes that directly affect the quality of the procedures and the mood of those relaxing in the sauna/bath.
The most common mistake is planning the layout of the air ducts after construction is completed. This is the most unpleasant thing, because such work should be done at the very beginning. Then not only will everything be convenient to install, but it will also be easy to hide communications by decorating them.
Excessive tightness of walls and floors can lead to the fact that they will soon require replacement
Secondly, excessive tightness of the room may not serve the best role. So, if there is no gap under the door of at least 2-3 cm, a window and an opening for inflow, then you can suffocate in such a steam room. This is an extremely bad option.
The third mistake made when installing a ventilation system is making only an exhaust hole under the ceiling. It will provide a greenhouse effect when air exchange does not occur. To breathe in a breath of fresh air, you have to open a window or door.
The exhaust and supply openings should be provided with a valve - it is convenient to use, and it can fit into any interior without violating the overall concept
Fourthly, the air mass inlet/outlet openings must not be left without a valve. Its presence will help to optimally regulate the indoor microclimate in any weather and outside temperature.
It is the valve that helps to clearly select a comfortable temperature and humidity by releasing excess hot air. With the valve closed, on the contrary, you can quickly heat up a well-ventilated room.
The presence of a protective grille at the inlet or outlet will protect against accidental entry of insects, birds and other living creatures into the steam room.
The fifth mistake is placing the inlet and outlet valves at the same level opposite each other. With this scheme, you can observe drafts walking along the legs and a complete lack of mixing of air masses. The air coming from the street will not have time to heat up and mix into the steam mixture under the ceiling of the room.
The sixth mistake is installing complex, expensive ventilation systems. Equipment cannot withstand sudden temperature changes for long and requires periodic repair and replacement of individual devices.
Complex systems are not a cheap pleasure, especially if the steam room is used occasionally - a couple of times a year
Therefore, when selecting the optimal ventilation scheme, you should take into account the characteristics of your room, its size, and ceiling height. It is important not to forget about this at the planning stage of construction work, so as not to overpay later.
Design and principle of operation of the supply and exhaust circuit
It is not difficult to organize such a system; the main thing is to understand the operation of its main constituent elements.
Creating inlets
If we talk about a steam room, then the supply openings in it need to be mounted on the walls near the floor, as well as near the stove. This way, cold air from the street can warm up faster. In addition, this will prevent unheated air from entering the place where the person is steaming.
Hood installation
Exhaust holes are always made on the walls on the opposite side of the supply ducts. There should be two such hoods in the steam room, one at level 1 of the floor, and the second under the ceiling (read: “How to make a hood in a bathhouse - design and installation of ventilation”). They will be connected to each other by a box. To prevent the ventilation force from being affected by the wind force and the height of the fan pipe, an additional fan should be installed.
In general, when arranging such a ventilation scheme, adjustable dampers (that is, shutters or dampers) should be installed to control the microclimate and air flows.
How to make vents for ventilation?
Installation of ventilation in the bath is carried out as follows:
- In selected places, holes are made of such a size that the pipe or box fits freely into it.
- The space around the pipe is sealed so as not to compromise the tightness of the room.
- From the outside, the holes are covered with gratings.
- Special dampers or adjustable grilles are installed inside.
It looks simple, but there are a few things to consider. For example, ventilation holes can be made not only round, but also square or rectangular with approximately the same cross-sectional area. In wooden baths, instead of plastic or steel pipes, wooden boxes are installed.
In this case, choosing a rectangular hole looks logical, because such a box is easier to make from ordinary boards.
It is best to plan vents at the design stage so that you do not have to drill into the finished wall. Ventilation openings that open to the street should be additionally protected with insect screens. The cross-section of the supply ventilation hole in the bathhouse is calculated based on the standard: 24 sq. cm of cross-section for each cubic meter of volume of the ventilated room.
Thus, for a bath with a volume of 12 cubic meters. m. you will need a hole with an area of 284 square meters. cm. If you plan to make a round hole, then its radius is calculated using the inverse formula for the area of a circle. We divide the resulting indicator by 3.14 (the number “pi”), and extract the square root from the result.
In our example, we get a radius of approximately 9.5 cm, and its diameter is 19 cm. Exact adherence to dimensions in this case is not relevant, so a pipe with a cross-section of 200 mm is quite suitable. Or you can take two 100 mm pipes. If the ventilation cross-section is square, the approximate dimensions will be 17X17 cm.
Natural ventilation has undeniable advantages. Its installation is simple and relatively inexpensive; operation does not require electricity costs or the installation of special devices. The simple design guarantees no breakdowns and a long service life of the ventilation system.
From the inside, special grilles are installed on the ventilation holes, in which the gaps can be adjusted, this allows you to adjust the intensity of air flows
In winter, due to the significant difference in temperature inside the steam room and outside, the draft can increase noticeably. This may cause slight discomfort due to the air flowing in too quickly. In addition, odors, which are not always pleasant, can also penetrate into the bathhouse from the outside. Controlling the ventilation flow can solve this type of problem.
What is ventilation in a sauna?
- From the point of view of ventilation, a sauna is a temporary room for several people, in which there is a high temperature and low/high (depending on the type) humidity.
- The presence or absence of ventilation in the sauna can be felt when staying in it continuously for more than 30 minutes.
- The ventilation in the sauna will operate differently during procedures and when the sauna is not in use and the equipment is turned off.
- The flow in the sauna is necessary not only for human comfort, but also for the efficient operation of the stove.
- The hood in the sauna operates on a constant basis. Also, the speed of the hood can be increased by adding a ventilation valve.
The sauna is a type of room with increased ventilation requirements. High demands mean frequent air changes. For a sauna this is at least 3/hour. To do this, the sauna must have inflow and exhaust.
Inflow
The supply to the sauna comes from the adjacent room. Any room from which it is convenient to organize this influx is suitable.
The classic option for inflow into the sauna is the gap under the door. To do this, use doors without a threshold, which are installed so that the glass panel rises 4-6 cm from the floor.
Another common option is an inlet behind the stove. With this option, the stove is directly supplied with fresh air, which circulates the air heated by the stove in the sauna.
Please note that a properly installed stove with a remote firebox is a priori equipped with such an inflow (I hope there is no need to explain why?)
Hood
The exhaust hood in the sauna removes waste air.
The best option would be to discharge the hood into the general outflow system. If this is not possible, take it to a room adjacent to the sauna (you must understand that warm air will come out, sometimes with high humidity).
To summarize and confirm all of the above, I suggest turning to very authoritative sources, which are the quintessence of knowledge about the construction of saunas and baths, ventilation in them and the correct steam - instructions from the best manufacturers of sauna stoves. Harvia, EOS, Tylo and Narvi write about ventilation in the most detail.
Types of ventilation, norms and conditions
For saunas, natural and forced ventilation are used.
The steam room and relaxation room are equipped with natural ventilation. It is caused by aeration. The principle of aeration consists of air flows coming from the street from the lower air duct, lifting it and pushing out the already hot air into the exhaust duct located on the opposite side. Saunas provide intensive air exchange.
For the supply air to be truly fresh, it must come directly from the street. If the stove is located at some distance from the wall, a box or pipe is extended to it from the inlet.
Forced ventilation is used in the washing and utility rooms. It is installed if it is impossible to arrange natural air exchange. The air change rate per 1 hour is taken into account. According to the norm: in the steam room – 5; in the shower - 30; in the rest room - 3; in the massage room - 5. When arranging ventilation in the sauna, the guideline will be the scheme when the air is renewed every 15 minutes. This is the limit for a sauna.
Mechanical ventilation sometimes entails significant material costs for the purchase of fans, filters, and other elements. In order not to make a mistake in choosing a fan, you need to know that the power of the exhaust fan must be greater than the supply fan (by 6-10%) in order for complete air exchange to occur.
Ventilation in the sauna will be effective if the following conditions are met:
- The exhaust and supply ducts are located at different levels and on opposite walls.
- The cross-section of the pipes depends on the volume of the sauna: for 1 cubic meter – 24 cm of cross-sectional area of the pipe.
- The diameters of both pipes (supply and exhaust) are selected to be the same size.
- Drafts and the formation of areas with stagnant odor are not allowed.
- The temperature and climate conditions should not be disturbed: a higher temperature should be maintained in the steam room compartment.
- Be sure to install dampers on climate control vents to control air flow by reducing or increasing airflow passages.
- The exhaust vent must face the street. If hot air is used to heat the washing room, then an exhaust hole with mechanical exhaust is made from there. An vent is also cut out in the adjacent wall, and a gap under the door of at least 5 cm. Failure to comply with these standards leads to improper air circulation and the uselessness of the entire system.
Is ventilation needed in a sauna?
Ventilation in a sauna with a conventional wood-burning stove - diagram
In a steam room where people sweat, the air becomes super-humid in a few minutes. It is extremely difficult to breathe in such an environment. It is much easier if dry air masses circulate. Therefore, ventilation is simply necessary in a sauna in order to regulate the level of humidity and the supply of fresh oxygen. In the absence of ventilation during the procedure, warm air will rise to the top, and cold air will accumulate below, which will definitely not benefit health. Also, if there are no ventilation ducts, unpleasant odors accumulate in the sauna and there is a risk of poisoning from accumulated carbon monoxide.
Often, a shower room and a relaxation room are also adjacent to the sauna room. If they are not equipped with air vents, moisture levels will increase. The result is that it is difficult to dry yourself or dry yourself. Over time, mold and mildew will appear on the walls and ceiling, and wood structures will rot. The sauna will last not 15-20 years, but only 4-5.
General instructions with photos
Installing ventilation in a bathhouse with your own hands is not a difficult task. In the simplest version, you only need asbestos-cement pipes and gratings, which can be selected according to the diameter of the channel.
We offer you a master class on how to make ventilation in a bathhouse with your own hands using a supply valve (if the walls are made using frame technology):
Illustration of work being done
| Disassemble the valve into its component parts. | |
| Trace the circumference of the ventilation duct on the wall using a marker or pencil | |
| Use a drill to make several holes in the casing. They must be large in diameter so that a jigsaw blade can fit into the hole. | |
| Using a jigsaw, cut out a circle in the trim. | |
| Remove the wooden part. | |
| Remove the insulation and vapor barrier. | |
| Using a long drill, drill through the outer casing so as not to make a mistake with the location of the outer part of the valve. | |
| Make a hole from the outside, following the marks of the long drill bit. Preliminarily outline the circle with a marker. | |
| Saw off the valve tube to the required length (wall thickness). This can be done using a hacksaw. | |
| Install the air duct tube into the finished hole. | |
| Attach the inside of the valve to the wall using self-tapping screws | |
| Secure the outer part of the valve. |
Such valves can be installed in the washing room and dressing room.