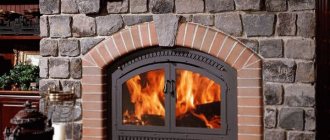
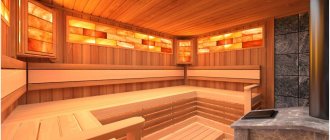
Lining is a type of lumber that is similar to edged wood. The only difference is the presence of longitudinal grooves, which ensure adhesion of the elements without the formation of gaps. Finishing from lining creates a microclimate in the room suitable for relaxation, while its arrangement does not require experience in finishing, as when working with wood. To obtain the expected result, it is enough to follow the step-by-step instructions and select materials in accordance with accepted rules.
Choosing the wood from which the lining is made
Before sheathing the inside of the bathhouse with clapboard, the owner of the room will have to decide on the type of material and wood. First, there are two types to choose from: regular lining and its Euro version. Finishers often prefer eurolining. The reason is the appropriate length of the groove and a wide ridge, which ensures a tighter fit of the elements than when working with ordinary lining. The eurolining is also equipped with holes for ventilation. Their task is to protect the material from the formation of condensation and subsequent deformation. The service life of such lining is many times longer than that of a conventional one, since the highest grade wood is used for its manufacture.
The finishing of the bathhouse with clapboard is carried out taking into account the specifics of the room - high levels of humidity, temperature changes. These factors are taken into account when selecting wood. Species that release resin when heated are not suitable for this, including most coniferous trees.
The following types of wood are suitable for finishing baths:
- Alder. Hygroscopic wood with low thermal conductivity. Used for interior decoration in country houses and baths. In addition to the pleasant aroma, the fumes it produces have a beneficial effect on human health. Medium price material. Sold in pieces up to 3 m in length.
- Oak. This wood is elite and one of the most expensive. Its advantage is that the oak panel does not require additional processing or protective coatings. Oak wood is also considered eternal - the finish will last for decades even with regular use of the steam room, since such wood does not rot. African oak, abash, has similar properties. Its only difference from the usual one is its light brown color and less processing complexity.
- Aspen. The wood is soft and easy to work with. Over time, its strength increases, the material tolerates high humidity and temperature changes without consequences. The only drawback of aspen lining is that over time its surface becomes dull. To return it to its original appearance, you will have to sand the outer surface of the lining with fine-grained sandpaper.
- Linden. The material not only looks beautiful and is easy to process, but also emits beneficial fumes when heated. Therefore, linden is one of the traditional materials for finishing both the dressing room and the steam room. The wood is light, with a reddish or brown tint, does not dry out due to changes in humidity and has its own matte shine. The only drawback is the oxidation of iron when interacting with such lining. Metal parts in the steam room or dressing room will have to be coated with special compounds, or their use will have to be abandoned.
- Cedar. Durable wood in shades from beige to coffee, the color depends on the region where the wood grows. Expensive and resistant to changes in temperature and humidity, it needs to be treated with an antiseptic before use as a finishing material. The disadvantage of cedar lining is the risk that over time the finish will begin to release resin without heating the room.
- Larch. Coniferous wood with antiseptic properties. Lining made from it becomes stronger when used in rooms with high humidity. Lining is in demand, found everywhere, its price is an order of magnitude lower than that of other types of coniferous species suitable for installation in a steam room.
- Hemlock. The second name of the tree is Canadian hemlock. It is resistant to temperature changes and increased humidity, and is also much higher in mechanical strength than pine. Like cedar and linden, it releases essential oils beneficial to human health when the room is heated.
Pine is used with reservation. You have to be careful when finishing the inside of the bathhouse with it - the wood releases resin when heated. This substance stains things and sticks skin to wooden surfaces. Can cause burns if heated too much. Therefore, only the dressing room and dressing room are upholstered with pine clapboard, choosing other types of wood for the steam room.
Criteria for choosing material for finishing
From time immemorial, pragmatic Finns have preferred wood. The discreet interior was compensated by excellent quality, good quality and thoroughness, including the most ordinary little things. As you know, wood is an environmentally friendly, quite durable and friendly material in relation to the human body. Let's see what requirements the materials we plan to use must satisfy:
- Environmental friendliness and sanitary cleanliness. Raw materials should not emit harmful substances, which is especially important in conditions of high temperatures of a Finnish bath;
- Contact surfaces, under the same high temperatures, should not cause burns to the exposed body;
- Texture and color should emphasize natural beauty, harmoniously complement each other, organically fit into the atmosphere of bathhouse comfort and tranquility;
- It is also important to note that finishing materials should have a natural therapeutic and restorative effect. After all, it is well known that the sauna is a stronghold of a healthy lifestyle;
- Finally, the materials must be available on the domestic market.
Having analyzed these requirements, we can conclude that the residents of Suomi are very sensible people, since they gave preference to wood as a key raw material in both general construction and finishing work.
A word from Experienced! Obviously, in the steam room of the Finnish sauna there was also a place for other natural materials, such as stones. Initially, materials were used in abundance exposed by the passages of glaciers during the Great Cold Period. To this day, they are found en masse in Karelia, the Russian North and, naturally, in the Land of a Thousand Lakes. These stones are of volcanic nature and, due to their key properties, are excellent for the role of stone backfill. In fairness, it must be said that to this day exotic materials, such as Chinese jade, have not gained such popularity among the Finns and Scandinavians as to relegate northern stones to secondary roles.
Wood also has weaknesses, this is natural, since there is no ideal raw material. Therefore, a thoughtful approach to the selection of industrial forest is a prerequisite.
The best of the best
Of course, covering a sauna with wood is optimal. However, you need to choose a breed whose disadvantages will be more than compensated by its advantages:
- Linden - it just so happens that the wood of this species is the most popular in our bathhouse traditions. Sufficiently strong and leveled core and sapwood, reliable mechanical processing of solid wood, delicate texture with a beautiful creamy tint, and a small number of critical defects ensure linden dominance in the market, at a fairly affordable price. And if you add here the excellent aroma of linden lining, then the choice is predetermined by itself. The acquisition of a linden croaker with a bast cover is a real success for a true connoisseur. Due to its porous structure, Lyko provides low thermal conductivity and it is impossible to get burned on such a surface even in an overheated sauna. Among other things, the surface of the bast is very pleasant and delicate;
- Karelian birch - if you follow the Finno-Karelian traditions, the wood of this tree was much less often used when carrying out such work as the interior decoration of a sauna. The main reason is the tendency of birch to twist and warp. It is quite difficult to make precise and fine adjustments of individual elements. In addition, the surface of mechanically processed, for example, finely planed birch, “stems” in a short period of time, becomes glossy and is very inferior to the velvety structure of linden or alder;
- Black alder is traditionally valued for the totality of its qualities. Elastic, durable wood heats up quite weakly and has long been successfully used for the manufacture of bath shelves and steam room utensils. The unusual property of this tree is to turn red when actively heated and turn pale when cooling. The texture and pattern of the array are beautiful and unique. Many people are captivated by the unique delicate aroma of alder. There are many adherents of its resistance to rotting and warping under the influence of the difficult atmosphere of a steamy room.
- Cedar - despite the skepticism of some users about coniferous species, when deciding how to line the inside of a sauna, this wood deserves the closest attention. The saturation of the array with phytoncides creates a pleasant, healing atmosphere in the steam room, high mechanical strength and resistance to fungal attack, which is also an important and significant plus for an informed choice. Obviously, high-quality cedar material is not available everywhere at a reasonable price. It is worth using it carefully when covering the ceiling plane of a steam room; discharge from resin pockets is possible;
- Spruce - the Finns prefer spruce among the conifers. Despite the resinous inclusions in the massif, it enjoys well-deserved popularity in the north, especially in the washing departments of saunas. Practically not used for ceiling finishing. To decorate the walls of a steam room, northerners prefer to use “simmered” wood that has been aged for several years to empty the resin pockets and natural loss of moisture;
- Pine is significantly inferior in quality to its sister spruce, and with high-quality finishing it is practically not used. Its destiny is rather rough structural use;
- Larch is popular as a finishing floor in washing departments. Resistance to excess moisture puts it beyond competition. Finishing is limited by the presence of a large number of through knots of “nails” and abundant resin pockets, especially in trunks grown on dead wood.
- Aspen and poplar are perhaps the most budget-friendly and least common options for interior finishing. This state of affairs is due to the low mechanical strength and susceptibility of these rocks to rot in a humid environment. However, in the steppe sparsely forested zone, poplar is popular as a tree that produces rapid wood growth in a short growing season. On the Don, in Cossack villages, bathhouses were decorated with poplar and elm. Resistance to rot was ensured by burning the finishing board with an open flame and subsequent grinding of the burned layer with coarse river sand;
- Oak and ash - using such lining is prestigious, but expensive. The beautiful texture, original pattern and color of this wood, along with strength and durability, give a very high-quality final result, and the spicy smell of steamed oak will make you never regret the money spent. A natural problem is the objective shortage of commercial raw materials of these breeds in free sale.
A separate paragraph is worth mentioning exotic species: abashi, rosewood, ebony, teak and domestic juniper. Their use in finishing work is often unreasonably expensive and rather serves as an expression of status rather than a reflection of an extraordinary visual or health effect. Yes, the smell of juniper is akin to the sound of a symphony orchestra, but decorating a steam room with it is within the power, or rather, not within the means of everyone.
Methods for attaching panels to walls
Using nails or self-tapping screws is the traditional option for attaching panels to walls. A more modern method is the use of clamps. It does not damage the panels, but requires additional costs of both time and money when installing the lining.
Using nails or screws
This method will require a screwdriver or hammer, as well as special nails or self-tapping screws - galvanized or made of copper alloy. Such fittings are more expensive, but if you save on them and buy ordinary nails, they will begin to rust over time. This will lead to the appearance of red streaks on the lining, which will spoil the appearance of the finish and stain the skin and things when touched. The fasteners are driven or screwed into the lining tenon at an angle of 45 degrees. The fastening points will have to be sanded so that there are no burrs or other defects left. The disadvantage of this method is that holes will have to be created on the planks when fastening them with nails. And when you try to remove the lining, the fastening points will be further damaged, which precludes the reuse of the panels if necessary.
Fastening with clamps
Do-it-yourself installation using clamps is safe for lining strips because it does not damage them. A clamp is a special bracket that is attached to the lower half of the lining groove - a recess into which the tenon of the next plank is inserted. The fastenings of the bracket are covered with the next strip in the row. Fixing the staples to the sheathing beams is carried out with nails or self-tapping screws.
With this installation method, the lining is not damaged, and there are no nail heads or screws left on the outer surface of the cladding, which eliminates the risk of getting burned or getting a rusty drip on your clothes after visiting such a bathhouse.
It is also easier to partially replace the lining mounted in this way - just pull the boards out of the grooves and pull out the fasteners. If you do not work carefully, it will be the staples that are damaged, not the boards.
We recommend reading:
Ventilation in the bath: purpose and installation
How to make a sheathing
So, you have insulated the room, prepared the lining, processed and dried it, now let’s proceed to the interior design of the bathhouse and do it ourselves. At the beginning of the work you need to make the crate. It will serve as a frame on which you will attach the finishing material. Installation of the sheathing structure begins with strengthening and positioning the upper and lower bars. This design will be used for vertical fastening of panels.
If you decide to place the wooden paneling horizontally , then the wooden blocks are mounted vertically; to do this, you need to step back a little from the corners of the building. To create an even structure, you should pull the mounting cord between the main bars. Using a level, a plumb line and a mounting cord, we secure the intermediate structural elements.
Methods for laying lining
Before choosing a method for laying lining, the first thing repair professionals advise to start with is to assess the humidity in the room. If finishing is needed in a steam room, then you should focus on horizontal placement of the slats. Vertical installation is suitable for a dressing room or sauna. This is due to the fact that the “vertical” method has a number of disadvantages:
- There will not be sufficient air circulation between the foil and the lining; this will lead to the formation of condensation and the development of mold on the inner surface of the trim and the sheathing beams.
- The finishing below will begin to deteriorate from moisture faster than the upper elements. With a horizontal mounting method, it will be enough to replace the lower strips. If you decide to attach the trim vertically, in the future you will have to trim each plank from below to replace the damaged area.
- When gaps form between adjacent elements, moisture will get inside and not flow down, as happens when installed horizontally.
The vertical method of attaching planks takes less time, so it is more often used by hired craftsmen. Also, the vertical placement of the lining does not make the room visually lower. Most often, to combine practicality and convenience, two installation methods are used simultaneously. In this case, the lower section of the walls is trimmed with horizontal planks so that, if necessary, they can be easily replaced. And the upper half of the wall is sheathed with vertically arranged boards.
How to lay the lining with your own hands
When decorating the interior of a bathhouse, the walls, shelves and ceiling in the room are covered with wooden paneling. This stage of construction occurs after the walls are insulated . To do this, use mineral wool, which is covered on top with a sheet of aluminum foil. After installing the sheathing and frame, it is impregnated with an antiseptic. The lining should also be treated, allowed to dry, and then installed. Laying work should begin from the corner.
For installation, fastening tools are used, and these are nails and staples. Interior decoration should begin from the floor. It is mounted on wooden joists. To do this, take boards whose thickness is at least 30 centimeters. It is desirable that they be made of hardwood. All joists and floorboards are impregnated with antiseptic . This is very important, since the inside of the bathhouse is constantly damp, fungi can develop, mold can form, which will lead to rotting of the wood.
Covering depending on the material of the bath
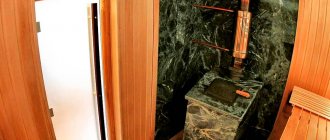
Covering the bathhouse with clapboard, as well as attaching foil in the steam room, was invented primarily for the purpose of preserving heat inside the room. Additional thermal insulation can be placed under the lining, and the film reflects up to 95% of the heat back into the room, creating the effect of a thermos and reducing the cost of heating a bathhouse or sauna. In order to properly sheathe a bathhouse to solve practical problems, and not to give the room an attractive appearance, you will have to take into account the material from which the structure is made. Some baths do not require additional insulation, others are more capricious and are subject to increased moisture formation. For long-term service of the steam room, you will have to take into account all its features.
Is there a difference between a bathhouse and a sauna?
In a Russian bath, the temperature is maintained below 100 degrees, but the air humidity reaches 70%. The Finnish version of the steam room, the sauna, is characterized by dry air, but at the same time its increased temperature. Therefore, it is allowed to use the vertical method of laying lining in the sauna, but you should avoid using coniferous wood in the finishing. The Russian bathhouse is less capricious in the choice of material, but requires more careful installation of the finishing - horizontally with the possibility of replacing several planks if necessary.
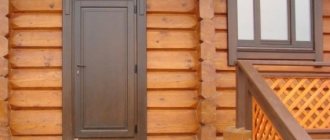
Finishing a brick or block bath
Such a bathhouse is sheathed from the inside not only to give it the appropriate style, but also for the purpose of additional insulation, as well as to comply with the requirements of the law on silence. First, they install the sheathing, between the rods of which insulation is laid - mineral wool or ecowool. After this, the foil is installed on top and a counter-lattice is made. The lining is attached to the slats of the latter.
It is advisable to cover such a bathhouse with clapboards on the outside, but such finishing is carried out at the request of the owner. If you make external cladding and place insulation underneath it, you won’t have to lay mineral wool on the inside - just install a vapor barrier, a counter-lattice and secure the lining to the walls and ceiling.
Frame building
The walls in such a bath are made in the form of a “sandwich” of two boards or panels, between which insulation is placed. If the thickness and material of the insulation are selected correctly, additional thermal insulation for such a bath will not be required. In this case, it is enough to install the sheathing, attach the foil to it, mount the counter-lattice and install the lining panels.
If the thermal insulation of a frame bath is poor, you will have to additionally cover it with insulation either outside or inside under the lining. In the future, you have to foil and decorate the bathhouse according to the generally accepted algorithm.
Do you need cladding for a wooden bath?
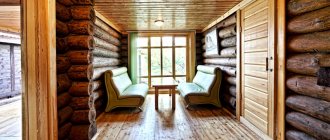
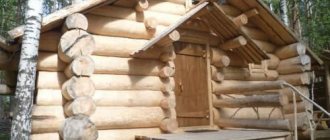
A bathhouse made of wood does not need additional cladding, because initially it contains the most suitable material for such a room, and the appearance is preserved as traditional as possible. The exception is situations when the owner of a wooden bathhouse did not calculate the thickness of the walls and the room turned out to be too cold. A wooden bathhouse will also have to be lined with clapboard if you plan to lay foil in order to create a “thermos” in the steam room and reduce heating costs.
What to do with a log house
The expediency of finishing a log house is similar to a bathhouse made of boards. But in a log house it is more difficult to install sheathing and lay insulation due to the unevenness of the walls. Even before foiling or finishing such a bathhouse, you will have to carefully caulk it and seal all the cracks.
How to decorate the walls in a bathhouse with your own hands
So, you have assembled the sheathing, now you can start finishing the interior. For this, only natural wood is used. Laying linoleum or other synthetic materials in the bathhouse is prohibited. These materials are of artificial origin . They cannot be used for interior decoration:
- they are fire hazards;
- when heated, toxic fumes are released;
- harmful to health.
Natural wood is best suited for finishing the interior of a bathhouse, steam room and washing area. The following tree species are used for this:
- Alder;
- Larch;
- Birch;
- Aspen;
- Poplar;
- Cedar;
- Abashi;
- Linden.
These types of wood have a dense structure, they heat up quite slowly, so they are safe, you will never get burned. Wooden lining dries quickly, it is smooth and pleasant to the touch, and when heated it emits a faint aroma. Wood used for interior decoration of a bathhouse, steam room and washing room should not be coated with paint or varnish. When heated for a long time, the chemicals that make up the paint evaporate, they enter the air, poisoning the bathing person.
Step-by-step guide to covering a bathhouse with film and clapboard
Sheathing begins with calculating the amount of materials and choosing one of them. Aluminum foil is used as a vapor barrier and heat repellent. This material is not recommended for use in residential premises, as it emits substances that are unsafe for humans in large quantities. But people visit a bathhouse or sauna for several hours and not every day. Therefore, there will be no harm from such finishing. In addition, the foil section will be hidden in the wall by the final finishing - clapboard.
The creation of sheathing and installation of heat insulation begins after the installation of all communications and ventilation is completely completed.
The lining is chosen with a thickness of 12.5 mm, a working width of about ten cm. The length of the panel ranges from 2 to 6 m, depending on the width of the wall. Or its height if vertical laying of panels is planned.
Initially, a sheathing is created, insulation is laid and a vapor barrier is installed. After this, holes are cut in the insulation opposite the ventilation windows. Upon completion of these manipulations, they proceed to laying the lining in the chosen method.
We recommend reading:
How to make a ceiling in a bathhouse
Protection from moisture and heat loss
Before finishing the room, it will have to be protected from condensation and heat loss. For this:
- Film waterproofing is installed or a special composition with similar properties is applied to the wall. The vapor barrier film is fixed using nails on wooden walls or slats on stone and brick walls.
- Install the timber sheathing. The pitch between the axes should be equal to the size of the piece of heat-insulating material. The height should be equal to the thickness of the insulation.
- Place the insulation in the recesses of the sheathing with an overlap of 1 cm.
- Foil is attached to the lathing slats. Its pieces are placed overlapping, the joints are taped with aluminum tape. To fix the film, they often choose either small nails or a construction stapler.
- A counter-lattice is attached over the lathing slats and the foil fixed on them. It follows the contours of the first sheathing and creates a gap between the foil and the finishing.
At this stage, the main thing is not to confuse the aluminum film with the vapor barrier foil, which protects the insulation from the formation of condensation on the wall of the building. If you neglect this step, the insulation will become damp due to contact with cold air from outside after the walls freeze. A damp insulator will become a breeding ground for mold and harmful bacteria.
Ventilation
After installing the insulation, ventilation holes are cut in it according to the size of the ventilation windows existing in the room. Initially, it is recommended to make one hole under the ceiling of the bathhouse, and another one at the bottom. This approach ensures better air circulation and rapid removal of excess moisture after bath procedures. It is best to force air circulation in the bathhouse, that is, install not only a shaft, but also a fan on it to blow through the rooms.
Creating a sheathing
Lathing over the foil should not damage the film. Therefore, it is advisable to clean the slats in advance from burrs and knots, and also to file the corners on them at 45 degrees. When installing the lathing in a steam room or dressing room, you will have to follow a number of rules:
- The batten should not reach another wall or ceiling. Otherwise, when heated, the wood will expand, which will lead to swelling of the entire counter-lattice mesh.
- Installation of the sheathing is carried out level, if thermal insulation has not been completed before. When using insulation, a level is not needed - the bottom sheathing is already installed in compliance with the geometry of the room.
- When installing the sheathing on the ceiling, you can use hangers - metal pins that are fixed to the ceiling. Their use makes it possible to artificially lower the ceiling in the bathhouse and reduce the cost of heating the room during operation. Suspensions are also installed by level; due to the specifics of the room, you need to choose those that are not susceptible to rust - aluminum, galvanized, etc.
- The optimal lathing pitch is 50 cm, this distance is enough to fix the lining. If the previous sheathing is wider than the required distance, you will have to add additional strips. In this case, they will have to be fixed only in the corners to the previous sheathing, and not to the insulation.
- For fastening the counter-lattice, self-tapping screws or stainless steel nails 9-10 cm long are best suited. Drive them in so that the heads are flush with the board. If you ignore this step, you won’t be able to lay the lining evenly because the caps will get in the way.
It is better to drive the fasteners at an angle from top to bottom, and not perpendicular to the wall. This approach ensures that the wood remains in place even as it expands due to heat.
Fastening the lining
Before attaching to the walls and ceiling, the lining panels will need to be properly processed. Preparation includes:
- Trimming the lining to the required size. Initially, the panel length is up to 6 m; few people will need such a large panel even with horizontal installation. The planks are cut with a jigsaw, the edges are polished so that there are no burrs or nicks.
- Drilling holes for self-tapping screws or fixing clamps. During installation, this will be more difficult to do, since you will have to be distracted by processing each panel, rather than installing them on the walls using the designer’s method.
After preparation is completed, the lining is laid in the chosen method. In this case, you will have to follow a number of rules:
- The gap to the floor should be about 2 cm. When fixing the lining to the ceiling, you need the same distance from the walls.
- You will have to cut off the ridge from the first plank, which is inserted into the groove. With the cut section, it is turned towards the nearest wall, the installation of the next plank is carried out in the groove of the first. The first plank is fixed against the wall with self-tapping screws, regardless of the chosen method of fastening.
- When using clamps and fixing them to the sheathing with mounting brackets, they must be driven in at an angle.
- The groove and that part of the main width that prevents the insertion of the lining into the space remaining between the adjacent plank and the wall are cut off from the final plank.
For better fixation when working, you can use a wooden or rubber mallet. The blows of this tool will ensure better adhesion of the panels to the sheathing, but will not damage the lining, unlike metal products.
Additional protection - special compounds and impregnations
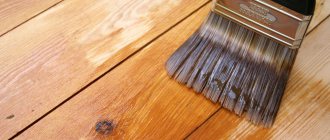
Wood is a pleasant-smelling, natural material, which, in addition, gives the bathhouse the appropriate atmosphere of a rustic steam room. Using wood clapboard simplifies the procedure for finishing a bathhouse, and also saves material and costs - covering the walls and ceiling with clapboard will ultimately be cheaper than making a bathhouse from wood or covering it with untreated boards. But the finished finish has a significant drawback - without treatment with waterproofing compounds it will not last long: moisture passes through the connecting seams, settles in the grooves, reaches the vapor barrier material, accumulates on it and provokes the development of mold. To avoid this, you will have to treat the walls, floor and ceiling after finishing with a waterproofing solution.
Protective impregnation will extend the service life of both the finish and the bath itself. The main thing when applying it is to read the manufacturer’s instructions on the packaging and act in accordance with the algorithms specified therein. The safest and most effective waterproofing agents for baths are those containing wax. Water-based impregnations can also be used.
Bath finishing technology
No matter what materials the bathhouse is built from, the finishing is done using approximately the same technology. Although it is still worth familiarizing yourself with the nuances of the process before starting work.
You need to move forward in the work process from the bottom up, that is, from the floor to the ceiling.
So, the internal lining of the bathhouse with clapboard is carried out in several stages:
- The first step is to lay the flooring in the steam room from larch boards. It is not recommended to use oak in this case, as it is quite slippery. The floor level in the steam room needs to be raised by 10 cm to better retain heat.
- The bottom shelf should be 10-15 cm higher than the stove level.
- Next, a lathing is made along the walls, along which the lining is attached.
- After completing the manipulations with the walls, you can begin finishing the ceiling.
- After the finishing of the wooden bath is completed, you can begin installing equipment and furniture. Ready-made items can be purchased in specialized stores.