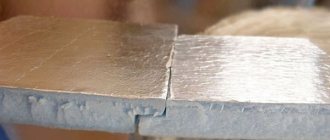
Which lining to choose for a bathhouse
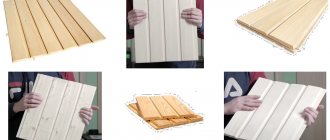
There are 4 types of lining, differing in the profile of the boards:
- Eurolining.
- Standard (otherwise called “peasant”).
- Block house (imitation logs).
- American (imitation timber).
Popular brands that have proven themselves to be of high quality:
- "Calm";
- "Soft Line";
- "Classical".
All of them belong to the eurolining category and differ in size and profile. Boards, regardless of their type and brand, are often called lamellas.
Finishing a bathhouse with clapboard is a traditional, frequently used solution. It has gained so much popularity for many reasons. Lining is a natural and therefore environmentally friendly material that is beneficial to human and animal health.
When choosing, it is extremely important to consider several points:
- type of wood;
- grade of material;
- resistance to moisture;
- coefficient of thermal conductivity.
What is imitation timber and what are the advantages?
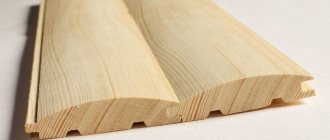
Imitation of timber is a technique for finishing buildings outside and inside. The material used in it is called false timber, or timber simulator. These are facing panels made of natural wood, a type of lining.
The material is used for cladding walls inside and outside the building, as well as for decorating the ceiling. Panels are also used in frame construction.
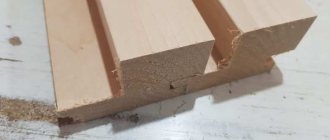
False beam
The material differs from eurolining:
- lack of recess on the front side (the so-called shelf);
- large width and thickness;
- maximum resemblance to a wall made of timber, which is why it received its name.
Eurolining
Prices for various types of lining
Lining
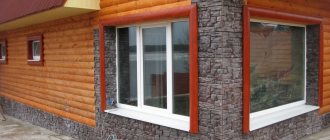
Facing with false timber has many advantages:
- after finishing, the building looks as if it was made of natural wood, and even a specialist will distinguish the imitation from the original only upon close examination;
- during interior decoration, it hides uneven walls, allows you to hide wiring and other communications;
- protects the walls of old buildings from atmospheric influences;
- has heat-saving and noise-reducing properties;
- creates a comfortable microclimate because it is made from natural materials;
- It is simply mounted on the walls, so its installation does not require special knowledge.
Wood must be well impregnated with insecticides to protect it from pests
Thanks to these properties, false beams are often used for cladding old houses. In this case, the original material of the walls does not matter. These can be foam, gas, cinder blocks, bricks and even rounded logs that need restoration.
But imitation timber also has disadvantages that should also not be overlooked. It is necessary that the material is well impregnated with antiseptics and insecticides. Otherwise, moisture will quickly destroy it, and insect pests can spoil the lining. Treatment should be carried out regularly when the previous layer expires. Detailed data on the validity period of the composition are indicated in the instructions for the drug. Fire protection will also be required, since natural wood burns well.
How to choose the best insulation for different tasks ↑
The choice of insulation with foil for a bath depends on the material from which the building is constructed and the frequency of its use. In some cases, you can get by with simple aluminum foil, while in others you need cladding using a heat-insulating layer.
General recommendations for selection ↑
Regardless of what type of bath foil you choose, you must proceed from the following considerations:
When buying cheap products of unknown origin, there is a risk of purchasing material made from poor quality raw materials. Its performance properties will be at the lowest level. The insulation must be covered with real aluminum foil. Some manufacturers practice spraying, but there is very little benefit from it. The fire threshold is of great importance
Foil in the bath is exposed to high temperatures, so fire safety is the main selection criterion. It is important to choose the right thickness of insulation with foil on the walls for the bathhouse; the effectiveness of the work you do will depend on this.
Bathhouse lining
What foil insulation is needed for a wooden bath ↑
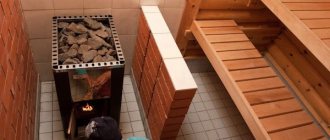
A log bathhouse with well-caulked walls does not require any additional insulation. Wood does not conduct heat well, so it is well retained inside.
In a small building, only the ceiling is sheathed with foil or kraft foil. If the bathhouse is spacious and you need to update the interior, then you can line its walls and ceiling with plain foil, and then line it with wooden clapboard.
In order to protect the wood from fire, they use wall cladding behind the stove. This measure further increases the temperature in the steam room, as heat is reflected from the foil.
When choosing regular foil for a bath, do not ignore such a parameter as the thickness of the aluminum layer. It ranges from 0.007 to 0.2 mm, and the vapor permeability of the material is directly proportional to this value.
Foil as a vapor barrier
Wall cladding made of other materials ↑
Buildings made from aerated concrete blocks are considered very warm, but a vapor barrier is required here. You can use regular foil for such a bath, but it is better if it is glued to waterproof craft paper. Such insulation will become a reliable barrier to the occurrence of dampness, will retain heat inside, and steam will not harm your health.
Baths with frame and brick walls are subject to mandatory insulation for the reason that they do not retain temperature well. Here you need foil insulation, the basis of which is mineral wool or expanded polystyrene. You can also make a “thermos” from a quencher and aluminum foil.
Which thermal insulation product is better?
Due to their characteristics, bath insulation has different properties; with foil they will cost more, but this is a justified expense. It is difficult for the average person to figure out at first what product is better, more reliable, what are the properties of thermal insulation foil, how much does 1 sq.m. cost. product for insulation. The table below will help you save time when choosing foil for your bath.
| Foil insulation | Price RUR per sq.m | Reflectivity | Environmental friendliness | Easy to install |
| aluminium foil | From 60 | 95%-97% | + | – |
| kraft foil | From 35 | From 95% | + | + |
| "folgoisolon" | From 25 | From 95% | + | + |
| "penofol" | From 60 | 0.97 | + | + |
| mineral foil insulation | From 80 | From 95% | + | – |
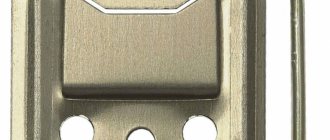
Installation of foil thermal insulation cannot be called too labor-intensive. If the steam room is made of logs or wooden blocks, then the foil can be attached directly to the wall in the bathhouse. The whole process is carried out in several stages: Rules for installing foil insulation
Thermal insulation is attached to the wall with special construction brackets
It is important to monitor the integrity of the canvas and avoid tears. If it was not possible to avoid damage, then metallized tape will help correct the situation. The insulation is attached with an overlap, the width of which should be at least 20 cm
Each joint is taped with special tape. The better this work is done, the less heat loss there will be in the future. A frame is mounted on top of the insulation for finishing. It is important to pay attention to one point: it is necessary to maintain a gap between the finishing panels and the insulation to ensure air circulation.
If the walls are made of brick, then, as a rule, installation is carried out on top of mineral wool. To complete this process, the procedure changes slightly. Then, first of all, you will need to assemble the frame of the future partition, and mineral wool is laid inside this frame, on top of which foil is mounted in the usual manner.
The process of insulating any room, including a bathhouse, is an important stage in the work. Not only the consumption of energy sources, but also the safety of building structures, as well as indoor comfort, depend on how well the work is done and how effective the materials are selected. Nowadays, materials for thermal insulation can be chosen from a huge number of products on the market.
It is important to know that foil for insulating baths is an integral part of the process of creating optimal operating conditions in the future
When building a bathhouse, the main task is to create a structure that will quickly warm up and retain heat for as long as possible. For this purpose, the walls and ceiling are insulated. Aluminum foil for baths is most often used as insulation. There are several types of this material, differing in strength, ease of installation, durability and service life. When choosing a specific type of foil insulation, you need to focus on the characteristics of the building.
Rules for visual inspection of boards and assessment of their condition
The following must be taken into account:
Pay attention to the quality of the chips. The boards must have a flat and smooth surface. This directly affects the economic benefits of finishing work. If the front side of the lining is rough, finishing will be complicated by the increased consumption of antiseptic and paint materials. The moisture content of the boards should not exceed 12-16% (GOST requirement). It is visually impossible to determine whether the material offered by the manufacturer meets this criterion. Therefore, it is necessary to request documents confirming compliance with GOST. If the wood is not dry enough, there is a high risk that it will suffer during the first years of operation of the finished premises. Pay attention to the depth and evenness of the groove. These indicators determine the quality of installation
And it doesn’t matter how it will be done: using clamps, nails or staples. If the groove is shallow, there will be nothing for the fasteners to grab onto.
An important characteristic of boards is width. Often there are lamellas on sale that are wider than standard ones (more than 88 mm) and managers assure that it is more profitable to buy such lining. This is not true, since such a finish will be less durable and there is a high risk of wide boards bending when exposed to moisture.
Features of repair of some structures
Repair of bath walls
If the condition of the building is quite satisfactory, then it is worth considering carrying out repair work. First of all, the walls are repaired. If the bathhouse quickly loses heat, then most likely there are cracks or cracks. Even if no through holes are found, the walls need to be insulated. You can use mineral wool for this.
New window installed
Then you should take care of the windows and doors. In old baths they are most often made of wood. If the building has served for several decades, then the windows and doors may become deformed, then they will have to be restored and insulated. It is best to remove old structures and replace them with plastic products. Such windows and doors will last much longer.
Interior decoration is no less important. Very often it is she who fails in the first place. There is a lot of moisture inside the bathhouse, and the wooden finishing of the walls, ceilings and floors (which is what is mainly used in bathhouses) begins to rot and warp.
Replacement of insulation and wall covering
In an old bathhouse, it is better to remove all the old interior lining. Then it is necessary to install the thermal insulation layer. Basalt wool is best suited as insulation. It does not burn and is not afraid of moisture. Then a layer of foil material is laid.
Particular care must be taken when covering walls. If work is carried out in a steam room, then it is advisable to use hardwood paneling. Many experts recommend sheathing with alder material. To decorate the walls in the washing area and rest area, you can use softwood lining.
Bathroom floor repair
More often than others, the floor in a bathhouse has to be repaired; it is the floor that is exposed to water more than other elements. Floors can also be insulated. You can choose penoplex as insulation for a steam room; polystyrene is suitable for other rooms. The floors are then covered with moisture-resistant hardwood boards.
Gangway installation
When repairing flooring, pay special attention to the sewage system. Even if it worked properly, when opening the floor, it is better to clean it or even completely replace it
One of the options can be seen in the video.
Repairing the ceiling in the steam room
The ceiling also needs to be insulated and covered with a layer of foil material. For cladding, you can use coniferous boards.
Wall treatment
Since almost all the interior decoration of the bathhouse is made of wood, it needs to be protected. For this purpose, special antiseptic impregnations are used. They need to process all wooden elements, not only the outside, but also the inside. This will prevent premature rotting of the wood.
Furnace repair
A very important part of the bathhouse is the stove. If it fails, it is better to replace it with a new one
It is worth paying attention to some points:
- Firstly, the power of the stove. It should be enough to create the optimal temperature.
- Secondly, the firebox design. Today, designs are often produced that can be heated from the dressing room. Such stoves are more convenient.
- And, of course, we must not forget about fire safety.
Protected wiring in the bathhouse
When carrying out repair work, do not forget about the lighting system. It is better to immediately replace old wiring, sockets and switches with new ones
In this case, special attention should be paid to safety. Water and electricity are bad neighbors
Therefore, all wiring and electrical appliances must have the necessary degree of protection.
Which tree to choose for a bath
Craftsmen are often asked the question of how to line the inside of a bathhouse inexpensively. The following types of wood come to mind:
- alder;
- oak;
- pine.
When you are interested in how to decorate the walls in a bathhouse, it is worth remembering the basic properties. We are talking about strength and moisture resistance. The wooden inner lining of the bathhouse should not lose its properties even at elevated temperatures.
Oak
If the question of what is used to line a bathhouse is interesting, it is worth evaluating oak.
Pros:
— interesting structure;
- nice smell;
- Possibility of simplified installation.
When asked how to sheathe the inside of a bathhouse, most often craftsmen talk about the need to clean the surface. First, preparation is carried out and all hangnails are removed.
Thus, the question of how to line a steam room inside a bathhouse is more relevant than ever. The price for oak starts from 20 thousand rubles. per cubic meter.
Linden
Linden is ideal for baths for the following reasons:
- variety of shades;
— ease of processing;
- boards of different sizes.
If you are interested in what is the best way to line the inside of a bathhouse, it is important to immediately evaluate the prices of linden. The 30 by 90 by 1000 mm format remains in demand
On the Internet, you can enter a query about how to line the inside of a bathhouse, and suggestions about linden will quickly appear. One board costs from 100 rubles.
Aspen
Aspen remains in demand for baths due to the following advantages:
- dense structure;
- different formats;
- Possibility of installation yourself.
When people are interested in how to decorate the inside of a bathhouse, aspen often comes to mind. They try to be objective, since for one piece they will have to pay from 150 rubles. If you consider how to decorate a bathhouse, aspen is surprised by its environmental friendliness. Some people choose it because of the smell. This lining for a bathhouse inside can be interesting in combination with other types of wood.
As an option, consider birch or beech. The finishing in the bathhouse is prepared by polishing.
Alder
The first question to the master is how to line the inside of the sauna. Alder is an amazing breed that has the following advantages:
- lovely drawing;
— moisture resistance;
- durability over many years.
Now, when they ask what to decorate the inside of the bathhouse with besides the lining, we can safely say about alder. Options available starting at RUB 150. for the workpiece.
If you search, the interior decoration of baths is available in different formats. If combination options are interesting, consider beech or pine
Now it’s clear how to decorate the inside of the bathhouse, but it’s important to find a trusted supplier
Cedar
It’s difficult to immediately figure out what can be used to cover a bathhouse. Cedar itself is not impressive in its properties, but it has the following advantages:
— low conductivity;
— the material breathes;
- not afraid of high temperatures.
The inside of a sauna with cedar looks special.
Larch
If you are interested, the interior decoration of the bathhouse, materials, larch should not be considered the last thing. She has the following advantages:
— good structure;
- smooth surface;
- presence of resins.
When asked what to line the inside of a bathhouse with, it’s worth looking at larch in more detail. Coniferous trees additionally have medicinal properties. If you are interested in the best way to sheathe the inside of a bathhouse, it is better to decide on several options. Larch can be combined with beech or oak.
Pine
The next question is what can be used to line the inside of a bathhouse. Pine is considered an excellent candidate, because the following advantages are noted:
- adheres well to nails;
— does not lose color;
- resistance to moisture.
Such lining of the baths inside attracts attention with its appearance. Pine harmonizes with other types of trees
When asked what can be used to line the inside of a bathhouse inexpensively, it is worth pointing out the combinations - pine and cedar, pine and spruce.
Dimensions for interior lining
The interior lining of the premises with wood makes the interior of the house warm, luminous and very cozy. For interior cladding of premises, experts advise choosing a false beam thickness of 16-22 mm and a width of 140 mm. Material of such dimensions looks much better than, for example, 180 mm wide boards: when using wide false beams, the room is visually smaller. In addition, experts note that if you decorate a small room with such a board, the grain (winding arrangement of wood fibers), which determines the beauty of the material, becomes hardly noticeable. The texture of the wood ceases to look advantageous and, accordingly, the effect of wood finishing, its warmth and comfort, ceases to be felt.
The most popular sizes of imitation timber for interior decoration are: width - 135 or 140 mm with a thickness of 16 or 20 mm (135x16 and 135x20 or 140x16 and 140x20 mm), and for small rooms - 11x140 mm. Premises finished with false timber of such dimensions are difficult to distinguish from those built from profiled timber 150x150 mm. In industry, material of this width has a thickness in the range of 16-28 mm, an economical solution is 16x140x6000. When making calculations, you need to take into account that the working width of a false beam with a dimension of 140 mm is 135 mm (5 mm is the width of the groove). If you are in doubt about what thickness to choose for a given width, remember that the ratio of thickness to panel width of 1: 5-1: 8 with sufficient strength will significantly lighten the board, and therefore the entire structure. At the same time, indoors, high strength boards, as when cladding a facade, are not needed.
Boards with dimensions of 150x20x6000 mm are also suitable for interior decoration. False timber with a working area of 140 mm, thickness 20 or 16 mm is designated as follows: 140x20x6000 or 16x140x6000. In this case, the tenon is not taken into account for the area of the board in the same way as when calculating the material for external wall decoration.
To save material, the calculation of its quantity is done in such a way as to reduce the number of joints during finishing
However, for wall decoration this is not so important, since the joints can always be hidden behind pieces of furniture, paintings, and other decorative elements. But you can’t hide the joints on the facade and on the ceiling either
In order for the joints to look artistic, the length of the imitation timber is carefully chosen - for rooms, preferably 2-4 m, and installation should be calculated from the window. If you plan the joints, then you need to mount the boards in a ladder or herringbone pattern, alternating the seams and the middle of the next board.
When finishing a large section of a wall, the following dimensions allow you to minimize waste:
- 20x135x6000;
- 28x190x6000;
- 20x140x6000;
- 20x145x6000;
- 35x190x6000.
But the most popular length of false beam is 4 meters. Boards for finishing ceilings should be relatively light, of small thickness, optimally 13 mm
The thickness and width of the imitation timber and their ratio affects the natural processes inherent in wood material and occurring in nature - swelling and shrinkage with changes in humidity and temperature changes. For external cladding of a house, boards with a width of 190 mm have proven themselves to be excellent with a thickness of 28 mm (198x28). Thus, the use of false pine timber 190x28 AB when cladding the facade of a house will allow postponing repairs for several decades.
If you do not monitor the ratio of the thickness and width of the imitation timber, their deformation in the finished coating is possible in the form of torsion and bowing like a boat. Russian enterprises produce false beams up to 250 mm wide.
How to choose insulation for a bath?
The most common and inexpensive is mineral wool. However, it is better to choose basalt wool. It withstands high temperatures better.
There is mineral wool on sale with already glued foil. This is not a very good option, as it is inconvenient to install. The surface of the foil may deteriorate during installation. Also, you should not use isolon, since it contains airborne propylene, which releases harmful substances into the air when heated.
Another good insulation material that can be used inside a bathhouse is cork anglomerate. It has antifungal, antiallergenic and antiseptic properties and is also non-flammable. Its cost is significantly higher than classic mineral wool.
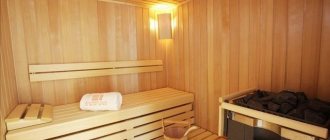
Which design do you prefer?
The design of the bathhouse inside can be very different, as you can already see from the photo above - and with the rest room everything is exactly the same. Ultimately, the nature of the decoration and interior design are entirely the prerogative of the owners. Which most often follow the lead of generally accepted practice is worth noting. Therefore, the classic Russian style is what can most likely be seen in the vast majority of modern baths.
Meanwhile, the space of options is not so narrow - and you may well choose something truly extraordinary and interesting for yourself. And we will help you with this. Keep a selection of photos with the best designs of a relaxation room in a bathhouse.
How to choose the type of material for cladding
Plastic or wooden lining? Each of these materials has its own advantages and disadvantages.
Advantages of wooden lining:
- Highly environmentally friendly material. In particular, pine or spruce will secrete fungicides from the resin for a long time, which is an additional healing factor.
- A more varied type of surface texture, even expanding if the cladding is made with eurolining.
- Ease of installation.
- Excellent thermal insulation properties.
Disadvantages of wooden lining:
- The need for antifungal impregnation.
- Higher financial costs (even for ordinary lining, not to mention euros).
- Dependence of coating durability on the initial quality of the material.
Advantages of plastic lining:
- Less money spent on purchasing materials.
- A variety of textures and colors (this can also be achieved for wooden lining, but at a much higher cost).
- Simplicity and ease of care.
Disadvantages of plastic lining:
- Reduced (compared to wooden lining) temperature resistance - with sudden temperature fluctuations, the material is deformed.
- Less thermal insulation of the room.
- The need to arrange lathing (for wooden lining on a wooden wall, lathing may not be required).
- There is a need to install a more advanced ventilation system for the steam room, since plastic does not “breathe” and fungus settles on the walls much faster.
By comparing the specific operating conditions of the steam room (duration, temperature), the correct choice of material is not difficult to make.
You can make a steam room in the old Russian style
What to process?
Any wood during its operation is exposed to various factors. This may be due to moisture damage, rodent damage, or thermal damage. To prevent the coating from deteriorating during operation, you need to know how to treat and impregnate the material so that the lining does not darken or deteriorate. Despite the fact that this procedure is quite logical, there are those who are against the use of impregnation. This is due to the fact that the impregnating materials are made from chemicals. The vapors that are released have a harmful effect on the human body.
But if the issue of the need to treat the lining with impregnations has already been decided, it can be covered with the least safe materials.
Among such impregnations, the following products are worth highlighting:
- drying oil;
- linseed oil;
- antiseptic.
Types of wood for making bath trim
The steam room finished with aspen paneling looks attractive
It is important what type of wood the product is made from.
For the bathhouse, wood trim with the lowest thermal conductivity is used: linden, aspen, abashi, cedar, alder. Moreover, you can take not any cedar, but only the northern one. It contains less resin and when heated, the walls and ceiling will not begin to cry.
Larch species have a lower wood density and with tactile contact in the bathhouse, the lining will be more pleasant, even at high temperatures in the steam room. Such lining costs more, but the costs will be justified. Each of the types under consideration is better suited for different bathhouse areas.
Aspen: has a beautiful reddish tint and increased moisture resistance. In terms of its durability, aspen can only be compared with larch.
When in contact with water, aspen wood does not collapse, but rather hardens. It is better to use it to decorate a rest room or washing area. The only negative is the high price, due to which it is not recommended for use in the steam room and dressing room.
An original version of a steam room trimmed with linden clapboard
Linden: Lining has become traditional for finishing the inside of a bathhouse. Linden does not heat up at high temperatures and has a pleasant whitish color. But linden has a serious drawback - if it is not treated with antiseptics and protective compounds, it quickly begins to darken and rot.
Cedar lining in combination with linden looks great
Cedar: This is a coniferous tree, but its structure is of low density, so it is often used for baths. Cedar has excellent antiseptic properties and emits a pleasant odor when heated. But it is not recommended to use it in a steam room, since it still contains some percentage of resin.
Alder lining in the interior of the bathhouse looks original and modern
Alder: has a pleasant pinkish tint with a pleasant velvety texture. Holds temperature well and is not afraid of moisture. In baths can be used in any part.
When choosing lining for finishing a bath, it is better to take chamber drying Extra or AB grade. Since changes in temperature and humidity in the bath occur constantly, it is impossible to use material with inaccurate or curved shapes. But in the highest grades this is unacceptable.
Algorithm for interior finishing
Walls
Finishing work begins with the walls. It is necessary to take into account that their list and sequence, as well as the materials used, will differ for the main premises for various purposes (steam room, washing department and dressing room).
It is better to finish the walls in the steam room with wooden paneling. The optimal choice is linden or aspen. As a last resort, birch trees.
In the washing department it is possible to use lining with a moisture-resistant coating, plastic panels or tiles. For a log bathhouse, the optimal solution is to use wood.
The walls of the dressing room (rest room) can be finished with any materials.
The sequence of work is as follows:
- The lining is left inside the bathhouse for a day to adapt the material to temperature and humidity. this reduces the likelihood of deformation;
- lay electrical wiring;
- perform caulking of all inter-crown seams (moss, tow, special hemp or jute edging, flax-jute insulation);
- steam and waterproofing is performed;
- the sheathing for the lining is installed;
- insulation is installed (the optimal solution is basalt wool);
- the lining is sewn on (an air gap is left).
In the washing department and dressing room, it is additionally treated with antiseptics and fire retardants.
Floors
Work begins with cutting off the subfloor and organizing ventilation of the foundation. This will minimize condensation on subfloors. The floors in the steam room and washing area are made with a slight slope towards the sewer holes so that the water flows there by gravity.
The steam room has wooden floors. The optimal solution is a tongue and groove board. This allows water, even when they are tightly packed, to go into the sewer. And ensures high-quality drying.
If financial possibilities allow, then you can install a cork covering on top of them (the feet do not slip and it looks amazing).
The floor surface in the steam room should be raised above the ground higher than in the rest room and washing area.
In the washing room it is recommended to place porcelain tiles, on top of which there is a wooden slotted panel. This will not interfere with the drainage of water and will prevent slipping.
Characteristics and properties of foil
One of the most important characteristics of aluminum foil is its reflective ability - up to 97% of infrared rays. Continuous covering of the steam room with this material contributes to maximum heat retention, because IR rays are not absorbed by the walls, but are reflected back into the room. And even if the surface of the foil fades over time, this will have virtually no effect on the reflective properties.
Foil on the bathhouse ceiling - photo
In addition, it can withstand temperatures up to 300 °C and higher, depending on the brand, has a low specific gravity and does not emit compounds harmful to the body.
Bath foil
This material also has other important properties:
- resistance to ultraviolet radiation and corrosion;
- vapor tightness;
- plasticity;
- durability;
- moisture resistance.
Almost all the heat remains in the steam room, and the walls and the insulating layer under the foil are reliably protected from condensation. For greater efficiency, not only the walls, but also the ceiling are sheathed with foil, because steam and hot air first rise upward. Attaching it is not difficult, the main thing is to avoid its deformation during operation and not leave gaps between the panels.
Foil fastening
Foil is produced in rolls and sheets, the thickness is from 0.007 to 0.2 mm, the width of the tape is from 1 to 150 cm. Depending on the manufacturing method, it can be annealed (soft) and unannealed (hard), and this is indicated by the marking - the letters "M" and "T" respectively. Both types are suitable for thermal insulation of rooms. It is recommended to sheathe the steam room with foil from 30 to 300 microns thick.
Photos of the appearance of rolls of reflective insulation Megaspan FB for baths and saunas
Prices for aluminum foil for baths
aluminum foil for bath
What is the purpose of foil?
To achieve effective energy saving in a bathhouse, you will need to not only insulate it, but also use reflective material in the form of a special foil film. Masters claim that it helps return up to 95% of the heat into the room.
The result is that fuel for the stove is saved and the duration of the fire is reduced.
For baths, aluminum foil with a thickness of 30–300 microns is used. It is used in combination with other insulation or is already fixed as its top layer.
Therefore, before covering, they first attach insulating material to the walls and ceiling, thanks to which the heat does not escape beyond the bathhouse. An insulated steam room heats up faster and retains heat longer.
The following are the advantages of foil:
- It acts as a vapor barrier and blocks the access of moisture to the insulation. The generated steam remains on the walls of the steam room.
- Its service life exceeds 50 years. Wooden elements will begin to rot faster than the foil layer will deteriorate.
- Excellent sound insulation. Foil can absorb up to 70% of all sounds and noise.
- Fireproof raw materials. Does not burn. It will become an obstacle to the spread of fire.
- Bathrooms warm up faster and take longer to cool down.
- If you fix the insulation with a foil layer, then the foil will prevent it from falling off.
Among the disadvantages, the following should be noted:
When there is a difference in temperature outside and indoors, condensation appears on the surface of the material. It is important to leave a gap for ventilation before covering. If this is not done, the resulting condensate will begin to be absorbed into the sheathing, which will lead to rotting of the lining. Foil has poor throughput
As users say, she is not breathing. Therefore, the rooms must have good ventilation, both forced and natural (windows, doors). Aluminum particles accumulate in the lungs, causing various respiratory diseases. But if you use the sauna periodically, the risk of harm to health is minimal.
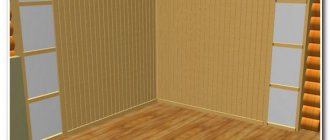
How to line the inside correctly if the bathhouse is made of bricks or blocks
Brick buildings are the coldest, blocks made of foam concrete are still better thermally insulated, but in general both of them need additional thermal insulation, so there is no option when you simply make a sheathing on a brick wall and start installing lining on it. Because it would take a very long time to heat such a bathhouse.
Therefore, it is possible to properly sheathe the inside of a brick bathhouse with clapboard only on top of a thick (depending on the cold of your area) layer of insulation. Since mineral wool is most often used, it is worth proceeding from its popularity. Below we will give an example of the entire “pie”, with insulation and lathing for the lining in the bathhouse.
Why insulate a bathhouse?
Those who do not understand construction, but try to build a bathhouse themselves, often try to save on insulation and do not insulate the bathhouse at all. What for? It will warm up anyway, and during construction all the cracks were sealed... However, this is a fundamentally wrong opinion, and there are several reasons for this.
So, firstly, the bathhouse will still shrink after construction. As a result, cracks will appear that will certainly not help retain heat inside. And heat loss can be impressive. And this will increase fuel consumption during kindling.
An insulated sauna will retain heat better
And in general, an uninsulated bathhouse takes quite a long time to warm up and cools down very quickly, especially in winter. And insulation will allow you to save a lot of money on fuel and quickly get a steam room ready for use.
By the way, it is recommended to insulate the bathhouse both outside and inside. Then the result of these measures will be as efficient as possible, and heating costs will be minimal.
How to calculate the amount of material
To calculate the lining, you can use the online calculator
The simplest option for calculating the amount of material required for lining and insulating a bathhouse is based on the area of the premises. You will need to measure the height, width and length of the rooms.
The area is calculated using the formula S=2HL+2HD, where:
- H – height;
- L – length;
- D – wall width.
The area of existing window and door openings is subtracted from the result. The area of the ceiling is calculated separately - its length and width are multiplied.
You can calculate the amount of lining in square meters manually or using an online calculator. It is worth adding 15% to the received quantity for a reserve in case of damage to the lamellas.
Required tools and materials
To carry out the work, a significant amount of tools and materials will be required.
List of necessary tools and materials for sauna cladding
| Tool | Materials |
| Gasoline or electric saw | Bar 20x20 mm and 30x30 mm |
| Drill or hammer drill | Roll or piece insulation |
| Screwdriver | Kleimers |
| Axe | Nails and screws |
| Plane | Polyurethane foam |
| Hammer | Tape measure or laser level |
| Doboynik | Construction pencil |
| Clamps and Clamps | Ladder |
| Construction stapler | Workwear set |
Criterias of choice
When choosing insulation, you need to consider a number of factors:
- To secure it to a wooden frame, it is better to choose foil with a backing. You can make it yourself from mineral wool, foamed polyethylene, or kraft paper.
- The material must withstand heating up to at least 100°C.
- On the packaging you can read what thermal radiation the foil insulation will reflect. The indicator must be at least 95%.
- The material must be durable.
- The foil and substrate should not emit harmful substances when heated strongly.
Advantages and disadvantages
Advantages:
- environmental cleanliness;
- high reflectivity;
- ease of installation;
- resistance to fungi and mold.
The main disadvantage is low mechanical strength. You need to work with it carefully so as not to damage it.
Sheathing device
Before lining the inside of the bathhouse with wooden clapboards, install the sheathing on the ceiling.
The first rail is attached at a distance of at least 10 cm from the wall. To protect against cracking, pre-drill holes in the slats for self-tapping screws. Taking into account the thickness of the counter-lattice bar is 20 mm and the sheathing bar is 30 mm, self-tapping screws of at least 7 cm in length will be required to fasten the sheathing.
The second rail is attached at a distance of 45-60 cm parallel to the previously installed bar. Work continues until the last rail is installed. When installing the sheathing, maintain a gap of 10 cm between the bars and the wall.
During the work, constant monitoring is carried out over the parallelism and verticality of the fastening of the slats. To do this, use a plumb line, a laser level and a stretched fishing line or cord. Identified deviations are eliminated by driving in wooden wedges.
To reduce the height of the room, metal hangers are used. They are screwed to the ceiling with long self-tapping screws. Wooden sheathing bars are attached to the installed hangers.
After completing the lathing on the ceiling, they begin to assemble the frame on the walls. The assembly of the sheathing begins in the corners of the room. The following slats are fixed in places where window and door openings are installed.
To speed up the work, use a pneumatic tool for driving nails and staples. To increase the strength of the fastening, they are hammered in from top to bottom at an angle of 30-45°.
After installing the vertical bars, they proceed to installing the horizontal slats. Holes for self-tapping screws are pre-drilled in the bars.
The first rail is attached to the top with a distance of 10 cm from the ceiling. The correct position of the slats is checked by level. The remaining horizontal slats are fixed in uniform increments of 40-50 cm along the entire height of the wall.
These works are carried out in rooms with high temperatures (steam room, sauna). In other rooms, thermal insulation and vapor barrier are not installed.
Before sheathing the inside of the bathhouse with clapboard, the lathing in such rooms is carried out on hangers. These elements are attached to the wall of the log house using long self-tapping screws. Sheathing bars are attached to the hangers. A gap of 5-10 cm is provided between the sheathing bars and the wall for ventilation.
When covering new baths, take into account the possibility of grate shrinkage. For this purpose, special hangers with an extended gap at the installation site of the self-tapping screw are used.
The installed sheathing is coated with antiseptic and fire-fighting compounds. After treatment with chemical compounds, the lathing is left to dry for several days.
After completing the entire complex of work, the bathhouse is heated to a temperature of 80-100 ° C. Exposure to high temperatures helps to detect places with peeling tape. A hot heated bath allows you to check the operation of the insulation and vapor barrier in the “working” mode.
After preparing the working tools and all the necessary materials, they begin to line the inside of the bathhouse with clapboard.
Step-by-step installation instructions
Of course, not all those who set out to create a bathhouse have a clear idea of how to cover a steam room with clapboard. Therefore, it would be logical to present detailed instructions compiled by experienced craftsmen.
So, now there are four main methods of fastening the lining.
Method one
The proposed method will ensure high-quality and fastest possible lining of the steam room. In addition, the use of this method will make it possible in the future to dismantle the lining without significant effort if, for example, some part of the material is damaged or deteriorated.
- The next panel is attached to a special groove fixed on the base surface of the panel;
- Special clamps (clasps) are placed on the inner protrusion;
- These clips are secured to the sheathing with galvanized nails or screws;
- Fastening the panels can only be done by completely fixing the adjacent elements;
- If necessary, the last of the mounted panels is trimmed and fastened in the same way as the previous ones.
Second method
This method is most convenient for those who decide to do the installation themselves; in addition, it is the most budget option.
- This method involves driving nails through a groove into the fastening strips;
- The caps are recessed using a hammer so that they do not create obstacles when installing subsequent panels.
Professional advice: it is more convenient and effective to make precise and infrequent blows with a hammer, and not to make frequent blows, as inexperienced, novice builders do.
The main disadvantage of this method is the large percentage of material damage that occurs due to inaccurate or very strong impacts.
Third method
This method is usually used when installing lining on seats and shelves:
- A hole is drilled in the panel for the screw head (the depth of the hole should be approximately equal to half the thickness of the panel);
- Then screws are screwed into the board;
- The holes made are closed with a pin made of wood;
- Then the surface is sanded. This method is convenient to use when installing elements completing the structure where fasteners are open.
If you still have questions, watch the training video at the end of the article. This material will help you understand the nuances of the method in more detail.
Fourth method
This method is suitable for installing exclusively old-type panels:
- Holes for screws are drilled in the panels;
- The chamfer of the hole is countersunk to fit the screw heads;
- The screws are screwed into the board flush with the panel.
We briefly introduced you to the installation of lining. Based on the information provided, you can answer basic questions on this topic. For example, which lining is better for a steam room and in what case. And everything else, of course, will determine your desire to do quality work.
Methods for attaching lining to the wall
Listed below are the 5 main ways to attach lining to a wall.
The simplest and most convenient way that does not require specialization. Installation in progress
using small nails and clamps
. In this way, it is permissible to fasten only light lining, because the grips are not capable of holding a lot of weight.
A clamp is inserted into the lining, which is attached to the guide rail using a nail, screw or self-tapping screw. A rail is inserted into the groove and each subsequent rail is fastened in the same way. They must be fastened tightly enough so that there are no gaps. If the last row of lining does not fit entirely, and a large gap remains, then the top row must be cut to size and secured along the guides.
Using nails
. It may seem that this method is simpler than the previous one, but in practice chips, bruises and other damage to the material often occur. In addition, the process of performing the work is not very convenient and labor-intensive. Nails are driven in every 25 - 30 cm. To install a two-meter long slats, 7 or 8 nails are needed.
First, the panel is marked in the places where the nails will be driven in. Then, at an angle of 45 degrees, the nails are nailed into the edge with the groove. The panel is applied to the wall and then you can drive in nails. After installation, the caps are recessed so that the next panel of the lining easily fits into the groove. After this, the next panel is installed using a similar method.
This installation method cannot be used for thin lining, as it will break off.
This mounting option is used
for old-style lining
. Cladding with eurolining is somewhat different from installing older lining. The design of the product consists of fastening with screws. To avoid splitting the wood, a hole is drilled in the places where the screw is screwed in. The drill should be smaller in diameter than the screw. The hole location is countersunk to recess the screw head. The fasteners are screwed in as far as possible using a screwdriver. The caps will not be visible because they are covered by the next row of panels.
Installation of lining
using a stapler and construction staples
. The bracket is driven into the groove at an angle of 45 degrees. You need to have a stapler that can push the staple tightly in until it stops. In this case, the fasteners will in no way interfere with the installation of the next row of panels.
The fifth method of fastening is most often used
for finishing a sauna or bathhouse
. Screws act as fasteners. A hole is drilled at the installation sites and the fasteners are screwed in using a screwdriver. The screws are tightened to the point where the head is significantly recessed. To hide the heads of the screws, a plug is driven into the hole where it is screwed in.
Over time, under the influence of high temperatures, the wood may dry out a little, and the locations of the plugs will appear. To prevent this problem, special compounds must be applied over the plugs.
Mounting options
Next, you need to choose how the lining will be attached. The planks are connected to each other by grooves, but they must also be attached to the sheathing.
You can do this in 2 ways:
- Using a clamper. This is a mounting bracket with 2-3 holes. It is put on the lining and fixed with nails, screws or staples. Installation begins from the center of the wall. Its main advantage is that the kleimer does not damage the lining.
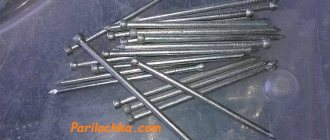
- Using self-tapping screws or nails: the first ones are screwed in at an angle, the second ones are driven in. To avoid rust, it is better to choose galvanized or copper nails. Unfortunately, the metal will begin to rust, and leaks may also appear at the fastening sites.
Claymer for liningSource mainavi.ru
You can easily see how to properly line a bathhouse with clapboard from the inside with your own hands. The lining can be mounted horizontally or vertically. The first method is more suitable for saunas, where the humidity is low, the second - for Russian baths, where there is high humidity.
Ceiling installation of lining
What surface do you start lining the bathhouse with? Installation starts from the ceiling. Firstly, it is easier to work in this sequence. Secondly, they say that the material is used more economically. In this case, the best type of fastener is clamps, since it is quite difficult to correctly and accurately make hidden fastening of this horizontal plane with nails or self-tapping screws.
- First, the sheathing is installed, then a vapor barrier is stapled to the ceiling beams: the minimum overlap is 150 mm, the joints are taped. Next, install a counter-lattice with a pitch of 400 mm, fix the slats with long (galvanized) self-tapping screws.
- Insulation is placed between them, for example, basalt foil wool. The width of the slabs is the pitch of the frame, to which 10-20 mm is added for installation in the spacer. Then the insulation is covered with a waterproofing material, the overlap is 150 mm. The material is secured with a stapler, and the joints are sealed with self-adhesive tape.
- The frame is made again on the installed waterproofing. To do this, thin slats are attached with self-tapping screws, their thickness is 20 mm. These elements should play three roles at once - additionally fix the top layers, create a ventilation gap, and serve as a frame for the lining.
- The first lamella is mounted perpendicular to the frame slats, it is nailed in the same way with a spike away from itself, installed flush against the wall, and secured with clamps. The following panels are fixed in the same way. The last lamella is cut to width, inserted with a tenon, and nailed through the front surface.
To hide the place, the nail is nailed as close to the wall as possible, then it can be easily hidden under the ceiling plinth. However, the hole can be successfully camouflaged with the same homemade “sawdust” glue.
How to cover a bathhouse with clapboard: stages
The first stages are counting, purchasing materials and preparing tools. The purchased lining must be brought to the bathhouse in advance, removed from the packaging, and allowed to rest for several days for acclimatization. If the panels are not treated during production, then you should purchase special mixtures called “bath impregnations”; they already contain fire retardants and antiseptics.
Lathing and insulation
For the frame, timber is used, the thickness of which is slightly greater than that of the selected insulation. For baths, mineral wool is usually used: the basalt variety is more praised. The lathing is made perpendicular to the direction of the lining: for horizontal installation of lamellas, the timber is attached vertically, and vice versa. A prerequisite is to carry out all “sheathing” work with a level and plumb line in hand.
The pitch of the frame elements is 450-550 mm. If the walls are uneven, elements cut from the same material or another, but quite dense, are placed under the beams. The sheathing is secured with self-tapping screws with plastic dowels (for brick or stone) or galvanized self-tapping screws (for wood). Insulation is placed between the elements. The main condition to ensure that there are no cold bridges in the bathhouse is that there are no gaps between the materials. If there is no need for insulation, this step is skipped.
Ventilation and vapor barrier device
To ensure high-quality ventilation, holes are made in the walls and insulation: one under the ceiling, the second at a short distance from the floor. These vents are covered with mesh to protect the bathhouse from debris.
Aluminum foil, plastic film or glassine (not for steam rooms) are used as a vapor barrier. The strips are fixed with a furniture stapler, the minimum overlap is 50 mm. To ensure greater reliability of the vapor barrier layer, the joints are glued with wide strips of adhesive tape or adhesive tape.
Another vapor barrier option is to use heat-reflecting foil material. The best type for a bath is polymer films coated with aluminum (for example, Izospan). They are durable, not afraid of corrosion, and can withstand high temperatures. In this case, the joints are sealed with self-adhesive aluminum tape.
Methods for installing lining on walls
Covering a bathhouse with clapboard is often done using a hidden method. It gives a chance for reliable installation without damage to the front side of the lamellas, and minimizes the possibility of contact with moisture, which threatens the fasteners with corrosion. Galvanized nails, self-tapping screws or clamp clips can act as fastenings.
Self-tapping screws, nails
In the first two methods, the fasteners are “driven” at an angle of 45° into the groove (tenon) of the lamellas, but the holes are pre-drilled: their diameter is slightly smaller than that of nails or self-tapping screws
The operation itself is quite demanding on the master, since any carelessness can lead to defects
Clippers with nails
Installation using clamps is simpler and safer for lining. This bracket is put on the tenon, then it is attached to the sheathing beam with two or three self-tapping screws (nails, a construction stapler): first in the middle, then, after checking the verticality (horizontalness), along the edges. Do the same with the following strips.
End-to-end lazy method
How to cover a bathhouse with clapboard faster, but no less efficiently? Conventional installation is possible - through, but in this case the nails are recessed quite deeply into the wood in which holes are pre-drilled. The hammering operation is completed with a hammer. “Crime scenes” against the lining are closed with plugs cut from wood. Or with homemade glue, consisting of the smallest sawdust and PVA.
Horizontal cladding begins from the bottom, installing the first element with the ridge up. Vertical installation - from the most problematic corner with difficult access. The reason for this choice is the last lamella, which cannot be adjusted in length or width in cramped conditions. The first and last elements are nailed into the timber, and the caps are deepened with a hammer.
Step by step guide
To do the work correctly, it is important to observe some nuances. Before proceeding directly to the sheathing, wooden planks are fixed along the vertical surface
Subsequently, they will play the role of a frame for attaching the material. A layer of insulation is placed between them. Thermal insulation is laid, aluminum tape must be glued at the joints
Before proceeding directly to the sheathing, wooden planks are fixed along the vertical surface. Subsequently, they will play the role of a frame for attaching the material. A layer of insulation is placed between them. Thermal insulation is laid; aluminum tape must be placed at the joints.
You can attach the lining to the foil with a fifteen-centimeter air gap. This step is necessary for efficient heat transfer.
Thanks to the air gap, the thermal conductivity of aluminum decreases; infrared rays hitting the foil sheet will reflect heat into the steam room.
You can also consider more detailed instructions for covering.
Log steam room
If the walls are built from logs, covering with foil is pointless. In this case, the quality of caulking is much more important. The thermal insulation layer on the log house will not play a role. In a log steam room, foil may only be used to cover the ceiling surface. In addition, aluminum foil is used to decorate the walls around the heating device. This way the heat will be reflected into the room rather than heating up the back wall.
When working with the ceiling, the foil is attached with the reflective layer down, overlapping, extending up to 5 centimeters onto the walls
It is important to seal the joints with special tape. The work should be done efficiently, without creating loopholes for steam
If desired, cover the top of the foil with clapboard, but you can leave it like that.
Brick steam room
When using frame technology or brick, it is important to follow a step-by-step guide, which includes covering the entire area of the ceiling and walls with material. Creates a thermos effect
- The master marks the wall onto which the sheathing bars are attached, the thickness of which must correspond to the thickness of the insulating layer, since it will be laid between the beams. If the lining is subsequently attached in a vertical position, the planks are secured in the same way.
- The width between the beams should be equal to the width of the insulation product. If there is ventilation or windows on the surface, bars are attached around them, onto which the foil will subsequently be attached.
- The insulation material is placed.
- It is covered with foil and secured to the sheathing with a construction stapler. Material with a small thickness should be laid with an overlap, but if it is thick, the material is attached end-to-end. Around windows and ventilation, the work is done more carefully.
- The joints are covered with metallized tape. They must be hermetically sealed.
- Slats with a thickness of about 25 mm and a width of 4 cm are attached to the sheathing. They will act as a retainer for the foil with insulation, create a gap and become a support for further installation of the lining.
- At the final stage, the lining is attached to the sheathing. When attaching the planks horizontally, you need to start from the bottom; they are placed with the grooves down. For vertical fastening, installation is performed from the corner, leveling the first element.
Work with the ceiling is done in the same way. You need to fill the baseboard around the perimeter.
Useful tips
The cheapest pine wood can be used to build a dressing room, a relaxation room, but not a steam room. Finishing with wooden clapboard is expensive; to reduce costs, experts give some advice:
Use slats of short length (up to 1.5 m), which are cheaper, connecting them on a joining strip. Hardwood boards should be installed only in the steam room; the remaining rooms should be sheathed with budget-priced softwood lumber. Combine types of lining in a steam room, where the quality of the material is important, install extra-class slats, and use class B in other rooms. Perform hidden fastening of the lining by driving a nail at an angle of 45° into a groove or tenon. This will prevent metal contact with water and slow down corrosion processes. Insulation during the construction phase seems like an extra expense, but it will quickly pay for itself thanks to fuel savings. A step-by-step plan will allow you to complete all the work yourself
A step-by-step plan will allow you to complete all the work yourself.
Finishing of the washing compartment. Wood or plastic
A real bathhouse must have a washing compartment - a functionally independent room in which they take a shower and complete the effect of cleaning the skin pores, washing away dirt and dead particles from it. Almost any tree without special treatment is powerless to withstand the destructive effects of water: rot appears, the structure changes, and the massif is destroyed. It is possible to use moisture-resistant larch, but it is very expensive.
Treatment of cheaper conifers (spruce, pine) with special compounds will partially slow down the effect of high humidity, but no more. It is much easier to replace wood with environmentally friendly plastic, PVC lining. The price gain is striking, and the benefit is obvious: polymers are not afraid of contact with moisture.
All that remains is to provide a vapor barrier layer under the PVC and special ventilation gaps. To do this, a thin sheathing of pine beams is sequentially constructed, ordinary polyethylene is laid on it, and at the end - plastic.
Suitable wood species
Wood for lining should not contain a lot of resinous substances. When choosing the type of wood for lining a bathhouse with lining, take into account the purpose of the room. Coniferous boards are not recommended for cladding a steam room. Due to the high temperature, they release resin, which causes burns upon tactile contact, and aromatic components, which in high concentrations provoke an allergic reaction. Steam room decoration uses hardwood:
- Linden - the low heat capacity of lumber, the pleasant aroma and golden hue of the boards ensured the popularity of lining when finishing saunas. The wood is durable, easy to process, and lasts a long time in extreme conditions.
- Alder - the lamellas have a reddish tint, and when heated, they release healing tannins. The wood dries quickly and is resistant to moisture. It has a soft structure with a small number of knots. One of the advantages is the affordable cost.
- Aspen is a light-colored species that does not deform from moisture or temperature fluctuations. The lining heats up slightly and is safe for use in a steam room.
After cladding, the wood is coated with moisture-repellent compounds. For other rooms, lining the inside of the bathhouse with clapboard can be done with any type of wood:
- Larch is the wood that is most resistant to moisture, has a solid structure and a beautiful pattern. Due to its strength it is difficult to process.
- Pine – has a pleasant aroma and is not subject to rotting. The material is strong and durable, suitable for cladding dressing rooms and rest rooms.
- Spruce board is distinguished by a small number of knots and resin, the light shade does not darken over time. Advantage – low cost.
- Cedar is an expensive reddish-brown material that emits a pleasant aroma with medicinal properties. Wood is not afraid of moisture and has high thermal insulation characteristics.
Types of lining and classification
Wood paneling
coniferous species
- Pine. The most common wood for lining. It has a beautiful appearance and low cost. Over time, a pine product begins to darken.
- Spruce. Northern spruce is used to make the lining. It is more durable and has a beautiful appearance. Just like pine darkens over time.
- Canadian cedar is used to finish the bathhouse. It is not cheap, but has excellent technical characteristics and a beautiful appearance.
Wood paneling
hardwood
- Oak. Beautiful and durable material, easy to process, expensive.
- Aspen. Beautiful light color. Has thermal insulation properties. Well suited for a bath.
- Linden. It is very suitable for finishing a bath, because the material does not heat up much and emits a pleasant aroma.
- Alder. In a room with high temperatures, the material does not heat up. It also hardly dries out or warps.
- Abash. African oak has high strength and softness. Such wood does not shrink, warp or heat up. Has a beautiful appearance. The cost of abasha is quite high.
Most often, the interior lining of a bathhouse with clapboard is made of hardwood. The temperature in the bathhouse is high and under its influence, coniferous wood releases resins. Hardwoods have virtually no resin compounds, so no resin is released.
The type of wood from which the lining is made is also of great importance. There are 4 main varieties:
- “Extra” is a product made from the highest grade wood without a core or flaw.
- “A” - one live knot, two resin pockets and two blind cracks are allowed per one and a half meters of the length of the product.
- “B” - the presence of four knots (up to 2 cm) is not prohibited, two of which must be captive. Two resin pockets are also possible, one and a half meters long for the product.
- “C” - lining classified in this class allows two captive knots with a diameter of 2.5 cm, non-through cracks of no more than 5% of the length, two resin pockets up to 5 cm long and up to 5 mm wide, mechanical damage up to 6% in diameter, a contrasting spot with a diameter up to 15 cm, as well as other spots and stripes totaling up to 5% of the entire surface of the product.
Also, the lining is divided by type of profile:
- Eurolining.
- Soft-line.
- Calm.
- Imitation of timber.
- Block house (imitation logs).
- Landhaus.
- American.
How to properly cover the walls of a room with your own hands?
Frame installation
Before sheathing, sheathing is installed on the wall. This is done like this:
- When the wall and timber for installation are processed, defects are eliminated, the verticality of the surfaces is checked, reference lines are drawn on the wall along which installation will take place. This can be done with a simple pencil (preferably a construction pencil with a clear, large lead) or a permanent marker that can be written on any surface.
- The bars are placed along the lines.
If they are too long, they are sawed down to the required length; if they are too short, the joints of two parts of one beam are marked. The distance between the vertical bars should be from 40 to 50 cm. A distance of one and a half to two centimeters should be maintained between the floor, ceiling and slats. This reserve is needed to compensate for possible shrinkage of the house. - Waterproofing is installed.
This is necessary for walls in damp rooms, for example, if the internal surfaces of a bathhouse are finished with thin wood, or if the dew point is poorly located and you need to protect the interior from fogging (how to line a bathhouse with clapboard?). To do this, the wall with beams is finished with construction foil, including the beam itself. For fastening, short sections are used, which are sewn on with self-tapping screws or dowels. - An additional sealing beam is installed under the ceiling and in the baseboard area. Its task is to ensure complete isolation of the inter-wall space.
- The beams are fixed to the base with long nails (for wooden surfaces), screws or dowels driven into prepared holes (if the base is concrete or brick).
Important If the surface ends up being uneven, you can use spacers made of plywood or thin boards at the fastening points. This is necessary so that the beams on which the material will be sewn are strictly even.
Securing wooden boards
You can attach the board to the sheathing in the following ways:
- Finishing small carnations. The method is quite reliable, not too noticeable in appearance (the caps are quite small), but not too strong.
- Self-tapping screws and a screwdriver.
- Hidden nails without heads. They can be driven in at an angle, masking the attachment points.
- Construction clips (claymers). First, the clips are attached to the lining, and then, using holes and a construction stapler, to the sheathing. If there is no stapler, the clips can be attached with small screws or nails. The advantage of gluers is that there are no traces of fasteners left on the outer surface: they are all hidden in the grooves.
When the first strip is secured, the subsequent strips are placed on it, taking into account both the texture of the wood and the tongue-and-groove joint.
It is important to ensure that the dimensions are adjusted to the nearest millimeter. If mounting on nails or screws was used, the fastener heads are masked with putty
When installation is completed, the coating can be subjected to additional processing. For this purpose, mastic (synthetic or wax-oil), varnishes (acrylic is best - safe, high-quality) or other means are used.
Advice If the buyer is not satisfied with the color or texture, you can use stain, tinting the material to the desired color. The use of paints is undesirable: the finish may warp and lose its quality.
Here
For the first and last layers of lining, it is better to remove the grooves and tenons. The board is sawn lengthwise in width so that the remaining mass completely covers the gap in the wall mass, and the tenons and grooves remain in the remote part.
this materialhere
Video description
In the video, the master talks about how he assembled the interior of the bathhouse from lining and stone:
To decorate living rooms with windows facing south, designers recommend choosing lining in dark shades of brown.
To make it look good, it is important to have good artificial lighting; experts advise simply whitewashing and painting the ceilings. If you leave one of the walls in the room painted and cover the remaining three with wood, the design will only benefit from this
On the contrary, you can cover only one accent wall with clapboard, and wallpaper the other three. It will also look very good.
An interesting option for a combined design Source 1povagonke.ru
If you need to use lining to decorate a bedroom or kitchen, it is better to use light-colored lining for painting. If you paint it on top with white or light gray translucent enamel, you will get a cozy space. Light textiles with spot bright accents (tablecloths, bedspreads) go well with it.
In the bedroom, designers recommend finishing the wall with clapboard, next to which the head of the bed will then be placed. For this purpose, lining of any shape, any color is suitable. The main thing is that it is then linked to the overall range of interior content and decor.