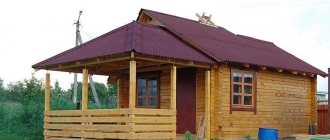
I decided to consult with my neighbor in the country about what would be the best
interior decoration of the bathhouse: unedged boards, clapboard or something else. The main criteria were a modest budget, seasonal visits and heating the steam room to a relatively low temperature. And, of course, there was a desire to do it well, but with a creative approach. As a result of discussions, the first option was chosen. I decided to share with you how the event took place.
Source kremenki-gorod.ru
How to steam?
The order of procedures in the steam room is determined by its arrangement. If the showers are located in front of the steam room, then first you need to wash yourself in them before entering the main room. In the dressing room you can undress, relax and have a massage. Inside the steam room, at first there is a relatively average temperature, which can rise to 90-120 degrees, depending on the type of bathhouse and the desires of the bathers.
The average level of air humidity contributes to the rapid heating of the room when receiving the next portion of steam. A person can stay in a Roman or Turkish bath for several hours due to low air humidity, but in a Russian bath the temperature is off the charts. It is recommended for an adult to stay inside a hot steam room for a maximum of 20 minutes, without danger to health, and a beginner should get used to it gradually, making several visits for 5-10 minutes.
With the help of a bath broom, a healing massage is performed and joint pain is treated. After treatment with a broom and several visits to the steam room with a contrast shower, the skin becomes clean, silky to the touch and more elastic. Intense sweating helps remove many harmful and toxic substances from the body, which makes it easier for the kidneys.
In healthy middle-aged people, variable exposure to contrasting temperatures has a good effect on the functioning of the respiratory tract and cardiovascular system. It is harmful to visit a hot steam room for people with heart disease and a tendency to hypertension.
Projects of small-sized baths
What is cheaper to build a bathhouse depends on its size and purpose. A 1.5 m² Turkish bath or sauna is required for 1 person. And given the space for the stoves, even a double Turkish bath, where users sit on benches, takes up at least 3 m².
- 3x3 is the lowest possible option. There's no point in doing it with bricks. A barrel sauna or building is knocked off the boards. There is no bathroom here.
- 4x3 - in such a steam room you can put wider benches or arrange a lying shelf.
- 4x4 - there is space for laundry. Often, to do this, they simply set aside an area away from the stove, where they place a shower with a watering can. In the steam room, you can get by with a couple of basins with cold water and a ladle.
- 4x5 - laundry room can be fenced. You will still have to undress on the street under the canopy.
- 6x4 is the most “spacious” of compact saunas. You can create a vestibule of 1.5 m², where things will remain. Its usefulness lies not only in this: the vestibule prevents heat dissipation when the door is opened.
A bathhouse at a summer cottage can be built literally from nothing: planed boards, wood waste, gas blocks, slabs. You can also use improvised means: a barrel, a removable machine, polycarbonate for a greenhouse. It is important to follow building and safety regulations.
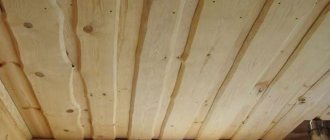
Bathhouse made from unedged boards: how to prepare the material
A little was said about drying above. But besides this, cheapness results in additional work for the buyer - before using it, the board must be cleared of bark, planed, and then sanded. If desired, also give the edge a wavy shape.
All this requires tools. If there are no special means - manual, if there are - electric. But the purchase of the latter is cost-effective only for permanent, and not one-time work with wood.
To remove wane
There are many ways to remove bark/wane, each of which seems easy and effective to different people.
An old-fashioned method that is still relevant today is to use a stapler. You can buy this device or make it yourself.
Photo source: Wikipedia
You can use a lawn mower if you have one. There are actually many ways, people try to use what they have at hand. An electric planer can also be useful, but if the task is only to remove the bark and not plan the tree, then depressions and curvature will become a problem for this tool.
You can use an angle grinder with a brush disk or a corroder disk, or an AlphaDisk. There are different types of angle grinders, there are reports that the machine at 9500 rpm did an excellent job, but the brush quickly broke down, and during the work it raised such dust that it was necessary to rely solely on hearing - the sound of the processed bark and wood is different.
The task is simplified by steaming the boards - impregnating them with fire-bioprotection (for example) and wrapping them in polyethylene for a day and a half. After this, the bark can be removed much easier, but it needs to be dried, and this board cannot be used everywhere in the bathhouse (it cannot be used in the steam room). For exterior decoration - just right.
It’s also a good idea to immediately think about how to simplify feeding and holding the board in the desired position. Perhaps you can come up with your own device that will fix the board with the ash end facing up.
And, of course, no one bothers you to use an ax to remove the wane. Or another sharp tool - maybe someone will find it convenient to do this with a pointed shovel.
Let's supplement our story with several videos that demonstrate the process of removing wane:
— here the author removes the wane, plans and sands the boards using professional equipment
— a fascinating example of how a brush cutter works
- grinder and cutting wheel for wood
For planing
For planing you need a workbench and a plane. If you have one, use an electric planer. The easiest way, of course, is to pass the board through a planer. But it is unlikely that its owners will become interested in the technology of creating a bathhouse from unedged boards - their own experience is enough
For grinding
The volume of finishing boards is not small, so there can be no talk of any manual sander here. Need electric. You should start with sandpaper, say 80, then move to 120 grit. In principle, this should be enough to get a smooth surface.
How to further protect the casing from the negative effects of moisture and high temperatures?
Additional protection of wood can be provided only by applying decorative and protective compounds that have increased adhesion and resistance to sudden temperature changes. There are the following options for finishing the interior lining of the bath:
- Borma or Adler oil, which preserves the natural color of wood and fibrous pattern, due to deep penetration into the material, prevents the appearance of rot and mold, strengthens the surface layers, but preserves the natural properties of the material, is also applied to solid wood, for example, logs to prevent them from cracking or delamination;
- Biofa wax, which forms a smooth and even layer on the surface, but not slippery, allows you to preserve the decorative properties of the material and provide reliable protection from high humidity and high temperatures, helps protect log houses from overdrying, waterlogging and the appearance of rot.
External finishing of a bathhouse made of logs or timber can be made with the following types of compositions:
- impregnations and antiseptics Wolman, Perma-Chink, Adler, Remmers, which can protect wood from negative climatic conditions, pests and sudden temperature changes, improve adhesion for applying decorative compounds and extend the service life of a log house or bathhouse several times;
- decorative wax enamel Borma, which gives the surface rich and contrasting shades, forms a durable but plastic protective layer and protects the material from climatic influences and mechanical damage, in addition, it hides minor surface imperfections;
- Borma, LOBA, Remmers, Watco, ZAR oil, which can be deeply absorbed into the pores of the material, protecting it from pests and moisture, strengthening the surface layers and preserving the natural texture and pattern of the fibers;
- acrylic or polyurethane varnish Borma or Varathane, which have excellent adhesion to all types of wood, protecting the wood from ultraviolet radiation, temperature changes, mold and pests;
- Remmers, Borma, Saicos glaze, which allows you to give the surface unique color shades and emphasize the natural texture and pattern of the fibers.
Answers to important questions
Is it possible to sheathe the inside of a bathhouse with an OSB board?
OSB board is plywood that contains harmful substances such as phenol, ammonia and formaldehyde. At elevated temperatures and humidity, they begin to be released, which can result in severe poisoning. Therefore, OSB boards and washable boards are not suitable for arranging a steam room. But you can line the dressing room with them.
How to treat a log bathhouse outside and inside
To protect the bathhouse log from the effects of external negative factors, it is necessary to treat it with the following special impregnations:
- Antiseptic - protects against moisture, fungus and mold. For external treatment, you need to choose antiseptics that are difficult to wash out. And for the inside - easy to wash.
- Fire retardants - protect against fire. Can be used both inside and outside.
- Complex universal impregnations.
- Copper sulfate.
Is it possible to use siding to decorate a bathhouse?
Siding is used for exterior work. The plastic from which the panels are made is completely inappropriate for arranging the inside of bath rooms.
How to paint the inside of a bathhouse
The choice of possible interior covering for a village bathhouse will depend on the type of room. The steam room can be painted with water-soluble varnishes and paints.
In the washing room it is better to use types of paints that are resistant to moisture (silicone, acrylic).
When painting the rest room and dressing room, it is better to give preference to water-soluble paints.
How to build a bathhouse from boards
When constructing buildings using frame technology, not only boards can be used, but also materials such as plywood or OSB (oriented strand board). The basic principles of construction depend on their choice.
But in addition to the sheathing, you will need materials for steam, hydro and thermal insulation. How to choose them?
Frame wall arrangement diagram
Selection of materials
- For the frame, you can take well-dried timber or boards with a cross-section of at least 50x100 mm.
- For external cladding - coniferous boards (pine, larch).
- For internal cladding - wood with low thermal conductivity (linden, aspen).
- When heated, the vapor barrier should not emit harmful substances or odors, so traditional roofing felt and roofing felt cannot be used. Stop your choice on modern vapor barrier films.
Basalt wool can be in rolls or sheets
If you decide to learn how to build a bathhouse with your own hands from boards, then keep in mind that the difference from construction from other materials lies only in the design of the walls. Although, as mentioned above, the foundation can also be lightweight - columnar.
Base trim
Installation of the bathhouse begins with the installation of a rigid base frame - the base for the frame. For it, use 15x15 cm timber or boards with a cross section of 50x100 (150) mm laid on edge in 2-3 rows. Before installation, they must be impregnated with antiseptic solutions.
Trimming of three rows of boards
The photo shows the herringbone end connection and sawn grooves. When working with timber, installing these elements will require more labor, experience and special tools (jigsaw, chainsaw).
After assembling the strapping, it is laid on the foundation support columns with gaskets made of roofing felt or roofing felt and leveled horizontally. If necessary, the level is raised using wooden pads or the required number of layers of roofing felt. The corners of the harness should rest on the posts, so do not make mistakes with the dimensions when making it.
Racks and top trim
After mounting and fastening the lower trim and making grooves in it, the racks are installed. The step between their axes is usually 60 cm; subsequently, it will be convenient to lay sheets of insulation for a bathhouse of the same width in these cells.
It is necessary to determine in advance the location and size of window and door openings in order to first install the framing and corner posts, then it will be easier to calculate the position of the intermediate ones.
To prevent the already mounted racks from falling while the others are being installed, they are additionally attached to the bottom trim with temporary jibs, while simultaneously checking the verticality.
At the upper ends of the racks, they are fastened together with a top strap, which is made from a fifty-fifty board laid flat.
Despite the apparent simplicity, the described work should be done very carefully in order to obtain right angles and maintain the vertical and horizontal level of the corresponding structural elements.
Insulation and sheathing
The instructions for the construction of frame baths require the following sequence to be followed when installing an insulating pie:
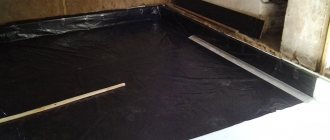
First, the outer cladding of the frame is done with boards. To give the structure rigidity, it is made in the horizontal direction. But the boards dry out over time and gaps may appear between them, so they should not be fastened end-to-end, and it is recommended to lay a layer of bathhouse waterproofing under the skin.
External cladding option - overlapping
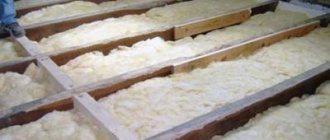
- The next stage is installation of insulation. It fits between vertical posts and does not require additional fastening, since the clean distance between them is slightly less than the width of the insulation, so it fits tightly in the cells.
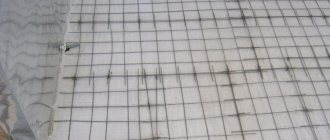
- The vapor barrier is installed on top of the insulation, close to it. For fastening, thin slats and a construction stapler with staples are used. The canvases are overlapped and must be taped with a special tape. It is necessary to seal all random holes with it, since the vapor barrier layer must be continuous.
Attach vapor barrier from bottom to top
The ceiling is installed in the same way, but to reduce heat loss, insulation is laid on it in two layers.
Required tools and materials
You can use any boards for the outer cladding; for the interior you need sanded lining
All materials for the bath ceiling are divided into rough and white. The former may be poorly processed, of low grade, and consist of scraps, but have sufficient strength or density. White must also satisfy aesthetic requirements.
Most often, a false ceiling is built in a bathhouse. It is expensive to implement, but its long service life and reliability fully compensate for this.
For the design you will need:
- timber for beams made of softwood with a cross-section of 50*50 mm no less;
- boards for external cladding - can be unedged, low grade;
- boards for interior decoration - edged, lining;
- vapor barrier membrane - it is better not to use polyethylene film in the steam room, but it is quite suitable for a dressing room or shower room;
- insulation – mineral or basalt wool; polyurethane foam is undesirable, it is flammable;
- waterproofing membranes;
- marking tool - square, tape measure, level;
- saw or hacksaw for wood;
- hammer and screwdriver or air gun.
You will need stationery: a pencil, scissors, a paper knife - it is easier for them to cut mineral wool.
Finishing the shower room
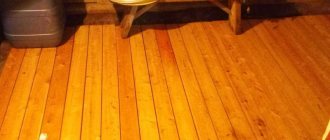
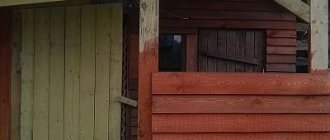
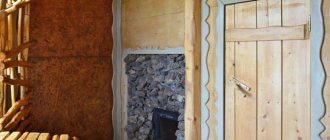
To decorate the washing area, you can use an unedged board. Despite its apparent simplicity, it looks original and has an aesthetic appearance. Proper cleaning and processing is very important. If you do not clean the surface of bark, you will still have to use protective impregnations and antiseptics. However, it is better to save such finishing material for the facade, and inside it is better to use linden terrace boards as a more attractive solution.
Tambours and rest rooms can be decorated with deciduous and coniferous wood in equal measure. The most popular are:
- oak;
- pine;
- aspen.
Such rocks are very durable and biologically inert. They are climatically resistant and mechanically strong. This material looks acceptable on all surfaces and planes. It is also worth emphasizing that for finishing showers, along with wood, you can use:
- tile;
- majolica;
- fiberglass wallpaper;
- a natural stone;
- decorative plaster.
Terrace boards are often laid on the floor - both “deck” and “corduroy”. The whole difference is related only to the appearance of the surface. They are identical in size. It is best if the board is made of larch. The resins it contains ideally stabilize the material and protect it from rotting.
An even more advanced and resistant material is thermowood. She can belong to any breed. Special processing guarantees almost “stone” hardness and a noble shade. Regardless of the chosen floor and wall covering, the need for it should be carefully calculated.
Wooden walls in a washing room can be protected with special paints and wax. This alone is enough to double the total time of use. Oil mixtures penetrate deeply into the tree and protect it from the inside. Several thin layers will reliably protect the structure from water. In addition to the usual generally accepted breeds, it is sometimes worth using expensive exotic abashi, which stands out for its original texture.
Black alder lasts a long time. Moreover, it is often noted that its aroma intensifies over time. This decision is also supported by the absence of a feeling of overheating. However, the usefulness is less than that of linden. And the cost is noticeably higher.
Ash is also a valuable species for washing. But he:
- will not darken;
- has a visually elegant texture;
- healing for ailments of the respiratory system.
Canadian cedar will be more expensive than almost all other species found. It is used only in elite bathhouses. The aroma of this tree is pleasant. It's easy to process
Another important advantage is the aesthetic appearance. You can save a lot by purchasing pine or spruce wood
The usual cost of lining from them does not exceed 300-400 rubles per square.
Nuances of constructing a frame summer bath
It is quite possible and convenient to install a frame-type wooden bathhouse with your own hands, which will be used only during the summer spring-autumn season. In addition, a competently and correctly assembled summer bathhouse made of boards with your own hands fulfills its intended purpose with the same success as a winter (insulated) building. If you subsequently invest a little more into it and thoroughly insulate the load-bearing structures, then the temporary flight structure made of boards can then be fully heated during the cold season.
- When selecting materials, purchase high-quality dried boards with a section of 5x10 cm or timber. At the same time, it is advisable to choose coniferous boards (for example, larch or pine) for the internal cladding, and linden or aspen for the external cladding, that is, wood with low thermal conductivity.
- Lay a vapor barrier using modern moisture-proof films (for example, foil), that is, the material should not subsequently release harmful substances and odors when the temperature inside the room increases.
- When carrying out thermal insulation work, use waterproof insulation. For example, basalt rolled wool, because Unlike other thermal insulation materials, it does not emit substances hazardous to human health when heated, and also does not burn.
In addition, before you start building a summer bathhouse on your country plot, in addition to the appropriate project, you need to choose a place for it where it will aesthetically combine with the appearance of other buildings and at the same time fully function.
- A pile foundation is being erected.
- The basement trim, that is, the floor in the bathhouse, is accordingly made from boards with your own hands, using the herringbone technology (in the end connection), and is also treated with antiseptic solutions.
- Walls (top frame) and other ceilings (windows, doors and interior walls) are similarly laid out using frame technology, that is, they are knocked together according to the intended design and covered with protective agents.
- Facing and other works on steam, hydro and thermal insulation are being carried out.
- Upon completion of construction, a standard roof is installed using a lightweight structure, which is made of the same boards as the bathhouse itself, laid with slings, and then, after insulation work, covered with roofing material, for example, corrugated sheeting.
Construction of a panel ceiling step by step
The three most common ways to make a ceiling in a bathhouse will provide the opportunity to choose the best option for the device. It’s easy to figure out the simple methods using the described diagrams; the complex panel type needs to be studied in detail.
Making shields is the main “catch”
To build a shield, you need a level platform; for this you need to level a piece of land or lay plywood. For convenience and control, you will need an even measuring rod and 3 templates 50 cm long.
Here's how the work is done:
- Two bars are laid parallel on a leveled plane, there should be 0.5 m between them. Templates will help to thoroughly check the distance at each point. The accuracy of the location is checked by perpendicular installation of the auxiliary rail.
- Boards are nailed perpendicular to the bars. The length of the nailed boards is 0.6 m. From each edge, the transversely laid board should “overhang” over the bars by 5 cm. When joining inverted panels, these indentations should form a “pocket”; it is needed for insulation and vapor barrier placed in the joints between the individual elements. The board is secured on each side with two self-tapping screws or two nails. It is recommended to sheathe the ceiling in a Russian bathhouse with galvanized nails with a fairly wide head. Two nails are nailed in one place due to the additional load from the weight of the insulation.
- The knocked together shield needs to be turned over, carefully distributed and the vapor barrier attached to the inner surface of the “box” with a stapler. It is recommended to nail jibs to this “semi-finished product” to make moving it to the ceiling assembly site more convenient.
Panel ceiling assembly
Work order:
- Before installing the panels, a sealant is placed on the walls of the bathhouse at the points of contact with the timber. 5 cm of the panel should rest on the beam, 10 cm of the beam is left for the installation of the rafter system.
- When installing panels between them, due to the presence of overlaps, a “pocket” should form. It contains a vapor barrier layer and insulation. The panels are not connected with ties, and the ends resting on the beams are not nailed down. To connect them, transversely laid boards are used.
- Thermal insulation material is placed in vapor barrier panels installed tightly to each other. Most often it is mineral or glass wool.
- The “boxes” equipped with insulation are secured using transverse boards. The starting board should span the entire width of the ceiling. The transverse boards are nailed to the bars of the panel boards.
- Next, you can nail several short cross boards, then a long board again. Such alternation also promotes savings by reducing the consumption of long lumber.
- The joint lines are covered with overhead boards.
The ceiling assembled from the panels is ready, but most often the work does not end there. If not very presentable remains were used to make the shields, the interior decoration of the bathhouse ceiling will be required. But it will need to be done after modernizing the rafter system.
Changes in truss structure
According to precisely calibrated dimensions in the rafters, it is necessary to select corner recesses so that the leg can rest on the upper crown. The excavations made will slightly reduce the load-bearing capacity of the roofing system. Strengthening will be required by installing two vertical supports with a horizontal crossbar. To install the support beam, you will need to cut a recess and install a support in it. The rafter legs will need to be attached using cap screws to the upper lintel and to the crown in the area of the sawn corner. Screws are used to fix the point of intersection of the crossbar and the support, and the intersection of the crossbar and the rafter leg.
The three methods of installing a bath ceiling are distinguished by technology, load-bearing capacity, and cost of lumber. The owner of a small family bathhouse with a pitched roof will most likely be satisfied with a simple flooring. But the owner of a solid bath structure has a choice: hemmed and panel type. The first type will help save effort and time, the second - financial investments.
Interior decoration of a bathhouse: great ideas from a design guru!
I cordially greet you, dear readers! Have you finished building your bathhouse? Congratulations! Now imagine yourself as a great maestro of design art, sketch out a sketch of your dream interior and start turning your dreams into reality. Are you looking confused at a blank sheet of paper? The wonderful thoughts that were in full swing yesterday have fled in all directions? The muse, with a capricious pout, went about her business? Well, what then? In this case, you need to put down your pencil, wander around the sites, look at photos of amazing baths, the design of which famous designers worked on, choose the work you like and start “plagiarizing”!
Don't you want it that way? Do you dream of exclusive interior design? In this case, I will tell you what facing materials are appropriate in a steam room, and based on this information you will create your own project called “Unique interior decoration of a bathhouse: photos and ideas - the envy of everyone.” How do you like this turn of events? Do you approve? Then let's get started!
From this article you will learn:
Choosing the type of wood for sauna cladding
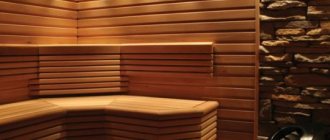
Each type of wood has its own shade, texture and healing effects. Deciduous and coniferous trees are used to produce boards. It is recommended to decorate the steam room with hardwood, and the recreation rooms with coniferous wood.
Deciduous wood for a bath
The following hardwood species are used to cover the bathhouse:
Linden
. Finishing the bathhouse with linden boards is the most popular option. This wood is easy to install and retains its beautiful color in high humidity conditions. You can touch linden even at high temperatures without the risk of getting burned. In addition, it smells pleasant and has healing properties.
Alder
. This breed is characterized by the presence of tannins, which provide clean air in the room and protect it from mold and bacteria. At high temperatures, alder releases substances that have a positive effect on the heart and vascular system, and also have an anti-inflammatory effect.
Oak
. Contains tannins, like the previous type of wood. It is very durable and flexible. When heated, it releases beneficial substances that help eliminate fungi and unpleasant odors. But oak has one drawback - its surface is difficult to sand to the required smooth state, since its wood is slightly rough.
Ash
. Ash wood is flexible and not very dense. However, it does not crack and has the best healing properties. In addition, ash is one of the most beautiful wood species. In various photos of finishing a bathhouse with ash boards, you can see that this wood is very light, clean and festive.
Aspen
. This type of wood has low thermal conductivity, which prevents burns at high temperatures. It does not crack or dry out. Also, aspen has a pleasant color and is easy to process. The only drawback is the rapid loss of natural color.
Coniferous wood for baths
You can sheathe a bathhouse using the following coniferous wood:
Larch
. It is very durable and has low thermal conductivity, which is important for a bath. It releases a subtle and soothing aroma even at low temperatures. Larch has a beautiful color, but, like oak, it is quite difficult to process.
Spruce
. Endowed with a pleasant color and smell. Spruce wood is very soft and easy to work with. Spruce boards are recommended to be installed in rooms not intended for high temperatures. This is due to the release of a large amount of resin.
Cedar
. Perfect for finishing a shower stall or rest room. It has a unique color, specific aroma, and also has antiseptic properties. Cedar releases resins and essential oils that promote calm and relaxation. This type of wood is the most expensive.
Pine
. This wood is the most popular material for finishing a rest room. It is highly undesirable to install it in a steam room. It also has a pleasant shade and produces volatile substances that eliminate germs around.
The entire installation and insulation process
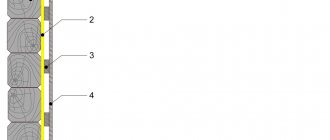
Ceiling vapor barrier
→The floor ceiling in the bathhouse can be installed even by a novice and inexperienced builder. The boards are simply laid close to each other on the top rows of walls and secured with self-tapping screws. Then, as already mentioned, from the attic side, bars are attached at intervals of 60 centimeters. At this point, the installation of the ceiling can be called complete; you should proceed to the following “necessary measures.”
→Vapor barrier of the bathhouse ceiling is a very important point and cannot be ignored. It is performed as follows. The foil is applied to the laid boards, from the side of the steam room, with a furniture stapler. The best option is to use Penotherm or its equivalent. Foil insulation is installed with an overlap of 10-12 centimeters. All joints are carefully taped with heat-resistant foil tape. Be sure to place foil on the walls along the entire perimeter of the premises (15-20 cm). This is necessary for better vapor barrier and better thermos effect.
→Then we carefully attach bars 20-25 mm thick to the foil. at a distance of 60-80 cm from each other. This will be the frame for finishing the ceiling. Of course, the best option is lining. We fasten it in a secret way using clamps or nails with a small head. Recently, it has become fashionable to use unedged, well-treated boards in finishing. The ceiling and walls in this case look unusual, but beautiful.
At this point, all work on installing the ceiling of the bathhouse indoors is completed, let’s move on to the attic.
Insulation of the ceiling in the bathhouse
→The next stage is insulation of the bathhouse ceiling. There is a lot of choice here. You can use proven old-fashioned methods, or you can “keep your head down” and purchase modern thermal insulation materials. Kraft paper or ordinary cardboard from packaging boxes is laid out on the laid boards, only from the attic side. And only then the selected insulation for the ceiling is installed.
Mineral wool slabs are considered the most popular and in demand. This is a convenient and practical insulation. Among the leaders are Rockwool, Knauf, Ursu and their analogues. It is no coincidence that the bars were fixed at intervals of 600 millimeters, because these insulation materials have exactly this size in width.
The best option would be to use thin mineral wool slabs or rolls 5 cm thick, but laid in 3-4 layers on top of each other. Layers should be laid “staggered”, avoiding joints on top of each other. In this way, the most optimal thermal barrier is created
Particular attention should be paid to insulation near walls. It is here (at the junction of the ceiling and wall) that “weak spots” are formed and cold bridges arise
Finishing the ceiling with unedged boards
You can use the old method of insulating the ceiling - clay with shavings or straw (not sawdust). The shavings play the role of a connecting link and prevent the clay from cracking too much. By the way, clay is also an excellent natural vapor barrier. Another option is to use bulk materials. And this is expanded clay, slag earth. But, as a rule, slag and earth do not cope well with the duties of insulation. Using these materials, you will have to install small wooden sides around the entire perimeter of the attic. They are needed to prevent the insulation from spilling or leaking.
Here is another small list of materials that can be successfully used in insulating the ceiling of a bathhouse: penoplex, polystyrene foam, ecowool, polyurethane foam. These options are used much less frequently, although they are quite suitable for such purposes.
→The last point left in installing the ceiling is waterproofing the mineral wool insulation. It is needed in order to prevent atmospheric or other accidental moisture from entering the insulation. Any waterproofing film is appropriate here, for example “Yutafol” or some analogue. We just cover the entire insulation with this film, seal the joints with tape and that’s it. At this point, the do-it-yourself floor ceiling in the bathhouse is almost ready. Now let's summarize...
How to strengthen a facade made of boards with your own hands.
Do-it-yourself reinforcement of a board façade is necessary when using untreated lumber. To avoid deformation, the appearance of mold and mildew, and to protect against fire, it is necessary to carry out a number of measures to strengthen the facade.
- Treat the lumber with a fire retardant (fire retardant).
- Then apply impregnation, varnish or paint.
- Monitor the condition of the wood and repeat protective measures if necessary.
Decorating the facade with wood is a wonderful modern way to show individuality, while protecting the walls of the house from the negative influence of the environment.
Design and drawing
Before starting construction, you need to draw up a drawing and indicate on it:
- general dimensions of the building;
- internal division of free space into separate rooms;
- location of doors, windows, stove, points with plumbing fixtures;
- door opening radius;
- room sizes.
Using the diagram, you can calculate how many consumables will be needed for construction.
To save space, you can assemble a barrel bath. These are mobile structures that can be transported. To build a barrel bath, you need to use edged boards, having previously treated them with antiseptics.
Requirements for structures
Requirements for frame buildings lined with edge panels:
- Corners must be properly waterproofed.
- Materials must not emit harmful substances during operation.
- It is necessary to erect a wooden structure at a distance of 15 meters from other wooden buildings. If they are built from blocks or bricks, at a distance of 8 meters.
- The structure must be solid, without visible defects.
- To prevent moisture from destroying the heat insulators, it is necessary to install a vapor barrier.
The supporting elements of the frame must be secured with nails, edged boards with self-tapping screws.
Covering a recreation room
Don't think that the interior of this room is less important. For fire safety reasons, decorative stone is often used there. Aesthetically it is also quite pleasing. Thinking through the ventilation device (in this case, the outlet points for ventilation pipes) plays a very important role. It is worth remembering that even a rest room is often filled with moist air and steam, so you need to use a sheathing board with a special impregnation that blocks dampness.
The boards themselves are oriented according to their choice - both in straight lines and diagonally. Decorating with natural stone is quite expensive. But there is reliable protection from aggressive influences and even from fire. In some cases, moisture-resistant grades of drywall are used. Paint is applied over it, wallpaper is glued; Another option is applying decorative plasters.
A modern and, at the same time, very elegant option is the use of photo wallpaper. They come in a stunning range. But again, not all of their options can withstand heavy moisture. If it is a serious problem, you should take a closer look at stone wallpaper. In terms of decorativeness, they are at least as good as other options. Alas, it is not advisable to use OSB boards for finishing, as opposed to rough finishing. Even a small emission of toxic substances that meets the standards is undesirable. During rough use, vapor membranes and waterproofing provide the necessary protection.
But even with their use, a subfloor cannot be made from OSB. Before finishing, the stone surfaces of the walls are leveled, and the wooden ones are treated with special substances. False ceilings are formed from lining, although moisture-resistant gypsum plasterboard is also not bad. Stretch ceilings are often used and fit perfectly into any environment. Only materials that can withstand abrasion and water ingress are placed on the floor.
The problem with using patterned tiles is the need for careful pre-layout. It is useful to even take a special photograph of such a layout so that it is harmoniously repeated. Fastening is done either with proprietary tile adhesives or with hand-prepared cement mortar. Beacons will allow you to maintain a precisely specified distance. You will have to wait several days until the floor covering acquires the necessary strength - this must be taken into account in advance when planning repairs and finishing.
An economical option for finishing is laying laminate flooring. You can fix it with your own hands without wet work. Panels made of polyvinyl chloride or MDF are often mounted on walls. Alternatives are vinyl and quartz vinyl tiles, wallpaper. Sometimes paint is also used; all these options allow you to imitate various types of natural wood.
Selection of lumber sizes
The requirements for the dimensions of boards and linings for lining ceilings are fundamentally the same:
- The optimal width is 90-100 mm. Installation of narrower lumber takes considerable time. Boards that are too wide often become deformed and crack during use.
- The thickness of the wood for making a panel ceiling can be any - due to the design features, the panels only need to withstand the weight of a small section of thermal insulation.
- The choice of boards for the hemming option depends on the presence of a subfloor in the attic. If provided, a thickness of 12 mm is sufficient; if not, 18 mm is required to support human weight.
- In two-story buildings, it is also permissible to use thin material for a false ceiling if there is a living space above it, which has, accordingly, a floor.
- Floor structures supported only by walls are constructed exclusively from thick moldings - from 50 mm.
On a note! When using tongue-and-groove boards, there is practically no difference from clapboard cladding. Their sizes are selected according to similar criteria, and the same fasteners are used during installation. But there is one nuance - due to the nonlinear configuration of the lining, the gaps between the cladding elements are much smaller.
Advantages and disadvantages
Aspen boards have a high degree of hygroscopicity, so this raw material is an excellent option for building or finishing a bathhouse, sauna, and can also be used in house construction. Aspen wood, like all other lumber, has its pros and cons.
The main advantages of aspen boards or timber include the following.
- Reliability and long service life. If the aspen billet was properly sawed and dried efficiently, then over time the wood of this hardwood becomes denser, and craftsmen often compare it to monolithic concrete.
- Resistant to wet environments. When in contact with water or in conditions of high humidity, unlike other tree species, aspen is not prone to rapid rotting, since its fibers contain a natural antiseptic.
- Wood does not emit resin. Moisture-resistant aspen wood does not contain resinous components, which come out after finishing.
- Environmental friendliness and aesthetics. Aspen lumber has a pleasant smell; in addition, buildings and products look solid and attractive.
- Budget cost. Unedged aspen boards are cheap compared to other lumber. A cubic meter of such material costs approximately 4,500 rubles.
- Natural antiseptic. People have long noticed that wells built from aspen have positive properties - the water in them does not bloom, and the log house itself does not rot or mold.
In addition to its positive qualities, aspen still has some disadvantages. They are as follows.
- The tree species grows in areas rich in moisture. For this reason, a mature tree often has a core that has naturally rotted. When processing such a workpiece, the rotten part has to be discarded, and only the apical part remains for further use. Thus, 1/3 or 2/3 of the aspen log goes to waste.
- Since most of the harvested aspen raw material goes to waste, and the yield of high-quality lumber is small, this increases the cost of timber and boards.
- Due to high humidity, drying aspen wood requires a qualified approach to this process. The shrinkage of the material at the exit from the drying chamber can reach 18-20%. In addition, 50-80% of the total mass of material undergoes warping and cracking during the drying process. Thus, high-quality material from aspen is obtained in small quantities at high processing costs.
Subtleties of wooden wall design
If you have already chosen a wooden option for finishing the facade, then you need to take care of the material in advance. An uncut board requires a special approach. First you decide whether to leave the bark on the board or not.
If there is bark left, it is necessary to select elements in which this layer is held tightly and does not peel off or crumble. If the bark is not needed, everything is cleaned and thoroughly sanded.
In addition, all wooden parts are coated with antiseptic and water-repellent compounds. If this is not done, the material will quickly become covered with unsightly stains and rot over time.
The wood can be painted and given an original shade, or you can choose a transparent coating in the form of paints. In the second option, the natural color and, of course, the texture of the wood are preserved.
Description of species
Fence
This type of unedged board looks quite unsightly. No one deliberately subjects it to scrupulous processing. Signs of warping and the presence of a large number of knots are common. In general, the structure of the fence board is not reliable, and is often even fragile. As soon as such wood dries, it is often discovered that the cross-sectional geometry has changed, which complicates the construction use of the lumber. Therefore, the fence board is used for sheathing and secondary fences (hence the name).
Carpentry
This type of unedged boards is prepared from logs of particularly high-quality wood. Usually these are trees with a large trunk diameter, for example, Siberian larch or Angara pine. The width of lumber starts from 150 mm. Such boards are characterized by either a complete absence of defects or a minimal number of them (within the varietal group). But the price of carpentry-grade products is much higher.
Dry planed wood is even more expensive, but it is valued for a number of positive qualities and is used for important tasks. As for the species, it is traditional to use coniferous trees for construction. Pine has even become a general construction material, which is easy to process and, moreover, widely distributed. Pine wood is relatively resistant to rot. And the special cellular structure makes it permeable to air.
Dried spruce can split and is not suitable for flooring. And it rots more than pine. Larch is much more suitable for large orders, since it is durable, dense, contains a lot of oils, and is protected from biological damage and harmful insects. However, larch is a very heavy tree.
Cedar is valued for its softness, ease of processing and beautiful texture. This plant practically does not rot, so it can be used even outdoors. Among deciduous trees, oak deservedly has a very good reputation. It is very durable and mechanically hard, rots little and pickles well. Oak wood is also tough, can be cut and bent without problems, and has a distinct texture.
Ash wood is generally close to oak. They have similar fibers, but the texture of ash is much lighter. It is also worth noting that when damp, ash can rot. Sufficient protection is provided only by treatment with antiseptics. Steamed ash easily bends in the desired way.
Beech is roughly equivalent in strength to oak. It is easy to saw, and when steamed, it can be bent. There are also no problems with drilling and cutting. However, the tendency to rot can be a problem. Therefore, beech has no place in damp rooms.