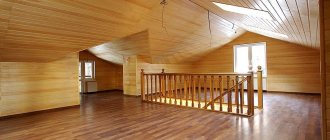
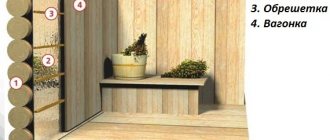
With the completion of the construction phase of the bathhouse on the site, work begins on the interior arrangement of the premises. You will have to think carefully about how to cover the walls, ceiling, and floors, because the rooms in the bathhouse differ in the degree of heating and the effect on the lining. One of the decor options is clapboard cladding. The practical and inexpensive material is environmentally friendly, and all the work can be done with your own hands. Let's figure out how to attach the lining to the ceiling in a bathhouse, consider installation options, as well as related work.
Selection of materials
- 1 Selection of materials 1.1 Which lining is better
- 1.2 Lining or eurolining
2 Installation work
- 2.1 Installation of electrical equipment
2.2 Finishing with insulation 2.3 Making lathing 2.4 Installing lining 2.5 Final work 3 Afterword
Which lining is better
Experienced owners and builders know very well that finishing the interior of a bathhouse with clapboard is a rather important and crucial stage in its construction.
Attention must be paid especially to the type of wood. The main requirements are safety and harmlessness
It is not recommended to take pine, since it is a flammable material that can release resin and other undesirable substances. It is only allowed to decorate the dressing room with it, and then in exceptional cases. More details in the article - why pine is good and its differences.
Each material has its own characteristics
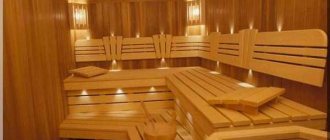
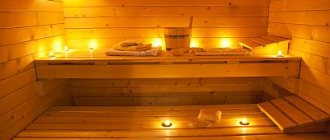
The classic interior decoration of a bathhouse with clapboard is made from healing, pleasant and aesthetic types of wood, such as cedar, linden or larch. Luxurious aroma, excellent tactile sensations and noble appearance are ultimately guaranteed.
Lining or eurolining
Here are the main features and advantages of eurolining:
- Correct and better surface geometry;
- Made from the best and highest quality raw materials;
- It has serifs through which the eurolining is ventilated;
- Due to the presence of a recessed groove, greater rigidity and strength are ensured, which will extend the service life of the material;
- The installation and operation of eurolining is no different from lining, which is confirmed by the instructions;
- Has certificates of quality and compliance in accordance with existing European Union standards.
Technical parameters of the two materials The other side of the coin is the higher price, which is relatively close in name to eurolining, but the impeccable appearance and perfect qualities justify the investment.
What is the purpose of foil?
To achieve effective energy saving in a bathhouse, you will need to not only insulate it, but also use reflective material in the form of a special foil film. Masters claim that it helps return up to 95% of the heat into the room.
The result is that fuel for the stove is saved and the duration of the fire is reduced.
For baths, aluminum foil with a thickness of 30–300 microns is used. It is used in combination with other insulation or is already fixed as its top layer.
Therefore, before covering, they first attach insulating material to the walls and ceiling, thanks to which the heat does not escape beyond the bathhouse. An insulated steam room heats up faster and retains heat longer.
The following are the advantages of foil:
- It acts as a vapor barrier and blocks the access of moisture to the insulation. The generated steam remains on the walls of the steam room.
- Its service life exceeds 50 years. Wooden elements will begin to rot faster than the foil layer will deteriorate.
- Excellent sound insulation. Foil can absorb up to 70% of all sounds and noise.
- Fireproof raw materials. Does not burn. It will become an obstacle to the spread of fire.
- Bathrooms warm up faster and take longer to cool down.
- If you fix the insulation with a foil layer, then the foil will prevent it from falling off.
Among the disadvantages, the following should be noted:
When there is a difference in temperature outside and indoors, condensation appears on the surface of the material. It is important to leave a gap for ventilation before covering. If this is not done, the resulting condensate will begin to be absorbed into the sheathing, which will lead to rotting of the lining. Foil has poor throughput
As users say, she is not breathing. Therefore, the rooms must have good ventilation, both forced and natural (windows, doors). Aluminum particles accumulate in the lungs, causing various respiratory diseases. But if you use the sauna periodically, the risk of harm to health is minimal.
How to choose the direction of installation of panels
Before you start constructing the frame, you need to choose in which direction the lining boards will be attached
This is important, since the sheathing guide bars must run perpendicular to the direction of the sheathing
There are several ways:
- vertical
- The most common. It allows you to visually increase the height of the room. For such wet rooms as a steam room in a bathhouse, it is also the most optimal, since water easily flows along the grooves between adjacent slats without lingering on the surface;
- horizontal
– visually pushes the walls apart. Some types of lining are attached only in the horizontal direction. These include the "American" and the board with the chosen quarter;
The “American” is mounted with the spike facing up to ensure normal water drainage from the surface. Source parki48.ru
- diagonal
– used for decorative purposes on walls and ceilings;
- combined
- also a decorative installation method that allows you to create patterns from multidirectional lamellas. It is the most complex of those listed, since the lining is attached to the transverse bars of the sheathing, which in turn must have a corresponding pattern.
The combined method of fastening the lining is difficult to do independently. It is better to entrust this work to specialistsSource rus-teplitsa.ru
Direction of lining arrangement
Now we will decide to mount the lining in the bathhouse vertically or horizontally. There is no mandatory option here; the user has the right to independently choose the location of the lining. But the chosen method can shorten or extend the life of the finish.
- The vertical arrangement of the lining makes the room attractive. The joints become invisible.
- When positioned horizontally, changes in the finish become less noticeable. Also in this case it is easier to replace damaged elements. If you need to visually enlarge the area a little, you should use this method. Moisture is also removed more intensively.
- The placement of the lining at a certain angle is often used selectively. This technique allows you to make the room unusual.
We have decided how to attach the paneling in the bathhouse: horizontally, vertically or at an angle, so we can continue to work.
Preparation of load-bearing surfaces
Preparation of surfaces includes their leveling and, if desired, additional insulation. There is no need to level each individual beam, only level those to which the wooden batten will be attached.
The slats, by the way, can arrive horizontally or vertically. Accordingly, the lining in such cases will be mounted vertically or horizontally.
Video - Installation of lining
It is better to check the evenness of the walls using a rope stretched in the corners of the bathhouse, or a flat, long wooden slat. It is advisable to use a rope, it is more accurate and faster. Stretch the rope as close to the floor and ceiling as possible, and use a flat rod to check the distance from the wall surfaces to the rope. If large bulges are found, they will have to be cut down; the depressions will be leveled out during the installation of the sheathing. And not all of them, but only those where the slats will need to be attached.
How to attach
You can install wooden lining using self-tapping screws, nails or special clamps - clamps. Each method has its own characteristics and advantages. If we are talking about how to properly attach the lining, then you can choose any of them. The choice itself depends on what is preferred: the appearance of the cladding, the speed of installation, the ability to quickly and easily dismantle the cladding.
The tongue-and-groove connection forms a continuous surface without through gaps. Source stroiremdoma.ru
Let's look at each method in detail.
Through mount
This is the fastest installation method, but not the most aesthetically pleasing, since the caps of the fastening elements remain visible on the surface of the cladding. If desired, they can be recessed into the body of the board, and the recesses can be filled with putty or closed with pins made of the same type of wood as the lining, and then sanded. However, the attachment points will still remain visible.
In the described case, you have to carefully choose how to fasten the lining. It is recommended to use corrosion-resistant galvanized self-tapping screws rather than nails, which, when driven in, have a high risk of splitting the board along the grain of the wood. Under them, in each plank at the place where it intersects with the sheathing, through holes with a diameter slightly less than the diameter of the hardware are pre-drilled.
It is better to screw in the screws in pairs, 1-1.5 cm away from the edges of the lamellaSource parki48.ru
Also, through fastening is used to fix the first and last boards of the lining in the corners.
Hidden mount
This method allows you to maintain the integrity of the wooden covering. Small screws or nails with a small head 5-6 cm long are used as fasteners. The fastening algorithm looks like this:
- The first lining is installed with a tenon in the corner and fixed with a through fastening. At the same time, be sure to control the vertical level;
- at the intersection of the lining with the sheathing bars, use a thin drill to make through holes on the inside of the groove, directing the drill at an angle of 45° to the surface;
- A self-tapping screw is screwed into the prepared hole or a nail is driven in so that its head is recessed into the wood and does not interfere with the installation of the next lamella. In the case of nails, a hammer is used for this;
- the second board is driven with a tenon into the groove of the already installed one and the process is repeated;
Scheme of hidden fastening of lining with nailsSource izvagonki.ru
The last board, if necessary, is cut to width and fixed with a through fastening along the edge. Subsequently, the places of through fastening can be covered with decorative corners or plinths.
Fastening with clamps
Clamps are metal clamps that allow you to maintain the integrity of the lining, secure it firmly to the frame, and, if necessary, easily dismantle the cladding.
To understand how to fasten the lining with clamps, you will need a description of this fastening element. This is a metal plate with holes along the edge through which it is fixed to the frame. In the middle part of the plate there is a tongue that fits onto the groove of the lining and holds it in place.
Clasps may differ in shape and size, but the most important thing is the height to which the tongue is raised. It should be equal to the wall thickness of the groove of the wooden panel
Therefore, before attaching the eurolining to the wall, make sure that the clamps are designed specifically for this type of cladding.
When using clamps, the wooden panel remains unharmed Source parki48.ru
The installation technology is very simple; it does not require pre-drilling holes. The kleimer is simply put on the groove of the already secured first board of the lining, and through the holes on the plate it is attached to the sheathing. The thickness of the tongue will not prevent you from inserting the tenon of the next panel into the groove, which is fixed in a similar way.
To secure the clamps, you can use both nails and self-tapping screws Source parki48.ru
Installation
Now we get to the step-by-step instructions. However, it is worth noting that no instruction will be complete enough to reveal all the nuances of the work ahead, so it remains advisable that the builder have at least basic experience with tools and construction in general.
Construction instructions, installation step by step
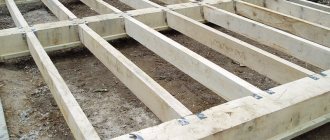
Grazing
Take all necessary measurements. If you are working in a log house, draw a line along the level where the deck boards will lie. If you have walls made of a different material, check the horizontality of the mauerlat or strapping beam. If it deviates from the horizontal, prepare the necessary tabs.
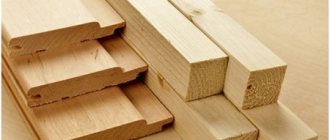
Boards can be very different - edged, unedged, tongue and groove.
But whatever they are, they need to be cut taking into account the approach to the wall of at least 5 cm (more is possible). In the ceiling crown , as we said above, you need to cut out a “shelf” on which the boards will lie. To do this, you can use an ax or chainsaw. “Shelves” are cut out on two opposite walls only.
on the mauerlat in the same way, only there is no need to make a ledge.
Fastening can be done with self-tapping screws or nails.
Then bars or boards placed on the end are laid out on top - all this across the length of the flooring board. From below they are attached through and through with self-tapping screws. This is a necessary measure to ensure that the boards do not “play” in the future.
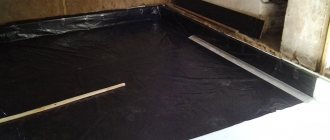
Next, we cut and lay the vapor barrier, securing it to the base with a stapler.
We lay the selected insulation on the vapor barrier.
We cover everything with waterproofing ( some do not cover it ).
Below we adhere to the chosen design solution - either we leave the existing one as a finished ceiling, or we fill unedged boards with a shift, or we make a sheathing and cover everything with clapboard.
In the steam room, of course, some owners will stuff the bottom with foil, put the sheathing on top of it and cover it with clapboard. This is done to reflect infrared radiation back into the steam room.
Hemmed
As agreed, we believe that we already have the ceiling beams. We take measurements and set the horizontal lines exactly to the level on the wall. We stretch the construction threads.
the cranial beams in accordance with the horizontal lines (this is one of the options, there are others). The skull beam provides a ledge on which the boards will rest between the beams.
We cut the boards and lay them in the transverse direction of the beams on the skull beam. Secure with self-tapping screws or nails.
On top, without covering the beams, we lay a vapor barrier. This means that the upper section of the beam remains open, the vapor barrier fills only the formed “containers”. This is necessary so that the wood of the beam can release moisture.
We lay insulation on the vapor barrier secured with a stapler .
We cover it with waterproofing (the vapor barrier does not breathe, but the hydro barrier breathes and releases steam from the insulation).
On top of the beams, either a subfloor or a laid.
The bottom trim remains. Here too it depends only on the design decision. See a similar point on the floor ceiling above.
In the steam room: a step-by-step guide
You will find a step-by-step guide on how to make a steam room ceiling in a bathhouse with your own hands on this page.
Frame installation
Fastening the lining in a bathhouse cannot be done without a frame. This structure is similar to the one that is erected for installing drywall. In our case, the slats are installed at a distance of 40 cm from each other. The frame for the lining is mounted as follows:
- We place the outer slats according to the level;
- We stretch a rope between them, which will serve as a guide;
- make markings for each subsequent slats;
- we nail the slats along a stretched rope, not forgetting to use a level;
- It is convenient to use wooden spacers to align the slats.
The frame is ready and it seems that you can fasten the lining in the bathhouse, but here another question arises. It is associated with the choice of direction in which the decorative trim will be located. We will deal with this problem in the next chapter.
Mounting methods
In total, there are two main options for fastening the lining. They differ from each other in directions. Let's take a closer look at them.
Vertical
Vertical fastening of the lining occurs as follows:
The starting part is installed in the corner. To do this, you should use nails, which are then hidden under a decorative corner. If you don’t have this item, then you can simply “bite off” the caps with side cutters
Drive nails as carefully and carefully as possible. Always check whether you are laying the lining vertically correctly - any errors can lead to the fact that the next lamellas will curve more and more. The fixed part must be attached using clamps. After this, you can proceed to installing the remaining lamellas
However, first they need to be inserted into the grooves, and only then fastened. Every 5 elements it is necessary to check the evenness of the surface using a level and plumb line. The final lamella must be cut to the required dimensions.
Horizontal
To lay the lining horizontally, the following rules must be observed:
In this case, the slats need to be fixed, starting from the ceiling. The groove should point downwards. If the trim looks like a rounded log, then it should be installed with the groove up to hide the joints. The parts should be fastened together according to the same principle as with the vertical installation method. It should be taken into account that for a more reliable fixation, the boards should be lined with dies. Gradually going down from top to bottom, it will be much more convenient to attach all the slats using nails
It is very important to hammer them in in such a way as not to damage the front side of the lining.
Headlining
Installation of the panels begins on the side of the ceiling farthest from the entrance.
The first bar is set along the cord line. Carefully checking the position of the first panel will ensure that all subsequent planks are parallel. If parallelism is not maintained, then leave a gap in the corner. During further covering, the gap will be closed with a ceiling plinth.
To fasten the panels, pneumatic tools are used. Clips and staples are used as fastening elements.
The operation and maintenance of such a tool is quite simple. The staples are inserted into a special compartment. The compartment lid snaps tightly into place and the device is ready for use. Under the influence of air, the impact mechanism pushes the staple out at high speed. This allows for increased installation speed and high fastening strength.
Panel installation work is carried out in pairs. One person holds the panel in a fixed position. Another person sews on the paneling.
If one person is working, it is convenient to use special racks for fixing the lining to the ceiling. These devices are made of metal. They have the ability to be adjusted in height. The upper end of the stand has a tip with a soft nozzle to protect the surface of the slats when fixing.
In the absence of such devices, use self-made racks from 50x50 mm bars. The length of the racks is 1-2 cm greater than the height of the room. The increased length will allow you to create the necessary stop for reliable fixation of the panel.
Using a finishing tool with a wooden or rubber tip, the boards are leveled and aligned with the cord. To avoid accidental displacement, one end of the bar is secured with a bracket. Further installation of elements is carried out to the opposite wall. Light tapping ensures that the panels fit snugly against each other. A tight connection is determined by the dull sound when struck by a hammer.
If the fit is loose, the lining is pressed against the sheathing. The panel is moved using a chisel. The tip of the tool is recessed into the lathing. With a smooth hand movement, the elements are moved until they are completely connected.
More significant irregularities are eliminated using a clamp. To do this, attach the device to the sheathing strip, tighten the fixing screws or lever mechanism. A wooden wedge is driven between the clamp and the board. The wedge is driven in until the panel is completely adjacent to the previously sewn strips. The sewing of uneven elements is carried out with two staples on each batten of the sheathing.
The parallelism of the boards is determined using a tape measure. Measurements are taken at each end of the laid panels. You can choose the frequency of checking yourself.
When joining a ceiling to a wall, a situation often arises when it is impossible to install a panel with a standard width. In this case, the last plank is cut lengthwise using a circular saw. The junction of the lining with the wall is covered with a ceiling plinth.
Ceiling installation in the washroom and rest room
A special feature of the washing room and relaxation room in the bathhouse is that although these rooms have high humidity , the air temperature is low compared to the steam room, so for finishing the ceiling, one of the best options is plastic lining.
The main advantages of plastic lining:
In the case of using plastic panels, their installation is the final stage of finishing work .
The installation of plastic lining on the washing room ceiling is carried out after the installation and insulation of the rough ceiling, in the following sequence:
When using glossy panels, keep in mind that they are very easily damaged, so the protective film must be removed from them at the very last moment.
Typically the panels are 6 meters long, which makes their transportation much more difficult. Experts recommend immediately deciding on the required length and cutting the panels in the store.
For the washing room and for the rest room in the bathhouse,
it is better to choose seamless panels , since if there is a decorative seam, moisture and dirt will accumulate in it, which will spoil the appearance of the ceiling.
Caring for this coating is very simple, but it is best to use gentle detergents. It is recommended to choose a calm color for the panels , this will allow you to better relax and unwind; it is better not to use contrasting solutions in the bathhouse.
Since plastic does not allow steam to pass through, it is necessary to ensure good ventilation in the room so that the ceiling and walls can dry properly.
Wall cladding
The installation of vertical panels begins from the corner of the room. With the horizontal method, the installation of the planks is carried out from the bottom up.
The first bar is set strictly plumb. The remaining elements are laid in the same order as for the ceiling cladding. A tight fit of products with unevenness is ensured with the help of clamps.
In the spans between the main posts of the sheathing, additional slats are installed - short ones. They provide a gap for ventilation of the space between the foil layer and the transverse strips of the sheathing.
The additional panels in the opposite corner are cut with a circular saw. The joint area is covered with a decorative strip.
The described method of performing the work is based on many years of experience in building baths using pneumatic tools. This technique has shown excellent results in the question of how to fasten lining in a bathhouse with high speed and excellent quality.
Cladding from the inside with clapboard from a to z
The interior lining of the bathhouse starts from the ceiling and ends with the walls.
We calculate the area of the internal lining. How to take measurements correctly?
To completely cover the lining in the bathhouse, it is necessary to calculate the total area of the walls and ceiling minus the window and door openings. Correct calculations will help you save your budget on the costs of basic and consumable materials:
- The ceiling area is calculated using the formula Spot = LxW, where L and W are the length and width of the room, m².
- The area of the walls is calculated using the formula Sst = 2x(L1xH1)+2x(L2xH2), where L1.2 and H1.2 are the length and height of the long (1) and short (2) walls, respectively, m².
- The obtained values are added to the total value Stotal = Spot + Sst, m².
- The area of the window and door is calculated: Sok = WokxHok; Sdv = WdvxHdv, where Wok, dv and Hok, dv are the width and height of the window and door, respectively, m².
- The net area for the cladding is calculated: Snet = (Stotal – Sok – Sdv), m².
Preparation of lining and beams. Treating wood with protective agents
It is recommended to first dry the room, then bring in lumber and open it for a day to allow it to warm up and get used to room temperature.
After a day, the lining can be coated with a water-based antiseptic, after which finishing work can begin.
Preparation of materials and tools
In order to sheathe the inside of the bathhouse, you will need:
- beams for sheathing with a cross section of 50x50 mm;
- fasteners (screws, clamps, dowel-nails);
- thermal insulation material;
- foil for vapor barrier;
- tape for fixing the foil;
- construction stapler;
- drill for working with concrete and brick surfaces;
- screwdriver;
- building level.
Conducting communications
Before you start fixing the lining in the bathhouse, you need to think through and mark the location of utilities on the walls and ceiling: power supplies, switches and lighting.
Installation of the frame under the lining
The lathing for the lining in the bathhouse must be durable and of high quality, since it is subject to such requirements as fixing the heat and vapor barrier layer, supporting the weight of lamps and shelves, as well as the finishing material itself. In addition, properly installed sheathing will allow the walls to “breathe”; condensation will not accumulate on the inner surface of the lining and the main wall and mold will not form.
If the lining is vertical?
Vertical markings are applied along the entire wall indicating the installation locations of the beams for the frame and the places of their fastening in increments of 0.5 m, then the beams are attached to the pre-waterproofed surface with self-tapping screws.
If you want to line the inside horizontally?
The technology for installing the frame is the same as for vertical cladding, with the difference that the main beams are attached vertically.
The same work is performed for mounting the frame on the ceiling.
Laying insulation and vapor barrier in a bathhouse
The insulation should be placed tightly into the cells of the sheathing, the vapor barrier should be secured with an overlap stapler, starting from the bottom row. Lining the inside of the bathhouse with foil is additionally accompanied by fastening the joints with tape. Then you need to stuff thin slats onto the frame - the lining will be fixed on them. The thickness of the slats is sufficient to form an air gap that prevents the formation of condensation.
The same work is done on the ceiling.
Installing lining on walls
With horizontal cladding, the lamellas are fastened with clamps to the sheathing from the bottom up, with the grooves down. In vertical finishing, fastening begins from the corner, evenness is also checked by level. Each panel is tightly packed into the previous one.
Lining the lining on the ceiling
The ceiling in the bathhouse should be covered with clapboard in the same way as the walls, but there are some nuances here:
- Installation of panels begins from the entrance, using only clamps.
- A hidden nail is used for the last board.
- The ends of the lining should be placed at a distance of 4-5 cm from the walls for air circulation and the possibility of panels moving due to temperature changes.
Decoration of doors and window slopes
Slopes for doors and windows are made of lining, cut to the required length, and covered with decorative corners and platbands. It should be remembered that it is not advisable to stick decorative elements. To fix them, finishing nails are used with final grinding of the installation sites to avoid accidental injury.
Classification of lining
The industry produces a wide range of linings. The products of wood processing plants differ in several respects.
Depending on the production technology:
- Classical;
- European.
The profile of the classic lining has a trapezoidal shape. The edges of the panel are beveled at an angle of 30°. The surface of the board is flat and smooth. For sale it is produced without treatment with protective compounds.
Eurolining is manufactured according to Western European standards. It is distinguished by the presence of special grooves along the entire length of the back side. The recesses are designed for ventilation of the panels during operation. It has increased dimensions and shape of the profile elements. The surface is pre-treated to protect against high humidity.
By type of material used:
- Metal;
- Plastic;
- Wooden.
Products made of plastic and metal are used for cladding outside and inside buildings. They are distinguished by durability, water resistance and a variety of colors.
Wood lining has low thermal conductivity and increased moisture permeability. Used for lining the internal walls of baths and saunas. Fastening wooden lining in a bathhouse has its own characteristics.
Wood of various species is used to make wooden lining.
Products made from softwood contain large amounts of resin. At high temperatures, the resin releases a unique aroma. The resin has bactericidal and healing properties. For cladding baths and saunas, materials from cedar, spruce, oak, and pine are used.
Products made from hardwood have increased density and water resistance. Ash, birch, alder, linden, and African oak (abashi) are used to decorate bath rooms.
According to the degree of processing, the following classes of lining are distinguished:
- Extra;
- A (1st grade);
- B (grade 2);
- C (3rd grade).
Classification in Latin letters is used to designate products manufactured in Europe. Sorting by class is used in domestic industry.
The “Extra” finishing material has no defects. The surface of the products is flat and smooth. Used for high-quality finishing of premises.
Class A lining has a rough surface. Characterized by few knots, hairline cracks and shallow resin pockets.
Class B products have an increased number of knots. Small cracks are allowed. In some places it may have wormholes and rot.
Class C products are used for cladding utility rooms. The products are of low quality with a large number of defects.
Depending on the profile, the following types of lining are distinguished:
- "Standard";
- "Calm";
- "Euro";
- "Soft-line";
- "Block house".
The profile of products of the “Standard” type is similar to the profile of classic lining. The length of the tenon is significantly less than the depth of the groove. A shortened tenon increases the strength of the connection of the planks during shrinkage.
The profile of elements of the “Calm” type has rounded outlines. On the reverse side there are special grooves for ventilation.
Eurolining is produced according to European standards. Has an increased spike length. The surface of the planks has a relief structure.
The profile of soft-line type elements has rounded outlines. The length of the spike has been increased. The surface of the products has a relief pattern.
Products like “Block House” resemble a rounded log.
What are the differences between lining types?
Modern manufacturers produce several types of these products, different in profile configuration and processing method. And this is not counting the different types of wood - from common pine to elite oak or ash. Among the variety of assortments, the following types are distinguished:
- Regular (standard);
- Calm;
- Euro;
- Under the beam;
- Under a log.
The first type is the simplest. When producing it, the manufacturer adheres to the minimum processing requirements: the top and bottom are planed, chamfered, and a quarter is formed. Calm is a more complex profile. It is distinguished by its softness and smooth contours. It is believed that such lining is best suited for visual perception.
The advantages of euro are the creation of special grooves, thanks to which the board “breathes”, and improved wood processing with a normalized humidity level. It is considered, if not the highest quality, then a fairly good product on the market. The “beam” and “log” profiles are distinguished by the imitation of a rough log house: being inside a steam room sheathed with such a board, it seems that these are solid wood trunks, tightly fitted to each other.
How to attach the lining to the wall of a bathhouse?
The lining should be attached to a pre-prepared frame made of wooden beams in three ways:
- horizontal;
- vertical;
- diagonal.
Depending on how the lining will be installed, a sheathing is installed, which should be perpendicular to the direction of the pattern. Each method has its own advantages.
For example, with vertical and diagonal it is possible to avoid the accumulation of moisture in the seams, and horizontal is attractive because it allows, if necessary, to easily replace elements that have darkened or show signs of rot, without dismantling the entire wall.
In addition, since the temperature under the ceiling of the steam room and below differs significantly, the thermal expansion of the lining in its individual sections will be different, which can subsequently lead to deformation of the material.
Features of fixing lining to the ceiling
We looked at what clapboard-lined walls look like, but how to sheathe ceilings correctly? Attaching the planks to the ceiling follows the same pattern as for vertical surfaces. Self-tapping screws and a screwdriver are very helpful here; sometimes small nails are used.
If the sheathing for the panels is made of wood, it is mounted in the same way as for the wall. However, it is better to leave the distance between the bars large. When a metal frame is planned, special hangers are installed, and the guide profile is fixed to them.
Advice! To finish the ceiling, get a second person to help. The work is not difficult, but it is quite difficult to hold the panels correctly and fasten them yourself.
Preparatory work
Almost always, construction work begins with preparation. Our case will not be an exception. The lining, which will be mounted on the walls in the bathhouse, needs to be treated, because this room is operated in conditions of high humidity. Using protective impregnation will allow you not to worry about the appearance of mold and signs of rot. It is also necessary to use water-repellent agents and protection from high temperatures.
While the lining is drying and preparing for further use, it is necessary to work on the walls. They must be smooth, clean and primed. Waterproofing in the form of a film is installed on the dried walls. If necessary, we lay power cables.
In conclusion
The finished result will delight you for a long time.
Before treating a surface with your own hands, it is always important to clean it properly.
- If surfaces have been treated with paraffin oil, it is sufficient to rinse them thoroughly before re-treatment.
- If, on the other hand, the surfaces have been treated with impregnations and their purpose is to change the color of the surface, it is better to completely sand the lining.
Rule of thumb: If the surface is shiny, remove the old finish.
After treating the surface of the steam room, it is important to preheat and ventilate the room before use.
Working with the ceiling
Attaching the lining to the ceiling in a bathhouse deserves no less attention. This stage of work has some specifics. By the way, it is from the ceiling that you need to start covering the bathhouse. There's a good reason for this. There should be thermal gaps of impressive size on the ceiling, and on the walls the lamellas should be installed close to the ceiling. The process of constructing a frame on the ceiling is similar to the technology described above.
Before you start finishing, you need to find out how to attach the lining to the ceiling in the bathhouse. Not all methods that were indicated in the corresponding paragraph are suitable for this. Only nails and clamps that will be able to withstand the load can be used.
The lining is not attached close to the walls; about 5 cm must be left to them. In this case, air can circulate freely, and the lamellas can “play” from exposure to high temperatures.
That's all we wanted to tell you about installing lining on the walls in a bathhouse.
How to make a ceiling in a bathhouse with your own hands: a step-by-step guide
When the walls have already been erected and one or another roofing system has been installed - trussed or without trusses, the turn of the ceiling comes.
And for those who would like to make a ceiling in a bathhouse with their own hands, we have prepared a step-by-step guide that describes step by step all the upcoming work. However, it must be preceded by some theory, because there are options from which you will have to choose one. Although... it’s hard to imagine a person deciding how to hang the ceiling in a bathhouse when the walls have already been erected. All this is planned at the project stage . And when the entire box with the roof is already there, then it either has or does not have ceiling beams.
Below we will not focus too much on exactly how these ceiling beams are placed and fastened; just watch the videos below. And we will assume that their presence is an initial given when installing a ceiling in a certain type of bathhouse.
How the lining is attached
The lining is attached with the groove down. Each board has a groove and a tongue. This allows for a tight connection. In order for them to hold, they are attached to a frame.
There are several ways to attach the material:
- The simplest method is done using screws. To do this, use screws that are tried on for working with brick or concrete. With this installation method, a hole is drilled, the same in diameter as the nail head. The screw is screwed in flush with the clapboard. However, this method has some disadvantages. When exposed to high temperatures, the nails become hot and can cause burns. In addition, the metal begins to rust;
- Not everyone likes hats. In this case, you can use a secret fastening method. With this method of fastening, the holes need to be drilled a little deeper. After the self-tapping screw is screwed in, the hole is closed using a wooden tenon;
- You can make a hidden fastening using nails. To do this, the nails are carefully driven into the groove. This requires some experience;
- Fastening with clamps is very popular. It's faster and doesn't require much experience. The appearance of the steam room is aesthetic.
There is a wide variety of fastening methods, however, regardless of this, installation of the lining begins from the corner. If the level cannot be maintained, a gap will form, which is then closed using a bar. If the direction of fastening is horizontal, then the work is performed from bottom to top.
https://youtube.com/watch?v=gIL7Z79Jc4g
How to install a pipe in a bathhouse through the ceiling?
The location of the pipe passing through the ceiling must be determined during design. When marking the hole, it must be taken into account that it corresponds to the vertical axis of the pipe. There should be at least 130 mm from the edge of the pipe and ceiling beams.
The gap that exists between the chimney and the ceiling must be insulated; for this you can use asbestos, basalt wool or fiberglass.
The thickness of this layer must be at least 50 mm so that the insulation does not fall; the hole around the pipe from below is hemmed with a sheet of stainless metal.
Types of lining for interior decoration of baths
To choose a lining for a bath or sauna, you should decide on your preferences for its external shape and profile, as well as the type of wood. In addition, depending on the capabilities of the “bath” budget, then the variety that determines its quality.
In terms of the variety of types of profiles, the lining is very diverse, but before making the final choice, you should take into account that the installation method will also depend on this. Therefore, if you are decorating the inside of the bath with clapboard yourself, then you should think about this in advance.
So, the lining profile is:
- “standard” - this type of lining has right angles with a tongue-and-groove connection, but with a shortened tenon, which allows solving problems of deformation during operation;
- “Euro” has an elongated tenon and, after installation, gives the surface a characteristic ribbing;
- “calm” differs from the “standard” in rounded corners and the presence of special ventilation ducts on the back side;
- “soft-line” is a combined type, a symbiosis of “calm” and “euro” profiles. This lining is distinguished by rounded corners and elongated tenons;
- “block house” is valued for its characteristic stylization of the front part of the material as a rounded log and is mainly used as exterior decoration, but in the case of creating a bathhouse interior in a special style, it is also quite suitable for interior cladding. It has a tongue-and-groove connection and mandatory ventilation recesses on the reverse side.
As a rule, the profile depends on which machine was used for the production of lining, although large industrial machines have the ability to produce different types of material.
And in the event that the lining is planned to be used not only for lining a bathhouse, but also rooms in the house, you can either purchase special equipment or make it yourself for the manufacture of wood products, the cost of which is much lower than the finished product.
When choosing lining, you should also pay attention to the markings indicating the grade of the material.
How to hang a ceiling in a bathhouse from other wall materials?
If in a log house one of the levels of logs is called the “ceiling crown”, then in the case of other wall materials it will be “timber beam” or “mauerlat”. This is precisely a wooden beam that is placed on top of the wall (and for block materials - on top of the reinforcing belt).
The Mauerlat simultaneously serves as a support for both the ceiling and the roof truss system. But this is the case if the bathhouse is one-story or the ceiling is above the second floor. Otherwise, you should watch the following video, which shows a labor-intensive but high-quality method of laying floor beams for the first floor in a foam block structure.
After completing all the work described above, the rest will seem easy to you. So, you can fasten the beams with corners to the mauerlat, and the flooring boards directly with long nails or self-tapping screws.
And again: the only difference is in how the ceiling fits onto the walls. Everything else is done in exactly the same way as described in the step-by-step description below for the installation of decking and subflooring.
Choosing wood for lining
To decorate a bathhouse, both material made from coniferous and deciduous trees can be used.
Experts in the “bath business” recommend giving preference to deciduous wood for a steam room, and for, for example, the design of relaxation rooms, to give preference to coniferous wood.
If the shower or wash compartment is also lined with wooden material, then larch lining is best suited for this, the wood of which is famous for its high resistance to high humidity.
Traditionally, the most popular for bathhouses is linden lining, which has a characteristic honey aroma, beautiful, light colors, wood texture and low density, which greatly facilitates its processing and installation.
It accumulates heat well in the steam room, but is not capable of causing a burn on the body upon contact with it. Thanks to this feature and amazing healing qualities, this sauna lining is also a very attractive finishing option.
Oak, another representative of hardwood, is also revered by many developers. Known for its high strength characteristics and beautiful design. It is a source of phytoncides that have a strong antiseptic effect.
Aspen is one of the most “bathed” types of wood. For a long time, this tree was the main supplier of material for the construction and finishing of baths.
But it should be borne in mind that aspen lining darkens over time, but this does not affect its characteristics.
Just like linden, it has a high accumulating capacity, but low thermal conductivity, which prevents burns from touching it.
Ash lining is distinguished by its unusually beautiful pattern and can withstand extremely high temperatures and high humidity. In terms of strength, ash wood is only slightly inferior to oak wood, but in terms of ease of processing it is significantly superior.
Alder, like oak, is a storehouse of tannins, which makes choosing lining from it for finishing a bath the right decision. It has a pronounced anti-inflammatory and hemostatic effect.
But sauna lining can also be made from coniferous trees, among which pine, which has a beautiful texture and color, ranks first.
Spruce lining is found on the market much less frequently, although it also has beautiful wood that is easy to process. It is superior to pine in terms of the amount of resin, so the recommendations for its use are the same.
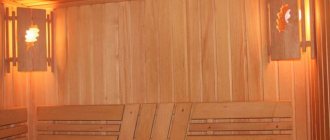
If you want to turn your bathhouse into a truly beautiful object, in which not only the body and soul, but also the eyes can rest, then for finishing you choose lining made of cedar, which is one of the elite species. It has a pleasant smell, beautiful characteristic pattern and color.
But due to the presence of resins, it is better not to use lining made from this wood in a steam room, but in the relaxation room, the released essential oils will help you completely relax after a bath.
The choice of material for finishing a bathhouse is quite extensive, but to determine which lining for a steam room is better, you should start from your own aesthetic preferences, performance characteristics and properties, as well as cost.
We choose the canvas, features and characteristics.
Taking into account the special microclimate of the room, the material is selected of a certain quality. Cladding of internal walls requires such qualities from the lining as: durability
- To high temperatures and sudden changes.
- To high humidity.
- To direct contact with moisture.
The market is filled with construction varieties and to make the right choice you need to know what to look for. The lamellas may differ in the back and front sides, the shape of the entrance grooves and its dimensions, and the type of wood
Types of lining profiles
- Eurolining. With visible seams after covering.
- Soft-line. With externally rounded shapes, with closed seams
- Calm. With various external shapes, without seams.
- Landhaus. With drawings on the front side.
- Eurolining is two-sided. Equally suitable for cladding on both sides. But this type does not have a ventilation groove, and is not entirely suitable for bathhouses.
- American. It has a sharp bevel on the front side.
- Block house. Or imitation timber, convex front part.
Manufacturers use different markings, both according to GOST and their own, so you should not rely only on them; when choosing, you must pay attention to external quality. The material is manufactured using the same technology, and the difference in grade is noticeable externally; you can also use the European DIN standard to distinguish the grade of products
The material is manufactured using the same technology, and the difference in grade is noticeable externally; you can also use the European DIN standard to distinguish the grade of products.
For a bath, choose a smooth texture, those profiles that have smaller profiles and no sharp cuts; it can be calm, softline, and so on.
Differences by lining classes
- Extra or premium. High quality products, even, smooth on the front side, without knots or cracks. The most expensive variety.
- And class. It differs from the premium class in the permissibility of knots up to 1 cm, and may have small cracks
- To class. The knots on them are no more than a third of the board and in any quantity, possibly through cracks.
- C class. The cheapest of all the classes presented, the lowest quality, many knots on the board, poorly planed front side. Rarely used as a topcoat.
For saunas, you can use any variety, and the first three options are better. For better comfort, it is desirable that there are no nicks or other defects to avoid scratches and splinters; the texture should also be pleasant to the touch, smooth and without roughness.
Let's consider what kind of wood is used in the manufacture of lining
The concept of a bathhouse combines a sauna with a dressing room, a shower room with a swimming pool, and a relaxation area, and here you can combine the use of the material, both for the sake of economy and to improve the appearance, for this you need to know what kind of wood the board is made from, and what properties each of them has.
- Coniferous species, cedar pine, etc. Coniferous species are cheaper and are more often used in dressing rooms, relaxation rooms, swimming pools, and showers. It is also acceptable to use it in a steam room, but if you have a Russian sauna, the board will get very hot, which will create some inconvenience. Conifers get very hot and burn at high temperatures.
- Hardwood, aspen, linden, etc. An excellent material for cladding saunas and steam rooms. Resistant to aggressive temperature changes and direct contact with moisture; the most common materials for saunas are linden and aspen. The boards do not overheat and you do not have to get burned, which is an important property and very convenient.
Particular preference is given to hardwood, especially in sauna finishing. They do not burn or release resin, making them uncomfortable in hot environments.
Useful tips
And finally, a few tips that will ensure the reliability, durability and aesthetic appeal of wood cladding:
- Before installation, it is advisable to treat all wooden surfaces, including sheathing, with antiseptic impregnation, especially if clapboard is used to finish a wet room or external walls. This will prevent the spread of mold.
- When finishing interior spaces, materials must be kept in them for two to three days for acclimatization.
- The lined surface can be painted, coated with oil, wax, varnish, or stain. Pre-priming will reduce the consumption of varnish or paint.
How to prepare the base
It is allowed to attach the lining directly to the wall or ceiling only under the following conditions:
- if the surface is very flat and strictly level. This can be a wall made of timber, lined with OSB boards, plywood or other sheet material;
- if the temperature and humidity in the building being finished is stable throughout the year. That is, it should be a dry, heated room with a normal microclimate.
In all other cases, before attaching the lining to the wall, a frame of parallel wooden blocks is installed on it. The distance between them is 40-60 cm. This frame allows you to solve several problems at once:
- level the surface;
- level out level differences;
- create an air gap between the base and the cladding to ventilate the rear surface of the lining.
Also, the space between the wall and the finish can be filled with heat-insulating materials, which is often resorted to before installing the lining in a bathhouse or sauna.
The thickness of the bars for the sheathing is selected taking into account the thickness of the insulation and the ventilation gap. Source board.bau.com.ua
The frame is secured to the base with self-tapping screws or dowel nails, depending on the wall material. When installing it, the level is constantly monitored - all bars must be in the same horizontal (ceiling) or vertical (walls) plane.
What to hammer in: nails, screws or staples?
The lining itself is a board with a certain profile, which must have a tongue-and-groove locking connection. It is attached to the wall or ceiling using nails, screws or staples. The tools and material required to hammer in the lining in the bathhouse are as follows:
- nails, screws, staples;
- hammer, screwdriver, hardware gun;
- a mallet or a piece of clapboard for knocking a tenon into a groove;
- building level.
What nails should I take for the lining in the bathhouse? It is desirable that these are finishing nails 30-40 mm long, with an anti-corrosion coating. It’s worth taking coated screws (their length is the same, by the way). Regarding the length, you should proceed from the thickness of the board (if in a groove, then only the walls of the groove), plus you need to punch through the block to which the board is attached at least to the middle.
The staples should be the same size, although there are comrades who nail 14-mm staples with a construction stapler through a clamp, but this is rather an exception. To properly line a bathhouse with clapboard, it is better to use long staples and shoot them at an angle of 45 degrees (approximately).
Of course, it is tempting to wonder which of these methods is better. There cannot be a definite answer to this, because everything depends on the experience of a particular person. And if it is not there, then the easiest thing to do is to shoot the staples using a pneumatic gun. True, it is not cheap, and few people would agree to buy it for a one-time job. Other methods are a little more difficult to implement.
How to lay lining correctly
There are two ways to fasten the lining in a bathhouse quickly and efficiently:
- Horizontal;
- Vertical.
The chosen method affects the speed and order of the cladding work.
With the horizontal method, the planks are placed parallel to the floor. When laying vertically, it is perpendicular to the floor.
When covering baths and saunas, they prefer to use horizontal installation. In this case, the boards are installed with the tenon facing up. The groove of each subsequent panel is placed on the tenon of the previous plank.
The advantage of the horizontal method is the high protection of elements from water penetration. In this case, ventilation of the space between the outer wall and the cladding is ensured.
During bathing procedures, the main percentage of dirt and splashes occurs on the lower panels. When positioned horizontally, the process of replacing them is greatly simplified. For repairs, it is enough to trim or replace a few planks. To repair damage in a vertical position, it is necessary to dismantle all adjacent elements.
Experts recommend using a horizontal position in wet steam baths. The vertical method is recommended in dry steam baths (saunas).
After determining the layout of the lining, they begin to calculate the volume of work.
Covering saunas and baths: what's the difference?
Bathhouses and saunas differ in humidity and temperature.
In the sauna, the air is dry with humidity up to 8% with a permissible temperature range of 80–140 degrees.
In the Russian steam room, high humidity is always maintained with an indicator of up to 70%. In this case, the maximum permissible temperature is up to 100 degrees.
There are no restrictions on the choice of tree species for sauna cladding, with the exception of pine. Raw materials are less susceptible to moisture and therefore last longer. Installation method: vertical, horizontal.
For lining a Russian bathhouse, it is better to take lining made of alder, linden, abasha, and larch. The combination of several breeds at the same time looks beautiful. The installation method is predominantly horizontal.
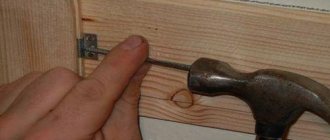
What are finishing nails?
This is the name for nails with a small cylindrical head, the diameter of which is only slightly larger than the diameter of the rod. They are designed specifically for fixing decorative trim, as they provide a hidden fastening. These nails are thin and, as a result, easily penetrate the wood without causing cracking. It’s easy to drown a small hat in the thickness of the material using a hammer.
Finishing nails
In the photo - the finishing nail next to the finisher
Characteristics
The rods of such hardware are smooth, with notches in the upper part, and range from 20 to 90 mm in length. The cap has an oval shape, and its height corresponds to the diameter of the rod. The diameter of the cap itself varies from 1.6 to 3.4 mm. The fasteners are made from low-carbon steel, and anti-corrosion compounds are used as a protective coating.
Unlike simple construction nails, finishing nails are not designed for high loads, since finishing materials are usually lightweight. They can only be used in structures that are not subject to shrinkage and mechanical bending or tearing loads. It is also undesirable to use them for temporary coverings: not a single tool makes it possible to pick up and pull out a nail due to the small head recessed into the wood. For the same reason, they cannot be reused.
NFL finishing nails
Galvanized finishing nails 1.8x40
Scope of application
Finishing nails are used not only for fastening lining; their scope of application is quite wide:
- furniture manufacturing;
- installation of small decor in interiors;
- decoration of window and door openings with platbands;
- fastening thin slats, glazing beads and skirting boards.
Some craftsmen use them when laying parquet and laminate flooring when they need to fix the planks, but since floor coverings are subject to constant mechanical stress, ordinary nails are more suitable here.
Driving the finishing nail. Using a finisher
Useful tips
And finally, a few tips that will ensure the reliability, durability and aesthetic appeal of wood cladding:
Before installation, it is advisable to treat all wooden surfaces, including sheathing, with antiseptic impregnation, especially if clapboard is used to finish a wet room or external walls. This will prevent the spread of mold.
When finishing interior spaces, materials must be kept in them for two to three days for acclimatization.
The lined surface can be painted, coated with oil, wax, varnish, or stain. Pre-priming will reduce the consumption of varnish or paint.