The gutter helps protect the roof and walls of the house from excess moisture. Nowadays it’s easy to purchase your favorite drainage system in a store. Well-known brands offer protection from moisture, and specialized companies offer installation guarantees.
The costs for this are considerable, the amount comes out to be large. You can purchase a drainage system in a store and save on installation. Better yet, make such a device yourself with a little effort and knowledge.
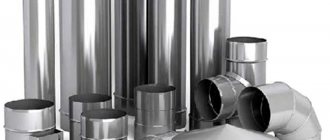
Materials for homemade gutters:
- plastic bottles;
- sewerage pipes;
- tree;
- galvanized metal sheets;
- copper metal sheets;
- profiles for drywall;
- ceramic drainage.
What does a roof drainage system consist of?
The diagram shows:
- The gutter of a drainage system is an element that collects and directs water.
- The gutter plug is designed to cover the ends and prevent water from overflowing through them.
- Angles are universal. Direct the flow.
- Gutter angle.
- Gutter holder. One edge is attached to the building, on the other there is a curved bed.
- Gutter connector (coupling). Connects parts of a structure.
- Outlet funnel. Connects the gutter to the drainpipe.
- Pipe elbow.
- Connecting pipe (coupling).
- Drainpipe.
- Drain elbow.
- Pipe clamp with pin.
- Pipe clamp with claws.
Main elements of drainage design
Gutter systems are manufactured in various variations, but their structural features are generally common and consist of the same elements:
- The gutter is the main part of the structure that collects water flowing from the roof; has a length of up to 3-4 meters.
- Hook-brackets - the gutter is laid on them.
- Caps for the edge sections of the gutter on the right and left.
- Funnels mounted to the edges or to the middle of the gutter (fixed with an adhesive connection, less often with grooves and seals).
- A coupling for fastening the gutter, mounted using the same methods (adhesive or groove).
- Pipe for drainage, equipped with a coupling.
- Clamps for tightening and fastening various elements.
- Tee for joining pipes to each other.
- Transition coupling - used when it is necessary to connect pipes of different diameters.
- The elbows connecting the pipes are bent at 60-70°.
- A mark, or elbow with an angle of 45°, directs water flowing from the roof into the storm drain inlet.
- Metal hook-bracket.
- Cornice strip - sometimes included in ready-made drainage systems instead of brackets or together with them.
If you assemble the drainage system yourself, then before assembling the drainage system, you need to draw up a drawing that includes the optimal layout of drainpipes for a particular roof.
How to choose the right drainage system
Before purchasing, it is important to decide on the parameters. Depending on the collection area and the location of the drain pipe, different throughput capacities are required. It is determined by the diameter of the pipes and gutters.
The main values that you need to know for installing a roof drain are given in the table.
| S slope, m² | Gutter diameter, mm | Pipe diameter, mm |
| up to 50 | 100 | 75 |
| 50-100 | 125 | 100 |
| 100+ | 150 | 120 |
Typically one drain pipe is installed per gutter. If the length of the slope is more than 12 meters, an additional pipe is installed in the middle.
Briefly about the main thing
Do-it-yourself roof gutters can replace a finished structure. The main thing is to follow the technology for installing the drainage system. The reliability and proper operation of drainage systems depends on the accuracy of measurements. A drain made according to all the rules will cope with the task and will last for a long time.
Different materials are used to make roof gutters: PVC, sewer pipes, galvanized steel, wood, plastic bottles. The process of installing the structure is similar in each case. Detailed instructions for installing drainage systems will help you complete the work without the involvement of a specialist.
Ratings 0
Selecting a drainage system by material
Before installing a drain, you should think about the materials of its constituent elements. There are two main types of roof drainage systems: plastic and metal.
Visual difference is not noticeable
Metal
Such roof gutters are strong and durable - any part made of metal is much larger than a part made of good plastic. Installation of a metal drainage system is suitable for multi-story buildings.
However, in some cases you should not install metal roof drains:
- The sea or an area with developed industry is located nearby. In these places there are a lot of salts and aggressive substances in the air, which, dissolving in water, spoil the protective coating and cause corrosion;
- Installation of metal gutters is not recommended if silence is required. When it rains, such a system will create a lot of noise.
Plastic
A more popular solution is based on PVC (polyvinyl chloride). By adding various modifiers, we obtain a material with a long service life - from 10 to 30 years.
Polymer systems have advantages over metal ones:
- low weight of the structure, which makes installation on old buildings possible;
- can be used at temperatures from -50°C to +75°C;
- low cost of installing a plastic drainage system.
Installing plastic gutters also has its disadvantages:
- fastenings are placed at small intervals from each other;
- thermal expansion and contraction, which can cause gutters to fall out of their fasteners or cause the plastic to burst;
- fading of flowers under the influence of the sun;
- low resistance to loads and mechanical damage.
Ice accumulation in winter or an accidental impact can crack the plastic. It is necessary to clean the drainage device in a timely manner during the cold season.
Types of drainage systems
The most famous and common roof drains are made of galvanized metal. They may not be as attractive as more modern options, but they are reliable and inexpensive. And this is important. What’s also good is that if you have the skill of a tinsmith or simply have “straight” hands, you can make a drain out of galvanized steel with your own hands.
General view of the drain (storm drain, roof drainage system)
If we talk about other metal systems, two of them belong to the elite category - copper and an alloy of zinc and titanium. They are certainly durable, but the price is very high. There is a more democratic option - metal drainage systems with polymer coating. They are quite affordable in price, you can’t fault them in appearance, and in durability – it depends on the manufacturer. If the technology is followed, they will serve for many years.
There is another type of roof drainage - made from polymers. They can withstand ultraviolet radiation, frost and heat, are highly durable, and look good. The disadvantage can be considered the rather high price, especially from European manufacturers. However, there are good options in the inexpensive category.
Types of mounting brackets
Depending on the stage of construction, the condition of the sheathing, the front board and the type of construction, gutters are attached in different ways: to the sheathing, to the rafters, to the front board and in other ways.
Attaching the bracket to the sheathing
This type of gutter fastening is suitable for those who have a fairly strong sheathing (the building is not old, the sheathing is made of strong wood) and the roof has not yet been laid.
It uses brackets with a long leg. Self-tapping screws are attached to the sheathing through special holes and the hook is bent to the required level.
Important! The distance from the edge of the roof to the center of the hook should be left 30-40 mm, otherwise water may overflow over the edge and splash.
Attaching to rafter legs
If the roof has already been laid, then drainage from the roof should be made using this method. The brackets have the same structure as when attached to the sheathing, with the exception of the legs being rotated 90 degrees. This makes it more convenient to work.
The disadvantage is the limited choice of distances between the brackets. If the rafter legs are located closer than 0.5-0.6 meters from each other, this will not create problems. If they are located at a greater distance, it will not be possible to maintain the recommended distance between the brackets.
Fastening to the front board
This type of fastening of the drainage system is also suitable for those who have a roof installed. A special stand with a full-length cutout, similar to a rail, is installed on the frontal (wind) board. Brackets are inserted into the grooves inside the cutout and fixed.
The advantage of this technology is easy adjustment of the distance between the fasteners. However, it is not possible to easily adjust the height and distance from the edge of the roof.
Other options
If the roof is already covered, it is possible to install suspended gutters. In this case, the brackets are attached to the roof sheathing. In this case, long legs are used, which can be adjusted both in length and angle.
Suspended drainage is not inferior to other types of fastening in efficiency and ease of maintenance and does not require the removal of part of the roof for installation.
Free roof drainage is not the cheapest solution
Among some developers, there is an opinion that the cheapest thing to do is to do nothing - let the water flow freely from the roof directly onto the blind area and then onto the ground.
There is no need to make a special device for collecting and draining water from the roof of the house, provided:
- Increase the overhang of the roof edge from the wall to 0.6 m.
- Carry out enhanced waterproofing of the foundation and basement walls to a height of at least 0.5 m above the surface of the blind area;
- Cover the base to the specified height with a non-moisture-resistant material with high frost resistance (for example, clinker bricks or tiles, natural stone, base siding).
- Ensure that the blind area around the house and the surface of the site have a slope of several percent away from the house.
Calculate the costs of this additional work and you will see that installing a drainage system to collect and drain water from the roof will be cheaper.
By arranging a free drain without the above measures, you risk significantly reducing the durability of the finishing of the walls of the house and the basement, and reducing the bearing capacity of the soil under the foundation due to their soaking.
In addition, unorganized water flows around the site reduce the comfort of using the territory. The blind area is often used as a pedestrian path. If there is a free drainage from the roof, such a path will become impassable during rain.
Free drainage is usually used in certain areas of the perimeter of the roof of a house and outbuildings. To collect water along the edge of the blind area, it is recommended to install a tray. The system for collecting water in a tray at the edge of the blind area is less sensitive to the effects of ice and snow, to clogging with debris, and is easier to clean than a drainage system with gutters on the roof.
Next article:
How to make a roof from corrugated sheets
Previous article:
Bituminous shingles. Installation and laying of soft roofing.
More articles on this topic
- Should I build a house on one floor or two?
- Concrete floor on the ground in a stone private house
- Canopy, canopy for external door
- What area of premises to choose for building a house
- Calculation of the load on the foundation. Calculation of the foundation base
- Technology for insulating facades and exterior walls of a house with do-it-yourself mineral wool
- Cleaning the heat exchanger of a gas boiler or water column from scale
- We are building a house, walls made of concrete blocks
Material design and calculation
The following are the main elements for installing gutters and their descriptions.
Brackets
The drainpipe is secured to the wall using brackets that are installed on the sheathing or to the eaves beam. The first type is considered obsolete and is installed before the start of roofing work. The second type is much more common and is easy to use. There are models with precise adjustment of the gutter position after installation on the board.
Gutters
They collect water from the roof and direct it to the drainpipes. They are installed along the entire length of the slopes with some slope. They have any shape, the possibility of self-production is allowed.
Gutter turns
Direct the water flow at an angle of 90° or 135°. The joints of these elements are subject to high loads; a powerful suspension is required.
Funnels
Connect gutters and downpipes. Funnels can be pass-through or plugged on the right or left. Pass-throughs are installed anywhere, while plugged ones are installed only at the edges of the gutter.
Pipe elbows
They change the direction of flow and use it to place a vertical pipe as close as possible to the walls of the structure.
Clamps
Fix drainpipes.
Drainpipes
Drain water from gutters. Standard length is 2 m.
To calculate the exact number of elements required to properly install the drain, you need to consider the following points:
- the minimum number of drainage gutters per slope should be equal to the length of the slope divided by the length of the gutter (standard - 2 meters) and rounded up. To calculate the total quantity, you need to add up the results for each slope;
- drainpipes are placed one per gutter, usually at the corners of the building. If the length of the slope is more than 12 m, another one is installed in the middle. Their size is determined by the height of the walls. The standard length of galvanized pipe is 2 m, plastic pipe can reach 3-4 m;
- Brackets for fastening gutters are placed every half a meter around the perimeter of the gutter. 2 brackets are installed on turns and funnels for greater structural rigidity;
- one funnel and pipe bend for each drainpipe;
- plugs along the edges of gutters;
- connecting element for each joint.
As an example, we will make a full calculation of materials.
For one slope 10 meters long with a wall height of 2.5 meters you will need:
- 5 gutters;
- 4 connecting elements;
- 1 funnel;
- 22 brackets (when using a corner element +1 for each);
- 2 plugs;
- 1 drainpipe;
- 1 pipe elbow;
- 1 drain;
- 2 pipe clamps.
For a four-slope, subject to the use of rotating elements:
- 20 gutters;
- 16 connections;
- 4 funnels;
- 4 rotating elements;
- 88 + 8 (at corners) = 96 brackets;
- no plugs required;
- 4 drainpipes;
- 4 knees;
- 4 plums;
- 8 clamps.
Rain chain - original drain
In one-story houses, instead of traditional drainpipes, a chain can be attached to the gutters, along which water will flow.
Rain chains are extremely popular in Japan, where they are decorated with a variety of decorative elements. Chains are made from various materials; the links can have a complex spatial shape and alternate with decorative bowls and other elements. The lower and upper ends of the chain must be secured so that the chain remains taut.
When using rain chains to drain water, the roof overhang should be increased - the distance from the wall of the house to the chain should be at least 0.5 m, or the wall should be additionally protected from wetting by splashes of water.
Step-by-step instructions for installing a drainage system
Step 1. Attaching the brackets
Metal elements are suitable if fastening to rafters is required. The outer parts are installed 15 cm from the end. There is a space of 2 cm between the front board and the bracket.
A cord is stretched between the parts and shifted to create a slope (4 mm per 1 meter). The remaining brackets are attached along the cord every 0.5 meters.
Plastic parts are used when attaching the gutter to the board. Before work, check the board for curvature in a vertical position. If it is uneven or at an angle, it will not be possible to do everything efficiently.
Further actions are the same as with metal brackets: secure 2 elements at the edges, pull the cord, create a slope and install the rest. Check the slope with a level.
The brackets must be fastened so that the distance between the edge of the future gutter and the roof line is 20-25 mm, while water will flow well into the gutter, and sudden snow melting in winter will not damage the structure.
Step 2. Installation of gutters.
The gutter design involves special recesses for fastening, and there are something like hooks on the brackets. The gutter is installed in the brackets and pressed until it clicks. A click means that the brackets have taken their place and fallen into the recesses.
Step 3. Installation of connecting elements of gutter couplings
The edge clings to the two edges of the gutter and is fixed until it clicks. To strengthen the structure, the couplings are sealed with brackets.
Step 4. Attaching the funnel
The funnel is applied to the pipe and outlined with a pencil.
Next you need to cut a hole; for this you can use a crown or a saw blade at low speeds.
After removing the burrs (for example, using a file), the funnel is snapped onto the gutter and secured on both sides with brackets. The connection can be treated with glue.
There are also connecting funnels that are installed between gutters as connecting elements.
Step 5. Installation of metal mesh
The mesh serves to protect the drainage system from leaves and other debris getting into it. It is built into the gutter and, thanks to the elastic material, expands. For reliability, it is secured with clamps.
Step 6. Installation of the gutter corner
To begin with, install one bracket on each side of the corner, at a distance of 10-20 cm from it. Then the edges of the gutters are fixed in the corner element until it clicks.
If you use elements with an adjustable angle, the procedure is the same. The main thing is not to exceed the maximum deviation allowed by the corner element (indicated by the stop mark).
Step 7. Attaching the plug
Caps are installed at the ends of the gutter to prevent water from overflowing outside the system. Attached using tight fixing tendrils.
Step 8. Installation of the pipe elbow
The elbow is installed in the outlet funnel. It is mounted so that the corner is directed towards the wall. On a metal funnel it is secured with clamps; on a plastic funnel, rubber seals are used for joining.
Step 9. Installation of pipe, clamps and coupling
One of the edges is inserted into the knee. The pipe is attached to the wall with clamps at a distance of 1.5 m from each other. Also, the brackets must be vertical, otherwise the pipe may not stand straight.
Only the bottom of the pipe can move away from the vertical in the direction opposite to the wall of the house. If the pipe length is not enough, an additional pipe is installed using a coupling.
Step 10: Installing the drain
It is enough to secure the drain to the pipe with a coupling and direct it away from the house.
This completes the work.
Made of wood
Having a dacha or country house, it is easy to find this material. For temporary use for a short period, a couple of hours is enough.
Temporary drainage is made from 150x10mm boards. The length of the boards is equal to double the perimeter. For example, the perimeter of the roof overhang is 100 m, which means the sum of the lengths of the boards should be 200 m.
The boards are nailed together at right angles. The resulting corners are overlapped, resulting in long gutters. For temporary construction, temporary hooks are made from boards and iron. Gutters are attached to the resulting brackets.
The bracket can be made of wood. A triangle with a landing for gutters is cut out of a wooden beam. The brackets are nailed or wired to the roof. When installing, the edges of the perpendicular gutters must overlap.
Having adjusted the slope of the gutter, we proceed to the drain. It can be made from pieces of tin or by making another trench that reaches to the ground.
The main task of such a drain is to drain water from the foundation of the house. Next, you can dig a groove to drain the water or take it under a tree. The water should move away from the house by about 1.5 - 2 m.
A temporary gutter looks a little silly, but it can last for over a year.
Until the owners save money or come up with another option. To protect wood from moisture, you can use plastic film secured with tape, a furniture stapler or small nails.
There is another option for making a gutter. Dissolving a small log into 2 parts. Using a chisel, cutting out an oval, you get an excellent gutter. The method of attaching to the roof remains the same.
Tips for using the system:
- Protective nets are installed to get rid of fallen leaves and debris. It's easy to make yourself. To do this, you need a fine mesh, which is cut into strips 6 cm wider than the width of the gutter (3 cm more on each side). You can attach it using clamps or wire.
- Cleaning the drainage system from dirt and debris will prolong its life and protect it from blockages. Clean with a brush or by hand, removing sticks. A clogged drain allows water to leak onto the walls and foundation of your home.
Basic mistakes in installing roof gutters
- Incorrect gutter slope. Usually the slope is 3-5 mm per meter. If this standard is not observed, the entire drainage system may stop working. With a greater slope, the gutter may move away from the roof, and water simply will not flow into it. If it is less, areas with stagnant water are formed, dirt and vegetation accumulate. It is not always possible to correct the error; cleaning the drain (which will have to be done regularly) is a long and difficult task.
- Small number of brackets. The brackets distribute the load along the entire perimeter. If there are not enough of them (the distance between adjacent brackets is more than 0.5-0.6 meters), the structure will begin to deform and crack.
- Incorrect coupling connection. It is important to use seals and join elements with good force. If the connection is incorrect, leaks appear in these places.
- Incorrect gutter placement. The gutter is installed so that the distance between the edge and the roof line is 20-25 mm. This distance ensures safety for the structure in case of sudden snow melting and at the same time collects rainwater. If it is less, there is a risk of damage to the system from snow melting. If it is more, rainwater from the roof will not fall into the gutter.
To avoid mistakes in installation, you should watch this video
Gutter: plastic or iron
To understand which drain is better - plastic or metal, you need to compare the pros and cons. They differ not only in price and appearance, but also in service life.
pros
The main advantage of metal structures is durability. A drainage system made of galvanized steel, an alloy of aluminum and zinc or titanium is eternal. The drainage system is not afraid of either the sun or the heat. The parts bend easily, adapting to any roof shape.
The advantages of PVC include its aesthetic appearance and the ability to choose a variety of colors. The drainage system made of plastic is resistant to moisture - it is not damaged by rust. Strong parts are difficult to break accidentally during installation, although there is a possibility of damaging the protective coating. The PVC drainage system is lightweight, which means it is suitable even for dilapidated houses.
Minuses
The big disadvantage of any metal structure is that it can be “defeated” by rust. A few scratches, which often appear during installation, are enough to shorten the service life of the product. In addition, they are heavy and sometimes bulky. It is not always possible to find a suitable design solution.
Plastic ones have slightly fewer disadvantages. The main thing can be considered intolerance to frost - most PVC structures are designed for regions where the temperature does not drop below -15 degrees. With sudden changes in temperature, pipes simply crack. In addition, there is always a risk of gutters breaking when snow or ice melts.
Heating cable in a drainage system
During the cold season, ice forms inside the gutters and a large amount of snow accumulates. As a result, water begins to overflow and icicles appear. The risk of the entire drain collapsing increases.
A solution to this problem can be a heating cable - a special wire that generates heat when electricity is supplied.
They install it after installing the drain, simply laying it inside the gutter and vertical pipes, securing it with special clamps. Along with the cable, installation of a thermostat and sensors is provided.
The thermostat determines the required current for a given temperature. For example, at zero temperature the cable may heat up little and consume less electricity; in severe frost, stronger heating is required, which means electricity consumption increases.
The thermostat knows nothing about the temperature around it and can be installed inside a building. So that it can set the temperature depending on the weather, special sensors are attached to it (may not be included in the kit and must be purchased separately).
In some cases, the cable only in the drainage system is not enough, and it is laid in a snake on corrugated sheeting. The cable is secured using special clamps.
To calculate the power consumed by heating, the total cable length is multiplied by 25 watts.
The cable on the roof and in the gutter is one system. They are controlled by the same regulator and connected to the same sensors.
Drainage design for a private house
The drainage system consists of different functional elements, each of which serves its purpose.
Drainage design for a cottage or household Source krasivydom.info
To understand how to make a roof drain in a private house, you need to know what parts it consists of :
- A gutter is a semicircular pipe mounted along the roof of a building. It is used to collect wastewater and is installed at an angle to the drain funnels.
- Couplings - used to connect corner and long gutter parts.
- A funnel for receiving water is mounted on a gutter for discharging waste into the drain pipe. A grill is installed in the funnel to protect it from debris.
- The drain is installed vertically to the gutter and collects water coming from the funnel. It must reach the sewer system and end with a hole for the waste to exit.
- The elbow or outlet has a bend so that there is a small distance between the flowing water and the building.
- Clamps or brackets hold the east pipe and gutter in place.
Attention! Components are selected and calculated individually, taking into account the size of the roof and climate conditions.
Homemade drain
Due to the fairly high prices for gutters, many people decide to make them themselves. There are a lot of options for both metal and polymer solutions.
Drains from sewer pipes
Sewer pipes are designed for use in areas where there is no sun. This means that they can decompose when exposed to ultraviolet rays. However, many note that gray and orange pipes can last even longer than the original systems.
Gray pipes are suitable for residents of the southern regions, as they can withstand high temperatures, but do not tolerate severe frosts.
Brown pipes hold up well in the cold, have thick walls, but are afraid of high temperatures. They do not tolerate long-term exposure to sunlight and deteriorate over time.
The rules for selecting sizes are the same as for a regular drain. The process differs only in that you need to cut the pipe lengthwise (you get two gutters at once).
It's more difficult with brackets. You can buy ready-made brackets and adjust them to the desired size. This takes a long time and such fastenings are not always suitable. Therefore, many people use regular mounting tape for fastening, simply hanging the gutters on it.
The remaining elements of drains (corners, caps, mesh, funnels) are also easy to make from sewer pipes. There are many ways and everyone does exactly what is convenient for him.
It is worth noting possible analogues of drainpipes. Ordinary chains are taken directly from the gutter and fixed to the ground. This solution is not striking, and it can also be disguised as a decorative element.
Gutters made from plastic bottles
Craftsmen assemble gutters and vertical pipes from ordinary bottles. Take dark bottles and cut them in half, removing the necks and bottoms. These parts are fastened together to form a kind of gutter. The drainpipe is made from bottles with the necks and bottoms cut off, but not cut in half. They are simply inserted into each other.
Galvanized steel gutters
The desired shape of the gutter is selected, markings are applied to the sheets of metal (keeping a small margin for folds), they are cut with scissors. To give the shape, cover a pipe of the required diameter with a sheet and punch it with a hammer. The folds are made using a hammer and a ruler. Funnels are made independently by cutting metal with scissors.
Made from galvanized steel
Galvanized steel is considered a durable metal that is resistant to rust, frost and ultraviolet radiation. The only negative is that the fastening seams come apart due to temperature changes.
First you need to prepare galvanized sheets. The workpiece is cut with metal scissors, adding 1.5 cm to the folds in width.
This material can be easily reshaped. For folds, it is enough to attach a ruler or a piece of timber to the sheet and beat it with a hammer. To give it a round shape, the pipe or log is wrapped in a sheet and passed with a hammer or mallet.
The finished structure is attached to brackets. The gutters are overlapped by 10 cm. Funnels are made using scissors, bending the metal according to your ideas. The pipes are fastened with clamps.
Pipe making
To begin with, you should design the funnel and make a rough drawing on a sheet of paper. Then you should start transferring the drawing onto the sheet metal.
A straight line is drawn from the edges with an indent of 0.5 cm from the edge and 1 cm from the other. Having cut out the part, bend the drawn edges at a right angle, an indent of 1 cm, and the other at an acute angle.
When folding the workpiece, the edges of the corners should fit into each other. Use a hammer to add tenacity to the pipe seam. Having special machines for bending metal, the process will take less time.
Funnel
The funnel consists of two different parts. Its diameter should be equal to the diameter of the pipe. The parts of the funnel are drawn separately on a sheet of tin. After cutting with scissors, as in making pipes, leave 1.5 cm from the edge for joining. They should connect outwards.
Funnels at home are difficult to make for a beginner, so if it doesn’t work out, you can buy ready-made ones in the store. It won't hurt your pocket that much.
Brackets
Brackets help support gutters. You can make this important hook-shaped item yourself. It is better to take material of the same width so that the brackets are identical.
To do this, you need steel with a thickness of more than 2 mm, this will allow you to hold the weight. Electrical strips are ideal for workpieces. Dimensions: 40 cm by 2 cm. The workpiece is bent using a pipe and nails driven into wood using a lever.
After manufacturing, two holes are drilled for fastening. Painted brackets, thus protected from rust, last much longer.
Painted metal is protected from rust and corrosion. This means that the service life of the product made from it increases.
For a temporary structure, the brackets are made of wood. Cutting indentations for the gutter in a piece of timber. Some nail them to the rafters on the roof.
Where to drain water from drainpipes next?
During installation, water is diverted from drainpipes to various places, at a distance of at least 5 meters from the foundation. If there is a place on the site below the level of the house, then you can lay the pipe there. The main thing is that water does not flow under the foundation of the house and does not disturb the neighbors.
If there is nowhere to drain the water, a drainage system with a well or block is constructed. The essence of the drainage system is that, being underground, it collects all the wastewater. After some time, this water is absorbed into the soil.
If you are lucky and there is a rain drain nearby, then all the water flow is diverted into it; it is even possible to install a storm drain on the roof. Of course, for this you need to coordinate the installation of drainpipes with the relevant regulatory authorities.
That's all. Now you can install metal or plastic roof gutters with your own hands. If you liked the article, share it on social networks.
Functions and types of drains
The main function of a roof drain is to collect water from the roof surface and drain it to a remote location. For large areas of slopes, options are provided when the drainpipe directs the flow into a storm sewer or a special tank.
Drainage structures form an organized system, in contrast to an unorganized one, where masses of water flow randomly from the surface of the slopes.
conclusions
If we compare the technologies for installing gutters (round and rectangular), the design of rectangular systems looks more complicated. Some parts differ in size and configuration. For example, the thickness of the strips of brackets for a rectangular gutter is usually taken to be at least 3-4 mm.
However, from an operational point of view, rectangular systems are more preferable. With savings of 10-15% relative to the installation of round gutters, they provide greater throughput.
Sources used: vsadu.ru, xn--86-dlcaicfy2bts.xn--p1ai, kanalizaciya.online, infotruby.ru, nicespb.ru, bobrhouse.ru, expert-dacha.pro, stoki.guru, a1-exp.ru , housechief.ru, pvsservice.ru, kryshagid.ru, klub-masterov.ru, homius.ru, okanalizacii.ru, prostroymaterialy.com, vesnadompenza.ru, 1-proect.ru
Recommendations for the operation of flat roof gutters
During the operation of buildings and structures equipped with a flat roof, in order to prevent flooding of internal premises, it is necessary to carry out a number of measures to ensure the prevention of such phenomena.
Here's what you should do for this purpose:
- clean water intake funnels from leaves and other foreign objects;
- check the tightness of the joints of structural elements and, if they become depressurized, restore it (change the rubber seals and cuffs, use sealant);
- if financially possible, create an electric heating system (heating cable) that ensures the absence of snow and ice in water drainage areas (funnels, gutters, etc.).
Carrying out these measures will allow you to avoid negative phenomena caused by the penetration of water into building structures and onto the surface of the earth near the facade of the building.
Using a heating cable will help avoid ice jams in the roof drainage system
Installation of drain brackets
It is very important to find out which method is best to use for attaching the brackets in a particular case. It must be taken into account that the minimum gap between the wall and the gutter should be 60–80 mm. Otherwise, this will lead to the walls becoming wet, if not from rainwater, then from the condensation formed.
Finishing of gutters
Another important rule for installing gutters is to maintain a slope, which should be at least 5 mm per linear meter of gutter. First of all, this is necessary in order to prevent water from stagnating in the gutters. Therefore, the fastening of the brackets is not carried out strictly horizontally, but with a corresponding slope towards the funnel. Only after marking the slope on the wall can you proceed to the direct installation of the brackets.
To calculate the required angle of inclination, the length of the roof slope is taken into account (for example, 6-m). The slope angle should be 1 cm per 1 m. Thanks to simple mathematical calculations, it turns out that the difference in the heights of the upper and lower brackets will be 60 cm. Therefore, on massive roofing structures with a length of more than 12 m, 2 separate drains are installed.
Attaching the brackets starts from the top element. Its location should be on the opposite side to the drainpipe. Its installation should be done in such a way that water flows from the roof enter the gutter, but at the same time it does not interfere with the convergence of snow, which can break the drainage system. The gap from the edge of the roof to the top bracket should be 100–150 mm. Standard screws are used for fastening.
The second in turn is the outermost lower bracket. It is fixed with the same screws. After this, construction string is stretched between the extreme points and the remaining brackets are marked for fastening. The fastening spacing of adjacent elements can vary from 40 to 70 cm, depending on the design features of the roof. It is also important to remember that the receiving funnel is not mounted at the very edge of the gutter, but at a distance of 30–60 cm from the extreme point.
Gutters on brackets
The next stage of installation work on arranging a drain with your own hands is the assembly and installation of gutters on brackets. The standard length of gutter pipes is from 1 to 2.5 m and therefore adjacent elements very often have to be joined together. For this purpose, connecting elements with rubber seals are used.
Plugs are installed at the edges of the gutters, and a receiving funnel and storm drains are installed in the designated area. It is important that the axis of the funnel coincides with the hole prepared in the gutter. The gutter must be mounted at an angle towards the drain receptacle. This provides additional safety for the entire structure and protects the drainage system from snow melting.
How to secure a gutter
After the fastenings are installed, the installation of roof ebbs with your own hands proceeds to the stage of attaching water gutters. First you need to adjust them to length. The pieces of the part must be placed in the fasteners, not forgetting to leave space for the connecting inserts. Their size can be measured in advance, usually about 10 centimeters are left.
If the gutter is too long, it can be shortened; you will need to use a hacksaw. The cut area is cleaned with a file. To make your work easier, place the cap on the end of the pipe while you are standing on the ground. It is quite difficult to do this by weight. The individual parts of the gutter can be connected using inserts. For convenience, they have special marks.
After assembling the gutter, it must be secured to the holders, then check whether there is the required slope. To do this, it is not necessary to take measurements, just pour a little water into the gutter and see whether it flows out or remains in place. If the liquid does not flow out, the inclination needs to be increased.
After you have managed to correctly install the ebbs on the roof , you can proceed to the installation of the drainpipe. Work starts from the funnel. If the length allows, the pipe can be immediately connected to it, otherwise, you will have to install an elbow: it will help avoid splashes and force water to flow into the pipe.
Typically the pipes are 2 meters long. You will have to calculate how much material and connecting elements will be required. Do this in advance.
Attaching the holders
Some features of polymer systems
Compared to metal drainage structures, polymer systems are attractive due to their cost-effective installation and simplified assembly.
Meanwhile, plastic has the properties of changing structure under conditions of fluctuations in ambient temperature. Therefore, for anyone who decides to make a drain for the roof of a private house with their own hands, these properties of the material should be kept in mind and an installation technique that compensates for thermal expansion should be used.
Compensation for thermal expansion/contraction is achieved, for example, by incomplete insertion of the smooth ends of the pipes into the socket parts. Also, loose tightening of the rim of the fastening clamps releases the axial displacement of the parts as a result of thermal expansion.
It is advisable to limit the use of glue when installing drainpipes; use it only on one part of the connections. Installation of socket connections should be carried out in the socket position with the “up” direction.
The design of the mounting element, which provides compensation for thermal expansion. Used in the assembly of gutters. Similar design solutions are used on other parts
Almost all manufacturers of modern drainage systems have taken into account the properties of plastic and produce shaped parts (expansion elements) adapted to temperature changes. The body of such parts indicates the temperature scale according to which they are mounted in the system.
The influence of temperature may cause deformation of the plastic. Therefore, it is necessary to comply with installation standards and the distance between fasteners. Compliance with the rules is a guarantee of installing a high-quality roof drainage system.
In this material you can familiarize yourself with all the advantages and disadvantages of plastic and metal gutters.