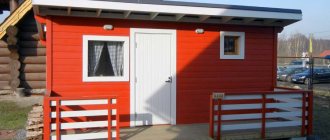
There are many walls in the bathhouse and they are all different, based on the conditions of each room and the material. Therefore, it is easy to answer the question “How to paint the walls in the bathhouse?” will not work. It depends where and from what. Therefore, here we give a detailed answer to both questions. However, you will find even more specifics in articles about paints and the features of interior and exterior coatings.
Requirements for decorative coating
When choosing paint for decorating the interior of a bathhouse, you should take into account that this material must meet the following requirements:
- protect the wood surface from the effects of aggressive environments that occur in the steam room and dressing room;
- withstand exposure to high air temperatures;
- maintain the integrity of wood and extend its service life;
- provide treated surfaces with an attractive appearance.
Remember that the time during which you can use the bathhouse without major repairs depends on what you paint the inside of the bathhouse with.
In addition, the following factors must be taken into account:
- the type of wood used;
- the ability to perform additional coloring;
- surface condition before treatment.
Special materials should be used for surface treatment
For those craftsmen who have not yet decided how to paint the inside of the bathhouse, it should be noted that most often special varnishes with special properties are used for this purpose:
- High coefficient of vapor permeability. This allows you to avoid the appearance of mold, prevents the appearance of fungi and bacteria, and prevents the formation of condensation.
- The ability to apply a new layer without cleaning the surface from the previous one.
- The presence of pigments that emphasize and highlight the natural texture of the wood with which the steam room and dressing room are decorated.
If you are not satisfied with varnish, acrylic bath paint is an alternative: you can use water-based mixtures inside. Considering the resistance of acrylates to low temperatures, this same type of decorative finish can also be used for facade work (the instructions for use confirm this).
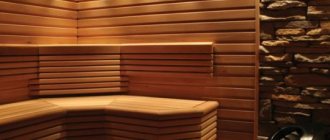
Photo of a steam room, the walls of which are varnished.
The advantages of paint over varnish include a large range of colors and a long service life of the decorative coating.
Rules for thermal insulation of partitions
When creating partitions in a bathhouse with your own hands, it is important to take care of preserving the maximum amount of thermal energy inside the room. A competent procedure for thermal insulation of the entire structure will allow you to cope with this.
Brick partitions are most often finished with modern insulation boards using the following fasteners:
- fastening strips;
- artificial binders.
Typically, the installation of partitions ends with a slight gap remaining, which is filled with mineral wool.
As for how to make partitions in a bathhouse using frame technology, you need to take into account a number of nuances. The main one is increased thermal conductivity, which causes low resistance of wood to stress.
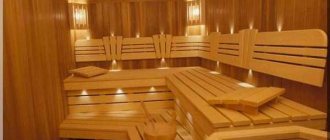
Directly inside the bathhouse, the walls are insulated using mineral wool, on which thermal insulation material is additionally laid. For this purpose, jute or reed slabs are usually used. The facing material in this case is multi-colored lining. The material looks aesthetically pleasing and looks original, both in the photo and during visual inspection.
The insulation itself just needs to be laid very carefully so that there are no gaps or bulges, which will make the surface more airtight. However, even with the most correct installation procedure, it must be taken into account that the bath microclimate will gradually destroy the structure.
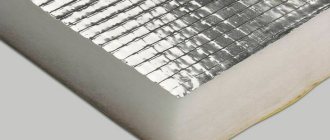
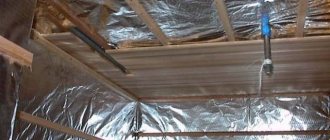
Whatever the partition between the steam room and the washing room or other rooms, high humidity will constantly affect it and this effect will be negative. The maximum service life of materials can be increased with proper installation of waterproofing materials. The waterproofing layer is laid before the installation of finishing materials begins. Typically, foil or kraft paper is used as a waterproofing material.
Under no circumstances should roofing felt be used in the partition structure. Although this material is a good protection against moisture, when heated, various harmful substances begin to be released from it, which negatively affect the human body.
If you process brick partitions in a bathhouse near the stove, then reflective material must be attached to them, which will be directed towards the room. This will allow more thermal energy to be concentrated in the building. Between the waterproofing layer and the finishing lining of the partitions, a ventilation gap of 15 centimeters thick must be maintained.
Dyeing process
Paint for a metal stove is quite in demand, so it is not difficult to find it on the modern market. The most popular fireproof paints are:
- Organosilicate products have long been known to a wide range of consumers, as they are used for various works. People who ask the question: “How to paint a stove?” first of all remember these paints. They can withstand temperatures up to 600 degrees.
- Some types of spray paint have increased heat resistance. They can withstand temperatures up to 650 degrees and can be applied in almost any environment, such as sub-zero temperatures or electrostatic fields. Heat-resistant aerosol paints are perfect for painting a boiler in a bathhouse.
- A sauna stove can be painted with electrically conductive paints, but it should be remembered that they have one significant drawback: the ability to reduce heat transfer.
If you want the decorative finish to maintain high aesthetic values for a long time, then painting the sauna stove should be done with products from well-known brands that have been on the market for a long time. Popular manufacturers value their reputation and sell products that have the characteristics stated on the packaging.
Elevated temperatures, high humidity, frequent heating and cooling cycles cause rusting not only of the sauna stove, but also of other metal structures located in the steam room. This primarily concerns the tank intended for hot water. It needs to be painted not only from the outside, but also from the inside, since the water in it will cause corrosion.
Painting the tank is carried out according to the same rules listed above. The only difference is that it needs to be coated with paint and varnish at the manufacturing stage. Once it is installed, such work will not be possible.
In addition to the tank, it would not be superfluous to paint the heat exchange system and the chimney pipe, which rusts quite quickly. It is better to paint boilers and other metal surfaces that the steam room is rich in at the same time. When answering the question of how to paint the tank and other metal surfaces of the bathhouse, the already mentioned paints and varnishes should be mentioned.
In addition to other advantages of painting stoves, tanks and other structures, it is also necessary to highlight the fact that cracks can appear on hot metal (especially cast iron) when it comes into contact with water. Thus, the painted stove can be safely used in a room with high humidity.
Before painting the inside of the bathhouse, you should select the tools used for this purpose. After all, the quality and appearance of the surface also depends on this.
There are two main options:
- Spray. Thanks to it, you can paint the surface as quickly and efficiently as possible. In addition, this method practically does not raise wood fibers, so the walls will not need to be thoroughly sanded after treatment.
- Brush. Despite the seeming archaism of this device, many experienced craftsmen advise using it, especially when applying the base layer.
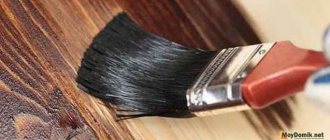
Paint brush
Painting the inside of a bathhouse begins with purchasing the necessary materials and equipment.
For ease of presentation, the process itself is divided into several stages:
- Prepare the area for work. Considering that you will have to paint not only the walls, but also the ceiling, you should make sure that there are stools, stepladders or scaffolding that allow you to gain access to any point in the room.
- Clean the surface. This phase is very important. You should sand the wood very carefully so that when you run your hand over it, you don’t get a splinter in your palm and feel a smooth surface. A vacuum cleaner or damp cloth will help get rid of dust and sawdust. For best results, you can treat the surface with white spirit.
- Apply a base coat of paint or varnish. Wait until it dries and sand the surface again with fine-grained sandpaper.
- Cover the wall with a second layer, for which it is better to use a sprayer. Before doing this, you need to cover the areas that will not be painted with paper and masking tape.
Before painting, you need to thoroughly clean the surface
Advantages of internal frame walls
If we are talking about what kind of partition in a brick bathhouse can be used, then the most popular option would be a frame internal wall. Its frame is assembled from well-dried wooden beams measuring 5x5 centimeters (standard). Thermal insulation material is placed in the voids between the elements of such a structure. Typically, mineral wool or foam boards are used as insulation.
We invite you to familiarize yourself with: Pipe for a stove being mined
We must not forget that the insulation must be reliably protected from moisture. To do this, it is carefully covered with polyethylene. You can also use special membranes with waterproofing properties, which in their characteristics are several steps ahead of polyethylene, but their cost is corresponding.
After the frame is insulated, it is necessary to cover it using dried boards with a thickness of 2 centimeters. A foil layer is fixed on top of these boards. You can use a construction stapler when working. Foil is the determining layer in the matter of thermal energy conservation.
The last stage of work is the decorative finishing of the frame partition. Traditionally, lining is used for these purposes. The most comfortable conditions in a bathhouse can be created by finishing it with aspen or linden lining. This choice in favor of deciduous trees is quite natural, because they do not release resin when heated.
For installation of the lining, slats are packed in the form of a standard sheathing. All wooden elements of the frame structure must be treated with antiseptic agents. Without this condition, it is simply impossible to hope that wood will last long under the influence of moisture. If you do not take care of the optimal protection of wood, then soon fungus and mold will appear on it.
Structurally, such a partition is a cake made of building materials, which from the outside looks aesthetically pleasing in the photo and upon visual inspection.
Distinctive features of the frame partition:
- increased strength;
- high level of sound insulation.
As practice shows, a frame partition provides high temperature in the bathhouse and maximum comfort for visitors. If a partition is installed between the steam room and the sink, then the thermal insulation materials must be of the highest quality and should be installed sparingly. By creating partitions between the steam room and technical rooms, you can install a simpler structure.
The design is simplified due to the fact that it is assembled from boards with a thickness of 4 centimeters or well-dried bars. The frame is covered with clapboard, and each gap is insulated using penoplex, which ensures the highest level of thermal insulation.
This option for partitions has its supporters and haters. Some say it's like dressing cabbage. On the one hand, this is true. But on the other hand, relatively quickly and inexpensively you get a warm and reliable partition. After all, pouring a foundation is more expensive. And what should you do if you suddenly decide to redesign the location of the internal walls? Break the foundation?
This is the only possible option for partitioning technical rooms in a bathhouse, such as a toilet or rest room. Using frame structures, you can separate the dressing room from the rest room or make a separate room for installing an installation block, from which the electrical wiring will go to the bathhouse. We can safely note the relevance and demand for frame partitions in all types of baths.
Waterproofing frame partitions with membrane film. It is laid on both sides.
Conclusion
I will answer a possible question - is it possible to paint a stove in a bath with oil, alkyd, vinyl, latex, acrylic, dispersion and other paints. I answer - it is possible. Just bake, don’t heat it later...
Tikkurila - heat-resistant paint
There is another option - experiment. For example, a friend decided to use paint for car mufflers, someone is trying something based on liquid glass, and so on. There are many different forums. If you do not want to paint an iron stove, you can do bluing. We associate this word with firearms. A good low budget option. How long will it last? Don't know. But good heat-resistant enamel is promised by manufacturers to last for at least 15 years.
Regarding chalk or lime color. There is one "impressive" drawback. It is difficult to achieve monotony. Streaks may be visible on the surface. Well, the durability of both options is approximately the same.
I hope the article was useful to you. If yes, then subscribe to the blog and recommend it to your good friends through social networks.
Anecdote: “My husband comes in the morning covered in lipstick, powder, and red hair.
Wife: - Where have you been?
“You won’t believe it, my dear, I fought with a clown all night.”
Good luck and good painting of your sauna stove!
Wisdom Quote: Pleasure should be the reward for work.
The process of painting the interior walls of a bathhouse is one of the most critical stages in its construction. The pleasure you and your guests receive when visiting the steam room directly depends on the quality of the chosen paint and the correctness of the work.
You can learn more about today's topic by watching the video in this article.
Do-it-yourself brick bathhouse finishing
The finishing of the brick bathhouse inside can be done when the installation of communications has been completed. When choosing a material for interior walls, it is important to understand under what conditions the room will be used. For example, the sink can be tiled, and the walls can be insulated and finished with wood. The walls of a recreation room can be lined without installing a frame system, under which insulation is usually located. This allows you to save materials and time during finishing.
5. Choice of paint – safety and visual effect
The main thing is not to choose façade paint by mistake. Of course, such materials are better suited for painting porous surfaces, but they contain many volatile substances that are hazardous to health. You will need interior paints - you can choose acrylic or alkyd for a matte or semi-gloss effect. Or use oil paint - it will give the brickwork a soft shine.
It is better to paint a brick wall with a brush - it is easier to feel contact with the surface and apply even strokes. The direction of painting is horizontal, according to the masonry pattern. For acrylic paint, brushes made of polyester fiber are recommended (but high quality!), alkyd and oil paints require brushes made of natural hair.
It is better to use a roller if you want to achieve the effect of a primer layer: brick absorbs a lot of paint at once, so it will take a long time to work with a roller on a smooth coating. But a carelessly rolled layer will turn out quickly and easily!
If you apply paint with a sponge, you will get the effect of old faded masonry. In this way, you can whiten the wall and make the paint layer translucent (as in the case of working with a roller). You can use a sponge to apply bronze or silver highlights, add spots of contrasting color to the wall, or paint over images using stencils.
Another common (but more labor-intensive) painting method is to paint each brick with a paint of the same tone using a brush and use a contrasting color compound for the joints.
When is the best time to use brick?
Trowel - a steel spatula with a wooden handle, designed for leveling the mortar; for filling vertical joints with mortar.
Before you start laying bricks, you need to prepare the walls and floor. The wooden covering is removed from it to the main foundation. Clean the surface with a wet broom.
- pull the string, which will serve as a guide for the first row of brickwork. Lay out the solution for the first row, level it with a trowel, checking the level with a level, let it take some time for it to set;
- then apply a new layer of mortar on it, but thinner than the first, start laying out the first row;
- apply mortar to the end of the first brick with a trowel and place it on the prepared mortar bed, press it against the wall. Tap the brick to align it with the stretched string. Remove excess solution with a trowel;
- Most often, the brick partition of the bathhouse has a doorway. Post it in advance. The box is installed using spacers; be sure to check its verticality and horizontality with a level;
- you lay the brick close to it. Tie the door frame or wooden wall to the brick partition using metal strips, which you bend and screw to the wall or door frame so that they are between the bricks;
- Use a pick to break the brick into two halves. Start the second row with this half. Don't forget to move the horizontal string to guide the laying of the second row. The third row starts with a whole brick.
This is how you will bandage the brickwork. Remember, it is necessary to do a dressing. The load on the partition will be distributed evenly, it will be strong and stable.
- place steel strips or reinforcement in the seams every 5 rows. This way you will strengthen the brick partition;
- You tie the partitions to the walls with strips of steel, and you can apply additional reinforcement above the door frame. It is best to use a channel of a suitable size for this;
- Fill the gap between the ceiling and the last row of masonry with small pieces of brick, after dipping them in the mortar. Try to press them together as tightly as possible. Seal the remaining free cracks with tow soaked in the solution.
Do not forget to periodically check the verticality and horizontality of your masonry as you work. The bathhouse should look beautiful inside and out. This is a very important part of the job. The doorway itself cannot be a guide to the correctness of the masonry, so these checks must be taken very seriously so that you do not end up with individual parts of the partition located in different planes.
Your partition is ready. If you are plastering it, then when laying the masonry you should not pay special attention to the condition of the seams between the bricks, but if you want to have a red brick partition as a design element, then when laying the rows, be careful and remove excess mortar or add what is missing.
This must be done immediately, before the solution hardens. You can use special joints for this.
If you immediately plan to plaster the partition, then you can use any brick, even used brick, to lay it. This will save you money.
If you provide any holes in the partition for wiring communications, then for these needs use a piece of pipe of a suitable diameter. Cover the tubes with bricks, but do not secure them with masonry mortar. This is done so that later, if any changes are made, the integrity of the masonry does not have to be disrupted. It is better to foam the voids between the pipe and the brick with polyurethane foam.
After completing the job, do not forget to thoroughly rinse all the tools you used.
Your sauna is ready to be used for its intended purpose.
Brick partitions are applicable in any bathhouses lined with similar material. The width is selected at your discretion, but given that this is a non-residential premises and sound insulation is not particularly needed, masonry with one stone is sufficient. More attention is paid here to the quality of the masonry mixture. It must correspond to indicators that are resistant to moisture.
Brick partitions are often used in wooden baths. This is acceptable when the stove is heated from the dressing room, and it needs to be lined with stone in order to create maximum fire safety conditions without compromising the temperature reduction. In order not to interfere with the overall decor, the partition is made of decorative stone, and in some cases it is combined with a stove. Thus, the wall will also heat the dressing room.
Partial partitioning of the furnace with bricks is also often practiced. By the way, work on installing partitions is carried out only after the bath has completely shrunk, regardless of what material it is made of.
In its original form
If you suddenly, with the greatest difficulty, cleared the wall of old plaster, discovered brickwork of unprecedented beauty and want to use it in the interior “as is”, without covering it with a layer of paint, then it makes sense to apply clinker oil to the brick. A special composition will refresh the surface, make the color brighter and more even, help eliminate small stains and protect against the appearance of new stains. Home craftsmen use acrylic parquet aqualak for the same purposes.
You can leave the brick wall uncoated, but you need to keep it clean, prevent mold from appearing, periodically wash and thoroughly dry the masonry.
Partition made of timber or logs
In this way, bath spaces are demarcated only in structures made of the appropriate material, and their location is worked out at the stage of building the bath. They lay it together with the crowns of the load-bearing walls, making a dressing. Under the internal partitions of a bathhouse made of timber, a foundation is required.
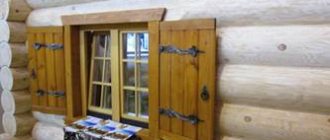
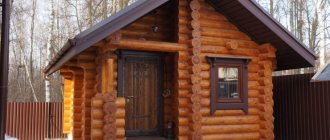
The use of partitions of this type is in demand in several cases: firstly, in a large bathhouse it is necessary, not only to divide the room, but also as additional support for the floors. This is kind of another load-bearing wall. Secondly, the “five-wall” log house assembly method will allow you to connect the structure with an internal partition. And thirdly, to create a general interior. Agree in a bathhouse made of timber. Will a brick wall look ridiculous?
A brick partition separating the stove from the washing compartment with an installed hot water tank.
Tags: bathhouse, brick, cover
« Previous entry
How to choose the right paint
The final result of coating a furnace with paints directly depends on the correctness of its choice. Heat-resistant paint for the stove is selected taking into account the following requirements:
- Firstly, the heat resistance limit of paints and varnishes must be at least 300 degrees. The best solution may be heat-resistant metal paints for furnaces that can withstand temperatures above 600 degrees. Sauna stoves do not heat up that much, but a reserve will not be superfluous. It can be a guarantee that the decorative finish will last for a long time. In most cases, the packaging of such paints and varnishes contains the inscription: “Heat-resistant paint for stoves and fireplaces.”
- Secondly, fireproof paints for stoves have appropriate certificates certifying their quality and ability to withstand high temperatures. You should not trust sellers in this matter. They may simply make mistakes or strive to make money.
- Thirdly, when deciding how to paint iron stoves in a bathhouse, you need to take into account that the paintwork material should not contain substances hazardous to health. When heated, evaporation from the surface occurs tens of times faster. If the paint is of poor quality and contains dangerous components, they will certainly enter the respiratory tract and cause poisoning.
Paint for metal stoves is sold not only in ordinary cans (to apply it you will have to use a roller, brush or spray), but also in spray cans. If you want to paint the stove as quickly as possible, then it is preferable to use the second option.
Unique building material – magnesite slabs
Magnesite plate is an excellent material, the use of which in the construction of partitions is due to a number of positive qualities:
- fire resistance;
- water resistance;
- ease of installation work;
- low cost.
The production of the material is based on perlite and cellulose. The slabs are mounted on profiles that are fixed vertically. At the ends of the slabs, thermal insulation material is placed in the joints, covered with a waterproofing layer or impregnated with special substances to increase water resistance. Finishing can be done using lining or other finishing materials.
No one forbids creating partitions without laying a middle layer of insulation. A double board is used. It is important to achieve a total thickness of both rows of the partition of at least 3 centimeters. Thermal insulation functions will be performed by an air gap between two rows of boards.
Installation is carried out as follows:
- a frame is assembled from profiles;
- inside it is filled with magnesite plates;
- polyethylene or foil material is applied as an additional protective layer;
- at the end, the entire structure is covered with clapboard.
We invite you to read: How did bathhouse attendants work in the Middle Ages?
If we make the partitions ourselves in the bathhouse near the stove or in the vicinity of other rooms, we will be able to make sure that all the proposed action algorithms, criteria for choosing materials and practical advice lead to the achievement of an excellent result.
Also, all stages of the work can be entrusted to specialists who will take responsibility not only for installation, but also for the selection of the necessary materials, as well as the subsequent commissioning of the bathhouse premises.
Painting rules
Painting a metal stove is quite simple. All you need is to follow a number of simple rules:
- Before painting an iron stove, it is necessary to carefully prepare its surface. There are many ways to perform this procedure. For example, you can resort to using a wire brush or sandblasting. The better the metal is cleaned, the higher the quality of the painting. To be fair, it should be said that there are compounds that can be applied over rust, but the aesthetic characteristics will suffer. If you want to paint your hot water tank, you need to do the same.
- Before painting, the sauna stove should be treated with degreasing agents. For these purposes, you can use an ordinary soap solution. It is prepared simply: you need to take a liter of water and 40–50 grams of laundry soap.
- The most important step is the coloring stage. Since you can use different paints and varnishes, the best solution is to follow the instructions on the package.
- To achieve the highest quality results from the use of heat-resistant paints and varnishes, you need to apply several layers of paint.
- Stove equipment, including the hot water tank in the bathhouse (if it was also painted), should be used after the paint has completely dried. Otherwise, it may begin to peel off.
Steel and cast iron stoves do not differ in terms of the selection of paints and varnishes. For both types, any high-temperature paint will do.
Homemade ingredients
With your own hands you can make the following types of painting materials that can be used to decorate a red brick stove:
- natural varnish;
- products based on lime and chalk.
Chalk and lime based coatings
To prepare, chalk or lime is simply mixed with water in the proportion of 1 kg of bulk material per 1.5 liters of liquid. The only difference between these compositions is that each subsequent layer of chalk mortar must be applied only after the previous one has completely dried; lime mortar can be painted in several layers at once.
Photo 5. An example of covering a stove with lime composition
It is also recommended to add table salt to the solution at the rate of 0.3 kg for every 2 kg of composition. This is necessary to increase strength, since without any additives the coating will soon simply crumble. Some experts use wood glue (0.1 liters per 10 liters of solution) instead of salt. In this case, the coating may acquire a yellowish tint, which can be eliminated and a classic white color obtained by adding regular blue in an amount of 20 ml.
It is possible to use color additives to achieve a specific shade, but choose based on the area of their use, since some materials may change color when exposed to high temperatures.
The use of chalk and lime compositions is the cheapest way to paint a red brick stove.
Making your own natural varnish
A good solution for those who are looking for an answer to the question of how to coat a red brick stove with varnish, but at the same time want to save money, would be to make it themselves. To produce it, you will need chicken egg whites. Don’t be surprised - our ancestors even did stone laying for eggs. But that's not all, there are other components
So, the ingredients for preparing natural varnish to cover an area of 1 m2:
- squirrels – 8 pcs.;
- milk – 0.25 g;
- brick dust - the quantity is determined independently based on the required color characteristics of the composition.
The whites are beaten with milk and brick dust is added. After painting, the result is an even red color. The decorative layer has good heat resistance and wear resistance.
Painting a stone stove
Some bathhouse owners prefer to use brick stoves. Their installation is more expensive, but they look acceptable in a Russian bathhouse. It is easier to choose paints for a brick stove. They are often painted with chalk or lime.
Before we talk about whether paints are needed for a brick oven or whether it is better to use proven old-fashioned methods, that is, ordinary whitewashing, it is necessary to describe the preparatory work. They look like this:
- the first step is to eliminate all existing defects by plastering the surface;
- the seams need to be covered with clay solution;
- Before painting brick stoves and fireplaces, you should wait a certain time for the cement and clay mortar to dry.
Not only traditional methods (chalk and lime) are perfect for brick stoves, but also heat-resistant paint used for painting iron stoves. Everything has already been said above about the third staining method, but the first two should be discussed in more detail.
Advice from the experts
There are no high temperatures in a brick washing bath, but the materials are affected by moisture. Therefore, the walls can be finished with tiles. The surface is first leveled with plaster. The layer is applied with a thickness of 15 mm. Once the ceramics have been laid, the solution is removed with a rag if it gets on the surface of the cladding.
The foundation, floor, walls, windows - all these are parts of a single whole - the baths. Therefore, for its finishing it is better to use materials that combine with each other. For cladding walls, for example, you can use clinker tiles for interior work, and for arranging the foundation, clinker for difficult operating conditions.
Source
Insulation from outside
Before you start insulating a brick bathhouse from the outside, you need to carefully consider the issue of laying bricks:
- The mortar should fill the entire space between the bricks evenly, at the same thickness; The first row of brickwork should be made only from solid elements; The beams rest on the joint row; As for clay bricks, before laying them, it is necessary to thoroughly wet the brick, especially if the bathhouse is arranged in the summer.
In order to insulate a bathhouse from the outside of the building, it is necessary to lay expanded clay 40-50 centimeters thick between the walls. You can also use slag, fluffed lime, sawdust and sand for this.
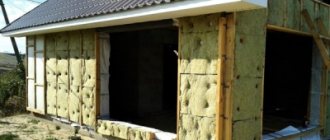
But it would be more rational to insulate the walls of the bathhouse from the outside with slab insulation. Direct fixation of the insulation layers occurs using a synthetic binder. The plates are placed in spacers at a distance of half a meter from each of the plates. Read the instructions on how to choose a stove for a sauna.
It is worth installing slab insulation so that there are small gaps between the elements. They are necessary for ventilation of the facade, because otherwise the entire surface will be covered with mold during the rainy season.
Frame (beacons)
Proper manufacturing of the frame is the most difficult stage of insulation. A high-quality and durable frame provides a smooth front surface made of lining.
Insulation of a brick bathhouse inside is carried out by filling the cells of a wooden or metal frame.
Other options do not apply.
The wooden frame is assembled from bars, the metal frame is assembled from a specialized galvanized profile.
A wooden frame is simple and cheap, but its strength is less than that of a metal one.
For a heavy block house, a wooden frame made of bars may not be enough. Then the cross-section of the elements must be increased or a structure combined with metal must be used.
A powerful wooden frame is only possible with a large gap for placing insulation. The choice of this gap must correspond to the thickness of the insulating board. Typical options provide a layer of 20 – 90 mm.
The quality of insulation directly depends on the thickness of the slabs. The choice of how to insulate a brick bathhouse from the inside is based on typical data for your climatic region. Recommended projects can be used. Types of connections in a wooden frame:
- Tenon and groove;
- With metal corners;
- Butt joint on nails and dowels.
The most durable and practical connection is on metal corners. Instead of nails, it is convenient to use self-tapping screws, which are purchased with metal corners.
Each T-shaped connection requires two angles and about 10 screws.
Vertical posts (beacons) and horizontal bulkheads are made from bars of the same cross-section.
The most advantageous aspect ratio is 7:5.
Such timber is produced in large quantities and can be purchased at any lumber store.
Metal frames (metal profiles)
The entire metal frame is quickly assembled from ready-made profiles, which are produced by industry specifically for this purpose. In addition to profiles, shaped elements are purchased to make connections.
If in a wooden frame you can make connections with ordinary nails, screws and glue, then in a metal frame you cannot do without specialized fittings. On a metal frame, only the insulation of a brick bathhouse is created from the inside; the scheme is not used for external insulation.
Advantages of a metal frame:
- Quick and easy assembly;
- Fireproof design;
- Suitable for insulation systems with minimal slab thickness.
Information. To insulate the bathhouse, a frame of a standard design is assembled. Without significant changes, frames for plasterboard, suspended slab ceilings and external ventilated facades are made using the same technology.
Location of the main heat-insulating layer
Load-bearing walls made of brick are distinguished by high thermal conductivity and heat capacity, acting in these properties as the complete opposite of log houses.
We insulate a brick bath from the inside, only at the stove we do not forget about fire safety
Unlike thermal insulation of residential premises, it makes no sense to insulate a bathhouse made of ceramic or silicate bricks from the outside. For buildings with periodic heating, heat capacity plays a negative role, since it requires more time to heat. For this reason, the main thermal insulation layer in brick baths should be placed exclusively as part of the internal sandwich.
