Do-it-yourself decorative finishing of the stove in the house: 5 best options
When decorating a stove in a house, you should take into account the design of the room and its size. Today, more and more families are deciding to move for permanent residence to a private house in a village where there is a garden plot. However, not everywhere there is central heating. And gasification has not yet reached all regions of the country. Therefore, quite a number of people have to use a good old wood stove for heating. And if someone has preserved such a device as a Russian stove, then he can consider himself the owner of a device that now many would like to see in their homes. Especially when the outdated main heating system malfunctions. In a wooden house or cottage, such a stove looks like a masterpiece.
Not a fad, but a necessary safety measure: how to line an iron stove with bricks?
When the oven operates, its surface becomes very hot. For safety, the device is placed at a certain distance from the walls: at least a meter for metal structures and half a meter for brick ones.
But this arrangement is not always convenient, especially in small rooms. To avoid damage to surfaces and, especially, fire, protective screens are installed. They also promote gentle heating and protect against burns.
How can you cover a stove in your home?
Most often, stove screens are made of brick or metal. These materials are available and no specialized equipment is required to work with them.
For masonry, refractory bricks are used: ordinary red or clinker. Silicate is not suitable. The material is held together with a clay mortar (sometimes with the addition of cement or lime), which can withstand high temperatures without destruction.
The best metal to choose is stainless steel. It is not afraid of dampness and does not emit harmful substances when heated, like galvanized steel. For fastening to the walls of the room, it is advisable to choose polished sheets rather than matte ones. Then the heat rays will be reflected from the surface. This will reduce the heating of the walls, and the temperature in the room will rise faster.
Types of protective screens for furnaces
For air movement and better heating of the room, the protection is located a few centimeters from the walls. Gaps are made in the lower part of the structure: gaps are left in the brickwork for this, metal sheets are installed on the legs.
Reference. When using brickwork, the room warms up more slowly, but the comfortable temperature remains longer.
Such screens are placed on the sides facing the room. And to protect walls, especially wooden ones, they are sheathed.
Important! Side and front screens are used only for metal stoves. Brick structures also need protection for nearby walls.
The size of the screens depends on the dimensions and power of the oven. The chosen material also matters. At the same time, make the necessary gap between the screen and the stove, otherwise it will overheat.
Metal
Metal protection is installed at a distance of no less than 1-5 cm from the stove itself. The distance to the wooden wall should be no less than 38 cm.
If the screen is attached directly to the wall, it is necessary to insulate it from the emanating heat. Then the following scheme is applied:
- A layer of thermal insulation is laid at a distance of about 3 cm from the wall. To create a gap, the material is not attached directly to the wall, but through slats or metal pipes.
- A metal protection is installed on top of it.
- The screen is made in such a size that it is higher and wider than the stove by a meter.
Advice. The air gap creates the possibility of additional cooling.
There should also be a small distance between the floor and the screen. Protection is placed on the wall 3-5 cm from the floor. When floor mounted, the screen is mounted on special legs. Another option is to make holes in the bottom of the sheet.
Brick around an iron stove
As a rule, masonry is carried out in half a brick. This provides sufficient protection, but at the same time does not interfere with warming up. Sometimes other options are used. When laying a quarter of a brick, the protective properties are reduced, and the heat becomes less mild, but the room warms up faster. But the distance to the walls should be greater than the minimum.
If the masonry is thicker, like a whole brick, the room will take longer to warm up. But this shield becomes a heat accumulator, that is, it gives off heat after the wood burns out.
Dimensions are calculated as follows:
- The height of the screen should be 20 cm greater than the stove. The masonry along the wall is sometimes extended all the way to the ceiling.
- The distance from the stove to the edge of the shield should be 5-15 cm.
How to cover the stove in the house: expert advice
Today, some of us can proudly say that their home still has a heating device such as a wood stove. However, often their appearance does not suit the design of the room and the stove stands out from the overall interior. To eliminate this drawback, it can be covered with some finishing material that will perfectly suit any decoration. Often, finishing a stove is not just decoration. Such repairs bring their advantages and the unit increases its heat capacity, heats up faster and retains heat for a very long time.
An excellent solution is to decorate the stove with decorative stone in a room made in country style
To decorate a brick oven, various types of tiles are mainly used. But lovers of bright design solutions prefer to decorate with plaster. It can be painted in an original way with bright colors and beautiful ornaments can be made. Moreover, this type of finishing can be considered the most budget-friendly.
However, if you decide to decorate your stove in an elegant and unique way, then the best option would be to use tiles. To do this, you need to figure out what type of finishing materials the cladding is made from.
In the design of stoves and fireplaces they use:
- A natural stone;
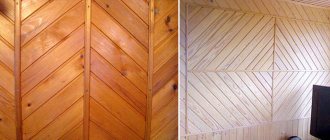
- Bright painted majolica;
- Wooden unglazed terracotta;
- Heat-resistant clinker tiles;
- Refractory brickwork;
- Porcelain tiles.
These facing materials meet the characteristics necessary for finishing stoves. They have sufficient thickness within 5-9 mm, withstand high temperatures, prevent mechanical damage, and have a low-porous structure. Today, compositions made from cullet or so-called fiberglass mesh are used for finishing furnace structures. They are considered completely harmless materials, since when heated to high temperatures they do not emit toxic substances, and also allow the stove to be painted in any convenient color.
Video “Do-it-yourself finishing”
From the video you will learn how to make a lining for a Russian stove.
The stove, as a source of heat, has always been the center of attention in any room. Surface treatment - lining a brick oven - will help make it truly beautiful and individual. It simplifies the cleaning process and prevents fumes from entering the room.
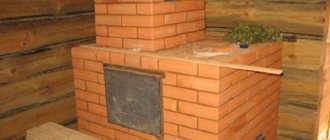
An example of a high-quality lined sauna stove
The process of lining a brick oven has a number of nuances that need to be taken into account before starting work. This includes frequent temperature changes and uneven heat distribution on the stove surface. If the processes are not followed correctly, difficulties may arise in the work, especially for people who do not have great skills.
How to line the stove structure? First you need to find out what exactly problems may arise in the process of facing work. The thing is that when heated, the laws of physics begin to apply, according to which, under the influence of temperature, the brick will increase in size. Now imagine this moment - the surface of the brickwork will begin to expand under the influence of high temperatures, but the facing layer will not. This will lead to cracking, or even destruction of the surface layer.
IMPORTANT POINT! The surface of the stove heats up unevenly, and accordingly the expansion will also be unequal over the entire area. A reverse reaction occurs when the furnace cools.
This means that the thermal coefficient of expansion of the selected material for cladding must correspond to the expansion of the bricks from which the heat source is laid. The following materials are suitable for the cladding process of brick kilns:
- clay;
- facing brick;
- tile;
- stone;
- tiles;
Clay cladding
This is the material from which the brick itself is made, so it is perfect for cladding. But the whole problem is that the end result when using clay, in its pure form, is quite unsightly in appearance. But our ancestors also used this method. Today, there are a lot of special clay-based mixtures that can serve as an alternative substitute. The surface obtained from the use of such mixtures is smooth and heat-resistant.
Clay cladding - example
To begin the process directly, the first thing that needs to be taken into account is the time that has passed since the construction of the furnace structure. At least a month must pass from the moment of laying; this period is necessary to ensure that the furnace does not shrink in the future.
Sequence of work:
- The clay must first be soaked in water for a day. After the clay has absorbed a sufficient amount of moisture, you can begin to prepare a solution, adding sand and lime. As for the finished mixture, you can knead it immediately before starting work.
- For better setting of the mixture, the surface must first be prepared - cleaned of dust and dirt, and also cleared the seams, 0.5 mm deep.
- Before applying the solution, the surface of the brickwork must be wetted with water.
- The first layer is applied with a grater with a more liquid solution, subsequent layers with a thicker solution.
- When the solution has not yet hardened, using a grater in a circular motion, you need to level the plastered surface. (you can read how to plaster walls with your own hands here)
IT IS IMPORTANT TO KNOW! Each layer should be applied with a thickness not exceeding 0.5 cm. This will ensure uniform drying of the entire surface.
Pay attention to the possibility of plastering a brick wall with clay. Details at the link.
To further prevent the lined surface from cracking, you can use a reinforced mesh for plaster, which will ensure the strength of the lining. It is installed directly on the stove wall and secured with fasteners. An alternative to mesh can be burlap.
It must first be placed in a solution with clay. The same solution, a thin layer, is applied directly to the wall. The soaked burlap is laid out around the perimeter of the stove structure, avoiding air bubbles. These precautions may not prevent the plaster from cracking. There are several reasons that can lead to possible damage to the coating; they can be laid down at the stage of laying the furnace. Some of them:
- severe overheating of the oven;
- improper dressing of brickwork;
- uneven seam thickness along the entire length;
A simpler and less labor-intensive way is to lay out the lining with facing bricks. For cladding, you can use the same brick from which the stove itself is laid. Most often, this method is used for lining sauna stoves, because they have the highest temperature conditions.
Brick cladding photo
In order to do the cladding yourself, you will need the following tools: a plumb line or level, a trowel, and a container for preparing the solution. You also need to prepare all the necessary materials:
- ceramic brick;
- Metal sheet;
- clay;
- water;
- sand;
- metal corner;
- asbestos sheet 10 mm thick;
Before you begin laying out work, consider the following points:
- If the brick lining of the stove promises to be quite heavy, it is necessary to prepare the foundation for the laying process. The base of the foundation should be 40 cm lower than the floor level. A day after the foundation has hardened, you can proceed directly to laying.
- It is necessary to mark the future cladding. The distance from the cladding to metal surfaces is no more than 10 cm.
- The clay should be prepared a day in advance by filling it with water. Before starting work, mix it with sand and prepare a solution for laying facing bricks.
Sequence of cladding operations:
- You only need to start laying from the corner of the stove.
- The first row must be continuous; the presence of all kinds of holes can only be made in subsequent rows. The size of such holes should not exceed half the size of the brick.
IMPORTANT! The distance between bricks and layers should be equally even and not exceed the parameter - 5 mm.
- You need to leave a hole of the appropriate size under the door on the front side. The upper part of this niche should be reinforced with metal corners.
- If the floors of your bathhouse are made of wood, you need to worry about safety measures. A metal sheet is placed in front of the firebox door, and an asbestos sheet is placed on top of it. These actions will protect your floor from fire if coals accidentally fall out. If the floor in the bathhouse is concrete, installation of sheets is not required.
- After finishing work, open windows and doors to speed up the drying process.
IMPORTANT! It is prohibited to heat the stove until it is completely dry.
If all specified technological processes are followed when laying your stove structure, it means that it will have a uniform heating surface. If this is not the case, then a heat-resistant sealant is best for gluing the tiles.
tiling the stove
If you use ordinary cement mortar, then in places with high temperatures, the use of such a mortar can lead to rupture of the lining. Tiles should also be selected with high heat-resistant qualities. Gaps left between the tiles during installation will also help reduce the likelihood of deformation. They need to be puttied afterwards with special highly plastic solutions.
Trying to save money, many people replace special stove tiles with regular tiles. It has a material expansion coefficient different from the expansion value of the stove surface. This indicator will most likely lead to cracking and tearing of the tiles.
tiling sequence
The process of tiling is labor-intensive and requires special attention and a certain sequence:
- We prepare the surface.
- We attach the reinforced mesh to the surface of the stove with dowels.
- We carry out plastering from top to bottom.
- After the layer of plaster has dried, we proceed to the actual installation. For cladding we use special heat-resistant adhesive mixtures.
- Laying tiles begins from the bottom up. The first layer should be laid out as evenly as possible, relative to the level.
- To obtain a uniform gap between the tiles, special cross stops are inserted.
IMPORTANT! Brick cladding should be done only after the furnace has warmed up to maximum, and this condition must be maintained throughout the entire process of the work being performed.
cover the stove with tiles
Laying tiles can be considered a rather risky undertaking, because these tiles are not intended for such work.
ADVICE! do not choose large tiles; the smaller the size, the less likely it is to crack. The optimal option is 10X10 cm. The installation process will be longer, but more reliable.
Tiles
This is a traditional Russian way of decorating stoves. He came to us from Ancient Rus'. Only wealthy landowners could afford such pleasure as decorating a stove with tiles.
facing the stove with tiles photo
First stage
- A clay solution is applied to the inside of the tile, into which crushed brick is pressed with force.
- The inner surface is leveled with the solution that you prepared for installation.
- The brick is pressed against the resulting leveled layer.
IMPORTANT! The first row should be laid out as evenly and clearly as possible. The slightest defect in the laying of tiles in the first row will worsen in the next rows, which will lead to disruption of the entire structure. It can only be corrected by completely disassembling the cladding and resuming the process from the beginning.
Second phase
- In the second row, dredge the tile along with the mortar to the level of the previous row. The same action must be repeated on all subsequent rows.
- Increasing the strength of the structure is achieved by filling with crushed stone the gaps formed between the tiles.
Finishing a stove in a private house using plaster: how to design the structure
Since ancient times, the Russian hut has been warmed by heat sources in the form of a huge, half-yazha-sized stove with a stove bench or a small “Dutch stove”. Since then, they have improved a lot, many are roughly removed, but the principle of operation and the appearance of the structures have changed little. Although the ancient mud-oven stove is a thing of the past, even now it is a symbol of home comfort.
It is to give the premises a feeling of warmth, coziness and comfort that many install stoves and fireplaces in their homes.
This gives the whole house a special zest, testifies to the warmth of the owner, and also provides the home with a unique flavor, coziness and comfort. They always tried to decorate the stove in every possible way or paint it with different patterns on the plaster. Such decorative finishing of stove structures is still relevant today. Decorating a stove design using plaster is the simplest and least expensive way. After dry, heat-resistant mixtures appeared, clay compositions lost their relevance. Therefore, the finishing method is somewhat different from what our grandmothers used.
Before decorating the brickwork, you need to carry out certain preparations, namely:
- Remove any remaining solution and dust;
- We deepen all seams by 10-12 mm;
- Prime the surface evenly;
- We cover the structure with fine-grained mesh;
- We heat the oven and moisten the walls with water.
Using plaster you can quickly and inexpensively finish any stove
The plastering process consists of gradually, layer by layer, applying the solution. The distance between intervals is 4 hours. The first solution is made quite liquid. It is applied to level the surface and form corners. If you are building a new stove, then before you line it and plaster it, you must wait a period of 1 month. This interval is needed for complete shrinkage of the new structure.
Application of protective screens
Screens are shields made of brick or metal that protect walls from intense thermal radiation. Similar protection is used when installing metal stoves.
- Metal screens are made from steel or cast iron sheets, these
casings surround the heat source with a distance of 3-5cm.
Advice! When purchasing a metal sauna stove, you should give preference to a model equipped with a metal casing. Its cost is not much higher, but the issues of wall insulation are eliminated.
Additional frontal or front shielding, which is located on the walls depending on the location of the stove, will not hurt. The protection guarantees the wood from overheating, reducing the temperature by 100 degrees or more, and provides the opportunity to save space in the steam room. A stove protected by a casing can be installed at a distance of 50-55cm from the wall.
Installation of screens is simple. The casing, equipped with legs, is secured to the floor by side or front screens - with galvanized nails or self-tapping screws.
- Brick screens are masonry used to cover the stove with
on all sides, the same casing, only made of brick. Another method is to lay half a brick between the firebox and a wall made of solid fireclay bricks laid on a solution of clay and cement. The width of the wall should be 120mm, although there is an opinion that it is permissible to put 60mm in a quarter of a brick, but it should be remembered that in this case the thermal insulation value is reduced by exactly half. It is recommended to raise the height of the masonry 20-30 cm above the surface of the firebox, but if you raise it to the ceiling, it will not be worse.
The screen should be placed at a distance of 10-15cm from the wall, 5-15cm from the stove, that is, the space saving is 30-40cm
Important! Functional openings for heat exchange should be made at the bottom of the masonry.
Protective screens are effective; they reduce the temperature to a level acceptable when using high-temperature fuel units. The same function is performed by wall cladding made of non-combustible materials.
Design of stoves in a private home: selecting heat-resistant materials for finishing
The presence of an original Russian stove in the interior of a residential building fills it with unique comfort and coziness, and a large selection of materials for cladding allows you to create a stylish modern element that is completely compatible with the room. It is no secret that the stove surface is constantly exposed to sudden changes in temperature, which means that work on its design is a painstaking process that requires strict adherence to all technologies.
In order to choose the right material for finishing the structure, you need to pay attention to the design of the entire room.
Most often, owners of a Russian stove choose a rustic style, if not of the entire room, then of the kitchen. It assumes the presence of rough finishes on the walls and floors, a whitewashed ceiling, chintz curtains and wooden floorboards. And to decorate the stoves, refractory bricks are used, which are subsequently plastered and decorated with multi-colored paintings.
In addition, there are plenty of options for decorating a Russian stove.
The stove can be lined with tiles, stone, it can be plastered or tiles can be used in decoration.
The choice depends only on the preferences of the home owners, the complexity of the work and financial costs.
Cladding without glue
If many years ago you had to make your own mortar for laying tiles, today you don’t need to accurately calculate the proportions of its components. After all, there is ready-made glue on the building materials market that can be used for high-quality lining of a brick kiln. For example, the adhesive is intended for cladding all types of stoves and fireplaces with ceramic and tiled tiles.
Professional craftsmen often choose a cement mortar to which the manufacturer has added components such as salt or PVA glue. You can independently add a small amount of ordinary table salt to the purchased masonry glue, which is available in the kitchen of any housewife. This component will allow you to accumulate available water.
The good thing about carrying out installation work without glue is that such cladding has a number of undeniable advantages. It will not react to temperature changes, and the air cushion formed between the tile and the wall will perfectly retain hot air. When installing using the “dry” method, it is important to take accurate measurements and manufacture frame elements.
Then the space obtained inside is divided by horizontal lines, the size of which is 3 - 4 mm. The inter-tile profiles will be fastened along them. The lines are marked with a cord painted with blue. The baseboard will be attached to the surface of the walls and floor. It is made from galvanized metal sheets or purchased ready-made.
To make a plinth with your own hands, you need to cut a strip equal to the height of the plinth plus 15 - 20 mm. The metal sheet should not be thicker than 1 - 1 mm. To make a bend that will extend onto the floor, the strip is placed on a metal table or fixture. The workpiece is fastened, leaving an outer protrusion of no more than 15 - 20 mm. You need to tap it with a mallet.
The finished plinth is fastened using anchors. Then they cut off part of the corner, which will be installed along the top marking line. It will hold vertically located elements on the surface. Metal strips are attached through already installed perforated corners. They must run vertically; a distance of 250–300 mm must be maintained between them. Their role is to install supporting profiles.
To make profiles into which the tiles will then be placed, strips of about 44 mm wide and a length equal to the width of the wall are cut. They require galvanized metal sheets. Manufacturing is carried out using a device - a sheet bender made of timber with a metal plate. The strip of the future profile is laid on the edge of the device with a mandatory protrusion outward at a distance of about 3 mm. At the final stage, the workpiece is fixed with clamps and bent with a mallet.
The tiles in a properly made profile should move easily inside. Proper installation of profiles is carried out from the baseboard. After the frame for several rows is installed, the material is installed in them. Next, the joints at the corners are closed. Corners should be placed around the cooking chamber.
How to decorate stoves in a private house with your own hands: getting ready for work
In order to properly cover a brick stove with tiles with your own hands, you need to carry out preparatory measures, as well as prepare the tools necessary for the work.
We will need:
- Rack level;
- Plumb;
- Putty knife;
- Construction trowel;
- Paint brush;
- Tile cutter;
- A hammer or mallet with a rubber top;
- Brush with metal bristles;
- Container for solution;
- Heat-resistant fire-resistant adhesive.
When finishing the stove with tiles, fire-resistant materials should be used.
Decorating a stove with tiles is a difficult process that requires skills and knowledge. Therefore, it is better to invite professionals for such work. However, if the owner has skillful hands and, as they say, grasps everything on the fly, laying tiles on the stove will not be difficult for him. This is done like this: the oven is cleaned of any mortar that has frozen in unnecessary places after laying it.
The most correct way to do this is with a metal construction brush, then rubbing it with a damp sponge or rag.
Then it is necessary to cover and strengthen a metal mesh with a small mesh size (up to 20 mm) over the entire surface.
For fastening, use nails or screws. The structure with the mesh is covered with solution, then leveled and allowed to dry. After drying, the oven is heated well and the tiles are glued.
Experts recommend starting to lay tiles from the bottom rows and corners.
In order for the rows to be even, you need to use a level and crosses. After laying the tiles, the joints should be grouted and coated with a heat-resistant compound. Before starting to seal the seams, you need to let the structure dry for at least three days. For fire safety purposes, the floor in front of the firebox should not be covered with a galvanized sheet of iron. For the same purposes, do not even think about gluing wallpaper or covering it with plastic on the stove. The use of non-heat-resistant tiles is also excluded. It is only allowed to cover the walls in the area of the stove with glass wallpaper.
Preparation
The simplest method by which a stove can be faced is to apply plaster to the surface.
Instead of the once familiar clay mixture, various types of heat-resistant plaster are now used. Dry formulations are available for sale, which should be diluted with water according to the instructions before use. Experts recommend starting any type of cladding by waiting a month after finishing masonry work. Since during this period the masonry has time to dry well and shrink. Whatever cladding method and cladding material is chosen, the surface must be carefully prepared for the application of plaster and the laying procedure itself. It is these works that directly determine whether the plaster and tile adhesive will adhere well to the surface.
The finishing of stoves with tiles is very durable; it does not have to be renewed every 2 - 3 years. A tiled fireplace or stove not only looks aesthetically pleasing. After all, the tile allows you to preserve the plaster layer, has an increased heat capacity and, when heated, fills the entire room with warmth. It allows you to create an interesting design to suit your taste.
First you will need to remove the existing layer of plaster from the surface. In this case, the wall needs to be thoroughly soaked, for which ordinary water is used. A tool such as a spatula will also help you with this. If the solution was not made of clay, but with the addition of cement, you will need to use a hammer and chisel. Next comes cleaning with an iron brush or grinder. The surface is treated with a spray gun, the seams are cleaned to a depth of 10 cm.
After drying, the surface is well primed and left until completely dry. Experts recommend not sparing the primer and applying it in several layers. Immediately before laying the tiles, the walls are checked using a building level and a plumb line for straightness. If differences are detected, you will have to equalize them.
Next comes the placement of metal beacons. If, when removing old plaster, broken corners are found, they need to be strengthened by reinforcing them with perforated metal corners. It is recommended to attach a reinforcing fiberglass mesh to the set plaster layer with a thin layer of glue. After drying, another layer of mesh is made.
If you plan to install the tiles using glue, then it is better to coat the dry plastered surface again with a primer.
When the installation of finishing material is carried out on a metal frame, the fasteners of which are made on the old one, there is a high probability that the entire structure will be able to move away from the wall surface. Preparation for decorative finishing includes the purchase of tools and materials necessary for the work.
Stages of finishing a chimney with a metal profile
Metal profile (or profiled sheet) is the most common material for lining a chimney pipe (especially if metal tiles are laid on the roof), as it has the following characteristics:
- Ease of installation and repair work.
- Durability.
- Resistance to sudden temperature changes (the metal profile does not crack or deform).
- Light weight (the use of metal profiles for finishing is possible on any type of roof).
- Low temperature resistance.
- Fire resistance (profiled sheet does not burn or melt).
- Environmental safety (metal profiles are manufactured without the use of harmful or environmentally toxic substances).
- Strength (the material practically does not deform under physical impact, unlike, for example, plaster, which quickly collapses during a hailstorm).
- Durability.
- Large selection of colors.
The metal profile is a sheet of galvanized steel, the outer layer of which is represented by a special polymer paint, which additionally protects the sheet from adverse environmental conditions.
Currently, there is a huge selection of metal profiles with slightly different properties, which allows you to choose the best option for any operating conditions:
- The profiled sheet of the support type is characterized by increased strength, therefore it is used for lining pipes, the reliability of which is a determining parameter.
- Aluminum sheets are highly resistant to moisture. Therefore, they are the most durable material for cladding.
- The combined metal profile can be used both for cladding and for other construction work, since, depending on the specific model, it combines the advantages of the first two types to varying degrees.
- Painted metal profile sheets fit perfectly into any architectural design.
After purchasing the sheets, it is necessary to ensure their proper storage (otherwise the metal profile will begin to lose its useful properties even before installation), adhering to the following rules:
- Sheets can only be stored in a dry, ventilated area.
- The sheets must be stacked on special pallets one above the other in a strictly horizontal position.
- When storing outdoors, cover the sheets with thick plastic wrap.
If the storage of the cladding material has been quite long, it is necessary to check each sheet for defects, and only then proceed with installation.
Watch video - covering with metal profiles part 1
To cover the chimney with tin, you need to prepare the following devices:
- Tool for cutting sheets. The ideal option is a circular saw or an electric jigsaw, but if the amount of work is small, you can get by with a hacksaw or metal scissors. It is not recommended to use a grinder, since when it comes into contact with a metal sheet, the surface heats up, which can cause the material to deform.
- Level for maximum installation accuracy.
- Self-tapping screws and a screwdriver for fastening sheets.
The installation of the sheathing itself takes place according to the plan below:
- A metal or wooden frame is manufactured and installed on which the sheathing will be attached.
- Cutting out metal profiles.
- Laying sheets.
- Fastening sheets using self-tapping screws.
- Sealing joints.
- Installation of special corners at joints for aesthetic appeal.
Watch video - covering with metal profiles part 2
The main thing in installation is the most even laying of the bottom row (at the junction with the roof), since the tightness and reliability of the structure largely depends on it.
How to make a hood in a bathhouse
This has already been said more than once, and yet it is worth repeating: the costs of installing ventilation will increase many times over if it is done late , after construction is completed. At the same time, the principle of creating ventilation in the bathhouse remains unchanged: it is necessary to create conditions for the inflow and outflow of air from the premises. So, how to make a hood in a bathhouse with your own hands or the hands of professionals.
Exhaust hood in the bathhouse: diagram
There are many schemes, but to understand the principle of ventilation, just one is suitable. Most often, steam room ventilation diagrams are proposed, but the diagram for the entire bath, with explanations, is of much greater interest.
Look at the sketch. It shows that ventilation was carried out in the washing room, steam room and relaxation room. Moreover, the air flow is carried out from one pipe to two points, one of which is in the steam room, and the second in the relaxation room. The hood is located in the washing room, in the steam room, and in the relaxation room. Let's describe all the ventilation devices in each room:
Do it yourself: how to do it right
Exhausting in a bathhouse with your own hands is not something that is impossible to do, but you need to approach the matter prudently and slowly. In order to make a hood yourself, you need to choose a diagram and prepare materials according to it. It is also necessary to calculate the cross-section of ventilation pipes.
IMPORTANT! The inflow volume must be equal to or less than the exhaust volume.
To do this, you need to know the volume of the room and the expansion factor (how many times the air should be renewed per hour) - it is in the standards. In main air ducts, the speed of movement should not exceed 5 m/s, in branches - 3 m/s, in the steam room - 2 m/s, natural ventilation - up to 1 m/s. Next in the table we find the value of the pipe cross-section that closest gives the required volume at a given speed.
Knowing the cross-section, all that remains is to prepare corrugation or pipes of the appropriate diameter, which are fixed at one end indoors at the required height according to the diagram, and at the other end they go outside. Self-tapping screws, metal tape and polyurethane foam are used for fastening. The openings are equipped with dampers in the room and grilles at the exit. By the way, ventilation cleaning should be done once a year .
Brick chimney finishing
Brick can withstand both static mechanical impact and strong shock loads.
- If installation work is carried out correctly, facing bricks do not require special care or constant cleaning.
- Resistant to prolonged exposure to moisture.
Brick does not absorb water and is not destroyed by prolonged exposure.
- Fire resistance.
- Low temperature resistance.
- Wear resistance.
By covering the chimney with brick, you will ensure reliable protection of the chimney and the attractiveness of the building for 30-50 years. After this period, the structure will gradually begin to collapse.
When is this required?
There are times when there is no need to protect walls. If the stove is located at a safe distance from the wall from a fire safety point of view, the installation of protective screens and other measures can be neglected. The distance from the walls that is required to reduce the heat from the source varies:
- A stove laid in a quarter of a brick should be located no closer than 35-40 cm from the wall;
- A metal stove without lining should be placed a meter away and no closer;
- A metal one with a lined furnace can be installed 70-75cm from the wall.
However, not every steam room has the opportunity to fulfill these requirements, due to the small area. The layout of steam rooms with an area of 6-8 m² can hardly accommodate the necessary set of items for the steaming procedure. Therefore, the need to insulate walls with special sheathing is relevant.
Plastering a chimney on the roof and attic
Plastering a chimney pipe is quite common throughout the world. In this case, it is possible to use both ordinary mortar used to level surfaces and decorative plaster. The second option is more interesting, since it becomes possible to create a unique design due to the special composition of the plaster (for example, some types contain crumb elements).
- Ease of use (plaster does not require any coating).
- Resistance to long-term exposure to water (during its entire service life, the plaster does not crack or wash off, even if the house is built in an area with a high average annual precipitation).
- Resistant to high temperatures (plaster does not burn or collapse, so it is excellent for finishing the chimney of a fireplace or stove).
- Fragility (high-quality plaster will last no more than 5 years, after which peeling and gradual destruction will begin; re-plastering can only be done after removing the old material and treating the surface).
Lining a chimney with plasterboard is carried out exclusively indoors, since this material is very sensitive to moisture. Drywall itself is not particularly visually appealing, but it is an excellent base for other finishing materials (for example, ceramic tiles or plaster).
If you decide to install a plasterboard box to hide the fireplace chimney, you must choose a material with a maximum heat resistance rating (most types are not resistant to high temperatures).
The process of installing a plasterboard box is quite simple and can be done with your own hands:
- Preparing the layout and cleaning the installation site.
- Installation of a metal frame.
The elements of the supporting structure are attached to the wall using self-tapping screws. The frame installation method ensures maximum reliability of the box and durability of the system.
- Cutting drywall.
- Fastening the sheets to the frame using self-tapping screws.
- Plastering the surface.
- Finishing.
The tiles are suitable for both decorative and existing chimneys. Thanks to the variety of shapes and sizes, it fits perfectly into almost any architectural style, because it can imitate many surfaces. In this case, the front side of the tile can be glossy or matte, embossed or smooth.
The tile manufacturing process consists of the following steps:
- Selection of several types of clays to ensure maximum density of the finished product.
- Crushing all ingredients.
- Mixing components: clay, quartz sand, feldspar.
- Drying the tiles at a temperature of 600°C.
- Final formation of the product.
- Re-dry the tiles to remove residual moisture.
- Firing (carried out in 2 stages).
- Tile quality control.
When all stages are carried out responsibly, the output is a product with the following characteristics:
- Moisture resistance (tiles do not collapse even with prolonged exposure to water).
- Resistance to chemicals (the tile surface can be cleaned with any detergent).
- Resistance to high temperatures (especially important for chimney pipes).
- Frost resistance.
- Durability.
Watch the video
Rules and regulations
Work on installing and lining the chimney must be carried out in strict accordance with current standards and regulations. The main document is SNiP 41-01-2003 “Heating, ventilation and air conditioning”, which details all the requirements for chimney lining:
- All heated surfaces must be insulated from flammable structural elements (for example, the roof). Moreover, the fire resistance of the insulating material should be 20°C higher than the expected temperature of the hot surface.
- The material used to cover the pipe from the fireplace or stove must be resistant to rust.
- If brick is used to line the pipe, the thickness of the masonry must be at least 120 mm.
- The design should include protective canopies (or umbrellas), the main thing is that they do not reduce the draft from the pipe.
- The distance from the pipe to the flammable roof must be at least 130mm (important to consider when covering).
Strict compliance with all requirements guarantees the reliability and durability of the structure.
How to finish a brick oven with galvanization yourself?
Granny has been asking for a long time to cover her brick stove with galvanization. How can you decorate a brick stove with galvanization yourself?
comment to favorites volod me [32.7K] 5 years ago
It is better not to do this for a simple reason, if there is a large temperature difference, the zinc coating will peel off from the steel sheet, this has been tested experimentally. If you decide to cover the stove, it is better to do it from stainless steel. And then if small children suddenly come into the house, they can get very badly burned. In a word, there are a lot of unpleasant moments, and no one is doing this now. Listen to the advice and clad the stove with stone - it’s much more profitable and pleasant.
But if you still decide to line it with zinc, then weld according to the dimensions of the furnace perimeter from a 20*40 mm corner. the wide side on the stove; vertical posts can be made from a 20*29 mm corner. structure, the sheets can be welded around the perimeter and then this entire structure is put on the stove. But first of all, you need to level the oven walls. Holes for anchors must be drilled in the corners, and the corners must be carefully secured with long anchors. That's basically the whole process.
the system chose this answer as the best comment add to favorites link thank houses oh [31.1K] 2 years ago
Still, contrary to the advice of some users and experts, I would recommend and agree with the opinion that there is no need to drill/hammer and hammer dowels into the stove; firstly, it will not look beautiful, since protruding screws, even with a decorative cap or plug, will spoil appearance and not the fact that the galvanized sheet will not bend at the fastening points.
And secondly, if you have a real, and not a decorative, stove, then it is built on clay mortar, and not on cement masonry, and if you drill it with a hammer drill, even with a thin drill, the masonry will easily collapse, and if you drill several dozen such holes, then the You know what this will lead to!
Therefore, in order to sheathe the stove with galvanization, you need to make a box - according to the principle of an aquarium, you can use galvanized corners for this (metal profiles are very often used for greenhouses).
From this corner you need to make a frame; it is better to use semi-automatic electric welding and weld with wire than conventional electric or gas welding.
When you finish making the box to size, line it from the inside with galvanized sheets and put it on the stove.
To fasten galvanization, use rivets; they look much more beautiful and neater than self-tapping screws.
I hope you understand what I explained. Galvanization should be thick, millimeter or even 1.2 mm thick, since 0.6 or 0.8 is very thin and will bend and play with the temperature, bending and deforming.
Each owner strives to decorate his hearth, to make it not only functional, but also part of the interior decoration, because the stove is usually located in a clearly visible place in the house. During construction, and during further operation, the finishing of the furnace must meet certain requirements, which will be discussed below.
When is this required?
There are times when there is no need to protect walls. If the stove is located at a safe distance from the wall from a fire safety point of view, the installation of protective screens and other measures can be neglected. The distance from the walls that is required to reduce the heat from the source varies:
- A stove laid in a quarter of a brick should be located no closer than 35-40 cm from the wall;
- A metal stove without lining should be placed a meter away and no closer;
- A metal one with a lined furnace can be installed 70-75cm from the wall.
However, not every steam room has the opportunity to fulfill these requirements, due to the small area. The layout of steam rooms with an area of 6-8 m² can hardly accommodate the necessary set of items for the steaming procedure. Therefore, the need to insulate walls with special sheathing is relevant.
Furnace lining
Cladding the stove with tiles If you are not sure how to tile the stove in the house outside, then for all stoves with a low surface temperature, we can recommend one method - clean the surface of the brick and paint it.
For painting, use facade paints or lime - they are sufficiently resistant to temperature changes.
It is advisable to paint the seams differently or clear them and fill them with special mastic for fireplace seams.
Quite often, paint on clay joints does not adhere very well, and they will have to be repainted from time to time.
At the same time, mastic for fireplaces holds up quite well. You can increase thermal efficiency if you paint the surface of the stove white - this will increase heat transfer due to radiation. It is also advisable to use light or white materials for finishing and cladding.
Application of protective screens
Screens are shields made of brick or metal that protect walls from intense thermal radiation. Similar protection is used when installing metal stoves.
- Metal screens are made from steel or cast iron sheets, these
casings surround the heat source with a distance of 3-5cm.
Advice! When purchasing a metal sauna stove, you should give preference to a model equipped with a metal casing. Its cost is not much higher, but the issues of wall insulation are eliminated.
Additional frontal or front shielding, which is located on the walls depending on the location of the stove, will not hurt. The protection guarantees the wood from overheating, reducing the temperature by 100 degrees or more, and provides the opportunity to save space in the steam room. A stove protected by a casing can be installed at a distance of 50-55cm from the wall.
Installation of screens is simple. The casing, equipped with legs, is secured to the floor by side or front screens - with galvanized nails or self-tapping screws.
- Brick screens are masonry used to cover the stove with
on all sides, the same casing, only made of brick. Another method is to lay half a brick between the firebox and a wall made of solid fireclay bricks laid on a solution of clay and cement. The width of the wall should be 120mm, although there is an opinion that it is permissible to put 60mm in a quarter of a brick, but it should be remembered that in this case the thermal insulation value is reduced by exactly half. It is recommended to raise the height of the masonry 20-30 cm above the surface of the firebox, but if you raise it to the ceiling, it will not be worse.
The screen should be placed at a distance of 10-15cm from the wall, 5-15cm from the stove, that is, the space saving is 30-40cm
Important! Functional openings for heat exchange should be made at the bottom of the masonry.
Protective screens are effective; they reduce the temperature to a level acceptable when using high-temperature fuel units. The same function is performed by wall cladding made of non-combustible materials.
How to glue tiles
To install the material yourself, you need to follow some rules. For example, laying should start from the bottom. The line for the first row is first beaten and markings are made, which is impossible without a painted cord. It is placed horizontally, pulled back, and then released.
Perforated corners are also secured in the corners to beautifully design the corner joint. After preparing the wall and tiles, you can begin to prepare the adhesive solution. It is mixed with an electric drill and a mixer attachment in a container of a suitable size. After waiting at least 10 minutes, it is permissible to begin laying the first row.
To do this, glue is applied with a spatula to an area designed for 5 - 7 pieces. Crosses are placed between the laid tiles in horizontal and vertical joints. They allow you to maintain the same thickness of the seams and often install 2 pieces on each side of the material. Sometimes pieces of drywall are used instead of crosses, for example, when large gaps need to be left during cladding.
How evenly the installation occurs will help control the building level. Later, the joint space is grouted with a special grout. After laying out 4–5 rows, it is recommended to take a break from work for a couple of hours. Next, the masonry is completed and allowed to dry for 24 to 36 hours.
Covering bathhouse walls with non-combustible insulating materials
To prevent the walls from overheating, you can use materials with increased thermal insulation properties and inertness to high temperatures. Two types of materials are used:
- reflective;
- fireproof with lining.
The first type includes materials for wall cladding, consisting of thermal insulation with fire-resistant properties and a metal covering in the form of a sheet.
Insulating walls with reflective sheathing
A protective cake with reflective materials is done this way. First, the thermal insulation is attached using ceramic bushings directly to the wooden walls, then it is sewn up with a stainless steel sheet.
Advice! It is better not to use galvanized metal, since heating may release heavy metals harmful to the human body.
Stainless steel with a polished surface reflects the heat flow inside the steam room, reducing heat loss. In this case, reflected heat is more useful than direct heat. For thermal insulation use:
- basalt cardboard or cotton wool, the only material with increased hygroscopicity, non-flammable, environmentally friendly;
- asbestos cardboard, which reliably protects against flames and has a long service life;
- mineralite, an artificial material made specifically for these purposes.
Protective sheathing requires ventilation gaps of 2 cm from the wall to the insulation, 2 cm from the insulation to the steel sheet. If it is necessary to install the stove as close to the wall as possible, make a double skin of non-combustible insulation, use ceramic bushings to maintain gaps of 2-3 cm and sew them up with a steel sheet.
How to cut tiles
Before the furnace is lined, the material must be cut correctly. In order not to spoil a lot of tiles and to cut them well, you need to do everything carefully. Having completed this procedure once, which, along with plastering the surface, purchasing materials and tools, can be safely classified as preparatory work, you will gain valuable skills in the future. To cut, you need a special machine - a tile cutter.
When the lever is lowered, the tile breaks into pieces. For the best performance of such manipulations, the roller and guide frame must be lubricated with machine oil. To avoid a crooked cut of the material, you need to check how correctly the roller is secured and whether it is loose. When you are dealing with a previously used tile cutter, it may be necessary to replace the roller. This is not difficult to do, since you can buy a new one in stores that sell tiles.
A simpler cutting device is a manual tile cutter in the form of nippers. It is unlikely to be suitable for very thick floor tiles, but can be used for wall material. Some craftsmen use a jigsaw available on the farm, on which they place a tungsten carbide file.
Another option for cutting yourself is to use a grinder with a special circle. Some people experienced in this matter even get by with an ordinary glass cutter. Here it is important to carefully break the tile into pieces after preliminary marking. But, due to lack of practical experience, it is better to abandon the latter method. Because otherwise there is a high probability of damaging your hand.
Of course, the most reliable way is to use a large tile cutter, which must be installed on the floor or a reliable table. If you are unable to get a perfectly straight edge of the cut material, you need to polish it using a special stone.
Plastering: simple and durable
Our ancestors did not have access to heat-resistant building mixtures, so before whitewashing the stove, they covered it with a layer of plaster made according to a fairly simple recipe. The mud stove allows for unevenness on its surface, but it will have to be whitewashed again every year. First, you will need to prepare a solution for the plaster.
- Sift cement and sand through a sieve.
- Mix these ingredients with clay diluted in water.
- In a separate container, prepare a mixture of water and plaster, which you then add to the plaster solution.
Important: due to the fact that plaster sets quickly, it must be diluted in small portions in order to be used within 5 minutes.
Source: Finishing the stove with plaster occurs as follows.
- Clean the brickwork of the stove with a wire brush to remove dust, cobwebs, and clay. It needs to be carefully treated with the surface for plaster.
- Clear the joints between the bricks to a depth of approximately 5 mm.
- Install a reinforced mesh on the wall, which will serve as a fastener for the plaster.
- Heat the oven and cool.
- Apply the first layer of plaster approximately 5 mm thick.
- Follow this with a second layer of plaster. It should be thicker than the previous one.
- Rub the dried plaster until a smooth surface appears.
The surface of the oven prepared in this way can be painted or whitened.
Selection of glue
In this case, you should choose exclusively from those glue widows that are resistant to high temperatures. It is important to remember that even such glue for normal setting is applied and left until completely dry on a non-heated surface, i.e. The oven does not light up for at least a day. It is better to do this in the warm season.
Adhesives, in turn, are divided by type of application:
- to continuous, i.e. the composition is applied to the surface, without leaving bubbles or empty spaces, approximately 1 cm thick, smoothed with a special notched trowel, and tiles are attached to it row by row;
- and spot application, such application is more economical, but does not guarantee either high-quality fastening of the tiles or their preservation from heat. It is better to cover the surrounding space in this way, but not the stove itself;
Preparing for decoration
Before starting work, it is advisable to completely remove the old layer of finishing and remove all dust and other particles, deepening the joints between the bricks.
After which it is better to prime the surface twice with a heat-resistant compound and let it dry.
Next, the above mesh is stretched and strengthened. You can use metal elements at the corners.
Alternative finishing methods
A possible option for covering is felt, which is pre-impregnated with clay. You need to attach a sheet of tin close to the top for thermal protection. The modern wide range allows you to choose other options:
- Cover with flat slate, decorate with patterns
- Plaster and whitewash
- Lay tiles
For reference! The stove can be lined with stone, vermiculite, soapstone or terracotta.
Is it possible to cover the stove with plasterboard? It will burn, reduce heat transfer and simply crumble over time. An alternative is special refractory clay (or mortar). The finished surface can be additionally covered with porcelain stoneware.
How to prepare gypsum mortar for finishing a brick oven:
- Knead the clay in water (1:3).
- Wait until completely dissolved and mix thoroughly.
- Pour the solution into another container.
- After settling, add fine sand (1 part clay to 3 sand).
Is it possible to cover a stove with plasterboard? In its pure form it is suitable only for decorative stoves, but in working rough it can burn. A popular alternative is brick or tile. The distance between the surface and the material should be on average 1-2 cm.
Chimney finishing: choice of materials
Negative factors affecting the chimney include
:
- atmospheric influences (wind, precipitation, ultraviolet radiation);
- difference in ambient temperatures;
- high temperature operating loads.
Due to the difference between the temperature of the working pipe and the air temperature in the chimney, condensation forms, which provokes destruction of the pipe during the combustion of heating oil
. To avoid the formation of condensation and protect the pipe from external influences, it is necessary to provide reliable insulation of the chimney through lining.
Various materials are used to cover the protruding part of the pipe. When choosing, you should consider
:
- resistance to external factors, wear resistance;
- appearance and color scheme (matching the roofing or wall decoration of the building).
It is recommended to line the chimney before laying the roofing material to avoid damage or contamination of the roof covering.
Finishing a chimney on the roof is most often done using
:
- clinker bricks or tiles;
- plasters;
- cement fiber boards;
- roofing material (corrugated sheeting, slate).
Characteristics of finishing materials
Clinker bricks or tiles are a practical option for finishing a chimney pipe, since dirt is not noticeable on such material. The advantages of clinker materials also include the aesthetics of the masonry; such a chimney goes well with any type of roofing. It is worth noting the resistance of tiles and bricks to weather conditions, temperature changes, as well as the strength of the material. For lining the chimney, exclusively solid clinker bricks are used, laid on a clinker mortar; special compounds are used for grouting joints. Thin, lightweight clinker tiles are usually used for lining tall pipes.
Finishing a chimney on the roof with plaster is characterized by
:
- affordable cost;
- simple installation;
- versatility (suitable for any roofing);
- the ability to implement any color schemes (plaster can be painted with silicone paint).
Plastering pipes is carried out using the same technology as finishing facade walls. Traditional cement or lime-cement mortar can be used, but a more durable option is to use mineral, silicone, silicate or acrylic plaster. Painting the dried surface increases the wear resistance and durability of the finish.
Small-format cement-fiber boards are durable, resistant to ultraviolet radiation, moisture, temperature fluctuations, and light in weight. This is an environmentally friendly, non-flammable material. Smooth or structured slabs can be used for lining the chimney; the material is available for sale in a wide range of colors.
If slate is used for roofing, the chimney lining on the roof is usually made of the same material. Slate slabs can be shaped like an arc, flake, rectangle or octagon. The color of this natural material depends on the deposit. This color is usually graphite, green or purple.
A fairly simple and inexpensive option for finishing a pipe is to use corrugated sheeting. It is used if the roof covering is made of the same material. The pipe, finished in the color of the roof, looks aesthetically attractive.
Manufactured in a factory, the chimney elements for the roof passage have an aesthetic appearance and are quite easy to install. They are equipped with a steel chimney duct and can have a ready-made external cladding made of any material, or be prepared for independent finishing so that the chimney is externally in harmony with the roof. The modular steel structure is not additionally finished; it is enough to install it at the point of passage through the roofing pie.
Tiles - the experience of centuries
Stove masters spent a long time looking for a way to protect the finish from temperature deformation, until they came up with tiles. In essence, these are ordinary clay tiles, but with a special “volumetric configuration”. On the back side of the tiles there are special projections - rumps. They serve to connect the tiles to each other and connect them to the masonry mass.
Stove tile (back view)
The laying of tiles is carried out simultaneously with the construction of a stove or fireplace, row by row. This creates a strong self-supporting wall. It is connected to the main masonry by wire “tendrils” placed in the seams between the bricks.
The tiles are connected to each other using steel hook brackets. They are connected to the brick wall of the oven not only by wire, but also by mortar placed in the tillers and in the space between the tiles.
The technology of tile cladding differs from conventional stove finishing. First, they place a row of tiles, fasten them together and fill the pumps with clay mortar. Only after this the brick wall of the furnace is placed close to them.
We invite you to find out how many bricks are needed for a stove at home
The richness of the decor and color range of stove tiles is amazing. Therefore, finishing with this material is often equated to high art.
Waterproofing a chimney on the roof
When making a passage through the roof, it is important to comply with SNiP standards. A gap should be left between the roof elements and the chimney, the size of which is regulated by documents. At the point of passage through the roof, a box (wooden or galvanized metal) is usually installed, in which all the free space around the pipe is filled with non-combustible material - stone or glass wool.
Sealing a chimney on the roof can be done using improvised means or using standardized elements. Around the chimney you should make a so-called collar, or flashing - a trim made of strips of metal, about 40 cm wide, in accordance with the dimensions of the pipe. The bend angle of the steel strips must correspond to the angle of passage of the chimney pipe through the roof. To calculate the length of the section, you need to take into account
:
- slope angle;
- chimney dimensions;
- chimney finishing type.
If the flashings are made of galvanized sheets, then they are interconnected with an overlay and soldered. Elements made of sheet steel are connected by a double standing seam. The rebated seam connection is used to seal the passageway on roofs made of corrugated slabs and tiles. If the roof slope angle is more than 30 degrees, a special beam should be installed behind the chimney - a “bumper”, which will protect the pipe from rainwater flows and excessive snow pressure in winter
.
A protective elastic apron for a chimney can be made
:
- from flexible metal tape (lead or aluminum);
- made of galvanized metal with polymer coating.
The apron is installed around the pipe in two layers around the entire perimeter. The bottom layer of the apron is placed under the roofing, and the top layer is mounted on top of the roofing material. To cover the top layer of the apron, a waterproofing film and metal profiles are used.
The top curved edge of each apron should fit into a groove cut around the perimeter of the chimney. After installing the edge into the groove, the joint is filled with polymer sealant or silicone for roofing.
Ready solutions
Sealing a chimney on the roof is a rather complex task, the quality of the solution of which determines the reliability of the thermal and waterproofing of the roof. You can make the passage assembly yourself, using various materials and special strips, or mount a ready-made structure, which includes a wide protective apron.
Ready-made roof cutting on the construction market is presented in many versions - models differ in material and manufacturing method, as well as the angle of inclination of the element that protects the place where the pipe passes through the roofing pie from water. The angle of inclination can be from 15 to 55 degrees, therefore, the cutting of the chimney on the roof is designed for the most common slope options.
To install such a structure, a hole of appropriate dimensions is made in the roofing pie. A seal made of rubber is attached to the outside of the structure using silicone. The distance between the pipe and the collection passage is filled with non-combustible insulation. The roofing penetration covers the passage unit, after which the penetration can be attached to the roof with self-tapping screws. To ensure a tight connection, it is recommended to use a sealant.
When choosing the option of how to seal a chimney on the roof, you can use other ready-made solutions, for example, Master flash roofing penetrations.
Author Pavlov Yuri Nikolaevich
Rate this article 0
Source: vseokrovle.com
How to glue tiles
To install the material yourself, you need to follow some rules. For example, laying should start from the bottom. The line for the first row is first beaten and markings are made, which is impossible without a painted cord. It is placed horizontally, pulled back, and then released.
Perforated corners are also secured in the corners to beautifully design the corner joint. After preparing the wall and tiles, you can begin to prepare the adhesive solution. It is mixed with an electric drill and a mixer attachment in a container of a suitable size. After waiting at least 10 minutes, it is permissible to begin laying the first row.
To do this, glue is applied with a spatula to an area designed for 5 - 7 pieces. Crosses are placed between the laid tiles in horizontal and vertical joints. They allow you to maintain the same thickness of the seams and often install 2 pieces on each side of the material. Sometimes pieces of drywall are used instead of crosses, for example, when large gaps need to be left during cladding.
How evenly the installation occurs will help control the building level. Later, the joint space is grouted with a special grout. After laying out 4–5 rows, it is recommended to take a break from work for a couple of hours. Next, the masonry is completed and allowed to dry for 24 to 36 hours.
How to sheathe a stove with iron
On cold winter evenings, it’s so nice to light the stove and sit sipping hot tea with raspberries, listening to the crackling fire. Quite often, it happens that the stove loses its attractive appearance. In this case, there are several options to put it in order. One of the most economical and fastest is to cover the stove with iron or tin.
You can buy tin at any hardware store and it is quite inexpensive. Plus a special heat-resistant solution for covering irregularities.
• Heat-resistant mortar for stoves and fireplaces;
• Scissors for cutting metal;
First you need to clean the oven of old material and paint. After which, we dilute a special solution, as written in the instructions. We take a spatula and cover all the unevenness that formed during the process of cleaning the oven from old material. Once the work is completed, you will need to wait about 3 hours until the solution is completely dry.
The oven must be pre-measured. Next, we take metal scissors and cut out the pieces of tin we need, which we will need for the sheathing. When sheathing the stove, we use a hammer and nails. After finishing the work, you can, if desired, paint the stove. It is worth noting that in case of painting, it is not recommended to use a stove for 2 days to allow the paint to dry completely. To paint the stove, it is recommended to use special heat-resistant paint, which will not release toxins and peel off when heated.
Materials for preparatory and finishing work
Anyone who has equipped their living space or bathhouse with an iron heating device, eventually has to think about the question of how to line a metal stove in order to create a protective screen for thermal radiation. After all, practice shows that during operation such a stove, along with a number of advantages (cheapness, ease of transportation and installation, cost-effectiveness), reveals one, but very significant drawback: too high thermal conductivity. This means that the oven heats up quickly and cools down just as quickly.
Horizontal homemade metal stove.
In order to avoid uneven heating of the room, rapid cooling of the heating device and destruction of the iron casing due to overheating, professionals advise lining a metal stove with bricks.
This solution will greatly improve its performance. In particular:
Even a non-professional can easily frame a stove with bricks. To do this, you just need to stock up on a set of necessary working tools, bricks, adhesive mortar and, of course, take the advice of experienced stove-makers.
Scheme of technological tools for furnace work.
The list of required building materials includes:
When choosing a facing material for a metal slab, experts insist on using only solid refractory bricks, popularly called stove bricks. It is not afraid of prolonged exposure to high temperatures, does not crack, does not deform, and does not lose its ability to retain heat for a long time.
Today, the construction market offers quite a large number of varieties of oven bricks: from the usual flat, economy version in red to much more elite models with textured decoration and a variety of colors to suit every buyer’s taste. Such varieties will serve not only for high-quality lining of the stove, but also to decorate its appearance.
Figure 1. Checking the mortar for cracks.
Stove makers use several composition options as a binding solution:
You can use any of them, the quality of brick lining the stove will be equally high. The main thing to remember is that to prevent the solution from hardening, you need to knead it in small portions.
Self-finishing of a brick oven is carried out using a spatula. The height of its teeth should be no more than 6 mm. Such a tool will allow you to efficiently apply and evenly distribute any type of glue over the surface. You should also stock up on a regular medium-sized straight spatula (to clean the surface), an angled spatula, and a rubber one. The latter is needed for sealing seams.
You also need to purchase a high-quality sander and tile cutter, a building level, a marker or a simple pencil (to make markings), a metal ruler, a glue container, a mixer attachment and an electric drill, which will allow you to place the adhesive mixture well. If the furnace lining will be carried out using a special technology - without the use of glue - you should also prepare metal scissors, a wooden or rubber hammer, and a bending jig for making corners. As well as rivets, a riveter, a drill and a set of drills designed for metal work.
Among the materials that will be needed for self-cladding the stove are glue intended for cladding fireplaces and stoves with heat-resistant properties, primer, baseboard, and grout for the seams between the tiles. This list is relevant when you are planning to lay any type of tile with glue.
If a so-called “dry” installation without it is assumed, then you need to purchase galvanized steel sheets, the thickness of which does not exceed 0.6 - 0.9 mm, a steel or aluminum corner to cover the corners, and aluminum strips. The latter are required for the manufacture of the frame; they must have a width of 20 mm and a thickness of about 2 mm.
Lining the chimney with metal profiles or other materials
Sheathing the chimney with a metal profile or other materials is necessary not only to improve the appearance of the roof, but is also the final stage of protecting the structure from the negative effects of the environment: wind, snow, hail - all this can cause the heating system to malfunction.
In addition, when choosing a chimney, it is necessary to take into account the temperature of the transported medium, because many materials deteriorate quite quickly at high values. Therefore, it is important to select the appropriate pipe lining material depending on the structural features and architectural design of the building.
The best way to heat a private home is to install an autonomous heating system. After all, at the same time, you will not only be able to save significantly, but also choose the most suitable stove for your home, depending on your budget and individual preferences.
Any heating (except electric, which is used quite often due to the high cost of operation) involves the removal of combustion products through a pipe. The main thing is to choose the right shape, cross-sectional area, and cladding material.
Manufacturers and brands
Heat-resistant materials for ovens are very well represented on the market. A large number of manufacturers and a wide range of prices indicate that the product is popular and companies are trying to make it the highest quality product in order to surpass competitors. This list provides examples of different types of materials, from different manufacturers and from different price groups.
We suggest you familiarize yourself with How to insulate walls from the inside in a private house? Step-by-step instructions Heat-resistant fabric for imported ovens can also be a very reliable competitor to other types of materials. The price is slightly high, but you can measure this by understanding the specifics of using the fabric.
Rolled fire-resistant non-woven material - cost of 1 linear meter from 112 rubles, produced by OgneuporEnergoHolding, LLC, Moscow;
Metal profile as the best material for finishing a chimney
Metal profile (or profiled sheet) is the most common material for lining a chimney pipe (especially if metal tiles are laid on the roof), as it has the following characteristics:
- Ease of installation and repair work.
- Durability.
- Resistance to sudden temperature changes (the metal profile does not crack or deform).
- Light weight (the use of metal profiles for finishing is possible on any type of roof).
- Low temperature resistance.
- Fire resistance (profiled sheet does not burn or melt).
- Environmental safety (metal profiles are manufactured without the use of harmful or environmentally toxic substances).
- Strength (the material practically does not deform under physical impact, unlike, for example, plaster, which quickly collapses during a hailstorm).
- Durability.
- Large selection of colors.
The metal profile is a sheet of galvanized steel, the outer layer of which is represented by a special polymer paint, which additionally protects the sheet from adverse environmental conditions.
Currently, there is a huge selection of metal profiles with slightly different properties, which allows you to choose the best option for any operating conditions:
- The profiled sheet of the support type is characterized by increased strength, therefore it is used for lining pipes, the reliability of which is a determining parameter.
- Aluminum sheets are highly resistant to moisture. Therefore, they are the most durable material for cladding.
- The combined metal profile can be used both for cladding and for other construction work, since, depending on the specific model, it combines the advantages of the first two types to varying degrees.
- Painted metal profile sheets fit perfectly into any architectural design.
The main thing when choosing profiled sheets for lining a chimney is to determine the required reliability and durability of the material, since its final cost depends on this.
After purchasing the sheets, it is necessary to ensure their proper storage (otherwise the metal profile will begin to lose its useful properties even before installation), adhering to the following rules:
- Sheets can only be stored in a dry, ventilated area.
- The sheets must be stacked on special pallets one above the other in a strictly horizontal position.
- When storing outdoors, cover the sheets with thick plastic wrap.
If the storage of the cladding material has been quite long, it is necessary to check each sheet for defects, and only then proceed with installation.
Single-wall and double-wall chimneys made of galvanized steel - what are good and what are dangerous
The time when a brick chimney or asbestos pipe was traditionally used as a smoke removal system is long gone. At the moment, many analogues have appeared (pipes made of stainless steel, ceramics, sandwich), which are superior to the latest options in technical and thermal insulation characteristics. One of the possible options for arranging a smoke removal system is a chimney made of galvanized steel.
Power calculation
How to choose the required thermal power?
Here are fairly simple instructions for houses with normalized heat transfer resistance (for the center of the country - approximately 3.2 m2 * C / W).
- The base value is 60 watts of heat per cubic meter.
Please note: for apartments this value is one and a half times less. A private house loses much more heat (in particular, through the floor and roof).
- Each window increases losses by 100 watts, each door by 200.
- In addition, a regional coefficient is introduced:
| Region | Correction factor |
| Crimea, Krasnodar region | 0,8 |
| Moscow and Leningrad regions | 1,2 |
| Far East | 1,5 |
| Yakutia, Chukotka | 2,0 |
So, for a house measuring 3x4 meters with ceilings 240 cm high, equipped with five windows, one door and located in the Moscow region, the heat requirement will be ((3x4x2.4)x60+5x100+200)x1.2=3513 watts (3.5 kW).
Please note: of course, it is worth considering the actual degree of thermal protection of the building. For example, uninsulated country houses made from block containers may well require not 60, but 160 watts per cubic meter of volume for heating.
Design features
Stoves—fireplaces. The transparent window performs 2 functions. Through it you can observe the flame and control the degree of combustion of the wood. In this case, the fire does not reach the glass, and it does not get dirty.
With heat exchanger. Such a metal stove is installed in a country house if there are several rooms. The equipment is connected to a water circuit that covers the entire room.
Pyrolysis. Another name is gas generators. Their fuel is wood. The main drawback - rapid fuel combustion - is eliminated here. With a weak air supply, the tree smolders. The resulting pyrolysis gas enters the next chamber. Air is also supplied here. Mixing with it, a secondary combustion occurs and additional heat is released. The smoldering of fuel can be extended over time without reducing efficiency. The operating time of the heating furnace reaches 12 hours.
Convection. These are pyrolysis structures, additionally equipped with large-diameter pipes. They are open at both ends and pass through the firebox. During heating, convection currents arise in them.
Material calculation
Before planning a trip to the shops, you will need to first take all measurements from the planes that will be covered.
You should not neglect the treatment of adjacent surfaces, which will also be exposed to high temperatures. The floor, adjacent walls and ceiling will also need to be protected with fireproof shields.
Tile adhesive is calculated separately; manufacturers attach instructions directly to the packaging, so now you only need to know the area that will be covered.
Don’t think that you can avoid cutting tiles, this is impossible, so you will need to purchase or borrow a tile cutter.
Before decorating the stove, it is imperative to strengthen the surfaces; this is usually done using a ready-made metal mesh or by tensioning the wire.