Home |Construction |How to raise a bathhouse yourself?
Date: August 28, 2017
Comments: 0
Wood is traditionally used to build bathhouses. Bath buildings built from logs, beams or panel elements are environmentally friendly buildings. They are characterized by increased strength characteristics and a long service life. However, the time factor gradually reduces the strength of the material. There is a need to restore or replace the lower crown of the building, which is its foundation, as well as to carry out major repairs of the load-bearing foundation.
Having an idea of how to raise a bathhouse onto a foundation, you can move a light building in a vertical direction with your own hands. To carry out repairs and ensure integrity, it is important to provide temporary fixation using metal or concrete supports.
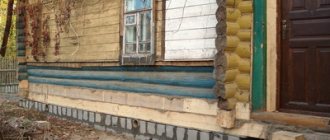
It often happens that the frame of a bathhouse can last for many more years, but for some reason the foundation is seriously damaged
When deciding to lift the bathhouse yourself, you should prepare the necessary equipment and tools. It is important to correctly carry out a set of preparatory measures, competently select and install jacks, study the technological process, and also carry out work in compliance with safety regulations. Let's look at these questions in detail.
Let's set up a bathhouse
Construction of a bathhouse.
After the foundation of the bathhouse has been built with your own hands, you can begin to build the walls. The best choice of building material in this case would be either a log or a wooden beam. This will reduce the load on the light base, and the choice in favor of wood has always been preferable for the construction of a bathhouse.
The procedure for constructing walls, partitions and erecting a roof is no different from building a bathhouse on a laid foundation. First, the strapping is done, after which they begin to raise the walls.
Roofing work can begin as soon as the frame of the building is installed.
It makes no sense to cover the walls inside the bathhouse with additional clapboard, since this will only increase the cost of construction, but it will not make much sense.
Lifting technology and rules
When choosing a diagram of how to raise a log bathhouse with your own hands, you need to take into account the weight and dimensions of the structure. In principle, you can get by with just one jack, but then the process will take a very long time due to its frequent rearrangements. But with the help of two lifting mechanisms, you can single-handedly lift not only a small bathhouse, but also a permanent residential building. The main thing is to ensure reliable fixation of the walls after removing the jacks to move them to the opposite side.
All work consists of several cyclically repeating stages.
- Placement of jacks at support points.
The jacks are installed in pairs on pre-prepared support platforms or stands strictly vertically with the upper part of the rod resting on the lower crown of the frame.
A board or rubber gasket is placed on the supporting part of the rod so that it does not cut into the wood Source oxlift.ru
- Rise by 3-4 cm.
By alternately pumping the jacks, they raise one wall to a small height, controlling the horizontal position of the supporting element as a result of the lifting. If the box needs to be torn away from the ground or the waterproofing glued to it and the foundation, then at the moment of maximum increase in load, the lifting is stopped, and supports are placed under the wall and left for a short time. After the resistance of the soil or adhesive layer weakens, the lifting is continued until complete separation.
- Installation of supports.
At one or more points between the jacks and at angles, supports made of concrete blocks, scraps of logs, and boards stacked on top of each other are placed.
- Carrying jacks.
The jacks are removed, transferring the load to the exposed supports, and move them to the opposite side of the bathhouse. Repeat the lifting procedure, eliminating the distortion and bringing the box to a horizontal level. To reduce the number of such rearrangements, you can raise this wall another 2-3 cm.
- Return to starting points.
After installing the supports under the second wall, the jacks are removed, returned to their original position and the box is raised a few more centimeters. The supports are increased in height.
It is convenient to use outrigger posts with a support beam laid on them, passing under the log house. Source lift-home.ru
Thus, gradually moving in a circle or from one wall to another, the bathhouse is raised to the desired height with small vertical movements.
How to lift a bathhouse correctly
Lifting should be carried out cyclically by doing:
- Restriction of movement within the territory;
- Level alignment with the opposite part of the site;
- Placing supports and spacers under the surface of the raised box.
To ensure that the bathhouse box does not settle or crack, and also to prevent destruction, it is necessary to ensure:
- Reliable fixation using stationary supports;
- The total movement in the vertical plane is no more than 0.5 m;
- Moving in height at intervals of 6-8cm;
- The use of thick timber to strengthen the box;
- Installation of spacer elements inside openings;
- Installation of jacks in the correct position;
- The use of thrust bearings only of the rigid type, for placing under the rods of lifting devices.
In order for repair work to take place as safely as possible and strictly according to technology, it is necessary that the structure be motionless.
In order to replace the foundation quickly, without mistakes and in accordance with the GOST standard, it is necessary that a certain technological sequence of actions be carried out.
- The scheme by which the movement will be carried out is selected.
- It is necessary to first prepare the place on the site where the lifting devices will be placed.
- It is necessary to thoroughly compact the soil where lifting devices will be installed.
- A reliable surface is formed by placing a supporting platform.
- Jacks are installed on the supporting plane, and the verticality of their location must be controlled.
- Plates are installed on the upper end of the rod to improve the contact area.
- Each jack only lifts 3-5cm at a time.
- To fix the position, you need to install pads.
- It is imperative to control the position in which the building is located at the time of movement.
- It is necessary to install stationary supports that will secure the structure during lifting.
The best option for a new foundation is considered to be a pile-screw structure, as it is strong, reliable and durable.
Preparatory work
At the preparatory stage, before moving the building vertically, the necessary measures should be taken to prepare the structure in order to prevent emergency situations and possible destruction:
- turn off the electrical power supply;
- turn off the water supply lines;
- disconnect the sewer pipes;
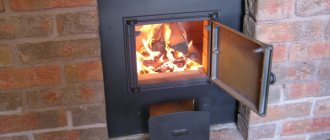
- ensure a guaranteed gap between the stove chimney and the ceiling;
- disconnect the heating device installed on a separate basis from the pipes;
- dismantle the floor in the area adjacent to the stove or heating boiler;
- attach metal profiles to the corners of the building to secure the box;
- dismantle window sashes to preserve the integrity of the glass.
Before work begins, a lifting scheme is worked out, which is determined by the purpose of the operation and the type of damage to the structure.
It is also necessary to carry out the following work:
- Assess the level of damage and perform a visual inspection of the foundation. To do this, it is necessary to dismantle the basement cladding, provide access to the base along the contour of the building, and locally go deeper into the soil.
- Check the strength and condition of the support rim. The solid wood should be tapped with a hammer to identify problem areas prone to rotting and cracking.
- Ensure delivery of all necessary materials and equipment to the work site. Timely preparation of jacks, materials for repairs, and temporary supports will reduce the duration of repair activities.
It is important to correctly determine the method of lifting the structure and first analyze a number of points:
- Bath weight.
The weight of the box, ceiling elements, external and internal decoration, as well as equipment located in the room is taken into account. By multiplying the resulting value by a factor of 1.4 and dividing by the number of jacks, you can obtain the load capacity of each device. - Dimensions of a wooden box.
By installing additional supports in the areas where logs, beams or wooden frames join, you can significantly reduce the likelihood of box deformation in the area where the elements join. - Strength and presence of cladding on the inside and outside of the room.
The presence of decorative finishing complicates the work. Fixing diagonally spaced bars 5 cm thick will protect the bathhouse frame from deformation and avoid subsequent repairs.
The lifting operation must be carried out taking into account further work
- The nature of the soil.
The possibility of immersing lifting devices when moving a building in the vertical direction depends on the characteristics of the soil. Increasing the support area with the help of pads will ensure the immobility of the jacks. - Lifting height.
The design features of the lifting device limit the amount of free play of the rod. The required moving height is achieved by using supports made of durable wood. - Duration of repair work.
Depending on the level of complexity of the repair, the duration of restoration activities is determined. The use of temporary structures made of steel and durable wood reduces the load on the rod.
A responsible approach to repair work will allow you to avoid unforeseen situations, as well as promptly complete planned repairs.
Selection of jacks and their installation
The main criteria for choosing lifting devices are:
- Load capacity.
The technical characteristics of the equipment must exceed the effective load by 40%. - The amount of movement of the rod.
The maximum stroke of the working body must ensure movement of the bathhouse box to the required height.
To carry out the work, it is important to choose the right jacks for lifting the bathhouse body
To perform the assigned tasks, the following types of devices are used:
- screw.
They are used for small bath buildings with limited dimensions. Features: simple design, small dimensions, ease of operation; - hydraulic.
Used to move massive structures. They are characterized by an increased degree of reliability and increased load capacity. Requires qualified service.
The following are used as a supporting structure capable of supporting the mass of the bathhouse and remaining at the zero level:
- steel plates;
- wooden shields.
The use of square boards with a side of 50 cm will provide the necessary supporting surface area.
Required Tools
When carrying out work with your own hands, you need to prepare the following tool in advance:
- a circular saw;
- Bulgarian;
- milling machine;
- hacksaw;
- electric drill;
- axe;
- chisel;
- sledgehammer;
- scrap;
- hammer;
- tools for laying and leveling concrete;
- plane;
- shovel;
- roulette;
- construction level;
- plumb line
About the need to raise the bath
The essence of the process of raising a wooden structure using jacks is to provide access to the foundation being repaired while maintaining the integrity of the building.
Using one or more powerful jacks, you can carefully lift the structure, the basis of which is:
- wooden beams of square section;
- prefabricated panel structure;
- cylindrical logs.
The basis for making a decision to raise the bath is the visual manifestation of the following signs:
- significant deviation of the building from its normal position with the frame skewed;
- formation of cracks on finishing materials outside and inside the premises;
- subsidence of the entire building along the perimeter of the bathhouse or its individual parts;
- immersion into the soil of parts of the foundation bearing the load from the mass of the structure;
- significant destruction of the foundation with cracking and spalling.
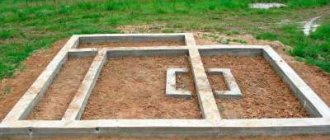
Often, the construction of a small bathhouse is carried out without a foundation, and its base is simply placed on compacted soil and a sand-crushed stone cushion
Raising the bathhouse with the help of modern technical means allows the following types of construction activities to be carried out:
- work to carry out major repairs of the destroyed foundation;
- partial restoration of fragments of the base;
- restoration and replacement of collapsing supporting elements along the contour of the building;
- eliminating distortions of the building frame while ensuring the verticality of the structure;
- antiseptic treatment, as well as protective impregnation of wooden structures;
- elimination of deviations and errors that the builders made during construction.
Necessary equipment and tools for doing the work yourself
To carry out repair activities, you should prepare:
- jacks corresponding in lifting capacity to the weight of the building;
- panel elements made of metal or wood, reducing forces on the soil;
The most optimal option for carrying out such an event is the use of high-power jacks
- steel or wooden linings to compensate for the stroke of the rod;
- hand tools to provide access to the support beam when disconnecting it (crowbar, axe, shovels, sledgehammer, hammer);
- electrical equipment that speeds up repair work (circular saw, drill, grinder).
Having prepared the materials necessary to carry out the work, you can begin restoration activities.
Typical stages of foundation repair
Stage I. Preparing the bathhouse for foundation repairs
Before starting work, it is necessary to identify all breakdowns and flaws in the structure in order to carry out one-time repairs.
First you need to decide what design the new foundation will be. The best option for an old log bathhouse is a monolithic reinforced concrete strip with a cross-section of 20x20 cm and reinforcement with 12 mm steel rods
It is important to select new beams for the lower crown that are level, with a length of at least 6.4 m. If your bathhouse is on a slope, then the best option would be a screw foundation
In the process of work, you definitely have to disassemble everything on the floor in the bathhouse, but the heaviest furniture can be left directly on the ground, so as not to take it out into the open sky and not look for something to cover it with.
Stage II. Installation of jacks
Installing the foundation on jacks.
Lifting the bathhouse with jacks is the most crucial moment. The bathhouse must necessarily rise evenly, because at this time the log of the lower frame will noticeably sag and take on the most significant part of the weight of the entire building. If the rise is uneven, the composite crowns may separate and even the lower log of the frame may break. Therefore, for insurance, it is better to fasten the crowns of both sides with two or three 5x15 cm boards both inside and outside the log house, and tighten the log of the lower crown with a steel rod of 20 mm. Also, the jack can only be installed where the wood is strong and not affected by rot, and the lining itself is located horizontally.
So, some of the fences in the corners of the bathhouse have been dismantled and the niches for installing jacks are ready. Now, in order for the force from the jack rod to be transferred to the log correctly, it is necessary to make gaskets in the form of steel plates 5 mm thick. Ordinary cuttings of boards about 50 cm long can serve as a supporting platform for jacks.
Stage III. Raising a bathhouse using jacks
Raising the bathhouse using jacks.
Now the task is to raise the wall 5-6 cm with jacks, remove the half-rotten extensions and lower the bathhouse onto temporary supports - cuttings of strong beams, which are placed on the end. So, one by one, you need to raise all four sides of the bathhouse by only 1.5 cm, laying a lining of the same thickness and gradually, thus freeing them from the lower logs and installing antiseptic-treated beams. Between the logs and beams themselves, you need to lay rolled tow, the width of which is equal to twice the thickness of the timber. Tow also needs to be treated with an antiseptic.
Once the beam is placed on the foundation, you can remove the load from the jacks
It is only important that the log of the log house lies on the beam exactly, and for this it does not hurt to fasten them with a pair of staples. The main thing is to do the foundation repair with your own hands slowly and carefully, because when raising one wall of the old bathhouse, the center of gravity of the entire building shifts, and this can be fraught with its unwanted rotation
As soon as the log house rises by 5-10 mm, you need to insert a spacer made of 1 cm thick lining scraps into the gap between the timber and the temporary support - this will save the situation if the jack fails.
Stage IV. Production of a concrete platform and additional reinforcement
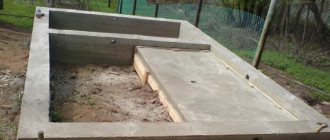
After being lifted on jacks, the house is placed on a support made of two bricks.
The next step is to make a concrete platform under each corner of the bathhouse, measuring 60x60 cm. At each such site, you need to cast a concrete pillar with a height equal to the strip of the new foundation, and on the pillars themselves, lay the corners of the future base 2 bricks high. They will need to be placed on the log house. All this is enough to install the reinforcement, install the formwork and fill everything with concrete.
The rods are mounted so that they can be tied into a frame. The strength of the foundation will be ensured by the dressing units spaced apart from each other. A 10-centimeter layer of gravel and broken bricks is poured under the future foundation strip of the bathhouse. To mark the height of each column, you need to use a hydraulic level.
Stage V. Manufacturing of the foundation strip and removal of jacks
As soon as the corner posts are ready and the frame is lowered onto the hardened brickwork, you can begin making the foundation strip. To do this, the space under each wall of the bathhouse is cleared in turn, formwork is installed, and at this time the other three walls rest on new and temporary supports.
At the end of all the work, it is important to leave niches in the base itself for jacks, so that later you can lower the bathhouse without any problems. As soon as it sits firmly on the new foundation, the niches can be filled with bricks - and the work is completed
Stage VI is additional. Replacement of the lower crowns of the bath
You may need to replace the basic crowns of the bathhouse - there can be a variety of reasons. Here's a diagram of how to do it:
Replacement of the lower crowns of the log house.
{advertisement2}
Bathroom renovation tips
In addition to the main structure, minor repairs may be needed. What parts can fail:
- It is advisable to completely change the wiring in the bathhouse. Previously, aluminum wires were used; it is better to dismantle them and lay a cable with copper conductors.
Example of power supply for a bathhouse
The cable cross-section is selected based on the use of devices in the bathhouse: for some light bulbs, a 2.5 mm cable is sufficient; - Old windows and doors can cause heat loss; they need to be replaced by first insulating the slopes with polystyrene foam or polyurethane foam;
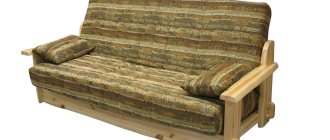
- The same should be done with the furniture in the bathhouse. Shelves, benches, shelves, tables are replaced with new ones, pre-treated with an antiseptic and water-repellent composition;
- If necessary, you need to change the stove. The old structure is dismantled and a new stove is installed in its place. It can be assembled from brick, or bought ready-made in a store.
The video shows the process of replacing crowns in an old bathhouse.
Basic requirements for structures without a foundation
Perhaps the main question of this article is “How to build a bathhouse without a foundation?” It should be understood that such structures do not imply a complete absence of foundation. They will have a foundation, but modified. Any structure without a foundation will sink unevenly into the ground.
It is important to understand that erecting a building without a foundation is not permissible in all places. Therefore, first you should make sure that there is solid soil on the site
The ideal solution would be rocky soil found in mountainous areas. If the soil is sandy, then the building will have to be placed on a foundation.
An important point is the requirements for structures without a foundation. To avoid questions from government regulatory authorities, you need to follow a number of rules during construction:
The weight of the structure should be no more than 4000 kilograms. The total area is no more than 30 square meters. The measurement must be taken along the outer perimeter. The bathhouse must have 1 floor
Installing a second floor will not only attract the attention of regulatory authorities, but will also significantly increase the load on the foundation. The building must be collapsible, at least conditionally. Of course, no one will try to dismantle your bathhouse, but you need to remember that according to the law, such an opportunity must be present.
https://youtube.com/watch?v=ilcK9v-jw-8
If you cannot meet all of the above requirements, the structure will have to be registered accordingly. In such a situation, the best option would be to place the bathhouse on the foundation.
How to raise a bathhouse
What if you already have a bathhouse on your property, but you want to raise it. For example, for the reason that you noticed how the walls are rotting from below. How to raise a bathhouse without a foundation? It's not as difficult as it might seem. You will need a jack (you can have one, but it will be easier with several), supports and posts on which the bathhouse should eventually be installed. So how is this done?
Place the jack under one of the corners of the bathhouse and carefully lift it. Not too much, five centimeters at a time will be enough. Place a firm base. Move to the next corner and repeat the same with it. So, the foundation has been laid under the walls, now you can begin to support. Everything is the same: you lift the corners a little bit, put supports one after another, remove the jack. If you have several jacks at once (preferably four), everything can be done much more conveniently: you install the jacks at all corners at once, lift them at the same time, and only then add supports. This way you can raise the bathhouse not five centimeters at a time, but a little more. In addition, this way the load on each individual jack will be less, which means there will be less risk that something will go wrong.
If the crown of the building looks unreliable and it seems to you that it may break, there is no need to follow the above instructions, because this is dangerous and fraught with injury, not to mention harm to the structure of the bathhouse.
Moving the bathhouse to a new foundation
Often, in addition to lifting and repairing walls or replacing crowns, it is necessary to move the bathhouse box a certain distance or move it to a new foundation built next to the bathhouse. In this case, in addition to jacks, you will need:
- Cable winch;
- Four channels 150 mm high and a length equal to the width of the bathhouse wall;
- A dozen two-inch steel water pipes, equal in length to the width of the bathhouse box;
- Four beams 200x200 mm.
Initially, you need to jack up the bathhouse box to a height of at least 30 cm, after which the old foundation remains are dismantled, and the soil area under the bathhouse box is leveled and leveled to get rid of humps and slopes.
The next step is to lay timber beams on the ground; the jacks do not need to be removed or rearranged. A pair of channels are placed on top of the timber under each of the longitudinal walls of the bathhouse. Water pipes are laid between the steel beams and jacks are released. The building sits on an improvised platform, along which you can easily winch the bathhouse box to a prepared and compacted area.
At the new location, the building must be jacked up again and, without removing the upper channel beams, new supports must be assembled from brick.
The procedure for installing a clay base
Preparatory work for arranging the base must begin with markings. Once the measurements have been taken and the boundaries of the base have been marked, you should begin arranging it. Such activities are carried out in the following order:
- The first step is to dig a pit. Its depth varies from 20 to 40 centimeters. The bottom of the pit must be level, so when carrying out work you need to use measuring instruments.
- Next you need to make the formwork. For these purposes, you can use boards with a thickness of 25 to 50 millimeters (used, but in good condition).
- The next stage of foundation installation is filling the pit with clay. She needs to stock up for future use, as a layer of at least 30 centimeters is needed. Filling the pit with clay should be done in stages - approximately 10 centimeters per day. It must be compacted thoroughly. For these purposes, you can use a special device or an ordinary hewn log.
- Immediately before installation of the above-ground part of the building, it is necessary to carry out waterproofing measures. Roofing felt and expanded clay are best suited for these purposes. You can use special waterproofing materials, but their cost is much higher.
The construction of a bathhouse without a foundation is beneficial (from an economic point of view) in places where clay is freely available. Otherwise, installation without a foundation can be much more expensive. In such a situation, it is better to initially place the building on a foundation.
Repairing rotten sections of the building crowns without raising the house itself
It often happens that the log of the lower crown of a wooden building, located closest to the ground, is not completely rotten - only a certain area can be affected by damage. This means that repairs can be made only in certain areas, without changing the crown completely. In this case, doing the work yourself will be much easier. This is especially true in cases where raising the house can cause serious problems. For example, a strip foundation under a log house that was raised to carry out repairs runs the risk of being destroyed. During “local” work, only the damaged section of the log is changed.
Repair of the lower crowns is carried out as follows:
- Step 1. Determine which area is damaged. We take a chisel and find out how much the wood has rotted. We clear the wood on both sides of the damaged area. Quite often, the use of a chisel makes it possible to understand that the area is much more damaged than is visible upon first inspection with the naked eye.
- Step 2. From the edges of the damaged area, make an indent of 40 centimeters in both directions. We place ties whose height coincides with the height of two or three crowns.
- Step 3. We take the “magpie” boards and nail them to the frame; such manipulations should be done from the inside and outside. We drill holes in the first crown, which is pulled together, and in the last one. We install special tie rods (they must pass through, and their diameter is 12 mm or more).
- Step 4. Take a chainsaw and carefully, but carefully, cut out the damaged part. In the crown, which required repair and replacement of rotten areas, we create notches, the width of which is 2 cm. Such notches are required in order to firmly connect the log with the new element, which will be inserted subsequently.
- Step 5. Make an insert using a log of the same diameter. The length of the insert is exactly the same as the length of the cut section. Don't forget to make counter cuts on the insert.
- Step 6. We insert a new element in place of the area that we previously cut out. Having placed the block, we carefully finish the insert into place using a sledgehammer.
- Step 7. In the places of notches, we make three holes all the way through from different sides, then we drive in dowels, which will then give us the opportunity to firmly connect the insert and the old log. All cracks must be caulked with tow; moss or jute are also often used for this purpose.
This way you can renovate multiple areas. Corner joints can also be repaired this way. However, such measures can be resorted to only in extreme cases, if the house cannot be raised, since the strength of the structure after repairs is somewhat reduced.
Installation of a base of crushed stone and sand
The base installation technology may be slightly modified. Sand and crushed stone are often used for such purposes. This option is perfect for black soil areas. Sand and crushed stone are a stronger and more stable base for a building. To equip a base of sand and crushed stone, you need to act in accordance with the following recommendations:
- Dig a pit at least 80–100 centimeters deep. It should be understood that this is a labor-intensive process and can take a lot of time and effort.
- Remove drainage trenches. Their effective operation is ensured by a greater depth than the depth of the pit intended for installation of the base.
- Cover the bottom with sand, then lay a layer of crushed stone. For these purposes, building materials of the middle fraction are ideal.
- Fill the trenches with draining soil. You can arrange ditches like drainage wells, alternately laying layers of crushed stone and sand.
- The final stage of foundation installation is to carry out waterproofing work. For these purposes, any suitable waterproofing material can be used.
A bathhouse placed on such a base will last much longer. This is due to the fact that the base made of crushed stone can withstand heavy loads.
What is the technique of “drilled injection piles”?
One of the most modern methods of strengthening a flimsy foundation is the technology of drilled injection piles. It is quite expensive and cannot be accomplished using home remedies, but in the most difficult cases it is a real lifeline.
So, the essence of the method is this: inclined wells of about 25 cm in diameter are drilled on both sides of the foundation. How deep - until the drill hits solid soil. After this, workers pour cement mortar into the wells and immerse a special frame of reinforcement into it. When the concrete dries, the bathhouse will already rest on several reinforced concrete piles at once.
Typically, for such reinforcement, piles with a diameter of 108-219 mm are used - and sometimes even more. In total, it takes from two to five days to strengthen a typical old foundation - it all depends on the complexity and volume of work. They are mounted using a rather complex mechanized installation, thanks to which they are placed accurately and tightly to the foundation itself.
Repairing the floor
When inspecting the floor, we pay attention to the condition of the beams, lower crown, joists and boards. If an unpleasant odor emanates from the underground, then the wood has begun to rot, although a visual inspection does not reveal any damage.
You can use an awl to check the integrity of the logs; they can be easily pierced if the tree has rotted at the core. Joists quickly begin to rot if waterproofing has not been installed.
Scheme for repairing damaged areas of the floor in the bathhouse
The process of rotting logs is especially dangerous for bathhouses made of logs and frame houses, since the damage can spread to the walls. If there is no need to completely change the coating, you can make partial repairs. Damaged areas are cut out, and new ones are installed in their place. The logs are fastened using aluminum plates and self-tapping screws. Then nail and mount new boards and the floor is completely dismantled and leveled with a plane.
If rot has damaged the beams, subfloor, joists and crowns, then you will have to replace it all:
- the floor is completely dismantled;
- logs and beams are removed;
- the two lower crowns are cut out in parts and replaced with a new beam;
- install new beams onto which to attach the logs;
- install flooring from new boards - subfloor;
- waterproofing and insulation are installed: 15 cm polystyrene foam for the dressing room, polystyrene foam for the washing compartment.
Ceiling repair
Before disassembling the ceiling, you need to remove the insulation from the attic. Then you can disassemble the entire ceiling. Inspect the ceiling beams; if damage is found, they must be replaced. If the ceiling covering is in good condition, it is enough to simply lay new insulation.
Before laying it, thermal insulation is installed. Mineral wool or polystyrene foam is used as thermal insulation.
The material is placed between the beams, then the attic floor is laid and insulated on top of the ceiling beams.
Buying a ready-made bath
If you are not sure that you can build a bathhouse yourself, you can always purchase a ready-made option. Then the foundation must be done in the same way as described above. The technology won't change. You just have to focus on the dimensions of the finished bath; don’t forget to check them carefully and several times. In general, even if you want to buy a so-called “mobile” bathhouse on wheels, the base will not interfere with it.
It is always better for the structure, even a mobile one, to stand horizontally, without distortions. Especially if you are never going to transport the purchased bathhouse anywhere. The weight of the building will still cause it to sag. Distortions will cause inconvenience when using the bathhouse, so a solid base will be a good solution. The only thing is that when buying a mobile sauna, you can take a little less care of waterproofing. It will still rise above the ground.
So, if you are not afraid of difficulties, have ingenuity and some engineering imagination, it will not be difficult for you to build a bathhouse on your own at your summer cottage. The main thing to remember is that if something doesn’t work out for you, stop and ask for advice from more experienced friends and acquaintances. You can also often get qualified advice on some forum dedicated to construction. Of course, it is a very special pleasure to steam in a sauna built with your own hands, so overcoming all the difficulties on the way to this goal is really worth it.
Prevention of rotting of the lower crowns: protective measures
You can replace old logs in the crown, but after 2-3 years you will find them rotting again. To prevent this from happening, the lower crowns must be properly waterproofed and protected from rotting. Protection measures may be the following:
- Making lower crowns from larch, which is little susceptible to rotting. Instead of solid logs, you can use larch boards. They should be placed under the lower crown. This way, a protective layer that is not susceptible to fungi will be formed between the crown and the foundation. A good alternative to larch are oak logs and boards.
- Coating logs with antiseptic. You can use any water repellent, for example, antiseptics “Pinotex”, “Sadolin”, “Senezh Ognebio”, etc. Another popular “folk” antiseptic is machine processing. Its disadvantage is a sharp odor that does not disappear for a long time.
- Coating the base of the bath with a water repellent.
- Using several layers of roofing felt (2-3) to waterproof the joint between the crown and the foundation.
- Protection of the lower crowns from external moisture using canopies (for example, from galvanized strips).
Such simple methods will help you eliminate the cause of rotting and prevent the need to repeatedly replace the lower crowns of the bathhouse.
- 5
- 4
- 3
- 2
- 1
Replacement of damaged area without raising the house
If the foundation is not destroyed and most of the logs are intact, then you can replace a fragment of the crown without understanding the house and without making a complete replacement. The degree of damage in width and depth is determined. Using a chisel and a chisel, areas of wood damaged by rot are removed.
- Stepping back half a meter on both sides from the area to be restored, vertical ties are installed. The tie is a metal strip at least 2 mm thick and long, allowing three crowns to be pulled together. Through holes of 10x12 mm are drilled in the metal tie and in the center of the logs and tightened with pins.
- The damaged area is cut out with an electric circular saw or manually. At the ends of the lower crown in the repaired area, nests are made - notches for a tenon for connection with the insert. An insert is made according to the dimensions of the cutting, fits into place and secured with dowels.
- All cracks and gaps are caulked with resinous tow and treated with an antiseptic. Polyurethane foam will also work. The remaining foam is removed and the seams are decorated with putty matched to the color of the log.
Sand and gravel base
It still won’t be a foundation, but you’ll have to dig a foundation pit. This option is suitable for less dense soil.
- Dig a pit. Its depth should be 90-100 centimeters. Theoretically, you can get by with a shovel, but it is better to use special equipment.
- Dig drainage trenches. They should go downwards and at an angle from the pit. Their task is to drain groundwater from the pit and reduce humidity. The trenches will need to be filled with special drainage soil.
- Fill the pit with crushed stone. You can use something else, such as broken brick, but it will be less effective. Crushed stone is better.
- On top of the crushed stone you need to lay a waterproofing layer of any material that you like and that meets the purpose of waterproofing. Roofing material is well suited for these purposes.
Such a base can support much more weight than a clay base.
Roof repair
Roof repairs are carried out based on the covering material:
- Slate. If the slate cracks, the cracks can be sealed with a mixture prepared independently:
- Cement – 1/3;
- PVA glue – 1 part;
- Water – 1 part.
Asbestos – 1/3;
The slate needs to be cleaned and covered with primer. Once the soil has dried, you can begin to seal the cracks. The mixture is applied two millimeters thick in several stages. In this case, each layer must dry well before applying the next one;
The metal roof must be treated with bitumen mastic and two layers of roofing felt laid;