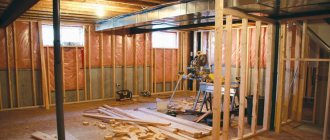
During the process of building the house, I had the idea to equip it with a sauna - I really wanted to have my own bathhouse “nearby”. There is a brick basement at the bottom of the house, which is where a built-in sauna would come in handy. There is plenty of space, and the ceilings are as much as 3 meters high. After several weeks of thinking and studying literature, I decided to take a desperate step and... built a sauna myself! The work was carried out for 1.5 months, exclusively on weekends, one might say without any stress. Now, based on the experience gained, I will try to describe in detail the progress of this construction.
First of all, I made a plan for the frame and placement of all the elements. The dimensions of the sauna in plan are 1960x2800 mm, height – 2100 mm. The entire structure, which is a wooden frame with an insulating pie, is built into a small room on the ground floor. Here, it is probably worth clarifying that such “introduction” into an already existing brick or other room is not a mandatory point. Very often, saunas, especially those with unusual corner or round shapes, are adjacent to the main walls on only 1-2 sides. In general, you need to choose a location depending on existing realities.
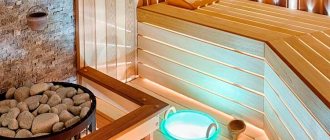
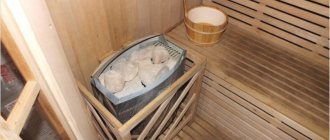
Sauna furnishings: 2 shelves with a sliding bench and an electric heater with a control panel, designed to load 90 kg of stones.
I calculated all this and drew it on paper, and then began construction.
- 2 Step 2. Installation of the frame
- 3 Step 3. Covering the frame with a membrane
- 4 Step 4. Stuffing the slats and laying insulation
- 5 Step 5. Sheathing with foil
- 6 Step 6. Installation of sheathing and lining
- 7 Step 7. Construction of regiments and shops
- 8 Step 8. Assembling the fence and installing the stove
- 9 Step 9. Installing the door
Interior decoration
Typically a sauna consists of several rooms. If it is located in a house, this is not a necessary condition, but a separate building must have at least 3-4 rooms.
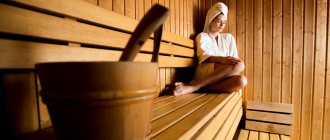
Steam room
The steam room is the main room of the sauna. Its mandatory elements are shelves (beds) and a stove. It is advisable to provide a thermometer and a container of water. The rest is at the discretion of the owner. To maintain the desired temperature, the steam room must be sealed.
The steam room is the main place in the sauna Source kakpravilnosdelat.ru
Distinctive features of a steam room in a sauna: dry air and low humidity. Due to this, the human body heats and cools evenly. Due to the different (most often three-stage) arrangement of the shelves, you can choose a comfortable temperature for yourself. The hottest air is above the upper sunbeds. No additional manipulations are required - in the sauna you just need to lie down or sit on a lounger. Some people pour water or beer on the stones in the stove to make the air moist. The temperature at this moment drops, but according to subjective sensations it becomes hotter.
The size of the steam room depends on the number of people who can be in it at the same time. Along the wall with the stove, the width of the bathhouse is from 1.5 m with a ceiling height of up to 2.5 m - so the wall becomes a screen from which heat spreads. The width of the remaining walls depends on the number of people who can be in the bathhouse.
You can steam in the steam room alone or with a group Source yandex.net
For one person in a sitting sauna, the wall opposite the stove will be 80-90 cm (the room will be trapezoidal). If you need the opportunity to lie down and relax, then the length of the lounger is up to 2 m. If it is expected that several people will steam in the sauna, then you can make a large room. Shelves and the stove are always located on opposite walls. If the sauna is large, the stove is made in the corner, and the sun loungers are placed along two walls at an angle to each other.
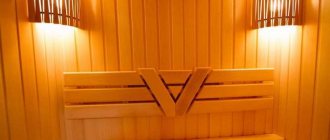
Steam room shelves and trim
The best material for walls and shelves is wood. It tolerates high temperatures well, does not crack, absorbs moisture from the human body, and is pleasant to the touch. In addition, wood does not heat up well and does not feel hot, so it is comfortable to sit or lie on.
For work, it is advisable to take solid boards, carefully sanded and varnished. Then there will be no risk of splinters, the shelves will support the weight of one or several people without the risk of breaking. There is no high humidity in the sauna, which can damage wooden structures, so treatment against rotting is not necessary. There is no need to use any additional coverings (carpets, mats).
The more wood, the better. The main thing is not to forget about fire safety Source heatline.ru
What to build a sauna from
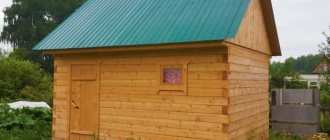
There are two options for arranging a sauna - in a separate building or inside the house. A self-contained sauna saves space in the house and, in the event of a fire, prevents the fire from spreading to the main building. But it requires a separate connection of communications, as well as more building material.
A sauna inside the house with an internal entrance will be cheaper; you won’t have to walk down the street to get there in any weather. But there are a number of inconveniences - any malfunction in the steam room will create discomfort in the house.
There are compromise options - a separate sauna connected to the house by a warm passage or a sauna in the house, but with a separate entrance from the street. The decision about which option to choose rests with the host or hostess alone.
The set of premises included in the bath complex depends on the chosen location and preferences of the owners of the house.
Foundation and floor
For a free-standing bathhouse, a strip concrete foundation is most often used. If your area has high groundwater, then you need to take care of drainage. Otherwise, the foundation will become damp, and moisture will spread from it to the walls and floor finishing.
This is what a strip concrete foundation for a sauna looks like Source sdelai-lestnicu.ru
The difference between a concrete foundation is strength and durability without additional reinforcement. Concrete is not washed away by water, does not become damp, does not rot, and can withstand heavy loads. The main disadvantage of a concrete base is cold. Be sure to put additional insulation on the floor, otherwise walking on it will be unpleasant.
You can put logs or insulation on top of the foundation. The floor on the joists and posts creates an air cushion that acts as a natural insulation. With an earthen floor and good moisture treatment, the floor will be well insulated from cold air from the street. But if the design is made incorrectly, the floor will be cold and will collapse over time.
It is better to lay artificial insulation on top of a concrete base. It can be combined with a log floor and placed between two layers of boards, or used independently. Foam plastic, cork, and mineral wool are used for the floor. All these materials do not burn or rot.
The floor needs to be carefully insulated Source bouw.ru
Walls, doors and windows
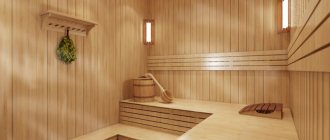
An ideal option for those who are thinking about how to make a sauna with their own hands inexpensively is a wooden frame. Wood costs little, is harmless to human health and the environment, and is easy to work with. If you avoid any cracks, the wood retains heat well, and with good care it lasts a long time.
For a log house, it is better to choose logs rather than boards - they retain heat better, and this is the main function of a bathhouse and sauna. There will be no high humidity in the sauna, so you only need to protect the log house from water from the outside, using water-repellent impregnations. Mineral wool is better suited as insulation between the log house and the finishing of the walls - it takes up little space and retains heat in the building, but not moisture. In addition, mineral wool does not burn, which is important in a wooden frame.
The wooden structure looks very cozy Source pinimg.com
Another option for walls is brick. This is more expensive and takes longer than building a log house, but it is safer in terms of fire. On the plus side, such walls will last a long time without additional maintenance; they do not need protection from water. Disadvantages - thermal inertia of brick. It is better to have constant heating in such a sauna, otherwise in winter it will take a long time to warm up.
Doors and windows in the sauna:
- The outer door can be wooden or iron, depending on the convenience of the owner. To prevent heat from escaping through it, additional upholstery is needed. It should close without obvious gaps and not create drafts.
- Interior doors - chipboard, fiberboard or other wood-based materials. You don't have to insulate them, they should close tightly.
- The steam room door is made of boards or tempered glass, strictly without metal parts, especially on the inside. It should close as tightly as possible so as not to release heat, but open without effort. It is better if it opens outwards. It is strictly forbidden to install a lock.
There should be windows or vents in every room, including internal ones. They are closed before you begin to wash and steam, and open after the procedures are completed. This is necessary to quickly ventilate the sauna and eliminate excess heat and humidity.
A supply of fresh air is required Source yandex.net
See also: Catalog of companies that specialize in the design and construction of baths
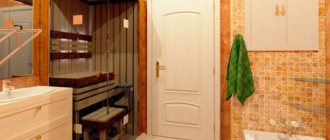
Sauna in the basement or on the ground floor
The sauna can be placed in the interior of the house - then it will be in a warm zone, and less costs will be required for thermal insulation. The walls can be made of the same material as the walls of the house; they do not need to be insulated. The floor is insulated only when the sauna is located directly on the foundation or above a cold basement.
What you need for a homemade version
The homemade sauna in the apartment is made of a wooden frame. At the installation site, the walls of the room are sheathed with mineral wool and faced with timber. The walls are assembled on a finished frame made of clapboard or sawn cedar, fir, or spruce. Thickness not less than 12 mm. Pine, aspen and linden are not used due to their strong resin content. The partitions, ceiling and floor are also thermally insulated.
Mineral wool slabs are more convenient to install than rolled material. A thickness of 50-100 mm is suitable.
In apartments, saunas are rarely assembled from brick, logs or concrete. But these types of frames are also possible.
A special film is applied over the thermal insulation. It is laminated with foil and has the properties of vapor barrier, heat resistance and heat preservation. With its help, the insulation is protected from moisture. The joints are sealed with aluminum tape.
The wood will need to be treated with a special varnish for saunas. It withstands temperatures and humidity and does not lose its attractiveness for a long time.
The outside of the sauna in the bathroom can even be tiled with tiles or plastic panels, covered with plasterboard or other decorative material.
The floors are insulated with polystyrene foam. Tiles or porcelain tiles are laid on top of concrete screeds. Removable grates are installed on the passages to service the drain.
Doors are made of wood or tempered glass. Locks are not installed for safety reasons. The opening direction of the hinges is strictly outward.
Inside there are also wooden benches and shelves 30-55 cm wide. There is a distance of 120 cm from the ceiling to the top shelf, and 40-50 cm from the floor to the bottom shelf. This is enough for a comfortable rest while sitting.
The stove is selected from an infrared or electric heater based on a power of 1 kW per 1 sq.m of space. You will also need a thermostat. The stove is placed on the wall or on the floor strictly next to the door.
Ventilation is provided along the floor, near the stove, under the ceiling into the air outlet hole.
Choosing a stove
Wood-burning stoves for saunas cannot be used in apartments, so only heating using electric or infrared types is allowed.
Although these two types operate on electricity, they are very different in principle:
- Electric ovens heat the human body using convection. That is, through the coolant: first the air warms up, and then everything inside.
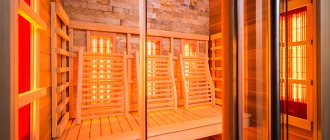
- Infrared types heat using the wave method, which means the body is heated directly, bypassing the air. Because of this, the temperature in such a sauna is not very high, and it is much easier to tolerate by the body. Therefore, even people with contraindications to a classic bath can take a steam bath in it. But lovers of traditional steam rooms may not like such sensations.
Small infrared cabin
Note! An electric sauna heater requires a lying canopy so that you are in a horizontal position at high temperatures. Therefore, if your room is small, use only the infrared option.
According to manufacturers, infrared built-in saunas are even beneficial for humans: they remove waste and toxins, rejuvenate the skin, help fight obesity and cellulite, and increase blood circulation.
The disadvantage of both types of ovens is dry steam, which is harmful to health. It is much different from a traditional brick heater. Therefore, some people prefer to install a steam generator in their apartment according to the principle of a Turkish bath - Hamam.
Ready-made booth options
If you buy a ready-made built-in booth, there should be no problems with assembly. The only caveat is to follow the manufacturer’s recommendations and connect it through a separate machine with an RCD.
The power of such a booth should not exceed 6 kW per phase in the apartment. If it is larger, you will need to obtain the appropriate permission and change the wiring to a newer one.
The simplest Chinese cabin models can be found starting from 80 thousand rubles. The price depends on the volume of the steam room, the type of stove, finishing and additional features.
If you want a built-in sauna not to take up much space, buy a combined shower and sauna option. These types take up no more space than a regular bathtub, so they are suitable even for a small Khrushchev-era apartment.
The photo shows an example of a combined infrared sauna with shower
For example, the cheapest finish is considered to be linden lining, while the expensive ones are lined with Canadian cedar (Hemlock) and Finnish pine.
As additional options, manufacturers add heated floors and seats, music systems, color therapy, lighting and ventilation to the cabin.