The roof is a complex and important architectural element of any building. Its construction should be treated with special attention; it must be remembered that installing a rafter system requires considerable experience in performing such work and special tools. Those who are holding carpentry and measuring tools for the first time in their hands should not undertake the creation of a roof - the results of the activity can be very negative.
There are two types of roofs depending on the number and placement of rafter support points, but each developer can, at his own discretion, slightly change the specific design of the rafter system. This takes into account the operating conditions of the building, the purpose of the attic space, the climatic zone of the location, and the technical parameters of lumber and roofing coverings. Of course, the type of rafter system is influenced by the personal experience and preferences of developers.
How to make rafters for a gable roof
Types of gable roofs
Let's consider the main types of roofs with two slopes, the rafter system in which will differ slightly in design.
Symmetrical gable roof
This is the simplest gable roof, however, the most reliable and in demand. Symmetrical slopes allow you to distribute the load on the mauerlat and load-bearing walls evenly. In this case, the type and thickness of the insulating layer do not affect the choice of roofing material. Thick rafter beams have a sufficient margin of safety, so they will not bend. In addition, spacers can be installed at your discretion.
Among the disadvantages of this option, one can note only that the angle of the slopes is too sharp, which makes it difficult to use the attic floor and creates “dead” zones that have no use.
Roof with two asymmetric slopes
If the angle of inclination of the slopes is made more than 45º, you can use some unused areas of space. It will even be possible to arrange a living space in the attic. However, some additional calculations will be required, since the load on the walls will become uneven.
Broken roof with external or internal fracture
This configuration makes it possible to place a spacious attic or attic under the roof. However, in this case, more complex engineering calculations will be required.
Tightenings (crossbars)
The purpose is to keep the rafter legs from spreading; they are used on hanging rafter systems.
Most often they are placed in the upper part of the truss; for manufacturing, you can use boards approximately 20–25 mm thick. The fact is that they work in tension, lumber holds such forces well. The boards do not work well under compression, quickly sag and lose their original strength.
The crossbar is a tie installed under the very ridge of the structure
The design of rafters for arranging a roof with two slopes
The design of the gable roof truss system assumes the presence of the following components:
- Mauerlat . It is a durable beam made of oak, pine, larch or other strong wood, which is laid along the perimeter on the load-bearing walls of the building. The purpose of the Mauerlat is to evenly distribute the load. The cross-section of the bars is chosen based on their structure - solid or glued, as well as on the age of the building. The most commonly used beams are 100×100 or 150×150 mm.
- Rafters . The entire structure is created from such elements (pro
Roof and roofing
Before you start installing the roof of a private house, you need to distinguish between two concepts. Non-professionals are often confused, but builders clearly distinguish between the definitions of roof and roofing. The roof is the entire structure that separates the building from the street above. The roof structure of a private house includes rafters, all other load-bearing elements, thermal insulation material, and roofing .
Rafters - load-bearing roof structures
The roof is the top part of the roof. It is also a roof covering. The installation of a roof requires careful selection of materials. After all, the reliability of waterproofing and comfort of living will depend on it.
Calculation of frame elements for a gable roof
If you are going to build a gable roof with your own hands, you need to make careful calculations in advance. The rafter system of a simple gable roof consists of a set of triangular trusses - this shape gives the structure maximum rigidity. Such figures are the easiest to calculate. However, if the slopes have different shapes, the results are irregular rectangles. In this case, they are divided into simpler forms and calculations are carried out for each element separately. At the end, all data is summed up.
Please note that the more complex the roof shape, the greater the number of trusses and other parts required to ensure its strength. All of them increase the total mass of the roof, which, if calculated incorrectly, can damage the load-bearing walls.
Design selection criteria
The roofs mentioned above can be installed on houses made of any popular materials (concrete, brick, wood). But when choosing a rafter system, you need to pay attention to the following factors:
- Decide in advance how the attic space will be used. If you plan to use this as a living space or storage space, you should choose a broken or gable system. If the room will not be used, a hip or lean-to structure is suitable.
- A layered or hanging system is selected based on whether there are load-bearing partitions inside the house, as well as on the design of the building itself.
- In addition, it is necessary to determine how many sectors the house will have. If several are planned, you need to determine which designs are best suited.
- It is necessary to resolve the issue with roofing material. The choice of system design also depends on this.
- Previously, notches were used to secure the system. However, now they are out of fashion, since it was necessary to take wooden parts of a large cross-section. Now everything is secured with anchors, bolts and screws. However, it is important that they have an anti-corrosion coating, otherwise they will quickly rust.
- All wooden elements should also be treated with special solutions that prevent the formation of rot. Experts also advise choosing coniferous wood, as they are less susceptible to mold.
- Be sure to pay attention to the climate in the region. Will the roof be subject to frequent wind or snow loads? Or both?
- And the last important criterion is a person’s financial capabilities. You need to immediately organize the project, calculating how much material will be needed and how much money you will have to pay.
Most often, mistakes are made at the design stage. And if you do not have experience in creating projects, it is better to contact experts who will help you make calculations and choose a suitable rafter system.
Load on the rafters according to the diagram
There are three types of load:
- Constant . This is a value that will not change throughout the entire life of the roof. This category includes a lot of roofing material, insulation, hydro- and vapor barrier, sheathing, additional roofing parts, as well as interior decoration of the attic. That is, the summed value of the mass of the elements will be the expected load. Its average value is 40-45 kg/m2, but not more than 50 kg/m2. It is advisable to provide a safety margin equal to 10% of the total mass.
- Variable . This refers to the intensity of precipitation, load from snow and wind, which can vary significantly depending on the time of year or weather conditions.
- Special . This group includes extreme natural phenomena - earthquakes, tornadoes, strong winds. In these cases, the safety margin is made significantly larger than usual.
Lugs (stops)
They have many specific names. They are ordinary pieces of boards 30–40 cm long and 40–50 mm thick, fixed at the bottom of the rafters.
They rest against the mauerlat and prevent the structure from slipping. The use of bosses allows for a rigid connection of elements without sawing down the rafters. We talked about the problems that arise in connection with sawing in this article above.
Options for attaching rafter legs to the Mauerlat. The third diagram shows fixation using a wooden shorty or boss
Rafter pitch size and length
As a rule, the pitch of rafters for residential buildings ranges from 60-100 cm. The type of roofing material and the total mass of the roof are important here. The number of rafters per slope is calculated by dividing its length by the step size plus one. For the entire roof the value is doubled.
It is also necessary to calculate the length of the gable roof rafters. The length of the rafter leg is calculated using the Pythagorean theorem. If the maximum beam length of 6 meters is not enough, it can be increased with other sections.
Preparation of lumber
Let's look at how to make roof rafters designed for high loads. To construct the roof frame, it is necessary to use high quality lumber. Mostly these are boards and beams made of coniferous wood (larch, pine), and it is recommended to choose a material with a high resin content, which protects the wood from rotting. In addition, lumber from trees of the coniferous family is easy to process and is affordable.
Be sure to read: Strengthening rafter structures: how to make reinforcement
Rafters are usually made of timber 100-150 mm wide and 50 mm thick. The length of the beam is selected based on the required length of the rafter leg and the installation angle. If necessary, composite rafters are made. Increasing leg length can be done in various ways. The construction of rafters is best done from aged dry timber in order to avoid changes in its geometry when drying - this makes it possible to guarantee the preservation of the shape of the roofing structure.
Before raftering the roof, the prepared rafters and other elements of the system should be protected from possible damage by insects and the fire resistance of the material should be increased. For this purpose, special fire-bioprotective impregnations are used. Elements made of timber should be treated on all sides with appropriate compounds, paying special attention to the places of future joints. The composition is applied with a wide brush with long bristles. The treatment is carried out in two layers, and after applying the first layer the material must dry well.
Installation of the rafter system begins only after the twice-treated parts have completely dried.
Rafter section
The cross-section of the rafters can be determined based on the following data:
- step;
- type of wood;
- type of material - logs, beams, etc.;
- load;
- rafter length.
Here are the approximate dimensions of lumber for a rafter system for a gable roof:
- Mauerlat, section 10×10 or 15×15 cm;
- tie rods and rafter legs, 10×15 or 10×20 thick, in some cases timber with a cross-section of 5×15 or 5×20 cm is used;
- for struts and purlins - beams 5x15 or 5x20 cm, based on the width of the rafters;
- racks – section 10×10 or 15×15 cm;
- beds, section 5×10 or 5×15, based on the thickness of the racks;
- sheathing, section 2×10 or 2.5×15 cm - the value is determined by the type of roofing materials.
Material selection
The basis of rafter structures is wood. There are strict standards for the quality and size of the material:
- wood moisture content should be less than 18%;
- There should be no more than 3 knots on each meter of the board, their diameter should not exceed 3 cm;
- through cracks are unacceptable;
- the depth of blind cracks should be less than half the length of the board.
The beam should have a cross-section from 4 to 15 to 10 by 25 cm. The indicator depends on the distance at which the legs will be located from each other, as well as on the number of loads from precipitation on a certain area of the roof.
It is important that the cross-section is no more than 5 cm. After all, the width is always directly proportional to the length. For example, if the length of the board is 5 m, the width should not be less than 13 cm.
When choosing a material, attention is paid to cracks, chips and other defects. It is impossible to find even wood. It is important that the maximum length of knots does not exceed a third of the thickness of the timber.
Types of rafter systems
There are two main types of rafter systems for roofs with two slopes - hanging and layered. Let's describe each of them separately.
Hanging rafters
The construction of a gable roof with hanging rafters is advisable only if the roof width is within 6 meters. Such rafters are attached to the ridge girder on one side, and to the load-bearing wall on the other. They experience bursting forces, which is the main feature of a gable roof with hanging rafters. The tightening for them can be made of both wood and metal. If you install the ties from below, they act as load-bearing beams. It is extremely important to securely fasten the tie, since it also experiences a bursting force. Tightening is necessary, first of all, to prevent damage to the load-bearing walls - otherwise they may fall under the pressure of heavy rafter legs.
Layered rafters
In this case, the size of the roof does not matter. The assembly of a rafter system of this type requires the presence of a beam and support posts. Part of the load is transferred to the bench, which is laid parallel to the Mauerlat. It turns out that the rafters are adjacent to each other at the top point and are additionally supported by a stand. In such a system, the rafter legs experience bending force only. They are much easier to install than hanging ones. True, support posts are required.
Combined type
Often the roof is given a rather complex shape, which requires the construction of mixed type rafter systems. Professionals recommend drawing up a detailed diagram with calculations for each element of the rafter system, so that during the work the data is always at hand.
What influences the choice of sizes and methods of fastening rafters
A very important point. The task of any fixation is to ensure the stability of the connection node, while it can be stationary or have one or more degrees of freedom. This cannot be achieved without knowledge of the loads affecting the rafter legs. Loads can be permanent and temporary, dynamic and static, unidirectional and multidirectional.
- Constant vertical forces . They arise due to the impact of roofing and roof insulation materials. Due to the fact that the rafter legs are located at an angle to the vertical force, they are subject to bending and expansion loads. The magnitude of the forces is determined after constructing the diagram; based on the specific bending and expansion forces, the thickness and width of the boards for the rafters is selected. The fastenings must prevent the rafter system from spreading.
- Variable vertical forces. Appear in winter, the magnitude depends on the depth of the snow cover.
- Lifting wind forces. As a result of gusts of wind, lifting forces are applied to the roof. The dimensions of the rafter legs are not affected; the forces are taken into account only when choosing the type of fixation; it must provide for and support such loads.
- Lateral forces. The value depends on the windage of the roof. As a result of gusts of wind, lateral forces act on the rafter system. They increase bending and tearing loads. This feature also needs to be taken into account during the manufacture and installation of rafter legs.
Loads acting on the load-bearing structure of pitched roofs
There are options for rigid fastenings of roof trusses; for this, metal plates, corners, screws and nails are used.
Options for rigid fastenings of roof trusses
Sometimes it is necessary to use floating rafter connections to compensate for changes in the size of wooden houses. For floating connections, special fasteners and bolts are used. The second allows the rafter legs at the top to rotate slightly.
Floating connection
Another example of a loose rafter connection is a sliding one. It is used on wooden log houses and makes it possible to compensate for the natural shrinkage of the house.
Sliding support for rafters
Installing rafters for a gable roof with your own hands
When all the preparatory work and calculations have been completed, and the necessary materials have been purchased, the installation of the gable roof rafter system begins. It consists of several stages.
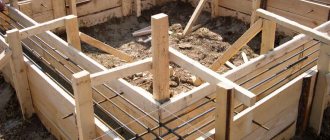
Laying Mauerlat on walls
This element is mounted on the load-bearing wall along its entire length. If we are talking about a log house, then the upper crown can serve as a mauerlat. For buildings made of aerated concrete or brick, you will need a Mauerlat equal to the length of the wall. Sometimes this part can be laid between the rafters.
If there is insufficient length of material for the Mauerlat, several pieces can be spliced together. In this case, the edges are filed at 90º and joined using bolts - wire, dowels or nails are not suitable.
There are two ways to lay a mauerlat on top of a load-bearing wall:
- symmetrical in the center;
- with a shift in the desired direction.
The installation of the Mauerlat is carried out on a pre-laid waterproofing layer of roofing felt. This will protect the wood from rotting.
It is worth taking the process of attaching the Mauerlat responsibly, since in strong winds it must withstand a particularly large load.
The following consumables can be used as fastenings for the Mauerlat:
- Anchors that are indispensable for monolithic materials.
- Wooden dowels. These parts are used in houses made of timber and logs, although they require additional fastenings.
- Staples.
- Reinforcement or special studs. This option is preferable for buildings made of foam or aerated concrete.
- Knitting or steel wire is an auxiliary fastening element that is almost always used.
Assembling trusses or rafter pairs
Trusses can be assembled using one of the following methods:
- The beams for the rafters are assembled and attached directly to the roof of the building. This process is quite labor-intensive, since all measurements, trimming and coupling of beams will have to be done at height. However, you can do it on your own, without the involvement of technology.
- Trusses or rafter pairs can be fixed to the ground, and then the finished elements can be raised to the roof of the building. On the one hand, this simplifies the process of installing the rafters, and on the other, due to the large weight of the structure, lifting it to the top will require special equipment.
Please note that you should start assembling rafter pairs only after marking has been applied. And if you make a template in advance, for which you take two boards equal to the length of the rafters and connect them together, then all the pairs will turn out to be absolutely identical.
Installation of rafters
After assembly and lifting to a height, the rafters of the gable roof of a wooden house are installed. To fix them on the Mauerlat, cuts are made at the bottom of the rafters. The first to install are two trusses at opposite ends of the roof.
After this, a rope is pulled between the starting pairs, along which all other trusses will be aligned and the ridge will be installed.
Now you can mount the remaining pairs, observing the calculated step between them. In cases where the pairs are assembled directly on the roof, a ridge girder is attached between the two end trusses. The rafters are subsequently installed on it.
The procedure for installing rafter halves may differ according to the opinions of professionals. Some people prefer to lay the beams in a checkerboard pattern so as not to overload the foundation and walls during work. Others are inclined to install pairs of rafters in series. Be that as it may, rafter legs may need supports and posts - it all depends on the size of the roof and the shape of the trusses.
Skate attachment
A ridge is an element that is formed by attaching rafters at the highest point. As soon as all the parts of the rafter system for a gable roof have been installed, all structural elements should be thoroughly secured.
Installation of sheathing
The presence of sheathing is mandatory when constructing any roof. It not only supports the roofing material and allows it to be securely fastened, but also makes it possible to move along the roof while working.
The distance between individual boards is selected based on the type of roofing material:
- soft roofing is laid on a continuous sheathing without gaps;
- for metal tiles you need lathing in increments of 35 cm (between the two bottom rows - 30 cm);
- slate and corrugated sheeting can be laid on the sheathing in increments of 44 cm.
Results
Thus, in order to assemble a rafter system for a roof with two slopes, many nuances should be taken into account and any possible complications should be provided for. We hope that our tips will help you cope with this difficult task and create a high-quality and durable roof for your home.
Main design elements
The elements of the rafter system may differ, it all depends on the type of structure. However, there are details that are common to all systems, regardless of their complexity.
Parts and components of systems
Typically, the rafter system is based on the following:
- Rafter legs. Responsible for the formation of slopes.
- Mauerlat. It is a beam (made of wood). It is placed on the walls of the house to secure the lower parts of the rafter legs.
- Horse. It is a junction of the frames of two slopes. This is the highest point on the roof. It creates a support for securing the rafters. The ridge is often formed by rafters that are fastened together. Sometimes it is fixed on the run (ridge board).
- Lathing. It is made of slats or timber that are mounted on the rafters at the same distance (a bit like steps). Serves as a basis for laying facing roofing material.
- Supporting elements. For example, a strut or screed. They increase the rigidity of the rafter legs, support the ridge or connect all the elements to create an overall structure.
In addition to the parts described above, there may be others, the purpose of which is to make the system stronger or evenly distribute the load from the roof to the walls:
- Overhang. The design allows you to extend the rafter legs behind the wall to divert the flow of water (after rain and snow) away from the house.
- Fillies. Used if the rafter legs are not long enough.
- Beam. It is made on the basis of wooden beams or rolled products. An important element of the structure if it is designed for bending.
- Grandma. Used quite rarely. It is a beam supporting the rafter legs. Installed perpendicular to the tie for connecting the rafters.
Attic space
Before you start considering the types of roofs, you need to decide what the attic space will look like, what purposes it will be used for, and whether people will live in it.
The roof structure is:
- roofless;
- attic
The first is called so because the space for the roof will be of low height. It is used only to create a thermal insulation layer. Typically, attic structures are chosen when installing shed roofs or those that have several slopes, but their angle is small.
The attic structure always has a long ridge. There are many ways to use an attic space; it can be either insulated or not. Typically, for this design, a gable roof or a mansard option is chosen. If a high ridge is installed, it is necessary to take into account the wind strength in the area where the house will be located.
Slope slope
To determine the slope, you need to look at the houses in the neighborhood. If they can easily withstand weather conditions, you should take them as a basis. If you need to create an original project, you need to pay maximum attention to design and operational features and calculations.
The slope of the slopes affects the force of interaction between the wind and the building. The steeper it is, the more attention needs to be paid to normal wind forces and less to tangential ones. If the angle is small or non-existent, it is the tangential force that is important.
The load from snow is also taken into account. It must be considered in combination with the wind force. Despite the fact that the roof is pitched, there are always places where snow accumulates. It is necessary to strengthen the load points with additional rafters.
The slope of the slope varies from 10 to 60 degrees. And it is important to take into account not only external loads, but also the roofing that is planned to be used. The reason is that the weight of the roofing material may differ, therefore, more or less elements of the rafter system will be required. The load on the walls of the house may also differ from this.
How to build a wooden frame house: all stages of construction
If a material that consists of many small elements, for example, ceramic tiles, is used for cladding the roof, you need to make the slope steeper so that water cannot remain on the roof.
When taking into account the weight of the material, you need to understand that the heavier the coating, the greater the slope angle should be. This is the only way to ensure an even load on the walls and frame system.
Typically the following materials are used to cover the roof:
- metal tiles;
- profiled sheets;
- Cink Steel;
- bitumen fiber foxes;
- asbestos concrete sheets;
- cement or ceramic tiles;
- roofing felt;
- soft roof.
Insulation and vapor barrier
Using high-quality roof insulation can significantly reduce heat losses and save on space heating. Companies provide a large variety of materials with their own advantages and disadvantages. However, the most common are still:
- mineral wool;
- basalt wool;
- glass wool;
- Styrofoam.
Installation is carried out from the inside into the space between the rafters. The sheets should be cut so that their width exceeds the distance between the rafters by 15-30 mm, which allows for more reliable fixation of the material, that is, “in space.” When insulating in several layers, the materials should be placed in a checkerboard pattern to prevent the appearance of a cold bridge.
In order to protect the insulation from evaporating moisture from the lower floors of the building and, accordingly, prevent the appearance of fungus, it is imperative to lay a vapor barrier film from the inside. Its fastening should be done using a stapler, maintaining an overlap of 4-6 cm, and the seams must be sealed with sealing tape.
Insulation is especially important if you have an attic space.
Preparatory operations
The production of rafters begins with preparatory operations.
Step 1.
Raise rafter boards into the attic. For convenience, place them evenly along the length of the building, place one end on the mauerlat, and the other on the girder. First you need to install the outer rafters on both sides of the roof of the house, stretch a thread between them and install and align all the remaining ones along it.
Step 2: Recheck the position of the ridge purlin. It should be located exactly in the middle of the roof. Its displacement by 1–2 centimeters will not affect the strength of the roof as a whole, but will somewhat complicate the manufacture of rafters and the laying of roofing materials.
In addition, an experienced builder may notice a discrepancy in the sizes of the slopes and, accordingly, the asymmetry of the roof. It is recommended to ensure that the ridge run is located along the line of symmetry, unless this is associated with great difficulties. The final decision is made by the foreman on site and depends on the magnitude of the displacement and the amount of work to correct the error.
Ridge run
How to align a run?
Attach a sheathing board to the mauerlat; it is lighter and easier to lift and fix. The second end should lie on the purlin.
The board is nailed to the mauerlat with an ordinary smooth nail or screwed with a self-tapping screw. Climb to the top of the purlin and use a tape measure to check the distance from the edge of the shoulder strap to the mauerlats installed on opposite walls. Work very carefully, it is advisable to use insurance. Unfortunately, in practice, few people follow safety rules, but in vain.
Falls from height can cause very serious injuries. Center the purlin and secure the board. To increase rigidity, fix the same board on the other side of the purlin.
Pinned board
Now everything is ready, you can begin to manufacture and install the rafters.
Specifics of manufacturing and laying rafters
It is clear that for the construction of the rafter system, lumber will be needed - long-length products from forest processing enterprises with clear geometric parameters. You will need a board or timber, which, naturally, does not have mounting cuts or notches for installation.
Why are cuts and cuts needed? The fact is that when placed on an edge, the boards and beams have too small a support area. They contact the Mauerlat with only one thin line, which is why, at the slightest load from above, they can simply “move out” from their occupied position and drag the entire structure along with them.
In order to increase the support area at the junction of the rafters and the mauerlat, or it and an additional purlin, a corner notch is selected in the beam or board, a tooth is cut out, or a support bar is sewn on. If the top of the rafter is connected to a mirror-opposite analogue, then for a reliable stop you will need a cut, the plane of which must be clearly perpendicular to the horizon.
The basic rule in the construction of rafter frames is that the platforms chosen for support in the lumber are strictly horizontal and vertical. At the slightest violation of horizontality and verticality, stability is lost, structural parts shift under their own weight and the action of the load until the complete destruction of the system.
Let us note that the nodes of rafter systems are responsible for ensuring the possibility of slight displacement and rotation when the load is exceeded. These movements are necessary so that the structure bends slightly, moves slightly, but does not collapse and remains stable.
These subtleties should be known to both the craftsman who has decided to make and install rafters with his own hands, and the owner of a house under construction who does not want to pay for the poor-quality labor efforts of the construction team. Let's look at common options to understand the essence of the process.
Construction of a roof frame using hanging technology
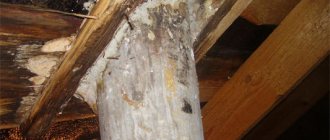
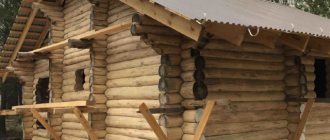
Let's look at an example of constructing a rafter system over a log bathhouse. The span between the walls is small, it is easier and more reasonable to cover it with a hanging structure, the installation of which will be carried out on the bypasses of the ceiling beams - matits.
A log base is an almost ideal option for installing hanging systems, because it is easiest to cut it into the horizon, eliminating the need to adjust the rafters in case of violation of the foot geometry. There is no need to install a Mauerlat. However, the tie will have to be moved upward to bypass the upper crown of the frame and form a useful attic space.
Before installing the rafters, stage-by-stage preparation of the log house is carried out. On both sides of the foot, we align the bypasses according to the lace tied to the nails driven into the two outer beams. On top of the bypasses we cut off the slab so that the edge of each beam ends with a flat horizontal platform.
The layer formed after cutting off the upper convexity of the log along the edges of the beams is leveled to the horizon according to the level. We apply the specified control tool to three or more beams at the same time. If the level is not long enough to carry out such a check, use a long strip or board instead.
After trimming off all the excess, we mark the sockets for the rafter teeth. To do this, we again use nails and lace. Note that nest sampling sites can be marked on the crossings both before and after the construction of hanging trusses. However, it is much more convenient to make the nests before making the rafters. They will help you carry out fittings with higher accuracy.
To make your work easier, it is advisable to find the center of the log house on the side of the future tongs. At these points it is recommended to nail along a control strip, one of the edges of which will indicate the axis of symmetry. You can do without slats if you already have some experience in building roofs.
Next we proceed to making the truss template:
- We sew two inch boards 10 - 15 cm longer than the designed length of the rafters at the top with a nail or bolt so that they can rotate around this connecting point.
- On a strip installed in the center of the future gable, we mark the design height of the rafter system. We put another mark above it - this is the height of the tooth, more precisely, the length of the vertical line laid from the base of the tooth to its top.
- We place the boards sewn at one point at the extreme bypasses so that the corner of each board rests on the future socket under the tooth.
- We align the connection point of the boards with the top mark on the rail, which determines the length of the rafters with the tooth.
- From the bottom corner of both rafters we set off the height of the tooth, return with the template blank to the ground and cut out the tooth according to the markings.
- We return the template blank to its place, install it by inserting the teeth into the slots intended for them. It may happen that after installation the top of the workpiece does not coincide with the instructions of the staff. Then you need to pull out the nail and adjust the position of the top, making sure to mark a new point.
- After adjusting the top, we draw a vertical line of their upcoming joint on both boards, measure the size of the crossbar and mark on the scraps of the board the shape of the overlays for the upper junction of the rafters.
If everything turned out exactly and no further adjustments are required, the template is ready. We return with him to earth. We disassemble the workpiece and make cuts along the marked lines. The parts obtained as a result of fitting and fitting will serve as a standard for the almost continuous production of roof trusses in the required quantities.
We will assemble hanging trusses on the ground. Their installation, as well as fitting, should be carried out by at least two people. One master simply cannot cope with such work. The person at the top will install the truss, and the second will change its position according to the instructions of the plumb line. The position of each leveled and installed truss should be fixed with temporary spacers.
To increase the stability of the system, we will install racks under the rafters:
- Let's mark the mats for the installation site of additional supports using the already proven method: we hammer in a nail on opposite sides and pull the string tight.
- We will hollow out nests in the logs according to the markings.
- Let's try on a piece of timber for the installation site. Let's mark a line on it, taking into account the height of the tenon.
- Let's make a stand and two pads for attaching it to the rafter.
- We will install the support we have made and similarly secure the position of the truss on the other side. We continue to work according to the verified scheme until we equip each rafter with additional support.
To ensure the rigidity of the hanging system, the trusses are connected by wind ties - boards, poles or slats nailed from the inside of the structure. On the outside of the rafter frame, the rigidity will increase due to the construction of the sheathing.
The rafter legs are attached to the mats with 200 mm nails or corner brackets. In this regard, metal corners and plates with perforations for fasteners are noticeably inferior to traditional methods. To the sides of the rafters we nail fillets made of boards, the width of which is half the size of the material used in the manufacture of the rafters.
The length of the fillies should be 70–80 cm greater than the designed width of the overhang. This distance is needed to securely connect them to the rafter legs. The fillies can be cut in advance, or you can nail scraps of narrow boards to the rafters without preliminary cuts, and then draw a line for the cornice. However, the first option is more convenient and economical.
In most cases, as in the example given, the fillies must be partially buried in the bypasses of the mats, for this:
- We note the actual width of the filly at the bypass.
- We make two cuts with a saw according to the markings for 2/3 of the thickness of the filly. We also use a saw to cut the log between the outer cuts. We refine the recess with a chisel accompanied by a hammer.
- We install the fillies in the formed recesses and sew them to the rafters with nails 100 mm long.
Upon completion of the installation of all fillies, we hammer a nail into the outermost ones. Pull the control cord and mark where the excess should be sawed off.
Installation of a layered roof frame
The construction of a rafter frame using layered technology has much in common with the installation of a hanging structure. The fitting is carried out in almost the same sequence, so it makes no sense to describe the actions twice. The main difference is in the methods of forming the upper node, because the tops of the layered rafters have a support - a ridge girder.
If the layered rafters at the top simply rest on the ridge girder, they are laid either with a run, i.e. parallel to each other, or with a strictly vertical joint, similar to the joining of hanging legs. However, in most cases, they try to secure the upper part with a notch or a vertical cut, tightly abutting it to the ridge beam.
There are schemes according to which the layered rafters rest not on the ridge, but on the side girder. In such situations, the top is formed according to the hanging principle, and the point of support on the purlin is formed with a corner notch.
Let us analyze the most popular option in private construction for constructing rafter legs based on the lower corner notch and on the ridge run through a vertical cut. Please note that the maximum cutting depth should not exceed 1/3 of the board width.
Option for marking with a construction square:
- On the square we mark the height of the roof and half the span on a scale. These values display the slope of the slopes and set the main angles. The proportions must be kept exactly.
- If further use of the square is not planned, then you can mark the deferred points with screwed bosses or short screws with screws; if you plan, it is better to use paint that can be removed with a solvent.
- We apply a square to the laid flat board with the side on which the height of the roof is marked. We draw a line according to the readings of the square - this is the line of the upper cut of the rafter - the area where it connects with the ridge girder.
- Cut along the marked line with a circular saw. We lay the board for sawing flat, as it should be when cutting wide. Longitudinal cuts are made on the edge.
- From the top of the formed angle we set off the length of the so-called diagonal. This is the distance from the point of connection with the purlin to the outer edge of the Mauerlat or the top trim, if a frame house is being built.
- Move the square to this point. We draw a line parallel to the first one.
- We turn the square over, move it along the workpiece so that 2/3 of the total distance is on the left, and 1/3 on the right. In the picture these are 8ʺ and 4ʺ.
- The line of the smaller segment will mark the cut for us.
At the end, we draw the outline of the eaves overhang on the board, cut it along the outlined lines and use the rafter blank we made ourselves to cut the remaining elements of the roof.
You can apply the described method without a construction square and marking the roof parameters on it. It is enough to imagine the process to set aside the necessary distances with a conventional drawing tool. However, without experience, you can get confused in calculating angles and segments.
To help beginning builders, a template has been developed with options for forming corner notches. It will help you navigate the production of rafter legs from the most common lumber in this area.
In cases of laying rafter legs with notches in the upper and lower parts, it should be remembered that the depth of both notches must be the same so that the roof slope does not change during construction work. Usually, to create two equal notches, an auxiliary block is used, the thickness of which is no more than 1/3 of the thickness of the board.
The rafter blank is then installed edge-on on the mauerlat and on the purlin. The block is applied to the side in the area of the lower and upper node to outline the notch.
If a notch is needed only in the lower part of the rafter, and the top will rest on the purlin with a cut, the board is installed below on the mauerlat, and at the top on the purlin and block, so that as a result of cutting the angle of the slope does not change. At the bottom, a second block of a similar size is applied to the future node and, with its help, the outline of the future notch is outlined.
The same methods are used to form cuts with teeth. The only difference is in the shape.
The installation of layered rafters begins with the installation of two outer trusses. The elements are mounted one at a time, their position is carefully checked using a plumb level. Most often, the outer trusses are made from paired boards, because more load is distributed over them. They are fixed with temporary spacers, then connected with a lace or strip to indicate the plane of the slope.
Ordinary rafters located between the outermost load-bearing trusses are installed according to the instructions with laces. If necessary, adjust the position of the legs according to the actual situation.