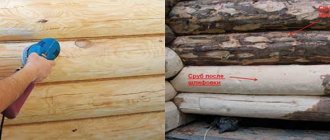
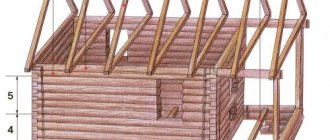
A log house is a cheap building, ideally suited for living. But the main condition for a comfortable stay in it is keeping warm. In this article we will tell you how to caulk a log house with your own hands. If the work is carried out correctly, the heat in the house will be well retained and additional insulation will not be needed.
Caulking is a long and painstaking process. In terms of time, such work can last as long as it takes to erect the log house itself. But as a result, you will have a warm, eco-friendly home.
Why do you need to caulk a log house?
A wooden house is very favorable for living. Wood holds heat well. But in log houses, gaps inevitably remain between the crown logs. They need to be closed to prevent the cold from penetrating inside the house. This operation is called caulking. With careful caulking, the house will be reliably protected from the cold even in the most severe frosts.
In addition to performing the function of insulation, caulk also protects a wooden house from rotting.
What you need to know about log caulking.
How to caulk a log house correctly and when
Caulking of a log house is carried out using two main methods:
- During the assembly of the log house.
- After completing the assembly of the log house and installing the roofing structure.
Beginners often face the question: how to lift a log to caulk a log house? The fact is that the logs do not rise during caulking. The insulation is laid between the logs during the construction process or driven into the cracks between the logs of the crown of an already assembled log house.
When laying insulation during construction, adhere to the following sequence of work:
- Place the logs of the first crown on the base.
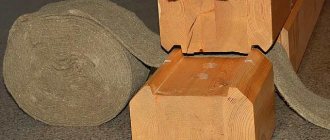
- Lay the insulation material on the logs along the entire perimeter of the log house so that its ends hang down on each side evenly by about 5 cm. Spread the sealant in as even a layer as possible, about 1 cm thick. The fibers should be located across the groove.
- Lay the logs of the second crown.
- Lay a layer of insulation again around the entire perimeter.
- Continue working in the same order until the top of the frame.
- Engage in the construction of the roof structure.
- After installing the roof, proceed to caulking: roll the hanging ends of the insulation into a roller and hammer it into the gaps between the logs using a caulking shovel.
- Re-caulk after the house has settled.
In some cases, when building a house, insulation is not laid between the crown logs. Then caulking is done after the frame is assembled and the roof is erected, also in two and sometimes in three stages: after the roof is erected, after the house shrinks in a year, after final shrinkage in 5 years.
When caulking a log house after construction is completed, one of two methods is used: in a set or in a stretch.
Since the logs in a log house are different, the gap between the logs can be large or small. Depending on this, the caulking method is chosen. This work is performed in the warm season.
The size of the logs in a log house is not always the same. The thickness of the cracks and, accordingly, the caulking method depend on this.
If the gaps between the logs are wide enough, then a set method is chosen for the work. To do this, the caulking material is rolled into a ball, then gradually unwound, pushing it into the cracks. If the gap is very large, then make a loop out of the material and also plug the gap with it. The result is that where the crack widens, it is caulked in two layers. Caulking begins at the top of the gap.
If the gaps between the logs of the crown are small, then the caulking work is carried out using the stretch method. To do this, a strand is formed from the insulation, then pushed into the gap, leaving about 5 cm protruding. Then this free end is folded up and also inserted into the gap.
Caulking of a log house using set and stretch methods.
You need to caulk the walls, starting from the bottom logs, from the corner, going through the entire row around the perimeter. Then they proceed to the next gap, located above, and also pass it around the perimeter. This is how all the outside walls go. After this, the same operation is repeated from inside the building.
If the thickness of the insulation in a frame house is calculated using a formula or taken approximately for a given area, then the thickness of the insulation in a log house depends on the size of the cracks. The larger the gap, the thicker the insulation layer.
When caulking each wall of a log house separately, you can get the entire building skewed. When carrying out work only from the outside or only from the inside of the building, the house may also become distorted.
Procedure for caulking at home
A log house or timber structure shrinks over several years. After the first year, shrinkage can reach up to 20 cm. Gaps appear where there were none before. Therefore, caulking is performed in several stages:
- Immediately after installing the frame, rough caulking is performed. Outside and inside the house, a not very tightly selected insulation is laid between the crown logs.
- A year after the completion of construction, re-finish caulking is performed. In this case, all the cracks are clogged with insulation very tightly.
- After 5-6 years, when the structure has completely shrunk, you can caulk the house again.
Repeated caulking can be spot-based: it is performed where cracks appear. It is recommended to inspect the house annually in the fall and carry out caulking work where required.
Caulking can be decorative: after the main caulking, a beautiful edging or decorative rope is laid on top of the seams.
The technology for caulking a log house with your own hands is not complicated, but it requires skill and patience. Considering the expensive prices that skilled workers charge, it’s worth mastering this process yourself. On average, caulking at home costs about 100 thousand rubles. With some practice, anyone can do this job fairly well.
Work on caulking a log house is carried out in the warm season. Since caulking involves working with insulation, and it does not like moisture, log houses are caulked in the summer. In rainy weather, caulking work is not carried out. It is also not recommended to caulk the log house in winter.
How to caulk a log house
The sealant should be driven evenly into the cracks between the logs. There should be only one blow of the mallet per width of the caulk. You should not force the insulation into the gap between the logs more forcefully, since after the house shrinks, the size of the cracks may change. A layer of insulation that is very tightly pressed into the seam between the logs can be squeezed out of it when the house shrinks.
If it seems to you that some gap is not tightly filled with insulating material, you should go again along the entire perimeter of this seam.
How to caulk the corners of a log house
Caulking the corners of a log house is done in different ways.
It depends on the house's cutting method. Corners are the most critical area for caulking. It is very inconvenient to work here due to lack of space. But it is the corners that are the main bridge of cold in a log house. They are blown even more than near-window seams. Therefore, they need to be given special attention.
Caulking the corners of a log house is done in different ways. It depends on the house's cutting method.
Into the bowl
Caulking the corners of the log house into a bowl.
Cutting corners “into a bowl” is one of the most common types of cutting corners “with a remainder”. In this case, the logs extend 20-30 cm beyond the log house. This design is stable and retains heat well inside the room - the corners are not blown through.
Despite the fact that when cutting corners “into the bowl,” much more material is consumed than when cutting “into the paw,” this method is more preferable due to the warm corners and good stability of the entire structure.
To caulk the corners of a house in this way, if there is a large gap, you need to proceed as follows:
- Separate a small piece of tow and, without twisting it, push it into the gap. There is no need to twist the tow in order to leave space between the logs for future shrinkage. There is also no need to apply strong pressure for the same reason.
- Push the tow inside the gap, leaving about 1.5 cm for the linen.
- Tear off a piece of linen that fits the size of the bowl, straighten it and push one edge into the gap. Punch through this edge with caulk and a sledgehammer or mallet.
- Place a little more tow in the flax roller and hammer the other end with a crooked corner caulk and a sledgehammer.
If the gap is small, there is no need to lay tow. Do it a little differently:
- Tear off a suitable piece of linen, lay it along the gap and begin punching to a depth of about 2 cm.
- Take some tow and place it in a flax roller.
- Punch the other end of the linen into the gap.
At the joints of the seams, perform a binding: the ends of the flax should overlap one another.
Jute in the paw
Another way of cutting the corners of a log house is cutting “without residue” or “in the paw”. The ends of the logs are cut down in the form of locks and are located within the log house. This method is also called a “clean corner” and is used to improve the aesthetics and beauty of a building: the walls and corners are smooth, nothing goes beyond them. At the same time, the stability of the entire log house suffers, and the corners become most vulnerable to the penetration of cold into the room. With this design, special attention must be paid to insulating the corners.
It is necessary to caulk the corners especially carefully. Jute fabric is most suitable for such work.
Insulating the corners of a log house involves not only caulking the cracks, but also additional insulation with subsequent lining. Perform the work in the following sequence:
- Caulk the corners by stuffing jute cloth into the cracks.
- Treat corners with an antiseptic to protect against rot, mildew and mold.
- Attach four vertical post rails to each corner. To prevent the corners from hanging, the guides are mounted on sliding mounts. For racks, you can use galvanized metal profiles or wooden blocks treated with an antiseptic.
- Place jute insulation in the cavity between the posts along the entire height of the corner.
- Cover the corners with a windproof membrane.
- Tape all joints between the membrane and the frame with double-sided construction tape.
- Sew up the corners with finishing material. This can be a board, metal siding or imitation timber.
Laying insulation along the entire height of the corner when insulating the corner joints of a log house cut into a paw.
Made from rounded logs
A house made of rounded logs usually does not have large gaps. But even the smallest crack can cause cold air to enter the house. Such gaps may be in the corners of the house.
Caulking of such buildings must be done especially carefully. All even the smallest cracks must be filled with insulation on both sides.
The most suitable method of caulking for a house made of rounded logs is caulking with a roller or in a stretch. After caulking in this way, you need to check its strength: it should be rigid and not be pulled out by hand even when force is used. In this case, it is considered that the work has been done well, and the heat inside the house will be perfectly maintained.
Features of caulking an old log house
Often old houses lose heat because the insulation has crumbled and does not retain heat. This situation is especially typical for log houses caulked with moss: over time, it dries out, crumbles, and falls out of the cracks. In doing so, proceed as follows:
- Using a stiff brush, remove as much moss as possible from inside the house.
- Caulk the vacated cracks with a jute cloth using the stretch method, driving the cracks to half the thickness of the wall.
- From the outside of the building, clean off any remaining moss with a brush.
- Caulk the remaining part of the cracks outside.
Caulking set
To seal large and wide cracks, use caulking in a set. First, long bunches of tow, maybe hemp, are wound into a skein, and then loops are made, which fill the cracks. The thickness of the loop should correspond to the size of the existing gap. First, the top of the gap is filled with sealant using “composite” caulk, and then the bottom is clogged using a “road builder”.
Return to content
How to caulk a house made of timber
Some sources claim that there is no need to caulk houses made of timber, since there are no cracks in them. However, in reality, there are still gaps: it is impossible to fit the beams so precisely that there are no gaps or gaps at all. Over time, the timber dries out, which is quite natural, and new cracks will appear. In this case, caulk is also needed. It is carried out in 2 or 3 stages.
The process of caulking a house made of timber follows the same rules as for a log house.
Caulking corners is of great importance, as in a log house. In a house made of timber, cutting corners is most often done using the claw method, and such corners are considered cold.
How to quickly caulk a house made of timber
The process of caulking a house made of timber takes about the same time as assembling a log house. At the same time, an experienced master will certainly cope with such work faster than a beginner.
To speed up the caulking operation, you can use a hammer drill. However, working as a hammer drill requires special skills. The quality of the caulk will not be up to par.
Working with sealant instead of tow and flax also speeds up the caulking process.
How to caulk a house made of profiled timber
Since profiled timber is pre-processed at the factory, it is practically impossible to dry out. In addition, the beams are connected using the tongue and groove method, which provides additional wall density.
During the construction process, the beams are laid as closely as possible to each other and a layer of insulation 5 mm thick is laid between them. Theoretically, such a house does not need to be caulked, but in practice it is different.
The fact is that profiled timber still shrinks, deforming under the weight of the wall and roof. The tendency of wood to shrink also depends on its storage conditions. Therefore, cracks and gaps inevitably arise, especially in the corners of the house.
As much as I would not like to admit it, a house made of profiled timber also needs caulking. This operation will prevent the appearance of drafts, heat leakage from the premises and icing of the timber outside the building. The latter is inevitable when warm air from inside leaks through microscopic cracks to the outside of the building and settles on the walls in the form of frost.
Caulking a house made of timber.
How much tow do you need for a bath?
Any natural material for caulking is compressed many times during installation and a large amount of it can fit into a log house, even with good inter-crown insulation. No one can say exactly how much tow is needed for a bathhouse: it also depends on what material the log house is assembled from and how the grooves are cut out in the logs. When manually cutting grooves, as a rule, more material is wasted. Also, a sanded log requires more material compared to a rounded one. Less is required for a log house, but even here the amount of tow or moss that will be used to seal the cracks depends on the accuracy of the geometry of the beam and the depth/number of cracks that appear during drying.
What is the best way to caulk a log bathhouse or a timber house outside and inside?
The question of how to caulk a house is a very serious one. If the caulking material is chosen correctly, the house will be warm and cozy for many years. Moss has long been used to caulk log houses. Now it is also used, but much less often due to its high cost.
New materials have appeared that, in some cases, are much better than moss in terms of a combination of parameters. This is tow, linen, sealant. All of these materials have positive and negative sides. Before starting caulking work, you need to choose the most suitable material for insulation.
It is best to caulk the log house of a bathhouse with moss, since fungi and bacteria do not grow in it. In this case, moss is certainly more suitable than jute tow.
When caulking a bath, it is important to choose materials that do not emit harmful substances at elevated temperatures. This will ensure a safe stay in the steam room.
Do-it-yourself caulking of a log house with jute
It is most convenient to caulk a log house with jute tow. This material fits better and more evenly into the seam. The caulking process consists of the following steps:
- Clean the logs from dust and dirt. You can use a stiff brush and vacuum cleaner for this. It will be good if you treat the cracks with an antiseptic.
- Soak the insulation in a special solution.
- Extend the rolled material to the entire length of the perimeter of the log house with a small margin: approximately 20-30 cm. This margin will be needed if the insulation lays out in waves somewhere. The jute tape is secured with a stapler along the entire length of the gap every meter.
- Start hammering the insulation from the outside into the gap between the first and second logs.
- Dig the lowest crack around the entire perimeter of the frame, then move on to the second crack, and so on throughout the house. When laying jute in parts, the edges are connected with an overlap of 5 cm.
- Repeat this operation from the inside.
- Apply decorative caulk or sealant.
Caulking at home must be done carefully, without missing a single millimeter. Strikes with a mallet should be rare. There should only be one blow per blade width. If necessary, you can go through the row again to hammer in the insulation evenly.
Sometimes the caulking process is performed during the assembly of the log house. In this case, place insulation on the first row, which will hang down on both sides. Next, place the insulation on the second log, and so on until the roof. After erecting the roof, hammer the hanging ends of the insulation into the gaps using caulk.
At the joints of the insulation tape, overlaps of about 5 cm are made.
After shrinkage
The shrinkage of the house is invariably accompanied by the appearance of new cracks. We have to carry out work to eliminate them.
When caulking, jute is driven cleanly into the cracks between the logs as follows:
- in a stretch - twisted jute 20 mm thick is pushed into the gap,
- into the set - the cracks are pierced with tape insulation, driving first the edges of the tape, and then the middle.
Hammer
Caulking a log house using a hammer drill.
Since manual caulking takes a lot of time and effort, you can master the method of using a mechanism for this work. In this case, a hammer drill is used as a jackhammer. The tool operates in pure impact mode, without rotation. To do this, you will need a three-mode model like Bosch PBH 2100 RE.
In the case of caulking, nozzles are chosen in the form of a flat spatula or chisel. Every 10-15 minutes of work you need to take breaks and switch the hammer drill to rotation mode. This is necessary so that the lubricant can penetrate evenly into all parts of the tool.
Do not use strong pressure on the tool when working, as the chisel may get stuck in the gap between the logs and it will be difficult to pull it out. It is difficult to get the tool strictly into the gap without damaging the wood. This work requires dexterity and skills, but after a while both will come.
As always, opinions on how to caulk a house - manually or mechanically - are divided. Therefore, everyone must decide for themselves: which method to choose.
Jute or flax - which is better?
It is difficult to answer such a difficult question: which is better - jute or flax wool? These are the most common insulation materials. Their differences are minor:
- jute is a stronger and denser material than flax batting and can be used for caulking in one layer;
- jute is somewhat more expensive than flax;
- jute has a higher degree of sound insulation than flax wool.
Jute has a high lignin content and is very hygroscopic. It can absorb a large amount of moisture and release just as much. Due to this property, it is often used in the construction of baths.
Linen wool consists entirely of natural flax; private developers prefer to use it. Flax wool is often stolen by birds: they peck the material from unprotected cracks in log houses to make nests.
How can you caulk a log house?
How to properly caulk a log house with tow
Tow is very often used for caulking log houses. Its low cost also makes it the most attractive. Tow can be made from various materials: hemp, jute or flax.
During production, tow is pressed into blocks. To close the gap between the logs, a strip of material is removed from the block and slightly twisted into a rope. Then such a bundle is laid in the gap between the logs. Sometimes tow is packaged in rolls.
In any case, it is obvious that tow is difficult to work with, since it is impossible to obtain a rope of the same thickness along its entire length. Because of this, unclosed areas of cracks may remain. This situation is unacceptable and requires a repeated process of caulking throughout the entire structure.
Positive properties of tow:
- is a material consisting of natural fibers;
- holds heat perfectly;
- is the most affordable material.
The negative properties of tow include the following indicators:
- subject to rotting;
- difficult to push into the space between logs.
The service life of tow is only 3 years. After this, it begins to rot and may crumble. Accordingly, it loses its thermal insulation qualities. It is recommended to replace it after three years of use.
To caulk a house with flax or hemp tow, proceed as follows:
- Treat the insulation. To do this, tow is soaked in formaldehyde diluted in water.
- Dry the tow in the open air until damp.
- Divide the tow into fibers and push it into the spaces between the logs, leaving a free end of 5 cm. Start work from the bottom, from the corner, on the outside of the log house.
- Bend the free end up and also drive it into the gap.
- Compact any remaining material outside into the gap.
- Work your way along the entire gap around the perimeter of the frame, then move to the next highest gap.
- Repeat all the work from inside the building.
Jute tow in rolls is the most suitable material for caulking a log house.
How to caulk a log house with moss
Moss is an excellent material for caulking. It has been successfully used for this for many years and is still relevant today. Its positive aspects:
- environmentally friendly;
- holds heat perfectly;
- does not rot because it contains a natural antibacterial substance.
But moss also has disadvantages:
- it is difficult to choose the optimal degree of humidity for it;
- requires special knowledge when laying between logs;
- has a high cost.
Before use, the moss is soaked and then dried in the sun. If the moss is not dried completely, it will contribute to the rotting of the wood. If over-dried, moss can turn into dust. Therefore, properly drying it to optimal humidity is an important point.
Work on caulking a log house with moss is carried out in the following sequence:
- Prepare a special solution: a bucket of water, half a liter of vegetable oil, 200 grams of grated soap.
- Soak the moss in the solution, then lightly dry it in air.
- Divide the moss into 10 cm wide strips.
- Bend the ends of the strips upward and drive the resulting roller into the gap between the logs so that the edges do not stick out. Start work from the bottom gap, from the corner, from the outside of the frame. Move along the entire perimeter of the building. Then move to the gap above.
- Repeat the entire process on the inside of the building.
Moss used as caulking sticks out in clumps and does not look very aesthetically pleasing, so it is recommended to cover it with decorative caulking in the form of a cord or rope. This will also keep the moss from being pulled out of the wall by birds for their nests.
You can collect moss for caulking a log house yourself. It must first be cleaned of insects and dirt.
Sometimes the question arises: how to caulk a bathhouse frame collected with moss? This can be done with the same moss, as well as jute or linen.
Caulk of a log house with moss.
Lnovatin
For caulking, flax batting is also used, which is made from flax fibers and resembles jute. Attractive aspects of flax wool:
- environmentally friendly material;
- good as a heat insulator;
- absorbs and releases moisture during changes in air humidity, which prevents wood from rotting.
Linen wool retains heat well inside the house and also regulates humidity levels.
The negative side is that flax wool quickly infests insects. Therefore, it is worth periodically sanitizing. If the log house serves as a bathhouse, then the air after such treatment will not be pleasant.
Another disadvantage of flax wool is its ability to increase indoor humidity due to its ability to absorb moisture when there is an excess of it and release it when there is a lack.
The flax batting can be secured with a construction stapler before caulking. The service life of flax wool does not exceed three years, after which it must be replaced.
If there are large gaps, flax batting can be used in two layers.
Caulk of a log house with flax wool.
Varieties of jute release forms and their application
Jute is available in the form of cord, rope, twine, rope or tape. The thickness and width of the material may vary. It is easy to caulk thin tow or jute in the form of a rope into old cracked logs with your own hands. Jute tape makes it easier to seal gaps around doors and windows. It is also used to fill gaps in building materials. A seal made from a harness and cord looks the most aesthetically pleasing and does not require additional processing. Thin cords and ropes are suitable for finishing not only walls, but also floors and ceilings.
The main producers of jute are India, China and Kazakhstan. The highest quality and most expensive product is produced in India. The width of the jute and its thickness directly affect its cost. The sealant is sold in the form of skeins and bobbins, which are gradually unwound during use. Working with natural material is quick, easy and does not leave excess debris, like synthetic sealants. Sealing materials made of jute reliably adhere to other building materials.
Jute tow has good elasticity, so it easily takes the shape of the surrounding space. Material made from wood fibers withstands frost and heat and does not crumble. The properties of jute made from wood fibers are similar to wood. Such material can be subjected to various treatments. It reacts to impregnation with resins and staining in the same way as wood: it does not dry out or crumble, and does not allow heat and moisture to pass through.
Caulk or sealant for a log house - which is better?
Synthetic caulk works well for sealing gaps between crown timbers. It leaves no cracks or gaps, tightly filling all gaps. It is convenient to apply. In aesthetic terms, the sealant is also good, since it has different colors and can be matched to any type of wood, while fulfilling an aesthetic role.
The sealant itself does not serve as insulation and allows cold to pass through. Therefore, it is used only as an additional material that tightly covers all cracks. The composition of sealants is:
- silicone,
- acrylic,
- polyurethane.
The sealant has an impressive cost, so it is also combined with other, cheaper materials - jute, linen. This combined seam will hold heat perfectly.
The sealant is durable. When using it, you will not need to re-seal the seams. It also prevents insects from getting into the porous insulation.
To insulate a log house with sealant, you need to proceed as follows:
- Place insulation cord into the cracks.
- Fill the cracks with sealant. Start working from the bottom log, from the corner, from the outside of the log house. Move along the entire perimeter of the log house, and then higher.
- Carefully remove all excess sealant with a spatula.
- Treat the inside surface of the frame in the same way.
To answer the question: Caulking or warm seam - which is better for a log house? — it’s worth remembering the many advantages that a warm or heat-insulating joint made with wood sealant has:
- The sealant easily penetrates into all hard-to-reach cracks and seals them tightly. As a result, all cold bridges are blocked. The premises are reliably protected from drafts.
- Considerable strength. It does not crumble or fall out of cracks for a long time, and birds do not peck at it.
- The ability to preserve the walls of the house. Traditional insulation gets wet in wet weather and dampens the wood. As a result, the walls begin to rot. Acrylic sealant is moisture resistant.
- The ability to improve the microclimate in the house due to durable protection from moisture.
- Durability. The service life is 20 years or more.
- The sealant also protects the wood from insect pests, such as wood-boring beetles.
- The sealant tolerates any high and low temperatures, as well as their changes.
- Environmental friendliness. The sealant does not release any harmful substances into the air and is in perfect harmony with the wooden structure.
- Elasticity. The “Warm Seam” sealant is flexible and can change its shape following the expansion of cracks between the logs due to shrinkage of the house. In this case, no cracks are formed.
- The sealant is much easier to work with than traditional caulk. The process takes less time.
Although caulk is more expensive than tow, the caulking job is even more expensive.
Therefore, many owners of log houses prefer a modern method of insulating a log house, namely, using sealant instead of tow, moss and flax.
To make the seams look aesthetically pleasing, they are trimmed with decorative jute. In this case, all traces of sealant are covered.
The use of sealant for insulating a log or log house is called a breakthrough in modern construction.
Caulking a log house with sealant is done quickly and looks very neat.
Some owners of log houses use construction foam to insulate the seams between logs. This is not suitable insulation. Very quickly, within a year or two, it dries out, falls into pieces and falls out of the seams. After this, the caulking must be done again.
In addition, foam does not retain heat and cannot act as insulation.
To caulk a log house, you need to choose a special sealant for wood that retains its plasticity for a long time, does not dry out and does not fall out of the cracks. This sealant must be used in conjunction with insulation.
Construction foam is not suitable as insulation for log caulking. It quickly dries out and falls out of the seams.
Owner reviews
The traditional method of caulking a log house with tow or moss requires special skills from craftsmen. Nowadays such craftsmen are difficult to find. Therefore, hired workers do not always perform high-quality work, charging a lot of money for it. This is what Igor M. from Moscow says about his experience in insulating a bathhouse.
After building a bathhouse on the site, I hired a team and caulked the entire frame with tow. The work turned out to be expensive and long. But the guys were good, they didn’t drink, they worked every day. The job was completed in 3 weeks.
After 5 years of use, some of the logs cracked and gaps appeared between them. The question about caulking came up again. I no longer wanted to spend a lot of money on a team, and I couldn’t find good workers. And then I decided to do the work myself. I chose sealant as the insulation material. Everything turned out great, even better than the specialists.
The bathhouse has stood for 15 years and there are no cracks. Therefore, I advise everyone to choose new materials, namely, wood sealants.
Material selection
To insulate baths, a wide range of materials of both natural and artificial origin is used. It is noteworthy that to this day, when constructing bathhouses and outbuildings, many owners of personal plots use materials that were used for insulation several centuries ago.
When choosing a material for caulking a log house, you should pay attention first of all to the types of insulation that have such properties as:
- environmental friendliness;
- chemical and radiation inertness;
- resistance to moisture;
- resistance to high temperatures;
- resistance to sudden temperature changes;
- resistance to mold and rot;
- biostability (resistance to damage by insect pests);
- durability (service life).
The inter-crown insulation must provide reliable protection of the building from blowing. The insulation will meet this requirement only if it has sufficient density and elasticity (compliance).
Disadvantages of caulk
Some aspects of the work of caulking a log house are clearly not very pleasant. You need to somehow get around them or you have to put up with them. This:
- The noise you hear when caulking a log house. Considering that the work has been going on for a long time, this causes serious inconvenience.
- If the insulation material is not packed very tightly into the grooves between the logs, birds begin to steal it for their nests. To distract them from this activity, pieces of tow are specially laid out around the house.
- Over time, insects infest the sealing material. This leads to a deterioration in the quality of the insulation and its spillage from the gaps. To prevent the appearance of insects, the walls of the house are treated with special protective impregnations.
- High cost of work. Since caulking at home is a long and painstaking process, the services of specialists are expensive. If we consider that caulking is carried out several times, it is clear that the cost of the work increases even more.
- The need for decoration. Caulking with moss and tow does not look very aesthetically pleasing. It is advisable to cover such seams with decorative caulk in the form of a rope or cord.
Self-help errors
Making caulk yourself is not easy. Lack of experience and lack of caulking skills lead to the fact that the work is of insufficient quality.
Typical mistakes that inexperienced professionals make:
- Using low quality insulation.
- Incorrect preparation of material for work.
- Violation of the sequence of work.
- Caulking the house on only one side, internal or external.
- The caulking is not around the perimeter of the building, but along the walls.
- Loose fit of the insulation and its protrusion from the seams.
The caulk will turn out to be of poor quality even if only one mistake is made. It is not easy to become a specialist caulker. Experience in caulking is acquired over years, so it is not surprising that inexperienced craftsmen often make mistakes, which then have to be corrected by professionals.
Do-it-yourself tool for caulking a log house
To caulk a log house, a special tool is used that you can make yourself. The main tool is a caulk. It resembles a spatula, only it has a thicker outer edge. There are several types of caulking:
- direct typesetting for walls,
- curve for corners,
- in the form of a fork for rolling rollers or a road worker,
- broken or wedge-shaped to widen the gap into which the tow is inserted.
In some cases, a construction spatula is used instead of caulk. You need to be careful not to damage the material with the sharp end of the spatula.
It’s better to use caulking rather than a spatula. Many craftsmen ask the question: how to make caulk for a log house with your own hands? This will be discussed in the next section.
The tool should not have nicks or burrs so that the caulking material does not cling to these irregularities.
In addition to the caulk, you will also need a tool such as a mallet, which resembles a hammer. You can also make this tool yourself. A wooden hammer is used to strike the caulk to seal the insulation into the cracks between the logs.
Do-it-yourself shovel for caulking a log house
A shovel or caulk for insulating a log house can be made of metal or hardwood. It is best to make the tool from the same wood from which the frame is made. In this case, the log house and the tool will have the same density and there will be no traces of impacts left on the wood of the log house.
A caulking shovel can be made in 10 minutes using an ax or jigsaw. The caulk is sharpened with an ax so that it can be used to conveniently push the insulation into the cracks between the logs.
The dimensions of the tools are shown in the diagram, but can be changed depending on your desire. The main thing is that the tool is comfortable to hold in your hand.
You can make your own caulking tools at home.
Services of professional caulkers
Entrust the caulking of your home or bathhouse to qualified specialists who will quickly and efficiently complete all the work. We employ caulkers with ten years of experience who are well aware of all the subtleties and nuances of caulking. We use high-quality and dried natural materials that meet all requirements. We work under a contract and provide quality guarantees. Our specialists will make caulking of any complexity and volume at an affordable cost. Contact us in any convenient way using the coordinates in the “Contacts” section.
Calculate the cost of painting and insulating your home right now
