The method of drainage from the bathhouse must be thought out before its construction, at the project development stage. Even for a small building, it is important to determine in advance how the drainage and disposal of water will be organized - into the soil or into the sewerage system. It is important that the drain is organized correctly and functions without problems. How to make a floor in a bathhouse with a drain? Today's material is about this.
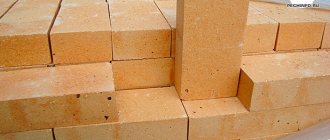
Construction of a pouring floor on a concrete base
Characteristics for choosing a drain method
When deciding how wastewater will be discharged, you need to rely on the following parameters:
- Frequency and intensity of use of the bathhouse. The depth of the drainage structure, as well as the methods of its arrangement, depend on the indicator.
- Proximity to fertile, usable soil. If the area is small and there is a vegetable garden next to the bathhouse, then just a drainage hole is not enough. For drainage, you will need to equip a septic tank to purify the water.
- How deep does groundwater go? The depth of the trench under the outlet pipe depends on this characteristic.
Having decided on the primary parameters, you can begin installing the water drainage system. It is divided into two stages: draining the interior of the bathhouse, which includes a certain floor structure, and installing a pipe to drain the liquid outside the steam room.
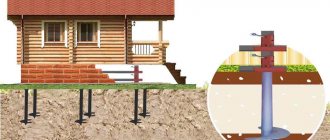
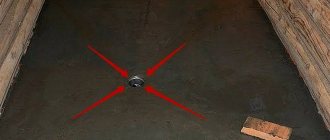
Basic installation diagram for water drainage from a bathhouse
Water drainage methods
Diagram of a filtration system for draining a bath.
The design features of the base and methods of arranging the hydraulic apparatus directly depend on what types of materials the floor will be constructed from. As a rule, wood, cement screed or combinations of materials are used to finish the base. For any type of construction, a system for draining water masses from the bathhouse is prepared in advance.
The design of the drain mechanism can be different and depends on many factors:
- For a bathhouse for three to four people, it is advisable to make a cesspool under the foundation of the structure. The walls of such a pit are edged with brick and covered with sand. As the tank fills with water, the liquid is pumped out of it using a cleaning machine;
- If you are building a bathhouse for a large number of people with your own hands, it is better to make a drain pipe connected to the central sewer system or a separate well;
- To purify wastewater from dirt, it is advisable to install an underground filtration system. It is equipped with a special sump, distribution well and waste pipe;
- A simpler option for water purification would be to install a filter well. Filter material (crushed stone, brick fragments, expanded clay) is poured under the bathhouse. In the process of irrigation with water, the mineral bed is covered with silt, which purifies the wastewater before entering the ground.
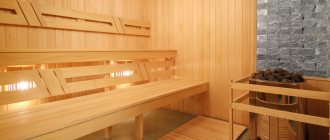
Drainage in the washing room
The layout of a standard Russian bathhouse has 2 rooms:
- dressing room;
- steam room connected to the washing room.
In standard modern designs, the washing room and steam room are two separate rooms. The dressing room serves as a rest room or locker room and does not need a drainage system.
The main factor that influences how to drain a bathhouse is the type of floor in the rooms where water is used.
Floors in the washing room and steam room are made according to the following principles:
Pouring. The design is based on the installation of logs. Suitable for southern regions where the soil is loose and sandy. The floor is covered with boards, between which there are gaps. Through the flooring, water flows directly into the ground, where it is immediately absorbed. It is not practical to use such technology in the central zone and in the north.
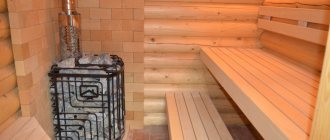
Dry floor in the washing bath
- Leaking. Suitable for paired rooms with a base on pillars or stilts. The wood floor is installed on joists. They are attached to the foundation supports or along the perimeter of the lower crown of the bathhouse frame. Through the distance between the floorboards, water flows into the lower compartment. From here it enters the drainage system.
- Solid. In this case, the floor is installed without gaps. Typically, this is poured concrete covered with ceramic tiles. You can make a slope of the floor in the bathhouse for drainage either towards the center or into one of the corners of the room where the drainage gutter is installed. At the first stages of construction, the drainage ladder is filled with a concrete screed. This floor can be made in steam rooms with a strip foundation.
Laying the floor in the washing room
In the first two options, the drainage design consists of 2 parts: a reservoir for collecting waste liquid and a drainage pipe. From the outside, the system looks different, depending on the size of the bathhouse, the type of soil and how it is affected by atmospheric temperature.
How to drain a bathhouse under the floor must be decided at the very first stages of its construction. The type of floor, pouring of concrete depends on this, it is necessary to lay communications in advance, if water will flow into the site, etc. For small rooms that are planned to be used rarely, a simple drainage system is suitable. A large drainage hole is not required here; it can be located directly under the floor or not far from the steam room.
If the family is large, and the bathhouse will be used on an ongoing basis at least 2 times a week, a full-fledged sewer system is installed, equipped with a drainage well.
Basic drainage scheme
A fairly complex floor arrangement allows you to avoid the destructive influence of water on the floor base.
How to make a floor slope to drain water from a bathhouse with your own hands? Before you begin the process of pouring floors with a drain system, it is worth familiarizing yourself with some technical nuances. According to many experts, installing a floor base with a hydraulic apparatus is advisable exclusively in the washing department. There are several reasons for this:
- Pouring concrete floors in a steam room leads to strong dust formation at a time of increased dryness of the atmosphere;
- Concrete surfaces tend to get very hot, unlike wood. Therefore, the presence of concrete in the steam room cannot be called appropriate;
- Cement screed has low ductility, so during thermal expansion or compression it will crack very quickly.
What should the base structure be like for the water drainage system to work like a clock? In order to evaluate the advantages of one or another method of laying a hydraulic apparatus, we will consider the process of assembling and draining water from the bathhouse. Sloped floors in most cases “work” using the following technology:
- The slope at the base allows you to collect all the liquid at one point in the room;
- A ladder is installed in the corner of the water assembly, through which “waste” water is removed from the room;
- From the drain, the liquid through the background pipe enters the sewer system or a crushed stone filter, which is installed under the bathhouse.
To make a really high-quality system for draining water from a bathhouse with your own hands, you need to take into account many points:
- foundation type;
- type of ladder;
- “seasonality” of the bath;
- floor type (concrete, wood).
Selection of sewer pipes
Choosing the diameter of the pipe depending on the level of the slope A correctly made slope at the base of the drain does not yet guarantee the rapid evacuation of water masses from the room. In this matter, the choice of sewer pipes is not the least important. Since the bathhouse uses a non-pressure liquid discharge system, it is advisable to use the following pipes to install the hydraulic apparatus:
- The minimum diameter of the pipe should be 50-60 mm, and the thickness of its walls should be at least 3-4 mm;
- It is advisable to assemble the external pipeline from PVC materials, since they are more frost-resistant;
- During the installation process, pipes are laid in the soil at a level that is below the freezing point.
Ladder arrangement
Options for installing drainage drains in a bathhouse
What is a drain? The drain is a plumbing device that plays the role of a water intake. It is equipped with a siphon or water seal, which prevents the spread of unpleasant odors from sewer pipes. The drain performs one important function - it quickly redirects wastewater into the sewer system.
When laying a sewer system with your own hands, the drain must be installed in compliance with certain rules:
- The drain must be located at the very bottom of the floor base, otherwise complete evacuation of water from the bath will be difficult;
- For rooms with high levels of humidity, it is advisable to choose drains or polymer materials, since they are not subject to corrosion;
- In order for the ladder to “work” correctly, during its installation it is advisable to raise the pipe 10 cm from the bottom.
If necessary, you can assemble the sewer with your own hands and without organizing a water seal. To do this you need:
How to make a floor in a bathhouse from tiles?
- Raise the base of the structure by 3 bricks and install a drain pipe connected to the drainage well;
- From the inside, attach an elbow with a diameter of at least 5 cm to the pipeline, with its upper part located 4 cm below the level of the base;
- Fill the base with a cement mixture, and then make a finishing screed with grooves through which water would easily flow into the drain;
- At the final stage of the work, a rubber ball is placed on the drain elbow, which acts as a shutter valve that prevents the spread of odor from the sewer.
Drain in a leaky floor
This is the simplest option for performing a floor drain. But keep in mind that it is recommended to use a bathhouse with such a lightweight water drainage system only in summer.
The drain is arranged in this way:
- After digging a pit for the foundation, dig a hole 60-70 cm deep in its center - it will act as a drain. From it, lay a trench towards a pre-arranged drainage hole. Then install the pipe in the trench at a slope of 5-6 degrees.
- Pour the foundation. Along the entire perimeter of the underground, remove a layer of earth at an angle of 10-15 degrees from the walls to the side of the drainage pit. Fill the slopes with crushed stone and place a special reinforced screed on top. Then the slopes are concreted so that the water does not fall into the ground, but flows directly into the drainage pit.
- Install a traditional floor beam on the foundation, rather than install boards with a pitch of 7 mm.
Drain in a leaky floor
As a result, you should end up with a floor with a lot of gaps between the planks - through them the water will flow into the underground, and from there along the slopes into the drainage pit. Next, the “route” is obvious: through the pipe into the drainage pit.
Primary screed
In order to provide additional thermal insulation, it is advisable to make the solution for the first layer of screed based on perlite. This material shown in the photo is an excellent insulator and therefore the floor covering will be warm and pleasant to the touch.
Since perlite is light and consists of small fractions, work with it should be carried out in a place well protected from drafts.
The solution is made with it in several stages:
- Pour 2 buckets of perlite into a concrete mixer and add 1 bucket of water.
- The mixture is thoroughly mixed, and its volume is significantly reduced.
- After the mass is made homogeneous, cement is added to it, which is poured gradually. The mixture continues to be stirred.
- When the mass becomes uniform in color and consistency, pour 1 bucket of perlite into it and pour in several liters of water.
- The mixture should ultimately be free-flowing.
- For perlite to react with cement and water, you need to wait some time - about 10-15 minutes with the concrete mixer turned off.
- Then they continue to knead until the mass is plastic.
If you don’t want to use a bathhouse during the cold season, you can do it simpler and use a mixture of 3 parts sand, 1 part M400 cement and 0.1 parts lime. These components are mixed by adding water until the color is uniform and the solution has the consistency of thick sour cream.
The finished mass is laid out on the subfloor and leveled. You don't have to use guide beacons at this stage. But at the same time, it is imperative to ensure that the floor in the bathhouse is poured correctly with a slope in the direction of the location of the drainage hole.
Basic tips for creating a drain for a bathhouse
If there is at least some possibility of connecting your drainage system to the central sewer system, then this is the most optimal and most effective option for organizing wastewater. If the site is located in an area that is not suitable for this, then you will have to carefully study the soil characteristics, the slope of the site, internal communications, the presence and level of groundwater, and correctly calculate the materials and energy costs. Bathhouse owners are often faced with a choice: septic tank or well? Both options have their pros and cons. Setting up a well, for example, will take more time than installing a septic tank. But the right well provides the best filtration of water and virtually eliminates the appearance of unpleasant odors. A septic tank is more suitable for frequent use of a bathhouse, as it provides faster absorption of water. In financial terms, the organization of a septic tank and a well are almost the same. Everything will depend on the materials used, because you can always replace, for example, an expensive plastic container with old tires, arranging them in such a way that they form a cylindrical container.
The drainage ditch, which was described in the last, fifth method, is permissible only in the case of a small volume of water and the absence of cultivated plants on the site. Otherwise, they will simply be poisoned by detergents coming from the drains, although the water will undergo filtration to some extent. However, this is the cheapest and fastest option for organizing a drain.
In general, despite the apparent ease of performing the task of organizing a drain, it is not so easy to calculate all communications correctly. Therefore, if you do not have experience in construction, it is better to hire a team of builders - today this service is not too expensive.
Source link
Which type should I choose?
The choice of type of drainage system is determined by two main factors:
- soil composition;
- volume of wastewater and intensity of use of the bathhouse.
If the site has sandy soil without impurities or layers of clay, the owner is very lucky. In such conditions, you can get by with the simplest and cheapest drainage option - making a pit with a filter layer. In sandy soils, the aquifer is low and no problems arise.
If the site has clay soil, you will have to build a storage tank or drainage well. The first option is used on clay, the second - on sandy and loamy soils. It is recommended to carry out test drilling to more accurately determine the composition of the soil layers. This information will be useful not only for creating a drainage system, but also when constructing other structures.
Sewerage in the bathhouse: manufacturing principle
The bathhouse is a rather specific structure that requires a certain approach in its manufacture. The drainage system deserves special attention, since it differs significantly from similar structures in an ordinary house. Taking this into account, the sewage system in the bathhouse is made using a special technology, taking into account the specifics of each room.
Amateur photo of the main drainage system, which is introduced into the room through the foundation
Manufacturing principle
External view of a drain embedded in a concrete floor with a certain slope
Organization of drainage
- First of all, it is worth noting that the floors in this building are best made of concrete, and a floorboard is installed on top of them on the joists. At the same time, small gaps are created between it so that water can drain onto the surface protected by waterproofing.
- The main sewage system of the bathhouse is located in the washing room. To do this, when creating the foundation, a hole is made in it, into which a drain pipe is installed. It is fixed at a slight angle, directed into a cesspool or system.
The principle of fixing the main drain pipe with the creation of a certain slope
It is necessary to create a hydraulic valve under the floor covering. It will protect the room from unpleasant odors and cold air from outside. In order to implement such a sewage system in a bathhouse, you can use special siphons, which are sold in any hardware stores.
The principle of operation of a water seal in a sewer
Next, before starting to create concrete floors, a drain pipe with a funnel is inserted into the siphon, which is poured, leaving only the drain part on the surface. It should be noted that before proceeding with the manufacture of the floor, the part of the system that will come into contact with the cement must be protected with damper tape so that when the surface expands as a result of heating, it does not damage the material.
Advice! Before installation, the pipes must be additionally insulated so that during severe frosts the water in them does not freeze and create plugs.
Implementation of a water seal using various corner joints
Gangways
The further arrangement of the bathhouse sewage system is the manufacture of drains.
- To begin with, it should immediately be noted that all this work is carried out during the manufacture of floors.
- When pouring, all surfaces are made at a slight slope towards the wall that is closest to the washing room, since the sewage system from the bathhouse comes out of this room.
The simplest type of implementation of a sewer drain without outlet to the outside
The ladders are made at the lowest point of the room. To do this, before pouring the floors, halves of pipes are installed on the surface, which are also mounted at an angle to the general drain. You can create such products with your own hands or purchase ready-made elements on the building materials market.
Special drains with protection that require connections to pipes
- After the floors have been poured, a layer of waterproofing must be applied to them. It is worth using a special mastic. Modern stores sell a special composition made specifically for baths, which tolerates high temperatures well and does not emit harmful substances.
- It is worth noting that the installation instructions assume that the drain in the bathhouse is organized in such a way that water that penetrates through the cracks in the floorboard flows along the inclined surface into the drains, and from there into the main drain located in the washroom.
A special drain, which involves not only a central drainage of water, but also has an edging edge for joining with drains
This system is quite simple and almost never clogs. To maintain it, it is enough to spill the floor with a large amount of water with antibacterial additives. It must be remembered that the price of the final product will be so low that, in comparison with other principles of organizing the drain, it can be called free.
Advice! If tiles are used as a finishing coating, then the drains must be made open, flush with the surface.
An original solution with the creation of a large hydraulic valve, a common drain and outlet to a sewer or drain pit
Conclusion
In the video presented in this article you will find additional information on this topic. Also, based on the text presented above, we can conclude that making a sewer system in a bathhouse with your own hands is a rather complex process that involves creating a foundation and concreting floors. At the same time, the sewage system in a bathhouse can be different, although the use of drain ladders is so simple that it is used almost everywhere.
9ban.ru>
Adviсe
In order for the process of installing the floor in the bathhouse to go “without a hitch,” experts recommend following a number of instructions.
- For insulation, you should choose materials that are least responsive to elevated temperatures and humidity. That is, it is better to simultaneously organize not only heat, but also hydro and vapor barrier.
- The bars should be laid correctly so that the liquid can flow down along the joint line.
- If there is a possibility that the space under the floor will fill with moisture, it is necessary to create a gap from the internal backfill on top of the soil to the wooden base. Its size reaches 15 centimeters.
- Fiberglass underlays on the waterproofing floor will make movement on the floor inaudible. They are produced in the form of a thick tape, which is extremely convenient.
Wooden materials must be treated with an antiseptic. It is advisable to use a composition that can destroy all microorganisms and prevent damage to boards and beams. In addition, all wooden parts are pre-dried or purchased already in this form.
If this is not done, the material will curl during use, cracks will appear and the shelf life of the floor will be significantly reduced. If it is necessary to install ventilation, it is important to organize its correct output. Usually a separate pipe follows the path along the wall to the attic
If the foundation is monolithic, then it is recommended to make holes that will connect the ventilation gaps with the air outside. If the steam room area is large, then one drain will not cope with all the water. It will be necessary to think about several so that the material does not rot too quickly. Dry floors not only eliminate moisture, but also lead to heat loss. In this situation, it is necessary to insulate the foundation and base of the log house, and place the sauna stove below the floor level.
- The floor in the steam room rises relative to ground level. And in a separate washing room, on the contrary, it should be lower than in other rooms.
- It is necessary to leave a ventilation gap under the floor. It can be installed at a height of 10–15 cm.
- It is worth installing the finished floor so that there is an angle of inclination in the direction that is directed along the length of the boards, and not in width. This will help extend the service life of the products, since the direction of water is also one of the reasons in the rotting process.
- To prevent the board from bursting when screwing in the screw, you need to work at an angle of 45 degrees.
- Under no circumstances should you use linoleum, laminate or other synthetic coverings in bathhouses, even in the rest room. In any case, such materials will begin to heat up and release substances that can poison the body. In the dressing room, such a covering should be placed on top of a special flooring that allows the floors to dry.
- The selected boards must be edged or tongue-and-groove. Their thickness varies from 25 to 30 mm.
Rules for arranging a drain pit
It is recommended to make a septic tank from two containers
Before you build a drainage pit for a bathhouse with your own hands, you should consider that the cesspool can be sealed or allow moisture to pass into the soil. It all depends on the material of the walls and bottom.
Drain well options:
- Brick. The walls are mounted with red brick, while making continuous masonry or placing stones at intervals. Use continuous concreting of the bottom or pour drainage.
- Made from concrete rings. More often, such a well is considered a relatively airtight option, since the prefabricated elements are placed on a concrete bottom. But concrete walls allow water to pass through in small quantities if they are not insulated from moisture.
- From a plastic container. This model is sealed and storage, so it requires regular pumping of liquid.
Wells are made from car tires, which are placed one on top of the other.
Advantages and disadvantages
The sealed structure does not pollute the surrounding space; it can be used at any level of soil moisture rise during floods and rains. A permeable container allows you to save on pumping out wastewater, but the water goes underground and fills the surrounding soil. The lack of drainage bottom is compensated by the distance of the pit from the house, cottage, well, vegetable garden and garden.
Construction technology
Brick wastewater well
The site is prepared, a trench with a slope is dug at the pit construction site for the location of the collector. The slope is 2-3 cm per linear meter, the diameter of the free-flow system pipe is 100-120 mm.
Further step-by-step instructions:
- dig a hole of the required size;
- a layer of crushed stone 25–30 cm thick is poured at the bottom, or concrete is poured to a height of 10–15 cm;
- the walls of the pit are insulated from moisture and insulated;
- walls made of ceramic bricks are laid on the mortar;
- the pipe is embedded in the masonry, the joint is isolated from moisture.
The edges of the pit are covered with soil, a lid is made of metal or wood on top, and a prefabricated concrete one with a hole is installed. The pipe is laid in a trench over a layer of crushed stone 5–7 cm thick.
Drainage well
This system can only be installed in an area where groundwater flows at great depths. Otherwise, due to its design, such a well will always be filled with groundwater, which will make it impossible to collect wastewater in it.
First you need to decide on the location of the well; it’s good if the gap between it and the bathhouse is about 2 meters. At large distances, problems may arise when creating the desired slope of the drain pipe. At the same time, placing the well too close will lead to the foundation getting wet and subsiding in the future.
Now you can decide on the material for installation. This will usually be affected by the type of soil, because if the soil is crumbling, the walls will need to be reinforced, and this is a fairly common occurrence.
You can strengthen walls using the following methods:
- Dig a container made of plastic or steel that has no bottom. Holes will need to be made in it to allow water movement.
- Lay the masonry in half a brick, taking into account the gaps for water drainage. Alternatively, you can use wild stone for installation.
- You can take tires and stack them on top of each other. They need to cut off the edges and cut holes for water to escape.
- If the well is rectangular, its walls can be reinforced with sheets of corrugated slate. The laying should be such that the waves of the next sheet look perpendicular to the waves of the previous one.
Sequence of construction work:
- We make a hole for the well. It is better if its shape is in the form of a cylinder, in which case the pressure on the walls in all places will always be the same. Also, such a pit will be repaired noticeably less often.
- We strengthen the walls using one of the methods described above.
- Prepare the layer for filtration. At the bottom of the well we make expanded clay, crushed stone backfill, or a cushion of broken brick. A layer of sand is poured on top.
- Now you need to install a sewer pipe. To do this, you need to dig a ditch with a slight slope towards the well. A slope of 10 mm per meter of length is considered sufficient. It is worth remembering that the pipe must be laid below the freezing depth of the soil. Next, the pipe outlet can be inserted into the well.
- Install the well cover. It can be either concrete or steel, but it must be removable, because about once every 6 months the well will need to be cleaned and the filters replaced. Now cover the lid with film and fill it with soil.
The drainage well is now ready.
The outflow of water from the bathhouse into the sewer system
If there is a running central sewer system at the location of the bathhouse, then the optimal solution would be to drain the water directly into it. However, all plumbing work and organization of drainage in the bathhouse must be done before laying the final floor covering.
You will need to obtain a number of documents:
- a concluded agreement with a design bureau authorized to carry out installation and excavation work, which is confirmed by certificates;
- consent signed by neighbors to carry out any work on the site.
The air in the steam room will always remain fresh and fragrant if you follow a number of useful tips when installing the drain:
- If water is to be drained into the sewer system from several points in the bathhouse, then each drain hole must be equipped with a water seal, in particular, a siphon of any design. This device prevents unpleasant odors from entering the room by means of a water plug inside it.
- Ventilation of the sewer system, carried out from a 5-centimeter pipe leading to the roof of the bathhouse, serves the same purpose.
Thus, following the instructions, you can drain the bath yourself to ensure long-term and hygienic operation of the bath.
Step-by-step instructions for making a bath drain design
We proceed directly to installing the drainage system.
- The drainage system is installed before pouring the concrete wash floor. The first step is to dig a trench with a shovel for the drain pipe from the sewer pit to the bathhouse. This is done in such a way that a slope of 15 degrees is obtained. That is, the depth of the channel is taken to be equal to the diameter of the pipe (100 mm), plus another twenty centimeters offhand.
- Using a grinder, we cut a 100 mm x 100 mm square in the metal wall of the sewer pit. We insert the first pipe into the resulting opening - with the socket inside the container. We seal the remaining space around the crack with mastic. It seals the connection and at the same time secures the end of the pipe.
- After the mastic has dried, we continue the process. We insert the remaining pipes in such a way as to bring the line to the bathhouse. If necessary, hammer each link with a rubber hammer.
- The last link should fall between the pillars of the bathhouse foundation and go under the floor joists. We continue to work indoors. We attach a rectangular elbow or two elements to the final pipe, creating a right angle so that the main goes vertically upward. You may also need to insert a vertical pipe if it is too far from the floor level.
- We install a sewer drain.
- Having laid a temporary flooring of boards as formwork, we fill the floor with concrete.
Many bathhouses additionally add a special layer of waterproofing.
Drying of the coating takes up to three days.
Calculation of the required material
Pipe and tee made of polypropylene for laying the drain
The amount of material required to install the drainage system is selected according to a previously drawn up project. For example, to install the internal part of a drain measuring 5x5 m you will need:
- drain with direct outlet 105×105/50 mm;
- PP socket pipe Ø50, length 500 mm;
- straight pipe PP Ø50, length 1000 mm;
- straight pipe PP Ø50, length 2000 mm;
- adapter coupling 50–110 mm;
- PP outlet 45o.
If necessary, a polypropylene bend at 90° is used. The length of the pipe for connecting the drain can vary from 500–1000 mm depending on the height of the floor. If necessary, the pipe is trimmed. A product 2000 mm long is used as a drain pipe. When laying external communications, PVC pipes up to 3000 mm long are used.
Necessary tool for the job
To dig trenches and water inlets you will need a comfortable shovel
To carry out installation work you will need the following tools:
- bayonet and shovel;
- bubble level;
- construction knife;
- grinder with a disc for metal/concrete;
- container for sand/crushed stone.
To excavate soil to a depth of more than 2 m, it is better to use special equipment. This will speed up the work process. If all work is performed manually, then it is necessary to take care of safety precautions.
Digging a well should only be done with the help of a partner, who will ensure that the earth falling from the walls of the well shaft does not overwhelm the worker. All work is performed on a safety rope. The performer must be equipped with thick overalls and personal protective equipment in the form of a helmet, goggles and gloves.
The importance of the bath part called “drain”
The Russian bathhouse is a very extreme place. Temperature changes up to 150, especially in deep winter. High humidity and very serious temperature contrasts - up to 150. The only source of thermal heating. Fire hazard. Streams of water on the floor in the steam room and washing room. That’s why a well-made floor, and a well-made drain in the floor, is so important. It doesn’t even matter critically whether there is water supply in the bathhouse or not. In extreme cases, the barrel can be trained by hand. But the drain should function perfectly.
Principles of good drainage
- The drain must cope with any flow of water, especially in the washing room, and especially if a bucket with a chain is used.
- The drain must have a good water seal so that the smell from the sewer does not penetrate into the bathhouse.
- The drainage along with the pipes to the pit or septic tank must be designed in such a way that it never freezes in winter.
- The drain should be easily accessible in case of need for repairs: if the floors are cracked and there is a single drain below, then the boards should be easily removable; if the ladder is visible, then the ladder itself should be easily removable.
- The drain must be durable, so the pipes and the structure itself must be made of durable materials and parts.
What to do with the finished floor
The resulting coating is quite smooth. The final stage may be processing with a grinding machine. After this, it will be pleasant to walk on such a floor, but it is better to make a beautiful finish.
Hand grinder
Today, ceramic tiles are often installed in bathhouses. You can use special types - for example, glass. It has the highest strength and abrasion resistance. In addition, the tiles are not afraid of strong temperature changes.
There are entire collections on sale, created specifically for bath conditions. There are mosaic coverings in the form of sea pebbles on the bottom or entire ceramic paintings. In short, you can find a finishing option to suit every taste.
Glass mosaic tiles for floor
Drainage device in a concrete floor
A concrete floor has a significant drawback - it is cold. Despite this, it is often used in the construction of modern baths. Work on installing a drain in a concrete floor is carried out on an already poured foundation, immediately before covering the floor.
Step-by-step instruction
- Make holes in the heat-insulating material, into which you will later install a drain ladder.
- Mount the gutter at the bottom drain mark with an inclination of approximately 5 degrees to the side of the drain.
- Place and connect to the drain a pipe connecting the drain to the wastewater disposal system.
- After installing the finished floor, the holes must be sealed, and the drain must be covered with a grate.
The drain can be installed either in the center of the steam room, or in a corner, or against any of the walls. The last option is more common, since it is technologically the easiest to implement.
The result is a diagram:
- water after use moves to the drain;
- from the drain through the gutter it enters the ladder;
- from the drain through the sewer pipe - into the existing wastewater disposal system.
Further drainage of wastewater is carried out using one of the following systems:
- natural filtration;
- drain hole;
- drain well;
- soil under the building (pit);
- sewerage system.
Approximate calculations of the material spent on various floors
Calculating the material required for arranging the floor is very important for the home craftsman. After all, it would be completely inopportune if, in the midst of work, it turns out that there are not enough boards, cement or insulation. Therefore, the HouseChief editors present an example of a ready-made calculation for a small room with an area of 3x3 m.
PHOTO: ldnstroy.ru Expanded clay is a very light, inexpensive material that provides insulation and drainage
The amount of material required for arranging a concrete floor
All indicators are based on 1 m2 of area. We present the final results below. The first layer is filling with fine sand at the rate of 0.12 cm. The next layer is expanded clay - 0.3 m. Next is 10 cm of extruded polystyrene foam. Now the concrete screed. Its thickness should not be less than 6 cm.
We get the following results:
- fine sand – 1.08 m3;
- expanded clay – 2.7 m3;
- expanded polystyrene – 2.5 packs;
- concrete solution (ready) – 1,134 kg.
Also, do not forget about the need to use reinforcing mesh, waterproofing material (placed between sand and expanded clay), a sewer pipe with a siphon and screed beacons (18 m of them will be required).
PHOTO: remontnik.ru The main thing is the competent and calculated organization of the ladder for draining water and the slope of the floor
What is needed to install a classic wooden floor
Here we will also consider the material consumption for a room of 9 m2 (3 × 3 m). Afterwards, everyone will figure out the calculations for each specific room themselves. To begin with, by analogy with the previous example, we will indicate the amount required for 1 m2.
PHOTO: drive2.ruClassic wooden flooring is laid on logs or beams fixed to the base
A beam with sides of 3 or 4 cm. The distance between the beams should be about 0.5 m. An unplaned board from which the subfloor will be mounted - 6 m per section between the beams. Beam for drain slope, as well as for joists under the base, roofing felt for the waterproofing layer, sewer pipes.
The total result of the calculations is:
- timber for the base – 30 m;
- rough board (250×25 mm) – 30 m;
- roofing felt – 16 m.
You also need insulation with a thickness of at least 8 cm and galvanized sheets in the amount of 11 m2.
PHOTO: drive2.ruIf you plan to use the bathhouse in winter, then you can’t do without floor insulation
Now let’s try to understand the algorithm for arranging a wooden floor in a bathhouse using step-by-step instructions with photo examples.
Step-by-step instructions for arranging the floor in a bathhouse
In order for the floors to be of high quality and durable, it is necessary to properly arrange the cushion and breathable layer. In today's example, everything is simpler. Here, a screed was poured over the waterproofing layer, on which it was planned to lay the boards. Let's look at photo examples of how to make a classic floor in a bathhouse with your own hands.
| Illustrations | Action to be performed |
| The first thing that needs to be done is to lay the logs, calculating the distance between them in such a way as to cut the insulation as little as possible when laying it between them. The base must be strong - the quality of the entire structure depends on this. | |
| The logs here have one feature: the support closest to the wall is 2 cm higher than the central one. After laying the finished floor, this will create the correct slope necessary for good water flow to the center. | |
| Now you can lift the assembled structures and take them outside for treatment with special compounds. One of the varieties of such compositions is liquid glass. This impregnation perfectly protects wood from moisture and prevents the appearance of fungus, mold and rot. | |
| After the logs have taken their place again, they are fixed to the foundation supports or walls, and polystyrene foam is laid between them. It cannot be laid closely, and therefore the remaining cracks are filled with polyurethane foam. | |
| A tongue and groove board was used as a floorboard, all the locks of which were pre-coated with silicone sealant. This will prevent water from penetrating into those parts where the insulation is located. | |
| A galvanized metal drain was made in the center of the steam room. Its edges are folded and tucked under the tongue and groove board. In fact, it can be made much smaller. | |
| There is a small gap left from the wall. It is necessary for ventilation of the space under the finished floor. A block is fixed along the edge of the floor, and the cracks are also coated with sealant. | |
| The final touch is to place a galvanized box on the block, which will prevent water from leaking under the floor. Now you can use the bathhouse. |
This is roughly what the algorithm for installing a leak-proof classic wooden floor in a bathhouse looks like.
Construction of a brick drain
A brick cesspool is the most ancient option for arranging sewer walls. It can be sealed or with an open bottom. To facilitate construction, it is necessary to prepare a foundation pit with smooth walls so that the brick can be laid close to them. This will significantly speed up the work, especially if there is not enough experience in this area. A home cesspool made of bricks is placed on cement mortar. You cannot use light sand masonry, because in conditions of constant humidity, a collapse will be inevitable.
The masonry is done in half a brick in a circle. This way the corners hold each other tightly. With this method, additional modernization is possible to improve tightness. To do this, you need to plaster the walls and fill the bottom. You can use old bricks taken from destroyed buildings. This construction method takes the longest. A brick cesspool is one of the most reliable, and if you use a strong mortar, its destruction will not happen soon. You just need to prepare a hole for the inlet pipe in advance, since it will be difficult to break through the wall later.
Methods for organizing the drainage of water from a bathhouse
Today, several options for water removal are known. All of them are not very expensive, but are quite effective.
Since the construction of the latter does not present any particular difficulties, you can build them yourself:
- a system that includes a drainage pit and a septic tank. Expanded clay and broken brick are used as its filler. The water is purified by microorganisms; after purification is completed, it can be used to water the plants on the site;
- well construction. Risers are installed in this tank, where sewage accumulates. In the future, periodic pumping out of waste and its removal will be necessary.
The downside is that it is necessary, from time to time, to call special sewage trucks (the price of such services is rather high), for which it is necessary to provide passage. In addition, the well is dug at the lowest point of the site;
This is not the best option, but it happens often
- an option that uses natural ground filtration. Here, wastewater ends up in a filtration well without a bottom, on the basis of which layers of loading-filtrate are filled. Water passing through them is purified and then absorbed into the soil over a large area. The downside is that you will have to lay pipes throughout the entire area, which will be expensive.
How to drain a bathhouse under the floor
During bath procedures, water flows directly onto the floor (unless we are talking about taking a shower in a specially equipped shower stall). Therefore, this floor must either allow water to pass below into the catch basin, or be waterproof and sloped towards the catch basin. The first type of construction is realized by installing wooden floors with intentionally left gaps or wooden gratings.
Water, penetrating into the cracks, flows below, into the basement or through the plank floor onto the ground, and gradually evaporates. The boards dry and are ready for new use.
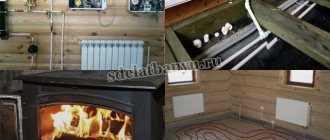
However, such a floor still takes quite a long time to dry (especially if there is a small gap between the flooring and the base), so it is better to install a two-layer wooden floor, as shown in the figure below.
In this option, first a rough flooring is laid with gaps between the boards of 20...50 mm, then logs are laid so as to ensure drainage to the drain hole, then another layer of boards with smaller (10...15 mm) gaps. Of course, the finished floor boards are laid so that the gaps between them do not coincide with the cracks in the bottom layer. But this option is acceptable mainly for a “summer” bath, when drafts and cold from below are not critical for the temperature in the steam room and wash room.
Another, relatively budget-friendly option for a “cold” floor is installing joists on asbestos or other pipes.
In this case, the pipes are placed on a cushion compacted with crushed stone and sand, and the logs are placed directly on the pipes. In this case, the leaking floor is better ventilated, and the water goes into the ground through a layer of crushed stone and sand, thus being purified. In addition, the compacted cushion prevents wet soil from spreading as quickly.
Interesting: if there is no desire or opportunity to install a cushion over the entire area of the underground, you can make a thinner layer and make a trench with greater depth in the place of the most active drainage.
Performing hydro- and thermal insulation
When studying the issue and trying to understand how to properly pour a concrete floor in a bathhouse, you cannot ignore the laying of layers of insulation. Without proper protection, the floor will not last long and will not provide comfort. Protection is needed both inside the room itself from moisture and from the ground.
Laying roofing felt
Waterproofing is usually made of roofing felt, which is laid in two layers. The roofing material is rolled out over the entire area of the room, overlapping with a bend on the walls of 3-5 centimeters. Where the sheets adjoin the walls and overlap, they are coated with bitumen mastic.
The second layer of waterproofing is laid in the same way, slightly moving it tangent to the first. The bottom and walls of the pit must also be covered with two layers of waterproofing.
Installation of EPS
Before pouring a concrete floor in a bathhouse, you also need to take care of thermal insulation. It is best to choose extruded polystyrene foam, which comes in slabs 5 centimeters thick. The material is not afraid of moisture and demonstrates good mechanical strength and density. Along the perimeter, the slabs have tongue-and-groove projections, thanks to which you can easily and quickly create a continuous thermal insulation layer.
Work begins from the pit, then the walls are lined flush with the floor, then the slabs are mounted on the floor itself. Any gaps between the material are carefully filled with polyurethane foam to create a monolithic layer of thermal insulation.
Where and how best to drain the water?
But where the water itself will go - it all depends on the planned budget and the load on the drainage. So, it never hurts to build a separate cesspool at a distance from the bathhouse, and then lay a trench from it and put a sewer pipe in it with good insulation.
And the most budget option is to put gravel (both large and small) directly under the sink, where the water will go.
Funnel made easy
Some bath attendants also make something like a funnel under the washing and steam room - they concrete its walls and coat it with liquid glass. In the center of such a funnel is a drain pipe that extends beyond the bathhouse: into a pit, the walls of which are reinforced with bricks, or the pit itself is an old iron barrel without a bottom.
At the bottom of the pit there is gravel, at the top there is a thick metal lid and a hole for the ventilation pipe. Judging by the reviews, such a simple but reliable system may not be opened for ten years.
We also recommend reading the article about installing a shower drain in the floor under tiles on the Vannapedia website - the technology for installing a classic water drainage system is very well described there.
Drainage hole outside the bathhouse
But some builders today are convinced that the water must be removed outside the bathhouse. They say that sand takes a long time to dry even in summer, and in winter all the water that goes under the foundation in the old fashioned way will simply turn into ice - and you can forget about warm floors in the steam room until spring.
Others are sure that very little water is used for one or two people in a bathhouse, the steam room is usually used from time to time, and if you take not ordinary sand, but a large fraction, then no problems should arise...
But the pit itself can be made using a technology that has recently become especially popular among bath attendants: the pit is made from tires of a jeep or similar car. The water flows into this pit through plastic pipes, and to prevent cold or unpleasant odors from entering the bathhouse in winter, a water seal is made - something like a water lock:
Step 1. Take a five-liter plastic bucket, make a handle from galvanized tape, and place an iron pipe on the lowest cord from the top tire - across the pit. A bucket is hung on it - it will hang like a cauldron over a fire, below the top level of the pit.
Point 2. A corrugation is put on the end of the sewer pipe, which is lowered into the bucket from above - it will be located at a distance of 10 cm from the bottom and 10 cm from the edge, i.e. in the middle of the bucket. That's the whole hydraulic lock - after draining, all the water will be collected in a bucket and overflow, carefully flowing into the hole. And when the draining stops, the water that remains in the bucket will prevent the same air from entering the bathhouse. And, even if dirt or leaves settle on the bottom of the bucket, you can always turn it over to clean it.
What system to make for a large number of people?
For a steam room, which is visited from time to time by three or four friends, you need one water outlet in the bathhouse, but for a whole group of regulars, it’s a different one. In a bathhouse for a small number of steamers, a drainage hole is usually installed directly under the foundation. Its walls can be lined with bricks and covered with coarse sand - just right for a summer bath. But in the second case, you will need a special pipe that will go into the drainage well - and below the freezing level of the soil, otherwise it will freeze. Or you can combine both methods - using the first in the summer, and the second in the winter.
And so that the water from the bathhouse does not go to waste and does not pollute the surrounding environment, you can use a septic tank that will purify it and distribute it through irrigation pipelines. The most complex and expensive way to remove and purify water from a bathhouse is a well with biological filters. It contains slag, broken bricks and crushed stone. The whole secret is that when bath wastewater constantly enters a well, it becomes covered with silt over time, and in the silt there are microorganisms that then purify the wastewater. Such a septic tank is usually built in the lowest place on the site.
That's all! Nothing complicated - you can do a proper drain in a bathhouse with your own hands.
conclusions
There are many ways to make the water in the bath drain away, and each time the most suitable one is selected according to local conditions.
- The most archaic drainage of water is under the floor into a drainage pit filled with rubble. The method is suitable for washing, which is rarely used;
- A medium-complex option is a shower tray that connects to the existing sewer system in the bathhouse;
- The most advanced option is a water drainage system built into the floor. It works over its entire area, so this washing machine is very convenient to use.
Important points:
- A water drainage system should be provided at the foundation stage;
- A water seal is required for a system that has a drain into the sewer. If the drainage is into a drainage pit, then it is desirable, but not necessary.
- Water should not seep under the floor (except for the rare option with a drainage hole)
- Stagnation of water should not be allowed in any element of the waste system (except for a small amount in the water seal);
- All materials used must be moisture resistant (with the exception of wood for the front flooring, but this is no longer a drain).
Drainage in a bathhouse does not require large expenditures, but adds significant convenience. It is built in almost every bathhouse, regardless of the allocated budget for its construction.
Installation of waste septic tanks
With intensive use, the sewer system requires periodic cleaning. The most effective cleaning method is septic tanks, which do not require the use of sewage disposal equipment.
A septic tank provides for the sequential purification of wastewater in various ways. First, the water is purified from contaminants, then disinfection occurs, and at the final stage, the water is discharged into the ground or used for irrigation.
Instructions for setting up a simple septic tank with 2 chambers for private needs:
A pit up to 3 meters deep is dug at a distance of 2 meters from the bathhouse. Filter layers of sand (up to 15 cm high) and crushed stone (10 cm) are placed on the bottom and compacted thoroughly. Concrete rings are immersed on the sand-crushed stone layer to impart rigidity to the future structure. The walls of the well are reinforced with brickwork. Next to the main well, a pit is dug for a well of smaller depth and diameter, which is equipped in a similar way. The bottom of the first well and the gaps between the rings are filled with concrete mixture to ensure complete tightness of the structure. Drain holes are made in the upper part and the rings of both wells are connected using pipes
In this case, it is important to maintain a slight slope of 2.1 cm per meter towards the deep well. The joints are covered with cement mixture. A sewer pipe is supplied with a drain from the bathhouse to a smaller well. The wells are closed from above with reinforced concrete slabs or hatches, in which small holes are made for installing ventilation pipes.
The first well is intended for rough water purification, the second - for eliminating organic waste using earthen bacteria.
If you have available funds, you can use ready-made septic systems available for sale. The process of installing such equipment consists of digging a pit and supplying a sewer pipe.
This is the most expensive option for organizing a drainage system for private baths. It can operate in automatic mode, with cleaning quality reaching 97%. The removal of purified water from the septic tank in the finished system is carried out using a drainage pump. This water can be used for irrigation of a personal plot and technical needs.
High-quality drainage for a modern bathhouse is a fairly important and responsible process that requires technical training, financial investments and free time.
Installation of a ground filtration system
A septic tank operating in autonomous mode is the main element of a soil filtration system. It simultaneously functions as both a sump tank and a well that distributes water. Pipes emanating from it distribute filtered water throughout the area.
There are ready-made septic tank designs, but they are quite easy to assemble with your own hands. Typically plastic or metal elements are used for this. A septic tank made of concrete or brick would also be an excellent choice.
In order to make a septic tank with your own hands, you will need concrete rings with a diameter of 1 m.
The process of making a septic tank is not complicated, but a certain sequence should be followed:
- First, a hole 2-3 m deep is dug. The distance from the wall of the bathhouse should be at least 1.5 meters;
- Next, you need to pour a layer of sand at the bottom of the pit, as well as a layer of natural filtrate. Broken brick is suitable as a filtrate;
- Concrete rings are lowered into the pit.
The finished tank is immersed in the ground to a depth of 1.3-2.7 m. Next, a sewer pipe is connected to it, which should be below the soil freezing level.
Next, the pipes are prepared. Usually their diameter does not exceed 10-12 cm. Ordinary sewer pipes can also be used as drainage pipes; you just need to make holes in them.
Important! It is necessary to ensure that the diameter of the holes gradually increases from the beginning of the pipe to its end. This will ensure a uniform outflow of moisture. In order to properly set up a ground filtration system, you must follow the basic rules:
In order to properly set up a ground filtration system, you must follow the basic rules:
- Each drainage pipe should not be longer than 0.25 m;
- Pipes must be laid below the freezing depth of the soil;
- Drains should be located at a distance of 1.5-1.6 m from each other;
- The trench for laying the pipe must be at least 0.5 m wide.
Draining a bathhouse with your own hands - a step-by-step guide:
- First of all, trenches are dug with a slope of 1.5-2 degrees. This is done to ensure that the pipes being laid are on a slope;
- Next, a base for the pipe is laid at the bottom of the trench. It is different for each soil type. For example, for clay soil, sand 10 cm thick is laid at the bottom of the trench, and a layer of gravel of the same thickness is placed on top;
- After the pipe has been laid, it should also be covered with a layer of gravel on top;
- A ventilation pipe is installed at the end of the drain, the height of which does not exceed 0.5-1 m. A protective fungus is installed on top of it to prevent debris from getting into the pipe.
Non-spill floor
It is considered a more reliable way to arrange a drainage system for a bathhouse. Step-by-step execution of construction work:
- Before pouring the foundation, a place for installing the pipes is arranged.
- The pipe must be tightly connected to the drain pipe.
- Pour the foundation of the steam room.
- Carry out complete waterproofing using bituminous materials and expanded clay or crushed stone granulant.
- Make a subfloor with an angle of 4-6˚ to the drain hatch.
- Carry out thermal insulation and waterproofing work.
- The final stage is to lay the finished floor, the hole for water drainage is closed with a grate.
Pipeline slope calculation
Scheme for calculating the slope of the pipeline depending on the diameter of the pipe
To achieve normal drainage of water from the room, it is not enough to lay the tiles at an angle to the drain hole. Designing floors with a ramp also involves calculating the optimal slope of the water supply system. This parameter determines whether the water will flow into the sewer by gravity or not.
During the construction of a bathhouse, the degree of inclination of the sewer pipe is often determined by the values recommended in SNiP. However, in some cases, the standard proposed by SNiP is not suitable for arranging floors. In such situations, additional calculation and design of the pipeline slope is required.
The required parameter is determined using the following formula:
D*√L/H ≥ M, where:
- M – slope coefficient;
- D – speed of water movement through the pipe;
- L – liquid filling level of the pipeline;
- H is the diameter of the sewer pipe.
How to make a floor in a bathhouse: construction of a subfloor
How to make a floor in a bathhouse with an underground floor? Its construction begins when the columns are ready. If the soil absorbs water well, then install a leaking floor: make a backfill of crushed stone 25 cm thick as a filter, which prevents the soil from silting and reduces humidity. Thanks to this, the subfloor dries out quickly.
If the soil does not absorb moisture well, then it is necessary to provide a special tray for water waste in the soil into a pit, and from there into the septic tank.
For this purpose, a clay castle is installed under the floor, which should be inclined towards the pit. On top of the soil in the underground, pour crushed stone in a layer of 10 cm and compact it thoroughly. Then lay clay 15 cm thick and form it into a horizontal slope directly towards the tray.
A pit is made in the washing compartment and an outlet pipe (internal diameter 15 cm) is led out from it.
If the floor is leak-proof, the logs are mounted from the walls to the pit. The logs that complete the structure are placed higher than the next beams; cuts are not made into them. The remaining logs are equipped with notches with a slight bevel of 0.2-0.3 cm.
The same notch is installed in the place where the logs come into contact with the support column. The covering should be placed at an angle of 10°.
Logs for leaking floors are installed at the same level. Work begins from any wall. But the timber under the logs should be 3-4 cm away from the wall for ventilation.
Logs, pre-treated with an antiseptic, are placed on support posts and embedded beams using waterproofing material - glassine, roofing felt, roofing felt.
When installing a floor in a bathhouse with your own hands, using a building level, be sure to check whether the assembly is carried out correctly.
If for some reason the joist does not fall into place, you can slightly trim it where it rests on a post or beam
Therefore, it is so important to use a building level to clarify how evenly the beams are positioned relative to each other. To level them, the logs are cut down or, conversely, pads placed under them are used
Installation of floor skirting boards
Moldings for finishing a bath
The profile of the skirting boards does not matter, choose which one you like best. Skirting boards are nailed with nails 30÷40 millimeters long, the specific values depend on its thickness and width.
The shape of the plinth and the cutter for its manufacture
Prices for different types of skirting boards
plinth
Step 1. Take measurements of the steam room around the perimeter. Skirting boards have a standard length of two meters, and most paired ones are wider and longer. This means that the moldings will have to be joined. If in ordinary rooms uneven joints can be sealed with wood putty or colored sealant, then in a bathhouse this method of eliminating errors cannot be used; the putty will quickly fall off. Try to make the joints of the skirting boards in inconspicuous places: behind the stove, near containers with water, under a shelf, etc. Of course, be very careful when cutting the skirting boards; the tool must be sharp and in good working order.
Wooden plinth and heat-treated abasha strip
Step 2. Check the corners of the bath, they should all be exactly 90°. File the end of the baseboard at a 45° angle. For even cutting, use a factory-made miter box or make the device yourself.
How to cut a floor plinth
We recommend cutting with a hacksaw - the cut area is much smoother. Always apply the left plinth to the miter box on the left, and the right one on the right, to the side away from you. Otherwise, instead of an external corner, you will get an internal one and vice versa. If you rarely work with a chair, we advise you to write on its sides where to install the left and right ceiling and floor plinths on the outer and inner corners.
The photo shows the joining of skirting boards in the inner corner of the room
Video - How to join skirting boards
It is somewhat more difficult to cut the baseboard if the angle of the steam room is different from straight. If you do not have enough experience, we advise you to try cutting any slats for the first time. Install them in the right place so that they rest against the walls. Use a pencil to mark where the slats intersect.
Example of plinth markings
From these marks, draw straight lines to the corners, make a cut along the lines. Check what you got. Everything is correct - excellent, repeat the same operations with the baseboard. A large gap has appeared in the gley - think about where you made the mistake, repeat all the operations again, taking into account the error. This does not take much time and will save expensive material.
Accurate joining of skirting boards is very important
Step 3. Start nailing the baseboard from the corner of the bathhouse, step back 2-3 centimeters from the cut point, nail the nails at an angle at a distance of 30-40 centimeters.
Step 4. Using the same method, nail the baseboard on all sides of the steam room. Check their position and, if necessary, remove burrs or lint with sandpaper. If there is a noticeable difference in height at the joints, then first remove them with a sharp chisel, and then correct them with sandpaper.
Installation of wooden plinth in a bathhouse
That's all. In Russian baths, as a rule, the floors are not varnished or painted, but if you really want to, apply a topcoat. Just keep in mind that no matter how durable coatings you use, they will still peel off - the operating conditions are too harsh.
Now let's look at how to make pouring floors in bathhouses on a strip foundation.
What should good poured floors look like?
The poured floors are wooden, they are made from boards that are not closely fitted to each other, but at a distance of several millimeters. The floor ends up with visible cracks. This is its main meaning: the water used for washing does not stagnate on the boards, but immediately spills through the cracks into the underground space. From here, the water is redirected through the drain hole through the pipe outside the bathhouse. Some bathhouse owners don’t bother and leave this water to soak into the ground. In my opinion, this is a very bad idea.
Yes, it’s simple: you don’t need to waterproof the underground space, do drainage, or take care of the sewage system. But all this simplicity will negatively affect your health and the health of your family. All used water will not be absorbed into the soil and soap flakes with remnants of dirt, bath leaves, and branches will settle on its surface. Let's get a real breeding ground for fungi. And fungi, as you know, emit a huge amount of harmful substances that cause allergies, pulmonary and many other diseases. So I don’t advise anyone to make a blatant “sewer” under the bathhouse! All used water must be diverted away.
An approximate diagram of pouring floors that you can use as a guide