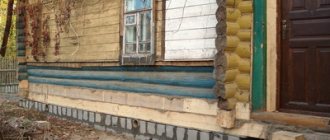
From time immemorial, the insulation of a wooden house has been done using caulk. This is hard and time-consuming work that requires accuracy and certain skills. Today, in the age of high technology, new methods of insulation have been invented, which are replacing the ancient craft. Disputes about the best way to close the gaps between beams or logs are ongoing. Many adherents of progress use foam instead of caulking to seal crown joints; conservatives prefer the traditional method of thermal insulation using caulking. Let's figure out what material is best to insulate a house and why.
What is better for insulating a wooden house: foam or caulk?
From time immemorial, the insulation of a wooden house has been done using caulk. This is hard and time-consuming work that requires accuracy and certain skills. Today, in the age of high technology, new methods of insulation have been invented, which are replacing the ancient craft. Disputes about the best way to close the gaps between beams or logs are ongoing. Many adherents of progress use foam instead of caulking to seal crown joints; conservatives prefer the traditional method of thermal insulation using caulking. Let's figure out what material is best to insulate a house and why.
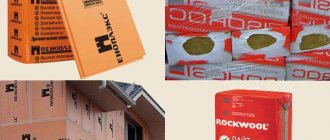
The best fire-resistant polyurethane foams
Specialized compounds are in demand when performing manipulations in buildings with high temperature conditions, we are talking about factories, baths, restaurants, nightclubs and other specific institutions.
The fire resistance of the material for external and internal work is due to the addition of fire retardants to the mixture; when considering this market segment, it was possible to identify 3 leading brands, a detailed description of which is attached.
NULLifire
The quality of the product is at a high level, the created layer is able to contain fire for up to 4 hours, while preventing the release of smoke and toxic gases. The product has a safety certificate, which every consumer can familiarize themselves with; such documents deserve attention.
880 ml cylinders are available for sale, from which 45 liters of solution come out, the valve is designed in a universal version, you can use either a gun or apply the composition using a nozzle. The recommended temperature when filling spaces is the range from +5 to +35 degrees. Pros of the model:
- There is decent sound insulation.
- Excellent adhesion with most base materials is achieved.
- Stickiness is lost after 10 minutes.
- The maximum operating temperature is +130 degrees.
Among the disadvantages, experts note the weak protection of the layer from exposure to ultraviolet rays; the price will also seem high.
Rush firestop flex 65
This product sample has a lot of positive aspects, which look like this:
- Excellent moisture resistance.
- Temperature range for operation is from -50 to +90 degrees.
- Low price.
- Reliable fixation on different surfaces.
The manufacturer does not recommend applying the solution in a layer exceeding a thickness of 5 cm, otherwise the material may begin to bubble. The container has a short shelf life, it is only 9 months; for storage, the cylinders are placed vertically so that the mass does not lose its beneficial properties.
From a composition of 1 ml using a gun, you can get 65 liters of an airtight and fire-resistant mixture, consumption is extremely economical, and primary treatment is available within 35 minutes after application.
Remontix pro 65
In addition to the G1 flammability class, similar models for PVC windows are distinguished by such strengths as:
- Ability to do work in any weather conditions.
- By using washing liquid, you can easily wipe away foam stains.
- High service life of finished seams.
- Fast hardening.
The applicator comes complete with the product; when spraying the mass, it evenly falls on a plane made of any materials, creating good adhesion. Using the product, you can fill fairly large voids, and then be confident in the quality of the adhesion of the composition.
Consumers have noticed some problems when combining with a polymer coating if the surface is not carefully prepared for the process.
Material requirements
Before answering the question: which is better, it is necessary to provide a list of requirements for insulating material for a wooden house:
- Vapor permeability, i.e. the material must freely pass through itself water vapor that forms in a warm house. If the material does not have this property, moisture is retained in the insulation without coming out. As a result, the heat insulator gets wet, the wood becomes damp and begins to rot.
- Moisture resistance. This characteristic indicates that the insulation does not accumulate moisture.
- Resistance to microorganisms and fungi.
- Breathability. The material must allow air to pass through well.
How to work with polyurethane foam correctly?
Purchasing a high-quality construction product is the basis for success when performing installation work. But in addition to having good quality foam, it is important not to make mistakes when working with it. Otherwise, all the effort spent on choosing a product will go down the drain! The following recommendations will help you avoid mistakes:
- If you plan to work with deep cracks, divide the work into several stages. The presence of several approaches in the work process will negatively affect the efficiency of completing tasks. But you will have confidence that filling the voids will be done really well; before using the adapter foam, you need to shake the container.
- When working with foam in a container, the container must be held upside down.
- It is advisable to fill the voids in the seams using V-shaped movements in the direction from bottom to top.
Without following the work technology and a responsible attitude to the choice of polyurethane foam, it is difficult to achieve good results when sealing.
Looking for adapter foams for household use? Interested in professional sealing products? The specialists of the online store 7745.by will help you choose a construction product that suits your needs. They work with such well-known brands as FOME PRO, PROFPUR, AUSTER and many others. Delivery of products is possible to all regions of the Republic of Belarus. Also, for your convenience, there are pick-up points in Minsk and all regional centers.
Information provided by the online store: https://7745.by.
Advantages and disadvantages of caulking
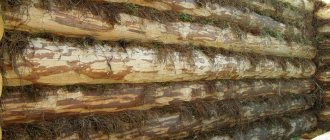
The log house is caulked only with natural materials: moss, jute, tow, flax.
- do not violate the environmental friendliness of a wooden house;
- do not interfere with the air exchange of wood;
- They retain heat well in the house because they have low thermal conductivity.
Article on the topic: How to attach paneling in a bathhouse vertically or horizontally
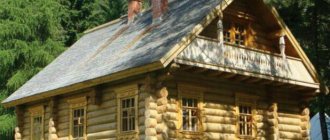
A log frame, caulked in the classical way, looks very expressive; the color of a traditional Russian hut is preserved in the house. Additionally, the crown seams are decorated with jute tape or cord, and a rope or decorative cord is laid between the logs. This not only improves the appearance of the house, but also improves its thermal insulation.
Despite many positive aspects, caulking also has some disadvantages:
Firstly, it is a long and tedious job that requires a lot of effort and patience. It is very important to have experience and work skills. Even a non-specialist can caulk logs. However, there are many nuances. If the seams and joints are caulked incorrectly, the house may become distorted, the insulation may be pulled apart by birds, or it will be knocked out during shrinkage. Every problem has its own solution, which only professionals know.
Secondly, caulking is done several times. This work cannot be done once and for all. The primary one is performed during the construction phase or immediately after its completion. The log house is caulked the second time after the main shrinkage has passed, the work is done both outside and inside. If the exterior finishing has not been done, then a third caulking is done 3-5 years after the construction of the house. In some cases it is necessary to perform intermediate caulking.
It should also be taken into account that only moss, and to a lesser extent tow, has good antibacterial properties. The remaining insulation materials must be treated with special compounds. On the other hand, tow tends to accumulate moisture, so it is advisable to use it to caulk areas that are least exposed to the influence of natural precipitation. Birds love to take away natural insulation materials, so you will also have to take care of protecting the material.
Sealing and insulation of the crowns of a wooden house.
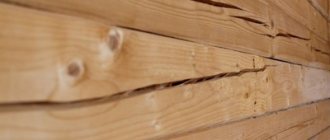
Despite the large number of modern building materials, many people prefer to use wood for individual construction. Wooden houses undoubtedly have their advantages: reasonable price, environmental friendliness, beautiful appearance. But there are also disadvantages. Wood becomes very deformed when exposed to moisture, dries out and cracks. Constant movements of the foundation, which occur at any time of the year, also lead to an increase in the size of the seams between the crowns of a wooden house. Ultimately, the wooden structures of the house lose their tightness and begin to let cold air and moisture inside. The problem can only be solved with the help of a professional wood sealant. Some people mistakenly believe that foam, putty, or any sealant can be used to seal wooden structures. In fact, selecting a sealant for wood is a rather serious task.
Wood sealant must have high elasticity. Polyurethane foam does not have this property; therefore, with subsequent deformation of wooden structures, they will not be able to provide sufficient tightness.
Silicone, polyurethane, thiokol, butyl rubber sealants and mastics do not have good adhesion to wood. They do not have the required degree of deformability and, moreover, do not match the color of wood well. Additionally, many of these sealants cannot be used indoors.
Accordingly, the ideal sealant for wood is an acrylic sealant with a high degree of deformability. Of the sealants presented in our company’s assortment, acrylic sealants for wood Atacamast 125 and Rustil-acrylic for wood are best suited for this work. These sealants have high deformability and excellent adhesion to wood. If you need to seal cracks in the wooden structures of your home, or fill the joints between the wall of a wooden house and a window block, door frame, etc., then our wood sealant is the ideal solution.
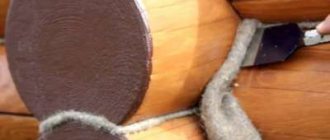
Now let's move on to the issue of insulation and sealing of the crown joints of a wooden house from the outside. Let us immediately note that it is better to carry out this work after the initial shrinkage of the house, that is, the next year, after laying the walls of the house. Before using wood sealant, you need to fill the gaps between the logs with insulation. For these purposes, a Vilaterm or Izodom tourniquet of the required cross-section and diameter is best suited. It performs several important functions at once.
First, it is a filler that reduces the consumption of wood sealant. Secondly, the tourniquet improves the thermal insulation of the inter-crown seam. Thirdly, a bundle made of foam material acts as an anti-adhesive gasket, which ensures that the wood sealant adheres to only two points - on the edges of adjacent logs.
Sealants Atacamast 125 and Rustil-acrylic for wood do not stick to the sealing gasket, because has adhesion only to wood. Consequently, if you fill the seam between the crowns with a Vilaterm (Izodom) type harness, then the layer of sealant will be, as it were, stretched over the sealing gasket and secured along the edges to the logs. Why is this necessary? Because without such insulation, wood sealant penetrates into the gap and sticks to the inner surface of the logs. This effect is called: three-point adhesion. If the logs become deformed, then the sealant that has filled the entire internal space of the seam will simply come off one of the logs and all your work will be useless.
It should also be noted that before starting work, the seams should be cleaned of dust, varnish, and old paint; it is also better to lightly sand them. It is better to carry out work at moderately warm air temperatures (about +20°C). In very hot weather, the surface should be slightly moistened. To ensure that the seam is even, use construction tape.
Summarize! The main tasks that our technology for sealing a wooden house solves:
Elimination of seam leaks. Protection from negative destruction of harmful insects. Durability. Serves for 20 years. Elimination of re-caulking. Preventing birds from pulling away insulation. Beauty and aesthetics. Reduces heat loss. Keeps your home environmentally friendly.
Thus, with one shot you kill 8 birds with one stone. A tube of sealant costs 310 rubles 900 grams, it is enough for about 15 m.p.
Pros and cons of polyurethane foam
Since the caulking process is very labor-intensive, many are trying to find other easier ways to seal the seams between the beams.
One option is to foam the joints with polyurethane foam. Let's figure out whether this can be done and how effective this method is. The material has excellent performance characteristics:
- high heat and sound insulating properties;
- moisture resistance;
- non-flammability;
- ability to densely fill voids and cracks.
In addition, the big advantage of polyurethane foam is its simple and quick installation and inexpensive price. For this work it is not necessary to hire installers; it can easily be done independently. It is these indicators that, first of all, those who have made their choice in favor of this insulation are guided by.
Article on the topic: How to install corrugated fence posts
However, foam cannot provide a home with reliable and high-quality thermal insulation because:
- does not have sufficient elasticity, which leads to the formation of cracks and crevices when the timber moves during shrinkage;
- when heated strongly, it releases harmful toxins;
- cracks and collapses under the influence of UV rays;
- wood is a breathable material, foam does not allow air to pass through, it simply clogs the pores in the wood and deprives it of natural air exchange;
- Moisture can accumulate at the junction of the foam and the timber, which leads to rotting of the wood.
As you can see, the list of shortcomings is quite wide, which limits the scope of its application.
With great reservations, you can foam cracks and roof joints in wooden houses only if this option is considered as a temporary measure.
Positive characteristics of elastic polyurethane foam and its advantages
In the construction of wooden houses from timber, the construction of frame-panel buildings, filling voids in building materials with different expansion rates for installation and finishing work, thermal and noise insulation between structural elements, highly elastic foam PURAFOAM 5175 from modified polyurethane is widely used.
Due to its distinctive characteristics, it has a number of advantages:
- Ability to withstand large weight and deformation loads;
- The high adhesive ability and elasticity of the mass of the composition prevents the occurrence of edge breaks and the formation of cracks during operation, which improves the durability of the foam and maintains thermal insulation and noise insulation up to 60 dB for a long time;
- Perfectly grips elements of wooden structures, PVC, metals, polymers, concrete, brick;
- When the surface is wetted before applying elastic foam, its fine-cell structure, sealing properties are improved, and the structures fit more tightly to each other;
- Thanks to high elasticity, seams and joints are elastically strong and durable and can last for more than 30 years;
- Ability to use foam at sub-zero temperatures (down to -10°C);
- The moisture resistance and fine porosity of the foam give it electrical insulating properties;
- Due to their highly expansive properties, they completely fill voids and cracks, which ensures increased strength and reliability of the seams;
The product is certified by the world famous to meet the highest requirements of compliance with the declared qualities.
Professional services
Experts do not recommend using foam to insulate a wooden house and bathhouse. Although caulking inter-crown joints is a more complex and time-consuming job, it guarantees good and reliable thermal insulation, provided that the work is carried out efficiently and professionally.
When performing work, we conclude a contract and agree on an estimate in writing. The stages and timing of the contract , guarantees and a list of materials used are also recorded in writing.
If you are attracted to new technologies and want your home to look modern and stylish, we suggest using the service of sealing log seams with sealant. This material is specially designed for insulating seams between logs and beams and provides a reliable and elastic connection.
The craftsmen of our company work carefully and accurately, strictly observing technology. Our specialists are highly qualified, have the necessary skills and extensive experience. You can entrust us with home insulation work of any complexity and volume.
To contact us, use the information posted on the “Contacts” page.
We also recommend you our partner: Help Consulting. These lawyers have long established themselves in the market of legal services in the field of construction. The company provides of legal services , a special place among which is occupied by: collection of penalties from the developer as well as debt collection in arbitration court .
Related article: How to go to the sauna while on your period
Calculate the cost of painting and insulating your home right now
The power of sealant in the rules of application and formation of the seam The rule of necessary sufficiency
To calculate the shape of filling inter-crown seams with acrylic sealant (forming seams), it is necessary to determine, first of all, what width will be sufficient to provide a protective coating for the seam between the logs. Naturally, the aesthetics of the seam is important; it should not be very wide and, on the contrary, too narrow. The proportion depends on the diameter of the log, the color of the sealant and the visual perception of the picture of the walls and the house as a whole. It is always better to make trial full-scale applications of different colors in advance for comparison, and, accordingly, select spatulas for the ultimately suitable seam size. Useful recommendations for installers - to form a beautiful warm seam, quickly work with sealant and achieve an ideal smoothing process without unevenness and sagging, use the smoothing agent Ramsauer® 506 GLÄTTMITTEL SPEZIAL .
Equally important for determining the optimal size of the seam is the sufficiency of the seam width to protect the space between the logs. To ensure excellent joint compensation under loads, a width to depth ratio of +/- 1:2 . At the same time, the depth of the seam on the sides can be slightly greater, so the adhesion to the tree is better and more reliable, and in the center it is less - this is where the loads are greatest. The tensile strength of PURAFILL® 7616 is more than 660%, which is more than necessary to ensure that the filling always remains permanently soft and does not collapse during the movements of the wooden house. From practice, it is not recommended to apply inter-crown sealant with a thickness of more than 12 mm.
The thickness (diameter) of the backing cord must correspond to the width of the seams between the logs or beams. A seam with a width of 10 mm or less is considered average. Backfilling narrow seams is cheaper due to the lower cost of cord with a smaller diameter. Another important aspect of the work on sealing inter-crown gaps or cracks in logs is the correct, uniform and sufficiently deep laying and reliable fastening of the cord between the logs and in the cracks. The cord must be laid carefully, in no way damaging or pinching it (with sharp objects), so experience and a patient approach are required here. Naturally, for a large number of strips, several coils of cord will be required.
Is it possible to caulk a log house with polyurethane foam? What does this mean?
Reading time: 2 minutes No time?
A wooden house has many advantages and one significant drawback: wood is a “living” material, and it breathes, changes its shape, gets sick, and eventually dies from age and various misfortunes. So you need to handle him carefully and competently, so as to prolong his health as long as possible. And if you are planning a house or a bathhouse made of logs, it is important to choose the right material to fill the cracks, otherwise it may just cause the log house to become sick. Or maybe you shouldn’t rack your brains and use regular polyurethane foam? Yes, our ancestors didn’t do that, but they didn’t have foam either.
Read in the article
Why you shouldn’t glue MDF panels onto polyurethane foam
Users often ask the question: is it possible to glue MDF panels onto polyurethane foam, and if not, then why are MDF panels an attractive material not only for forming furniture facades, but also as cladding panels for walls? Laminated MDF imitate various types of wood, stone, marble and look very impressive. The thickness of MDF boards can be different - 5-40 mm. For wall cladding, take 12-18 mm. MDF boards have a smooth surface on both one side and the other, in addition, in comparison with PVC panels, medium-density fiberboard has significant weight, and therefore the foam after drying will not be able to hold it for a long time. There is simply nothing for foam to catch on on a smooth surface. A heavy slab can easily fall off immediately after drying completely.
As an adhesive for MDF, it is best to use liquid nails, glue foam, or, if you have to make lathing, screw it in with self-tapping screws with countersunk holes, and seal the recesses with putty putty, tinted to match the surface of the slab.
What materials should be used for caulking so that the log house does not “get sick”
To prevent the wood from starting to rot, an optimal microclimate must be maintained in the house - that is, there should be no condensation and no tin can effect. And this breathing is provided precisely by the materials that fill the space of the cracks. If the insulation does not allow moisture to pass through, but rather accumulates, it remains between the logs and becomes a breeding ground for rot.
How log houses are traditionally caulked
It is not for nothing that we are talking about the experience of our ancestors, because it has been tested for centuries. Traditionally, log houses are caulked with dry moss, jute and tow. All these materials are of natural origin. They, of course, breathe due to their fibrous structure, do not accumulate moisture, since it is thanks to their loose composition that they dry quickly.
And finally, natural caulk will have to be renewed from time to time.
Modern materials for caulking
It is the labor-intensive “fussing” with natural caulking that makes you think about replacing it with modern sealants. There are two available options: silicone or polyurethane foam.
It is better to sweep away silicone immediately. Filling the cracks with this composition will tightly seal the log house, and the log will begin to rot, since there will be nowhere for moisture to evaporate from it.
PHOTO: ximtex.ru Silicone has 100% tightness and an almost endless service life, but when used, the log house will most likely rot much earlier than its counterpart with natural caulk
Article on the topic: How to visually increase the height of the ceiling in a wooden house
What about foam? It’s very tempting to use it, because it perfectly fills everything, even very difficult crevices, and is so easy to apply?
How to choose polyurethane foam for wood?
It is impossible to do without the use of polyurethane foam when carrying out a number of construction and repair activities:
- installation of windows;
- door installation;
- installation and repair of the roof;
- fixing wall panels;
- sound and heat insulation works;
- repair of heating systems and water supply.
The insulation or installation process, thanks to the consistency of high-quality foam, will please you with efficiency. You can forget about long multi-stage work. And thanks to the self-hardening property, you don’t have to worry about caulking or sealing with cement. Foam allows you to solve many problems:
- ensure effective connection (gluing) of materials;
- seal (observe) cracks and seams;
- seal voids;
- ensure the rigidity of building structures:
- reduce the noise of climate control equipment and pipelines.
Is polyurethane foam suitable as caulk?
What are the benefits of foam? It is resistant to moisture - this is good, which means this material will not accumulate water. The foam is non-flammable, has high penetrating ability and fills even the most inaccessible places due to its expansion.
PHOTO: samstroy.com This material is relatively inexpensive, you don’t need to bother with its preparation, and it is applied quickly and easily
All these factors make foam very attractive for caulking, but...
Once hardened, the foam is no longer elastic, and the wood continues to change with age and depending on the season. That is, it expands and dries out, but the foam does not. And as a result, new cracks form, and this negates all the work.
PHOTO: blog.leskos.ru In addition, foam does not allow air to pass through, that is, like silicone, it seals cracks with all the ensuing consequences of this fact, that is, rot and mold
Finally, this material is afraid of the sun; it makes it brittle. If foam is used somewhere, it must be followed by a finish that protects it from ultraviolet radiation.
So polyurethane foam is not a suitable material for caulking, although it’s a pity to admit it. Foam can only be used as a temporary measure and then with mandatory sun protection. But it’s better to caulk a log house with natural material. How to do it correctly - in this video:
What kind of insulation is polyurethane foam suitable for?
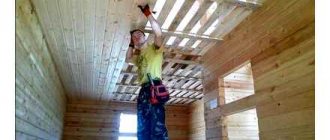
After construction, a wooden log house does not have insulation, so you have to caulk it and think about how to insulate the floor, walls and ceiling. Insulation with polyurethane foam solves all these issues at once. Having treated it with foam insulation, we cover the home like a warm, sealed blanket. Polyurethane foam does not need to be joined, so there will be no seams. At the same time, treatment can be carried out externally and internally.
Internal insulation
When treating a wooden floor, you can obtain not only insulation, but also sound insulation between floors. Its installation is simple. Lay the floor and fill the part between the logs of the log house with foam. The insulation dries quickly and begins to work immediately. When dry, the foam not only seals the floorboards, but also makes them stronger. It does not creak or crack over time. The ceiling is insulated in the same way as the floor. Foam is blown onto the sheathing mounted on top. The walls inside are treated with the same insulation.
Insulation technology from the inside
This kind of work needs to be done only after making sure that the external insulation of the walls is frozen. Indeed, unlike other types of insulation, it is more difficult to install internal polyurethane foam. The exceptions are newly built wooden houses without windows and doors. Details about the technology of polyurethane foam insulation can be seen in free videos from professionals on various sites, there are also numerous photos. We will tell you in detail about all the stages of internal insulation with liquid insulation:
- The first step is to clear the room of all household items. Window and door openings are sealed with tape and newspapers. The floor is covered with protective material. Once on an object, the foam will harden and it will be almost impossible to wipe it off.
- Cleaning walls from previous cladding, etc. to the frame and finishing.
- Lathing walls or ceilings. At this stage you need to install the sheathing on the walls. The step distance is 60 cm. The timber used is 40x40 or 50x50 mm.
- Spraying insulation. At this stage, I spray polyurethane foam between the sheathing. Then it is allowed to dry for 9-12 hours.
- Remove excess foam and level it under the sheathing.
How experts do this is shown in the video:
External insulation
It is recommended to install polyurethane foam at temperatures above +20 C, without precipitation.
At low temperatures, foam consumption increases, as its foaming occurs worse. It is best to insulate with liquid material from the outside, since when sprayed it can get into the respiratory tract, eyes and other parts. It's easier to avoid this in the air. But it is still recommended to wear protective clothing and a mask.
The main stages of installing polyurethane foam outside
- Preparatory work includes cleaning the surface from dust and dirt.
- The second stage is the sheathing. It can be excluded if the façade of the wooden house is subsequently plastered. The sheathing is done in exactly the same way as from the inside.
- Treating the facade with water using a wide brush.
- Spraying insulation. Particular attention should be paid to corners and transitions.
- After the outside has dried, the unevenness is removed and the top layer can be cut off exactly along the rail.
Why can't you apply it yourself?
Special equipment is used to spray a liquid vapor barrier.
It is expensive and easier to hire specialists. When working, the operator applies foam to the surface of the log house through a gun under a pressure of about 140 bar. The mixing of liquid and gas (polyisocyanate and polyol) occurs at the outlet. In the apparatus they are located in various containers. A high-pressure installation costs from 150 thousand rubles and, judging by the reviews, is not the best. But you can save money by doing all the preparatory work yourself. In large cities, such equipment can be rented at specialized rental companies.
Polyurethane foam instead of caulk: is it possible to foam a bathhouse with polyurethane foam?
From time immemorial, wooden buildings (between logs and beams) have been caulked with moss, tow, flax or jute. Caulked seams can be decorated with jute tape or cord.
These natural materials will retain heat well and will not interfere with air exchange. There are also disadvantages:
- Long work that takes a lot of time and effort,
- If you do everything wrong, the birds will pull out the insulation or it will become deformed when it shrinks.
- Caulking needs to be done several times. After the structure shrinks, it needs to be caulked again. After 3-5 years you need to do the work again.
Article on the topic: How to treat the inside of a timber house
There are more modern ways
: insulate using polyurethane, silicone sealant or polyurethane foam.
The option with silicone sealant is questionable. Wood absorbs moisture and evaporates it. The sealant will prevent evaporation. The tree will begin to rot.
Silicone sealant is 100% waterproof and has a service life of 10 years longer than its acrylic and silicone counterparts.
What kind of material is this, what characteristics does it have?
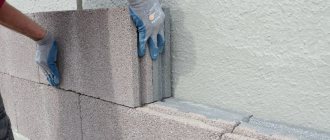
This new heat insulator appeared with us relatively recently. But to speak of it as “new” would be misleading. It was invented in Germany back in the 30s. First used in military technologies, and then in the 70s they began to be used as insulation. If you compare the structure, it resembles polyurethane foam but in larger volume cylinders. Having appeared on the market, polyurethane foam immediately won the hearts of specialists. It is used for insulating any elements of houses made of timber, logs, cinder blocks, bricks, etc. Using insulation, you can foam the roof, floor, interior and exterior walls. It easily adheres to any building material and is considered the most effective in its properties: heat and sound insulation. Thanks to its liquid, foamy texture, it fills even the smallest crevices.
Has high adhesive properties. It will easily lie on smooth metal, such as corrugated sheets. It also has protective qualities, so the metal under the foam does not rust, and the wood does not rot. It also has high performance characteristics, so its service life is at least 50 years.
If we compare it with all previously known insulation materials, there are simply no analogues. But how this material will perform in practice can be said no earlier than in 10 years. So far the reviews about it are positive. The only thing that users are talking about more and more is whether a wooden house will remain as environmentally friendly? And I am outraged by the high price of polyurethane foam insulation work. The video explains it in more detail:
Comparative analysis of the thermal conductivity of various materials:
Experts talk about a number of advantages of insulating a wooden house with polyurethane foam on the outside:
- Due to the fact that the pores of the material are 98% closed, it has high waterproofing qualities. Maximum moisture accumulation 2%.
- Adhesion occurs with all substances: iron, paper, wood, concrete, brick, etc.
- Neutral to any chemical effects of alkali and acid.
- Practically does not burn. In terms of flammability, it has a class G 1-3. It burns only in direct contact with fire, but as soon as the source is removed, it goes out immediately. At the same time, it will not smolder and release toxic fumes. This is an indisputable plus for a wooden house. This process is captured on video:
- Tolerates temperatures from -150 to +150 C.
- You can easily adjust the insulation density from 8 to 750 kg/m3.
- Acoustic insulation is 5 times higher than that of polystyrene foam.
- Excellent protective qualities.
- Not afraid of rodents, mold and mildew.
Polyurethane foam instead of tow
Another method of insulation is using polyurethane foam. Is foam suitable instead of caulk or not?
The cracks and gaps between logs or beams are foamed with polyurethane foam. This is very simple and easy to do. No need to use a chisel and hammer.
The foam is resistant to moisture and has high sound/heat insulating properties. It tightly fills all small cracks and voids. There is fire-resistant polyurethane foam that does not support combustion.
No need to hire specialists. You can do the work quickly yourself.
But foam also has disadvantages:
- Not elastic material. When moving and shrinking logs, small cracks and crevices may form.
- You cannot seal cracks inside the bathhouse. When heated, foam releases harmful substances (toxins).
- Foam does not allow air to pass through, but wood breathes. Therefore, moisture may accumulate and, as a result, the tree may begin to deteriorate and rot.
- The main disadvantage
: the foam is destroyed by exposure to sunlight.
But some believe that foam can only be used if it is covered with finishing material. Uncovered foam turns to stone and begins to crumble over time.
It is not recommended to cut off the foam. Because its properties change, and it becomes like a sponge. It is better to crush the excess polyurethane foam by hand after 20 minutes. after foaming.
RepairDom channel:
subscription .
Benefits of foam
The advantages of this material that distinguish it from others include.
- During application, the foam penetrates into all inaccessible cracks and fills them.
- The foam has a very high thermal and moisture insulation rate.
- After applying it to the surface, there are no joints or seams left.
- The foam is very light weight. When applied to any surface (wall, foundation, ceiling), the building and any surfaces do not become heavier.
- Does not create corrosion on metal.
- Increases sound insulation of the house.
- When using foam in the house, it does not contain any factors that threaten your health.
- Increased moisture resistance.
- When used, the service life of the material reaches 50 years.
What and how to properly caulk a bathhouse - practical advice from an expert
Simply laying a frame when building a bathhouse is not enough - you will definitely need to caulk the bathhouse, that is, close the existing cracks and cracks formed after the wood has dried out. This article will discuss how to caulk a bathhouse.
The caulking of the bathhouse frame is needed so that it loses a minimum of heat. It is very important to use a well-prepared log house, lay it correctly and do not forget to install inter-crown insulation.
Article on the topic: How to build a gazebo at the dacha from scrap materials
What to choose as insulation - moss, tow or jute - is up to the owner to decide, but it must be present.
The insulation is placed in two layers as follows:
- on the lower crown so that the edges of the insulation extend beyond the edges of the bowl by 30-50 mm, while the width of the insulation is determined by 50-100 mm more than the width of the bowl;
- the second layer of insulation is placed in the bowl of the upper crown, while its edges should also protrude by 30-50 mm.
It is worth keeping in mind that when laying moss or tow, tapping such material is not required. If you hit it with a hammer or an ax handle, the moss fibers are torn, and dents appear on the surface of the wood, which after some time can cause the appearance of rotting zones. It is recommended to compact the fibers only by pressing with the palm of your hand. Excess elements in the moss simply need to be removed.
If, when deciding on the best way to caulk the log house of a bathhouse, the choice fell on tape insulation, then you can fasten it with a construction stapler. In this case, it is important what to pierce the bathhouse with, since it can cause harm to the material.
Damage to the wood from the stapler will be minor, but this will allow the material to be firmly fixed. It is best to lay out insulated crowns together so that the log can be taken from both sides and slowly lowered without damaging the insulation.
Installation features
PVC panels are a soft and plastic material. On a wall with an uneven surface, if some measures are not taken, they will also lie unevenly and will look unaesthetic. Leveling the wall with putty or plaster is not the best solution in this situation. Therefore, a sheathing is first attached to the wall, onto which the panels are screwed with self-tapping screws. The distance between the slats of the sheathing is 35-40 cm. If you decorate the ceiling with plastic panels, then the slats should be located closer - at a distance not exceeding 30 cm. This is necessary in order to prevent sagging of the PVC slats.
PVC cladding material can be glued to a flat wall. With the right choice of glue and adjustment of the lamellas to each other, the wall looks smooth and beautiful. Such a wall can then be easily maintained.
Fastening PVC panels to polyurethane foam
Internet users who are interested in the question of whether it is possible to glue PVC panels to polyurethane foam have probably watched more than one video in which craftsmen show how famously they glue plastic panels to polyurethane foam. But these videos leave questions. What happens to the glued cladding after 12 hours, a day, three days? Nobody demonstrates this. Without a doubt, the foam has excellent adhesion on rough surfaces. And while it is wet and has not begun to polymerize, everything looks even, smooth and beautiful. What happens next? Knowing the properties of foam, this is easy to assume. Expanding, the polyurethane foam deforms the panels, and they bend in waves. To avoid this effect, some recommend installing supports, while others screw in a self-tapping screw in the middle to secure these panels.
Experts recommend gluing the panels onto the foam point by point. This will reduce the expansion effect. But then the adhesion area decreases, which in turn reduces the strength of their attachment.
Supports made from wall-to-wall slats can be installed if PVC is glued on a narrow balcony. But what to do, for example, if the distance between the walls is two or more meters? Or if the slats are narrow and the balcony is six meters high, how many of these supports need to be installed to cover the entire wall? It is recommended to spread out such work over 3-4 days.
If you fasten the panels using just one self-tapping screw, you can count on the fact that they will last for some time if they do not start to tear out and swell from the expanding sealant. This is only possible if very little foam is applied.
Craftsmen assure that polyurethane foam adheres to the wall and smooth plastic panels. If the first statement can be believed, then the second is doubtful. Thus, gluing PVC wall panels to the wall with mounting foam is not advisable, since the foam has high expansion and low adhesion on smooth surfaces.
Installation of decorative wall panels
From all of the above, the question arises: what to glue it with then? For such purposes, the construction market offers:
- Liquid nails are an adhesive based on liquid rubber, supplemented with binding polymers and clay as a filler. Liquid nails do not expand at all when dry and are perfect for gluing panels on a flat wall.
- Adhesive foam. It consists of polyurethane, like polyurethane foam, but unlike the latter, it does not expand and has excellent adhesion thanks to special additives. Visually, foam adhesive is similar to assembly foam, as it is also packaged in spray bottles. Only she is blue. It's easy to use. Just remove the cap, shake the can, and it's ready to go. Foam adhesive is great for PVC panels. For example, sipall foam glue. Or TechnoNIKOL.
Before gluing plastic panels to the wall, you must first prepare it: wash it from dust and prime it with an adhesive solution.
First, the upper and lower guides are attached, which are produced, as a rule, by the same manufacturers as the panels themselves. They serve as accessories. A thin strip of foam adhesive is applied to the outer edge of the guide and glued to the selected location. For greater reliability, you can fix the guides with three self-tapping screws: two in the corners and one in the middle.
Note! If the wall is flat, you can do without guides. Just cover the edges after finishing the work with a decorative cornice on top and a plinth on the bottom.
PVC panels have a remarkable feature. Their side ribs are equipped with grooves on one side and a protrusion along the entire length on the other. Thus, the panels are inserted into each other, and the connecting joint is almost invisible. Foam adhesive is applied to the plastic panels and pressed against the wall after it has been inserted into the groove of the previous lamella.
Fastening PVC panels to the wall
Important! You cannot attach wall panels with the mentioned types of glue in rooms with elevated temperatures, for example, next to heating appliances, in saunas, in the kitchen near the stove, since the glue softens when heated. In these cases, it is better to use self-tapping screws or heat-resistant glue.
Features of using polyurethane foam when installing plastic windows and sandwich panels
So, it’s time to talk about the direct purpose of polyurethane foam, namely sealing openings when installing plastic windows and leveling bevels from sandwich panels.
Installation in a window opening
Before installing the window in the opening, it is necessary to level the end, sealing all the cracks in it. This requirement is especially relevant if the wall is made of bricks, stone or concrete blocks. To level the wall from the street side, waterproof dry mixtures should be used. On the room side, ordinary dry mixtures for plastering are suitable.
If the window consists of several elements, for example, a window with a balcony door, they must first be connected and the finished structure inserted into the opening. Before installation in the opening, it is also necessary to stick a vapor barrier tape to the end of the entire structure. It will cover the space between the window and the opening, filled with polyurethane foam, and protect the polymer from the effects of the external environment. It is important not to pull the tape.
Then the anchor plates are installed to mount the window. Anchors are attached according to pre-prepared markings. After completing this operation, a self-expanding sealing tape is glued to the window frame, which will perform two tasks simultaneously:
- will cover the mounting foam between the wall and the frame;
- will serve as an additional seal and insulation.
But before this you need to remove the protective film, otherwise it will be much more difficult to do later. Here the tape is not bent at the corners, but is cut with scissors so that the next one, glued at an angle of 90°, fits tightly with the previous one. Thus, the glued SU tape (SUL) forms a frame on the structure fixed to the wall. Until the JUL begins to expand, it is important to install a window system in the opening. The window is leveled using a regular spirit level. After this, you should secure the structure in the opening by pressing the anchor plates to the wall with self-tapping screws.
Finally, another tape is glued on the street side - diffusion waterproofing tape, which is also vapor permeable. When gluing this tape, it is important that there are no gaps left anywhere for moisture to penetrate. Foaming of seams with polyurethane foam is carried out from the room side. But before that, you need to moisten the wall with a spray bottle. This is not done to capture dust, but for more efficient polymerization of the polyurethane foam.
Finally, the foam is covered with the tape that was glued at the very beginning. Then the seam between the frame and the window sill is foamed and also sealed with waterproofing tape. After completing all the activities, work is done with the sashes.
Thus, when installing a plastic window, polyurethane foam does not serve as an adhesive holding the structure in the opening, but acts as a sealant and must be protected on both sides with impermeable films.
Leveling the slopes of window openings with sandwich panels
When you mention sandwich panels, the reader probably imagines massive slabs that are used to build walls. But these are different panels. They have a thickness of 15-25 mm. The outside may be thin plywood, thin sheet metal or PVC. The filling of this sandwich is extruded polystyrene foam. The material is easy to cut, has heat-insulating properties, and is aesthetically pleasing. This material is now used as slopes in window openings.
PVC window slopes look very aesthetically pleasing and are easy to install
For their installation, U-shaped plastic profiles, or “pawns”, as builders call them, are used. The width of the groove in the profile must correspond to the thickness of the panel so that it is easily inserted and does not move around in the pawn fixed around the perimeter of the opening. The pawns are screwed to the frame so that they do not interfere with the hinges and sashes. Thin, short self-tapping screws are used to secure them. It may be necessary to cut off the polymerized foam protruding from behind the frame before installing them.
First, install the side vertical panels. They are simply inserted into profiles. The horizontal slope falls on the side slopes. Accordingly, the profiles for it are located above the profiles of the side slopes. Then the slopes are leveled using a rule and fixed with tape and wedges inserted from the inside, which are cut from a board or the same sandwich. The wedges prevent the panel from bending inward, and the tape prevents it from bending outward. The space between the wall and the panel is filled with polyurethane foam. After the foam has dried, the corner fasteners and tape should be removed, and the outer corners should be decorated with special cornices.
Slopes are so called because they are installed in the opening at an angle of more than 90° relative to the window. In the slopes, the expanding foam will fill the free space, maybe it will come out, and the clamps will not allow the panel to deform. Moreover, if the thickness of the sandwiches is 24 mm, it has some resistance to deformation.
How can you caulk a log house?
There are natural materials for caulking and artificial ones. The first include tow, hemp, jute, moss, and so on. The latter include industrial sealants. Sealants are easier to work with and apply quickly. As a rule, in order to reduce their consumption, a cord is laid in the inter-crown gap, and the sealant, which is distributed with a special spatula before hardening, is applied on top of it.
However, sealants have a number of disadvantages:
- Some brands are afraid of exposure to ultraviolet rays - this leads to their destruction. This drawback can be eliminated by hiding the sealant seams under the strips.
- Some of them, after hardening, create a monolithic material that interferes with the process of expansion or contraction of wood, for example, due to weather, which can lead to the destruction of nearby fibers. To prevent this fact, it is better to purchase elastic sealants.
Article on the topic: How not to be embarrassed to go to the bathhouse
You can learn more about how to operate the sealant by watching the available video material. A simple tablespoon is perfect for distributing the sealing agent.
If, when determining how to caulk a bathhouse, you chose a sealant, then carefully study the instructions and make sure that it can be used with exactly the type of wood from which your log house is made, that it is suitable for your region, and also has all the necessary characteristics.
It is advisable to use a synthetic sealant for a log bathhouse if it is used to close caulked cracks. After double caulking the log house with tow, moss or jute, wait until the log house finally settles and reaches working dimensions. Next, a cord is inserted into the seams and covered with sealant.
Each of the natural materials for caulking has its own positive and negative qualities, and preparatory measures are required in any case.
Moss is considered the most common, time-tested material for caulking. It has been used for hundreds of years. Currently, there are many other materials, but they all have slightly worse characteristics. True, new materials are easier to operate, and they also have such positive qualities as antibacterial properties and special resistance to rotting.
Before caulking a log bathhouse with moss, it must be dried and soaked right before use. This action will give the moss fibers elasticity. The moss is laid out in a layer and leveled so that its ends hang down on both sides of the beam. After all the logs have been laid out, the excess moss fibers are shortened, and what remains is wrapped and tucked into the cracks. Thus, the first stage of caulking the log house is carried out. Further stages of caulking will be continued after a year and a half.
Recently, builders are increasingly asking the question of how to caulk a bathhouse with jute. Given that we mean rolled material. Jute fiber has excellent thermal insulation properties and contains natural binding resins. Jute is practically not afraid of moisture, and very rarely becomes unusable due to rotting. Even in conditions of high humidity it does not get wet.
Jute comes in several varieties:
- Jute tow . During the production of this material, the fibers are not torn, but combed, aligning them in the desired direction. This preparation of the material allows it not to lose all its properties. However, jute is not very convenient for caulking, because it is hard and has a low density; caulking has to be done several times due to the material drying out, the impossibility of obtaining a tight seam the first time, and birds pulling it apart for nests.
- Jute felt . This material is based on 90% torn jute fiber, and is supplemented with 10% long flax fibers. The result is a dense and flexible material that is much easier to work with. But if it has a short fiber length, it may get confused and fall out. When choosing jute, you should choose a material with a fiber length of at least 20 mm to obtain maximum elasticity. Short material will not have the necessary properties; it will either fall out or be blown away by the wind. Another disadvantage is the fact that moths can appear in it. In this regard, it is recommended to impregnate such material before installation with a composition against moths and against rotting.
- Flax-jute . It is a composite tape material, half of the volume of which is soft flax fibers, and the rest is hard jute fibers. This material is of interest to many builders, but it also has disadvantages, such as a tendency to rot and moth damage. That is, like the previous material, this one also needs to be treated with mixtures against rotting and pests.
Article on the topic: Is it possible to wash in a bathhouse with a purulent sore throat?
What is penoizol
Penoizol is a liquid foam plastic. Penoizol is a common name; this material is correctly called urea-formaldehyde foam. Liquid foam plastic is one of the universal insulation materials, which is used mainly in the construction industry.
It is used for insulating walls (including brick ones), when installing laminated panels, and for insulating multi-storey buildings (in this case it is “laid” between floors). The material is quite popular when insulating roofs and even when it is necessary to make decent sound insulation. This is not a complete list of works in which penoizol can be used. I have listed only the main ones.
What is good about foam insulation?
The difference from traditional insulation is that liquid foam does not take up much space. Stored in barrels. Prepared directly on the construction site.
Then it is pumped into the cavity between the walls. Penoizol insulation is good when the house has already been built.
In my opinion, this is the most budget-friendly way to insulate a house. After all, if you insulate a house with polystyrene foam or basalt insulation, you will have to make a facade. These are additional costs.
To compare thermal conductivity: one ten-centimeter layer of foam insulation can replace a three-meter concrete slab.
Of course, like any material there are advantages and disadvantages. So, about the advantages:
- The material is easy to apply. That is, the required layer of penoizol is simply sprayed where it is needed. The shelf life is equal to the average life of the house. As they say, insulate and forget.
- Nitrogen ensures the fire safety of the material. If a fire breaks out, the insulation will not become a catalyst for its spread, nor will it emit a toxic odor. And it is for this reason that penoizol is considered an environmentally friendly material.
- This is one of the universal insulation materials that can be pumped into hollow structures. It absorbs moisture and does not shrink if certain application rules are followed. There are no joints, penoizol is laid down in a continuous layer.
- If you are going to insulate the roof, then penoizol is well suited. They say that rodents and various insects do not eat it.
Disadvantages of foam insulation insulation
Despite the fact that the material is resistant to small amounts of moisture, it still suffers from constant exposure. Relatively speaking, if a water leak occurs, the insulation will stop working. Due to the fact that penoizol is able to absorb vapors from the air, it cannot be used to insulate the foundation or placed under a reinforced concrete screed.
Penoizol has shrinkage. But this can be avoided if you use micro- and macro-reinforcement technology, do not dry it on purpose, but let it harden naturally. This usually lasts up to four weeks.
There has been a lot of controversy over the release of formaldehyde and restrictions on its use have been introduced in a number of countries, however, if the technologies for preparing and pouring penoizol are followed, the risks of poisoning can be minimized.
Tow
This material is waste generated after the primary processing of natural fibers. The logs are caulked with jute, hemp and flax tow. The properties and quality of such material are determined by the raw materials, the length of the fibers and the level of their purification. During production, tow is pressed into blocks. To use it, you need to pull a strip of material from the block, twist it into a rope and place it in the seam. Although, it is easier to use tow sold in rolls.
In general, tow is not very convenient to work with, since it is very difficult to get an even seam. When caulking a log house, due to the high rigidity of the material, it is difficult to obtain a tight seam from the first approach. We have to resort to a repeat process. If you decide how to properly caulk a bathhouse by choosing between moss and jute tow, then you can confidently say that it is better to choose moss, since it does not harbor fungus and bacteria.
At what stage can you start caulking a bathhouse?
If the frame was laid on moss or tow, pieces of material of various lengths protrude between the crowns. In this case, you can begin the initial caulking: trim off the excess fibers, and hide the rest in the seams. You should be careful and take your time, adhering to the rules of caulking. If the log house was laid on tape insulation, then further operations are not necessary.
The first caulking is carried out about 6 months after the construction of the log house walls. During this period, almost all the moisture will leave the logs, new mother-in-law will be visible, and most of the crowns and corners will shrink. After this, you can begin installing doors and windows.
Further caulking is carried out after 12 months. During this time, the log house will be completely stable, so that all found defects can be eliminated. Based on the selected material and the quality of the work performed, you may need a new caulk in about 5 years. Sometimes, due to negligent construction work or if insulation was not laid between the crowns, caulking has to be repeated several more times, every year.
Article on the topic: A rectangular plot of land is surrounded by a fence 40 m long
Is it possible to foam the walls of a log house instead of caulk if you are going to insulate and sheathe it?
So I specifically went to him and looked at what happened to these boxes under the foam. NOTHING! Full order.
Thus, if your house rots in a hundred years, not a single expert will tell you why it happened. From foam, or from old age. Personally, I'm not going to give up foam. Maybe you just fed your Germans poorly, and they decided to take revenge on you?
I hope that among the readers of this site there will be foam experts who will express their strong opinions!
How to calculate tow for a bathhouse
Before caulking a bathhouse with tow, you should decide on the required amount. Tow compresses quite well, so it is consumed quite heavily. Perhaps no one can say the exact figure. This is because there are a lot of nuances that influence this: the material of the log house, what grooves are cut into them.
If the grooves were made manually, then, often, the consumption of tow will be large. In addition, consumption increases if a sanded log was used rather than a rounded one. Less material will be used for the timber, although in this case its quantity will be determined by the parameters of the timber, the depth and number of cracks that appeared during the drying process.
Caulking technology
Before caulking the log house of a bathhouse, you need to study the basic rules of this process. In fact, caulking a log house is quite easy, but it takes a lot of time, and you also need to be patient. For a bathhouse with dimensions of 5x4 m, one person will need about 10 days, spending 7-8 hours daily.
At the same time, you should not overdo it when laying insulation, since this fact leads to the fact that the log house becomes 15 cm or more higher.
The basic rules for caulking include the following points:
- First of all, they start with the lower crown, moving along the entire perimeter. First, the outer part of the building is processed, after which they move on to the process of caulking from the inside. Only after this can you move on to the next crown.
- When caulking, special attention should be paid to the corners, because in such places, as a rule, the largest cracks are located.
- If this is the original caulking, then first of all the sagging material is picked up, folded and pushed into the gap. You can resort to any tool as needed. The process is carried out in stages - after the meter is processed, they move on to the next section.
- On the same area you can use a caulk, a hammer or a wooden mallet; the latter is much easier to work with. The caulk is beaten until it begins to spring back. After this they move on to a new area.
- Following the compaction process, cracks may appear into which fragments of insulation are inserted. If tow was used, a rope of a certain thickness is rolled up from it or a fragment of a specific length is disconnected from the tape, which is also driven in with caulk and a mallet until a springy effect is achieved. This operation is repeated until all the cracks are filled, after which you can move on to a new area.
Like any other part of construction work, caulking requires certain skills from the master. Based on the fact that there will be quite a lot of such procedures, after some time you will definitely develop them. Over time, as you gain experience, you will notice more and more new inaccuracies that were made in the initial stages of work.
You can eliminate them without much difficulty, bringing the work to almost perfection. Actually, those who do nothing make no mistakes, so caulking a log house with the proper quality is possible even without sufficient experience.
Caulking of grooves: technology, requirements, features
Despite the fact that the surface of the timber is quite flat, which allows for a tight fit of the individual elements of the log house, it is impossible to do without sealing the joints during construction. Heat does not need a three-centimeter gap to escape; an imperceptible gap of a couple of millimeters is enough so that the room is never warm. In order to avoid this, laying inter-crown insulation is used, followed by caulking of the joints. Unfortunately, this process has to be repeated throughout the entire period of operation of the log house, but such is the price to pay for environmental friendliness and comfort.
Moss, tow, jute, and flax are used to seal joints. These natural materials, despite all their differences, have common properties:
- Excellent vapor permeability. All moisture that enters the insulation comes out freely and does not settle in the form of condensation;
- Low thermal conductivity. Allows the seal to perform its function - to prevent heat loss through the joints;
- Resistant to mold and mildew. Moss is especially different in this regard; it has antimicrobial and bactericidal properties;
- Good breathability. Does not create obstacles to air exchange necessary for the preservation of wood.
High-quality caulking of joints allows you to keep the timber in perfect condition, and also ensures the preservation of heat in the house, eliminates the appearance of drafts, and helps create a comfortable microclimate. Perhaps the only drawback is the laboriousness of the process: it takes a lot of time, since each joint needs to be passed through, sometimes more than once, and this will also require considerable physical effort. Proponents of the widespread use of polyurethane foam are trying to solve this problem.