Houses made of logs or timber, like frame buildings, are structures with an increased risk of fire. For this reason, organizing heating requires a careful approach and strict adherence to fire safety standards and regulations.
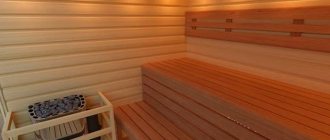
The heat source in a large house is usually a boiler installed in a separate room. To heat a small building, it is enough to install a stove - metal or brick. A fireplace in a wooden house serves to a greater extent as a pleasant addition to the main source of heat, since its heat transfer is limited due to design features.
Installation location
When choosing a place to install the stove, you should take into account the prescribed fire breaks - the distance between the stove and the building structures closest to it. It is important that the surface of wooden walls cannot heat up to critical temperatures.
A gap of 110-125 cm should be provided from the heating part of the stove body to the wall, column, or staircase made of flammable material. If the wall is protected with sheathing made of non-combustible material with heat-insulating properties, the fire gap can be reduced.
The minimum distance between the firebox door and the structure made of combustible material is 125 cm. But it is recommended to leave maximum free space in front of the door so that it is convenient to service the stove - remove ash, add fuel. If the door is glazed, such a stove in the room acts as a fireplace, allowing you to admire the flames.
The location of the chimney and the ease of its maintenance during operation of the heating unit are also taken into account. The chimney must be installed in accordance with fire safety rules; when installing it, elements of the rafter system cannot be dismantled so as not to reduce the strength of the roof frame.
The choice of installation location is also influenced by the design features of the furnace:
- the air heating unit (“Bulleryan” and analogues) is installed in such a way that the direction of the air flow contributes to the rapid and uniform heating of the room, air ducts are connected to it for heating adjacent rooms;
- a brick heating stove is built into a partition so that it can heat two or more rooms;
- a brick stove with a hob is installed between the kitchen and the main room of the house;
- a stove with a built-in water heat exchanger can be located in any convenient place in the house, but it is necessary to ensure that the heat exchanger is the lowest point of the heating system.
With an optimal location, the stove will provide maximum heat transfer, while it will be convenient and safe to use.
Fireplace arrangement
When installing a fireplace, it is necessary to take into account a number of requirements :
- As a rule, the presence of a fireplace in a wooden house is foreseen at the design stage . The wall near which it will be located must be insulated with a metal sheet, this will completely eliminate the risk of fire in the future.
- should not be placed close to the walls.
- It is necessary to make a non-combustible base for the fireplace furnace, and isolate its location from the living area using non-combustible materials.
- A prerequisite is to protect the ceiling from elevated temperatures.
- If the house has several floors , during the design it is necessary to provide a fireplace for each of them in such a way as to combine them into a common system.
- Installation of chimneys must be carried out in accordance with existing rules and regulations.
The stove can be located between two rooms: the firebox goes into one, and the stove itself goes into the other. Source lv.aviarydecor.com
Foundation for the stove
When planning to install a brick fireplace stove or install a compact metal solid fuel heat generator, it is important to determine whether a full-fledged foundation is required.
According to building codes and requirements, the presence of a foundation is determined by the weight of the heating unit. Based on this:
- for steel furnaces weighing up to 80 kg, it is enough to install a non-combustible solid base; there is no need to pour a separate foundation;
- for cast iron and compact brick stoves weighing up to 450 kg, a concrete pad is installed;
- for stoves weighing 450-750 kg or more (brick, cast iron with brick or stone lining) a full foundation is required.
If you plan to line the stove with stone or brick, it is important to correctly calculate the total weight of the structure and prepare a solid foundation.
Types and weight of sauna stoves
Brick
The largest and most massive stoves are brick . Their weight can reach several hundred kilograms. They are distinguished by excellent heat capacity and durability; it is possible to install a large tank for heating water and install a beautiful fireplace in the dressing room. For decorative purposes, such stoves are finished with natural stone: coils, marble, granite, soapstone, flagstone, heat-resistant tiles, etc. However, even without special finishing, neatly embroidered brickwork looks presentable.
Brick heater
A separate monolithic reinforced foundation is built for brick stoves, not connected to the base of the bathhouse. It is not always advisable to build a brick stove in a ready-made bathhouse; you will have to dismantle the floor, ceiling and roof, as well as, possibly, the partition between the steam room and the room next to it, which is associated with significant financial costs. The optimal alternative to a classic brick stove is a thick-walled metal stove with cladding.
One of the foundation options for a brick kiln is columnar
Cast iron
A cast-iron sauna stove itself weighs a lot, and if you add a water tank, a heat exchanger, a lot of stones, cladding, the total load can become critical for the wooden floor. Therefore, we recommend that you plan in advance to purchase a cast iron unit, if necessary, strengthening the floors under the stove installation site.
Cast iron sauna stove "Sibir-24"
On a note! The entire heating unit or just the firebox can be made of cast iron. Some stove models have a steel heater. Fully cast iron products weigh more than steel and composite ones.
Steel solid fuel
Steel solid fuel sauna stoves cannot boast of such wall thickness as their cast iron counterparts. If we compare cast iron and steel stoves, the latter cool faster and are prone to burning out, the radiation from them is not so soft, but such units are cheaper, weigh less, and the range of models is very wide.
Steel solid fuel sauna stoves with lining
Steel solid fuel sauna stoves
Electrical
The most compact ovens are electric . They operate on 220 and 380 V, saving owners from the need to prepare and store firewood, clean the chimney and other “dirty work”. High-quality electric heaters are compact, do not fail when exposed to moisture, and are equipped with an overheating protection system, a steam generator and temperature sensors. The stoves are selected according to the size of the steam room (the larger the volume of the room, the more powerful the unit should be purchased). On average, the equipment weighs 10-28 kg; from 20 to 75 kg of stones can fit inside, depending on the design and dimensions of the furnace.
Electric sauna stove
Electric sauna stove
Principles of foundation installation
When choosing a foundation for a furnace, proceed from the following conditions:
- soil characteristics and requirements for the load-bearing capacity of the foundation for the furnace;
- foundation dimensions (depending on the dimensions and weight of the stove);
- total cost (includes the cost of materials, work on preparation and installation of the foundation).
It is recommended to build a capital foundation for the stove at the stage of arranging the foundation for the house itself. This reduces the labor intensity of the work and its cost. The base for the stove is made of reinforced concrete. However, it should not be connected to the foundation of the house - otherwise, due to uneven thermal expansion, part of the foundation of the house will collapse.
The permanent reinforced concrete foundation for the furnace is laid as a regular strip foundation. A reinforced concrete slab is simpler to make - it is enough to equip a shallow pit with a sand and gravel cushion, install formwork, mount a reinforcement cage and pour concrete.
After treating the concrete to remove air bubbles, it is covered with film and regularly sprayed with water for two weeks while it gains strength. The stove unit can be installed on a reinforced concrete foundation only after 28-30 days from the moment of pouring, otherwise the slab will crack due to load and thermal expansion.
Types of foundations for a stove in a wooden house
There are several types of foundations used for furnace equipment, each of which has its own characteristics, design and operation features.
When choosing a suitable foundation, consider the following:
- Installation cost – the price of building materials, installation and preparatory work is taken into account.
- Characteristics of the foundation and soil characteristics - the choice is based on the total weight of the structure, the type of soil (clayey, sandy, black soil, stone).
- Dimensions of the foundation for the stove in the house - depending on the area occupied by the stove equipment, the total weight of the structure, the required type of foundation is calculated.
Additionally, several other factors are taken into account. The choice of foundation is influenced by the time of manufacture of the foundation (in an already finished building or simultaneously with the construction of the house), the qualifications of the craftsman, weather conditions, speed of work, etc.
All existing foundations are usually classified into several groups:
- On stilts and pillars.
- Concrete bases.
The stove, subject to certain conditions, can be installed directly on the floor.
Foundations on piles and pillars
The base is made in three ways:
- Screw piles are a method that requires material investments. The advantage of using screw piles is the speed of installation. During installation, a worker drives a steel screw into the ground. The steel pillar will be the basis of the future foundation. The piles are tied together, after which a concrete pad is poured on top. The work only takes 1-2 days. You can even put a heavy cast-iron stove lined with brick on a screw foundation. The only drawback is the limited service life. The steel base rots after 50-60 years of use.
Bored piles - in this case, holes of sufficient depth and diameter are drilled with a drill. The resulting cavity is reinforced with a mesh to prevent soil from falling out. Knit a reinforcing structure. After reinforcement, the pillars are filled with concrete mixture.
Columnar piles - the process of installing the foundation is the same as in the case of using bored structures. The difference is that ready-made concrete or wooden pillars are used. Massive structures with a large weight load are installed on a columnar foundation. This is the design that is used in the construction of multi-storey buildings.
If you want to make a foundation for a stove in a wooden house with your own hands, without involving outside help, it is better to choose a pile structure, which is easy to install and does not require (with the exception of a screw device) serious material investments.
Concrete bases
The most common type of foundation used for furnace installations is a monolithic foundation made of concrete with mandatory reinforcement.
Concrete foundations are made in two ways:
- Strip foundation - a trench is dug along the perimeter of the structure below the freezing point. A metal frame made of reinforcement is installed. The structure is poured with concrete. The strip foundation of the stove cannot be connected to the foundation of the house. The foundation of the building is squeezed out of the ground in winter. The intensity of the “walking” of the walls, the rise from the ground varies, reaching 20-30 cm. If you make a common foundation, this will lead to the destruction of the brick cladding, and often to the deformation of a steel stove decorated like a brick. In any case, SNiP imposes a strict ban on making a common foundation for a stove and a residential building.
Concrete slab is another popular solution. The slab is poured with a thickness of 15-20 cm. If installed correctly, the result is a monolithic base that can withstand almost any load. To level and evenly distribute the weight, you will need to make a gravel-sand cushion under the foundation. The layer is thoroughly compacted with plenty of water. After filling, a layer of waterproofing is laid, beacons are placed, along which a concrete screed is poured. To prevent the slab from cracking, freshly poured concrete is covered with oilcloth. The base is watered for 2 weeks.
Floor placement (floor installation)
Existing building codes for installing a home heating stove in a wooden house allow the installation of equipment that does not have cladding directly on a wooden floor. When installing on the second floor, you will need to strengthen the logs with metal corners and channels.
To prevent fire, the tree is protected with a metal sheet or a clay-brick layer. Otherwise, installing a wood-burning stove in a wooden house yourself is not difficult.
Installing the stove on the floor
The installation of the furnace can be carried out without preparing the foundation, if we are talking about a steel unit or a compact cast-iron model. In this case, you should take care in advance to strengthen the base of the floor.
For this purpose, the logs at the place where the stove is installed are mounted with a reduced pitch - this increases the rigidity of the structure. If you plan to install the stove on the second floor or in the attic, the ceiling made of wooden beams is additionally reinforced with metal channels and corners.
On a wooden flooring, it is necessary to install a base under the stove. For this, a non-flammable heat insulator is used - basalt fiber cardboard, asbestos sheet, etc. Since asbestos-containing materials are hazardous to health, measures should be taken to ensure that the thermal insulation does not collapse during operation and its particles cannot enter the room air.
Brickwork bonded with heat-resistant mortar or clay can also serve as a heat insulator. Sheet metal is laid on top of the heat insulator. Detailed instructions for arranging the base, as well as the dimensions of the structure, are indicated in the operating instructions for stoves made of cast iron or steel. The instructions must be followed to ensure fire safety.
Load on wooden floor
The maximum load on a wooden floor depends on the cross-section of the beams and their pitch. The larger the cross-section and the smaller the pitch, respectively, the greater the load the floor will withstand without any deformation. If under the wooden flooring instead of beams there are inch boards placed on the edge, and their pitch is about 60 cm or more, then in the steam room you will have to be content with a miniature electric heater weighing 10-12 kg. Therefore, the first step before installing a stove is its correct selection, taking into account the permissible load on the floor.
Structural protection
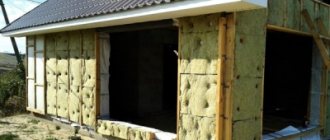
If the stove is installed near building structures in a wooden house, it is important to ensure that they are protected from fire. For this purpose the following is used:
- treatment of wooden elements with special impregnations or mastics with fire-retardant properties;
- installation of sheathing made of thermally insulating and non-combustible materials.
Wall protection. To protect a wooden wall near the stove from fire, use the following methods:
- install brickwork half a brick thick, followed by decorative finishing (tile cladding, painting with fireproof paint, etc.);
- plastered with mesh reinforcement, the thickness of the plaster layer should be from 3 cm;
- covered with basalt cardboard and a sheet metal sheathing is mounted on top (you can use special protective and decorative screens made of stainless steel).
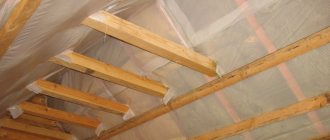
Ceiling protection. Ceiling structures heat up the most at the places where the chimney passes. The ceiling lining cannot be made from materials that are unstable to heat - plastic panels, PVC sheets, etc.
Near the chimney inside the ceiling there should be a box filled with a non-flammable heat insulator (basalt wool), special metal aprons or sheathing made of gypsum fiber sheet, which is treated with gypsum-based putty and painted, should be installed outside.
All wooden structures in the immediate vicinity of the stoves (at a distance of up to 1.5 m) are treated with fire retardants before installing protective coverings for the floor, ceiling and walls. Impregnations have virtually no effect on the appearance of wood, but mastics provide more reliable fire protection. The processing technology is specified by the manufacturers of fire retardants. The composition is usually applied by brush or roller, or using a sprayer.
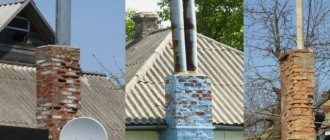
Installation of chimney pipes
Installing stoves and fireplaces in a wooden house necessarily implies the presence of chimneys. Installing them at random is like lighting a fire inside a wooden house. The thing is that when the stove heating system is operating, a short-term temperature may occur in the chimney, which sometimes exceeds 800 degrees. For this reason, fire breaks must be provided in chimneys.
Installation of chimneys is carried out in accordance with the rules:
- the chimney is made of refractory brick, stainless steel or ceramics, which has a heat-insulating layer;
- It is not advisable to place the chimney close to the wall. The places where the chimney pipes will pass must be covered with thermal insulation;
- the junction between the pipe and the ceiling is insulated using basalt cardboard, stainless or galvanized sheet.
Chimney installation
When solid fuel burns, the temperature in the firebox reaches 450-5550 degrees, while the flue gases heat the metal chimney to 300 degrees. If soot accumulates in the pipe and flares up due to heating, the temperature in it can briefly reach 800-1000 degrees.
It is important to know how to install a chimney to avoid the risk of fire in the ceiling and roof structures. According to current fire safety regulations:
- It is recommended to install a sandwich chimney - a two-layer ceramic or stainless steel pipe inside is equipped with thermal insulation;
- the size of the fire gap when the pipe passes through the ceiling, walls and roof is at least 25 cm on each side along the perimeter/circumference of the chimney;
- When installing ceiling and roof trim (self-made or factory-made), the fire gap is filled with basalt heat insulator.
If the chimney is brought outside not through the ceiling and roof, but through the wall, care must be taken to securely fix the pipe to the wall so that the chimney can withstand wind loads. It is recommended to cover the wooden wall of the house where the pipe passes with sheet metal with a non-combustible backing or plaster it.
If you understand the question of how to install a stove in a wooden house, it will not be difficult to provide heat for a summer house for seasonal or year-round use, a small private house or a workshop.
A wooden house (dacha), not connected to central heating, needs a heat source that allows it to be lived in at any time of the year. Traditionally, fireplaces or stoves are used for these purposes, which can have a variety of designs.
The order of arrangement of stoves in a wooden house is regulated by current standards (SNiP), and is also specifically stipulated by fire safety requirements.
Installation of stove and chimney
The installation of a metal stove itself is not difficult.
The main thing is to strictly follow the recommendations in the instructions supplied with the equipment, and also to align the structure at a horizontal level. In this case, the minimum distance specified above must be observed from the wall. Advice. Before installing the device in the house, it is recommended to carry out the first firing in the yard so that the thermal paint that covers the stove outside and inside is firmly fixed and loses its specific smell.
After installing the stove, the chimney is connected. The most successful option for a wooden house is a sandwich chimney. There is a heat insulator between the two layers of steel that it is made of, so the outer surface does not get too hot. Other advantages of chimneys of this type include the fact that they are not prone to condensation and less soot accumulates in them.
If the pipe is made of stainless galvanized steel, then it must be insulated with non-combustible material. But, despite the presence of insulation, the chimney, according to safety regulations, must, like the stove itself, be located no closer than 38 cm from the wall.
The rules for installing a chimney are as follows:
- In order to make chimney passages through the ceiling, a factory-made cutting (special box) is used. This type of cutting is called interfloor or attic.
- The box should be selected so that the diameter of its hole matches the outer diameter of the pipe.
- A square hole should be cut between the beams, the size of which should correspond to the square part of the cutting. You can make this hole a little larger so that you can metal it with two layers of basalt wool.
- After this, the assembly of the chimney begins. A pipe must be connected to the chimney outlet, which is located on the top or rear surface of the housing. A slide valve is mounted above, which is designed to regulate draft.
- To create hermetic connections, special heat-resistant compounds are used. If it is necessary to create a connection between pipes of different diameters, special adapters (so-called glasses) are installed. You should not make a chimney with a large number of turns - fuel combustion products will accumulate in them.
- Next, the chimney is passed through a box in the ceiling, and the space between the cutting walls and the pipe is filled with basalt fiber.
After this, all that remains is to remove the chimney through the roof. For this you will also need factory cutting, but this time for roofing. Such elements are produced with different slope angles and are selected in accordance with the angle of the roof. The technology for passing a chimney through the roof is approximately the same as for a similar operation with a ceiling:
- It is necessary to maintain a distance of 25 cm between the pipe and flammable materials.
- The chimney and the hole under it from above must be closed with a special part - a roof.
- After this, you need to put a comfrey on the pipe. This is an element that protects the chimney from precipitation.
- The areas between the rafters and the pipe should be filled with basalt wool, and a metal reflector should be attached below.
The chimney of an iron stove can be exhausted either through the ceiling or through the wall. In the second case, you need to arrange for fixing the pipe from the outside to the wall of the house to ensure its resistance to wind.
When passing through a wall, the thermal insulation of the structure is performed in exactly the same way as when passing through the ceiling. The only caveat is that a wooden wall may shrink over time. As a result, a sliding fit of the cutting must be implemented.
All these measures can be carried out on your own, but before putting the stove into operation, you will definitely need to contact the Ministry of Emergency Situations to obtain a certificate stating that fire safety rules have been complied with. However, we recommend entrusting the installation of equipment to professional craftsmen, and the tips from the article will help you monitor their work.
Choosing a location for the oven
Any metal or brick stove in a wooden house is installed based on the following considerations:
- the possibility of arranging a chimney in relation to the design features of the floor and roof;
- free access to the stove for the purpose of its maintenance;
- compliance with fire safety clearances ensuring its distance from flammable surfaces.
Such types of stove devices as potbelly stove or buleryan are subject to special requirements related to the possibility of free movement of convection air flows.
Note! In order to heat adjacent rooms, a brick stove is sometimes built directly into the partition.
The installation of a stove in a wooden house must be tied to the location of the designed chimney. It is not enough to simply move it as close as possible to the combustion products exhaust channel. Correct installation of a heating stove for a wooden house should ensure ease of connection to the chimney, as well as the possibility of servicing both.
This requirement is explained by the design features of furnaces, from which it is necessary to constantly remove accumulations of ash, clean the combustion chamber, and also clean the walls of the chimney. During installation, some distance should be left in the direction of opening the firebox door.
According to SNiP requirements, the distance from the stove to the walls must be at least 110–125 cm. The same gap is left on the side of the stove combustion chamber door. The stove should be located within the house so that maximum heat transfer can be obtained from it.
Features of metal stoves
Metal stoves are designed specifically to equip a house, cottage or cottage with a constant source of heat without spending a lot of time and effort. However, you can fully enjoy the benefits that such a stove provides only if it is installed correctly.
- A large selection of models: from stoves of traditional design to technologically complex options with two- and three-turn fireboxes.
- Characterized by moderate cost.
- They heat up quickly, which allows you to make the room temperature comfortable in a short time.
- Long service life. If handled properly, a metal stove will last at least fifteen years.
- Compact dimensions and the presence of a hob in many models.
- Installing a stove in a wooden house does not require much time and effort.
It is worth saying that metal stoves can be additionally equipped with large panoramic glass and also perform a decorative function, such as the stoves of the Matrix, Meteor, and Vertical series. In this case, when choosing a place to install them, you need to take into account that the door should be in the viewing area.
Types of foundations
Among the known types of foundations for arranging furnaces, the following are suitable:
- concrete pillars;
- strip foundation;
- monolithic slab.
Each type has its own characteristics. Concrete pillars are suitable for both a heavy metal stove and a massive brick fireplace. The number of supports is selected based on the total weight of the structure and the condition of the soil at the installation site. To install them, holes of the required size are made in the floor, and after installing the posts, a frame of welded metal channels is laid on them.
Strip foundations are erected according to the classical scheme. According to the method, when constructing them, formwork is first made around the perimeter of the supporting structure, into which liquid concrete is then poured. All other operations are performed in exactly the same way as described in the previous case.
Important! The strip base should not be connected to the foundation of a wooden building, since due to its small mass in winter it can be squeezed out of the ground.
The monolith is mainly used when installing fireplace-type stoves in dachas. Its thickness can reach 15–20 cm, which is quite enough to withstand the design pressure on the foundation.
Any of the types of foundation discussed above must sit for some time after pouring. You can begin installing the stove on it in about 28–30 days.
Base for a stove in a wooden house
When the stove has a small mass, it is necessary to slightly increase the strength of the floor. You can additionally make a flooring perpendicular to the main one. To maintain fire safety, asbestos material is laid at the installation site. The top is covered with a metal sheet. Construction can begin. If the stove is heavy, you will have to dismantle the floor.
Use of piles
General rules for bookmarking a database
If the stove is located away from the outer walls, the ground will not freeze, so there is no need to be afraid that the base will deform. A small indentation is made. There is no need to worry about soil heaving on sandy or rocky soils as long as the water does not lie too close to the surface, even if the equipment is located next to external walls.
When constructing the foundation, you need to monitor the vertical and horizontal levels. The height of the base depends on the distance between the ground and the floor. Must be below floor level, related to waterproofing. The base is covered with roofing felt so that the resulting moisture does not fall on the stove. If the base is higher, close to the floor level, dampness will transfer to the flooring.
Slab base for metal stove
This refers to a thin reinforced concrete slab. Applicable:
- concrete;
- fittings;
- filler.
Filler:
- crushed stone;
- pebbles;
- broken bricks, concrete fragments.
It is necessary that the materials are not too large, otherwise they will interfere with the installation of the reinforcement mesh.
Slab making
The slab can be selected when the ground is hard and a starting platform is needed. After waterproofing, you can begin laying the stove. If you need to raise the level, raise the base to the floor, lay out brickwork around the perimeter, the width of a brick. The space is covered with sand, and two rows of bricks in a bundle are again laid on top. Brick and cement mortar are saved.
Stone (rubble) base for a brick kiln
Large stones can be used to make a strong base for a very heavy stove. They make a hole, fill it up, tamp down the pillow, it will help the water not to accumulate. You can pour tar, mastic on top, cover it with roofing material, separating the lower wet layers. Stone masonry is laid on top of the waterproofing. The largest stones are laid around the perimeter, and smaller ones closer to the center. They try to make the outer sides even in a plane, vertically.
The structure can be erected quite high, it is necessary to monitor the dressing. After construction is completed, the concrete is given time to gain the necessary strength, and you can begin laying the stove. The top and sides of the cabinet must be coated with tar and mastic; roofing material may tear on sharp edges.
Reinforced concrete base
The design is similar to a slab, but has a greater height. To make a concrete mixture, use a recipe of 1: 3: 5: 0.5, where the following are indicated: cement, sand, gravel, water.
The ratio of water and cement should be as indicated in the diagram. Theoretically, the water-cement modulus should be 0.2, but due to the low viscosity, it is necessary to make the figure higher. An excessive increase in the number leads to a decrease in the strength of concrete, usually several times. The water-cement indicator varies depending on the brand of cement used.
Reinforced concrete base
A special feature is the use of reinforcement. Unlike the slab type, a column bond is required here. The point is the diameter of the rods. The main load in the slab type falls on the horizontal elements, while in the column type it is evenly distributed on horizontal and vertical planes.
Fire safety requirements (FPR)
The PPB requirements stipulate the conditions under which correct installation of any type of furnace equipment is possible. To a greater extent, they relate to the protection of the floor and walls of the building from accidental fire (due to contact of wood with hot surfaces).
The following protective measures will ensure the safety of housing and people:
- The use of special fire-resistant materials that protect the walls and ceiling in the area where the stove and chimney are located (if the house is two-story, the ceiling between floors should also be protected);
- Impregnation of elements of wooden structures bordering the hot parts of the furnace with special compounds.
Compliance with all fire safety requirements and proper use of fire protection equipment is the main condition for the safe operation of home heating equipment.
Thermal screens
How to install a stove in a bathhouse on a wooden floor and protect wooden partitions from high temperatures? For steel and cast iron units, the following types of screens are used:
Fire protection will protect the tree from fire and charring. The material is mounted on the wall surface, in some cases through thermal insulation inserts. They lay out a brick covering or line it with natural stone or ceramic tiles. Another option is to install iron sheets on the partitions and ceiling. It is recommended to use stainless steel, which is attached to the boards with a heat-resistant gasket, or basalt cardboard can be laid on top of the layer.
Brick barriers can be laid on the sides of the stoveSource bg.decoratex.biz
Protective types protect users from various burns of contact and remote origin. In this option, the firebox itself is lined, with the obligatory arrangement of an air gap of 3-7 cm. The thickness of the finishing material is half a brick, but some builders make masonry using a quarter of a whole brick. When installing the stove, the iron screen is also attached at a certain distance from the body.
A wooden wall and floor can be protected by metal shields Source banya-ili-sauna.ru
A floor heat shield made of steel sheet will protect boards located near the heating device. It is recommended to use a sheet measuring 70x50 cm; it is attached along the front part of the firebox, while a layer of heat-insulating building material is laid between the wooden floor and the metal. Basalt or asbestos cardboard is suitable.
In addition to its protective qualities, the screen will give the furnace unit a complete appearance.
Wood processing
The most common protective agents include special impregnations (fire retardants) and transparent mastics. The following elements of wooden structures are usually processed by them:
- ceiling beams;
- floorboards in the area where the stove is installed;
- walls adjacent to it.
Additional Information! When choosing products, you must keep in mind that mastic has a higher fire protection rating than colorless impregnation.
Fire retardant treatment of wood elements can be carried out not only by representatives of the Ministry of Emergency Situations, but also by the owners of the house themselves. In the second case, they will need to obtain a special certificate confirming the correct installation of the stove.
Functional purpose of individual parts
Fuel is loaded into the firebox and ignited. The combustion activity and intensity of heat release are directly related to the damper - with a larger opening, maximum air enters the firebox and the wood burns better. If the design involves an open firebox, the intensity of the fire does not need to be adjusted.
To regulate the air supply you need a grate. An important point is the timely removal of ash, which collects through the grate into the ash pan. Usually it is raked out or shaken out, depending on the presence of a built-in or retractable system.
The fireplace chimney removes the accumulated combustion products to the street. To prevent gases from spreading inside the house, the chimney is often equipped with forced draft force. It is a fan. For the construction of a chimney, it is allowed to use only heat-resistant bases: brick, ceramics, heat-resistant steel.
Ceiling and wall protection in the form of sheathing
In addition to treating elements of wooden structures with fire retardants and mastics, they can be protected from the hot parts of metal furnaces by covering them with fire-resistant materials. When preparing for this procedure, it should be taken into account that the ceiling lining in the area of the roof outlet is carried out only with non-combustible materials that do not spoil the interior of the room.
Important! It is strictly prohibited to use flammable panels for upholstery.
The optimal cladding option is gypsum fiber boards treated with fire-resistant putty. To protect the walls, basalt cardboard can be used, covered with steel sheets on top. Most often, special decorative screens made of stainless steel are used. They not only protect surfaces well from burning, but also look quite aesthetically pleasing.
Another option for protecting walls from hot stove parts involves covering them with bricks placed on edge.
Arrangement of a cast iron hearth
It is impossible to make a cast iron fireplace for a summer house entirely with your own hands. Unless, of course, you have a mini smelter at home. In the vast majority of cases, cast iron hearths are made to order and then assembled at home according to the attached drawing by professional assemblers. You can order individual parts from the manufacturer and assemble the fireplace yourself. Read more about how to create a country fireplace on our portal.
Design diagram of a cast iron fireplace
Materials for assembling a cast iron fireplace
Some parts and materials for a future cast-iron stove-fireplace for the home can be purchased in a store or ordered at a factory, and some can be found in the countryside among old tools. Here's what you'll need to assemble a cast iron firebox:
- several (4-5) full sheets of chipboard or other materials for the pedestal (for example, brick or cement board);
- basalt wool;
- cement mortar;
- components of the fireplace: external walls and partitions for the ash pan and firebox, a door for the ash box and legs made of cast iron (usually made to order);
- fireproof glass door;
- door hinges;
- reinforcing bars;
- chimney pipes with a diameter of at least 20 cm, if necessary, an elbow for the outlet and connection of several pipes;
- bracket;
- head;
- fungus;
- heat-resistant sealant;
- materials for external decoration (stone, gilding, silver paint, brass figurines) upon request;
- building level;
- Bulgarian;
- welding;
- screwdriver.
Fireplace installation diagram
Before you begin directly assembling the fireplace, you need to develop and carefully study the drawing. When ordering a finished fireplace, the manufacturer usually includes a diagram and instructions for assembling the fireplace. You can also draw up a drawing yourself. In this case, it is important to indicate the dimensions of the furnace and its component parts, their connection points and the order of installation. You should start with the pedestal and end with the outlet of the chimney to the street. On the Internet you can find many drawings of cast iron fireplaces, which you can use as the basis for your own design, taking into account the characteristics of the room. We advise you to study: installing a fireplace in a wooden house with your own hands in addition to this article.
The diagram must indicate the dimensions of the fireplace
The main stages of installing a fireplace
Assembling a cast iron fireplace for your home is not at all difficult if you strictly follow the assembly sequence and follow the drawing.
- Installing a fireplace begins with preparing the floor surface. If the floor is wooden, then it is recommended to put a layer of basalt wool between the ceiling and the floor covering for thermal insulation.
- Next you need to prepare the pedestal. It can be made by connecting several sheets of chipboard together, with a fire-resistant coating (ceramic tiles, fiber cement board) placed on top. A cement slab can also serve as a pedestal - an ideal basis for a cast iron fireplace stove.
For safety reasons, the fireplace must be installed on a pedestal.
- If the walls of the room are decorated with wallpaper and other flammable materials, then in the area where the fireplace is located it is better to protect them with ceramic tiles, brickwork or artificial stone. This is especially necessary if you have chosen a corner cast-iron fireplace, and it is in direct contact with the walls.
External cladding of walls with fire-resistant materials will protect them from dirt, soot and fire
- Next, the fireplace is assembled according to the drawing, first the side walls are connected to each other. The bottom of the fireplace (cast iron plate) is attached to them.
All parts of the fireplace are connected strictly according to the drawing
- After this, partitions are installed for the ash chamber and combustion chamber. Between them it is necessary to install a grid, which can be welded from reinforcing bars.
For assembly accuracy, do not forget to use a measuring tape and level
- The fireplace is closed with an upper wall-lid. If there is no hole for the chimney, it must be cut before installation.
- If the design involves a closed firebox, then the combustion chamber is covered with a fireproof door. First, the hinges are attached to the fireplace, and then the door itself.
It is necessary to install a grate between the firebox and the ash pan to allow ash to leak out.
- The installation of the chimney completes the installation.
Tip: When assembling the fireplace, do not forget to use a level to avoid gaps, unevenness and distortions. In case of an error, a cast iron fireplace is quite difficult to disassemble.
Chimney installation for a cast iron fireplace
In general, the chimney design for a cast iron stove is practically no different from the chimney in conventional metal fireplaces. The chimney is installed in a special hole in the fireplace lid.
Chimney installation
If the design involves 2 or 3 sleeves, then the pipes are connected to each other using elbows. All joints and penetrations must be filled with heat-resistant sealant.
For better thermal insulation and thermoregulation, use sealant and basalt wool
The stability of the chimney will be provided by a bracket that is attached to the wall. The pipe will rest on it. On average, 1 bracket is needed per 70-80 cm of pipe. Ultimately, it is necessary to bring the chimney to the roof. It should rise above it by at least 500 mm. A head and a fungus are placed on top of the pipe. They will protect against water and snow getting into the chimney.
The chimney assembly is carried out in stages and strictly according to the drawing.
This completes the process of assembling the cast iron hearth. If necessary, finishing work can be carried out. For example, cover certain areas of the fireplace with gold or install brass figurines. The cast floral ornaments on the front panel of the fireplace look quite aristocratic. It all depends on the design of the room and taste.
Tip: The fireplace can only be painted with special fireproof paint. Avoid using varnishes. Otherwise, the external finish will melt: it will not only quickly lose its appearance, but will also ruin the fireplace itself.
Installation of a metal furnace
When considering the features of the placement of metal and brick stoves, approaches to their installation are somewhat different. Iron stoves may not weigh too much, so during installation they do not need a foundation.
Important! According to the provisions of SNiP, only metal stove products with a mass exceeding 80 kg need a reliable foundation.
With a lower weight indicator, such a product is installed on a substrate made of refractory material directly on the floor. Once the location has been chosen and the issue with the foundation has been resolved, you can proceed to the procedure for installing a metal furnace. When installing a heating device, all requirements specified in the section on the protection of wooden structural elements of the house must be met.
For this purpose, a metal stove with a water boiler is sometimes simply lined around the entire perimeter with ordinary bricks. In all other respects, its installation comes down to installation in an already prepared place. The only thing you should pay attention to is compliance with the rules for venting the chimney outside.
Project No. 1 – compact mini-fireplace
This hearth is suitable for heating a room of 16-20 m² in a country house or a small country house. Another option for using the structure is as an outdoor barbecue built in a garden gazebo. A special feature of the fireplace is the side convection channels that heat the air in the room. The size of the building is 102 x 51 cm.
To lay out a mini-fireplace, you will need the following materials:
- solid ceramic brick – 240 pcs. (chimney pipe is not taken into account);
- inspection door 24 x 14 cm – 1 pc.;
- cast iron grates 18 x 14 cm;
- valve 25 x 14 cm;
- stainless steel sheet 1 mm thick, size 500 x 1000 mm;
- sheet of black or galvanized metal, laid in front of the firebox, dimensions - 70 x 50 cm.
Sectional drawing of a mini-fireplace.
There are outlets for convection channels on the side walls. The mini-fireplace shown in the drawing is laid out in the following order:
- The first tier is solid. On the second, 3 air channels are laid - 2 side and one in the middle, located under the grate.
- On the third row, the bottom part and the grate nest are formed (made 5 mm wider than the product). Then the grill itself is installed.
- From the 4th to the 10th tiers a fireplace insert is built. On row V, 2 metal rods Ø5 mm are laid for mounting a stainless steel sheet.
- In the 10th row, the rear brick protrudes a quarter into the firebox, the side stones move outward by 40 mm. The width of the firebox in this place is 49 cm.
- The ends of the side stones of the 11th tier are filed at an angle of 28° to the vertical line. You will get the supporting platforms of the arched vault. 2 stones in the depths of the firebox are placed on edge.
- The vault is built from 9 stones, cut in the form of a trapezoid with base sizes of 65 and 52 mm, as indicated in the order. The circle radius is 51 cm.
- On the 12th tier, the formation of the vault is completed, the upper steel rods are installed and a stainless screen is installed.
- Tier 13-14 forms the outlet openings of the convection channels. An inspection door is installed here.
- 15th row - the ceiling is being built, 16-18 - the beginning of the chimney.
The master will tell you in detail the algorithm for laying a mini-fireplace in his video:
Installation of a brick kiln
It is preferable to lay out the base of a brick stove in advance (at the stage of designing a house or when pouring the foundation for it). For a brick wood-burning stove weighing about 300 kg, it is best to prepare a monolithic concrete base, poured over the entire area of the structure. If the house has already been built and lived in, you will have to dismantle the floors in the chosen place, then go deeper into the ground by about 25 cm.
After this, it is necessary to prepare a cushion of sand and gravel, compact it thoroughly, and fill the pre-reinforced base with concrete mortar. It is possible to make a foundation in the form of concrete columns or a strip structure constructed according to a standard design.
Important! The dimensions of the base should exceed the dimensions of the stove or fireplace by approximately 10–15 cm.
Upon completion of the installation of the fireplace stove in houses made of timber, all that remains is to insulate the wall in any way convenient for a person.
Which heating system to choose
A stove in a wooden house can perform not only the function of the main heating system. Another, no less important purpose is cooking. Accordingly, according to the type of use, furnaces have the following division:
- heating system;
- combined system (heating and cooking).
Often in homes the second option is used. However, most owners of country wooden houses are content with installing a fireplace, which looks much more aesthetically pleasing than a stove, but is inferior to it in practicality. The main advantage of a fireplace is its cost-effectiveness, which is why many owners of wooden houses prefer to combine a stove with a fireplace.
Do not forget about the safe operation of the heating system. This indicator largely depends on the design of the stove or fireplace.
The following types of heating systems are well suited for arranging a wooden house:
- Classic Russian stove with a stove bench . Despite the complexity of installation, it is an ideal option.
- A decorative fireplace stove will decorate the interior of the room well. It is a universal and safe source of heat, thanks to the presence of special heat-resistant glass that separates the fire from the living area.
The fireplace stove is equipped with glass doors - and the fire is pleasant to look at and sparks do not fly in all directions Source bauenhaus.com.ua
- A massive cast iron stove will fit perfectly into the interior of any room. It is distinguished by a variety of models, ease of installation and high fire safety.
Important! If the choice was made in favor of a fireplace, you must give your preference to a model with protective glass. An ideal option would be to install a fireplace stove in a wooden house.
Chimney installation
Due to the strong heating of the furnace, the temperature in the chimney area can reach 300 °C. If there is a large accumulation of soot in it and it ignites, this figure rises even higher. When installing steel chimney pipes with your own hands, you need to take into account a number of points regarding the order of their installation.
Firstly, the chimney can be laid not only inside the building, but also along the outer surface of the wall (in the attic). Secondly, in the internal spaces of the house it will be necessary to reliably insulate the pipe in the areas where it passes through the ceiling and roof. Finally, the outside of the chimney should be carefully secured to the wall of the building.
In the process of arranging a diversion channel, it is necessary to be guided by the following requirements of the PPB:
- near the walls, the drain pipe should be laid at a distance of approximately 25 cm;
- the surfaces of the walls are first lined with basalt cardboard, and then sheathed with galvanized or stainless steel sheets;
- the holes in the ceiling must be large enough to maintain 25 cm gaps on the sides (they are subsequently filled with basalt insulation).
To install a chimney, it is preferable to use a sandwich pipe made of ceramic and stainless steel, protected by a layer of thermal insulation. If you have available funds, you can install a branded ceiling trim.
The stove is also called the hot heart of the house. And not in vain, because thanks to her:
- You can dry wet things at any time;
- you will become the owner of an alternative heating method if, for example, there is no electricity;
- you can cook or heat food;
- You can live in the house permanently: no one is immune from the fact that in a year or two they will have to live in it permanently.
Therefore, you must know how to install the stove correctly so that for many years it not only warms the whole family, but also becomes the heart that attracts everyone to itself and creates home comfort.
Protective cladding for walls and ceilings
The walls directly adjacent to the stove, as well as part of the ceiling along the passage of the chimney, are subject to significant thermal loads.
Therefore, before installing a stove in a wooden house, you need to fulfill a number of prerequisites:
- The ceiling lining is made of non-combustible material. Wooden or plastic panels are not used. It is best to purchase gypsum fiber boards treated with gypsum putty for painting.
- The walls must be protected with a layer of basalt cardboard and covered with a sheet of steel. As an option, you can use ready-made decorative stainless steel screens. These products are able to provide safety and are distinguished by external beauty. In addition, the walls can be plastered with a layer of 3 cm or more, and also lined with brick (read: “How to line a metal stove with brick in a house - a step-by-step guide”).
Fire safety rules for installing iron stoves in wooden houses are described in more detail in SNiP 05/31/2003 and SP 118.13330.2012.
Types of furnaces
Typically, a furnace performs several functions. With its help, the room is heated, water is heated, and food is prepared.
Depending on the functionality, there are heating or cooking structures.
Depending on the goal pursued, you need to choose a fireplace or stove option. A fireplace looks more aesthetically pleasing, but a traditional brick stove is more practical. Although it is impossible to replace it with a fireplace, since it is most likely suitable for ventilating the room and creating home comfort in it than for heating.
An ideal, but more difficult option is to combine a fireplace with a stove. Therefore, in order for such a stove installation in the house to be successful, it is necessary to have special skills. After all, it’s not enough to be careful and precise; you also need to skillfully connect the stove, oven, and other stove appliances. It is clear that in such cases you can discuss everything with an experienced stove maker, and if time is pressing, then use his services. However, it must be taken into account that such work is not cheap.
Advantages of cast iron stoves
It is worth noting that cast iron can be heated to very high temperatures without loss of properties. Consequently, a cast iron stove can even withstand burning wood with a high combustion temperature or even laying coal . Steel stoves can simply burn out when using this type of fuel. The only caveat is that cast iron cannot be cooled quickly - this can lead to cracks.
Such stoves serve their owners for several decades. These are fairly budget devices; purchasing them will not put a big dent in your wallet. And certainly buying a cast iron stove will cost less than building a classic stone stove.
cast iron stove with fireplace
Cast iron stoves are usually small in size and fit perfectly into small homes. It is worth noting that despite their considerable weight, their installation does not require pouring or installing a separate foundation.
The installation process for such a device is quite simple and will be described below.
Another advantage of cast iron stoves is the minimum time for lighting such a device. It is brought to operating temperature in literally 15 minutes. After just a quarter of an hour, it begins to intensively heat the room in which it is located.
The modern design of cast iron stoves allows you to use fuel material quite economically, and maintenance and cleaning of such devices will not take much effort and time.
What functions can a cast iron stove perform?
It is important that in addition to heating the room, cast iron stoves can perform many other useful functions. Depending on their design, you can cook food on such stoves, use them as an oven for baking, or dry prepared fruits or mushrooms.
cooking cast iron stove
The cast iron stove is a rather massive structure and gives the interior some solidity. Since the tradition of heating rooms with stoves dates back to the Middle Ages, stove models can be designed with interesting historical parallels, which will certainly decorate your interior. The most notable models are those recreated from drawings from the late 19th century, which are excellent examples of Belle Epoque - the Belle Epoque.
A cast iron stove has a long service life and can be usefully used by your family for up to half a century.
Design features of cast iron stoves
Cast iron stoves became most popular in the 19th century. However, since that time, engineering has not stood still and stoves have developed from simple boxes of firewood to high-tech devices. Let's look at the most popular types that are currently on the market:
- Single-circuit heating stove. A classic version, built according to 19th century patterns. They are made both in a purely utilitarian design (the classic “potbelly stove”), and as copies of works of applied art, which can serve as decoration for the interiors of even prestigious mansions. Simple models are in constant demand for heating small country houses. Low efficiency (up to 60%) is compensated by ease of installation and use. But, by the way, in comparison with the “potbelly stove” of revolutionary times, such a stove looks like the crown of technical progress.
Cast iron stove stove
- Cast iron convection ovens. A more complex model in which a metal casing is mounted around the firebox. Heated air rises between the cast iron and steel. This design increases the efficiency of the furnace to 75%.
5 convection oven
- Cast iron stoves of gas generator type. The pinnacle of furnace technological art. The firebox of such a furnace has two chambers. The lower chamber contains smoldering solid fuel, which releases flammable gas, which rises and burns in the upper firebox. The efficiency of such a system reaches 90%. Such furnaces can be equipped with automated control and mechanical fuel supply. With just one installation, such a boiler will be able to heat your room for 10 hours.
Oven with gas generator
- In addition, a cast iron stove can easily be combined with a fireplace. Typically, such an oven has two heating circuits. The firebox used as a fireplace can be closed or open. Firebox. Covered with tempered heat-resistant glass, it is safer.
- Note that cast iron stoves can additionally be equipped with devices for cooking or for ingots. In this case, it is truly multifunctional equipment.
Where is the best place to place the oven?
Placement is determined by its purpose.
Stoves used purely for heating the room are recommended to be placed in the center (option 4).
If the stove unit is planned to be used for cooking, as well as creating home comfort, then it is best to place the structure in the corner of the room or near the wall (options 1,2,3,5). Although in this case some of the heat will be spent on heating the wall, it’s not that bad.
Important! When choosing a location for the stove, the main thing is that fire safety rules are followed!
According to the standards, the furnace must be placed taking into account the following conditions:
- in order to protect the floor, use brickwork as a base;
- Be sure to lay a non-combustible coating in front of the firebox. Most often, metal sheets are used for these purposes;
- the oven door should be located at a distance of ≥1.25 m from the nearest wall;
- the gap between the top of the structure and the ceiling should be 1.20 m or more;
- the side of the stove should be at a distance of more than 0.5 m from the flammable wall. Although, if thermal insulation is carried out correctly, then some reduction in requirements is possible.
Detailed furnace layout diagrams:
Scheme for the location of the stove near the wall Scheme for the corner placement of the stove
Heating with wood has always been and still remains the most beneficial for human health. Its popularity is growing every year. And if you don’t know how to properly install a fireplace or stove with your own hands in a country house, then if you follow all the recommendations, you can do everything yourself very quickly, safely and economically. Try it, and you will succeed, as evidenced by numerous reviews from consumers who installed a stove in their home with their own hands.
If you plan to install an electric fireplace stove, then in this case these rules are more loyal.
Selection of materials and oven
Initially, the author of the thread planned a fireplace to decorate the interior - I wanted to give it more coziness. However, it turned out that the stove heats up very strongly, and one full load is enough to heat one room and two adjacent ones - it even gets hot within half an hour. And the fireplace remains hot for about 4 hours after heating. This is quite suitable as an alternative heating.
The installation of the fireplace stove began with preparing the floor. For the base, porcelain stoneware slabs were chosen, installed on a heated floor with a 150 mm screed. The fireplace was built on a floor covering made of a standard expanded clay block with a distance of 50 mm from the wall. The masonry was made using mortar. This is a cast iron fireplace, so the distance from its walls was minimal - 300 mm. Heat-resistant facing tiles were laid on top of the blocks with glue and sealed with a sealant that was also resistant to high temperatures.
anshushkov
The fireplace gets very hot, from one full fireplace in the room and 2 adjacent ones, it becomes hot within half an hour. The protective shield also heats up, but to about 60-70 degrees Celsius. The fireplace remains hot for about 3-4 hours after heating. But I use it more for aesthetics; I usually make only 1 bookmark.
Expanded clay block was not chosen by chance. According to the user, he had previously studied thermodynamics and thermophysics, so he understood perfectly well that, due to its hollowness, the expanded clay block heats up less, and therefore the risks are reduced. This was the main factor when choosing expanded clay blocks rather than bricks.
And to improve heating, the hero gave good advice:
ansushkov
It is very important to install a heat-removing convector on the first pipe, I don’t remember what it’s called, it was difficult to find, they usually suggest not installing anything, this is not correct, due to convection, the heat extraction is higher and the heating of the room is better.
Ansushkov painted the stainless steel with black heat-resistant paint. The choice was made not only because of the style of the stove, but also because stainless steel itself quickly loses its original color.
Navigator6989
Super! I’m also planning an Invicto stove with a black chimney. It will be located near the outer wall between two windows. The house is made of timber, so I decided to do without any imitation and line the inside wall with facing bricks (half a brick) with a bandage to the timber.
Fireplace foundation
Like any structure, a fireplace stove must have a reliable foundation. The fact is that the bricks, mortar, ceramics and other parts of this heating unit assembled together look like a tall and massive structure. Therefore, for its construction you will need a strong foundation that can withstand heavy loads and ensure strict verticality of the structure. Otherwise, after a short period of time, as a result of possible distortion of the structure caused by subsidence of the base, cracks and even faults will begin to appear, which can significantly deteriorate the heating characteristics of the fireplace and cause a fire.
This is how it should be Wrong
Main requirements for the foundation
- It is necessary to choose the right place for the fireplace stove. This means that in the process of building a heating unit one cannot take into account only its advantages from a design point of view. That is, the foundation construction process must begin in parallel with the walls of the building, which will eliminate the need in the future to carry out expensive measures to dismantle part of the floor, floor elements, etc.
- Remember that the walls of the room and the base under the stove will be subject to different loads, their shrinkage is also different. Therefore, if you want to place a fireplace near a wall or make it part of it, then immediately abandon this option. If you really need it, then you need to leave a small gap between the foundations (at least 5-7 cm) and fill it with dry sand.
Important! It is impossible to arrange the foundation for different building structures as a single whole.
- Keep in mind that the immediate plane of the base should, along the entire perimeter, be wider by about 5-7 cm from the dimensions of the so-called table under the fireplace stove, and the foundation pit should have a minimum depth of 55-60 cm. Although the deeper the better (within reasonable).
Approximate foundation diagram
- It is necessary to have information about the condition and type of soil on which you are going to build the foundation. Keep in mind that sandy soils are characterized by rapid subsidence; wet clay analogues are also not able to withstand heavy loads. It is recommended that the foundation lies below the soil freezing line by approximately 25-30 cm.
Without disputes
Of course, there was some controversy. The author of the discussion also posted a photo of the stove he made in a bathhouse - with heat-resistant bricks. Another FORUMHOUSE user, Alexey Telegin, said that this fireplace was made incorrectly. There is a risk of fire. He pointed to the boards above the portal that either needed to be protected, or better yet, gotten rid of.
Alexey Telegin
An absolutely wrong decision! As well as feeling the surfaces with your hand (cheek, thermometer) to look for heat. Ignition is quite possible not only from heat, but also from a spark, including accumulated dust in a ventilated portal, or stuck on a board, or a burr formed... And if heating occurs up to 70 degrees, it is very dangerous!
I’m sure you yourself understand that heating and igniting dust or wood chips will require significantly less energy! So it’s better to replace the boards with any fireproof materials! It's easier and cheaper. Take care of yourself!
He advised raising it by 2-3 rows of masonry and pushing it forward like a shelf to deflect the hot air flow from the wall. In response to criticism and wishes, Ansushkov showed photographs of the finished fireplace stove and explained that in order for the stove to heat up, a heat removal shield and the Geyser included with the stove were installed. He clarified that he followed the instructions and information given in the product data sheet.
ansushkov
For a general understanding, I’m adding a photo of the inside view. Where there is doubt that it will “heat up”, a factory heat removal panel is installed, which comes complete with the Geyser stove. In addition, the view from the inside is made of brick with a large thermal gap.
However, each of the discussion participants remained unconvinced.
Metal heating stoves
General information
With the help of such equipment, baths, cottages, work trailers, and other small rooms are heated.
These stoves are different:
- functionality. This means that over the entire period of improvement, today models are being created whose operation is characterized by different temperature conditions at different times of the day. Thanks to such innovations, the design can be adjusted to provide an optimal microclimate in the room;
- low efficiency. Today's options for metal stoves are constantly being improved. Such measures provide the opportunity to choose different fuels, which is very important for the consumer. In addition, constant work to increase the furnace area contributes to a constant increase in efficiency;
- universal configuration, in particular, in modern models a tank for heating water is installed, which allows the unit to be used not only in bathhouses, but also in dachas and other residential buildings;
- good design, thanks to which you can choose quite stylish designs from a large range of models. High efficiency plus ergonomics – the perfect combination. Decorative glass elements and forged parts are increasingly being used to decorate products.
Wall and ceiling cladding
The ceiling and walls adjacent to the stove are subject to the greatest thermal load. Therefore, it is simply inevitable to adhere to certain fire safety conditions and measures:
- To arrange part of the ceiling above the stove, it is necessary to use non-combustible materials. It is prohibited to use wooden, and even more so, plastic panels. The best option is gypsum fiber boards;
- In order to reliably protect the walls, basalt cardboard is installed on them, which must be sheathed with steel. For this purpose, we have now launched the production of ready-made protective decorative wall screens made of stainless steel, which are characterized by a beautiful appearance. But the main thing is that such elements help ensure a high degree of safety. You can also protect walls using plaster (thickness ≥3 cm), ceramic thermal tiles, and brickwork.
Features of metal furnaces
Often, as a simpler and more budget-friendly option, old forgotten potbelly stoves are used for such purposes in new, more modern versions. This heat generator is different:
- long service life;
- rapid heating of the room;
- the ability to adjust the temperature manually;
- reliability;
- possibility of using any type of fuel;
- reasonable price.
One of the advantages - rapid heating - is also a disadvantage, since the structure cools quickly. In addition, the unit requires constant maintenance, and using it for cooking purposes is almost impossible.
After weighing all the pros and cons, the owner himself must decide which stove structure will be installed in the house.
TOP 3 popular models of wood-burning cast iron sauna stoves
| Photo | Name | Rating | Price | |
| #1 | Hephaestus PB-04 MS | ⭐ 98 / 100 | More details | |
| #2 | Vesuvius Legend Forging 16 (271) | ⭐ 97 / 100 | More details | |
| #3 | NMK Sibir-18 | ⭐ 96 / 100 | More details |
Hephaestus PB-04 MS
A modern stove made of alloy cast iron (a firebox made of cast iron with the addition of chrome), which harmoniously fits into the interior of a Russian steam bath. Decorated with forging elements. Through the door with heat-resistant glass, the live flame is clearly visible. Stainless steel ash box.
“Hephaestus PB-04 MS”
High efficiency (up to 87%), energy efficiency (active afterburning of pyrolysis gases), quick heating of a steam room with a volume of up to 15 m³. The firebox is remote. The thickness of the elements is up to 40 mm.
The stove weighs 130 kg. The heater can hold up to 180 kg of stones. Product dimensions 39.4 x 56 x 64.5 cm.
Hephaestus PB-04 MS
Vesuvius Legend Forging 16 (271)
A sauna stove made of a special cast iron alloy “Vesuvius Legend” is suitable for steam rooms with a volume of 8 to 18 m³. Wall thickness 12 mm. It has a combustion tunnel with a length of 250 mm (filling firewood is implied from the adjacent room). The door is cast iron, without glass. Convection-ventilated steel casing. Furnace efficiency up to 80%. It warms up the steam room quickly and gently, the steam from the stove is finely dispersed, light and pleasant.
“Vesuvius Legend Forging 16 (271)”
Product dimensions 70x56x69 cm. The weight of the unit itself is 98 kg and the stones additionally up to 120-160 kg.
Vesuvius Legend Forging 16 (271)
NMK Sibir-18
The Siberia cast iron sauna stove (grade SCh-15) with a panoramic door is designed for steam rooms with a volume of 12 - 18 m³. It features a spacious firebox, is visually aesthetic and ergonomic. Wall thickness 10 mm. Flame stopper made of steel, thickness 6 mm.
“NMK Sibir-18”
Suitable for use in commercial baths and saunas. Loading firewood from an adjacent room.
The dimensions of the stove are 72 x 72 x 43 cm. The weight of the stove is 104 kg, stones - up to 80 kg.
NMK Sibir-18
* Heat exchanger tanks for water are purchased and installed separately. The volume of tanks varies, from 6 to 85 liters or more. When calculating the load on the floor, it is worth taking into account the weight of the metal (10-15 kg on average, indicated in the product passport) and the water being poured.
Selecting a water tank
Dimensions and location of the hearth in the room
When choosing the design and drawings of the fireplace, pay attention to the dimensions of the portal, fuel chamber and chimney. The indicated dimensions are selected according to the area of the heated room and are related to each other by the following ratios:
- cross-sectional area of the chimney pipe - 1/9 of the portal quadrature;
- the depth of the firebox is made 1.5-2 times less than the height of the portal opening;
- the area of the open opening is 1/50 of the square footage of the room.
If you make a large fireplace in a small room, the chimney draft will not have enough air flow. The fireplace will begin to smoke into the room or “suck” air from neighboring rooms, along with the heat. It is permissible to build a small structure in a spacious room, but the heating will be minimal - the fireplace will decorate the living room and play the role of a barbecue.
For the convenience of determining the size of the firebox and smoke exhaust duct, depending on the square footage of the room, there is a ready-made table:
According to their shape, fireplaces are divided into 2 types - wall-mounted and corner. In the publication we provide a description of the first type - it is relatively simple. To build corner-type home fires, you need to gain experience in the stove business. Having decided on the dimensions of the heater, select a place for installation, taking into account our recommendations:
- Place the fireplace in the central part of the interior partition. If a private house is under redevelopment, renovation or construction, the rear wall can be brought into the adjacent room by making an opening inside the partition.
- It is not advisable to build a fireplace near the outer wall - some of the heat will go outside.
- Think about convenience - do not place the structure near interior doors and do not place furniture close to each other.
- Carefully study the design of the ceilings and rafter system so that the chimney pipe does not fall into the load-bearing beam or onto the edge of the reinforced concrete floor slab. The minimum distance from the wall of the flue to the rafters is 10 cm (taking into account fire-resistant furnace cutting).
When choosing a site for a fireplace, do not forget about the foundation. In a residential area, you will have to dismantle the floors, dismantle the screed and dig a pit without affecting the existing foundation of the building. Remember if there are house utilities installed in the selected location - sewerage, water supply or heated floors. The basement under the room is also a problem; not every ceiling can withstand the weight of the masonry.