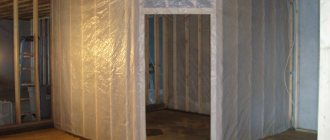
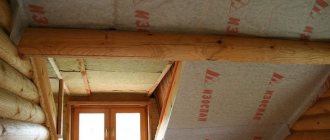
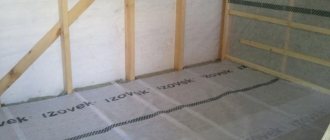
In order for the roofing structure to successfully withstand the effects of moisture and steam, it is necessary to install the roofing pie according to all the rules. The quality of this work depends not least on the waterproofing materials used - glue, tape and vapor barrier tape.
We can only talk about high quality protection if all the necessary requirements are met during the work process.
For waterproofing, you need to pay no less attention than the choice of roofing material. It is especially important here how exactly the vapor barrier films and waterproofing membranes were laid. And for this you need to know which side to attach the vapor barrier.
Waterproofing and insulation
Waterproofing is a dense layer that is not subject to water penetration. It can be made from paint, roll or other materials whose direct purpose is to protect structures from moisture.
Waterproofing and insulation are carried out in many cases. This can be thermal insulation and protection from groundwater of a foundation, basement, attic, etc. In all cases where it is necessary to protect a certain space from water ingress and balance the temperature regime.
We will consider which side to lay the waterproofing against the insulation next.
What kind of waterproofing is there for insulation?
The main purpose of a modern waterproof coating is as follows:
- External waterproofing of insulation from exposure to dampness and moisture;
- Ensuring high-quality operation of buildings, increasing durability and reliability.
This is a kind of external barrier. To carry out work in relation to insulating material, there are the following types:
- Polyethylene;
- Polypropylene;
- Non-woven breathable.
The modern market is saturated with a variety of waterproofing materials. These include membrane films, reinforced meshes, and special fabric coverings.
Many people are interested in the question: which side should the waterproofing be laid to the insulation? Often the required direction is indicated on the packaging or on the material itself. Under no circumstances should there be any confusion. Since the product is one-sided, if installed incorrectly, it may not perform its intended functions.
There are also coating options, for example bitumen-latex mastics.
Which side should the diffusion hydro-vapor barrier be laid on?
Modern film water vapor barrier for roofing is produced using a woven method from pure, 100% polypropylene. Its structure, if you look closely under a microscope, is a network of thin threads. Their interweaving forms microscopic cells. Their size is not sufficient for the unimpeded passage of water molecules in a vapor state.
High-quality diffusion hydro-vapor barrier for floors or roofs is made in two layers. Its specificity lies in its operation on the principle of a valve: passing steam from the air in only one direction (from an area of high pressure to an area of low). When there is oversaturation of moisture in the air in the room and under the influence of steam pressure (diffusion), water molecules literally seep through the film and excess moisture is removed outside.
Such material is laid when organizing a system of ventilated facades, on top of mineral insulation with the obligatory arrangement of a ventilated gap. This water vapor barrier is suitable for floors and walls.
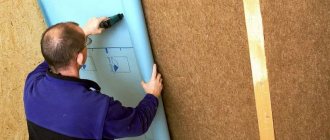
Diffusion films usually have markings for installation, which are different for each manufacturer. Before installation, you must carefully study the instructions. Often such material is made dark and rough on the back side, lighter and smoother on the outside.
Installation is carried out with the light (water-repellent) smooth side facing away from the room in the following cases :
- for insulation when arranging the under-roof space;
- under insulation when laying the floor on concrete or soil;
- external thermal insulation when installing ventilation facades.
When installing a floor under a screed, protecting walls and ceilings in wet rooms (for example, baths, saunas), the water-repellent side should face the inside of the room:
Which side should the anti-condensation hydro-vapor barrier be laid on?
To give the material improved vapor barrier properties, one side of the diffusion film is coated with a special moisture-absorbing hydrophobic coating, polyester fabric, or an aluminum reflective layer is applied. Such membranes are called anti-condensation and superdiffusion. Due to the absorption of condensate, this hydro-vapor barrier is best suited for cold roofs: pitched type with metal decking. The absorbed moisture prevents the formation of metal corrosion. The additional layer provides better thermal protection.
Antioxidant hydro-vapor barrier is installed in the same way as diffusion barrier: with the water-repellent side facing away from the material that needs to be protected from moisture . Typically, manufacturers apply markings on the outer (water-repellent) side such as: “This side up”, a logo or brand designation.
Related Products
- Water vapor barrier Ardmanol D 1.5x40 m (60 m2) 1,024 p — + Remaining:
- Water vapor barrier Ardmanol S 1.6x37.5 m (60 m2) 1,157 p — + Remaining:
- Water vapor barrier Ondutis RV 1.5x50 m (75 m2) 1,829 p — + Remaining:
Preparatory work
Preparation for laying waterproofing consists of checking the ends of the rafter legs for the presence of sharp protruding edges, chips, nails or screws. All such elements must be removed to preserve the integrity of the film.
In addition, it is necessary to prepare scaffolding or special mobile ladders for safe movement on the roof. They will come in handy during the process of laying tiles, so this step should not be ignored. You also need to prepare the necessary tools and materials, safety devices.
Why do you need a vapor barrier for insulation?
Vapor barrier is always necessary when using moisture-absorbing insulation. The fact is that the characteristics of mineral wool are such that the material installed on the inside of the wall comes into contact with warm air, which contains water vapor. In the absence of a water barrier, moisture penetrates into the thermal insulation layer on the floor, where it condenses, turning into water.
An example of using a vapor barrier when installing a warm roof
As a result of moistening, the thermal insulation properties of mineral wool material are reduced; in addition, mold and mildew may appear in a humid environment. If the vapor barrier under the insulation on the wall is correctly laid, then it becomes an obstacle to moisture. Therefore, thermal insulation requires the installation of a vapor barrier between the warm air of the room and the insulation.
Does vapor permeability change when changing sides?
All of the above modern barriers are divided into the following types:
You will be interested to know that the first membranes, which had the same properties as modern roofing membranes, were used in astronautics. And from there they were borrowed for construction and the national economy. But until recently, there were not as many problems with their installation as there are today.
There is a strong opinion among ordinary people: if you lay the vapor barrier to the roof insulation “on the wrong side,” then the entire structure will not last long. In fact, the correct choice of side affects exclusively the service life of the interior finishing of the roofing pie, because the rough side has the same abilities as the smooth side and has absolutely the same vapor permeability. But how much it will retain droplets of condensate is a little-studied question.
Main types of vapor barriers
A wooden house involves several areas where it would be good to install a vapor barrier. In addition to the floor covering under consideration, an additional barrier often has to be installed in basements, attics, and also in the presence of uninsulated ventilation and furnace ducts. Therefore, it is necessary to know what kind of vapor barrier there is and its applicability in each specific case. They can be divided into three main groups:
1. Painting room. It is a liquid or plastic mixture (bitumen, tar), which is applied to uninsulated metal surfaces (roofing, chimneys). The barrier prevents the formation of condensation, which causes the development of corrosion areas.
2. Film. Thin roll insulation made of dense or membrane materials (polyethylene, polypropylene). Most often used in private housing construction to create a vapor barrier for a wooden floor.
3. Antioxidant film. Used as a safety net, especially at ventilation outlets and chimneys on the roof.
Considering that the topic of the article is the vapor barrier of a wooden floor, we should dwell in detail on the second group. In practice, three main types of films are used:
1. Polyethylene. The most accessible and familiar type, successfully used in the construction of not only floors, but also greenhouses. Depending on the surface texture, these films can be smooth, perforated or aluminized. As a material, polyethylene has low strength, so you need to work with it carefully. As for the barrier properties directly, the best level of vapor barrier is provided by a laminated film - its permeability indicator is at the level of 200 m, whereas for a regular smooth film it is good if it reaches 60 m. It should also be noted that a two-layer barrier additionally retains heat inside the room.
2. Polypropylene. More durable material. The level of vapor permeability reaches 100 m. It is often also two-layer, one side of which is smooth, and the other is woven - a combination of viscose-cellulose fibers - or fleecy. This solution allows you to better retain moisture and evaporate it faster. A striking example is the film Izospan B and Rockwool.
3. Membrane. This is a modern type of vapor barrier, the cost of which, naturally, is higher than its analogues. Multilayer material regulates moisture concentration well, as a result of which there is no need for ventilation gaps during installation.
Features of installing waterproofing film
No less difficult is the installation of waterproofing film, which also has its own characteristics:
- During installation, the material must be positioned in such a way that when operation begins, moisture cannot penetrate from the top side to the insulation layer.
- Particular attention should be paid to the quality of processing of the areas adjacent to the penetrating elements. This is achieved by making a trapezoidal cut in the required places.
- The upper and lower valves are secured using horizontal sheathing elements using a sealed tape to the penetrating element. The side parts should be taken to the upper side, fastening is carried out to the penetrating component using a similar technology.
- When working with skylights, moisture-proof materials are installed in accordance with the instructions for use.
- When working on a roof with inclined ridges and a hip roof, the film must be placed relative to the longitudinal axis of the corresponding element.
- When laying hair on horizontal roof slopes, be sure to comply with the requirement to cover the protruding side.
How to distinguish the inside from the outside
Photo. Izospan B at multiple magnification
If the manufacturer’s instructions are missing or do not contain the necessary information about which side of the film is considered internal, then you should independently determine this based on external factors. Please pay attention to the following points:
1. If the waterproofing film has a different color on both sides, then the light side of the isospan is laid against the insulation; 2.
The side of the waterproofing that faces the floor when rolled out is considered internal and should face the insulation; 3.
The outer side is made fleecy so as not to allow moisture to pass through, and the inner side is smooth and is laid towards the insulation.
Correctly laying the film on the insulation
So which side should the waterproofing be laid to the insulation? If you are using a film, one side of which will be smooth and the other rough, then place the smooth side on the insulation, and the rough side up towards the floor covering.
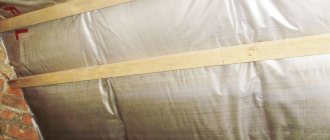
In this case, the steam will not penetrate down to the insulation, but will remain at the top, and if there is effective ventilation of the underground space, it will quickly evaporate. If you use foil films, then lay them with the aluminum side up. It will also not allow steam to pass through and will reflect thermal energy.
If you used polypropylene film, then lay it with the laminated side down and the wicker side up.
But there are also exceptions. For example, a material such as Izospan V is very popular today. Which side of the waterproofing is laid against the insulation if it is used? It's the other way around, i.e.
We place the rough side on the insulation, and the smooth side upward, towards the floor covering.
In this regard, we recommend that, even after reading this material, you always carefully study the instructions of their manufacturers.
In addition, do not forget about the main purpose of the films listed above - to prevent steam from penetrating into the insulation. This means that they must be laid between the finished floor and the insulation.
At the same time, we must not forget that steam can penetrate from below, through the subfloor or interfloor ceilings, which means that another, lower layer of vapor barrier, on which the insulation is laid, will be quite relevant.
The latter option is especially relevant when it comes to the first floors of wooden houses, in which the floors are laid on the ground or are located above a damp basement.
Roof insulation
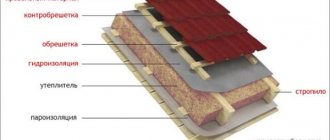
According to the physical laws of convection, warm air from living quarters, rising upward, carries priceless heat with it to the roof. Therefore, together with hydro- and vapor barrier, insulation is an integral part of the “roofing cake”.
With proper roof insulation, a comfortable thermal regime of the building will be maintained, which will ensure the durability of all structures. And so that the insulating layer does not lose its thermal insulation properties, it must remain dry and voluminous.
Insulation material
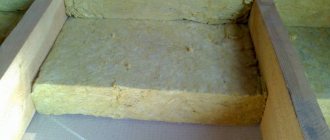
Any of the known materials with high thermal insulation properties can be used as insulation:
- Mineral wool
- Glass wool
- Styrofoam
- Polyurethane foam
- Foam glass
- Expanded clay, etc.
Video description
The whole process and possible nuances are clearly shown in the video:
The minimum number of layers is 2. Each next one is applied after the previous one has dried.
After completing the creation of the waterproofing layer, the floor is ready for pouring the screed and laying the finishing coating (tiles or self-leveling polymer floors).
Self-leveling 3D floors can be misleading Source pol-master.com
Types of materials according to vapor permeability:
To help builders correctly apply vapor barriers, various building materials are classified according to their vapor permeability.
Impermeable materials:
- Glass
- Sheet metal
- Polyethylene sheet
- Rubber membrane
- Vapor barrier paints
- Exterior plywood
- Foil Rigid Insulation Board
Semi-permeable materials:
- Foamed or extruded polystyrene
- Laminated plywood
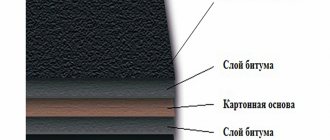
- Bitumen coated paper
- Drywall painted with oil- or moisture-resistant latex paint
Permeable materials:
- Unpainted drywall
- Stone and glass wool insulation
- Cellulose insulation
- Lumber
- Gas silicate and foam block
- Expanded clay block
- Concrete block
- Concrete slab
- Brick
Conclusions on the use of vapor barrier materials
Impermeable materials are not always desirable, as in some situations the wall needs permeable materials in order to properly breathe and get rid of excess moisture. Most experts advise against sealing the wall on both sides, as this is an invitation for moisture to trap and create inherent problems.
Is it possible to use roofing felt?
cannot be used as under-roof waterproofing . The reason for this is the lack of mechanical strength of the material - it is very easy to tear it during the installation process, thereby ruining all previous work.
In addition, roofing felt sheets are joined using a torch or a special bitumen-based glue. Both options pose a serious threat to the thermal insulation of the roof. Therefore, roofing felt cannot be used as roof waterproofing.
To the ceiling
As for the vapor barrier of the ceiling, it is overlapped with the vapor barrier of the walls up to 20 cm. The presence of a vapor barrier on the ceiling will allow the finishing material to be preserved for a long time. As a rule, vapor barrier can be installed both from the bottom of the ceiling and from above from the attic. In this case, you will get the following pie:
- Vapor barrier.
- Thermal insulation.
- Vapor barrier.
This work must be done even with concrete ceilings. When there is a temperature difference, the accumulated condensation can, after a while, provoke the appearance of mold and mildew, which is not so easy to fight.
Ceiling vapor barrier
The installation process begins with preparatory work:
- The surface is cleaned of construction debris and old finishing material.
- All existing cracks and imperfections in the base are covered.
- The ceiling is primed and dried.
The vapor barrier process looks like this:
- As mentioned above, the vapor barrier is laid overlapping with the wall one. It is attached to the ceiling with a stapler.
- It’s good if it is possible to treat the vapor barrier joint with slats.
- The joint is first covered with waterproof tape.
- On the ceiling it is enough to overlap up to 10 cm.
- There is no need to stretch the material too much. But you should not allow sagging. Otherwise, condensation will accumulate on the film and the polyethylene may break through.
Briefly about the main thing
A residential building located in a cold climate is isolated not only from water in its liquid state, but also from steam. If this is not done, then over time the frame of the living space itself may begin to collapse due to the constant ingress of moisture from the inside.
To understand which side to lay the vapor barrier on, you first need to look at its color and tactile sensations when running your hand over it. After the required side has been determined, the work is carried out carefully and slowly. The technology for carrying out the work varies depending on where the film is installed - on the ceiling, floor or facade.
When working, it is important to avoid the most common mistakes. Otherwise, the quality of the material may quickly deteriorate due to the appearance of frost and even ice on it.
When is it needed for polystyrene foam?
Now let’s look at specific moments when you can do without a vapor barrier layer, and when its absence will lead to the negative consequences described above. Professionals know exactly where it is necessary and where it is not necessary to use vapor barrier and expanded polystyrene in one set.
When insulating walls outside
Most often, the house is insulated from the facade. There are a number of reasons for this, and one of them is a shift in the dew point in the environment. Here, vapor barrier is not used at all, both for buildings built from materials with a high vapor permeability rate, and vice versa.
If the main structure is made of concrete, then the risk of moisture appearing on the outer wall is very low, which means glued polystyrene foam will not cause any trouble. If you decide to insulate a house using “breathable” materials, it is better to use a ventilated façade design. Then there will be a small gap where air flows will naturally remove excess moisture.
Thermal insulation of walls from the inside
This option for installing insulation is used extremely rarely, including polystyrene foam. The main reason for choosing this method is the inability to perform external insulation. In this case, high-quality vapor barrier is simply necessary. Otherwise, all the moisture will begin to condense in the thickness of the wall, which will lead to:
- Wetting of finishing materials.
- The appearance of an unpleasant odor.
- The development of mold and mildew, which can cause many complex diseases.
Roof of the house
Expanded polystyrene is a universal material, which is why it is also used for roof insulation. Here, vapor barrier is also not replaced with anything and is not ignored. Moreover, they also use waterproofing. To protect the insulation from moisture, a kind of “pie” is constructed from both precipitation and interior spaces.
The layers are placed as follows, starting from the roofing material:
- waterproofing;
- expanded polystyrene;
- vapor barrier.
This material is also used for thermal insulation of ceilings. And here it is impossible to do without vapor protection. Warm and humid air is always at the top, and therefore polystyrene foam will be exposed to it. At the same time, the vapor barrier must protect the insulation, which means it is mounted on the side of the room.
Floor of the house
When installing thermal insulation on the floor, the presence of a vapor barrier depends on several factors:
- Using a screed - in this case, waterproofing is required. This layer protects against moisture penetration. This means there is no need to use an additional barrier.
- Floor installation using wooden structures. Here you will have to spend money on a vapor barrier to protect the tree. The floor is installed like this: wooden logs, then vapor barriers, and then polystyrene foam.
In private houses, they completely abandon vapor barrier, because warm air does not linger near the floor, and therefore does not affect these structures.
Balconies and loggias
These structures in our homes require the use of vapor barriers. Thanks to the special microclimate and conditions here, warm currents of moist air come into complete contact with cold surfaces, where condensation appears.
Therefore, when insulating a balcony or loggia with polystyrene foam, it is recommended to use difficult films and membranes. You should choose options that have foil on one side, and the base should be foamed. Only in this case will the object be completely protected.
